
Your quest for truly inspirational and superior tone has led you to the final link in the chain – Mercury Magnetics. Premium guitar amplifier power transformers, output transformers and chokes.
Transformer sets are often misunderstood, yet vital musical components. They’re integral to the nuances of your guitar amp’s sound. Far more than tubes, speakers or other amp components, the transformers establish the platform for shaping your amp’s unique sound.
Today’s players are more informed and demanding than ever. They hear the differences and know that both transformer design and build-quality have a dramatic effect on their tone. Indeed, if your tube-based amp is suffering from bland and unexciting tone then it’s probably related to low-end or poorly designed transformers. As amp designers, techs and manufacturers have discovered, the practice of dumping generic, low-bidder transformers into their amps doesn’t cut it any more. And now you know why.
Within the player community no other company commands as much respect as Mercury Magnetics. You can depend on our uncompromising, fanatical build quality, consistency and reliability.
All of our transformers are 100% handmade by us here in California, USA. They come with an unheard of 10-Year Workmanship Warranty as well as a money-back Tonal Satisfaction Guarantee.

Did you know that tube-based guitar amp transformers are unusual and very different from industrial as well as audio transformers? And did you also know that it is impossible to engineer the “perfect” guitar amplifier transformer from strictly “by the book” specifications? Interestingly, almost all of the great-sounding amp transformers contain either flaws, “happy accidents,” or have other issues in their construction that were not part of their original specifications.
Decades ago, when Mercury’s engineers first discovered these curious phenomena, the music industry was already in the process of losing its references to tone. In the throws of converting to solid state, tube and transformer platforms were mistakenly being relegated to relics of the past. Those who knew the original technology were either retiring, dying off, or jumping ship for the “new improved” way of doing things. By the time we collectively began to realize what was happening to guitar tone, it was almost too late. “Old school” manufacturing had been all but shut down and as quality dwindled N.O.S. (new old stock) components became the last bastion of our tone.
It was during those Dark Ages that the transformer connection to tone was almost lost completely. However, Mercury was there as a hold out — and even when it wasn’t fashionable, never compromised. But as often happens, when an older era fades, the remnants of what made it great were readily available to study. And like archeologists, Mercury’s engineers began sifting through the bones of the most coveted old amps in an attempt to discover what made them better, and often times so different than others.
The resulting products of those studies were the earliest ToneClone and Axiom designs. Mercury quite literally evolved a new science of guitar amp transformer design for tube-based guitar amps from there, and has continued to innovate and revolutionize it since. Perhaps few people realize the significance of these discoveries and the resultant developments. But without Mercury’s catalog of transformer designs, guitar tone as we knew it would have been lost.

For over 60 years, Military, Industrial, and Commercial buyers have relied on Mercury Magnetics® for the best in Transformer Engineering Design and Manufacturing. Whether designing turnkey magnetic products or building to customer-supplied specs, 100% of our manufacturing and design is done on-site in our Southern California facility.
We are short-run specialists and are tooled for custom production and prototyping. Our streamlined manufacturing processes and ship-to-stock quality control methods ensure short lead times and high value for our customers.
Contact us today for assistance, quotes or inquiries:
Mercury Magnetics®
General Manufacturing Division
10050 Remmet Ave
Chatsworth, CA 91311
FAX (818) 998-7835
PHONE (818) 998-7791
info@mercurymagnetics.com
Need a boost? The NewVolt® product line from Mercury Magnetics® is the answer for Auto and Marine applications demanding more power and better performance from stock ignitions, pumps, and motors.
With over 60 years of magnetic engineering expertise, we’ve designed our Voltage and Current boosters to efficiently deliver more power where you need it.
Contact us today for assistance, quotes or inquiries:
Mercury Magnetics®
Automotive Division
10050 Remmet Ave
Chatsworth, CA 91311
FAX (818) 998-7835
PHONE (818) 998-7791
info@mercurymagnetics.com

Your complete tonal satisfaction is our only goal. All Mercury Magnetics® APS®, Axiom®, ToneClone®, and Radiospares® products come with a Tonal Satisfaction Guarantee. If you are not satisfied with any Mercury Magnetics® transformer or choke, for any reason, you may return it within 30 days for an exchange or refund (minus all freight). See “Exchange or Refund Policies” below for addendums.

Mercury Magnetics® warrants its non-OEM transformers to be free from defects in material and workmanship, if properly installed, under normal use for a period of TEN (10) YEARS from the date of purchase, and by the original owner. Note: this warranty does not cover damage caused by external sources or user error. Defective transformers will be replaced or repaired at our discretion. To the extent permitted by law, the foregoing is exclusive and in lieu of all other warranties or representations whether expressed or implied, including any implied warranty of merchantability or fitness. In no event shall Mercury Magnetics® be liable for special or consequential damages. All warranty returns are examined by our engineering staff to determine the exact cause of failure. This warranty is void if your transformer has been tampered with. See “Exchange or Refund Policies” below for addendums.
All Mercury Magnetics® products are 100% handmade in California, USA.
Copyright © 1954-2018 by Mercury Magnetics. All Rights Reserved. Mercury Magnetics, Mercury Vintage, Partridge, FatStack, SuperStack, NewVolt, Mini-Choke, Multi-Choke, Mercury Custom Shop, Mercury Boutique, “The Heart & Soul of Your Amp,” “Holy Terror,” “Bad Guitar Tone — Whatever Its Evil Mission It Must Be Stopped!”, “Champ 600 Upgrade,” “XLG Upgrade Kit,” “Mean 13” and “The original British amp tone — shaken, but not stirred,” “Our Transformers are Stacked,” “The Essential Building Blocks of Your Tone,” “Mercury Studio-Pro Upgrade Kit for the VOX AC4tv,” UTM (Universal Transformer Mount), Amp-Saver and Copper-Tone are trademarks licensed to Mercury Magnetics. Axiom, ToneClone, Radiospares, VoodooScrew, Multiple Arrayed Geometric Inductive Coupling (M.A.G.I.C.), and APS (American Pro Series) are registered trademarks licensed to Mercury Magnetics. All other companies, products and trademarks mentioned on this website are trademarks of their respective owners. Unless otherwise noted Mercury Magnetics is not affiliated with any of these companies.
Mercury Mod and Upgrade projects and their documentation are the result of technical investigations made by the engineering staff of Mercury Magnetics. The disclosure of the information herein may pertain to proprietary rights, and the furnishing of these documents does not constitute an expressed or implied license to use such materials.
Mercury Magnetics® transformers and other products are in compliance with the European Union RoHS Directive 2020/95/EC with respect to the following substances: lead (Pb), mercury (Hg), cadmium (Cd), hexavalent chromium (CR (VI)), polybrominated biphenyls (PBB), and polybrominated diphenyl ethers (PBDE).
Mercury Magnetics® founded in Southern California in 1954 and incorporated in 1968.
CAUTION!
The voltages in your amplifier can be dangerous. Transformers and chokes are not user serviceable parts. Installation of these components should always be performed by an experienced technician.
The simple ability to use a soldering iron is not enough to qualify a “do it yourself person.” Those who are inexperienced in working with electronic circuits should never attempt to service their amplifier. Household line currents can be deadly!! Transformers, chokes and large filter capacitors can store a dangerous charge for several days or more after the amplifier has been unplugged. Never touch the terminals of such devices without being certain of their charge status. Risk of shock and damage to equipment may result from mishandling and/or improper use of these components. Please use common sense and always think safety first. After all, tone is most enjoyed when you are alive to hear it.
Not finding what you’re looking for? We are constantly adding new products to our catalog – for the most up-to-date information, please email or call us: 818-998-7791.
Mercury offers Transformer Restoration Services for rare and vintage transformers that are failing or underperforming. With our attention to detail you can be assured that your restored vintage transformer will look AND sound exactly as it did. For more info please email or call us: 818-998-7791 for a quote.

It doesn’t take too much digging to find a laundry list of boutique amp builders using Mercury Magnetics transformers in their products. From Mojave Ampworks to Joe Morgan Amps to kits from MetroAmp, builders have found that Mercury knows their iron. While transformers rarely receive the same level of attention of NOS tubes, speakers, or even guitar cables, they are a major contributor to tone. Think about it—the power and output transformers are the start and end of the line with any amp.
Based in Chatsworth, California, Mercury Magnetics has been building transformers for close to 60 years. I recently had a chance to talk with Mercury’s Sergio Hamernik to dig deeper into their roots, find out what one can expect from upgrading their iron, and what sets Mercury apart. Prior to our conversation, I had the opportunity to witness the remarkable transformation of an Epiphone Valve Junior modified from stock to hot-rodded, using one of their transformer upgrade kits. Not only was it a noticeable upgrade, it was a revelation in just how important the role of quality iron in an amp is. But because it is the single most expensive part of any amp, it’s no wonder we see so many modern amp manufacturers skimp on the iron to keep costs down. Let’s see what the passionate, and often hilarious, Sergio has to say about his part of the business.
I’ve been seeing Mercury transformers in amps for at least a decade. When did you get into the amp scene?
This happens to be one of our most often asked questions. Even though Mercury Magnetics’ roots go all the way back to the early 1950s, there are guitar players who are only now discovering us. But if an industry insider like you has been aware of us for at least a decade, then I suppose it means I don’t need to lay off any of our sales and marketing staff.
I would attribute most of our lingering anonymity to the old days. Back then, most of our clients from the audio community preferred to keep us as a trade secret from their competitors and the press. The typical transformer-savvy amp builder also didn’t usually want to share the credit with us, or reveal what their “unique” technical advantage was regarding audio and tone. Consequently, we were asked to maintain a low profile and generic look for our transformers for quite some time. On occasion, a customer in the know will spot a small “MM” mark on a transformer from an older piece of gear, and ask if it’s a Mercury. Odds are that it is.
It was the guitar amp crowd that pushed us to go above ground. Now Mercury gives any electric guitar player or amp restorer a taste of what the pros were using, talking about in their studios, and amongst themselves. Many players have told us their amps increased in value when upgraded with Mercury transformers, and this became evident when insurance appraisers began to contact us for verification. However, it wasn’t until the mid-1980s when we began to market our services and various brands to guitar players.
For me personally, I got into the amp scene around the mid- to late 1970s. I just found it to be a nice way to relax from the strain of oversleeping.
Your website shows a large number of amp manufacturers you have replacement/upgraded transformers for. What are your best sellers and why?
There are so many different camps loyal to their particular amp brand, so it would be difficult to single out the best sellers. The best sellers are transitory and change from week to week because guitar amp players are a fickle bunch. That’s why we’ve built the world’s largest catalog of guitar amp transformers where nobody is left out.
But trends tend to follow their own dynamics. And the current worldwide trend seems toward smaller wattage amps—regardless of brand. Conversely, the 100-watt heads are not selling like they used to. Players are gigging with no more than 15 watts and a few pedals. Regardless of playing style, they’re doing just fine abiding by sound level restrictions and kicking ass with the tone we feel Mercury upgraded amps deliver.
These players really get the fact that an amp lacking in tone can’t be fixed with higher power or covered up with a gain mod. An amp that coughs out an asthmatic tone at 50 or 100 watts easily fatigues both music listeners and guitarists. But the audience will stay until the bar closes if the band plays well and sounds great—even with as little as a few watts going through the available PA system.
What can a guitarist expect to hear when upgrading their transformers in a newer amp?
An amp’s transformers are the most important component in determining the quality of amplified guitar tone. And it’s no coincidence that they’re the most expensive parts in an amplifier. Many of the newer amps just don’t have the same “overkill” factor with their transformers as the amps in the ’50s and ’60s. Why? Ignorance and a bean-counter mentality. What’s good for accounting isn’t necessarily good for tone from an amp. Sadly, the people making these decisions are probably not players themselves and don’t seem to realize the damage they’re doing to the industry.
It’s not unusual to find a current production amp with a power transformer running hotter than hell, even without cranking the amp all the way. Or having an undersized, cheaply built output transformer whose sphincter begins to tighten the moment the guitarist reaches for the amp’s volume knob. An amp built around anemic transformers yields only to dull, thin, noisy, fuzzy mids and mushy bass. That’s what makes your notes sound more like farts through a pillow. This overkill factor is probably the only edge that some of the vintage amps have over the newer amps.
We have made it our mission to duplicate the performance of the best original transformer designs of all time. In terms of amplified guitar tone history, these transformers represent the best ever produced. – Sergio Hamernik
Have you ever noticed how most newer amps often weigh less, sometimes a lot less, than the older ones? That’s usually the weight difference between the old and new transformer designs. There is a direct relationship between weight and having transformers that seem to stay cooler and “loaf around” with power to spare, until a player demands more from their amp. It’s like they are waiting around having a card game, waiting for the player to do something. The best vintage tone was born that way. Newer amp tone can be easily improved—if the builder follows some of the same ideas.
Upgrading with quality transformers gives a second chance to a new amp owner to make things right with their tone, by reclaiming that overkill factor. Assuming there are no issues with the amp’s circuitry like bad parts or worn out tubes, a guitarist should hear and feel improvements with the very first pluck of the guitar. They should expect to hear the notes more detailed with overtones, and a quicker and more immediate response to their playing. Clean notes will have less sonic collisions with noise and reveal more bell tones, chimes, etc.
When more distortion is required, the player will sense better control of crunch and when break-up begins to happen. The coughing and hacking that happens when a stock amp is pushed, will vanish with a transformer upgrade. It will be replaced with longer sustains and notes that reach farther. The amp will also sound closer and bigger than the power it puts out—and the bass notes will have a tighter, rounder bottom end. And when pushed, she will still be able to hold that quarter from dropping—no matter how tall her high heels—something most musicians are looking for.
It’s not uncommon for guitarists to report that it took a few weeks of playing to fully realize what they’ve gained in terms of harmonic richness. These players have typically played longer and felt more inspirational emotions sucking them in, as they have invested more time into relearning and becoming reacquainted with their amps.
Many players become very attached to the transformers in their vintage amps. When you create ToneClones or Radiospares and Partridge versions of these classic transformers, how close are they get to the originals?
Radiospares and Partridge are our brand specific clones, whereas ToneClones are “best-of-breed” duplicates culled from the hundreds of other brands that have made transformers over the years.
We have made it our mission to duplicate the performance of the best original transformer designs of all time. In terms of amplified guitar tone history, these transformers represent the best ever produced. In the grand scheme of tone pursuit, these designs are incredibility important and deserve to be considered treasures.
This is an ongoing project for us, spanning almost three decades now. And it couldn’t have been accomplished without the enormous amount of assistance we’ve received from top players and amp collectors around the world.

What about Axiom transformers? Where do they fit in?
The Axiom transformer line takes over where the limitations of vintage transformer design ended. No bean counters here—simply the sincere pursuit of answering the age-old question: What if there were no constraints on budget, time, or material quality to achieve the best possible performance? That’s our objective with the Axiom line.
Axiom transformer designs represent many new approaches—new tone with the best materials and designs money can buy, so they’re not intended for the timid or the low-budget crowd. Check out our FatStacks and SuperStacks for the Marshall DSL and TSL families for interesting comparisons.
Mercury’s vintage transformer restoration service has been gaining a reputation for quality work. Why would someone want to restore a transformer instead of replacing it? And vise-versa?
Some vintage amp owners prefer to pay the extra cost of our restoration services, because it’s very important to them that their amps retain authenticity. Collectables or rarities are valuable. They’re of the “why take chances” mind. The high road. But on the flip side, we have pro musicians who insist on touring with their vintage gear. To play it safe, and not sacrifice the tone of their original transformers, they have their techs replace the stock transformers with Mercurys. By doing this, they preserve the original transformers from road abuse while taking advantage of our reputation for tone, durability, and warranty. Restoration of vintage transformers is a tricky and highly specialized art. Sadly, too many of the great originals have been lost forever due to technically inept and musically disinterested people. We see attempts at “rewinds” here all the time.
Occasionally, it appears some people confuse “demolition” with “restoration,” and the preservation of the original tone is lost forever. There’s no shortcut to doing a proper restoration.
I understand you’re doing all of your labor and get all of your materials in the USA. How does that impact your business aside from just the straight costs?
Well, we figured that someone has to do it—and we really do make everything here with 100 percent American materials. There are plenty of products out there stamped with “Made in the USA,” but are actually assembled with non-USA, low-price materials. But yeah, we’re the real deal and proud of it.
Building transformers that make an amp sound good requires highly specialized technologies, highly skilled labor, and the right kind of materials. We love music and owe it to the players out there to do all the work “in-house,” so we can keep tight control over every aspect of our transformer designs. It’s really old-school military spec style, so our transformers don’t vary at all from batch to batch. If you need a replacement transformer 10 years from now, it’ll sound exactly the same as the one it’s replacing.
We’re hard-liners when it comes to not playing shell games with a musician’s hard earned dough and quest for better tone. Perhaps I’m a fool for doing it this way, but I was brought up in a musically minded family. From a very early age, I was taught that music is as important and necessary as food. If there is a day our services are no longer needed or appreciated, I’ll pursue my dream of owning a car wash in the valley, and get into the business of making money.
Any new or exciting projects in the works at Mercury?
Yes, but we’re planning on releasing the news sometime around summer. For quite some time, we’ve been fielding requests for accessories to accompany our transformer line. We’re being asked to apply our know-how to other aspects of guitar amps.
Do you have any advice for guitar players and techs in their quest for tone?
Don’t let anybody fool you—every player has the ability to discern the difference between good or bad tone. Unfortunately, there are a few too many self-styled “experts” who irresponsibly dispense advice without having a clue. As a result, we’ve all seen amps completely lose their tone by being modded to death.
There’s no excuse for the old “damn, I’ve done it this way for many years so it must be right” mentality. More than ever, it’s so easy to seek opinion, advice, and help online and elsewhere. I highly recommend the old textbooks from the 1950s and 1960s as a good place to start on vacuum tube audio circuits.
Do your homework and follow what the smart players are doing—improving your tone isn’t that elusive. If what you have sounds good to you, leave it alone. But if you know your amp’s tone could use some improvement, then start where it begins … the transformers.
Source: https://www.premierguitar.com/articles/Builder_Profile_Mercury_Magnetics
A few months back, we restores a 1960 Vox AC15 to it stellar sonic signature. But as with all vintage amps, you never know when something might go on the fritz!
We had just tightened the last screw and powered up the amp to unleash some ear candy when – major bummer – there was a noticeable loss of signal. After a diagnostic check, everything pointed to the output transformer. So it was off to Mercury Magnetics and the meticulous mind of its founder, Sergio Hamernik, to re-wind this 51-year-old piece of harmonic history back to spec.
VG: So… is it all over for this output transformer?
Sergio Hamernik: Well, it appears that it’s given up its ghost. A major bummer to say the least! Replacing a transformer in a guitar amp is a similar feat to heart surgery. But it’s NOT “All Over Now Baby Blue” because we’re going to fix it. And when we do, it’ll likely sound better than the original.
This output transformer is an original, from 1960. The late 1950s into the early 1960s was a transitional period for VOX. And one in which their transformers were known to have various failure rates, depending upon which batch ended up on the chassis.
In your case, someone from the original transformer company had the bright idea of using low-cost wax instead of a varnish dip. No doubt to save their six-pence. To be fair, most transformer companies back then were somewhat ignorant to the unique demand placed on transformers by the guitar amp builders. As a means to inhibit rust on the iron core and also to fortify the insulation of the windings, the industry standard is to dip and bake transformers in varnish, NOT wax. And you know what happens to wax when it heats up!
When we originally opened this amp up, there was wax all over the chassis that had to be scraped out.
There is some merit to using wax if the component doesn’t generate much heat above ambient temperatures. Output transformers do not generate much heat by them themselves. Especially when they’re working within their design specs – even with the amp cranked. But what the original transformer maker failed to take into consideration was all the tubes packed in there next to the transformers on a limited size chassis. As you might have already experienced when you try to pull a tube from a powered up amp – they do get really hot.
Class A amps run hot because they’re designed to run wide open, no matter where you’ve set the knobs. Now enclose this or any amp into a box and you have created an ideal environment for a large temperature rise above room temperature. You can practically see the wax dripping off the transformer.
Plus, VOX amps are notorious for getting hot inside the cabinet anyhow.
Yeah, but VOX wasn’t the only company that stuffed wax transformers into their hot boxes. As we discovered during the course of rebuilding transformers from old Dynaco, Sunn, Marantz, and a few others, they tried this idea and had their share of failures, too. Using wax as an insulator would never fly today because it’s is extremely flammable. Is there such a thing as a nonflammable wax candle? Today’s amps though are probably the safest they’ve ever been.
How long did this wax-period last?
A few years of trial-and-error seems to have put a stop to that practice. The interesting thing is that among the first VOX amps built they used Radiospares transformers. Radiospares were extremely well constructed, varnished and expensive for their day. VOX amps with these transformers are highly sought after (“pre-wax debacle era”). However, I don’t believe VOX ever intended on using Radiospares for anything but prototyping and the earliest short-run productions.
Back then Radiospares catalogs were essentially England/Europe’s equivalent of the American Allied/Radio Shack catalog stores. We’ve run across a few early AC30s that came with their full compliment of Radiospares transformers. If they had failed it was due in part by operator error and not the construction of the transformers themselves.
It seemed that shortly after the Radiospares era VOX began to solicit other transformer companies. An early one that comes to mind was Parmeko. Based upon our forensic investigations, Parmeko seems to have been a low-bidder – which was clear by their rather feeble attempt to copy the Radiospares. Also, the Parmeko output transformers were dumbed-down with cheap materials and short-cut winding methods. Their transformers were in no way even close to the Radiospares quality, as their lack of tonality proved.
The engineering of the original Radiospares designs and workmanship are highly respected by us. They’re extraordinary, and for that time they really raised the bar – as demonstrated by Eric Clapton’s sound on the “Blues Breaker” album – a JTM-45 Marshall using the same Radiospares transformers!
What time period are we talking about?
This was during the first year of production for VOX of these amplifiers.
So… the output transformer in this AC15, is that a Parmeko?
No. It’s definitely after Parmeko, which once again marks another transitional period in the company’s history. Soon after Parmeko, VOX found another transformer supplier, Woden, a former military supplier who bid low to get the VOX order. Your transformer shows all of the tell-tale signs of it being a Woden.
Woden had some problems with quality and consistency. So the performance of their amps varied from transformer batch-to-batch. I wouldn’t be surprised if Woden was behind the idea of changing their production run to wax the transformers. Many amp players and collectors are quite fond of these Woden-era amps.
The Beatles era marked another transition for VOX. From Woden to Haddon, and Haddon is generally what people recognize when they think of that Beatles sound. Haddon was another former military contractor, but a step UP in build quality and consistency and probably cost from the Wodens.
If I were to purchase a vintage AC30, for example, I would look for the ones with Haddon transformers, although I still prefer Radiospares because they consistently give that benchmark tone. When the Beatles and the British rock seen took off in the early ’60s, VOX grew into a big corporate thing. At that point the Haddons were becoming just too expensive – so enters another transition in their transformer suppliers – a lower-cost company called Albion.
Although VOX saved money with Albion, their transformers created an interesting and more aggressive new VOX tone. Sadly, right after the Albion era the company went to Thomas Organ and shifted over to solid-state circuitry. And as we all know those were a part of VOX’s darker years.
The Albions do have a small group of followers that really dig that sound. But when I’m thinking “VOX” I’m really talking about the goose bumps that the Beatles era gave me with the Haddons. George Harrison had no problem overdriving his VOX amps into that unmistakable jangle and sparkle tone. Nor did Brian May with his signature thick and creamy textured sound.
For the record we have cloned Radiospares, Parmeko, Woden, Haddon and Albion transformers from that era and make them available in our catalog.
Did this transformer die because the wax had melted away?
Probably not. This transformer lost its wax at least 40 years ago. But even that’s okay. I have built amps and prototypes in the past where I used unvarnished transformers and they performed just fine. The main purpose varnish or wax is basically to coat the iron core. Rust proofing it because the better the grade of iron the greater the chance for rust to settle in. London fog didn’t help things either. Actually the coil’s insulation itself doesn’t always depend upon the use of varnish. So your transformer probably led its life mostly free of the wax, and it still performed well.
So why did the transformer die?
Transformers are not apt to commit suicide… no matter how poorly one plays the guitar. Transformers in general are not subject to the effects of aging. Instead, they usually die at the hands of others.Consequently, it’s almost always some outside operating condition or an offending part.
There are a few exceptions though. These come from some well-known and liked amplifiers that over the years have fallen victim to self-destructing transformers. Time bombs of a sort stemming from historically problem-laden transformer designs. More often than not inadequate internal insulation systems. An amp that comes to mind is the first generation of Marshall Majors. Their power transformers would frequently fail from voltage breakdowns. These transformers were a bit oddball since they didn’t appear to follow the build methods of the Drake transformers which are found in the 50 and 100 watt amps of the same production era. Jim Kelly amps another oddity, they came with power transformers with screaming high B+ voltages and an output transformer built with no insulation other than the coating on the magnet wire itself! I believe these were made by the now defunct Time Magnetics.Even the transformers from AmpegB15s are frequent visitors/patients to our rewinding / restoration lab. Since these transformers are in cans, and extremely expensive to repair, most clients choose our ToneClone replacements as upgrades in tone and reliability over the stock transformers. It’s only a matter of time, depending on how many hours are clocked on these amps, before we get that phone call. We see firsthand the failures of transformers like these that are designed without enough insulation to survive the demands a guitar player can put on them.
So was it something else in the amp that’s making the transformer work harder or the wrong way?
For your particular transformer we’re going to take a series of photographs showing you the rewind/restoration process from beginning to end. In the first photos we’ll show how we received the transformer from you. Take a look at the view of the bottom of the transformer. Notice that there is a tiny, pin-sized burn mark on the outer-wrap of the winding. This bothers me. It looks similar to a bullet entry wound.
Transformers in general can withstand a lot of abuse. But if there is something making the transformer work harder or the wrong way, then something in its operating environment has changed or failed leading to a breakdown. First of all, we noticed fresh re-soldering on the outside of the transformer. The only soldering that should take place are the lead wires to the terminals. There are very fine wires underneath the outer wrap that may get damaged from a lingering soldering irons. We prefer that people keep their dick skinners away from any original solder joints on the transformer.
With regards to your particular transformer we can narrow the problem down into three categories of investigation:
1. The condition of the components that connect to the input of the transformer.
2. The parts and connections that connect to the output of the transformer.
3. The possibility of rough or mishandling of the transformer
Could the transformer have failed from a shorted tube?
Not likely. A shorted tube failure will create a different witness mark on the transformer. A shorted tube usually causes half of the primary winding to light up like the heating elements of a toaster. Scorching a larger section of the input coil. Your transformer does not show any signs of that type of failure. Remember you still had some audio coming out of your amp. You’d be hearing crickets instead if the primary winding was shorted or melted.
On the speaker side?
I have a tendency to believe that it’s a voltage breakdown due either to a lack of load (no speaker connected), broken connection, or some defect or damage done to the winding itself. Another bit of evidence of course is that your amplifier had partial output – it wasn’t completely dead quiet.
Based on how you described the amp sounding it leads me to believe that the failure will be isolated to a small spot on the primary winding as opposed to the coil being completely burned. And I wouldn’t be surprised if the output winding still looks like new. Amps that end their life with noisy output generally don’t suffer from current (short-circuit) related problems.
That’s exactly what I heard when I turned on the amp.
Sometimes if you catch it on time by turning the amp off ASAP you have a chance of saving the transformer. If not, the transformer will eventually fry itself.
So the transformer didn’t see a proper load on it.
It probably was exposed to some form of open or partially open load or a connection. Which will cause out-of-control voltage spikes/arcs to take place beyond what the transformer’s insulation system is designed to withstand. “Transformers Gone Wild” is not a DVD I would recommend. There are no girls in it!
We can restore the transformer to better-than-new condition. But if you don’t find, fix or replace the offending part or bad connection that took it out to begin with before you re-install your resurrected tranny, you may to blow it all over again.
Last month, we dropped off a toasted output transformer from a 1950 Vox AC15 with Sergio Hamernik and the team at Mercury Magnetics. From a suspicious pin-sized burn in the transformer’s outer paper insulation, they were able to determin probable causes for the transformers untimely demise. Then it was onto the rewind process! So, is it over for this amp’s output transformer?
VG: What goes into the process of rewinding a transformer?
We begin the restoration process with a thorough testing of the transformer’s electrical performance. Then we put the transformer’s insulation system through its paces – checking its integrity, making sure the voltages inside the transformer stay where they belong and not going wonky by arcing over to neighboring windings.
Consider these steps a weeding out process to find the proper candidates for restoration. If the transformer in question passes, then we return the transformer back to its owner or tech. Believe it or not, about 1-in-4 transformers we receive pass our testing! We offer free-of-charge transformer testing to anyone – all they have to do is cover the shipping costs. Some of these transformers are sent to us simply to make sure that all is operating well within specs – essentially for a second opinion.
We consider it a “sin,” a violation of our sense of professional ethics, to tamper with a perfectly good transformer. Rewinding or restoring transformers is a service born out of our passion for preserving tone at its highest standards. Properly rewinding transformers is a time-consuming and costly endeavor. The reality is that our rewinding service is not exactly a profit center. Who knows, maybe one day we’ll sober up and quit doing it altogether. But it does break our hearts when we find vintage transformers ruined by feeble attempts at rewinding by people who do not posses the necessary skills, or who do not have an interest in or knowledge of guitar tone.
If the transformer does fail our testing in any way, then we deem it unsafe to be put back in its amp. Now the process of rewinding begins. A large part of this process is akin to archaeology, or perhaps autopsy. We want to find out precisely how it was made and discover who or what killed it. So the first thing we do is remove the core stack and catalog each plate for original position and sequence. Check out the photo of your core completely apart and tagged. We did find some rust and will do our best to preserve it.
it. So the first thing we do is remove the core stack and catalog each plate for original position and sequence. Check out the photo of your core completely apart and tagged. We did find some rust and will do our best to preserve it.
We actually talked about that in an article we did back in the August 2009 issue of VG.
Yes that’s right. That patina of rust on the core of your transformer is an indicator of better quality iron that is ideally suited for guitar tone. The rust itself is working in league with the iron to assure that level of tonal performance. Modern day technology messes with the original iron processing recipes by adding rust inhibitors and other fillers. They’ve short-cut the more time-consuming and costly metallurgical processes – just like how auto makers are putting in more plastic than metal in their cars. Iron is an amazing magnetic conductor until it gets diluted or polluted with things that are better suited for non-audio applications. So if I had my choice, I’d prefer to play an amp with rusty transformers delivering the tone I want rather than an amp with pristine rust-free transformers that make the amp sound like it’s got a sock stuffed down its throat.
So the original core will go back in the transformer?
Yes. Since you have the right kind of iron core we’ll reassemble it the way we found it, then retune it to the original factory specs. If you were stuck with a transformer that had inferior core material, then we would suggest swapping it with Mercury upgrade iron.
It’s come to our attention that many current production transformers marked with “Made in the U.S.A.,” are actually using offshore materials, i.e. magnet wire and steel. More accurately they should read “Assembled in the U.S.A.” These self-defeating transformers are good candidates for our upgrades rather than rewinds.
Cores are the first component out and the last in during the course of restoration. An interesting fact: cores are never at fault when it comes to a transformer breakdown. The core is removed solely for us to gain access to the coil of the transformer. Taking apart the coil is a surgical process that begins our forensic investigation – like the crime shows on TV. Unpeeling a coil is quite revealing and will tell us the story of what happened. Under interrogation the coil always tell us the truth. A body of a man is wheeled in to the morgue. His wife insists that he shot himself while cleaning his gun – but the autopsy’s evidence proves otherwise. Now she’s under suspicion.
Well the coil of your transformer quickly spilled the beans. Remember that small black spot we noticed on the outer wrap of the coil? Sometimes there are innocuous blemishes in the form of spots that may appear on the surface of paper and are nothing to worry about. However, what we normally find in fried transformers is that the burn begins somewhere in the middle of the coil and works its way out – causing an exit wound. In your case the failure was not typical. Yours was an entry wound.
This is important because it indicated to us that it was killed by a sharp instrument that penetrated the outer insulation that broke through and severed two turns of the fine wire that make up ½ of your primary winding. Meaning that only one of the two power tubes was operational. The damage to the entire transformer was limited to that spot and only the very top layer of the magnet wire. Those broken wires were arcing across each other and taking advantage of the oxygen available from the perforation of the outer wrap to form that black spot. Further evidence to support these findings is the fact that the rest of the winding, all the way down to the bobbin, was unharmed.
This type of injury is caused by the usual suspects – the installer or remover of the transformer. The smoking gun possibilities are: the tip of a soldering iron, the tip of a Phillips screw driver… or rough handling (dropping or bumping the transformer against something sharp, etc.) with enough force to puncture it to cause such a failure. And finally, we cannot rule out beer as another possibility.
You can now relax. Your tubes and speaker are now ruled out as possible components of interest.
What gets burned out in a transformer that you’re actually replacing?
The magnet wire. When its insulation gets over taxed the fuster-cluck begins as the insulation system of the overall coil progressively losses its integrity (dielectric strength) and begins to arc or burn.
Can you ever rewind a transformer with its original wire?
We certainly wouldn’t do it. When the tires of your car are worn out, do you go out and buy used ones to replace them? Unless you’re a former stockbroker, what’s the point?
Magnet wire is not bare copper wire. There is a micro thin coating of plastic insulation that protects it from shorting. That very thin layer of plastic is susceptible to microscopic spider web-like cracking. And the process of unwinding the magnet wire virtually assures it’s going to get damaged.
Check out the photo of what the magnet wire from your transformer looks like after it was unwound. Does this look like something you’d want to put back in your transformer?
Has any of the machinery used for rewinding changed over the years?
Most of our methods and equipment for rewinding transformers we consider proprietary. So I’m going to stay away from specifics. However, the basic concept of winding equipment hasn’t really changed for over the last 100 years. Today, of course, we see more computerized machines. But we chose to stick with the gold standard of vintage equipment
Aside from ours, I’d be surprised if there is any precision equipment available that is dedicated for the sole purpose of unwinding/rewinding. Most attempts at rewinds today just use run-of-the-mill winding machines that produce, at best, haphazard results.
So if someone gives you a prized “mojo” tranny, do you have the capability of rewinding it exactly the way it was before?
You know I’m not a big believer in mojo. I maintain that all things to do with amps and their respective tone can be easily explained and reproduced, and dare I say it… improved. But yes, we do have the capability. We treat all transformers with the respect and the dignity they deserve. Most people in this business wouldn’t treat these transformers with such reverence. Likewise, they may not have any musical background or an appreciation for electric guitar tone. We’re more than just a transformer company. If the original transformer included magical “fairy dust” or whatever that made it sound unique and desirable, we wouldn’t overlook it or change anything. That’s our promise.
We must be doing something right because we receive mountains of mail, email and phone calls from players all over the world who thank us for giving back (or preserving) their amp’s mojo.
When you begin rewinding, are you using the same wire that was used in the ’50s and ’60s?
That brings up a couple of interesting and important points. First, Mercury is probably the only company in this industry that uses high-purity OFC (oxygen free copper) magnet wire made in here the U.S.A. – which we use exclusively because of its guitar tone (as well as our hi-fi audio) properties. This type of wire is clearly sonically superior and more consistent than the wire that was used in the ’50s and ’60s. Wire technology back then was limited to about half of the temperature and electrical performance of Mercury’s standards. As a result, transformers using our materials last longer, take more abuse, are sonically more revealing, and follow a closer musical path when over driven into harmonics.
The second point is that we, as players, would much prefer the original wire from the ’50s and ’60s to the offshore and south-of-the-border suppliers of magnet wire. We gave them a chance, thinking we’d save some dough for our customers. The tested results yielded dull tone, inconsistent batches with too many instances of insulation breakdowns. Not even up to the standards of the vintage wire. Further, in real life tests of putting amps through their paces, the sonic differences were quite noticeably inferior to the guitar players here at Mercury and the players working for the recording studios here in southern California.
Have you ever seen a negative effect of age on a transformer?
In some cases yes. Sometimes your ears may pick up on affects of transformer aging before you realize what is happening. Dark, dull and fuzzy tones with a general sense of lower output volume.
If anything suffers from aging it will most likely be core. There are two major contributors that cause a negative effect of aging and affect your tone. Before World War II the science of processing iron was not up to snuff. It seemed that it was difficult then to boil out residual carbon from the iron. We are carbon-based life forms that age. We also rely on carbon for dating or aging organic compounds. Even a miniscule amount of carbon left in the older iron causes it to age. As the iron core ages, the magnetic conductivity begins to poop out, slowing the transformer’s responsiveness with increasing losses. The result is less output with only lower mids breaking through.
During WWII there was a shortage of iron for the war effort. So many transformer companies, in order to survive the hard times, made their cores out of soup can sheet metal! Transformers made this way were naturally plagued the wrong kind of iron and harboring plenty of carbon to boot. Do not confuse iron with steel. Finally, when silicon was implemented to help force out the carbon from post war iron, transformer iron became much more stable. Stable enough to out last us all.
Another contributor to transformer aging comes from humidity. Amp owners who live in humid climates have noticed their tone changing over the years. This is especially true if their older amps had transformers built around paper tubes. Paper-bobbins have always run the risk of moisture absorption affecting and changing tone. Conversely, we found that amps built with premium transformers that utilize plastic bobbins weren’t likely to suffer tone degradation via moisture saturation. A couple excellent examples would be the original Partridge and Radiospares transformers from England. With all the fog and rain they experience, these transformers have held up quite well.
Maybe this explains why coating paper in wax was attempted early on? To verify that dew point (humidity) affected output transformer tone, we had transformers from amps made in the ’60s, that had never left the U.K., flown in. They were provided to us by some of the best legendary players their country had to offer. They knew what their amps sounded like originally.
We put their transformers (all with paper bobbins) through a dehumidifying process, then re-sealed them in a generous varnish dip and a full bake. All these guys freaked out and thanked us for giving them their original tone back! And one of the player’s even called with a personal thanks that we had reaffirmed that he had not actually suffered hearing loss! He said that as time passed he noticed less treble tones and a lot less note separation and definition. Note attacks seemed impeded. Other players also had this mistaken belief that their amps were getting too old to play.
Obviously this new transformer won’t be dipped in wax like some of the old experimental ones. What will you use to insulate it?
Well, I wouldn’t call your transformer new. It’s still a 1960. If we had restored a 1960 Corvette for you, does it change the year, make or model? Instead of a fresh coat of paint for the car, your transformer will receive a fresh dip of glorious varnish. A non-flammable sexy coat of see-through clear. Something that may last long enough to pass along to your grandkids.
What can I expect the tonal differences to be between the rewound transformer and the original?
It should sound as good as when it left the showroom floor in 1960.
Your only other option, as far as upgrading the tone, would be to try one of our ToneClones. These are copies taken from some of the finest specimen celebrity-owned and played “pick of the litter” amplifiers. And it’s likely that you’ve heard these transformers in action on your favorite recordings.
Have rewinds come back to you shortly after you’ve sent them out?
On occasion, yes. Installer error happens, and if you don’t find and fix the problem that caused the transformer to blow in the first place, you’re just setting yourself up for a repeat performance.
Another thing that’s fairly common is the use NOS tubes. Usually purchased from eBay. We had a situation once where a customer, after installing his rebuilt transformer, decided to re-tube his amp with 40-year-old American-built originals. As luck would have it one of the NOS tubes shorted and caused a different failure in the newly rebuilt output transformer.
Is a rewind in store for every old transformer, or will they go on forever?
No, not every old transformer will need to be rewound if taken care of properly. Perhaps most may outlast the “Iron Age” of guitar amplifiers which we’re living in now. The push for solid-state technology is tenacious enough to replace tubes/transformer-based amps in the long term (perhaps within the next 50 years?). Tubes may go but they’ll have to pry the transformers from my cold dead fingers before I’ll give them up.
We recently put transformers of all kinds, old and new, to the test by volunteering to help out the flood victims in Nashville. We offer to test and restore any flood damaged guitar amp transformer sent to us free of charge. We encountered some pretty nasty stuff. Yet, less than 5% of them needed to be rewound! (Namely, transformers with paper bobbin insulation, or amps that had been turned on before the transformers were tested.) Some of the transformers that came in were from amps that had been submerged in raw sewage for weeks! The odor was so fowl that we had to air them out, and the staff actually had to draw straws to determine who was going to work on them.
Talk about your shit jobs.
Man, you got that right! Ah, but there’s nothing like the fresh smell of varnish in the morning to help one deal with that challenge. We did manage to extract the moisture and reseal these transformers with varnish. The sacrifices you have to do to help out fellow musicians….
Last month, Sergio Hamernik, head honcho at Mercury Magnetics, walked us through the intricate process of rewinding a vintage transformer. This month, we dig a little further into the details of winding, materials, the ways age affects some transformers, and why some of them fail.
When you rewind a transformer, do you use the same wire used in the 1950s and ’60s?
No. We use high-purity, oxygen-free copper magnet wire made in the U.S.A., and we use it because of its tonal properties – it’s sonically superior and more consistent than the wire used in the ’50 and ’60s. Wire, back then, had about half the temperature and electrical performance capability of Mercury’s standards.
We, as players, would prefer to use wire from the ’50s and ’60s compared to offshore and south-of-the-border wire. We tried them, thinking we’d save our customers some dough, but test results yielded dull tone and we saw inconsistent batches with too many instances of insulation breakdown. The stuff was not even up to the standards of vintage wire. Further, in real-life tests putting amps through their paces, the sonic differences were noticable to the guitar players here at Mercury, and those working for the recording studios here in Southern California.
Have you ever seen a negative effect of age on a transformer?
In some cases, yes. Sometimes, your ears pick up on the effects of aging before you realize what’s happening – they produce dark, dull, and fuzzy tones with a general sense of lower output volume.
If anything in a transformer suffers from aging, it will most likely be the core. Two major contributors cause a negative effect of aging and affect your tone. Before World War II, the science of processing iron was not up to snuff. It was difficult to boil out residual carbon, and even a miniscule amount of carbon in older iron causes it to age. As an iron core ages, its magnetic conductivity begins to poop out, slowing the transformer’s responsiveness with increasing losses. The result is less output with only lower mids breaking through.
During WWII, the war effort created a shortage of iron. So, many transformer companies made cores from sheet metal, like that used to make soup cans! These had the wrong kind of iron and harbored plenty of carbon, to boot – do not confuse iron with steel! Finally, when silicon was implemented to help force the carbon out of post-war iron, transformer iron became stable enough to outlast us all.
Another contributor to transformer aging comes from humidity. Amp owners who live in humid climates have noticed their tone changes over the years, especially if their older amps had transformers built around paper bobbins, which have always run the risk of moisture absorption affecting tone. Conversely, we found that transformers with plastic bobbins weren’t likely to suffer tone degradation via moisture saturation. A couple excellent examples are the original Partridge and Radiospares transformers from England – with the fog and rain they experience, these transformers held up quite well. That may explain why coating paper in wax was attempted early on, and to verify that humidity affected output transformer tone, we flew in transformers from amps made in the ’60s that had never left the U.K., all with paper bobbins, and put through a dehumidifying process, then re-sealed them in varnish and gave them a full bake. The owners freaked out and thanked us for giving them their original tone back! One called to thank us personally when he realized it was his tone fading over the years, and not his ears! He said that as time passed, he noticed less treble and a lot less note separation and definition. Others had this mastaken belief that their amps were getting too old to play.
Obviously, the rewound transformer for the 1960 Vox AC15 we’ve been working on the last few installments won’t be dipped in wax. What will you use to insulate it?
It’ll receive a fresh dip of varnish.
What can we expect the differences to be between the rewound transformer and the original?
It should sound as good as when it left the showroom in 1960. The only other option, as far as upgrading the tone, would be to try one of our ToneClones, which are copies of the finest celebrity-owned and played “pick of the litter” transformers. It’s likely you’ve heard these transformers in action on your favorite recordings.
Has a rewound transformer come back to you shortly after it was sent out?
Yes. Installer error happens, and if you don’t find and fix the problem that caused the transformer to blow in the first place, you’re setting yourself up for a repeat performance.
Another thing that’s fairly common is the use of N.O.S. tubes, usually bought from an online auction. We had a customer who, after installing his rebuilt output transformer, decided to re-tube his amp with 40-year-old American-made originals. As luck would have it, one of the tubes shorted and caused a different failure in the newly rebuilt transformer.
Is every old transformer destined for a rewind, or could some go on forever?
Not every old transformer will need to be rewound, if taken care of poperly. Most may outlast the “Iron Age” of guitar transformers, which we’re living in now. The push for solidstate technology is tenacious enough to replace tube-/transformer-based amps in the long term. Tubes may go, but they’ll have to pry the transformers from my cold dead fingers before I’ll give them up!
We recently put transformers of all kinds – old and new – to the test by volunteering to help flood victims in Nashville. We offered to test and restore water-damaged transformers, and encountered some pretty nasty stuff. Yet, less than five percent of them needed to be rewound – namely, those with paper bobbin insulation or amps that had been turned on before the transformers were tested. Some transformers were from amps that had been submerged in sewage for weeks! The odor was so foul we had to air them out, and the staff actually had to draw straws to determine who was going to work on them.
You must have your share of unpleasant jobs….
Man, you got that right! But there’s nothing like the fresh smell of varnish in the morning to help one deal with that challenge. We did manage to extract the moisture and re-seal these transformers with varnish. The sacrifices you have to do to help fellow musicians….
Boy have I got a treat for you guys!!! As you know I am a big fan of Mercury Magnetics transformers and have been a dealer for many years now. Their products are excellent as well as their customer service. The Mercury Magnetics line is quite extensive and they will do custom pieces as well.
I have been working with Sergio Hamernik for almost a year now on an exclusive interview all about guitar amp transformers. In this interview Sergio talks about how transformers affect your amp’s sound and feel, if transformer size matters and how it affects tone, what a choke is and much more information.
Mercury Magnetics is the leader in guitar amplifier transformer manufacturing. I have personally used their iron in many repairs, restorations and custom builds over the years. It never ceases to amaze me when I use a set and listen to the amp after the project is complete. It’s almost like a blanket was taken off of the sound and you are listening with “3D glasses.” The feel of the amplifier becomes much more dynamic as well. In my opinion “your amp’s transformers truly are the heart and soul of your amp.”
In this exclusive interview with Sergio Hamernik (the man behind the scenes at Mercury) some basic questions that all relate to the tone and feel of a guitar amplifier. His answers are forward, straight to the point and insightful.
 300guitars: Why should guitar players care so much about the transformers in their amps?
Sergio Hamernik: When a player has to struggle with his amp then there’s really not much of a reason to play it. The tonal quality and performance of a tube-type guitar amp is largely determined by its transformers. Where there is great “tube tone,” you’ll always find “great sounding transformers” making it all happen!
Once you get past the player’s talent/ability, it’s all about the tone. If an amp doesn’t produce desirable tone, the window of inspiration closes and gets replaced with fatigue for both the player and the listener.
These days musicians who choose to play an electric guitar are only as good as their technical awareness and development allows them to be.
Transformers are the most important and most expensive components of guitar amp’s parts list. Also, they are the only components designed and built specifically for that amp, unlike the rest of the components — the resistors, capacitors and even vacuum tubes. These other components are considered to be “universal application” parts — meaning not just for making guitar amp tone. The electronics industry commonly uses these same components for medical, industrial, radio and many other applications. You certainly couldn’t fit or use guitar amp transformers for any of these other applications without offending someone.
Transformers are the key to providing that unique signature tone. It’s the transformers that differentiate one amp brand or sound from another. Here’s another way to look at it — all amp builders have to deal with the same limited choices from a small pool of vacuum tube manufacturers and other off-the-shelf component requirements (resistors, capacitors, etc.). This is NOT so with the transformers. Although there are plenty of generic transformer designs available that service the “power requirements” of an amp, you wouldn’t want to use these awful-sounding devices in your guitar amps. Likewise it’s not a coincidence that most of the best-sounding amp builders, modifiers, and repair techs begin their craft and finish it with enviable distinction, relying on their choice of transformers.
300guitars: Would you explain, in guitar player terms, what power and output transformers are?
Sergio Hamernik: Well, I really don’t like to lump all guitar players into one category. Making assumptions here (be it charitable or not) just doesn’t seem fair to me. Each player has their own level of interest and technical understanding on this subject. So I’ll split my answer into three different groups of definitions and let the player choose the one that suits them best.
In basic guitar player terms: It’s magic!!
In technician terms: A device applying mutual inductance in an efficient manner, so that circuits with different voltage/current requirements can correspond to each other.
In engineering terms: Transformers are electrical devices consisting of a magnetic-core and two or more coils (commonly referred to as windings) inductively coupled as circuits for the transmission of alternating-current energy from one closely coupled coil to another usually at a different voltage and current value. Transformers are also used for matching impedances between the signal generating source and the load.
 300guitars: How does the power transformer affect the sound of your guitar? The sound comes from the output transformer right?
Sergio Hamernik: Yes the amplifier’s sound does come out of the output transformer, but where does it all begin? While an output transformer is vital to an amp’s ultimate tone, it simply can’t do it alone. The power transformer is the first step in building tone and in setting the standard of performance that the tubes and output transformer utilizes.
The output transformer depends on the power transformer for determining the maximum amount of power the amp can put out. The power transformer is also a major contributor for the overall feel of the amp. Such as punch through (the oomph factor), note attack, a perceived larger/wider soundstage presence and most importantly, the speed or reaction time of the amp’s audible response to the player’s sense of touch and playing technique. Tamper with that in any way by using cheap “dumbed down” power transformers and your audience may confuse your amp’s tone with the sound that is made by farting into a pillow!
A puny power transformer will deliver puny tone no matter how good the output transformer is. A good output transformer is also not intended to be a problem fixer or a turd-polisher. Garbage in is always garbage out. So please don’t shoot the messenger because the power tranny just ain’t cutting it.
Output and power transformers are actually close cousins. Doing similar tasks, one matches and isolates the speaker from the amp and the other one matches and isolates the amp from the power company. Peace keepers of a sort, preventing tubes from frying the speakers and preventing the power company’s energy from frying the amp and people connected to it.
300guitars: How does the output transformer affect the amps sound and feel?
Sergio Hamernik: An output transformer is the last component of the audio chain. The amplifier’s voice. The final word that reaches the speaker. Because all vacuum tubes were never really designed to distort intentionally, the weight of producing desirable amplified guitar tone falls heavily on the transformers. The output transformer’s job is to coax, extract and even irritate the power tubes into tone-friendly distortion. Ever wonder why solid-state amps have always played second fiddle to tube amp tone? Is that simply because of not employing tubes or of not having an output transformer? At the very least, it’s something to think about.
The output transformer determines how the amp sounds like from fully clean (sweet with a touch of sparkle) to fully over-driven (chainsaw) distortion, and everything in-between.
By the way, the term “clean” as used in guitar amp speak is a bit of a misnomer. There is no such thing as a distortion-free guitar amp. “Clean” simply refers to less distortion. There is an intimate inductive/reactive relationship between the output transformer (coils) and the speaker voice (coils) that also back-washes into the power tubes and influences that “clean to dirty” range of distortion. The quality of the output transformer determines how well the production of tone is executed by the amp — those notes that float between the strings which are created by overtones, chimes, bell tones, sustain, etc. Poorly made output transformers tend to gargle out, squash and mask those overtones.
The output transformer is also responsible for how efficiently the audio power of the amp transfers to the speaker (load). Ultimately, the player issues the final report card for the performance of the amp and the output transformer with comments like “clarity,” “articulation,” “loudness,” “break-up,” “grit,” “glassy,” “grind,” “dirty,” “woody,” “mushy,” “mashed,” “fuzzy,” “dark,” “cloudy,” and so on. There are hundreds of guitar amp speak descriptions and euphemisms out there which capture their emotional response (players and listeners alike) to what is coming out the amplifier’s window.
The mighty output transformer. Loved and hated by so many. Still one of the most misunderstood components of a guitar amp. 80 years and going strong. Go figure….
 300guitars: When it comes to transformers does size matter? How?
Sergio Hamernik: I can almost hear my wife saying “now that sounds like a guy question.” Actually, in most situations, transformers and chokes make a good case for “bigger is better.”
A power transformer that is undersized for the job will run hotter than a bitch kitty. The amp is unable to be pushed — collapsing under weak, sagging voltages. It’s unable to keep up with the demands a player puts to an amp. The amp slows and has a tendency to cough out notes when played clean, and honk or bark out the notes when overdriven.
Another symptom of undersized and/or poorly designed power transformers is the phenomenon of “tone drift.” You know this is happening when the amp (common with some early Fenders and half of today’s 100 watt amps) starts off with decent tone for the first hour or so, then somewhere around two hours later the tone begins to change and not for the better. The internal temperatures of the transformer reach their peak and begin detuning the voltages and power the amp sees. This is caused by the changes to the resistance of copper. As the temperatures become excessive, the amp’s tone drifts. Remember rich amplifier tone needs to be well fed.
An undersized output transformer will act more like a suppository to amplified guitar tone than a big open window, which is its main purpose. Contrary to popular myth, there is no tone magic that occurs when you force feed an output transformer into alleged saturation or intentionally under power it with a dinky power transformer.
The term “output transformer saturation distortion” comes out of poor guessing by people who really don’t understand how tubes and transformers work together to produce music friendly harmonic distortion. If an output transformer reaches true saturation, all bass frequencies will disappear, the mid-range will sound dark and fuzzy with lower volume — leaving the treble frequencies tinny and brittle sounding. Does that sound desirable to you?
So it’s not the transformer itself generating that saturation effect on overdriven guitar tone. Good output transformers are designed to operate at low flux densities (loads of inductance). That low flux makes it difficult to saturate an output transformer. So the output transformer doesn’t get the credit or blame for that “saturated” sound. The actual source is in the push-pull power tube plate circuit reacting/saturating to the changing impedance it sees in the primary coil of the output transformer as its flux density changes with the changing frequencies and fluctuating power coming into it. The saturation phenomena (when it appears) is mostly happening in the tube.
If one wants to intentionally use a dinky power transformer to achieve tone magic (yes some have tried it, believe it or not). They could save themselves a bunch of money and buy that pillow I mentioned earlier for similar results.
Bigger is better for chokes if you have the room for it on the chassis. Assuming the same value of inductance, more iron and copper will let more power through and it will run cooler as well. This is because of lower DC voltage resistance with the extra copper involved. More voltage being available to the tubes means more power out of the amp.
300guitars: What is the choke for and why do you offer so many models?
Sergio Hamernik: Originally chokes were used in guitar amps to extend the life of vacuum tube rectifiers nearly tripling their life expectancy. They behave as a quasi current spike shock absorber. Chokes help capacitors smooth out any ripple that may be present on the DC voltage. The goal here is to always try to get the cleanest voltage to the tube circuits. Caps by themselves do a pretty job of it. But the choke is a multi-tasker. Along with doing a nifty job of smoothing out ripple, the choke does something else that makes it a significant contributor to the amp’s final tonal character. Because its connected in series with the rectifier and not tethered to ground like a cap, the choke (being an inductor) works nicely as a current regulator. And it keeps the current from decreasing as much as it would if there were only caps involved.
This nearly constant current available from the power supply, courtesy of the choke, makes for an ideal platform to make the best possible tone. Simply put, changing the value of the choke changes the tone and behavior of your amp.
Why so many varieties of chokes? Since chokes are a significant link in the audio chain, a one size fits all approach would be a great injustice to all guitar amp owners. Choke values are a finesse point, a fine tuning that helps to extract the most favorable tonal characteristics from an amp. We even offer a “shift on the fly” option with our multiple-value Multi-Chokes. One choke with several choices of inductance to help the amp builder find that sweet spot.
There is one last benefit to using chokes and it’s the most overlooked attribute. When a choke is connected between a couple of caps, a form of a low pass filter is created. What this means is the choke blocks high frequency garbage on the AC line from mixing with the guitar signal and causing all sorts of sonic collisions during the process of amplification. Let us not forget that we live in an electronic age far more complicated than the 1950s or 1960s. There are all sorts of things contaminating our power before it hits our amps. Computers, TVs, BTL cable services superimposed on our power lines, you name it, are all sources of noise we don’t want in our amps.
You’d be surprised to find out how many amp builders substitute a resistor for a choke just to save a few bucks and lose out on the choke’s very cool advantages. Almost all of the great vintage amps had chokes (Marshall 50 & 100 watt, Vox AC30, Fender Twin, Showman, Super Reverb, Vibroverb, Pro Reverb, Deluxe Reverb, etc.). The builders back then were taught tube theory and understood the relevance of the choke in their designs.
300guitars: Would a Mercury replacement reverb transformer make the reverb in an amp sound better?
Sergio Hamernik: That depends on how lousy the original one was. Reverb transformers are wound similar to guitar pickups. Lots of turns with very thin wire. Which adds to the expense of building them. Many companies skimp on materials to keep their costs down as a result.
We believe that the low level signal (barely a whisper) going into the reverb transformer is quite fragile in nature and anything less than using the best materials and winding techniques would cause it and its tone harm. According to our customers that have upgraded their reverb transformers with ours, they report better performance, higher def, a more lush-sounding reverb, etc. Based on that, my answer is yes — or your money back.
300guitars: Is it easy to upgrade an amplifier to a set of Mercury transformers?
Sergio Hamernik: Heck no! It’s not at all easy. Therein lies the rub. This is why we have the great divide between disappointing “corporate” tone and a thriving (yet inconsistent) boutique amp market.
How much hassle and expense are you willing to put up with to get your ideal tone? If merely swapping out tubes will improve tone, then why are we still missing so much of it today? If simply plugging things in or out made for better tone, then all the big amp companies would have nailed it decades ago and we wouldn’t have the need for this interview. But no, it’s not that easy. Quick, cheap and dirty (non-transformer) amp fixes are not worthwhile timesavers. They tend to act more like tinsel and don’t do much for real tone problems. My wise old grand dad once said, “Putting powdered sugar on a turd, doesn’t make it a doughnut.”
Upgrading to Mercury transformers requires technical expertise and a morbid fear of being electrocuted. There are potentially lethal voltages present, a ship load of wires coming out of these things to further complicate matters and requiring a good share of installation elbow grease to boot. A person should be schooled in electronics and not sexually frustrated. A steady hand goes a long way in doing a good install. It shouldn’t be a D.I.Y. project no matter how simple it may look to the casual observer. We have techs all over the planet that are willing to help and do a good job with safety first. Transformers are expensive and labor intensive to install.
Those who are ready to make such a commitment/sacrifice (who needs kids anyhow?) will be rewarded for their efforts. Don’t take my word for it, just read our testimonials. We have a bunch of them all unsolicited from players, amp builders and amp techs, who were impressed enough to write to us telling everyone that it was well worth it.
300guitars: It seems that tubes and big hunks of iron (transformers) are very old school technology. Is there anything new on the horizon at Mercury?
Sergio Hamernik: Playing a guitar is even older school. There isn’t anything modern about an electric guitar. But, what makes an electric guitar “electric” is the fact that it depends on the rules of magnetism. The pickups on an electric guitar are made of coils of wire responding/reacting to a changing magnetic field, so are the voice coils in speakers. And let us not forget the power transformer, choke and output transformer in an amplifier are doing their jobs through magnetic fields — literally completing the link between a player’s finger tips to the player’s and listener’s ears.
My point being that if you replace your amp’s transformers for something else, you might as well replace the electric guitar with something else. So happily, we’ll stay stuck with big hunks of iron and hang on to our electromagnetic guitars! This means that tubes, which are not magnetic devices, could eventually be replaced by other devices such as high-voltage Field Effect Transistors as long as they’re mated to right kind of transformers. This is stuff that you don’t really need to know, but it’s a point of interest. There are a lot of motivated people out there that are fed up with the poor quality of tubes today and might be able to make tube substitution a reality someday soon I hope.
What’s new on the horizon at Mercury? A bunch of stuff. A cool new line of transformers that will give the next generation of players a unique voice of their own. Vintage is great, but we also want to encourage a new generation of inspired song writers and players to continue guitar based music. It’s all about the tone that will help seed this.
We are in the process of designing, developing new Upgrade Kits, pre-packaged transformer sets for those who are not satisfied with the tone of their present day amps. It’s our passion.
And, possible amp tone clinics. If that is what players want. We are also working on things that are a bit beyond the horizon which I’ll talk about sometime later.
300guitars: Thanks Sergio for taking the time for this most informative interview!!!
Sergio Hamernik: Thanks Billy for this interview and for giving a damn about all this stuff we call tone. Your passion clearly shines through on your website. It’s people like you that keep it all going and compel us to continually raise the bar for the guitar playing community.
I also want to apologize in advance if I offended anyone’s sensibilities with any comments I may have made. I will learn to live with the guilt….
Source: https://mercurymagnetics.com/pages/news/300guitars/300g-02.htm

In late 2009 I had the opportunity to talk with Sergio Hamernik about the history of the Mercury Magnetics, how he became involved in making transformers for guitar amplifiers, and the difference a high quality transformer can make on your tone.
How did Mercury get its start?
The company’s roots date back to the early ’50s. Mercury was started by an old General Electrics transformer engineer who was working there pre-World War II. He then went on to do a bunch of design work for the war effort. And in the early ’50s, hung a shingle and became self-employed.
The name “Mercury” came out of his passion for Mercury cars, he always drove a Mercury since the late ’40s — he loved those cars — and eventually moved from the East Coast to the West Coast where he found that there was a lot of military and aerospace work. A booming economy in the early ’50s gave him a lot of business.
I met him in the 1970s when I was an engineering student and an audio enthusiast. Back then the electronics world was well into its solid-state “evolution,” and interest in tube gear was quickly disappearing. Not for me, however. I found myself in demand as a guy who knew about those “old things”; not only the math, formulas and specifications but I also had the “ears.” I could fix and keep the old gear running. So, I worked as a hired gun for a bunch of studio heads and pro musicians.
Typically when an amp’s output transformer blew. No one seemed to know any better so it was just swapped by whatever “factory” replacement or an off-the-shelf “equivalent” catalog transformer was handy. The invariable result was that the amp’s characteristic sound was gone. And no matter what resistors, caps or tubes were used, it could not be rescued or returned to its original sound. It was the transformers, it turned out, that were the key. The problem was coming up with a way to remedy the blown transformer replacement or repair that wouldn’t alter its tone.
To further complicate things, most transformer people I dealt with just didn’t want to bother with the music industry. For the most part the established electronics industry considered the needs and opinions of the audio and MI (Music Industry) communities as subjective, run by kooks, and occupied by people who didn’t know what they are doing. Audio and MI had always been considered the illegitimate stepchildren to the rest of the industry.
Out of pure necessity I had to got involved with transformer design and manufacture. As a customer of Mercury, they had built many custom transformers to my specifications — although we had many heated, on-going debates on the subject because the company owner hated audio! He never did understand what made guitar amp transformers tick, or how musicians thought and reacted to them.
That aside, he pestered me for almost a decade to take over the company because he felt I was the only one qualified. Eventually I did, and that was when Mercury got serious about the guitar amp connection. Sometimes you end up becoming an expert at something when no one else wants to do the job.
By the time I took the helm we were developing a really good and workable understanding of the relationship of transformer design to decent tone and how amps should behave. And around 1980 we began the long and arduous task of collecting and cataloging transformer specifications for every vintage amp, from all over the world. The deeper we dug, the more apparent it became that there were all kinds of factors that no one had previously suspected that affected guitar tone. And likewise, no one seemed to be paying attention to such things.
In turn, we invented proprietary technologies to aid this work. Even after three decades, we’re still innovating and discovering new things. From that fundamental research came our now famous ToneClone series, and later the Axiom line, which is probably the most significant advancement in toneful guitar amptransformer designs since the ’50s. Both product lines, we’re proud to say, have distinctly different niches in the annals of guitar amp tone.
We’ve not only cured the old transformer tone issues, but made it possible for musicians to upgrade their existing amps. And we’ve also made it possible for amp builders to reproduce amps of the same or better grade than even the most outstanding vintage amps of the past.
When did you become involved with making transformers for guitar amplifiers?
Back in the ’70s I worked for people on a one-to-one basis, usually under confidential arrangements, with certain rock stars that just didn’t want to be bothered by their names being flaunted around. What they want was their amps running right for recording, projects, touring, etc.
The problem was that when technicians would fix the amps they’d often loose their tone. It turned out that the culprit was the replaced output transformers. A changed output transformer would completely alter the character of the amplifier. So as I was the guy doing most of the work to resolve this issue, this expertise was brought to Mercury where we began a special division to cater to the guitar heroes.
Word got around rather quickly that Mercury was able to repair, rewind, and restore the original transformers and it just grew from there. The whole “Tone Clone” thing came from artists who had these amazing irreplaceable amps, amps that often made recording history. They didn’t want to take these amps on tour. So we came up with the innovative idea of cloning their original transformers that they’d fallen in love with. With the clones we could now easily make, for the first time ever, several identical amps for them. Or they would assign their techs to drop-in the cloned transformers so they would have, for example, six amps that would all sound the same as that first perfect amp.
These artists could now go on tour and not worry about breakdowns or theft, and keep their prized-originals back at home.
I worked with Ken Fisher, the whole Trainwreck thing, and a lot of the early boutique guys — and still do with Alexander Dumble. They preferred to keep things confidential and not let too many people know who their sources were because there were so few transformer designers that catered to the guitar amp market.
There was also a slow-but-steady dumbing-down occurring in audio and all that had been the post World War II momentum. Many of the ex-military components we’d been using were high tolerance parts, with mil-spec formulations of iron and copper and so on, that had been used to win the war effort. During the ’50s and ’60s we enjoyed the benefits of those high quality components at surplus prices. But by the late ’70s, and definitely in the ’80s, steel manufacturers started to change recipes to make the iron and other materials much more affordable.
You can hear the differences between a late ’60s Marshall, a late ’80s Marshall, and a Marshall today. A good listen will really help you to understand what changes took place. Unfortunately they made so many of those changes more out of economic considerations than anything else. The amps were loud but they seemed to be losing sight of the fact that their tone was disappearing — the “recipes” had been changed.
In addition to many other factors, the iron that Mercury uses is custom-formulated specifically for us. We buy enough of it to be able to dictate the exact recipe from the foundries. And all of our iron is literally from American ore processed right here in the USA. 100% American madeto the original specs. Are there drawbacks? Well, some of the iron rusts more easily, but that’s actually a good thing because rust is a natural insulator. But the opposite is also true. When you see a modern transformer with a silvery or a shiny core just know that they aren’t worth a damn when it comes to tone.
Can you tell us more about guitar amp transformer history?
Here’s an amusing anecdote that may help explain our case for guitar amp transformers: There’s a great deal of documentation, from back in the mid-’50s, where engineers, and other technical people, were writing really scathing reports on how awful the transformers were in the audio industry. Those darn transformers! When tubes were plugged into them there was a tendency to distort! And they couldn’t have any of that! Likewise with harmonic distortion — especially even-order harmonic distortion.
Many amp builders, techs and players, today, don’t understand that tubes were originally designed to run dead clean, linear, and be efficient voltage amplifiers. That the tone we’ve all come to know and love is caused by the transformers literally “irritating” the tubes into distortion.
Which is, of course, the whole point of what we are looking for in guitar amps. Back in the ’50s, they were fighting to get rid of those nasty distortion tonal characteristics. Now we embrace them. But that was audio – guitar amps were still in they’re infancy and yet to be realized. It took a generation or two of innovative musicians to take those “undesirable” tonal characteristics and create music; to work with distortion and make it into something musical.
Ironically, it was that no-distortion engineering mindset that ushered in solid-state, and why it was so openly embraced in the ’60s. It was solid-state electronics that eliminated the output transformer.
In the late ’60s, Vox went to Thomas Organ to have solid-state amps built. They were very proud of this state-of-the-art amplifier. Curiously, I met a few of the musicians from the late ’60s that were sponsored by, and using, those amps. The tone was so awful and unbearable that they used the enclosures but hid their old tube gear inside! As you may already be aware, the vacuum tube industry is alive and well, and we’re still waiting for the solid-state industry to catch up.
Part of the confusion is that musicians assume it’s the tubes that give them their tone. There’s a lot of synergy going on in an amp, and the tubes certainly contribute, but let me illustrate this another way. Did you know that there is what we call “output transformer-less” amplifiers in the HiFi world?
These amps basically parallel a bunch of power tubes together until they get down to 16, 8, or 4 ohms. There is no output transformer, so you literally connect the speaker directly to the tubes. If you ever get the opportunity to do an audio demo with this style of amp, you will find that while it works, it sounds nearly solid-state. The output transformer is what provokes a tube into giving the characteristics that we find desirable as far as tone. Audio engineers didn’t want the tubes to distort, as tubes are basically nothing more than very clean voltage amplifiers. But when you have a reactive element like a transformer, you irritate the tubes into harmonic distortion.
Therefore, the difference between a good and mediocre transformer is based on how it works and syncs with these tubes to produce the kind of tone or distortion we are looking for. It is not as easy as winding some wire around a steel core, if it was then we would not be having this conversation.
How does a Mercurytransformer made today compare to the transformers made in the golden age of amps (the ’50s and early ’60s)?
One of the biggest mistakes existing in today’s amplifier community, especially amongst hobbyists and do-it-yourselfers, is to blindly copy every aspect of a vintage amplifier hoping to get a piece of that golden tone. At best, this method still produces very random results. One of the key reasons for this is the often-overlooked missing transformer formula. A builder will fuss around with the tiniest of other details but completely miss how the transformers fit into the equation. In short, get the transformers right, then the rest is much easier. Here’s another look at theses deceptively simple devices:
 For vintage-style transformers, Mercury starts by duplicating the transformer design, build errors and all. We use the best grade components like they did in the ’50s and ’60s. We wind every layer and every turn as if it were a circuit in itself. In fact, the diagram on the left shows an output transformer circuit equivalent. Most people would think it is an audio circuit. These things are fairly complex, and all the numbers have to be right in order to get the tone we want as musicians.
We really do follow the recipe to a point. Although we don’t repeat any of the mistakes or inconsistencies that were prevalent, but didn’t affect tone. For example, if you were into Fender tweeds or late-’60s Marshalls. To do this we would literally put the word out to rent or borrow dozens of amplifiers to find the one or two that had thesound, and dismiss the rest. There were typically many inconsistencies as well as “happy accidents” in the best-sounding examples we’ve auditioned. A lot of this has to do with the sloppy tolerances of the original transformers.
For our transformers we extract the best parts and virtues of the original best-of-breed transformers and remove all of the obstacles to tone. Perhaps just as important is that we adopted a “cost is no object” approach, making our transformers equal or better than the originals — and then add consistency. We now have this so finely tuned that if you bought a transformer from us five years ago, and then the same one today, it would sound exactly the same. You don’t want good batches and bad batches, which is precisely what made the original production runs vary so much.
Another issue is the so-called controversy between paper tubes and nylon bobbins. In the vintage years they used both. Some people think that somehow, some magical quality comes from using a paper tube winding form over a nylon bobbin. Tonally it made no difference at all. Paper tubes were widely out of tolerance most of the time because of how they were made. They would wind multiple coils on long sticks then use a saw or blade to cut off the various coils. In order for these long tubes or coils to come off of their winding forms they had to be conical. So this invariably meant that the first coil would be larger in diameter and the last coils smaller. As you can see, it’s easy to see why each of these inconsistently-made bobbins had a greater difference than the material they were made from. And there are other issues that occur over time, like paper has a tendency to disintegrate, collect moisture, etc.
When we switched to using nylon bobbins the tolerances were within 3,000’s of an inch of each other, as opposed to the wildly varying amounts found in paper tubes. If you were ever to take apart a really old transformer (pre-’70s) sometimes you’ll find wood wedges that are jammed between the paper tube and the core because that piece of paper was too wide and too sloppy to fit into the core correctly! They would force a wedge in there so the darn things wouldn’t rattle!
Which method, paper or nylon, made for the best tone? It’s the luck of the draw. We’re fortunate in that we have all these stars as clients who have these amazing-sounding amps. They went through the hassle of culling and choosing and picking the special amps that inspired them. The amps they recorded with. When we analyzed their transformers we sometimes found happy accidents or other little anomalies that would set a transformer apart from already sloppy tolerances of the standard production run.
There are little subtleties and changes from one transformer to another that make a heck of a difference tonally. So when you look online at our list of ToneClones, just know that they are from the hand-picked, best-of-the-best amps of their model and era. We continue this “weeding” process every day — and there’s apparently no end in sight. And that’s why, with some amps, we have several versions — each with its own tonal qualities — and others only a single set to choose from.
We use this process to establish new benchmarks. And you never know, tomorrow a new variant may arrive that totally blows away what we already thought was as good as it could ever get.
It is interesting that you take that approach to upgrading — the never-ending search for better-sounding benchmarks.
There is no real money or glamour in what we do, it is really all born of a passion for music. I come from a musical family, my Mom taught me as a little kid that music was a form of “food.” And that hasn’t changed. Everyone who works at Mercury is just in love with playing and listening to music, and we all believe that there is always some room for improvement or a way to raise the bar somehow.
Back in the ’70s and ’80s there wasn’t really a need for a company that designed and sold transformers to the public, so I stayed away from the general public for as long as I could and really only worked with professionals.
But at some point I realized that it was the average player who was getting ripped-off. Things were getting dumbed-down, the tone is slowly and steadily being vacuumed out of the amps. They were becoming duller-sounding, less interesting and more noisy. So, we decided to formally launch this product line so the average guy could have access to our technology. It takes an extreme amount of labor and effort it takes to build them to this standard. You know, even if someone wanted to buy 1000 transformers we would have to no-bid them because we really don’t have any way of doing things quickly.
Automation isn’t a practical solution. Everything we do is wound by hand, one at a time; it is the only way it can be done. Say you have 100 turns and 10 layers, well that would mean 10 turns per layer — that is how a machine would think of it. But what if a rock legend’s best transformer was 9 turns on one layer, 11 turns on the next, 7 on the next, 3 after that and so on, but the sum total ended up being 100 turns. Sometimes one layer can have a different winding style than the other; sometimes it is non-symmetrical meaning, if it is a push-pull, that one side of the primary doesn’t have the same turns as the other side. If that was the recipe that created the magic, we’d have to duplicate it. It’s just not practical to build machines to do that, so we end up having to do it by hand. It’s the proud old-school craftsmanship way of doing things. Something I think we could see a lot more these days.
We have a reputation for nailing tone. Our Fender transformers don’t sound like Marshalls, they sound like Fenders — and vice versa. In fact, we’ve become the industry’s new standard. If you were going to design or create a tube-based amp, it’s clear that we’re the folks to talk to.
Can you explain how a Mercurytransformer can improve an amplifier’s tone and how they outperform the stock transformers found in most amplifiers?
In designing toneful transformers specifically for guitars (and that’s all we’re talking about here, not necessarily transformers for HiFi or any other purpose), the trick is in the magnetic field and how it behaves. The nature and the speed with which the iron reacts to the changing of an alternating current, in an alternating magnetic field, is what makes tone happen.
If you have “slow” iron, you’ll have a dull, non-sparkly sound with no bell tones — no matter what you do with the amp it will always be kind of noisy and fuzzy.
Where others have tried and failed they’ve blindly followed generic transformer formulas without understanding that guitar amps are different animals. They’ve somehow missed that point despite all the evidence to the contrary. The fact is that transformers for guitar amps do not necessarily follow textbook rules.
Indeed, it should probably be noted that we’ve developed a whole new technology around transformer design specifically, and only for the guitar industry. And that these designs are essentially irrelevant to any other use. But Mercury is also in a highly unusual position. Our decades of transformer “vivisection” have revealed all manner of unconventional tips ‘n tricks to us. And we’re now the keepers of this new, but proprietary, technology.
I seriously doubt that we could have done it without the, let’s call it “archeological benefits,” of our observations. Decades of studying the good, the bad and the ugly of guitar amp transformers have revealed a great deal.
Nothing that I have found in the reissue market, transformer-wise, even resembles anything that was made during the “the golden age of tone.” They are unrelated. The inductance, magnetic fields — all of that is just completely different and far removed from the original designs and recipes. So there is no way that a reissue amp is ever going to sound vintage unless they bother putting in the right ingredients.
With our Upgrade Kits, for example we’re trying to show people that we can move forward into new sonic territory from where vintage designs and tone left off. And our Axiom series transformers are the definitive showcase for this technology. Their tone is just amazing.
To push the point even further, we don’t include any “voodoo” parts in our Upgrade Kits. With the exception of the transformers, the Kits use only common, everyday, and off-the-shelf components. And most of our Kits also include a Mini-Choke. When the circuitry is correctly designed a Mini-Choke will make a huge improvement in an amp’s tone because, in terms of its power supply, it changes the way the amp works.
A good guitar amp is only as good as its power supply. If you have a dynamic and moving power supply that reacts to the demands of the audio end you’ll get get great note separation and good bass dynamics. You start to hear chimes and other phenomenon, and even the harmonics between the strings like a “5th note.” What the heck is the “5th note”? In barbershop quartets, if they get their harmonies right, they hear the “5th note” which is basically a harmonic of all four singers. We are doing that with our guitars thanks to distorted amplifiers.
Where did the idea for offering an Upgrade Kit for amplifiers like the Champ “600” and Valve Jr. come from and who designed the Upgrade?
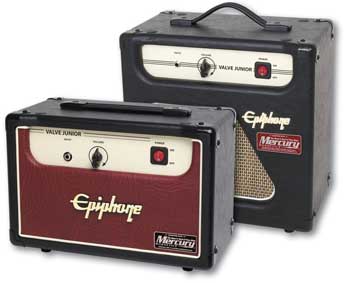 I designed all of the magnetics (the transformersandMini-Choke) and the general concept behind the Upgrade in league with Allen Cyr from the Amp Exchange. He is one of the most competent, finest amp designers I know of; there are only about five in the world that are true masters of the art — those who really know the math, how to read tone, how to listen to the subtleties of clean and overdriven sounds and tones, design circuits, and understand tube behaviors. As a bonus to those who appreciate this kind of thing, we always try to throw in some interesting tweaks and tricks that are unorthodox.
The idea is to spark some interest and perhaps get more people involved in tube-based amp tone and evolution. We expect some folks to study our Upgrade Kits, learn from what we’ve done, and take off into new territory from there. No one is offended by that.
But our initial concept was to take an inexpensive stock amplifier, one that cost no more than $100 or so, and modify it into a professional- or recording-quality amp for very few bucks. The Valve Jr. was the amp that gave us the inspiration for this project. Epiphone broke the mold with their little Valve Jr. amp. Out of the box it’s a remarkable value. So, although it was a bit of a challenge I thought it was interesting because we were not stepping on anyone’s toes — we were just taking something that already existed and designing an Upgrade Kit around it. A simple proof of concept that made the case of transformers and guitar tone. It just seemed like a cool thing to do. The project was validated when pro players began demo’ing our prototype amps — they couldn’t believe how amazingly great such a tiny amp could sound, it freaked them out, and they all wanted one of their own!
Our intention was to give the kid who was practicing guitar in his bedroom, whose parents are on a limited budget, REAL guitar tone. In a typical scenario, the parents buy a cheap little amp and guitar combo because they want to see if their kid will stick with it. But the kid doesn’t understand that the sound of the amp is fatiguing. He doesn’t understand why the amp doesn’t sound good. And he doesn’t realize that the amp is fighting him, tiring him out. I know that happened to me and so many of my friends when we were kids. Struggling with hard-to-play guitars and poor-sounding amps is probably the single-most reason so many budding young (and old) guitarists give up the pursuit of their dream. But some are rescued. One day they visit a guy, or hear someone play, who has the amp with the tone and with just the sweep a few chords they experience the “My gawd!!! I want to sound like this!” phenomenon.
That is what we’re trying to offer with these Upgrade Kits — where thetone is accessible to just about anyone. So they could have an amp that wasn’t dull or desensitized. An amp that allows them to make that real connection to the tone. Tone is not just about noise and volume, it is rather complex, and undeniably emotional.
 At the LA Amp Show we had our Upgraded Fender Champion “600” running into a full Marshall stack. Here we had this little amp powering eight 12″ speakers and it sounded great. People kept asking to see the back of the amp thinking that we had somehow rigged up something, but it was just the little Champ “600” with our Upgrade Kit.
When you have a nice open tone it is not about counting watts because the window is so big and wide and the soundstage is so deep that it gives you the impression of more power. We are not putting out more power with the Upgraded “600” — but it sure sounds like it! It’s about opening up that tone window and giving you more.
It’s kind of like taking a radio whose volume is set to half way and having it placed about 20 feet away from you then bring it right next to your ear — the volume has not changed but you hear a lot more of its content.
One of the things we do when modifying a circuit is to lower the noise floor, which a lot of people overlook. Many amps, like the Valve Jr., have a nasty hum in standby. We had one that would just start to howl if you left it alone for a while! So whatever high noise floor it had would eventually feedback on itself and cause that noise.
Our focus is on inspiring people. We are trying to show people that they really can get great tone today, that there is no age that has come and gone. There is still a lot of fun things left to do with your amplifier when you are on the search for great tone.
Hearing how much these Kits improve upon the tone of the amplifiers, and how well thought-out they are, will a Mercury amplifier that is designed and built by you ever make an appearance?
No. We are a supplier of key components to the boutique industry and to several of the large amplifier companies, and that is a comfortable spot to be in.
There is no shortage of amplifier companies out there and it really is a conflict of interest if we were to start selling amps and transformers. I would rather stay out of it.
The whole point of the Upgrade Kits was an area where I didn’t see any conflict with the people who were in the amplifier business. In the end the Kits really represent a transformer demonstration. If you were to just show someone a picture of a transformer or even had one in your hand and tried to explain how much better their tone would be, no one would care — it’s a yawner. But when you build one of these inexpensive Upgrade Kits and you actually hear the difference that the transformers make, it really drives home our point that transformers are important, that they are the building blocks of guitar amp tone.
And in the end we do this because we love it, we really love what we do. We get to create all of these products that help people find their tone, and who wouldn’t what to do that?
Source: https://mercurymagnetics.com/pages/news/GuitarFixation/SHinterview/index.htm

I have always had a passion for music and audio. Guitar tone through an amplifier aroused my curiosity early on because many of the design rules for hi-fi equipment didn’t apply to producing great guitar tone. In the case of vacuum tube amplifiers, transformer design has a significant influence on the characteristics of tonality. Unfortunately, there is not a lot of reference material available and many of the original designers have either retired or passed away. In the early 1980s my partner and I purchased Mercury Magnetics, a transformer design and manufacturing company, from one of the early pioneers who founded this company in 1954. Our close proximity to the Los Angeles recording industry gave us access to studio technicians and many well-known musicians. Out of necessity, and to meet the demands of this level of clientele, we had to develop precise, “no compromise” methods of documentation and assembly techniques to rebuild and replicate these transformers to exacting specifications. A past example of this was when a legendary guitarist sought our services to help solve a frustrating problem. A technician had replaced the original output transformer in his amp with a generic copy, which resulted in completely changing the character of the amp. Several breakthrough albums from the late 1960s and early 1970s were recorded using this particular amplifier, and the sound of that amplifier really had helped define his signature tone. Needless to say, most musicians are very concerned about maintaining the character and unique tonality of their amplifiers. We ended up rebuilding his original output transformer and we provided two additional clones as backup.
TQR:Are you referring to all types of guitar amps, or more specifically British amps rather than, say, vintage Fenders?
I think that in all guitar amps, regardless of origin or brand, you also supplying custom transformers to amplifier manufacturers. Our extensive collection of vintage transformer designs really began to take off at that point in time. The ongoing accumulation of the finest sounding examples we could find inspired our line of ToneClone® transformers.
TQR: What is it about those particular transformers that make them so special, and how do you evaluate them? Do you install them in an amplifier and A/B them, or is it done more or less on paper?
We do have the necessary test equipment and software to check various parameters, but ultimately the ear has to make that decision. We also plug in, play, and conduct A/B testing at our facility. I have a dedicated sound room at home that has been tuned for the purpose of testing and evaluating audio equipment. We are lucky, because the Los Angeles area offers us an amazing amount of guitar playing talent that continues to help us maintain a level of objectivity. Also, some of our best listeners are avid tone enthusiasts who work in and for the local studios. These people understand good tone and give us their experienced opinions.
TQR:And can you describe what it is that makes these transformers special? What would we hear, specifically?
Having a detailed transformer spec is only the beginning. Breaking down into fine details what materials and assembly techniques were used decades ago helps us assure our customers an accurate reproduction of vintage tone. We have carefully selected the best of new and old technology to put performance and quality ahead of economy. Our transformers are hand-wound and the cores are hand stacked. Some materials we fabricate in house, and others, like our steel laminations, are custom ordered. Because we build them one at a time, the Axiom and ToneClone series are only available in limited quantities. Consequently, there is an audible difference between a budget transformer and an Axiom or ToneClone.
TQR:Can you describe the audible differences?
A good output transformer should go beyond its job of impedance matching, and an amplifier’s overall personality depends on it. A desirable output transformer’s distortion has more detail. The harmonics seem even and smooth. Played clean, the transformer should sound natural without harshness, obviously within the boundaries of the authentic tone characteristic the player is eeking. Better said, we still can’t make an apple into an orange.
TQR: What are some of the comments that you hear from players when they hear the Axiom or ToneClone transformers that you build? Is it a matter of touch dynamics, harmonics, all of that?
Yes, and let’s not forget musicians’ colorful tone speak, such as: The amplifier sounds more open, glassy, sweet, brown, fat, with more notes perceived. Barred chords are not muddy or squashed. Chimes and bell tones are much more apparent. Good note separation, sustain improved, more definition, etc…
TQR:And these things can all be affected by the output transformer in some considerable detail….
It is pretty much the last tone filter in a series of components. Other factors like tube quality and speakers can play an important roll as well. Also, if you were to look at an amplifier circuit as a modulated power supply, then the quality of a power transformer and choke, if a choke is used in the circuit, also affects tonality. The ghost note phenomenon would be an example.
TQR:Like a few amplifier builders we know, you have taken the direct route of precisely replicating the materials and tolerances that comprised the industry standard decades ago…
I remember having a conversation with Leo Fender a number of years ago and getting a chuckle out of him as he told me how amazed he was that so much scrutiny was being given to how things were done in the early days of Fender. He said that they had taken what they were doing in the ’50s and ’60s so matter of fact back then. They were hardly thinking at the time that they were building future classics. They were trying to make an affordable, good sounding, quality amplifier while still trying to make a buck. Leo also mentioned that for reasons of cash flow and/or inventory problems, they would resort to using alternate vendors from time to time. They kept a careful eye on cost of materials, and their supply, rather than hand picking components with alleged magical tonal qualities.
TQR:They weren’t matching tubes, either. All of this can and does get out of hand, but when your rig sounds so good that you can get lost in the magic of it, as a player, wonderful doors can be opened.
Years of research led us to the conclusion that not every aspect of a vintage transformer needed to be copied. There were problems and limitations in their day, so why repeat them? We achieved better results by combining old and new technologies. Making the math work for the best tone characteristics together with improved consistency and longevity is the formula we chose to follow. There are a lot of vintage amps today with transformers that are going bad simply because they have aged. The tonal quality of the amp is deteriorating along with the transformer. Paper and certain types of varnishes used in these transformers tend to have hygroscopic properties. Moisture is absorbed over time, affecting the insulation system and increasing the chance for high voltage breakdowns. To make matters worse, the primary winding voltage is high enough to produce a corona effect whose ions help oxidize this insulation. Over time, reliability and tonality will suffer. Do you believe in transformer cancer?
TQR:That leads us to an interesting situation in which the original output transformer in our ’60s Pro Reverb died, and we noticed how much better the amp sounded when we had installed a new transformer, which was a commonly available unit sold by MojoTone. Now, the amp sounded great before the old transformer went out, but it sounded significantly better with the new transformer. I asked our tech and advisory board member Jeff Bakos if it was possible for an output transformer to gradually decay over time, dying a slow death while you continue to lose ‘tone’ in a very subtle fashion over years of use. Is that possible? It seems as if that was the case with our amp, which we had always considered to have a rather legendary vibe.
Not only is it possible, it is probable. Keep in mind that if high voltage insulation breakdown has started, there is no reversing it. Assuming that the transformers insulation system is intact, we have in the past reversed some tonal degradation in original transformers under controlled laboratory conditions. I’ve proven that point with my more cynical, high-end customers. One example of this is an amp (a Marshall JTM 45 or a Plexi – I forget which) that had been used in England for years and then brought over to the United States. The owner felt that the tone had decayed over time, seeming darker, lifeless, and the higher frequencies were less pronounced. We asked him to remove the transformer and all we did when he brought it in was to re-bake it in an oven to drive out the moisture. We then vacuum impregnated the transformer with our proprietary resin to hermetically seal it before the final bake. He put the transformer back into the amp and the results were pretty amazing… it became a lot brighter and more detailed from the upper midrange to the upper frequencies. I’m not recommending that anyone start baking their old transformers, however….
TQR: No, but it seems to be a fair statement to say that it’s possible that your good sounding old amp might sound significantly better with a new output transformer. At least that was our experience, and in hindsight, we didn’t realize what we had been missing.
That’s true. The tonal degradation I’m speaking about is very slow and gradual. Your results would be even better if you had used ToneClone transformers. Any of our transformers should outlast older vintage transformers because each are put through the same process during production.
TQR:Doesn’t it become particularly more problematic with amps like AC30s and Hiwatts, where repro transformers have typically been poor compromises at best?
I believe that Marshall, Vox and Fender, to name a few, are doing an outstanding job of building affordable vintage reissue amplifiers. When an owner of one of these fine amps wants to take his/her tone to the next level, they will usually consult someone like a Don Butler (Toneman) for example. Don is an expert in the field of amplifier upgrades and the art of tonal improvement. Don is also one of the key figures in this mini industry, which is similar to the aftermarket for automobiles and motorcycles. Much like an engine tuner, Don will replace transformers and other components in the signal path to give the customer an upgraded, outstanding sounding amp that comes much closer to capturing the original tone they were seeking.
TQR:Your website seems to be very comprehensive, but can you be contacted over the telephone for customers that either don’t see their amp listed or perhaps have additional questions?
Yes! Paul Patronete, an accomplished guitarist who has a good ear for vintage tone and heads our MI division, is happy to help those customers when I am unavailable. Our website is constantly being updated with vintage and modern transformer versions. We will probably always be two or three pages short of having all of the various models listed that people may be interested in. Of course, we can’t possibly list every one-off we’ve done. Another cool thing we offer are modern, updated versions of many of the classic transformers. We have added output impedance taps for many of the classic Fender transformers, which were never originally offered. For any make of amplifier, we offer various mounting styles from the original. We can, in addition, alter tonal characteristics to fit the unique needs of each customer.
TQR:Are you building transformers for many small builders?
Yes. If you own a high end, small production amplifier, there is a chance you will find a Mercury Magnetics label on the transformers. Some exceptions are when certain amplifier manufacturers remove labels in an effort to keep us and other vendors a secret. We do maintain a confidentiality agreement with all of our customers if this is their desire.
TQR:Schumacher was a primary supplier to Fender during the tweed era, and they are still operating, although we understand that you generally have to be capable of placing a fairly large order to get geared up. That seems to be a significant barrier to many would-be amp builders.
That company is doing a good job of supplying inexpensive transformers to a high volume market. When a lot of emphasis is placed on meeting price points, something has to give. The cost of labor and materials are logically their first consideration. The end result is a compromise, and who could blame them? Ultimately, end users will determine if the resulting tone is adequate. Someone who has paid several thousand dollars of their hard earned money for a “high end” amp is expecting to have something that excites their senses along with a build quality that justifies their investment. This is where we can assist the amp builder. It goes beyond Mercury Magnetics “sending in the clones.” We have made every effort to break those barriers by eliminating minimum buy requirements. We work closely with today’s designers and builders to provide them with a thoughtful, next-level approach to their signature tonal requirements.

VG: Tell us a little about the background of Mercury Magnetics?
Sergio Hamernik: Although Mercury was founded in 1954 it was around 1980 that we fully recommitted ourselves to designing and building transformers specifically for tube-based electric guitar amplification.
Most of us know that by the late 1970s the audio electronics world was going solid-state. Although it now seems absurd, back then tube-based amplification was being abandoned. We were amongst a relatively small group of hold-outs. We were also acutely aware that if someone didn’t step in to preserve the technology that decades of know-how (not to mention the essence of tone) would be lost forever.
We put out the word about Mercury’s mission and immediately began to work directly with a select number of top players and amp designers who were like-minded.
VG: Who came knocking?
Sergio Hamernik: We were surprised that much of the early interest came from British artists. They had the resources and seemed to understand the transformer connection to great-sounding amps. But it didn’t take long for the word to spread. Soon artists from all over the world were bringing us transformers from their most prized amps to study and clone. The feedback from this period set the pace for Mercury and we haven’t strayed since.
Today Mercury’s friends and customers include pretty much the entire upper echelon of professional players and recording studios. In the builder community our friends range from the legendary Alexander Dumble and Ken Fischer, to passionate enthusiasts building amps on their kitchen tables. I’ve always been amazed at the caliber of talent we’ve attracted and the level of interest in our goals.
VG: How did Mercury determine which transformer designs had superior tone?
Sergio Hamernik: Think of what we’re doing as transformer archeology — not unlike opening ancient scrolls for the first time. Over the years we’ve unearthed some real sonic treasures!
Artists and amp collectors continue to bring us transformers from their most coveted amps to analyze, restore, duplicate or upgrade. They’re hard-won converts because they’ve all tried other replacements only to discover that the magic was gone.
By tradition, transformers have always been hap-hazard and inconsistent in design and build quality. Many of these amps were the freaks, factory prototypes, or often with one-of-a-kind transformers that just blew everything else away.
These are the transformers we have always been most interested in studying. Unfortunately, when it came to analysis, we discovered that the conventional methods only gave us a piece of the puzzle. Mercury had to devise its own proprietary methods of determining what made these outstanding transformers sound so amazing. Their “recipes” if you will.
“… if someone didn’t step in to preserve the technology that decades of accumulated knowledge (not to mention the essence of tone) would be lost forever.”
It can take up to a week to properly analyze a single transformer. Aside from the need to catalog and replicate these gems, we’ve tackled these projects for other important reasons. What makes a great-sounding transformer tick is no longer mysterious. Prior to our research the engineering community did not fully comprehend the characteristics of a good electric guitar amp transformer. We’ve used this hard-won knowledge to look beyond the confines of conventional engineering to find the previously undiscovered rules behind the most desired electric guitar amp tones.
VG: If a transformer dies will a replacement change my tone?
Sergio Hamernik: Until Mercury got involved if your transformer tanked there was a good chance that your sound would be lost forever. An amp tech could spend a lifetime fiddling around with caps, resistors and tubes and never find your sound again. The missing component in the equation was the transformers.
Oddly enough, duplicating build quality so that each and every transformer of a particular model, or period, sounds exactly the same had been a struggle in the past. Traditional manufacturing methods have always produced inconsistent-sounding transformers. Literally no two had the same sound. This only makes sense when you realize that few were aware of the transformer connection with tone. This also explains why the average amp tech uses random and generic transformers. They just didn’t know any better. The ability to buy an identical replacement transformer, or an upgrade for that matter, is a major breakthrough in amp tone — there’s no doubt about it.
There’s also a side benefit to consistent build quality that some players and amp techs are just beginning to discover. Mercury catalogs many design variations for all the popular amps. This means that you can easily and reliably experiment with the tone-enhancing qualities of other transformer designs and amp configurations.
VG: Why are transformer magnetics so vital to guitar amp sound?
Sergio Hamernik: Once you understand that generic “by the book” transformers can actually neuter your tone — the battle is over. Your choice in transformers opens the door to MAJOR tonal possibilities.
When you listen to all the different tube amps made over the years, it’s brutally obvious that the really bad-sounding variations had junky transformers (even though they were usually within design spec). We know this because when you simply replace the stock transformers with quality units they come alive.
There’s a curious phenomena associated with cheap magnetics — they tend to make an amp fatiguing to the ear — uninspiring to play or listen to. Boring, actually. With tonally dull transformers you just can’t get the other components to sound as they should. And the fun doesn’t stop there—inferior transformers result in amps that are unreliable, have a tendency to overheat, etc. You can easily identify them by their uninteresting, thin-sounding and harmonically anemic tone. Unless one is stone deaf, the sonic superiority of quality magnetics is obvious.
“Once you understand that ‘by the book’ transformers can actually neuter your tone — the battle is over.”
It’s important to understand that the pioneers of the electric guitar amplifier and most of the techs that followed were self-taught. It only makes sense that much of what they came up with were results from happy accidents. But despite their trial-and-error methods with tubes, speakers, and other components, many of them misunderstood the role of the amp’s magnetics (transformers) as it relates to electric guitar tone.
Over the years there’s been an overwhelming number of hit-n-miss transformer designs used in guitar amps — even within specific models. Mercury has had the benefit of the rear-view-mirror, looking back over time, discovering what sounded great and what didn’t.
Mercury’s holistic approach has taught us that the unique nature of the amplifier seldom lends itself to just one ideal set of transformers. Can you imagine that for the Bassman sound alone Mercury inventories over 2,000 transformer combinations? The differences may be slight, but we cover just about every conceivable tonal and configuration variation for that model amp — factory, mod or custom built. And that’s just one amp line out of hundreds — Mercury’s growing library is approaching every amp ever made (including the odd-balls!), from 1948 to 2006!
Our current library consists of hundreds of unique transformer designs and their variants. Aside from vintage, we also have our enhanced next-generation Axiom designs. They incorporate many of the discoveries we’ve developed for even better-sounding, more inspirational amps.
VG: I understand Mercury has three separate electric guitar amp transformer lines?
Sergio Hamernik: Everything we do has evolved from the real needs, wants and requests of our user base. Mercury’s products are all logical extensions of each other, but there are actually four separate offerings.
Mercury Vintage — our one-off service where we repair or restore otherwise valuable, usually vintage transformers. There are no modifications or enhancements added. These one-off restorations are ordered by players who are aware that their original (and valuable!) transformers are expiring but want to continue using the amp because they love its tone.
ToneClones are tonal duplicates of best-of-breed vintage amps. We have hundreds of designs and every one of them is from a stellar-sounding original. Indeed, it was our customers who helped to invent the ToneClone line. If you want to make your vintage-style amp sound as close as possible to the best-sounding amp of a specific period — you need to hear our ToneClone series transformers.
The Axiom series is a totally new concept in tube-based amp transformer design. They marry the best of the vintage-era and Mercury’s breakthrough discoveries. Axiom-ized amps give you more tonal “bloom” — vintage-sounding but more, a lot more. There’s a growing group of boutique amp builders, as well as tech-savvy players, that have been working with them. Of all the raves and testimonials we receive daily, the most emotional are those by our Axiom users. I’m particularly proud of the Axiom series because we believe they represent the future of tube-based amp designs.
And finally, custom transformer designs. Non-disclosure agreements prevent us from discussing our clients, but there are quite a few boutique as well as major brand manufactured amps out there with our custom designs in them.
“Think of what we’re doing as transformer archeology — not unlike opening ancient scrolls for the first time. Over the years we’ve unearthed some real treasures!“
All of our products are built like no other transformers in the world. We may be the only manufacturer who uses custom-formulated, American-made materials. Every single transformer is handmade, hand-tuned and tested by us before it leaves Mercury. Our proprietary processes and expertise are unique. We design and make every one of our transformers here in California — no work is farmed out to other countries.
VG: Where do we go from here?
Sergio Hamernik: Our work is fascinating, and as our advertising reflects, we’re having a good time doing it. But we wouldn’t have gone through all the drama of creating these exceptional-sounding transformers if it wasn’t for the support and encouragement we’ve received from so many brilliant artists and passionate players. Their passion has fueled our drive.
We view Mercury is a catalyst — reintroducing what inspirational, non-fatiguing real tone is all about. We’re also confident that we’ve also raised the bar for the “old” guys who long for the tone they grew up with. Can you imagine playing modern equipment that sounds even better than you remember it did back then? It was transformer and tube-based sound that originally turned the world onto electric guitar tone — the tonal qualities you feel more than just hear. At Mercury we believe that transformers are the last key to the tonal puzzle.
Source: https://mercurymagnetics.com/pages/news/VGmag/VGbuilderprof06.htm
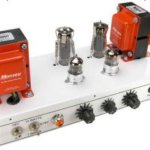
For decades, unquantifiable numbers of discussions have wrangled over the main ingredient of amplifier magic. Some amp gurus say it’s the vacuum tubes. Others swear by the capacitors. One question has always remained: Does the transformer have anything to do with an amp’s tone?
At Mercury Magnetics, founder Sergio Hamernik readily acknowledges transformers are a bit of anenigma. Nonetheless, he very firmly believes they are the true foundation of tone.
“They remain the biggest and most misunderstood black hole on the subject of amplifiers and tone,” he said. “But it’s really not all that mysterious. Get an amp’s magnetics right, and everything else falls into place.”
But what does a transformer really do? We recently spoke with Hamernik, posing that question along with a slough of others about the design, purpose, and effect on output “trannies” in guitar amps.
VG: How does a transformer affect the sound of an amp?
SH:A power transformer that’s underbuilt is much the same as an automobile with an under sized engine. Take two cars; one has a five-horsepower engine, the other has 500horsepower. Run them both to 70miles per hour. How long does it take the five-horse to get there?
In an amp, energy has to be converted into sound – and the quality of the transformer determines the quality of the rest of the amplifier. The better the power supply, the faster it will respond to the sonic demands of the player. It’s the amount of energy available; you don’t want to be waiting for the transformer to play catch-up with every note you pluck.
VG: A lot of players believe the main contributor to an amp’s tone are its vacuum tubes.
SH:Tubes are greatly influenced by the reactance of an output transformer and how it’s built. That’s why a Marshall amp sounds different than a Voxor a Fender. It’s the main reason why a Marshall has a distinct output transformer design. When you swap power tubes, the differences in tone are actually quite subtle. But if you replace the output transformer, you have a completely different-sounding amp.
VG: Does that mean some players put a little too much stake in“matched” output tubes?
SH:It’s partly true that you don’t need exactly matched tubes to get great tone. Often, you can get great tone with mismatched tubes if they’re at least operational. An old studio and touring trick was to swap power-tube positions, which often provoked the best tone. The trick was simply taking advantage of the differences in unmatched tubes!
So, while it’s important that tubes be tested for defects, they do not necessarily need to match. Tubes used for pre amp and phase splitters should, as a rule, be matched for balanced operation. The“imbalanced” concept is actually a fundamental design philosophy, noting differences between transformers built for hi-fi audio versus guitar tone.
VG: How’s that?
SH:Output transformers in amplifiers are highly reactive components. Not only are they reactive, they tend to be reactive in a lopsided way,which disturbs the tube into distorting in a manner we find pleasing for its musical qualities.
This introduces a key point; there’s a huge difference in design and execution between hi-fi and guitar amp transformer designs. In order for a guitar amp transformer to sound its best, certain imbalances must be built into its design. With hi-fi, you’re trying to get as clean and undoctored an output signal as you can, without distortion. The opposite characteristics –distortion, overdrive, “grind,” and“crunch” – are the cornerstone of what makes a guitar amp toneful. The term “clean” in a guitar amp actually means “less distorted,” but it’s still a distorted signal.
This reactive element of transformers running imbalanced is key to creating a complex soup we call ampli-fied guitar “tone.” When you’re making good soup, how thick or thin you cut the vegetables, the other ingredients you put in, all affect the flavor. The ingredients are often subjective, but in the end, the effort and attention to detail make all the difference.
Musicians were on the verge of losing the quality of their tone until some-body stepped in to utilize these fundamental principles. At Mercury, we made it out mission to gain the knowledge and craft of how to make guitar amp transformers.
VG: Do they still make transformers like they used to?
SH:No, with Mercury being one of the few exceptions. Consider the quality of the wonderful transformers of the 1950sand early ’60s, when manufacturers were still building to military specifications.
How could this happen. Well, transformers have always been the most expensive parts of an amp, somewhere around 50 percent of the costs. Not to mention they’re often heavy, which affects ship-ping costs. The folks responsible for purchasing face a lot of pressure to get costs down, thus maintaining the trend toward low-budget transformers. So it was inevitable that the “baby” – in this case, tone – got tossed out with the bath water.
Older transformers were designed to meet a power ratio of 6:1, 7:1, or even 8:1, the ratio meaning the power supply rating versus audio output rating. It wasn’t unusual to find 600 watts of power supply on a 100-watt amp. Talk about headroom!By the ’70s, though, price points started having more influence on product than did design, and power ratios started to slim down. Case in point; a popular line of amplifiers that made their mark in the ’60swere built requiring power ratios of 6:1 or8:1. By the ’80s they were dropped to 4:1,3:1, or even 2:1. Today a lot of transformers coming out of Asia are as low as 1.5:1!
Why is this important? Two main reasons; the first is that note separation and the amp’s punch-through characteristics depend on these ratios. The lower the ratio, the less dynamic and more dull-sounding the amp becomes. The second reason has to do with the operating temperature of the transformer. Many reissue amps have undersized transformers with low power-to-audio ratios. With as little as a half hour of play, many of these amps are running hotter than a bitch kitty.
Weak power supplies equate to weak sounding amplifiers. Understanding the relationship of magnetics to tone is the foundation of getting the tone thing right.
VG: Do transformers made with paper tube bobbins sound better than those with nylon?
SH:Paper bobbins will not rescue dull tone. Does wearing the right ball cap make you a better baseball player? Perhaps this myth started when someone compared a great-sounding vintage transformer that happened to have a paper bob-bin with a modern-day generic transformer with a nylon bobbin.
Paper tubes were a cost-cutting measure,first and foremost. They allowed a transformer manufacturer to easily wind more than one coil at a time. Back then, nylon bobbins were a high-priced alternative,but were recognized even then for superior performance.
Another problem plaguing paper bobbins are their sloppy tolerances, which make it difficult for any two transformers to sound the same. And paper tubes tend to collect moisture, which varies the reactive properties of transformer design, and thus,tone. We’ve proven this by taking transformers from highly humid environments and driving the moisture out of them. This procedure noticeably improved tone,brings back detail, and makes an amp sound less dull.
We have no bias one way or the other.Certainly, it would be less expensive to use paper. But we had some of the best studio players help us make the determination, and the choice was clear.
VG: How do you devise specs for transformers?
SH: We’ve been documenting designs for decades. Many include “happy accidents” and hidden treasure among the thousands of mediocre-sounding specimens. Our transformers are duplicates of those from the best-sounding amps in the world,many of which were literally one-of-a-kind designs donated by collectors and artists.
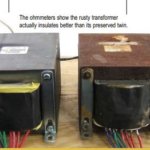
It’s truly amazing that half-century-old amplifiers are still out there, churning out more ear candy on a daily basis. But perhaps even more amazing is what you see if you peer inside the back panels of these warhorses. Some look so weathered, dusty, and rusty; you wonder how the hell they still work! Even more impressive is that most of these amps, with very little service, sound as good or better than the day they rolled off the production line.
How is that possible? Well, we know speakers get better with age and use, and old tubes are da proverbial “bomb.” Some might go so far as to say aged wood in a speaker cabinet adds flavor to an amp’s tone. But when you look at a rusty old transformer—pitted, flaking, and by all appearances a fire hazard—you get nervous because that transformer’s just gotta be on its last leg, right? Like, any instant now, there’ll be nothin’ coming out of it.
That perception inspired Mercury Magnetics’ Sergio Hamernik to devise an experiment to see whether rust affects the transformer in a guitar amp. His results might surprise you….
VG: So, is rust bad for a transformer?
SH:I can understand how one can be tone-sucking in nature. One of the obstacles to getting the best tone out of transformers is to minimize those losses.
VG: So, are all transformers prone to rust, or is rust a sign that a transformer was cheap or poorly made?
SH:Rust can actually be a mark of quality on a transformer, because better grades of iron rust fairly easily.
VG: So, how did your experiment work?
SH:We did an A/B comparison on identical transformers. One was left outdoors for seven years,exposed to the weather, cobwebs…you name it! The second one, from the same production—samemachine winder, etc.—was put away pristine, without a speck of rust, for the same seven years.
We put both on the bench and subjected them to a battery of true A/B tests,showing them the same input voltages. And we intentionally left the output leads unconnected so we could measure each transformer’s performance without outside influences.
VG: The result?
SH:The rusty transformer ran at a lower temperature because it drew less power. Bear in mind that each transformer started life drawing the same power! At the very least, the results show that rust didn’t harm the performance of the transformer. And they imply it actually helped a little. So, if you’re worried about rust affecting the performance of the transformer in any of your amps,don’t. If you simply don’t like the way it looks, don’t sand it off! Instead, seal it with varnish, but make sure the varnish is completely dry before powering up the amp.
VG: Does the change rust causes in a transformer’s efficiency change the sound of the amp? Or does it just make for a more efficient transformer?
SH:If there’s any shift at all, it shifts toward helping the tone, not hurting it. The same holds true for output transformers. We’ve had more than a few rusty output transformers in amps with the most amazing tone.
View PDF Article
Seen the price of a vintage Marshall Plexi lately? Your three grand won’t guarantee a virgin circuit or great tone, but if real Plexi tone is what you’re all about, you can get there for a lot less, guaranteed. When TQR Advisory board member and Sheryl Crow guitarist Peter Stroud decided to make a Plexi from his late ’70s fawn 100W head, we enlisted the capable assistance of our main toneman Don Butler and the team at Mercury Magnetics, home of
the ToneClone line of authentic vintage-style replacement transformers. Mercury has blueprinted and reproduced nearly every vintage transformer made for guitar amplifiers, and they can rewind any blown transformer to exact, original specs and sound. So settle back and enjoy the following discussion and review of Peter Stroud’s successful conversion of a common (they built 1,000s) Marshall 100W into a stellar 100W Plexi.
TQR: What is the origin and general history of this Marshall amp?
Peter: I bought this amp about 10 years ago with the matching straight-front 4×12, 100 watt cab from a dealer down in Texas. It’s a ’77 Super Lead 100 watt 4-input. I was big into collecting the f awn-colored Marshalls at the time – a poor man’s custom color. Around the same time, I had learned how to work on my own amps from the standpoint of preventive maintenance and tone tweaking, so I converted the amp over to a cascade-style master volume circuit like a late ’70s head or JCM800. Eventually, I missed having the 4-input sound and put it back to its original wiring.
Don: This amp was a standard 100 watt, non-master Marshall from the late ’70s. Some mods had been done and then undone. A few coupling caps had been changed as well as a few resistors
Strengths: Semi-loud. Typical PCB Marshall from this era. Better quality glass board than what’s used now.
Shortcomings: Ceramic caps. This amp was voiced for brighter sound, less bottom, and quicker distortion onset that original ’60s versions didn’t employ. It still had a couple of the original filter cans. The amp sounded exactly the same no matter what guitar was plugged up to it – no tonal distinction between any instrument at all! Very over-emphasized, weird G string odd harmonics (most likely old filter cap related). I have to add from a personal note that this was the worst sounding Marshall I’d ever heard or played! In a word – no tone!
TQR: Describe the specific improvements that you wanted to make to the amp, both from a technical perspective, and sound-wise. What components were changed and why?
Peter: I don’t know why – from my monkeying around with it perhaps (laughs), but this Marshall just sounded like crap. Every time I plugged in I would end up turning it off – totally uninspiring. I replaced tubes and a cap here and there but resigned to the notion that it might be the transformers. I had replaced all of the power supply caps, but not the 50/50mf in the preamp circuit. It could have been that – who knows? But in any case, I would have thrown it on eBay had it not been for the color. Instead, I decided to make it a guinea pig. I’ve been messing around inside my amps again recently and have had a real desire for that 100 watt Plexi sound and the cleaner, fuller tone they deliver. This head was far from it! Having read the ToneQuest interview with Sergio about Mercury Magneticstransformers and poking around their website, I figured the fawn 100 watt would be the perfect amp for a conversion – change out the transformers for high voltage models reminiscent of the Plexis and wire it up exactly like a ’67. I was determined to demystify the whole Plexi thing once and for all for my own comfort. After seeing how Mercury Magnetics had “cloned” the power and output trannies of an old Plexi, I felt the missing link had now appeared. Then you stepped in and it mushroomed into a topic for ToneQuest, and a very deserved one indeed. Nothing better than to see if any Marshall can become a Plexi, especially since the latest prices on eBay for Plexis are more than I care to spend. I need amps that are bulletproof and easy to replace. I spoke with Sergioand Paul at Mercury and they eventually hooked me up with Don Butler. I was thrilled to have Don take over the job knowing his ear for tone and knowledge of Plexis. There were three CD’s I used as a tone reference: bootlegs of Cream in ’67 and Jeff Beck in ’68, and the Hendrix at Monterey Pop Festival album.
Don: Peter wanted the amp to sound like a mid-to-late ’60s Plexi 100 watter. More specifically – a ’67. I replaced all the little green (or were they grey?) ceramic caps with polyester tubular caps and replaced any resistors that needed to be changed with carbon comp types. Polyester caps were used in the ’60s in all Marshalls for the main tone and coupling caps. I know for the higher value caps in the pico farad range, Marshall generally used the ones from Lemco or RS that were a flat mica-looking cap covered in a baked on ceramic or wax dipped coating. I used silver micas for those in Peter’s amp. I like the smoothness and more transparent quality of silver mica. The original polyester coupling and tone caps that Marshall used in the ’60s were from a company in the Czech Republic called Iskra. I believe Phillips imported those to the U.K. Those are the ones everyone refers to as the mustard caps. I used Mercury’s Plexi 100 output tranny, 10H choke and 100W Plexi power tranny that provides the B+ with around 525V DC after rectification. In my humble opinion, Mercury makes the best sounding, most accurate and most reliable clone transformers on the planet.
I also used the FRED rectifiers in place of the little cheap-o IN4007 diodes for the rectifier. I like the way they smooth out the harshness of the treble frequencies and take out that mid range bump that’s common with a solid state rectifier in amps. They also seem to add more note clarity, harmonics, and detail to the sound and tone of an amp. I replaced the components, transformers and the remaining filter cans. I then converted the circuit to what was used in 1967 in terms of how it was wired and component values.
Really, it’s not much. On the first valve/tube you remove the wire coming from pin #8 and shorten it and solder it to pin #3. The cathodes on that tube were shared and went to an 820 W resistor with a 250mf @ 25v cap paralleled with it to earth/ground. The second valve/tube did not have a cathode bypass cap in those days – only the resistor. There was a .68 cap I removed from that spot. I also removed the .004 cap from the volume pot on channel #1. That cap makes the amp distort quicker, and usually at just “2” on the volume pot you’re out of clean headroom and well into distortion land. That’s not what Peter wanted or what the old amps were like. I also used two 0.1/ 600V caps coming out of the phase inverter vs. the .022/600V caps that Marshall started using in around ’69 to brighten up their amps.
On the later Plexis you will find a 500rf and 33K slope resistor on Lead models and a 250rf & 56K slope resistor on Bass & PA models. Most, if not all of the schematics I’ve seen for early 100 watt Plexis used the 250pf & 56K in the tone stack. Peter’s amp had the 500rf and 33K. I replaced the 33K with the 56K for more bottom and hit a mid point between the 500rf & 250rf and used a 390rf cap for the treble control. Not too bright and not dark. With Some Lead amps, you have to turn the treble off and even then it can still be too much. I’ve found that by using a 390rf you get a happy medium point where the treble pot is still useable. All I did was put the amp into what Marshall’s circuit was in 1967 and used the same values and type of components they used, with a few improvements like the FRED rectifiers.
TQR:What type and brand of tubes were selected and why?
Don: I used the Svetlana EL-34s, as I’ve found them to sound extremely close to what the old Mullard xf3s offered in tone, as well as reliability. I’ve compared them side by side in my old 50-watter and in my ’64 VoxAC-50 and it’s really close. Preamp tubes – I used the new Ei Elite gold pin 12AX7s. To me they sound very nice and close to old Brimars and Mullards. Don’t forget that the Phillips Electronics Corp. once owned Mullard and Ei among many other subsidiaries. Ei seems to have made an excellent attempt at creating a good sounding, reliable 12AX7 that they pre-test before sending out. My favorite 12AX7-type of valve/tube for Marshall’s are the Brimars, as they offer a bit of that aggressive old tone that Marshall’s are famous for.
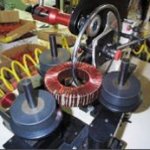
With all of the money one can spend on an amplifier, be it boutique, reissue or just a good roadworthy unit there is one area that can be overlooked, the quality of the output transformer. It is essentially the final filter in your amp chassis from the tubes to the speaker, matching the two up so you can make music! Let’s talk with Sergio Hamernik and Paul Patronete of Mercury Magnetics™ to find out what we all need to know about this overlooked most integral part of getting the best overall tone from your rig.
MH: What services do you offer at Mercury Magnetics?
MM: We offer new hand-wound transformers and chokes. We also offer a rewinding service for vintage transformers. Mercury Magnetics™ can rewind a transformer back to its original specs. Founded in Southern California in 1954 and incorporated in 1968, Mercury Magnetics™ has built a solid reputation on superior quality, reliability and customer satisfaction.
Mercury Magnetics™ has the right combination of experience and a low overhead operation to meet specific requirements. Custom designs, quality assurance and safety standards are included as part of out total customer support with no-nonsense pricing that often beats out standard “off-the-shelf” components, while not being bound to their limitations. Mercury Magnetics™ has a long standing reputation for quality and reliability. These transformers are not built “offshore” or “south of the border,” they are 100% handmade in the USA and are backed by a money back tone satisfaction guarantee. Their line of Axiom® transformers are found in some of the finest and best-sounding modern production amps manufactured. We build transformers and maintain a high standard for tone in the tradition of our forefathers, making improvements that they would have made if they had access to today’s computer assisted designs and materials.
MH: To what degree of effort do you extend yourself when restoring a vintage transformer and how does it happen?
MM: We methodically unwind the vintage transformer by hand and document each wind detailing every anomaly and turn. We then rewind the transformer by hand so it will sound exactly as it did when it was brand new. The interior of the transformer is new and the exterior of the transformer is maintained so it will look like a vintage transformer and sound vintage as well. We attempt to use every piece of the original tranny that we can use. We DO NOT attempt to improve or alter the original tone or frequency response of the vintage transformer. Our rewinding service is more time consuming and can be more expensive than purchasing a new Axiom®transformer. However, with our attention to detail and experience the customer can be assured that their vintage transformer will look AND sound terrific! Professional musicians, technicians and studios regard our rewinding services as the best. For transformers, the core material suppliers’ industry sets a +/- 20% tolerance on characteristics like permeability to begin with, so most of the industry realizes that anything that’s an inductor or transformer has that kind of tolerance unless a particular manufacturer tightens the tolerance up. But when we were dealing with high speed stick winding methods of the ’50s and ’60s, they didn’t really have time to scrutinize each coil, because these coils were wound simultaneously. There could be six or ten coils being wound at the same time. For example, we’d find missing layers, or layers that had a different number of turns than what was specified. So what I did was blueprint a transformer, documenting every layer, the space between turns, the number of turns, type of wire, and in some cases oddball gauges and half sizes. I would also take measurements of dielectric constants, leakage reactance, and other characteristics to be able to clone a transformer. So we ended up providing a service where we would fully rewind and rebuild original vintage transformers. Imagine disassembling the laminations in a core, numbering each one and putting them back in the same sequence.
MH: Do you believe that an output transformer can decay and lose its tonality over time, and if so why?
MM: Absolutely. I’ve proven that point with some of my more cynical, high-end customers, and I did it in such a way that we took a Marshall JTM 45 or a Plexi, I forget which, but the amp had been in England for years and been brought over here. The owner thought that the tone had decayed over time, it seemed darker, lifeless, and the higher frequencies weren’t as pronounced. They removed the transformer, and all that I did was rebake it in an oven and drive out the moisture. We put the transformer back into the amp and it was pretty amazing; it became a lot brighter and more detailed from the upper midrange to the upper frequencies. I’m not recommending that anyone start baking their old transformers. What we do with our transformers to avoid that degradation process is use a resin process that hermetically seals the coils. We do it in a vacuum chamber in which the coils are impregnated with the resin material and then we bake it thoroughly. Because of this process, our transformers should way outlast older transformers, including those made today.
Transformers are still being made today with the same mindset, do it as cheaply as possible while offering the customer a decent value for the money. It’s correct for the required impedances and matches all of that, but the rest of the details have been omitted because they just don’t have the time and budget to do the longer process. Years of research led us to the conclusion that not every aspect of a vintage transformer needed to be copied. There were problems and limitations in their day, so why repeat them? We achieved better results by combining old and new technologies. Making the math work for the best tone characteristics together with improved consistency and longevity is the formula we chose to follow.
There are a lot of vintage amps today with transformers that are going bad simply because they have aged. The tonal quality of the amp is deteriorating along with the transformer. Paper and certain types of varnishes used in these transformers tend to have hygroscopic properties. Moisture is absorbed over time affecting the insulation system and increasing the chance for high voltage breakdowns. To make matters worse, the primary winding voltage is high enough to produce a corona effect whose ions help oxidize this insulation. Over time, reliability and tonality will suffer. Do you believe in transformer cancer?
MH: In conclusion tell us what you think makes you the best company to work with.
MM: Our customer service is second to none! Paul Patronete heads the Axiom® division. He is an accomplished guitarist and has an experienced ear for vintage tone. Paul is more than happy to help our customers find the exact transformer to fit their tonal needs. Our website is constantly being updated with vintage and modern transformer versions. We will probably always be 2 or 3 pages short of having all of the various models listed that people may be interested in. Of course, we can’t possibly list every one-off we’ve done. We offer modern, updated versions of many of the classic transformers. We have added impedance taps for many of the classic Fender transformers, which were never originally offered. Having a detailed transformer spec is only the beginning. Breaking down into fine details what materials and assembly techniques were used decades ago help us assure our customers an accurate reproduction of vintage tone. We have carefully selected the best of new and old technology to put performance and quality ahead of economy. Our transformers are hand wound and the cores are hand stacked. Some materials we fabricate in house and others, like our steel laminations, are custom ordered. Because we build them one at a time, Axiom® Mercury Vintage™ are only available in limited quantities.
There is an audible difference between a budget transformer and an Axiom® Mercury Vintage™!
A good output transformer should go beyond its job of impedance matching. An amplifier’s overall personality depends on it. A desirable output transformer’s distortion has more detail; the harmonics seem even and smooth. Played clean, the transformer should sound natural without harshness. Obviously within the boundaries of the authentic tone characteristic the player is seeking. Better said, we still can’t make an apple into an orange. The output transformer is pretty much the last tone filter in a series of components. Other factors like tube quality and speakers can play an important roll as well. Also if you were to look at an amplifier circuit as a modulated power supply, then the quality of a power transformer and choke, if a choke is used in the circuit, it also affects tonality. The ghost note phenomenon would be an example.
A lot of the people modifying Marshall amps don’t want their transformer to break up so easily when they really overdrive their amps, and they can have a custom transformer built that will handle gobs of gain and still hold it together. A boutique amp builder might come along and specify a particular classic transformer with a few improvements. It’s all passion, really, because this is not by nature a high-dollar, profitable business. In fact, the machines that we use to hand wind the Axiom® transformers are from the 1960s.
In the early ’80s there were dozens of companies doing what we do in this area, and now there are perhaps 3 or 4. It’s frustrating for most transformer makers to have a musician describe to them a desirable tonal characteristic when that can’t really be put on paper. You have to at least be able to see things from a musician’s perspective. Paul and I have a decent guitar and amp collection, and we try to stay abreast of what’s going on. And we also have a lot of walk-ins and a sound room, so people can bring their amps in and play and talk about what they want.
Most of the current transformer manufactures sell them cheap and dirty, their approach is cookie cutter, they offer an okay value for what you get, but they mainly use bottom of the barrel materials. Unfortunately, they are barely in the ballpark of what really needs to be done if someone is serious about getting a vintage tone. If you have an inductance bridge, a simple test is to measure the primary inductance on a vintage unit and then on a new transformer. You’ll find that the inductance on the new unit is usually less than half of the vintage transformer. There is no way that transformer can sound like the original, but if you aren’t interested in achieving the authentic sound of the past, then everything that’s out there today is all right. The devil is in the details, and there is no substitute for doing things by hand. Certain items for our transformers that I couldn’t source elsewhere, I learned to make here, because there just weren’t any other sources for them.
As you can see the people at Mercury Magnetics™ go to great lengths to make their transformers sound good and “correct,” not overbuilding them to prove a point. To get that tone back into your amp have your favorite repair shop get you a custom-wound output transformer from Mercury Magnetics™. We have only skimmed the surface here in this profile; the power transformer also makes a difference in the performance of your amplifier. Mercury Magnetics™also makes transformers and chokes which we will speak with Paul and Sergio about in the future. Until then check out their website at www.MercuryMagnetics.com and never stop learning about your tone!

Ken Fischer was truly a silent hero among guitar amplifier builders and pro players. Knowing his nature, I’m not sure if he will ever receive the full credit he deserves for his contribution to amplified guitar tone. Our friendship dates back to the ’80s and I cannot recall a time where Ken drew any attention to himself. I admired him for being a modest person with a kind and generous heart and having an old-school sense of ethics. He was indeed a treasure-trove of amp circuit information which he freely shared with me and yet he seemed to constantly apologize before (as he put it) “picking your brain about transformers and their effect on my tone.”
Sadly, for as long as I knew Ken, he struggled with his health and finances while always maintaining a positive spirit. Few people know that he did not directly benefit from the sharp increase in the market value of his original first run of Trainwreck amps.
My only regret was that I never saw him prosper. However, his impact on the boutique amp world is enormous. As long as players and listeners experience the joy of Ken Fischer’s vision for better tone, he will not be forgotten.

Some interesting discoveries were made during the course of our research, development and playing a whole bunch of the original Marshall JTM-45 amps to help us achieve our benchmark ToneClone transformer series for this mighty amp.
Many thanks also to our player and collector friends for loaning us their amps and offering their insight for the cause. Many hours of tasty licks included. Incidentally, we do actually own one of the first coffin logo offset chassis amplifiers built by Mr. Marshall and crew.
There are more JTM-45 amps built using EL34 tubes than with the legendary KT66 tubes and there is nothing wrong with that. But a change of tube type also requires swapping out the output transformer to get the correct operating impedance and tone.
All of the original (limited run) handmade amps had 6L6, 5881 or KT66 tubes connected to a Radiospares “De Luxe” output transformers. The “De Luxe” model being the premium offering followed down by the “Heavy Duty” and “Hygrade” models. Primary impedance was selected at 6.6K.
The Bluesbreaker’s legendary tone was made by using KT66 tubes and Radiospares (RS) premium transformers. The transformers did most of the work here with their unique high primary inductance and low leakage inductance combined with padded (surplus) primary impedance as compared to Fenders of the time.
Note: With the exception of the transformers the JTM was a copy of the Bassman. An interesting discovery came to our attention here. It seems that most of the amps made during that era had the output leads connected in reverse phase (backwards). Was it by intent or a happy accident? We and a number of pro players seemed to prefer the reverse phase connection after many A/B tests. We had the impression that the speaker cabs sounded better, more articulate.
When the JTM-45 went into full production, the KT66 tubes were switched for EL34s and the Radiospares transformers were replaced with Drake transformers (judging by build quality and style). All to save BIG on costs since at the time Marshall was being hammered by a distribution deal that shot up retail prices for his amps right through the roof (a deal Jim Marshall later regretted). The EL34s were decent sounding tubes, but the new transformers (not so Bluesbreaker-ish) bore no resemblance to the original RS designs. These simplified transformers had a primary impedance of 3.4K with a much more simple (lower labor cost) design.
The bonus here, though, was in the easier to hook-up speaker connections for the player on the road, which also made it more difficult to connect speakers to the amp in reverse.
Another interesting piece of historical data is that when the EL-34 started earning the reputation as an affordable, reliable and great-sounding tube, the people at Radiospares added it to their compatible list of tubes for the RS “De-Luxe” output without changing the 6.6K impedance. And the EL34 still sounds great through the RS output transformer!!
Source: https://mercurymagnetics.com/pages/_misc/FAQ.htm#EARLY_MARSHALLS

Question: Can changing an amp’s OT create more clean headroom?
Answer: Changing out an OT with a tranny that has the same impedances as the one being replaced won’t deliver more power because volts-is-volts and watts-is-watts. Meaning: no extra power is delivered here for free.
You can force out more power from a tube by lowering the primary impedance of an OT. This usually does more harm than good, shortened tube life and harsher tone for starters. A player can get more out of his amp like extended clean tone headroom and a noticeable presence of a bigger soundstage effect by way of transformer solutions. By increasing an OT’s “tank capacity” with more of the right kind of iron and copper resulting in more inductance to the primary winding. It’s this inductance that has a more profound effect on tone and how large it sounds that goofing around with starving tubes with lowered impedances.
OTs that are physically larger in size do sound larger even if they may have the same impedance as their smaller counterpart. The reason for this is the energy carrying the guitar tone information through the tranny is seeing less power-robbing resistances and going through its magnetic field transformation with faster responding iron helps the tranny to have a larger window for tone to flow through.
The same holds true for the PT. While the OT benefits the player with extended headroom and frequency range, the PT supplies more energy and the quicker delivery of it to the amps circuit resulting better bottom end and improved note dynamics in the form of note attack and separation.
This is also why amps that run hotter than a bitch kitty usually don’t have good tone as well.
Source: https://mercurymagnetics.com/pages/_misc/FAQ.htm#Clean_headroom

the way your nasty little amp makes you play…
So where does great tone come from if nearly everybody is using the same parts from a small circle of high production manufacturers? What gave vintage amps their great tone and why do some amps sound better than others? How come so many new amps don’t have that inspiring tone anymore? And where do babies come from?
The answer to (most of) these questions, and the absolutely mission of Mercury, is in the TRANSFORMERS. We’re not kidding when we call them the “heart and soul of your amp.” Transformers establish the character and behavior of your amp’s ability to generate tone, from clean, to dirty harmonic distortion. That’s why Mercury goes through the trouble and expense to build and tune transformers the hard way: by hand, one-at-a-time, with old-world craftsmanship and the most tonally effective materials money can buy. The end result is all the guitar tone you want without a speck of cereal.
But what does the future hold for the electric guitar player and vacuum tube guitar amp owner? Is there truly something out there beyond the limits of vintage tone that isn’t going to be solid-state? Yes, we think so. With just the right combination of know-how and passion, Mercury is now helping amp builders re-think guitar tone by re-inventing it. We call these new tone-generating machines Axioms. The Axiom line showcases new advancements in magnetics through transformer design. Designs that give amp builders better tools to work with and tone that we feel will better connect you to your guitar. All without following conventional vintage designs or recipes.
One fine example of Axiom-based advanced transformer technology is Mercury’s Epiphone Valve Jr. Kit*. What started out as a simple demonstration of Axiom transformers gave a $100 economy tube amp $1,000+ worth of tonal performance! It’s hard to believe there isn’t a vintage bone in their windings! We’re not surprised that this best-selling kit is fast becoming the first choice of pro players and recording studios alike.
Imagine an affordable entry into the world of boutique amps that delivers top-shelf vintage American clean tones all the way to the overdriven distortion of the old British amps. Also imagine an amp that totally responds to every tone knob and pickup adjustment setting on your guitar. It’s fun stuff!
Our little upgrade kit is a showcase of what the future has in store for harmonically-rich tone. We invite you to check out our Epiphone Valve Jr. Kit and hear for yourself just what everybody’s talking about. Or ask your amp tech about other Axiom upgrades for your amps. Remember, in addition to our already amazing-soundingToneClone and Radiospares lines we make Axioms for most popular amps.
Source: https://mercurymagnetics.com/pages/_misc/FAQ.htm#Give_me_your_dirty_tone

Question: My amp guy told me that “core saturation” (overloading the transformers) was part of my amp’s distortion — and important to my tone. Is this true?
Answer: This is a popular misconception. You can irritate a tube to distortion — but the rules are completely different for trannys. Here’s why. Think of the musical signal that comes out of your electric guitar like the fuel you put in your car. Where does it go? It goes into the gas tank of course. The inductance of the output transformer is a lot like that gas tank. It holds the fuel and makes available as much as the engine demands. The engine’s ability to generate horsepower and torque can be severely limited by restricting the flow of fuel.
The same goes for your amp. Deep and tight bass notes, and how large the perceived soundstage your amp can deliver to, requires a lot of inductance to do the job properly. Undersized transformers and circuits designed to overload or saturate transformers won’t cut it. Inductance gets sucked out which converts your good tone into heat! So you not only get tonal loss but potentially shorter life expectancies from both your transformers and tubes!
You’ll know your amp’s trannys are being pushed beyond their operating capacities when you hear:
Make sure your amplifier is up to the task of delivering all the tone you demand with the proper output transformer installed. Don’t feel like you’re stuck with a poor sounding amp. There are many choices available to you from Mercury that will fix the problem. Buy the best and transform your uninteresting amp into a force to reckon with.
Technical explanation: Core saturation is the condition where the core material (usually iron) is completely magnetized. Any further increase in input energy will not produce an appreciable increase in magnetic flux. When this happens, the inductance of the coil is greatly reduced because no counter EMF is produced when theflux is unable to increase.
Source: https://mercurymagnetics.com/pages/_misc/FAQ.htm#Looking_for_Tone_in_all_the_Wrong_Places_

Caption: Photo shows measuring the temperature of a transformer’s laminations with a NON-CONTACT thermometer. In this shot the transformer is outside of an amp and hooked up to a Variac. This type of handheld thermometer does not require direct contact with the transformer and can read temperatures from a safe distance.
Transformers designed with high-temperature insulation systems can run safely at temps up to 200°F. But remember, a hot-running transformer is an angry transformer.
Want to know the health of your amp’s transformers? Take their temperatures! A hot-running transformer is an angry transformer and it may very well be telling you its dying. It could be an older vintage unit that is showing signs of aging materials. Or, you may have a newer amp with a far-to-common undersized “runt” transformer. Either way heat means a waste of power and potentially shorter transformer lifespan — not to mention strangulation of your tone. Transformers should normally run between warm to very warm temperatures. Hot is a bad sign — especially in the case of output transformers (OTs). Make sure that other components are not the cause of excessive transformer heat. For example the tubes should be the only hot-running component in your amp. But keep in mind that if they’re too close to a transformer they could artificially heat the unit, also leading to damage over time. Of course there’s more to the story, but if you are in doubt then see your local amp tech or give us call. By the way, Mercury recommends using a non-contact thermometer to take your readings. If you do have a dying transformer it’s time to think about a rebuild, replacement or upgrade. Remember, Mercury offers you not only the best-sounding and most reliable transformers, but more tonal choices than any other company!
Did you know that hot-running transformers not only drain your amp’s reliability but can also cause major tonal issues?
The problem is so common that many players mistakenly assume that transformers should run hot. Not so. In fact, excessive heat is an all-to-common sign of under-powered “runt” transformers that are potential tone-killing accidents waiting to happen.
Heat is nothing more than a symptom of energy loss. And hot-running transformers certainly do nothing to contribute to your tonal quality. Energy loss means one thing—inefficiency. It’s like driving a hot rod around with the parking brake on. Think of “runt” transformers like brakes on your amp, making your tone dark and muddy.
Here’s why: Insulation aging is accelerated by higher temperatures. As insulation temperature approaches redline, resistance begins to decrease. A breakdown occurs when insulation becomes damaged by the unchecked rising heat. Transformers wear-out from the effects of usage, time and high temperatures.
Exposure to electrical spikes can also contribute to stress on the transformer’s insulation system. If that wasn’t enough, the coils of wire inside your transformer are often beaten up by vibration! These internal vibrations sometimes cause the magnet wires to rub against each other, wearing off the insulation and causing short circuits.
The life expectancy, and resulting tone, of a transformer is completely dependent upon its insulation system. The build-quality and consistency of the transformer design must be greater than the working conditions and stresses you subject it to (i.e. how hard and often you play). This explains yet another reason why transformers wound with paper tube bobbins are the most susceptible to thermal- and aging-related breakdowns.
Remember, a hot-running transformer is an angry transformer. It is angry because it is overstressed. This may not cause your amp to immediately fail, but eventually it will. The ideal transformer should run between cool to very warm. Excessive heat is nothing more than the amp’s circuit demanding more power than it’s transformer can give. The proof is when you correct the problem. Swapping the “runts” with higher-efficiency upgrade trannys gives you enhanced tone by way of increased headroom, higher loaded voltages, better response and often a very perceivable tonal depth improvement.
Getting you both superior transformer tone and reliability isn’t easy. At Mercury we tackle the problem by making uniquely musical transformers for specific guitar amp designs. Each transformer is made by hand, one-at-a-time, then individually hand-tuned for maximum tonal performance — and coolest running temperatures. No other approach comes even close.
With Mercury transformers you’ll have one less thing to worry about in your quest for great and consistent guitar amp tone.
Source: https://mercurymagnetics.com/pages/_misc/FAQ.htm#Take_Your_Transformers_Temperature,%20Part%20I

Did you know that the transformers and chokes in your amps are aging? If your amp is 20 years or older you really need to know this. Over time, the materials that were used in the construction of these transformers have changed — actually degraded, and become increasingly fragile. Before the “smoke gets in your eyes” hang on to your power cord and don’t plug in just yet until you understand the following.
Basically, transformers can be broken down into three components. The first being “copper,” which is what the wound coils inside and the lead wires are made of. The second is “steel” which is what the stack of metal plates in the core are made from. Third, and most important to overall life expectancy, is “insulation” whose function is to keep things alive and running properly by not letting the other components touch each other and/or conduct when they are not supposed to. A breakdown with any one of these components will eventually grenade your amp!
Copper by itself doesn’t really age, but the thin, clear coating of insulation around it does in the form of microscopic spider web cracking. This will lead to high voltage break down in the winding. Lead wires are also susceptible when their vinyl or cloth jackets become old and brittle — sometimes causing arcing through the cracks and splits in the insulation. Phantom clicks and pops heard through the speaker are also telltale symptoms of aging.
Steel can degrade over time and extended use, especially if contains traces carbon. Carbon is a contaminant and has no positive contribution towards tone. The older the amp is, the higher the possibility. When that happens, the core begins to be less conductive to magnetism (magnetism is the essence of how transformers work!). Symptoms of that occurring include higher transformer operating temperatures, general dulling out of tone with the absence of treble frequencies, fuzzy mids, and a noticeable softening of the bass notes. None of which has anything to do with rust. Remember, rust on your core is a helping friend. For more information on this check out the article “Transformer Rust—Friend or Foe?”
Insulation is where most of the aging problems lie. The older your amp is, the more likely its transformers were wound on paper tube bobbins — with Kraft paper as its insulation (which is no different than the paper used to make shopping bags at your local grocery store). This material has a tendency to suck up moisture and retain it. Moisture alters the delicate balance of reactive values in the transformer throwing off your tone into less interesting domains. The more destructive side to this moisture absorption is that it harbors mold and bacteria which consumes the paper, further diminishing its insulating properties. Even if this material has avoided moisture altogether, it will eventually crumble into dust over time.
Are all vintage amps time bombs? Certainly not. But to be safe don’t play Russian Roulette with your valuable, irreplaceable, and highly-prized collectible vintage amps. If your amp hasn’t been fired up in years, don’t just plug it in and flick that switch on. You risk seeing your investment go up in smoke.
If you are in possession of a Variac, a volt meter and a current meter then you have the necessary tools to properly and carefully ramp up the input voltage while monitoring the current draw. This will also help reform the filter caps as well as avoid the “smoke test” with your transformers. If you don’t know what any of this means then we strongly recommend getting an amp tech to do it for you. If you don’t know of one, call us and we’ll help you find one qualified to do the job. When the fuses in your amp keep blowing it is your amp’s way of telling you something’s wrong and to take it to a professional.
One of the most important services Mercury Magnetics has to offer is free to all customers. We will evaluate your transformers with the most thorough and advanced testing. We do this at no cost providing you cover the shipping costs to and from Mercury. Transformers with no fault found are sent back to be reinstalled in the amp with a least the knowledge and confidence that things were double-checked. Transformers that failed in testing are either rebuilt/restored or replaced with ToneClones®. Free estimates are always given in advance. Either way you leave satisfied with the confirmation that your original works fine or the problem can be fixed.
Source: https://mercurymagnetics.com/pages/_misc/FAQ.htm#When_the_Smoke_Gets_in_Your_Eyes

Most of us agree that amps built with vacuum tubes have superior tone. Therefore, it’s the tubes that take all the credit for great tone… right?
It is easy to see where one might get that impression. So far, the tube remains the ultimate conductor of musical signals. But in reality the tube is completely dependent on the circuitry connected to it. Consider the perfect tube hooked up to a perfect circuit. The resulting amp would have little to no distortion. Signals would pass through exactly as they came in. Nothing added—nothing subtracted. Amplified, but cold and sterile. The ideal conditions for neutering your guitar tone.
As you can see, blindly seeking design symmetry can work against us when it comes to electric guitar tone. To better understand this concept let’s compare it to rock vocalist style. Imagine in your mind your favorite singers — do they have perfect vocals? Far from it. There’s always at least some grit or grind to their singing styles. The use of unusual vocal techniques is what makes their voices interesting and memorable. Opera is not what we’re looking for here.
On the other hand, the presence of odd harmonics in music is generally annoying. Better-sounding amps work to minimize these odd harmonics. At Mercury we design and build transformers that enable your amp’s circuitry to emphasize even order harmonics between specific frequency ranges. Our methods intentionally showcase the virtues of electric guitar tone.
To get desirable tone from a tube it must be coaxed, bothered or even irritated in some way. This is where the tubes share interdependence with the transformers. Great transformer designs are the key to provoking tubes to behave in a manner that is conducive to getting desirable tone. Having the right transformers has long been one of the fundamental insider secrets behind great tube amp tone!
Remember, your amp’s transformers are the cornerstone of its tone. Whether you’re a player or a builder, using Mercury transformers is unquestionably your best investment in superior tone, reliability and amp value.
Source: https://mercurymagnetics.com/pages/_misc/FAQ.htm#The_Role_of_Transformers_in_Electric_Guitar_Tone_
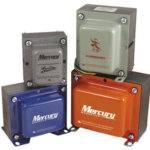
Many people, including more than a few amp techs, have the mistaken belief that when it comes to a power transformer, “volts-is-volts,” and upgrading a PT won’t have much of an effect on a guitar amplifier’s overall tone. Not so! My tone transmogrifying tweakers!
The audio circuitry of your amp is completely dependent on the quality of its power supply. The very first component in this food-chain-of-tone is the power transformer. It makes the necessary connection between your amp and the power company. How it behaves sets the standard for your amp’s performance. The PT has a profound affect on your amp’s sonic characteristics especially its ability to handle musical dynamics. What this means to you is crisper note attack, better note separation, and added sparkle in the upper mids and treble frequencies. And keep in mind that with a properly-designed power transformer you’ll hear all-around higher definition with the amp’s clean and dirty tones.
Do not assume that all amp manufacturers know this, or that they have provided your amp with the best possible transformers (unless they are already equipped with Mercurys!). Instead you might just be stuck with low-cost, short-cut transformers. Remember, there are dozens of ways of building cheap transformers to meet certain voltage values but they all fall short of giving your amp the best musical qualities—that’s the magic of Mercury Magnetics!
Which turns you on more? A tranny built only to please a volt meter — or one that maximizes the sonic potential of your amp? You no longer need to be a victim of the sonically-challenged. It’s time to liberate your amp with the only guitar amp transformers actually designed for better sound—Mercury Magnetics.
Source: https://mercurymagnetics.com/pages/_misc/FAQ.htm#The_Power_Transformer
Question: I heard that rust is bad for my transformers. I’m being told that rust causes an increase in eddy current losses which will heat up and further damage my transformer. Rusty transformers will also hurt my tone, so I must remove the rust or replace the transformers to make my amp operate properly and extend its life.
Answer: Nothing could be further from the truth. While iron possesses the necessary magnetic properties, it is also electrically conductive. Eddy currents are circulating currents in the core induced by a magnetic field emitted by the energized primary winding of the transformer. These electric currents are undesirable. The coreis acting much like a shorted secondary winding. They are power-robbing losses that convert your guitar playing (input power) into heat that beats up your transformer. This effect is certainly not helping your tone!
On the other hand, rust (iron oxide) is a nonconductor of electric current. The high resistivity of rust reduces eddy current losses. Since iron is also a conductor of electric current and the goal here is to minimize eddy currents, which is why the construction of the core is made up of a stack of thin plates of iron (laminations) which are insulated from each other by an oxide (rust-like) coating. This confines the eddy currents and prevents them from circulating between the laminations. The higher resistance created results in a reduction of power losses within the core.
What’s this mean in plain English? Back in the early years, manufacturers of laminations intentionally exposed their iron to moist air to encourage rust to naturally form on the surfaces as an insulator! Like a fine patina on an antique bronze the rust on your transformer could be viewed as badge of honor. Assuming that your transformer doesn’t have other problems like coil damage from excessive moisture exposure (common with paper bobbins), you can actually expect some improvements in output transformer tone and lower losses in power transformers as rust develops.
If you are still bothered by the cosmetic aspect of rust, never scrape off the rust to the point of exposing bare metal because you will bring back those nasty eddy currents. Instead, brush off the loose particles and re-paint the area with varnish. If you want to send your transformer to Mercury, we can re-dip it in varnish and bake it for a small fee. Transformer evaluations are always no charge providing you cover the shipping costs to and from Mercury.
Source: https://mercurymagnetics.com/pages/_misc/FAQ.htm#Transformer_Rust
Fiction: Transformers made to look vintage with paper tube bobbins (PTBs) somehow have better vintage tone than those using nylon.
Fact: PTBs were used in the early years of transformers only because they were the cheapest material available. Back then tone, consistency and long term reliability usually took a back seat to meeting a low budget. This still remains true today. If the issue of using PTBs for the sake of sounding more vintage was that simple then sporting a set of sideburns like Elvis should give you the ability to sing like him. Impersonators/imitators rarely scratch below the surface to find the heart and soul of what advances art and science.
Mercury’s goal of providing you with the finest sounding transformers on the planet could never be achieved by peddling myth, voodoo, junk science or unqualified opinion. The bottom line is that under close scrutiny PTBs fell short of our tonal expectations, not to mention the valued opinions and advice we’ve received from the finest players, recording artists, technicians and engineers of the past fifty years.
Let’s leave the question of paper or plastic to the box boy at your local grocery store. At Mercury we combine the best of what tradition has to offer with the best of today’s technology — and of course plenty of hindsight to boot. If you love music as much as we do, then you won’t settle for anything less than a set of Mercs in your amp — the best in tone without compromise.
Source: https://mercurymagnetics.com/pages/_misc/FAQ.htm#The_Paper_vs._Nylon_Bobbins_Myth_
Transformers mount onto various chassis in several different ways. How the transformer mounts to your chassis determines the mounting style you order.
Most transformers have standardized mounting styles. However, within the industry there are several naming conventions used. Mercury has adapted the following simple and easy-to-remember system.
When ordering you’ll need to know the following —
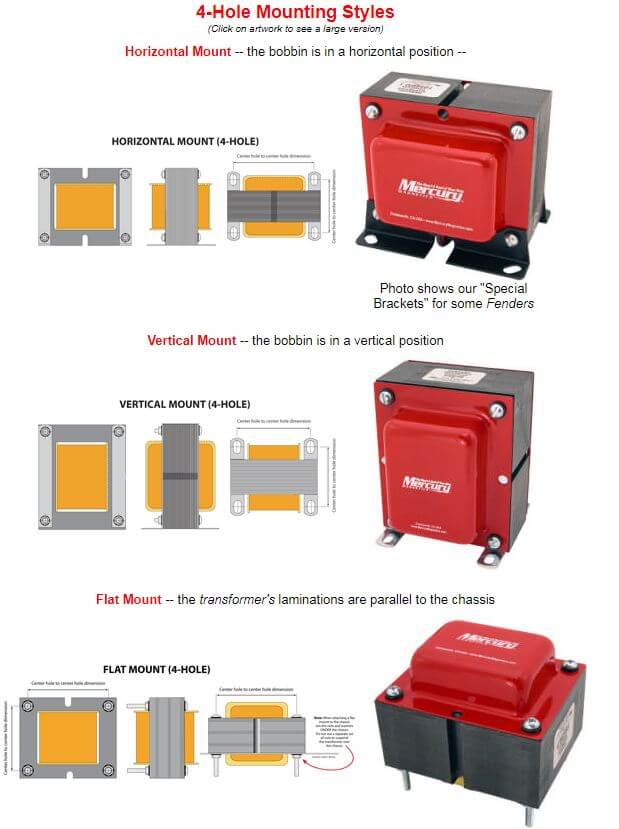
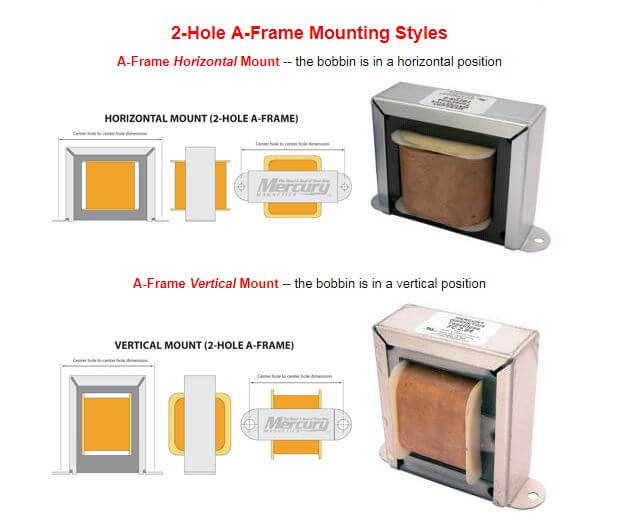
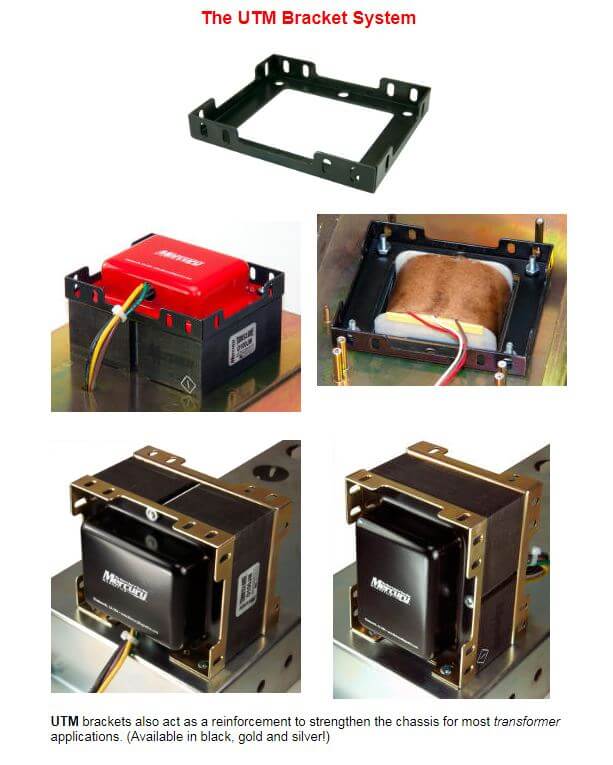
Notes:
Endbells (caps that cover the bobbins and laminations) for transformers are optional. Ask your Mercury Representative about color options and custom graphics.
Not all transformers and chokes can be fitted, or need, endbells. For example, chokes and single-ended outputs are gapped, therefore endbells are not used because they will short the gap. If you have any questions, please consult your Mercury Representative.
A-Frame Mounts are standardized.
4-Hole Mount transformers mount in several ways, including L-Brackets, “Special Brackets” or UTMs.
UTMs (Universal Transformer Mount) brackets will greatly increase your mounting options and are available in several colors. They can help to strengthen the chassis, especially for Flat Mount applications.
Contact us to with any questions or to go over mounting options.
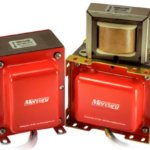
What’s at the heart of your amp restoration, repair and mod business?
When an amp comes to you for service, which best describes your method?
You’re the expert in your customer’s eyes and he often depends on you to not only fix his busted amps, but deliver the best possible tone and reliability from his gear.
Here’s your chance to truly impress your customers by making tonal improvements they never imagined possible. And the best part is how easy Mercury makes it for you to become their “go-to-guy.”
Transformers 101―Design Matters
The simple truth:
Ordinary transformers are at the root of many difficult to diagnose amp problems, not just tone. Excessive noise and heat, tone drift, and reliability issues are just some of the symptoms you should be aware of. When a transformer dies you’ve probably always ordered a replacement from the amp’s manufacturer or a parts distributor. Have you noticed that you never hear any tonal improvement with their generic-sounding transformers? And how replacements often further degrade an amp’s tone?
It’s not your fault!
You’ve only been offered replacement transformers from whatever was available — rather than what amps actually need to perform at their best. A dirty little secret is that they just don’t get it — so, they’ve cut way back on transformer quality for purely economic reasons. Tonal quality is not a first consideration. In fact, it’s not even on their radar!
On your next repair, mod or restoration, try something new. Forget about those anemic other transformers — give Mercury a call. We offer you a whole new world of golden-voiced designs to be explored. Everything from “clones” of the best-sounding vintage gear ever made to the latest tonally-enhanced models. Give your customers something that’ll blow their minds (and help your business grow!) go with Mercury.
Join Mercury’s Service and Support Network (SSN) Program
As more and more musicians discover the awesome tone of Mercury transformers we’re getting bombarded with requests to install replacements or upgrades for everything from modern tube amps and reissues to classic old amps. Although that’s great news, our business is designing and making transformers, not installations and service.
We’re looking for qualified amp techs and music stores with amp service departments to become Mercury distributors and service centers.
There’s nothing better than customer loyalty. Aside from making it possible for the amps you work on to sound better than they ever have, we can help build your business by:
Our expert tech support team will also help you with the all-important “which transformer to use” decisions. The time to start learning about the benefits of high quality transformers is now — call us today! Ask for the Service & Support Network (SSN) manager. He’ll answer any of your questions and if it sounds like a good idea to you, he’ll get you started on our SSN program.
What your customers need to know about the transformer connection to great guitar amp tone
Which components have the single-most dramatic effect on a tube-amp’s tone? Its tubes, speakers or transformers?
Surprisingly, an amp’s transformers are the actual backbone of any tube-based amp’s tone. If your customer is not happy with his amp, or just wants to make it sound a whole lot better, start with its transformers. When you work with premium-quality transformers as a foundation, you’ll discover how much easier it is make the final tweaks to an amp’s tone.
Why are some amps more inspiring to play than others?
There is a phenomenon known as “ear fatigue.” It is caused by unmusical, muddy and confused tone. With tube-based amps, low-quality transformers are one of the main causes of ear (as well as listener) fatigue. As an amp tech you can open up an amp’s sonic potential by upgrading its transformers. And quality magnetics generate the kind of lush tones that inspire guitarists to create more.
I’ve been told that ordinary transformers sound just as good as premium units.
Maybe if you’re tone deaf… or the amp’s circuit is of an extremely poor design. But, even at their best, cheap transformers barely mimic, in a lifeless sort of way, an amp’s tonal capabilities. An alarming number of amp makers cut corners by not using high-quality and better-sounding transformers. By upgrading an amp’s transformers you are essentially correcting this design error. The result is often startling. By simply upgrading the transformers you can give your customers’ amps vivid harmonic overtones, added sparkle and more dynamic headroom, with much better note separation. They’ll love you for it — and that’s good for business!
* * *
The bottom line: Inside every great-sounding amp is a set of quality transformers. If they’re not vintage originals, then they’re probably Mercurys. If your amps don’t come alive when you plug in, it’s time you called Mercury.
Mercury offers you several very different brands of uniquely designed premium transformer-each with it’s own distinctive tonal characteristics and tonal flavors.
With permission, Mercury’s logos and artwork may be used on websites, printed advertising, business cards, affixed to MI products that contain Mercury’s transformers or chokes, and other product as well as promotional material. For permission or other special uses, please contact Mercury’s sales department sales@mercurymagnetics.com for details.
![]()
Mercury Magnetics
![]()
“The Heart & Soul of Your Amp”
![]()
ToneClone
![]()
Axiom
![]()
Radiospares
![]()
Mercury Custom Shop
![]()
Mercury Vintage
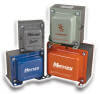
“Beauty” shot #1
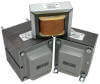
“Beauty” shot #2
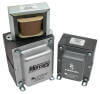
“Beauty” shot #3
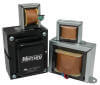
“Beauty” shot #4

“Beauty” shot #5
Source: https://mercurymagnetics.com/pages/SSN/pages/MercArt.htm
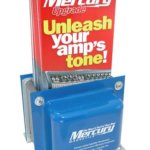
Requests for educational consumer handouts about Mercury have been pouring in. So, we’ve designed this simple P.O.P. (point-of-purchase) display to make information on Mercury’s quality transformers available. The brochure discusses transformer upgrades and restorations, as well as our ToneClone, Axiom and Radiospares lines of vintage and next-generation products. A must-read for any guitar player!
Help your customers to learn more about the sonic-qualities of great transformer designs. Our eye-catching display is designed to hold 40 Mercury Magnetics “Unleash Your Amp’s Tone!” brochures.

BROCHURE PAGE 1
BROCHURE PAGE 2
It’s available for dealers and resellers — free! Getting a display for your store is easy — just give Patrick a call (or email) and ask for one!
Source: https://mercurymagnetics.com/pages/SSN/pages/POP1.htm
Effective immediately, all Mercury dealers and resellers are required to follow our M.A.P. in their advertising.
Definition: M.A.P. is the acronym for “Minimum Advertised Price.” It is the lowest price Mercury Magnetics dealers and resellers can advertise our products for. In reselling Mercury’s products you agree to not advertise prices below M.A.P. Advertising, in this case means any form of printed or published promotion, including print ads, signage, eBay, banner ads, websites, etc. M.A.P. establishes only the prices that appear in advertising, but does not dictate prices that the product may actually be sold for.
What is Mercury’s M.A.P.? The maximum discount you may advertise Mercury products for 5% off our published retail prices. For the most up-to-date retail prices, see Mercury’s website (www.MercuryMagnetics.com).
Why is the purpose of M.A.P.? M.A.P. is a method of ensuring that Mercury’s dealers and resellers make a fair profit margin without driving prices into “discount hell.” Mercury’s products have set prices so that our products do not end up being advertised at lower than necessary prices. M.A.P. is used to keep our product pricing consistent among sellers.
Are there violation penalties? Yes, violators will be beheaded. Or worse! You’ll lose your Mercury volume discount until the non-M.A.P. advertising is withdrawn (or some other arbitrary hand-slap capriciously doled out by Mercury).
Questions? Give us a call or email if you have questions.
Source: https://mercurymagnetics.com/pages/SSN/pages/SSN-MAP.htm
If you are an amp tech, or have an amp repair department, check out Mercury’s Service & Support Network. There’s a huge demand for quality transformer upgrades, replacements and vintage rewinds. And, Mercury is here to help. Click on the brochure images to read about what Mercury’s SSN is all about.
BROCHURE PAGE 1
BROCHURE PAGE 2
For a printed version of this brochure, or to talk to us about the benefits of Mercury’s Service & Support Network (SSN) program, give Patrick a call (or email)!
This informative brochure introduces guitar players to the benefits of quality transformers. And, is the first of its kind. Click on the mini pages, or links below to see or print a PDF of the brochure’s pages. Or, email us for a printed copy. Be sure to include your name and mailing address.
BROCHURE PAGE 1
BROCHURE PAGE 2
For a printed version of this brochure, or to talk to us about the benefits of Mercury’s Service & Support Network (SSN) program, give Patrick a call (or email)!
Source: https://mercurymagnetics.com/pages/SSN/pages/Consumer-bro1.htm
Many amplifiers are prone to “ghost notes.” It helps to know what kind of amp we’re talking about.
Certain capacitor brands, like F+T, LCR have high leakage current. Other capacitors for coupling have ESR problems, sometimes caused by the physical construction, and lead type. Pure copper leads reduce this, and tubular capacitors are less prone. This is because they do not have any flat sides for the signal to bounce off of.
Some amplifiers like Fender Black/Silverface models that have the ghost note issue can be reduced by cutting the phase inverter “output” coupling capacitor values in half.
Others generally are just suffering from old, or leaky filters. Vintage amplifiers like Vox AC30s have very low filtering, I believe this was not because of design, but more as an economical approach to save money. The same is true with many amplifiers designed in the 1950s. Increasing the filtering can cure the ghost note problem.
With Marshalls there are two ways to help cancel this out:
Install a luf 600-1000V non-polar plastic capacitor across the last decoupling electrolytic in the line. This is the last filter, which filters the supply for the preamp. The capacitor will be wired to “by-pass” this filter, one lead to ground, the other to the capacitor lead.
Increase the filtering. On 50 watt models, it seems to take another 50mf across the main B+, and another 50mf for the screen supply.
For 100 watt Marshalls expect to add another 100-150mf across the main B+, and at least another 100mf for the screen supply. Now, the amp will be stiffer on bass notes, if not acceptable, you can add anywhere from a 100-200 ohm 209 watt resistor in series with the output transformer center tap, this will give back a looser feel.
Source: https://mercurymagnetics.com/pages/SSN/pages/GhostNotes.htm
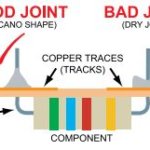
Safety Precautions
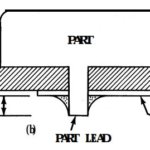
GENERAL REQUIREMENTS
1. Unless otherwise specified or approved by the procuring NASA Installation, parts shall be mounted parallel to, and in contact with the mounting surface.
2. IRREGULARLY SHAPED PARTS. When the shape of parts is such that only point contact can be made with the mounting surface, additional support shall be provided.
3. HEAVY PARTS. Parts which weigh more than 1/2 ounce (14 grams) shall be supported. Design requirements shall specify method of support or attachment.
4. METAL CASE PARTS. Metal cased parts mounted over printed conductors, or which can come in contact with each other or with other conductive material, shall be encased in transparent insulation. Such parts shall not be mounted over solder connections.
5. GLASS ENCASED PARTS. Glass encased parts (such as diodes) shall be enclosed in transparent resilient sleeving or coating material when epoxy material is used for support, conformal coating, or potting.

Watch these fascinating vintage Youtube videos (many made before or during WWII) from the companies that made and perfected vacuum tubes. Excellent source information.
RCA: Electrons on Parade (Part 1)
1942 factory promo for RCA vacuum tubes. Shows how they made the metal-can octal base tubes.
RCA: Electrons on Parade (Part 2)
1942 factory promo for RCA vacuum tubes. Shows how they made transmitting tubes, and many applications from television to Tommy guns.
Mullard Valves: The Blackburn Story
Works History (Part 1)
Covers the history and functions of Mullard’s Blackburn Works.
Mullard Valves: The Blackburn Story
Parts of a Valve (Part 2)
Covers all the parts that make up a valve.
Mullard Valves: The Blackburn Story
How a Valve is Manufactured (Part 3)
Covers assembly of a valve up to the cage stage: mica, cathode, grids and anode.
Mullard Valves: The Blackburn Story
How a Valve is Manufactured (Part 4)
Continues coverage of the assembly of a valve: pins, heaters and base.
Mullard Valves: The Blackburn Story
How a Valve is Manufactured (Part 5)
Covers the final assembly of a valve, treatment and vacuum.
Mullard Valves: The Blackburn Story
How a Valve is Manufactured (Part 6)
Covers the final inspection of the finished valves.
Source: https://mercurymagnetics.com/pages/SSN/pages/tube-history.htm
Breaks down the structure of matter into atoms and, by use of conventional symbols, shows the action of electrons within an atom. The principles involved in the flow of current are explained and a volt, ampere and Ohm are defined.
General Electric: Principles of Electricity (Part 1)
General Electric: Principles of Electricity (Part 2)
Source: https://mercurymagnetics.com/pages/SSN/pages/PrinciplesElectricity.htm
It doesn’t take too much digging to find a laundry list of boutique amp builders using Mercury Magnetics transformers in their products. From Mojave Ampworks to Joe Morgan Amps to kits from MetroAmp, builders have found that Mercury knows their iron. While transformers rarely receive the same level of attention of NOS tubes, speakers, or even guitar cables, they are a major contributor to tone. Think about it—the power and output transformers are the start and end of the line with any amp.
Based in Chatsworth, California, Mercury Magnetics has been building transformers for close to 60 years. I recently had a chance to talk with Mercury’s Sergio Hamernik to dig deeper into their roots, find out what one can expect from upgrading their iron, and what sets Mercury apart. Prior to our conversation, I had the opportunity to witness the remarkable transformation of an Epiphone Valve Junior modified from stock to hot-rodded, using one of their transformer upgrade kits. Not only was it a noticeable upgrade, it was a revelation in just how important the role of quality iron in an amp is. But because it is the single most expensive part of any amp, it’s no wonder we see so many modern amp manufacturers skimp on the iron to keep costs down. Let’s see what the passionate, and often hilarious, Sergio has to say about his part of the business.
PG: I’ve been seeing Mercury transformers in amps for at least a decade. When did you get into the amp scene?
SH: This happens to be one of our most often asked questions. Even though Mercury Magnetics’ roots go all the way back to the early 1950s, there are guitar players who are only now discovering us. But if an industry insider like you has been aware of us for at least a decade, then I suppose it means I don’t need to lay off any of our sales and marketing staff.
I would attribute most of our lingering anonymity to the old days. Back then, most of our clients from the audio community preferred to keep us as a trade secret from their competitors and the press. The typical transformer-savvy amp builder also didn’t usually want to share the credit with us, or reveal what their “unique” technical advantage was regarding audio and tone. Consequently, we were asked to maintain a low profile and generic look for our transformers for quite some time. On occasion, a customer in the know will spot a small “MM” mark on a transformer from an older piece of gear, and ask if it’s a Mercury. Odds are that it is.
It was the guitar amp crowd that pushed us to go above ground. Now Mercury gives any electric guitar player or amp restorer a taste of what the pros were using, talking about in their studios, and among themselves. Many players have told us their amps increased in value when upgraded with Mercury transformers, and this became evident when insurance appraisers began to contact us for verification. However, it wasn’t until the mid-1980s when we began to market our services and various brands to guitar players.
For me personally, I got into the amp scene around the mid- to late 1970s. I just found it to be a nice way to relax from the strain of oversleeping.
PG: Your website shows a large number of amp manufacturers you have replacement/upgraded transformers for. What are your best sellers and why?
SH: There are so many different camps loyal to their particular amp brand, so it would be difficult to single out the best sellers. The best sellers are transitory and change from week to week because guitar amp players are a fickle bunch. That’s why we’ve built the world’s largest catalog of guitar amp transformers where nobody is left out.
But trends tend to follow their own dynamics. And the current worldwide trend seems toward smaller wattage amps—regardless of brand. Conversely, the 100-watt heads are not selling like they used to. Players are gigging with no more than 15 watts and a few pedals. Regardless of playing style, they’re doing just fine abiding by sound level restrictions and kicking ass with the tone we feel Mercury upgraded amps deliver.
These players really get the fact that an amp lacking in tone can’t be fixed with higher power or covered up with a gain mod. An amp that coughs out an asthmatic tone at 50 or 100 watts easily fatigues both music listeners and guitarists. But the audience will stay until the bar closes if the band plays well and sounds great—even with as little as a few watts going through the available PA system.
PG: What can a guitarist expect to hear when upgrading their transformers in a newer amp?
SH: An amp’s transformers are the most important component in determining the quality of amplified guitar tone. And it’s no coincidence that they’re the most expensive parts in an amplifier. Many of the newer amps just don’t have the same “overkill” factor with their transformers as the amps in the ’50s and ’60s. Why? Ignorance and a bean-counter mentality. What’s good for accounting isn’t necessarily good for tone from an amp. Sadly, the people making these decisions are probably not players themselves and don’t seem to realize the damage they’re doing to the industry.
It’s not unusual to find a current production amp with a power transformer running hotter than hell, even without cranking the amp all the way. Or having an undersized, cheaply built output transformer whose sphincter begins to tighten the moment the guitarist reaches for the amp’s volume knob. An amp built around anemic transformers yields only to dull, thin, noisy, fuzzy mids and mushy bass. That’s what makes your notes sound more like farts through a pillow. This overkill factor is probably the only edge that some of the vintage amps have over the newer amps.
We have made it our mission to duplicate the performance of the best original transformer designs of all time. In terms of amplified guitar tone history, these transformers represent the best ever produced.—Sergio Hamernik
Have you ever noticed how most newer amps often weigh less, sometimes a lot less, than the older ones? That’s usually the weight difference between the old and new transformer designs. There is a direct relationship between weight and having transformers that seem to stay cooler and “loaf around” with power to spare, until a player demands more from their amp. It’s like they are waiting around having a card game, waiting for the player to do something. The best vintage tone was born that way. Newer amp tone can be easily improved—if the builder follows some of the same ideas.
Upgrading with quality transformers gives a second chance to a new amp owner to make things right with their tone, by reclaiming that overkill factor. Assuming there are no issues with the amp’s circuitry like bad parts or worn out tubes, a guitarist should hear and feel improvements with the very first pluck of the guitar. They should expect to hear the notes more detailed with overtones, and a quicker and more immediate response to their playing. Clean notes will have less sonic collisions with noise and reveal more bell tones, chimes, etc.
When more distortion is required, the player will sense better control of crunch and when break-up begins to happen. The coughing and hacking that happens when a stock amp is pushed, will vanish with a transformer upgrade. It will be replaced with longer sustains and notes that reach farther. The amp will also sound closer and bigger than the power it puts out—and the bass notes will have a tighter, rounder bottom end. And when pushed, she will still be able to hold that quarter from dropping—no matter how tall her high heels—something most musicians are looking for.
It’s not uncommon for guitarists to report that it took a few weeks of playing to fully realize what they’ve gained in terms of harmonic richness. These players have typically played longer and felt more inspirational emotions sucking them in, as they have invested more time into relearning and becoming reacquainted with their amps.
PG: Many players become very attached to the transformers in their vintage amps. When you create ToneClones or Radiospares and Partridge versions of these classic transformers, how close are they get to the originals?
SH: Radiospares and Partridge are our brand specific clones, whereas ToneClones are “best-of-breed” duplicates culled from the hundreds of other brands that have made transformers over the years.
We have made it our mission to duplicate the performance of the best original transformer designs of all time. In terms of amplified guitar tone history, these transformers represent the best ever produced. In the grand scheme of tone pursuit, these designs are incredibility important and deserve to be considered treasures.
This is an ongoing project for us, spanning almost three decades now. And it couldn’t have been accomplished without the enormous amount of assistance we’ve received from top players and amp collectors around the world.
What about Axiom transformers? Where do they fit in?
The Axiom transformer line takes over where the limitations of vintage transformer design ended. No bean counters here—simply the sincere pursuit of answering the age-old question: What if there were no constraints on budget, time, or material quality to achieve the best possible performance? That’s our objective with the Axiom line.
Axiom transformer designs represent many new approaches—new tone with the best materials and designs money can buy, so they’re not intended for the timid or the low-budget crowd. Check out our FatStacks and SuperStacks for the Marshall DSL and TSL families for interesting comparisons.
PG: Mercury’s vintage transformer restoration service has been gaining a reputation for quality work. Why would someone want to restore a transformer instead of replacing it? And vise-versa?
SH: Some vintage amp owners prefer to pay the extra cost of our restoration services, because it’s very important to them that their amps retain authenticity. Collectables or rarities are valuable. They’re of the “why take chances” mind. The high road. But on the flip side, we have pro musicians who insist on touring with their vintage gear. To play it safe, and not sacrifice the tone of their original transformers, they have their techs replace the stock transformers with Mercury’s. By doing this, they preserve the original transformers from road abuse while taking advantage of our reputation for tone, durability, and warranty. Restoration of vintage transformers is a tricky and highly specialized art. Sadly, too many of the great originals have been lost forever due to technically inept and musically disinterested people. We see attempts at “rewinds” here all the time.
Occasionally, it appears some people confuse “demolition” with “restoration,” and the preservation of the original tone is lost forever. There’s no shortcut to doing a proper restoration.
PG: I understand you’re doing all of your labor and get all of your materials in the USA. How does that impact your business aside from just the straight costs?
SH: Well, we figured that someone has to do it—and we really do make everything here with 100 percent American materials. There are plenty of products out there stamped with “Made in the USA,” but are actually assembled with non-USA, low-price materials. But yeah, we’re the real deal and proud of it.
Building transformers that make an amp sound good requires highly specialized technologies, highly skilled labor, and the right kind of materials. We love music and owe it to the players out there to do all the work “in-house,” so we can keep tight control over every aspect of our transformer designs. It’s really old-school military spec style, so our transformers don’t vary at all from batch to batch. If you need a replacement transformer 10 years from now, it’ll sound exactly the same as the one it’s replacing.
We’re hard-liners when it comes to not playing shell games with a musician’s hard earned dough and quest for better tone. Perhaps I’m a fool for doing it this way, but I was brought up in a musically minded family. From a very early age, I was taught that music is as important and necessary as food. If there is a day our services are no longer needed or appreciated, I’ll pursue my dream of owning a car wash in the valley, and get into the business of making money.
PG: Any new or exciting projects in the works at Mercury?
SH: Yes, but we’re planning on releasing the news sometime around summer. For quite some time, we’ve been fielding requests for accessories to accompany our transformer line. We’re being asked to apply our know-how to other aspects of guitar amps.
PG: Do you have any advice for guitar players and techs in their quest for tone?
SH: Don’t let anybody fool you—every player has the ability to discern the difference between good or bad tone. Unfortunately, there are a few too many self-styled “experts” who irresponsibly dispense advice without having a clue. As a result, we’ve all seen amps completely lose their tone by being modded to death.
There’s no excuse for the old “damn, I’ve done it this way for many years so it must be right” mentality. More than ever, it’s so easy to seek opinion, advice, and help online and elsewhere. I highly recommend the old textbooks from the 1950s and 1960s as a good place to start on vacuum tube audio circuits.
Do your homework and follow what the smart players are doing—improving your tone isn’t that elusive. If what you have sounds good to you, leave it alone. But if you know your amp’s tone could use some improvement, then start where it begins… the transformers. PG

So first things first: an important disclaimer. Modifying an amplifier is serious business, especially when tubes are involved. These amplifiers contain enough voltage inside to kill you, no joke. These kinds of mod kits are intended for people who know what they are doing with electronics. So if you have never used a multi meter (or don’t know what it does) and are not very handy with a soldering iron, these modifications are best left to a professional.
I had heard many good things about the Mercury Magnetics Upgrade Kit for modifying a Epiphone Valve Jr. amplifier. I believe my first encounter with the company was via an ad in Vintage Guitar Magazine (proof advertising actually works!), which prompted a little Internet sleuthing on the subject. My initial searches lead me directly to YouTube, where I found a good collection of demo videos on both the stock Epiphone Valve Jr. and Mercury modified version.
I will say right off the bat that the stock Epiphone (for its price point) is no slouch; it has a good tone for blues and rock and a classic look to it. But after watching some before-and-after videos I was convinced that it would be a worthwhile project.
So with that I purchased two Epiphone Valve Jr. heads and requested a kit from Mercury so we could modify the amp and then see how it stacked up against a stock unit. Phil Manley was the perfect guy to take on this project for GuitarFixation. Phil has a wealth of experience with electronics from building his own fuzz pedals to repairing amplifiers. Phil also has a well-stocked workbench in his garage (yes, a garage in San Francisco — there will never be a time that I don’t covet his garage) that includes a quality soldering iron with adjustable heat and a large assortment of tools, parts, and meters. Again, this is really a project for an intermediate; I would not recommend this to someone who is picking up a soldering iron for the first time.
With all of the parts together I headed over to Phil’s on a foggy San Francisco morning and we began the modification. Pulling the amplifier apart and removing the components was a simple enough task, as Mercury includes a disk with the kit that contains a huge manual and some videos. The only real issue with the instruction manual was that it had almost too much information. The manual is for all three versions of the head (current production is version three) and that made them a little hard to read because the document was referencing all the versions on one diagram. That being said, the instructions are very thorough and it is a good idea for you to read them a few times before you start. [Editor’s Note: Always RTFM, boys!]
Discharging the caps on the main board is a fairly simple task; you just want to ensure that they are totally drained as to avoid any chance of a shock. We didn’t plug in the amp before we started the modification so there was no juice to be found, but if you are going to use the old screw driver technique, you should remember to ground it. A good way to do this is by getting two alligator clips with a wire in between them and connecting one side to the screw driver and the other to a grounded source. It reminded me of when I use to work on tube television: one had to discharge the picture tube with a flat blade screwdriver — POP!
An indispensable tool for this kind of work is a solder sucker that is used to remove hot solder from a board or component. You simply heat the area till it flows and then you load the solder sucker by compressing the spring. Then simply put it over the area in question and hit the button. This will remove most of the solder from the area (you may have to do it twice to get it all), well worth it, as makes adding the new components much easier. You can get one from Radio Shack, but beware their tiny under-$10 model. Be sure to get a half decent one that has a lot of suction to clear away the solder. I recommend the “Edsyn Solder Sucker” it is the one Phil is using in the video. You can get an Edsyn from MarkerTek for about $24 — you can get it HERE.
A Dremel tool will also serve you very well for the modification of the amp. I ended up buying one after Phil had already completed all of the trace cuts on the board (sorry Phil!) The Dremel would have made these cuts worlds easier when compared to using a flat head to scrape away at the trace. If you are not going to use a Dremel then you will want to double check the trace cuts with a meter set to continuity and to ensure that the cuts are 100% or you’re in for some trouble down the road. You will also need a step bit if you decide to do the 6V6 mod, but you could always use a drill and Dremel like we ended up doing when the local hardware store came up flat in the step bit selection (see the video).
So to this point Phil had been working on the amp for a total of five hours, but we had taken a few minutes for lunch and had to make a trip to the hardware store. So in reality I would say this first section took Phil roughly two and a half hours. If you were working alone without someone pointing a camera in your face I think you could have it done in less than two hours. So far the kit is straightforward and easy enough to work on with a reasonably clear set of directions to work from (but be sure to print them in color!) The fun will continue in part two as Phil really gets into the nitty-gritty of this amp mod.
Now on to the installation of the installation of the transformers and Mini-Choke. You want to pay close attention to the directions in terms of how to twist and dress the wires in the chassis. The way you dress your wiring can mean the difference between an amp that is a quiet monster and one that is not even usable. You would not believe the difference a clean, tight wiring job makes on a tube amp!
The re-soldering of the components to the main PCB (printed circuit board) is a fairly simple task, there is not too much that you need to be on the look out for. I had mentioned in part one that you will want an iron that has a variable temperature control; this really comes in handy when you are soldering the resistors and caps. You don’t want to overheat these components as you may damage them and degrade their performance. A high-quality iron is one of the most important tools for this kind of work; it will make all the difference in the world in terms of ease of use and component damage. I also recommend that you look at getting some high quality solder. I use Cardas Quad Eutectic Solder and it is very easy to work with. This solder flows very quickly and has saved me many times from damaging components. The Cardas solder is a tin/lead/silver/copper mix and it is what I use for all of my cable and electronics projects.
Adding the resistors to the 6V6 tube socket is easy, but you will want to ensure that you have a pair of needle nose pliers. It can be tricky to navigate inside the chassis when you have the main board inside, and you’ll want to be extra careful that the iron tip doesn’t hit anything important! You might also notice that when the directions call for you to widen some of the holes on the PCB that the drill bit they call for may not widen out the hole enough. We found that some of the wires were a little too thick for some of the holes, so Phil ended up stepping up to the next bit for some extra wiggle room.
The center tap lead of the power transformer ends up being soldered to the underside of the main PCB board. The directions are not 100% clear on how to go about this, but with a little reading we found that you would need to scrape off some of the coating on the board till you get to the trace below it. For this part, you’ll need to go slowly and may not want to use the Dremel, as you will not want to cut or damage the trace below.
Once you have completed all of the steps on the board, it is helpful to double-check your work to make sure there are no cold solder joints or messy wires. This is the time to do any clean up on the board and neaten the wires. The directions include tips on making the interior nice and neat. Again, stray wires can cause you an unbelievable amount of trouble. You may also want to verify continuity on the trace cuts and the new parts that you soldered.
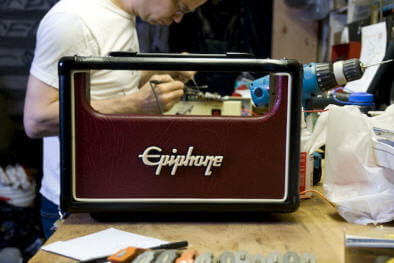 The other piece of equipment you’re going to need for this modification is a Variac and if you don’t own one, you’ll need to borrow it. So why exactly do you need one? The Variac will allow you to slowly bring the amplifier up to its operating voltage so you can monitor the amp using a voltmeter to ensure that everything is working correctly. In this case, we pulled the fuse and metered across the terminals to ensure the amplifier was maintaining its correct working voltage. Had the voltage gone past the correct level we could quickly and safely cut the power and not damage the amplifier. If there is an issue you will see the voltage spike well above the recommended level as you are turning the variac up. Also, if you happen to start smelling smoke as you turn the Variac up then you’ll want to immediately kill the power and double check everything.
After we verified that the amplifier was working at the correct voltage it was time to plug in and turn it up! Right from the get go, you could tell that the Mercury Magnetics kit had brought new life into this little amp. The tone was immediately complex and rich, not loud or brutish, but smooth and inviting. There was also the immediate feeling of success; there is just an all around good feeling when you complete a project and hear it working for the first time.
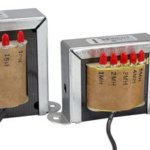
Mercury’s NEW MultiChoke offers you these important benefits:
Think of a choke as a shock-absorber for your amp’s power transformer. Did you know that upgrading your tired old or wimpy reissue stock choke — or adding a Mercury choke to an amplifier that doesn’t have one* — will actually extend the life of your power transformer and rectifier?
*Amp manufacturers often cut costs by the use of a resistor in place of a choke. This choice has absolutely nothing to do with tone, it’s purely economic. Replacing that resistor with a choke is a low-cost upgrade that’ll usually give you a huge improvement in tone.
Your amp’s tone noticeably improves with any peaked and tweaked, hand-tuned choke from Mercury. Mercury users tell us that they hear a tonal richness that was not there before adding one of our chokes. Why? Because a choke provides musical smoothing to your amp’s circuit. It also has a huge impact on touch-sensitivity and tone dynamics.
A choke is so much more than a simple inductor. It can also store energy like a capacitor. Better voltage regulation results from using premium-quality chokes. The choke puts less stress on your power transformer and permits higher load currents to be drawn from vacuum tube rectifiers without exceeding their peak current rating. This means life extension for your tube rectifier — and even solid-state rectifiers run happier!
Mercury’s NEW MultiChoke is in a league by itself. The MultiChoke allows you to quickly and easily audition several different choke values to determine the best possible fine-tube the tone from your amp. And, the MultiChoke saves time and money by eliminating the need to purchase a stack of single-value chokes — not to mention all of the added time needed to solder/de-solder leads for your tests.
Depending upon your needs, Mercury offers several MultiChokes with varying value sets. Currently available sets include:
Mercury’s MultiChoke come in 3 sizes* with these center-hole-to-center-hole mounting dimensions:
*Check our catalog for size availability.
For a little dough, and some help from Mercury, you will be on your way to having a better sounding amp.
Also see our adaptation of the MultiChoke to the Orange “Tiny Terror” Upgrade Kit.

Did you know that Mercury™ has been developing and perfecting THE next-generation of guitar amp magnetics? When it comes to guitar tone our Axiom® series may be one of the most significant advancements since the mid-1960s.
Here’s why. We now have the “rear-view-mirror” benefit of knowing what made certain amps sound good… and just as important — what didn’t. Mercury was the first, and still is the only company, to capture and retain the sound of the most desirable old school amps with our ToneClone® series trannys. But, along the way, we discovered that we could now do things the old school guys never dreamed of. The Axiom® series was born!
Our Axiom® series answers many of the “what if” questions that has plagued both players and amp designers for decades. For example: What if you could mix the characteristics of one amp’s outstanding magnetics with another — say, get both Fender– and Marshall-tones from the same amp without the lifelessness of digital emulation? Or, what if there was no quality limits imposed on how transformers were made (you wouldn’t believe how dumbed-down most transformers are!)?
The Axiom® series isn’t only the result of engineering expertise. We received profound contributions from many of the finest players who ever recorded—musicians who generously gave their insight and direction to this on-going project. Axiom® “high def” transformers take your tone, clean or distorted, to the next level. Axiom-ized amps give you more vivid harmonic overtones, added sparkle, more dynamic headroom, and much better note separation. Even if you’re into weapons of mass distortion, Axiom® transformers deliver a far wider spectrum of tonal variations and possibilities than any previous design.
So, whether you’re upgrading an existing amp, or working on a new design, give our Axiom® line a test drive—you won’t be disappointed.
Source: https://mercurymagnetics.com/pages/_misc/FAQ.htm#Next-Generation%20Trannys

Output Transformer Bobbins – Is Paper the Real Gold Standard?
I’ve heard it repeatedly: Paper bobbins on output transformers in tube amps are somehow better than plastic bobbins. Is this version of the adage “They don’t make them like they used to” true or false? Or, is it a bit of both?
Transformers used to be wound on cardboard formers, which were hollow “sticks” of glued-up cardboard about three feet long. The hollow within offered just the right dimensions needed to slip the transformer laminations snugly inside.
Winding-machine operators would place the bobbin-forming “sticks” onto big machines and then wind several coils at the same time, spaced out along the stick. Each separate section would be wound with primaries and secondaries, stacked atop one another just the way they would be in the completed transformer.
The finished stick was cut into sections, each section being long enough to hold one set of coils. These sections each became the entire windings for one transformer. That’s how the term “stick wound” originated in regard to those transformers. They were literally wound on a stick. Almost all the “golden age” transformers—the good and the bad–were made this way. It was simply the cheapest way to produce transformers in high volumes.
Transformer vendors eventually came up with the concept of using plastic bobbins for the windings. These bobbins formed a protective insulating layer on the ends of the coil, as well as between the coil and the core. They could also be produced on new automated winders at a cost that was even lower than stick-wound transformers. Manufacturers looking to reduce costs jumped onto the plastic bobbin bandwagon and wrung a few more cents out of their transformers.
Critical musicians, however, noticed that the new plastic-bobbin transformers didn’t sound as good as the old ones. Not surprisingly, they noticed the plastic bobbin and made the connection: Paper was good, but plastic was bad. Is that assumption correct? No.
The plain fact is that both cardboard and plastic are completely invisible to magnetic fields, and neither one makes any difference in the functioning of coils that are otherwise identical. The difference in performance is determined by how carefully the windings are designed and done, not which bobbin material is used.
It’s possible that sloppy winders adopted plastic bobbins to hide their work, but that has nothing to do with the bobbin. After all, it’s also possible to wind coils poorly onto cardboard. If the assembly worker is skillful and patient, then either bobbin material could be used with equal results.
On the other hand, something that really changes a transformer’s performance is something you never hear about: whether the transformer is impregnated or not. Impregnating the transformer—or, filling all the voids inside it–will always increase the unit’s self-capacitance because the air is replaced by varnish, polyester, urethane, beeswax, etc. A transformer that isn’t impregnated will always exhibit better high-end frequency response than an impregnated one that’s identical in every other respect. Technically, this is because air has a very low dielectric constant and the impregnating materials all have a higher dielectric constant.
So, is the way Leo did it better because he used paper bobbins? Sorry, but it isn’t.

Working inside a tube amplifier can be dangerous if you don’t know the basic safety practices for this kind of work. If you aren’t prepared to take the time to learn and apply the right precautions to keep yourself safe, don’t work on your own amp. You can seriously injure yourself or get yourself killed! This is not intended to be a complete guide to safety in tube equipment, just to hit the high points as refresher for those of you who have some experience. The best way to learn the requirements and practices for safety in tube equipment is to find someone who will teach you one on one.
Source: https://mercurymagnetics.com/pages/_misc/FAQ.htm#DISCHARGE_THOSE_CAPACITORS!!!
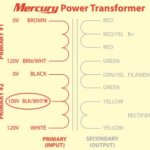
CAUTION: Any changes in the configuration must be performed by a qualified professional.
WARNING: With a Mercury Universal Voltage Primary power transformer BOTH primary windings MUST be used. Failure to use BOTH windings will damage the power transformer.
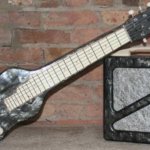
It seems as if almost all of our clients have at one time or another, purchased something online. Often a funky old guitar or amp that was acquired at, what seemed to be at the time, a decent price. We hear the same words uttered over and over again. I just got an amazing deal on this at e… (rhymes with hey) but I think it needs a bit of work. Often, the amount of work required to transform the instrument into something playable makes the “great deal” now seem like a thorough hosing. Sometimes items come with a trial period in which the buyer can return it if doesn’t meet his/her expectations. Other times the piece may be salvaged or kept, though unusable, simply because it has a certain amount of character that makes it worth having if only for a wall hanger.
This month we’ll be taking a look at one such project. It involves a Magnatone lap steel and amp set.
A client purchased a beautiful (and very early) Magnatone lap steel and amp set. They were brought into our shop to have a basic “check and clean” done to the amp and to have the lap steel repaired/restored. The lap steel needed to have the tuning machines replaced as the buttons had deteriorated to the point that they were now little ratty stubs that needed a pair of pliers to aid in the tuning process. A similarly styled set of Tone Pros 3-on-a-strip tuners were installed, scratchy pots were salvaged with a bit of electronics cleaner and some minor setup work was done to level the string heights at the nut.
The amplifier was powered on to see if it was working and to listen for any nasty noises that would need to be addressed in our “check and clean” procedure. Surprisingly, the amp sounded pretty darn good. It had a very unique character to the break up as the amp was pushed into distortion. The amp was then disassembled to check for leaky caps and resistors that may have drifted out of spec that would cause the voltages to swing to unsafe/improper levels. First I tried to locate the power transformer to get my bearings. Hmmmm, strange I thought, no power transformer! Then it dawned on me. This amp is running on pure AC!
While this isn’t that unusual in very early amps and it certainly contributes to its unique tone, it’s also very dangerous. One leg of the AC is tied to the chassis as a buss in the same way a ground would be in a more modern design. This would almost be okay if the instrument being played through it had the strings isolated from the electronics (though it’s still present on the metal chassis). However, in most modern guitars, the strings are attached to the ground. In this instance it means that the player now has one leg of the AC on his/her strings! This puts me in a rather precarious position. As the tech and owner of the shop, there are some obvious liability issues associated with this project.
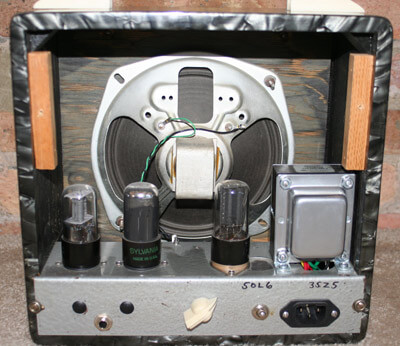 The client was consulted and told of the dangers that lurked within this design. As he loved the look and character of the box, he gave me the go ahead to build a simple and more “modern” (late-’50s) design into the existing chassis. A promising schematic was found (a Valco of some sort) that used a 6SL7 octal preamp tube a 6V6 and a 5Y3 rectifier. This design was chosen simply because of its funky character, which was thought to be in keeping with the original design.
The build was a bit tricky as the amps chassis was quite small and was never made to carry the bulk of a power tranny. Every component was stripped off and the task of figuring out a layout that was physically possible, considering the tight space, begun. It was necessary to make a metal plate to cover a hole left by one of the tube sockets that had to be relocated to make room for the new Mercury power tranny. The output transformer had to be located inside the chassis due to lack of room caused by the speaker’s magnet protruding into the optimal space. New holes had to be drilled/punched for the input jack, transformers, IEC style AC socket and tube socket.
It’s freeing being charged with the task of simply making something funky that works. Certain liberties can be taken in component selection that wouldn’t necessarily be considered when shooting for a dead silent recording amp or a rock solid touring amp for example. I was able to use some really neat Soviet-era paper in oil caps that I found while traveling in Bulgaria last year as well as some interesting carbon comp resistors acquired at the same time. Fortunately, the original speaker was still in good shape and was reused.
Mission accomplished. The end result was a marriage between over-the-top vintage form and functionality. The amp was transformed into a safe and usable conversation piece and I’m told, gets many hours of use a week. While this project may not have been the most economical way to go about getting a small practice amp, it did end up salvaging a very cool set and making it safe and enjoyable for the proud and happy owner.
Source: https://mercurymagnetics.com/pages/news/PremierGuitar/PremierG-28.htm

Calabasas, Ca (October 20, 2010) – Vintage guitar collector and reseller Fretted Americana is now in the electronic production business with the release of its new Evil Robot guitar amplifier. The first production run of 100 pieces, all made by hand in the USA, are now available for order.
Inspiration for the new Evil Robot comes from the 1959 Tonemaster Troubadour 214 amplifier, built by the Chicago-based Accordion Company. Originally produced for accordion amplification, it quickly became a favorite of guitar players, sought after for its tone and its ability to create a controllable vibrato. An original Troubadour found its way to Fretted Americana through guitarist Phil X and it quickly became a favorite of customers. After receiving countless offers on the amp, Fretted Americana made efforts to not only to duplicate, but to improve upon the original. This work led to the creation of what is now, the Evil Robot.
The Evil Robot is a Class A, 18-watt, 1×12 combo guitar amplifier constructed of Baltic Birch. The cabinet is a semi open back and houses a 16 gauge steel chassis and one 12” 8 ohm handmade speaker. Internally, all assembly is point-to-point hand-wiring and includes hand-wound, ear-tuned transformers made exclusively in the USA. Cosmetically, the amplifier features a custom vintage brown vinyl, classic gold mesh grille cloth and a heavy-duty, vintage style black handle.
Keeping with the vibe of the original, the instrument control panel has two separate high and low gain inputs with individual loudness controls and a master tone knob. The foot switchable vibrato utilizes two separate potentiometers: one controls the speed and a second controls the intensity. Completing the panel is the on/off switch, red LED power light, remote speaker jack, screw cap fuse holder and a three way slide switch for additional tone control. MSRP $1595.00 USD
As acknowledgement for his contribution, each Evil Robot bears the name of Phil X, silk screened onto the control panel. Phil works extensively with Fretted Americana as the host of over 250 videos produced to demonstrate, promote and sell the inventory of Fretted Americana. As with the walk-in customers, viewers were often inquiring about what amplifiers were used in the videos and where they could get one for themselves, further prompting the development of the new Evil Robot.
Fretted Americana is now seeking to establish domestic retailers and international distributors.
For more information
Fretted Americana
Source: https://www.premierguitar.com/articles/Fretted_Americana_Releases_First_Amplifier_the_Evil_Robot
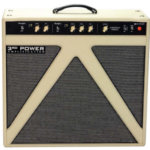
American Built, American Vibe
The American Dream is a 1×12 combo utilizing a Celestion Alnico Gold speaker housed in a very striking and unique cabinet. The cab incorporates 3rd Power’s triangular speaker chamber, which is designed to eliminate standing waves and enhance clarity. There are two vents that let sound escape through the sides of the amp, as well as a removable triangular back panel that lends a touch of open-back sound. With its white Tolex and salt-and-pepper grille cloth, the American Dream looks very mid-century American. And adorned with a black control panel with white
The front panel is fairly sparse, given there are two channels available. From left to right, Channel 1 (the “brownface” channel) features an input, Bright switch, Volume, and Tone controls. Channel 2 (“blackface”) also has an input and Bright switch, but is followed by Volume, Treble, and Bass controls. A global Presence knob and 3-way switch with settings for 22 watts, standby, and 10 watts is adjacent to the Power switch and jewel light. The back panel has an IEC power input, fuses, and four speaker outputs (16Ω external, 8Ω internal, and 8Ω internal + 8Ω external).
The American Dream runs on a pair of 6L6 power tubes and boasts a two-stage preamp that uses 12AX7 preamp tubes. Staying true to the vintage concept, there is no effects loop or reverb on the amp.
Plug and Play
Because it’s not bogged down by bells and whistles, getting a good tone with the American Dream pretty much comes down to plugging in and playing. You’d have to work hard to get a bad sound out of the amp, but make no mistake — that doesn’t mean there isn’t a lot of tonal variety inside. Plugging my Les Paul into the Brownface channel, I dialed in a killer, dirty tone that conjured up sounds reminiscent of the first Montrose record. There was some of the low-end splatter that comes from a cranked Fender, but that’s part of the charm of playing this style of amp. Note definition and clarity was superb and dynamic response was excellent. This is a very touch-sensitive amp. Without accessing the guitar’s volume knob, I went from clean to dirty just by digging in harder with the pick — and this amp likes hard picking!
Like many vintage brownface amps, there is less headroom and the mids bark a little more. But the triangular internal design and side vents open up the sound and give it a wide, dimensional quality that feels like full-blooming stereo compared to the highly focused and compressed projection of a normal, closed-back cab. Removing the triangular back panel lets the amp breathe even more, and the tone opens up accordingly. Engaging the Bright switch adds more top-end spank and chime, while the Tone control, though somewhat subtle, offers plenty of range.
As I explored this channel, I found the global Presence control becomes more effective as the amp revs up in volume. This control is voiced in such a way that the tone never gets harsh or brittle, just fuller and more cutting in the mids.
Clear as Black
Moving to the Blackface channel gave me more headroom and clarity, making the American Dream perfect for mating with pedals. The combo revealed the full character of just about every pedal I threw in front of it. If you’re a guitarist who favors pedal textures, this amp makes a perfect blank slate.
 Switching guitars to a Fender Stratocaster made it clear why the combination of Strat and Deluxe has always been so revered. From the first chord, the American Dream was bold, chimey, clear, and powerful. The response of the amp felt like an extension of my nervous system. It was both immediate and springy, giving me the feeling of the guitar being played back from the amp. Typically when I play with this clean of a setting, my amp feels a little too unforgiving, but in this case it was positively inspiring. At full volume, the American Dream gave way to a beautiful, blooming gain that was warm, detailed, and willing to get rude with a little force from my right hand.
When I switched to the 10-watt output setting, I experienced an apparent, but not huge volume drop. The most obvious change was in the response. It became a little darker in tone, but there was also a spongier feel and faster breakup in the tone. I liked this setting for pushing the amp and getting some grit without killing everyone in the house with volume, and I could see the effectiveness of this option for clubs. It’s a great feature and adds useful tonal variety to what seems like a very simple amp, when you look at the front panel.
The Verdict
The American Dream reminds you how much you can do with simplicity, and how a few knobs can offer a wide world of tone. The innovative cabinet design opens up a new dimension in sound dispersion, and the amp makes you never want to quit playing. For all its clarity and richness, it makes pedals sound terrific. And while it isn’t a small combo, it doesn’t weigh a ton. It’s easy to see myself taking the American Dream along with a few pedals to just about any gig and getting every tone under the sun. One can dream, right?
Buy if…
you love classic American tones and want a perfect blank slate for exploring pedal tones.
Skip if…
you need a Swiss-Army amp to feel like you’re getting your money’s worth.
Rating…
![]()
![]()
![]()
![]()
![]()
Source: https://mercurymagnetics.com/pages/news/PremierGuitar/PremierG-27.htm
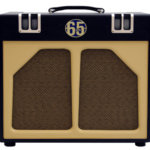
By Design
Designed to produce a bigger and bolder flavor of the great ’60s American amps with more tonal and modern gain options, the Tupelo pushes 20 watts through a pair of 6V6s, three 12AX7s, and a solid state rectifier. The combo is made of 1/2 blind dovetail-jointed Baltic birch and covered in the classic and classy 65Amps black and tan color scheme with gold piping and basket weave-like grille cloth. Like in the Lil’ Elvis, the speaker of choice is a Celestion G12H-30. Front panel controls from left to right are Volume, Smooth switch, Tone, Bump switch, Intensity, Speed, and Master. The rear panel offers a passive effects loop, two-button footswitch jack, dual speaker outs, an 8/16-ohm impedance switch, and IEC power cord input. The power section has been optimized for 6V6s and includes newly designed Mercury Magnetics iron to maximize the tone. The transformers are big and beefy — cool!
Peaking inside the beautifully designed and cleanly laid out chassis, you can see a mix of NOS carbon comp and metal film resistors as well as a selection of Sozo caps. According to 65Amps, they use the carbon comps in the tonal paths and the metal film resistors where stability is critical. The Sozo caps are also a mix of modern and vintage styles. With all of these additions I was ready to get right to it and check out what the Tupelo had to offer, so it was time to plug in.
Big American
I won’t lie — I’ve heard the clips of [65Amps co-founder and Sheryl Crow guitarist] Peter Stroud playing through the Tupelo and was blown away with that big, open jangle and gorgeous, chimey distortion, so I was expecting a lot. First up was my standard litmus test of a 2003 Gibson Murphy Les Paul R8. With the controls all set at about the halfway mark and the tremolo off, the amp kicked my ass right out of the gate. The Les Paul didn’t have the same chime as Peter’s Elliot guitar but I’d expect that from the different guitars. The tone was thick and chewy with a bold and wide bottom end and a killer crunch that had just enough top without being brittle. You could feel the headroom and power on big chords, making me realize just how loud 20 watts is — I was shaking the walls.
Backing off the volume knob on the guitar cleaned the amp up very nicely and brought out the more subtle tones that you only get from that type of combination. Throwing caution to the wind, I dimed the controls and hit the Bump switch. This setting gave me that open throttle feel, similar to my favorite Marshalls where it’s on the verge of feedback and notes effortlessly glide out of the guitar. Because the Master is a voltage control, it works differently than a typical master volume by bringing the voltage down correctly and effectively reducing the volume. At all but the lowest settings it didn’t harshly affect the tone. You can bring it down to a comfortable bedroom volume without killing the integrity of the sound, which is a nice bonus and also useful for late night studio sessions at the house.
The Smooth switch is labeled with a “+” and “-” on either side of the switch. In the “+” position, it acts like a boost of some sort and added a nice edge to the sound while increasing the gain. Both positions sound great, and if you’d like a little smoother sound, you can switch to the “-” position and take some of that edge off. I found this very useful for matching guitars to the Tupelo. In particular, my Strat liked the sound of the “-” position when using the bridge pickup.
Let’s not forget the tremolo! The tremolo is engaged either with the included footswitch or using the Intensity knob. The trem has a unique sound and a depth that I’ve rarely encountered on an amp. With the Intensity set at full and the Speed at the lowest position, it produced a thick throbbing that was syrupy and gooey. Bringing the speed up and backing down the Intensity took the focus off the effect, resulting in a beautiful swirl and depth that added richness and texture to the tone. The effect was so addictive I found myself leaving it on almost all the time, including soloing. It’s that good.
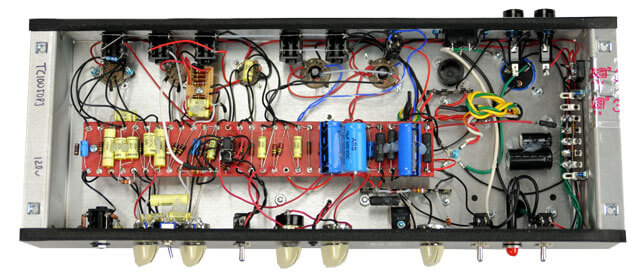
65Amps uses a combination of vintage American Allen Bradley carbon composite resistors and modern 1% Mil-spec metal film resistors in their circuitry. The carbon comp resistors are used in the tone path, while the more stable 1% Mil-spec metal film are used in areas that do not affect the tone as heavily. This creates a unusually repeatable and predictable formula that 65Amps says provides the best of vintage tone and modern stability and safety. 65amps purchased over 350,000 vintage Allen Bradley 5% Mil-spec resistors from the military and can build in this fashion for years.
The Les Paul wasn’t the only guitar that loved the Tupelo. Over the review period I ran a Hamer Korina Special through it with devastating results. The tone was so raw and edgy that it ended up being the star of a track on my upcoming CD. An Epiphone Sheraton matched nicely with the amp and gave off shades of tones that I hadn’t heard come out of that particular guitar before. As much as I loved the dirty tone, it was the semi-clean, backed-off volume knob sound that blew me away and had me playing for hours. A Richmond Dorchester with Lace Alumitone pickups and a Bigsby produced a glassiness and class, and the combination of the tremolo and a little dip of the Bigsby was right out of a David Lynch film. This could very well be my favorite sounding guitar with the Tupelo for cleans and slide.
The amp’s passive effects loop worked flawlessly with a variety of pedals and effects I ran through it. While I don’t usually use effects loops these days, it did bring up the point that if one is designed well there’s no reason not to use one for time-based or other effects.
The Final Mojo
While a lot of amps these days can do a lot of different tones through channel-switching and FX, the beauty of the Tupelo lies in its seemingly simple design. Even though there are only a few knobs and switches, each one of them serves up a potent range and, most importantly, allows the guitar’s personality to shine through. Throughout the review process, I found sounds in guitars I’ve owned for years that never had been heard before — a truly remarkable feat. With enough power to play at a club or in the studio, coupled with a master voltage circuit to cut down the volume when necessary, I’d say 65Amps really nailed it — again! This one’s a keeper.
Buy if…
portable, versatile, big American tone is what you’re looking for
Skip if…
you need more power (what? You’re playing the Enormodome tonight?)
Rating…
![]()
![]()
![]()
![]()
![]()
MSRP $2395 – 65Amps – 65amps.com
Source: https://mercurymagnetics.com/pages/news/PremierGuitar/PremierG-26.htm
OK, so perhaps you’re sold on snatching a stock Pro Junior, but of course, you want it to sound the best it possibly can…. Should you wish to dig a little deeper in the quest for tone, veteran amp builder Ben Fargen has developed a line of Hot Mods for stock production amplifiers – lots of them, including the Pro Junior, and we asked him to describe the inspirational behind his concept for the Hot Mods….
“For a number of years I had a lot of people wanting me to work on their vintage Fender, Marshall and Vox amps, and I really never had the time until the economy slowed down in 2008. A local customer asked me to take a look at a Marshall JCM800, which (laughing) really isn’t the kind of amp I’d usually be interested in, but I agreed to look at it, got in touch with Mercury Magnetics, went through the schematic, and wound up turning it into a really great sounding high-gain amp that would appeal to people who like that sound. I had also done some design work for Carvin when they wanted to optimize a production design and get the most out of it, so when the economy slowed down I began taking in specific camps to upgrade, and from there we started developing mod kits. Customers went just their chassis in, which isn’t expensive to ship; we do the work and ship it back.
Through the later part of last year we were doing about one mod project a day, at first taking in just about anything, but we’ve since whittled it down to specific amps like the Pro Junior, Blues Junior, Blues Deville and the reissue blackface Deluxe Reverb, for example. With these amps it’s not the design that’s the problem – it’s just that the component selection is based on what is most practical and economical for an affordable production amp. We take those amps and optimize the sound as if production cost was not an issue, and we have customers who have had two or three different amps modded now, because they are basically getting a boutique amp and the tone that comes with it.
TQR: In the Pro Junior specifically, what areas of the circuit do you focus on for the mods?
There are really only so many ways to wire up a tube amp circuit, and in most cases we’re focusing on the same key areas in each amp – plate resistors, coupling caps in the EQ and phase inverter, and slop resistor for the EQ, and cathode resistors and cathode bypass caps are huge and often overlooked…. We hone in on the tone-shaping improvements that give us the biggest bang for the buck, and of course the Mercury transformers make a big impact. You can do any of these mods alone and improve the sound, but it’s really the cumulative benefit of using specific high quality components and the Mercury Magnetics transformers that determine the end result where you really hear the magic. We aren’t the only people doing mod kits, but you’ll notice that we use specific brands and types of caps and resistors in very specific places with our mods, and that’s the result of my having build amps for 12 years and learning what specific types of components are going to do in a particular part of the circuit.
TQR: You also added a power supply choke in the Pro Junior you modded for us….
We add the choke because it is so critical to what I call pick dynamics – the note response to pick attack, and improved sustain. Most budget amps just have a power resistor separating the B+ and the screen voltage – it works and does the job, but the correct choke in a circuit really adds a huge amount of that ying and yang you want to hear between the power amp and the preamp.
TQR: And what is the cost of the Pro Junior mod as you’ve done this amp?
With the full Mercury transformer set it’s $499 without a speaker swap. All the Hot Mods are in the $349 to $549 range until you get into 100 watt or JTM45 Marshall reissues and things like that. We’ve also done a lot of mods for the reissue Bassman…. As you know, there is nothing like a great Bassman, and there are a few revisions that Fender made that are just not happening at all, but when you get rid of those they can sound fantastic.
Here’s the deal…. You economically ship your chassis per Fargen’s instructions and they ship it back fully optimized. We asked Ben to send us a Hot Modded current production Pro Jr. for review and we directly compared it to our stock 2001 Junior, fully loaded with our NOS tubes and Jensen Vibranto. The modded amp Ben sent included stock Groove Tubes and a new Celestion Greenbackten.
As soon as we played through the Hot Modded amp, we heard the same dominate midrange push and lack of treble presence we had heard at first in our own amp. Less pronounced with brighter single coils, yes, but still too middy for our taste, so we subbed in the JensenC10Qfor the Greenback and the angels were singing again – sopranos, altos, tenors, and baritones all present I the choir. In fact, both amps sounded similar with the stock tubes in the Hot Mod Pro and our stock model with the NOS tubes – thick, rich and very smooth with excellent dynamic response and full, clear fidelity. Fargen’s Hot Modded Pro Junior possesses smoother, warmer overall tone while our Pro still sounds brighter and a little glassier overall. We suspect that a bias pot and lower voltages would tame the intensity of the distortion, but the 5751 does a nice job as an easy workaround. Fargen’s amp was also a little quieter at idle than ours, although we hadn’t noticed this until we had a quieter amp for comparison. For more information on all of Fargen’s modifications, check out the Hot Mod pages on the web site.
Wizard amps founder Rick St. Pierre has been the amp tech in charge of keeping AC/DC’s Angus and Malcolm Youg rocking for two decades. In the early ’90s he began building amps, and his latest offering is the Modern Classic.
A 100-watt head with a judicious nod to a hot-rodded vintage Marshall, the Modern Classic has a Lexan front panel with on/off and standby switches, indicator lamp, and knobs for Presence, Bass, Middle, Treble, Lead Master (with a pull boost), Lead Gain (pull to activate lead channel), indicator light for lead mode, rhythm volume (with pull boost), and High- and Low-Gain inputs. The back panel has a selector for choosing 4-, 8- and 16-ohm input, two speaker outputs, a line-out jack with its own level control, and footswitch jacks to control channel switching and boosts.
There’s also military-spec turret board wiring, done by hand. The matching black Tolex-covered 4×12 cab with basket weave grill cloth is made of birch plywood and has Wizard’s proprietary Rock 20 ceramic-magnet speakers. It plugs in via a standard 1/4” speaker jack and there’s another for an extension cab.
Teamed with a Gibson Les Paul running into its rhythm channel, the Classic produced the big, wide, full-frequency clean tone that can only be had with a 100-watt amp with large transformers. The tones were firm and in-your-face, as you’d expect from stout transformers and four EL34s.
Turning up the Rhythm channel to full-on grind quickly reveals further benefits. Low-end response stayed tight and focused while the Volume knob was rolled up all the way. This channel is especially nice, given its ability to produce the clean-yet-dirty driving tones that help Malcolm Young do his thing.
With a Fender Stratocaster, you get less dirt, of course, but the tones are equally great; the pull boost does well getting the Strat on more-equal footing with a humbucker guitar. And this is a good time to say that Wizard makes a great-sounding cab. It offers robust tone with great late-breakup characteristics. The custom-made 20-watt speakers sound like a cross between a Celestion Greenback and an Anniversary G12H30 – a great combination of firmness and woodiness. Kudos to the speaker maker. Typical of a well-made 4×12, it weights 85 pounds.
Switched to the Lead channel via the pull function on the Lead Gain control, the tone became a bit less bright and (as it should) offers more gain. Even at lower settings, it has a nice amount of drive no matter which guitar is plugged in. And even at maximum volume, the Lead channel held together with a tight, sinewy tone that never approached mush-out. Running with boost pedals, the amp not only responds well to added input gain, it seems to push back some in terms of touch and/or feel of the instrument.The Modern Classic may not be the ideal club amp, given that its sweet spot is at a relatively high volume (club players should check out the 50-watt version). But it’s designed for the traveling pro who needs an amp that will produce tight, gainy tones from the beginning of a gig until the end. Its build quality is second to none, and tonally, it’s at the top of its class.
As I take the train from New York City to Sommatone Amplification in Somervilles, New Jersey, lush greenery and farms flash by the window and it’s easy to see why the area is called the Garden State. The Sommatone factory is actually part of a three-car garage nestled in the woods behind a ranch-style house abutting a large swimming pool. This is where Jimmy Somma designs and builds some fantastic-sounding heads and combos.
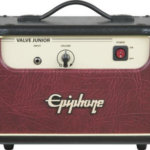
The Epiphone Valve Junior is a small 5W amp head that is first most noteworthy because it is… well, cheap. Especially considering it is a tube amplifier, selling for $129 is frankly a bargain. Because of its simplicity and price, it has had a bit of an underground following being a pure-tube circuit with a single 12AX7 in the preamp stage and an EL84 as its output tube running Class A. The amp has 4, 8, and 16 ohm output jacks to enable a wide use of cabinets.
All in all, with this setup and a single volume control, players can get an idea of how tube distortion and compression changes as the volume is turned up. And it can all be done without the need to put in ear plugs that you would otherwise need when trying similar activity with a 100 watt head.
And the amp on its own sounds o.k. It’s obviously not wildly versatile, but “old school” style players can set an amp like this to obtain as much gain they’d like, then they can clean up their signal by use of their guitar’s volume control. Problem solved. Not enough volume for gigs? Throw a microphone in front of the cabinet.
The Mercury Magnetics Modification
The basics are changing the power and output transformers and adding a choke. There are some additional filtering and component changes. While the amp stock has one EL84 tube, the mod kit adds an additional 6V6 tube that gets blended to increase power.
The documentation that comes with the kit is excellent and really makes performing the mod easy. Our resident amp builder Mike Mullen took the amp further and created a new handwired board for the Valve Junior Kit — just for fun. He also flipped the chassis so that the front of the amp has the mesh screen and makes the amp look a bit more like some of the contemporary designs (you can see this look in the videos).
As one would expect with the change in transformers and the 2nd power tube, the amp is louder. In fact, it’s now loud enough to play with a full band of drums, bass, guitar and singer — unless you have a hard-hitting drummer that is! What you can expect is an overdriven sound great for rock and blues. But if you need clean headroom, you’ll still want to mic it up. The modified amp is very dynamic, with much more clarity and fullness on the lows when the amp is turned up to bring on the 6V6/EL84 combination of tube compression.
Where the modified Valve Junior may now have its strongest application use is for recording. It’s no secret that some of the greatest recorded sounds in rock and roll and blues history were done on smaller amps.
The modification kit sells for $299 through www.MercuryMagnetics.com and those with basic soldering skills can do the job with the step-by-step documentation and CD being a big help. While some may balk at the fact that they now have spent a total of about $400 for the amp, transformers are indeed the heart of the amp’s circuit, especially the output transformer. The output transformer is the final link between the tubes and the speakers, and we know from past tests what a great output transformer can do to improve the tone and fidelity of a tube amp. With the Upgrade Kit complete here, you’ve now got a custom boutique amp for about $400 — which would still be considered a bargain for many.
We recorded a couple of basic videos to show some of what the Mercury Magnetics modded Epiphone Valve Junior can do when plugged straight in just playing some basic blues and rock style lead and rhythm (no Charvel shred-style this time folks).
The first demo uses a Les Paul, the second a Stratocaster.
Source: https://mercurymagnetics.com/pages/catalog/kits/valvejr/LegendaryTones/LT-01.htm

In response to the last month’s devastating flood in Nashville, custom transformer builder Mercury Magnetics is offering to salvage and/or restore flood-damaged transformers free of charge. The process includes inspection and testing, evacuating moisture, and re-varnishing.
“Vintage and rare amps are never going to sound the same if this process isn’t done correctly,” said Patrick Selfridge, Service Manager for Mercury. “There’s a potential tragedy of some historically important tone being lost forever if those transformers are not properly brought back to life.”
Mercury reports a 90 percent success rate using their process. The company can be reached at (818) 998-7791 or via their website, www.MercuryMagnetics.com.
* * *
Also, Music Rising, a campaign launched to aid musicians in the Gulf Coast region impacted by hurricanes Katrina and Rita, has pledged $250,000 to Nashville and the musicians affected by the floods. Co-founded by U2’s the Edge, producer Bob Ezrin, and Gibson CEO Henry Juszkiewicz, Music Cares will aid musicians with the repair and replacement of instruments damaged or destroyed in the recent Tennessee floods.
“Nashville is a treasure chest of Southern heritage and American musical tradition, and is indisputably the world’s country music capital. But it’s more than that. It is also home to one of the greatest concentrations of musical talent on earth,” said U2’s the Edge. “The news of the floods brought back terrible memories of Katrina and when Anderson Cooper of CNN titled his new coverage Nashville Rising, it became obvious what we had to do.”
Anyone interested in donating to Music Rising’s Nashville Flood Relief effort can do so by going to www.GibsonFoundation.org. To apply for assistance, visit www.MusicCares.com.
Source: https://mercurymagnetics.com/pages/news/VGmag/VGAug10-Nashville.htm
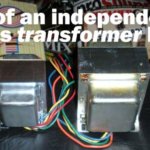
Ernie Johnson writes:
“My brother Joe and I have been fans of old Vox amps for a long time. Not having the ‘spare’ money for one of the originals, Joe decided to build two amps… one for me and another for him.
The amp would have two discrete channels. One channel is a Marshallish 18 with a 6EU7 in the preamp and the other is a Voxish with an EF86 in the preamp with two EL84s in the shared output stage.
So… in August of last year the amps were finished. Not being in any real hurry and enjoying the process of tweaking and learning, we spent the last year fine-tuning the amps. It was fun having two identical amps so we could tweak one… then compare it to the other.
In the end the amps were not quite tonally where we wanted them to be. So… we began to question our transformer choices. The original transformer was obtained from a guitar/amp supply house that was supposed to be ‘THE’AC-15 transformer. (It’s the one on the left in the picture.)
Joe then found a transformer from another supplier that was a little stouter (second from the left in the picture) and installed it in one of the amps. There was a noticeable difference. This opened our eyes a little to the difference a transformer can make.
We started looking around and that’s when Joe and I talked with you, Paul [Patronete], and decided to try one of the AxiomVXO-15W-C transformers you suggested. The difference as I told you before was HUGE! After 2 months I am still astounded by how much better the transformer sounds. Magic, 3D, supercharged, bigger, sweeter, dynamic….
The story doesn’t stop there. Wondering if the big sonic difference was due to the physical size of the transformer—after all the AxiomVXO-15W-C is HUGE compared to the previous transformers we tried—we decided to do one more experiment. We had access to another transformer similar in size and specs to the AxiomVXO-15W-C and installed it in the other amp (third from the left in the picture). NOPE… not the same at all. The other transformer was an improvement over the first two we tried… but it’s still not close to the . The has a much bigger low end, sweeter mids and highs, and somehow that thing I keep calling ‘3-D’ that makes the sound hugely vibrant!
Paul, I know none of this is news to you. I wish we had called you BEFORE we began to build the amps. Your knowledge would have saved us some time!! (Perhaps if we had begun with a , our tweaking process would have been much shorter!) Forgive me for dragging on but I just wanted to again thank you for your advice, and time and caring enough to share your experience with us… and thanks for making the transformers!
In recent years I received many emails from readers about boutique amps. Often the writer complained that the manufacturers usually lack the courage to go in a new direction with a new design: “Is it not possible, today, to do it a different way than Marshall, Fender and Vox have done in the past?”
Too much gets copied and regurgitated. So wrong because, in general, boutique products are already moving along well-trodden paths. The manufacturers complain that a new design is just far too expensive to produce. This is correct, because boutique amps are purchased only in small quantities by buyers. They serve a market that does not really exist. Here and there a new chassis and cab are constructed, but they always remind us of the shapes of the traditional geometry of typical role models.
“A young Canadian residing in Rastatt, Germany, wants to change that now. Bold as a Bang & Olufsen designer, Irving Blacker has devoted himself to a design that immediately splits the guitarist community. The Tonehenge Monolith is already a more than respectable visual statement about tube amp design. Like the unusual guitar designs by Auerswald, Ritterand Teuffel, this product dispenses with all known forms and reinvents it-self according to its own desire. “You will either love it or hate it,” Irving admits laconically. “But I really wanted to do something new.”
The name “Monolith” seems to be in his design message. On the whole it stands 134 centimeters high and the slender column of sound towers above all other so-called stacks. Slim, elegant and thoroughly modern. At the front, solid aluminum ribs protrude like the grille of a Rolls-Royce towards the beholder. The deep-grained wood veneer is polished to a shine, like a high-end hi-fi speaker or a grand piano. That this should actually be a rock ’n roll tool be-comes only apparent after one ponders it for a moment.
How should it be transported? How to combine it with other amps? How does such a construction hold up after the first tour? All these questions can only be answered in the future. One thing is for sure though, something like the Monolith has never been seen before. And it happens to have caused mouths to water from a few pros, too. Carl Verheyen, Joe Bonamassa and Larry Carlton were curious about plugging into the luxury model and were more than pleasantly surprised, because this unique amp sounds damn good.
The Monolith is therefore not an amp, where only the glossy facade conjures quality. To use one of our examples again: Bang & Olufsen has simple Philips technology in-stalled. The Danish noble manufacturer is primarily known as a “wrapping artist.” On the other hand, the Monolith is equipped with the latest technology under the hood. The only things traditional about this amp are the tubes, Mercury Magnetics transformers and Celestion speakers. The rest corresponds to a quality that in guitar amplifiers was previously sought in vain. Irving Blacker and his meticulously selected technical team have literally spent years to put together an optimum in components, which is beyond all known standards.
For example the high-quality potentiometers are usually found only in the most expensive hi-fi systems, as well as the internal wiring, all of which promise high-quality signal processing.
Each amp is also comes fully equipped with cable from Evidence AudioSiren II speaker cable, Mono-rail shielded cable, choice of Lyric or Forte guitar cable, and a power cord that alone is more expensive than a small combo amp from the Far-East. Everything should match together and ultimately nothing should impede an optimal sound. Inside, it looks similar to a modern computer. Instead of solder lugs and vintage plastic-sheathed cables, here is a solidly-built modern high-quality board which is so perfectly made, and as luxurious in appearance, as the gracefulness of the entire Monolith. Even behind the power socket an opulent line filter extends into the interior. Literally everything has been thought through to completion.
The block diagram looks usual for a modern amp. There is a Clean channel with Volume, Treble, Mid, Bass, and a Crunch channel with Gain, Volume, Treble, Mid, Bass. Add to this a Master section with master Volume, master Presence and master Reverb. The latter controls a built-in digital unit that has been specially programmed in Germany for the Monolith. That’s it!
On the back there is a footswitch jack for channel selection, two switchable speaker outputs with 4, 8 and 16 ohms, a variable line-out and an effects loop. It is all just as much as only necessary, but normally enough for the majority of cases. The structure of the Monolith is clear and self explanatory… no voodoo switch, no push-pull pots and no mini-switches!
The towering speaker enclosure houses a CelestionHeritageG12H and a Celestion Alnico Gold, a blend, that according to Irving Blacker, fits perfectly to the sound of the Monolith. With speaker selection though, the customer has a hand in choosing. After all, Irving Blacker sells through his company Tonehenge the Weber speakers on the European market. “There’s always room for wishes,” says Irving. “The Monolith is only a basic framework in which the customer also has a hand in creating.” This also applies to the cabinet. There are numerous alternatives for color, wood and paint. Yes, even cabs painted or carved by artists are offered. On the sample we previewed, we had the chance to admire an airbrush design with attractive guitar art. On top of that is the stunning polished high-gloss varnish. Despite all the modern ingredients of the Monolith it is a cleanly laid out and thoroughbred tube amp.
I would find it easier if I could fall back on describing the sound of known reference samples. But the product vigorously denies this as there is nothing that reminisces Fender, Marshall or Vox.
The clean channel is, for example linear and unswervingly neutral in its tuning that it recognizes neither the strengths nor the weaknesses of the famous classics. Rather, this channel brings all samples to a design of an attractive tube clean sound to a wonderfully catchy blend. You hear the player, not the guitar and the amp! The amplifier is not primarily loud, nor does it roar, but bundles all the nuances of the guitarist. And that is the way it should be! From Volume at position 5 the sound goes into a very fine and pleasing crunch sound, which should enchant mainly blues fans. The tone shines with a fantastic mid-range without any weakness. It sounds warm, dynamic and assertive with a resolution so fine that one can represent all the nuances of his playing effortlessly. Likewise, the tone controls actually work with predict-able quality. From 0-to-10, the filters work continuously and are effortless to operate when dialing in your tone. The reverb unit is reminiscent of a good studio reverb Lexicon; long and deep, without noise and clatter. And perfectly enriches the sound as you would desire it to. The crunch channel offers exactly the same qualities and character as the clean channel, but with much more gain and a little more emphasis in the midrange. The bass sound is a bit slimmer and starts from volume on 3 to really growl. Depending on the gain setting, the Monolith produces a beautiful lead sound that is great for rock and fusion alike. It is a bit reminiscent an early Dumble amp or the tones of players like Larry Carlton, Lee Ritenour and Robben Ford. In this genre, the channel might be more at home than with AC/DC. A singing lead tone with a nice mid-range and very fine-selectable distortion characteristic is the focus of this unit.
As expected in such an exquisite boutique product, the Monolith thus offers not only finest ingredients for the eyes, but also outstanding tone in all parameters. I’m very curious how this conspicuous creation will place in the market but having never encountered something as original I find it hard to believe that this amp will not find its fans. The Monolith worthy of an award, not only in terms of design, but in its technical structure and its sonic possibilities. In any amp test I have rarely been allowed to develop as much curiosity and eagerness as with this amp. Simply brilliant!
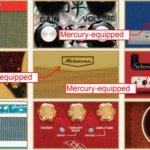
Step Right up, ladies and gents. You’re about to revisit 21 pieces of gear that gave us the proverbial slap upside the head, left us shaking in our seats, begging for more, and screaming at the thought of living in their absence. Welcome to the parade of 2011 premier gear award winners.
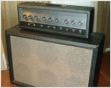
Hi Jeff, The first decent amp I owned was a silvertone Twin-Twelve 1484 I bought from my guitar teacher in 1967 for $100. At some point I traded it, but I’ve missed it. Now I’m in my second childhood, so I just got one that appears to have been made in 1965,. It has all the original components and needs a cap job and general maintenance.
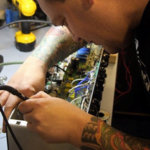
“I’m extremely picky about my tone & Voodoo is the only amp Mod company that gets it right.” Jason Hook of Five Finger Death Punch said.
Trace Davis is Founder and President of Voodoo Amplification, He started his business in the mid 1990s with a small shop in Ithaca, New York, repairing and modifying production guitar amps with his own custom circuits. And now he and his company produce and design some amps that are favoured by such great guitar players Vivian Campbell, Doug Aldrich, Jon Schaffer and George Lynch.

* Hi Trace, how are you doing? please introduce yourself and your company for our readers
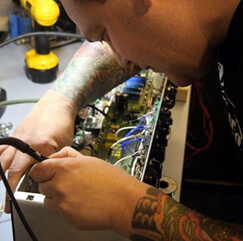 I am doing well thank you. My name is Trace Davis and I am the Founder/President of Voodoo Amplification since 1998 located in Lansing, New York USA.
* Voodoo amp were in the LA amp show 2011, how did the show go for you? Can you tell me about the feedback from people who attended?
This was our first time exhibiting at the LA Amp Show in Van Nuys California. The show was a great success for us and we could not be more pleased. All feedback we received was very positive and we met a lot of great players. It was good to see a lot of old friends and meet many new friends. A good time was had by all and I am happy we decided to do the show.
* Which Voodoo products were shown there?
The rooms were smaller so we had to take limited gear.
We are constantly striving to improve on all aspects of what we do, be it our own high end products or our Modifications. It has always been our goal to not only meet a players need but to exceed them. With this comes improving every aspect of what we do as no player wants an amp that is destined to break down or requires continuous visits to the repair shop because it was poorly designed. Through our Modifications, we strive to improve reliability as well as tone and performance. The Voodoo Amps products manufacture are designed to last a life time.
 * Is there any shocking news that you want to tell us about?
We are proud to announce Mark Tremonti of Creed & Alter Bridge is now using/touring with our V-Rock DL100. It goes without saying that Mark is a great player and we could not be happier to have him onboard.
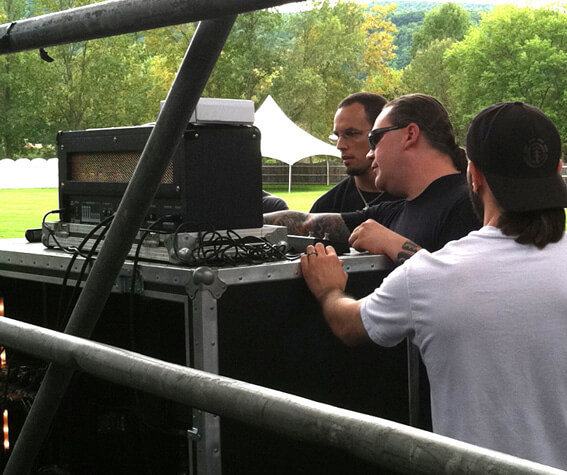
Dialing In Tones on Voodoo V-Rock DL100. From left to right – Mark Tremonti, Trace Davis and Anthony Cacciotti (09-09-2011)
* Great musicians and guitar players like George Lynch, Vivian Campbell, Doug Aldrich and Phil Collen choose to use Voodoo amps products, how did that happen? i meant how do they find out about your products?
That is a good question and unfortunately it is one that has no specific answer as it varies greatly from one player to the next. We have seen every scenario you can imagine but to generalize it I would say it comes through referrals. Some players are gear-heads and are in-the-know through the internet though often times it comes through the referral of their guitar tech and/or another player who is in a band they are touring with.
* and tell me do you have meetings with your clients to discuss their needs?
Yes and that comes in the form of meeting in person and/or though phone calls. It really comes down to what works best for the artist and their schedule. Meeting at trade shows is all well and good (NAMM, etc) but any great player who tours will tell you that they need to hear the amp at stage volume and I whole heartedly agree, which is we always meet players on the road when they are touring.
The V-Plex was the first amp we released. This is a bit of a long story so in the interests of your readers I will try to keep this as short as possible; I used to own an amazing 68 plexi but one day I was playing the amp and lightening struck very close to the building and shorted the output tubes as well as the output transformer. Unfortunately the amp never sounded the same again, which ironically is also what lead me to getting into this business full time (trying to get back a tone that I had lost). Several years later a gentleman brought a very late 68 or early 69 plexi to shop to be serviced. We refurbish/service a great deal of older Marshalls but this was the first amp that sounded the same as my old plexi had and I couldn’t believe it! Naturally the gentleman did not want to part with it so after several offers he finally agreed to sell the amp to us. This amp was the basis for our V-Plex series. , including every minute detail as I wanted to offer an amp that would allow every player to be able to experience the magic is a great sounding plexi, without having to buy/sell numerous older ones in the hopes of finding a gem.
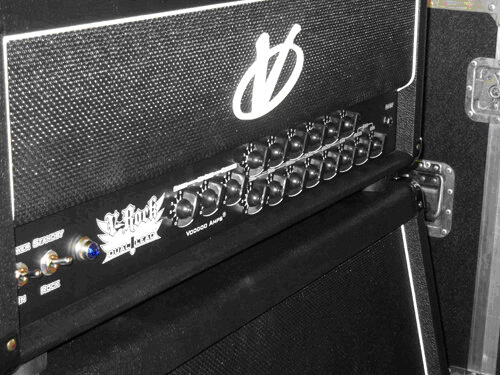
V-Rock-DL100
* What ‘s the company plans for the future? Do you think we will see the day when Voodoo amps are used the same way as Marshall are now?
That is one of our goals, as lofty as it may be. Our primary goal is to continue to build the company the proper way, which is by continually offering the highest quality products and services at the best possible price we can.
Having Modified thousands of tube amps gives us an advantage over others. IE: we see many short comings such as but not limited to; factory defects, premature failures, poor layout (hand wired or PCB/printed circuit boards), etc. This knowledge directly helps us to build a more reliable and bullet proof amplifier that will last a lift time.
Joe Stump & Trace Davis, NY Amp Show
* Tell me about yourself, how did you choose this path for your career? how did you find that you’re interested in designing guitar amps and creating new products?
I actually grew up around it. My father worked for Westinghouse Corporation making and over seeing the manufacturing of vacuum tubes. As many know Westinghouse made their own high quality brand of tubes but they also OEM’ed tubes for other well known companies such as RCA, GE and others. I also come from being a session player, recording engineer and a live/touring player. I truly cannot imagine doing what I do without having all this experience to draw from.
Our goal is to continually grow the Voodoo Amps brand to be as large as possible without sacrificing our high standards through which we built this company. I was raised with the mantra that “anything worth doing is worth doing well” and I intend to adhere to that.
What many may not realize is that we design products for other amplifier and pedal companies and have been doing so for the past 5 years. There are many larger companies that manufacture in China however Voodoo Amps has no plans of doing so. As such we offer our services to help design a better quality product that can still maintain its present price points. Having literally Modified thousands of amplifiers we have seen all the short comings (IE: design flaws, factory defects, etc) and this gives us a unique edge when designing. More to the point, we know what not to do and as such product reliability can be vastly improved with little to no additional cost.
As we are bound by NDA (Non-Discloser Agreements) I am not at liberty to disclose names at this time. Many reading this may ask why I would bother and the answer is simple; there are young kids cannot who cannot yet afford the products Voodoo Amps manufactures. I come from humble beginnings so I can relate to that on many levels. Learning to play guitar changed my life and as such I believe it’s important to inspire kids to play. If I can help to do that by taking part in improving/developing a product they can afford – I am more than happy to do so.
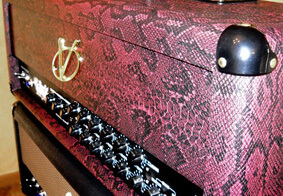
Custom-Shop V-Rock DL100
As the largest Modification company in the world we fully realize that one-sizefits- all does not work for everyone. There are players who have specific needs and/or are looking for tones that go outside of what is commonly. We are here to meet those needs, which is why we offer Custom Modifications. To follow suit we also have our Voodoo Custom Mod Shop. Through the Custom Shop we offer both single channel as well as multi channel models and are set up to meet the most demanding needs.
A great deal of time and experience goes into the production models we design and manufacture. Our products (and Mods) have been on tour all around the world numerous times and continue to perform flawlessly night after night.
This is a common question and one I receive at least once a week. What I am about to say is not meant to deter one from entering this business but rather it is an honest assessment at the time of this writing. This is a difficult and hard business to enter, it is honestly a labor of love. If working on amps is a passion then I would recommend doing it on the side (IE: have a good day job/career to rely on). The good news is that the cream always rises to the top and yes it can take some time.
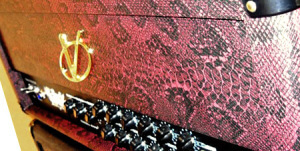 Having worked as both a session/touring player as well as recording engineer and I understand that an amp not has to sound good but it has to equally feel good to playing. An amp has to sound good in the room so that its inspiring to the player but it also had to sound good under microphones, both live and in the recording studio.
I always strive to learn some thing new every day. We are constantly looking for new ways to improve our products and the journey to understanding every aspect of what effects tone is part of the alchemy or the art if what we do. Mathematics and oscilloscopes only take you so far, from there you need to use your ears to tell you what sounds right and use your hands to know what it feels like when playing on the amp. More over, having worked on some of the most famous amps in the business and having been blessed to work with so many talented players has given us all helped to give us a distinct advantage.
In short – we are obsessed with tone. We have worked with some of the most demanding players out there and I always look forward to the challenge. Tone is a matter of taste and as with all matters of taste there can be no right or wrong.
Thank you Trace, Wish you all the best.

“The Amp Show is about finding your sound and creating your reality as a guitar player. Most of the people who come to the show are guitar players that wish they had the key to make a living doing what they love. They come to the show to purse their passion and find the gear they dream about to create their own tone. They want to get advice from guys that have found all the little secrets, to follow their bliss, and actually do what they love.”
-Loni Specter

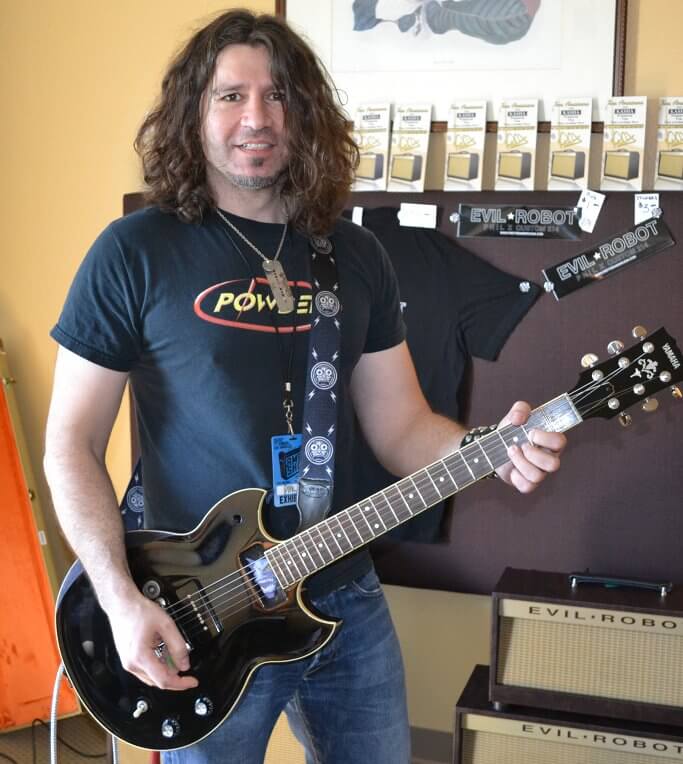
The Amp Show was created seven years ago when Loni Specter learned that there was huge interest from boutique amp makers, wanting to show their work to guitarists and other amp manufacturers. The first show was held at the Airtel Plaza Hotel in Van Nuys California in 2005, and hosted twenty-five exhibiting rooms.
What sets this convention apart from other gear conventions is that each manufacturer has their own private room to demonstrate their equipment. This affords each company the ability to sonically isolate their product in the proper environment, and gives the consumer the chance to listen to the newest gear without distraction.
The LA Amp Show continues to be held at the Airtel Plaza Hotel in Van Nuys California every October, and The New York Amp show is held in New Jersey every June. A new Amp Show convention will be held in Anaheim California in January, and will focus on American manufacturers.
Specter has shaped the show to cater specifically to the fine art of critiquing and “cork sniffing” righteous amp tones. Bands performed at earlier conventions but that idea was nixed due to lack of interest. In its place, panel discussions were staged with professional musicians, amp makers, and attendees. These Q&A sessions have proved to be a great way for gear freaks to interact with industry professionals, and get answers to burning questions covering a variety of topics.
Specter offers another aspect of the show that distinguishes it from other gear conventions, “The show was never intended to have a thousand people in attendance. It was only meant to have only the true seekers of the golden tone come here. I keep the price of admission at twenty dollars. It’s always been twenty dollars so that little kids that you see wasting your ears at the big stores aren’t here. It’s a planned filtering system so that the companies that come here’s time is maximized. They’re interfacing with people they can relate to, so they aren’t wasting their time.”
The 7th annual 2011 LA Amp Show on October 1st and 2nd exhibited over fifty amp manufacturers and makers of guitars and guitar accessories. Manufacturers donated door prizes for the two-day event, and attendees were able to rub elbows with some of the greatest guitar players and amp builders in the world.
Raphael Saadiq guitarist Josh Smith was on hand to demonstrate his new signature amp from Morgan Amplification. “We’ve been working on it for months and it’s unreal. It has the best reverb ever!” Guitarist extraordinaire Steve Trovato could be seen in a number of rooms wielding various Telecasters, blazing away, and jamming with attendees.
Chris Justice from Suhr Custom Audio Electronics showed off the Custom Audio PT100, which is the Pete Thorn signature model head. Pete Thorn later showed up to plug in and drop jaws. The tones were huge! “It’s like a super hot-rodded Marshall. It started out as our standard SE Plus model but through tweaks for Pete’s playing style, it got a lot of forward midrange – really bitey attack, like a really good Marshall but with a sweeter top end,” explained Justice.
Guitarist Phil X hung out to show off the Evil Robot amp line and played some wicked guitar. John Kasha who built the Evil Robot for Phil X had this to say, “The initial design was modeled after the Magnatone 214 but it wouldn’t work in a band situation where you’re trying to get over a drummer. I boosted the power to eighteen watts, and kept the circuit tried and true. It’s hand wired, we kept the 50’s look to it, but kept the tone where it needed to be.”
Blues phenom Kirk Fletcher and Chuck D’Aloia showed off their jazzier side trading licks in the Red Plate Amplification room. Elsewhere, Dweezil Zappa ran the amazing Fractal Audio Axe-Fx II through its paces. The demo was truly mind blowing so I spoke to Dweezil about it, “I was one of the early adopters of it because with the music I was playing, I needed the maximum amount of flexibility to create tones and textures that were originally done with obscure equipment. My dad was like a mad scientist in the studio. He was plugging anything into everything. The Fractal lets you do that, and it keeps getting better and better.”
All the manufacturers shared a great sense of pride in their work. Sam Evans of Cardinal Instruments of Austin Texas typified this feeling that ran though out the convention. He had this to say about his guitars, “I make every one by hand, I wind my own pickups, I use local woods, I mix my own varnishes, and I do what I want. Each guitar has a unique but accessible voice and something that someone feels like they can use. I wanted to build something that someone’s going to keep for the rest of their lives. Not something that’s going to be on eBay next year.”
Overall the show has a laid back and friendly vibe with none of the chaos and confusion of larger conventions. The Airtel Plaza Hotel isn’t a particularly large venue for the convention, but it’s more than big enough to handle all the exhibitors and attendees. It allows for just the right amount of space, intimacy, and a good time for guitarists of all levels pursuing the holy grail of excellent guitar tones.
Source: https://www.guitar-muse.com/the-2011-la-amp-show-3440

We told this was coming.. Tes, when readers ask us to review something, we do our best to respond, and thanks to RedPlate founder Henry Heistand, we received two RedPlates for review. We’ll start this episode by telling you that Henry Heistand appears to be a very clever fellow who is not working in the shadows of that past, which is to say that he builds feature-rich amplifiers that in no way pretend to be vintage knock-offs. Play a RedPlate and you’re firmly treading in the present, rather than mining tone out of a dusty box built by a dead man (or woman—sorry Lily). And that’s fine. There is certainly ample space in these pages for the living, and RedPlates are in fact very lively tools indeed. We asked Henry to give us a glimpse into his background and motivation, and our reviews of the TweedyVerb and BlackVerb follow….
TQR: How and when did you initially become involved in electronics and amplification?
HH: Starting around age 12 playing to the radio and jamming with friends, my first build attempt was a speaker cabinet made out of ½ plywood and covered with yellow carpeting. It had a leopard (spotted) grill cloth and contained 6 speakers recycled from various old TVs and stereos. My first real amp repair was replacing a screen resistor in a Fender Bassman in 1970. I went to college for a year and then played guitar full time until 1979 when I attended electronics school (they still taught tubes). To pay for school I got a part time job at a church organ repair shop that had a “combo” repair department and still played in club bands on weekends. Attending electronics school in the morning and repairing gear in the afternoons was a great way to instantly translate the classroom to the real world. Compared to the tube TVs and tube broadcast transmitters, the tube musical amplifiers were relatively simple. Besides Fender and Marshall, tube amps by Sunn, Ampeg, Gibson, West, Park, Hiwatt, Sound City and all the Supro/Kalamazoo/Dan Electro stuff. If I only had a nickel for every good tube I tossed in the trash back then. Many of those same companies had solid-state amps too along with companies like Acoustic, Kustom, Peavey, Randall, Lab, SG and Roland. It seems like the ’70s was the golden era of guitar amp designers. Although most tube amps have a similar topology, the differences between brands in those days ranged from truly innovative to laughable. On a few occasions when a solid-state repair would come in that was totally fubar, one of the church organ repair guys would show me how to design a new circuit right over the top of the problem area, teaching me the value of having a few simple circuit designs at the ready for emergencies. In late ’82 I got a career job in the computer field, and by ’86 purchased the part of the church organ repair shop that repaired the “combo” gear. The new company was named Music Mechanix and kept the warranty contracts with all the majors for amps, keyboards and P.A.s.
TQR: As you became more familiar with various amp designs of the past, what were your favorites and why?
HH: Thinking back to the tonal memories accumulated during those years spent repairing amps, the most musical of all of them were probably the early ’60s Fender tube amps. In addition to repairs, Music Mechanix did all the popular mods of the day (anyone remember the original Train Wreck Mod pages for Fenders?), many times we would redo almost everything inside but keeping the exterior unchanged. Most of my playing back then was strictly radio cover songs so the quest was always to find the one amp that could imitate everything. Music Mechanix was continuing the warranty station status from the previous owner (established in the ’50s) so every original manufacturer’s amplifier schematic ever released was available as a reference source, residing in 16 large file cabinets. On the side, I kept a little notebook of circuits and mods of interest to use as building blocks.
TQR: Can you describe the lasting impressions created by your study of the experiences with classic amps that have most affected your own design philosophy and preferences?
HH: As a service to friends and regular customers Music Mechanix would take a classic amp (at the time it was easy to get something like a used Bassman for $100) and do Frankenstein amps that were Fender this, Marshall that, with a sprinkling of Vox and Ampeg thrown in depending on the customer’s needs. On the weekends I was doing gigs using a pair of modified Ampeg VT-40s in stereo until somehow I ended up with a Mesa Boogie S.O.B. that had a really innovative phase inverter section controlled by a “LIMIT” knob. A bizarre variation of a PI section’s constant current source, the circuit was not in the RCA manual or on any other schematic. It sparked something in me and from hen on I started doing creative amp mods that were not copies of things I had seen on schematics.
TQR: When did you first begin to sketch out the concept for RedPlate amps, and what did you want to accomplish that would be unique and different?
HH: I had always been fascinated with “sleeper” amps that looked small but sounded big. After selling the repair business I used my free time to do a lot of experimentation on point-to-point builds in a Fender Camp sized chassis, eventually working out how to do a 7 tube, large transformer build in a Champ chassis without noise or oscillation. My favorite guitar tones were the recorded sounds of the Mesa Boogie/Dumble ODS type amps (even before I even knew what a Dumble amp was). A clean singing tone with a hint of character that sustains and blooms is my idea of the ultimate tone and the design goal of all the RedPlate models.
TQR: Can you briefly describe the unique features and differences among the current line of RedPlate models?
HH: RedPlate probably has too many models because we treat the sections as modular building blocks. We start with one of the 3 chassis sizes:
CH1. 15” width with four 9 pin sockets and two 8 pin sockets, transformers up to the 50 watt size.
CH2: 17” width with six 9 pin sockets and two 8 pin sockets, transformers up to 80 watt size.
CH3: 19” width with five 9 pin sockets and four 8 pin sockets, transformers up to 160 watts
Then we use different combinations of the building blocks with the only limitation being the number of controls (physical knob space) and the number of tube sockets available. Building blocks currently in use:
BB1. PREAMP1—Tweed—A single tone knob preamp (Tweed style).
BB2. PREAMP2—Blackface—A Treble, Middle, Bass Preamp (Blackface style).
BB3. DRIVE1—A three knob overdrive section (Gain, Drive, and Level).
BB4. DRIVE2—A six knob overdrive section (Gain, Drive, Level, Treble, Middle and Bass).
BB5. REVERB—A single knob tube reverb with medium decay tank.
BB6. EFFECTS LOOP—A fully buffered serial loop, return level is the master volume.
BB7. PHASE INVERTER—Standard Long Tail pair, very similar to the early ’60s designs.
BB8. POWER AMP #1—40 watts cathode bias (6L6GC).
BB9. POWER AMP #2—50 watts fixed bias/40 watts cathode bias (6V6GC)
BB10. POWER AMP #3—80 watts fixed bias (KT-88).
BB11. POWER AMP #4—45 watts fixed bias/18 watts cathode bias (6V6GTA)
BB12. POWER AMP #5—100 watts fixed/50 watts fixed (6L6GC).
TQR: Both of our review amps are loaded with Warehouse speakers from Kentucky, which we have reviewed before. How extensive are your evaluations of various speakers when creating a new model? Does the same process apply with transformers, tubes or other components?
HH: The current lineup is using WGS Retro 30, WGS British Lead 80 and Eminence Swamp Thang speakers in the combo amps. The decision to use these was based on side-by-side comparisons with other brands (an ongoing process).
Tube selection is mostly based on reliability (as long as the tone is still there). The current production amps use Svetlana 6L6GC, SovTek 12AX7LP (PI tube), and Electro Harmonix 6V6GTA and 12AX7s (preamp).
Selecting individual signal path components is more difficult because side-by-side comparisons can be misleading (no 2 amps are exactly alike). The signal path in current production amps use PS series Orange Drop capacitors and carbon film resistors based on low noise and musical warmth in the tone. RedPlate Amps has a good relationship with Mercury Magnetics and I like to use their transformers in most models.
TQR: How does the half power switch function in your amps, as well as the “mode” control and various voicing controls?
HH: Depending on the output section, 3 methods are used:
1. 6L6GC 100 watt/50 watt—The switch lifts two of the four tubes by 10K so they are effectively out of the circuit yet the impedance selection is still valid.
2. 6V6GTA 45 watt/18 watt—Full power runs two of the tube in cathode bias and two in fixed bias, the switch lifts the fixed bias tubes by 10K to effectively remove them without changing the output impedance.
3. 17 Watt (Hi/Lower)—This switch just lowers the voltage to the phase inverter tube so the amp breaks up sooner. There are two different styles of mode switches. On the Tweed style preamps the 6 position mode regressively reduces midrange and preamp output to imitate a Blackface style amp. On the Blackface style preamp the 6 position mode switch progressively fattens the midrange to imitate a Tweed style amp. Most of the models also include a Humbucking/single coil switch to set the amount of bass gain in the input stage.
TQR: How much individual customization or voicing do you offer for specific models when working with an artist?
HH: Unlimited customization is available, although most of the professionals that use RedPlate Amps are content playing standard models.
TQR: We noticed that you include the owner’s name on the back panel, correct? A nice touch…
HH: Yeah, the front and rear panels are done in-house, we could even put pictures of your dog on there.
TQR: What do you want to accomplish in the future? New models?
HH: “Amps that sing” being every guitar player! Going forward, curiosity and customer feedback will continue to drive the evolution of current designs and the development of new designs. For example, there will be a “shredder” amp in the near future (The ShredPlate) and possibly a bass amp. As RedPlate continues to gain name recognition with the music industry, models like the BlackVerb, MagicDust and TweedyVerb will hopefully be taken for granted as standard amplifier types.
The front and rear panels on the BlackVerb reveal an impressive array of controls, push/pull-knobs and switched pots. In fact, the printed operation guide includes a signal path diagram on the front page with a welcoming invitation to skip an in-depth review of the manual and just set all the knobs at 12 noon and play, which we did, consulting the manual as needed as we spent more time with the amp. So, is the BlackVerb too complicated for you “plug & play” guys? Not really, but the control panel is best reviewed in sections. You’re essentially working with a clean preamp circuit and a Drive section that includes Gain, Drive and Level controls for variable levels of distortion overdriven tones, but there are still many more additional tweakable features lurking within…
The first control adjacent to the single front input jack is the miniature Bright switch toggle with the center position OFF, Down producing the sound of “new strings” (an accurate description we might add), and Up rendering a brighter tone that will be familiar to those of you with a Fender Blackface amp with bright switch. We usually use the bright switch to put a little extra shimmer and spank on humbucking pickups, or neck pickups on single coils.
The Volume control includes a pull switch to engage a midrange boost that increases upper mids. The Middle control does what you’d expect, with a pull switch for a “Deep” setting that scoops mids and boosts bass frequencies—an excellent change-up for clean tones. The Bass control handles low end quite well, and it can be clicked OFF to be removed from the tone stack. Try that with a neck pickup and it produces the odd and very different EQ found in some old Valco and Gibson amps.
The Mod Selector is a 6-position rotary EQ switch that gradually produces a fatter, thicker tone as you rotate left to right from the “Funk” setting, to “Normal” and “Fat” (tweed). All this pulling and turning may sound complicated, but you’ll have it thoroughly digested in 5 minutes, and most importantly, these extra EQ controls expand the tonal capabilities of the BlackVerb in a clever and creative way that really is worth using and exploring. We have bitched about such bells and whistles on other amps having limited value, but no such questionable affectations plague the BlackVerb. Like we said, Henry is a clever fellow. On the Drive section…
This is where you mine and manage overdriven tones and distortion. The Gain control can be bypassed by clicking fully left, otherwise, you’re setting the amount of signal being sent to the first gain stage, which produces variable levels of smooth growl and grunt. The Drive control further ramps up distortion through two gain stages, and a pull switch on the knob serves as an afterburner for maximum burn and rip. At this point you will be channeling Metallica at full husky, so hide the dog. The Level control sets the output volume for this section, resulting in a progressively bigger, thicker, bolder voice. Of course, the big selling point for the BlackVerb is how all of your clean, moderately busted up and filthy dirty tones can be deftly tweaked and the volume managed with the Volume and Master volume controls. At the full power setting, you really can get this thing to sound like a 100 watt high gain amp on “7” at low decibel levels suitable for home recording and friendlier sound pressure levels.
The reverb control is what it is, and you can turn it off fully left and it’s out of the circuit. The Presence control is described as using “global negative feedback to remove low frequencies which frees up bandwidth for more midrange and highs,” and it can also be turned off when rotated fully left. Frankly, the appeal of this control escaped us, but we can imagine how it might be useful in a live situation where you may want to avoid too much low end muddying up the mix with bass and drums. The Master volume works very well without producing the dreaded master volume/low volume faux zizzz when you’re trying to light a fire at low volume levels.
One of our favorite features is the 50 watt/40 watt switch on the back panel that changes the boas from fixed to cathode for a completely different feel. With the 40 watt cathode biased setting you can also change the 6L6 output tubes to 6V6s, transforming the BlackVerb into an 18 watt cathode biased flame thrower, or bypassing the Gain section for a more tweedy character and voice. The Hi/Lo power switch changes the voltage on the input stage and the threshold for clean headroom.
The back panel Smooth switch is just that, adding slight compression in the clean preamp, and the Humbucker/Single Coil setting sets the amount of bass gain in the input stage, relieving you of perhaps resetting EQ when switching from single coils to humbuckers.
Additional utilitarian features on the back panel include a handy bias adjustment and test point, speaker impedance selector, main and extension speaker jacks, FX send and return, and footswitch jack. The footswitch gives you the capability to get in and out of the Tweed, Drive and Boost circuits. Tweed boosts upper mids while lifting the midrange control on the front panel for maximum push in the frequencies where the guitar really lies on stage. Drive engages the Drive feature, bypassing it when off at the footswitch. Boost makes everything sound bigger with a partial tone stack lift.
And now for the bottom line…. It seems to us that the intention of the BlackVerb is to be as tonefully versatile as a 1×12 combo amp can possibly be whether you are playing small clubs, bigger rooms or wide open outdoor stages. You could play nothing but smooth, clean jazz through this amp without ever venturing into the gain stages and be perfectly happy. Or you could do nothing but feast off the considerable gain and distortion lurking in the heart of the BlackVerb and be equally happy. Most gigging musicians want to range between such extremes living somewhere in the middle, and you can do that, too. Like most feature-rich amplifiers, you’ll find certain favorite settings that will be revisited with specific guitars, and after a few days you’ll have no trouble quickly accessing those settings, although the control panel is a bit difficult to read until you no longer need to read it at all.
The standard Warehouse Retro 30 speaker is a brighter version of the Veteran 30 we have favorably reviewed in the past. Given the considerable range of overdrive and distortion available in the BlackVerb, the Retro 30’s clear, articulate character and exceptional capacity to handle low frequencies makes it an excellent choice for this amplifier. Even at extreme gain and drive settings, the BlackVerb produces a rich and musical burn that does not mask or obscure essential overtones and harmonics. The clean tones are equally strong, powerful and clear, and the amp will nimbly spill into overdrive played clean at higher volume levels that can be managed with the volume on the guitar. The BlackVerb impressed with its ability to embody many different styles of amplifiers in one compact box, limited only by your capacity for experimentation and your imagination. Imagine that.
We were particularly anxious to experience the TweedyVerb because it seems to fit the power and volume requirements of so many players today, and it is a very straightforward and versatile 1×12 combo that is a breeze to hump to the next gig. Got your attention there, did we? We finally figured out why vintage blackface Pro Reverb amps have remained relatively underpriced… just pick one up.
The TweedyVerb is a cathode biased dual 6L6 amp with reverb, loaded with an 80 watt Warehouse British Lead 12” speaker. You won’t find a bad tone in this amp, and the controls are very intuitive, delivering outstanding “blackface,” “brown” and “tweed” tones via a 6-position Mode switch. The Bright switch is identical to the BlackVerb (you’ll love the “new strings” setting), with a single Volume control, simple Gain control, and a Tone control that can be clicked off fully left to bypass the tone stack for a very heavy and thick does of overdriven tones with excellent dynamic feel and touch sensitivity. The spring reverb is good—delivered form an original new old stock Accutronics pan made by Cary, IL, and the Presence control is identical to the BlackVerb, using global negative feedback to remove low frequencies and emphasize mids and highs. It also seems to decrease volume and gain, best used in our opinion for clean tones.
The 40 watt/17 watt switch on the back panel changes the voltage on the phase inverter. We preferred the sound and girth of the 40 watt setting, which still allows plenty of room for managing volume and variable distortion with the Gain and Volume controls, but the 17 watt setting is fine, too for close quarters. 6V6 power tubes can also be used at this setting without re-biasing for lower power output and volume. A footswitch is included to access both the fat Tweed setting on the Mode switch on the fly, and the Boost function, which acts as a tone stack bypass. Despite its compact size and relatively light weight, the TweedyVerb is a big-sounding amp that produces outstanding clean tones at usable stage volume, yet it can also be gradually pushed into the familiar sound of a Deluxe Reverb on “6” or even a vintage Marshall head at higher volume and gain settings. It’s a right fair chameleon, this one.
The Warehouse 80 watt British Lead 12 gracefully handles the power output of the TweedyVerb with excellent clarity, sold bass, vivid mids and a sweet and chimey top end. Like the BlackVerb, the TweedyVerb offers the sound and feel of several distinctively different amps in one box via the Mode switch, and we liked them all, from the rough and tumble Tweed, the slightly less raucous, smooth upper mid voice of the Brow, and the more scooped, open and airy Black settings. Both RedPlate models reviewed here clearly share the same DNA, which is to say that they possess a remarkably rich and music character, whether you choose to stroke big clean tones through them or dial up a tone that would make Billy Gibbons proud. Douse that light, and Quest forth….
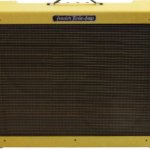
A couple of decades ago several small amp manufacturers, noting the demand for used Fender amps, started to produce amplifiers using old Fenders circuits, capitalizing on the simplicity of operation and purity of tone of these classics. I invested in a Clark Piedmont (’59 Bassman) and a Clark Beaufort (narrow panel Deluxe) and so am well acquainted with the high standards used to produce these replicas.
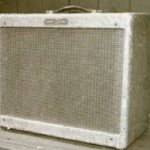
We always maintain a steady flow of gear arriving for review, but sometimes we also employ a fascinating if time-consuming research strategy that involves logging onto eBay, picking a broad category such as “guitar amplifiers,” and settling in for as long as it takes to patiently scroll through every page of listings. Yeah, that’s often 50 pages or more, but since we can’t possibly think of all the items that might interest us and search for them by name, it’s far more revealing and productive to just hunker down and scroll. Rarely do we fail to find something intriguing that would have otherwise been missed, and such was the case on a morning in August when we stumbled on a listing for a 1959 tweed Deluxe. Were we looking for a tweed Deluxe? Nope. Wouldn’t have crossed our mind at the time…. We had already reviewed 5E3 reproductions from Fender, Clark and Louis Electric within the past 3 years, and we have frequently referenced our 1958 Tremolux as being our desert island #1. Isn’t a Tremolux just a tweed Deluxe with tremolo in a bigger box? No… not even close. That would be like saying you wanted to date a blonde – any blonde. For the record, our fixed bias Tremolux possesses a cleaner tone with a bigger, booming voice created by the taller Pro cabinet. The Two Fifty Nine is a completely different animal….
Sporting a February 1959 date code on the tube chart, the ’59 had been listed by a seller in Arkansas who turned out to be Tut Campbell, formerly a well-known guitar dealer in Atlanta. Still buying and selling gear, Campbell had described the Deluxe as being in original condition with the exception of a replace output transformer – a big old mono block Stancor dating to 1957. Given the otherwise original condition of the Deluxe, which included the Jensen P12R, we made Campbell a “best off” below his asking price and scored the amp for $1,850 shipped. We wouldn’t say we stole the Deluxe, but it seemed a fair price of admission for the opportunity to experience and explore still another rare classic and supremely worthy piece of Fender history on your behalf.
The Deluxe arrived with the big Stancor dangling from the chassis despite Campbell’s careful packaging. Wasn’t his fault, really – in a feeble effort to avoid any additional holes being drilled in the chassis, the fellow who installed the Stancor in the ’60s had merely tightened set screws over the small tabs at the base of the heavy tranny, which was designed to be mounted upright – not hanging upside down in a guitar amplifier. Of more concern was the fact that while the amp was lighting up, there was no sound…. Well, we’ve been here before, so we made a call to God’s Country and the Columbus, Indiana domicile of Terry Dobbs – Mr. Valco to you. We had already set aside a spare output transformer (Lenco, McHenry, IL) that had been the original replacement installed in our ’58 Tremolux when we first received it, replaced with a Mercury Magneticsfor our June ’07 review article. Mr. Valco cheerfully answered his phone and as we explained the situation with the Deluxe he agreed to walk us through the installation of the new replacement – a simple process involving four lead wires being connected to the rectifier and output tube sockets, and the speaker jack. As long as you put the correct wires in the right place, a piece of cake, and we had the new tranny in within 10 minutes. Pilot lamp and all tubes glowing, still no sound…. Valco patiently guided us through a series of diagnostics with the multi-meter and the Deluxe was running on all cylinders, pumping 380 volts. Stumped, and with the hour growing late, we called it a day. Leaving the mysteriously neutered Deluxe chassis on the bench until tomorrow.
Morning came with a whining voice delivering a plaintive wake up call – “It’s got to be something stupid and simple….” Inspired by a huge steaming mug of Jamaican High Mountain meth, we sat back down at the bench, tilted the innards of the Deluxe chassis forward beneath a bright halogen desk lamp and peered in for answers. We began slowly examining the chassis in sections, looking for broken or dull solder joints, loose or broken wires, while gently pushing and prodding wires and connections with the eraser tip of a #2 pencil as we had seen Jeff Bakos do so often at his bench. After ten minutes or so we were about to give up, when we turned our attention to several places where the circuit was grounded to the chassis adjacent to the volume and tone pots, and damned if a solder joint for one of the uninsulated ground wires hadn’t separated from the chassis. No ground, no sound, and as soon as we had restored the solder joint the Two Fifty Nine arose from the dead with a mighty A major roar.
The amp was indeed remarkably well-preserved in all respects, with the typical amber patina of old tweed. The burnished chrome control panel remained bright and clean with no corrosion, the original handle remained intact, and a couple of small ciggie burns on the edge of the cabinet added a stamp of historic legitimacy to the Deluxe’s pedigree. The top half of the Jensen’s frame was coated in a fine film of red clay dust from the Delta, and while the cone was in remarkably good shape with no tears, an audible voice coil rub called for a recone. We would send the speaker to Tom Colvin’s Speaker Workshop in Ft. Wayne, Indiana, requesting that he leave the original unbroken solder joints for the speaker wires intact if possible.
Meanwhile the first order of business was to listen to an assortment of NOS tubes from our stash, and audition no less than a half dozen speakers. Different sets of power tubes and individual preamp tubes will sound surprisingly different, so we started out with a matched pair of NOS RCA 6V6s, a GE 5Y3 rectifier, and an RCA 12AX7 and 12AY7. From there we subbed in a dozen different RCA, Amperex, Tesla and GE 12AX7s, noting varying levels of brightness, warmth and intensity among them all. For an edgier, more aggressive voice, the GEs and Amperex typically deliver the goods, while RCAs produce a slightly warmer, richer, fuller tone. We also experimented with a 12AT7 and 12AX7 in place of the lower gain 12AY7, and while those tubes ramp up gain and distortion faster and with more intensity than the 12AY7, they seemed like overkill for us. Our Deluxe possesses a tone of gain using the stock 12AY7.
Rather than repeatedly reloading the Deluxe with different speakers, we used a Bob Burt 1×12 cabinet built from 100-year-old pine for our speaker tests. The original Jensen had never been pulled from our amp, but multiple speaker replacements in an old Fender inevitably cause the speaker mounting screws to loosen in the baffleboard, making speaker swaps unnecessarily clumsy and complicated. When we do run into loose mounting screws, we simply run a few small drops of Super Glue around the base of the screw and surrounding wood. Allow to dry and your screws will stay put provided that you don’t torque the nuts on the mounting screws like an idiot with a socket wrench. Don’t be that guy,
We tested a range of speakers that included a Celestion G12H 70thAnniversary, Colvin-reconed ’64 Jensen C12N, Eminence Wizard, Private Jack, Alnico Red Fang, Teas Heat, Screaming Eagle, Red, White & Blues, and Warehouse Green Beret, Veteran 30, Alnico Blackhawk and Alnico Black & Blue. The Alnico speakers generally produce a tighter, smoother, slightly more compressed tone, with a variable emphasis on upper mid-range and treble frequencies, while the speakers with ceramic magnets possess a wider, more open sound. Higher power ratings of 75W-100W offered by the Red, White & Blues, Screaming Eagle and Warehouse Blackhawk typically translate into more graceful handling of bass frequencies, and in a 20 watt Deluxe, zero speaker distortion, for a clean, powerful voice.
Let’s cut to the chase with speaker evaluations, shall we? It has become clear to us that even after reviewing a dozen speakers in as much detail as mere words allow in a single article, many of you remain uncertain about which speaker to choose. No kidding. We would absolutely love to hand you a single magic bullet when it comes to speaker swaps, but here’s the dirty little secret about choosing speakers…. The overall character of the amp you will be installing your new speaker in is critical, and to some extent, the type of guitars and pickups you play most often are important, too. Tailoring your sound with the unique gear you play is not a one-size fits-all proposition – you have to invest some thought into the process. Are you going for a classic “scooped” American Fendery tone, or something more British, with a bit of an aggressive edge and upper midrange voice? Are you playing guitars with single coil pickups or humbuckers? Is there a specific, signature tone you are searching for, or are you playing a wide variety of musical styles that requires a broader range of tones? Do you like the more open sound of speakers with ceramic magnets, or the smoother compression of Alnico? What are you not hearing from your amp and the speaker that’s in it now? Do you want a brighter tone, darker, better bass response, or fuller, more prominent mids? Do you want to really drive the speaker and hear it contributing to the overdriven sound of your amp, or do you want a big, clean tone with no speaker distortion in the mix? The truth is, if you don’t know what you want, you are far less likely to get it. On the other hand, nothing is accomplished with paralysis by analysis. To be perfectly honest, there are lots of speakers made by Celestion, Eminence, Warehouse and, if you can wait long enough for them to break in, Jensen, that we could and would be perfectly happy with, but we would also choose them carefully, taking into account all the factors mentioned above. After a couple of days spent swapping speakers, we ultimately concluded that we preferred the ’64 C12N for a classic tweed Deluxe tone, and a broken-in Celestion G12H 70th Anniversary for the most mind-altering 18 watt Marshall tone we have ever heard. Seriously. More on that in a minute….
Having split more than a few hairs with our speaker swaps, it was time to start picking nits off of gnats with some output transformer evaluations. We first contacted Dave Allen of Allen Amplification, who also stocks Heyboer transformers built to his specs. We found a variety of appropriate output transformers on Allen’s site that offered subtle variations on a stock original Deluxe OT, and we asked Dave to describe the TO26 model we wished to try in the Deluxe:
“The TO26 was intended as a hot rodding upgrade to a stock Deluxe Reverb OT. While maintaining the stock 3-1/8” mounting centers, its fat stack of hotter core steel and multi-tap secondary make it a good choice for builders wanting to maximize the performance of a pair of 6V6s and who may also want to push the envelope with 6L6/5881s while still being able to clear the speaker in a stock cabinet. There are physical limitations in small amps, so its short low profile is welcome. The orientation of the laminations is also good for low hum pick up from the power transformer. I found that an OT mounted the tall way (like my TO30D) picks up considerably more hum simply due to its orientation to the power transformer, so, shoe-horning a ‘tallish’ OT into your amp may cause it to pick up hum from the power transformer – not much of an upgrade. “The TO26’s 7K to 8 or 16 ohm rating makes it ideal for a pair of 6V6s as well as 3,500 ohm to 4 or 8 rating for 6L6/5881s. Notice you always have an 8 ohm option with both types of power tubes. An impedance switch could be wired (I use a blackface grounding switch) as a power tube type selector for an 8 ohm speaker to go between 6V6s and 6L6s. The TO26 will typically give slightly more output with 6V6s due to its more efficient low-loss core steel and will keep the bass clean longer for more perceived clean headroom. As it takes the most watts to reproduce the bass, you notice distortion there first, and since Fender-type amps are so bass heavy, you can quickly hit the wall with headroom, so a noticeable increase in clean bass response certainly feels like a more powerful amp with the TO26. It is kind of like you installed a new speaker with a larger ceramic magnet that is more efficient than the old speaker. The amp is a little louder and the bass a little tighter or cleaner.
“There seem to be a lot of 6L6-based 5E3 amps out there now to get a little clean headroom from a circuit normally not known for much of that. The TO26 is a good choice for that type of amp as it will fit typical available chassis and cabinets. It has extra long 12” topcoat leads ready to strip and solder. I would reckon it would handle up to about 30 watts before starting to saturate and compress – plenty of cathode-biased 6L6s. I find that the Heyboer paper stick-wound and interleaved output transformers with premium core steel and heavy core stacks have typically better clarity or definition than ‘stock’ OTs. Call it fidelity or whatever you want – just clearer distorted and complex tones and better separation of notes in chords, etc. I use the TO26 in the Allen Sweet Spot, Accomplice Jr. and Hot Fudge with Nuts amps with excellent results. All of these amps can use either 6V6 or 6L6 power tubes. You know how a 5F6-A or Super Reverb has that huge 4 bolt OT for a pair of 6L6s to get the maximum clean bottom end? That is sort of what the TO26’s OT is to a pair of 6V6s. It just doesn’t even come close to saturating.
When we informed Dave that we planned to run the Deluxe with 6L6/5881 power tubes as well as 6V6s, he recommended that we try the TO26 since it had been specifically designed for such applications. He also sent a smaller TO20 transformer, described as being designed with a wider 1-1/4′′ lamination “fat stack” that provides 60% additional core mass than typical ¾′′ stack units for improved performance. The TO20 is a direct replacement for Blues Jr. and Princeton Reverb amps, and also suitable for dual EL-84 amps with an 8 ohm load.
Mr. Valco also sent us a replacement 5E3 output transformer he had bought on sale from Clark Amplification a few years ago made for Mike Clark by Magnetics Components in Schiller Park, IL – a company that has been producing transformers since 1943, having been the primary supplier for Valco and various Gibson amps in the ’50s and ’60s. A call to the company revealed that ToneQuest ReportV12. N1. Nov. 20104the transformer Valco sent was essentially their replacement for a Deluxe Reverb, model #40-18002 without bell ends per Clark’s request. We also learned that the company offers a complete range of Classic Tone vintage power and output transformers, including a reverse-engineered clone of a ’55 Triad 5E3 output tranny, model #18022.
We also contacted Paul Patronete at Mercury and requested a ToneClone “brown Deluxe” output transformer, since Larry Cragg had provided them with specific measurements from original OT in Neil’s ’61 tweed Deluxe, confirming that it was indeed a ’61–’62 brown Deluxe tranny. With a total of 6 output transformers to listen to, we took the Deluxe to Jeff Bakos, who set up a rig on his bench that enabled us to clip in each transformer and very quickly switch back and forth between them as we played a guitar through the amp. Are we having fun yet? Here’s what we heard:
Lenco – An excellent authentic “vintage” vibe for those that prefer the classic, if somewhat murkier sound of a tweed amp being pushed, lots of sag in the low end and a jangly pop in the top. And “old,” rather “lo-fi” sound indicative of the ’50s era amps.
Magnetics Components Clark Deluxe 18002 – Similar to the Lenco, but stronger and more robust, with a prominent growling character and voice. Thick, wooly and willin’ with better treble presence and clear string definition then the Lenco, yet an entirely “vintage” character. This tranny is comparable to those found in Deluxe amps from the brown era through silverface. Excellent power, punchy and fat with exceptional clarity and tone.
Magnetic Components 5E3 Clone – Percussive and dynamic with a faster attack response than the Clark/Deluxe Reverb version, this transformer was reverse-engineered from an original ’55 Deluxe OT. IT imparts an intense, throaty tweed character with enhanced mid and treble presence, remarkable clarity, and an authentic vintage ’50s vocal tone with softer bass response and slightly less volume and power than the Deluxe 18002.
Allen/Heyboer TO20 – An interesting variation with a much more modern, percussive dynamic character. The sound was not as heavy and imposing in the vintage style, and with this transformer the Deluxe reminded us of the more refined sound of a Fender Princeton, with excellent dynamic punch for slide and Allen/Heyboer TO26 – As advertised, the low end held up loud and proud with very little sag and an audibly higher threshold of clean headroom, although beyond 6 on the volume control the Deluxe was still holding nothing back. Overall, this transformer imparts a cleaner, high fidelity tone with more clarity and stout bass response than a typical stock 5E3 transformer. An excellent choice for enhanced low-end and maximum volume.
Mercury Magnetics brown Deluxe – Immediately recognizable, the Mercury displayed a trademark sound that is smooth, exceptionally musical, warm and balanced. Sounding more “high fidelity” than the Lemco or Magnetic Components transformers, but still seductively unruly enough to get yer ya-ya’s out. Sweet, rich, detailed and sticky.
Now, you may be wondering why we would bother to audition so many output transformers…. How much difference can it make? Well, forty-odd years ago when someone rigged that old Stancor tranny in the Deluxe, the only choice available to most repair shops was whatever was on hand in the scrap pile. Today we can shape the tone and dynamic response of an amp with a variety of “vintage” or more modern, custom transformers that allow us to recapture the original sound and feel of the amp, or improve upon the original design. Why did Cesar Diaz install output transformers for a Twin Reverb in Stevie’s Super Reverb amps, and Bassman transformers in his Vibroverbs? Because the first thing that chokes and overwhelms a smaller output transformer are the bass frequencies, and Cesar wanted Stevie’s amps to produce a rock-solid, thundering low end that could handle his massive wound strings. The tone we’re celebrating with our ’59 Deluxe is quite the opposite…. The raucous sound of the amp teetering on the edge is the key to it’s exploding tone, but if you wanted to go in the opposite direction with more headroom and a tighter low end, transformers like the TO26 have been specifically designed for that purpose. We once replaced the output transformer in our Pro reverb with a bigger MercuryToneClone Bassman, and the Pro grained a tone of clean headroom and unyielding bottom. Wanna make it even harder still? Use a plug-in diode rectifier in place of the 5AR4 rectifier tube. No saggy britches now. As with so many choices we make in the Quest for tone, the final decision comes down to your mission and individual taste, and Jeff agreed that between the Heyboer TO26, both Magnetic Components trannies and the Mercury brown Deluxe, the question wasn’t which one was “best” – all four were exceptional, but different. Some players would prefer one over another for different reasons described here, but all of them represent stellar examples of just how far we’ve come since the day that old Stancor tranny was used to put the Two Fifty Nine back into service.
One last detail needed to be addressed…. Could we safely run the Deluxe with 5881s or 6L6s if we preferred that sound over 6V6s? Once again, we asked the prescient Mr. Valco for some Hoosier insight:
“The impedance mismatch in this particular amp using the 6L6s is really not a big concern, it won’t hurt the amp and will either sound good or it won’t. The 6L6s draw 1.8 amps and two 6V6s draw 0.9 amp, so using the 6L6s will add about 1 amp more current draw that the power transformer needs to supply from the 6.3 volt heater windings. On some small 6V6 amps, using 6L6s can and does cause the power transformer to run hotter because more current equates to more heat. The concern is that the power transformer in the Deluxe, not being a large one to start with, has the extra 1 amp of heater current capacity to safely use the 6L6s. One way to determine if the power transformer is really stressed out with the 6L6s is to measure the AC heater voltage on pins 2 and 7 on the power tube sockets (or on the pilot lamp) and see if the AC voltage drops significantly from the reading using 6V6s versus 6L6s. It should be a bit over 6.3 volts AC with the 6V6 anyway (since the wall voltage is higher these days than in the early ’60s) and with the 6L6s you sure don’t want to see a large drop in voltage below 6.3 volts AC. If there is a large drop it means the transformer is having trouble supplying enough current for the 6L6 heaters if given enough time with the 6L6s could damage the power transformer. If the drop is only a few 10th of a volt, and doesn’t go below 6.3 AC, then it would indicate that the transformer is supplying the demand for the heater current and should be OK. Most Fender amps used power transformers that could handle some extra current demand.
And now we arrive at the moment of truth. We’ve been steadily reeling in a parade of new and classic amps for review in these pages for 12 years now this month – Marshall, Fender, Magnatone, Hiwatt, Vox, Valco, Silvertone, Ampeg, Gibson, Gretsch, Mesa Boogie, Park, Supro, Dickerson, Traynor, Budda, Western Auto, Standel, Dumble, Cornell, Clark, Crate, Divided by 132, Reeves, Bad Cat, Gabriel, Fuchs, Koch, Star, Category 5, 65 Amps, Balls, Bakos, Callaham, Blankenship, Reinhardt, Grammatico, Siegmund, Chicago Blues Box, Roccaforte, Headstrong, Rivera, Mad Professor, Talos, Maven Peal, Reverend, BC Audio, Savage, Goodsell, Fargen, Carol-Ann, DST, Two Rock, Germino, Matchless, Louis Electric, Swart, Demeter, Juke, Aiken, Bluetron, DeArmond, Carr, Victoria, and Dr. Z, with more coming. Lots of amplifiers, multiple models from the same builders, and among the foremost classics – Fender, Marshall, Vox, Hiwatt, Gibson, Ampeg and the entire Valco catalog, we have acquired, optimized and restored dozens of amps considered to be among the most desirable vintage models ever built. In the 20 watt wheelhouse occupied by the Two Fifty Nine, it has no equal by a mile. Game over.
After a lot of back and forth testing with different sets of output tubes, we became hooked on the thundering sound produced by a pair of Philips small-bottle 6L6WGBs. Thanks to Larry Pogreba’s talent for scavenging rare tubes (in Montana, no less), we are flush with several outstanding and stout pairs of RCA 6L6s, but the brighter Philips really lit up the Deluxe with a fresh and lively attitude that mirrors the bounce of a newer amp. With the ’64 Jensen C12N loaded, the Deluxe spookily nails the tones of Neil Young’s rig on Ragged Glory – a “studio” recording cut live with the Deluxe and Old Black in a barn on Young’s ranch with Crazy Horse. With the volume backed off to 4-5 a bluesy jangle emerges anchored by solid low end, rich midrange, the sweetest treble tones imaginable, and variable levels of sustain and edgy distortion that can be controlled both by the volume on the guitar and pick attack. The Deluxe does not discriminate between single coils or humbuckers, ravaging both with equal fervor, and the responsive dynamic character of this amp simply is not of this world. Rotating the single tone control sharpens treble without dumping lows or mids, while also subtlety increasing gain, as if you were using a boost pedal. A “Y” cord plugged into the Instrument and Microphone inputs enables the two channels to be mixed with great effect. As Neil Young described, bringing the mic input volume up with the instrument volume set between 6-8 gradually deepens the tone while slowly igniting an intense explosion of thicker second order harmonics and distortion as the dynamic character of the amp softens. Pushing the Instrument volume level up into the 8-12 range brings the volume up to a perceived level that exceeds 20 watts, while provoking an angry, pissed-off cascade of astonishingly rich musical distortion as the notes swerve into controlled harmonic feedback.
Switching from the Jensen to the Celestion transforms the Deluxe into the most stunningly toneful 20 watt Marshall you could possibly imagine. To be honest, you probably can’t imagine it, because we have never heard anything like this ourselves, even after owning a couple of vintage Marshall PA20s, a rare Lead & Bass head and 1×12 cabinet, and a Balls 2×12 18 watt. We could easily live with either speaker, and the Deluxe also just kills pushing our 8 ohm 4×12 pinstripe cabinet.
For those of you who appreciate a somewhat tamer vibe, we can assure you that the Deluxe loaded with a fine pair of 6V6s is equally mind-altering. The overall sound is a wee bit smaller in girth and less imposing, yet abundantly overflowing with vivid harmonic depth, a supremely touch-sensitive response, and brilliant combination of fidelity, clarity and bloom. Compared to a black or silverface Deluxe Reverb, the ’59 presents a more musically complex soundstage, less harsh, stiff and linear, and it lacks both the sharper treble of a blackface amp, and the scooped midrange character. The tone is rounder and meatier, the treble sweeter and less dominant, with an enhanced 3-D image.
Now, if you’re the type that skeptically requires a qualifier to add a stamp of legitimacy to such an over-the-top review, here it is, Mr. Been There-Done That…. The Deluxe doesn’t and won’t spew big clean tones at stage volume. Our ’58 Tremolux produces a cleaner tone with a higher threshold of clean headroom by far at comparable volume levels, and the taller tweed cabinet encourages a stronger, cleaner resonant bass and low mid response. The Tremolux is also equipped with a Mercury ToneClone Tremolux output transformer, which creates a tone that is less wooly, raucous and indistinct.
The busted-up sound of the Tremolux above 5–6 is gloriously righteous indeed, but with more clarity and less provocative intensity than the Deluxe. Taken in context, what we’re suggesting here is that in our experience, the Deluxe has no equal as both a Fender and Marshall style 20 watt rocker (depending on speaker selection), and we’ll add “blues” to that description equipped with 6V6s and the Jensen C12N. During our 2-month test period, we also routinely used our Lee Jackson Mr. Springgy reverb, Analogman-modded Boss DD3 digital delay, and a very cool, versatile (and cheap) Flip tube tremolo pedal reviewed here. Can a modern replica of the 5E3 Deluxe deliver the same inspiring tones as the Two Fifty Nine? The closest thing we’ve heard is the Louis Electric “Buster,” but no, magical happy accidents like this Deluxe can’t be reproduced today – and that is as it should and shall always be. Quest forth…
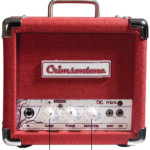
Decades ago, practice amps were effectively no-frills versions of their bigger brothers. Even so, those little amps of yesteryear became something magical in the studio. From Jimmy Page and his Supro to Joe Walsh and his Fender Champ, getting big sounds from little amps became the stuff of legend and a go-to approach for recording. Crimsontone Amplifiers embraces this philosophy in a big way—only two of the seven amps the company offers are 20 watts or more. Their newest amp—the 4-watt SE Mini—is a testament to the power of small and a cool nod to the role of low-wattage amps in the history of rock ’n’ roll.
In the Court of the Crimson
At just 7.5 pounds, the SE Mini certainly lives up to its name. The cabinet is covered in a tough red tweed fabric, and it features a sporty aluminum handle for easy transporting to the studio—or a gig in the park for that matter. Crimsontone didn’t design the SE Mini with gimmicks in mind either, which is evident in the simple feature set. It has just four controls—Gain, Tone, and Master knobs, along with a tiny Gain Boost switch.
The single-ended, all-tube head is powered by a Sovtek EL84 coupled to a JJ ECC803 preamp tube and a Mercury Magnetics GA5-P power transformer for a maximum of four watts. The GA5-P is part of Mercury Magnetics’ fantastic Toneclone Plus line, which is stocked with the company’s replicas of famous power transformers from the past. In this case, it’s a faithful reproduction of the transformer in Gibson’s 1950s Les Paul Jr. combos. I was pleased to see that the output transformer was also a Mercury Magnetics model, an FTCO-M that replicates the units in Fender’s Tweed Champ amplifiers of yore.
The SE Mini doesn’t rely on modern circuit design, but instead forgoes current technologies for a traditional, handwired, point-to-point circuit. Upon pulling out the adorably small chassis, I was treated to the sight of tidy wiring held together with clean solder joints and tight mounting. And the Components—F&T filter caps, Alpha pots, Orange Drop capacitors, carbon-comp resistors, two Xicon power resistors, and a Cliff input jack—are all top-of-the-line.
Good Things … Small Packages
Crimsontone touts the SE Mini as a practice amplifier, but it excels at hitting tones in the ’60s classic-rock vein. With a Fender 60th Anniversary Telecaster and a feed to the two 12″ speakers in a Fender Twin Reverb reissue, the Crimsontone’s clean mode belted out seriously raw, garage-rhythm jangle with a dash of classic Neil Young sting thrown in. The highs are crisp and brash, with tight lows and a gritty midrange. With a Gibson Les Paul Studio, the amp accentuated the midrange and softened highs, but the amp still retained its bold essence, staying tight in the low end and having a nice, even sag. It’s not a sound for everybody, but it speaks in the raw, unadulterated tones of no-holds-barred slingers of the first classic heavy rock era.
It’s worth noting that, while the SE Mini kicks with James Gang-worthy tones, I did have to really work with my picking hand to squeeze any real dynamics out of it. That said, that’s not uncommon with most small-wattage amps, and it certainly doesn’t mean that the amp isn’t touch sensitive. But if you’re used to using a big Marshall to get your ’70s tones, the SE Mini will feel like an entirely different animal. The amp doesn’t have excessive gain or saturation to hide behind, so it assures that you hear every single mistake. The sweet sounds that come as a trade-off are well worth it, though.
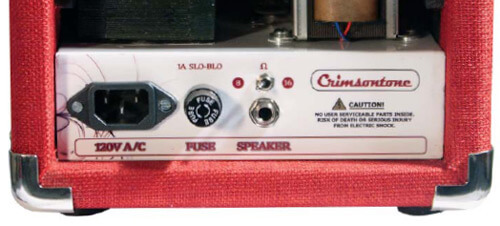
This Dog Bites
Getting the most meat and bite out of the SE Mini requires careful adjustment of the Gain and Master knobs. With the Gain Boost switch off, not much grit is available from the Gain control. Rather, it acted more like a voicing control, altering the feeling and response of the tone. Most master-volume tube amps have a gain structure that changes from tighter and crisper to warmer and spongier as you increase the Gain. Without the boost on, the Gain control on the SE Mini reacts the same way, but without adding huge amounts of saturation. Kicking in the Gain Boost adds a dose of rage to the tone, and I thoroughly enjoyed playing quick double-stops and soaring country bends with the SE Mini’s overdrive-infused, high-midrange snap.
Predictably, the boost kicks up the volume a few decibels, too. And I discovered by lowering my guitar’s Volume knob just how well the amp cleans up at even the dirtiest settings. The Gain Boost adds noticeable touch sensitivity, too. I got one of my favorite tones by dropping the Telecaster’s Volume down a quarter of the way and letting my picking-hand attack determine the amount of overdrive.
If you’re looking for more aggressive tones, it also pays to keep the Master at or near its highest levels. At practice-amp volume levels, the Telecaster sounded a little thin, and understandably so—I wasn’t pushing the single EL84 enough until I moved the Master to 3 o’clock, where there was a considerable volume jump. The sweet spot on the SE Mini’s Master is just a little higher, where it retains just the right amount of definition, while maintaining ample punch. Set the Master there and use the Gain control to set the flavor of the attack, and you’ll find a load of tone variation at your fingertips. Working within this range helped me keep the Tele’s bite under control and let the raw nature of the amp’s voicing shine through.
The Verdict
Four watts may not be the right recipe for tearing the paint off walls, but the SE Mini uses a well-designed circuit and quality components to sound much bigger than it looks— especially with a few 12″ speakers at the receiving end of its signal. Crimsontone’s SE Mini is a great choice for lovers of dirty, jangly rock guitar tones. But, like tube practice amps of yesteryear that needed to be driven and played hard to achieve their fullest tonal potential, it can require a more dynamic and forceful touch to tap into its inherent dynamics. Still, there’s nothing quite like a healthy, low-watt tube amp cranked to high heaven for creating sweet, raw, rowdy sounds. In that musical category, the SE Mini is a hit.
Buy if…
you’re a fan of dirty, to-the-point guitar tones at reasonable volumes.
Skip if…
you need to be heard over a drummer or can’t abide bone-simple feature sets.
Rating…
Street $799 – Crimsontone Amplifiers – crimsontone.com
Source: https://www.premierguitar.com/articles/Crimsontone_SE_Mini_Amp_Review
In the May 2011 edition of Gitarre & Bass, Voodoo (www.VoodooAmps.com) had their V-Rock 100 tested and Mercury was very highly praised. You can see this test in the attachments.
The tester, Ebo Wagner, wrote:
“However, specially selected components are used: from coupling caps to the exquisite custom transformers from Mercury Magnetics, currently the leading manufacturer in this field, especially in terms of replicas of old transformers.”
He judged the tone, dynamic, transparency, response behavior, over tone spectrum (as very intensive and very lively), high gain with very harmonic distortion characteristics in the best praise possible.
In the June edition he tested the Hook R20 and R40 and wrote the following about Mercury:“All the transformers come from Mercury Magnetics and are currently the finest what one can purchase in this sector. With this in mind we already suspect that the rest can’t be bad either (won’t have bad parents either).”Again, in this test he marked all the tone/reaction points with highest marks.

After a Year on the road, most successful bands take a few months off before returning to work. Not Five Finger Death Punch. As soon as they finished touring with Godsmack in Novermber2010, lead guitarist Jason Hook and rhythm player Zoltan Bathory started working on the band’s third album, the followup to 2009’s Gold-certified War Is the Answer.
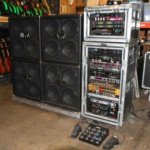
When I interviewed Vivian Campbell for Guitar World’s “Vulgar Display of Power, Guitar Rigs of the Stars” (August 2011) he told me he’s a bit disconnected from his massive Def Leppard rig, but that’s part of the gig with Leppard. The guys are perfectionists and this huge behemoth is what he needs. I’ll bet the band picked up this perfectionist attitude about sound while working with their old producer Mutt Lange. Viv says, Wolfie, his guitar tech, is switching gear in and out constantly, often between verses, pre-choruses, choruses, etc. Viv’s tones are changing all the time.
I watched Leppard on the Jay Leno show a day or so after I talked to Vivian, and through my Bose home theater system the sound was absolutely amazing, just like the record. So bottom line is, this Def Leppard approach works.
Although Viv collected all the gear in his racks over years, his rig is so complex only his tech Wolfie really knows how it all fits together. I talked with Wolfie for about an hour and a half and after that we exchanged about 30 follow up emails. Jeff Kitts at Guitar World told me this was the most complicated rig GW has done, if you have the magazine check it out. Adam Cooper, the artist, did a great job.
Also, though Vivian’s using the most expensive wireless system you can get, he’s not a big fan of it. It’s just necessary because the band moves around the stage so much. I can relate to this, I used a high-end Sony wireless years ago on tour and hated it. Something about the signal from your pickup being changed into radio waves and then converted back, it just sucks the life out of a guitar tone.
Another thing Vivian told me, when he joined Leppard, Phil Collin, the other guitarist, kept asking him to turn down. Viv said his volume was already down so he decided he needed to create a smaller tone to fit with the band, so he did. This is a very mature way to think about your guitar tone, in terms as a part of the overall band sound.
Vivian also plays with Thin Lizzy these days, and that rig is exactly the opposite of the Leppard rig, very simple, which he likes. The Thin Lizzy rig is made up of a Dunlop Hendrix wah and an Angry Troll Overdrive, these are plugged into a Mojave 50 watt Scorpion head, and last a Mojave 4X12 cab for his main tone. Then Vivian takes a line out from the Mojave head and goes to a Full Tone Tube Tape Delay, which he says it’s a glorious little unit. The delay runs into a Crate power block amp, and then a Marshall 4X12, this is his wet signal. Very cool, one amp for the delayed sound and the other amp for the dry tone, this keeps the delay out of the way of the straight guitar sound.
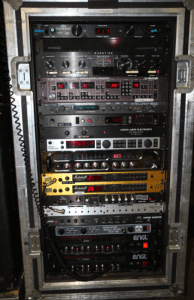 There were a lot of gear pieces I thought were notable in the Leppard rig [right] but two in particular were Vivian’s RJM Effects Gizmo, and his Marshall JMP-1 programmable preamps. BTW, the Voodoo Amp mods done to the JMP-1s are to darken the tone a bit, this is because the Palmer speaker simulator they use is so bright. Vivian was also trying out the programmable Engle preamps, and was thinking of using them instead. These programable preamps are very interesting. I’ve always loved the preamp concept. My favorite was the Reinhold Bogner Fish Amp. Wow! They sounded amazing. BTW, the Fish Amp was used by Jerry Cantrell for those great tones on the Alice and Chains records. A cool thing about a preamp is that you can get your sound at any volume depending on what power amp you use. And the midi programable ones make changing tones a snap.
 The RJM really caught my attention, check it out at: (http://www.rjmmusic.com/effectgizmo.php). Everything in Vivian’s racks are patched into it. The RJM has twelve loops and then individual or groups of effects can be inserted into the loops. In a preset you can activate any loop or group of loops and then save the preset. Whenever you activate that preset you’ll have those effects, whatever gear combinations you want. I think Wolfie told me he had 90 or so presets saved at that point, getting ready for the summer tours. The RJM also sends midi; so within the preset, Wolfie can save program change info for the JMP-1 preamp, or use midi to change presets in a delay unit so the delays are in tempo with the song.
Anyway there ya go.
Photos courtesy of David (Wolfie) Wolff.
I am often asked how upgrading an amplifier’s transformers will improve tone. It’s a simple enough question, but the answer is a little complex. First off, let’s examine what an output transformer is and why someone would inquire about replacing it. Then we’ll get to some things to consider when replacing your amp’s transformer.
The output transformer in a push-pull guitar amplifier is the last stage of the audio path before getting to a speaker—it’s one of the large blocks of metal mounted to the amp chassis (or speaker, as is sometimes seen in older amps). The transformer’s function is to convert the high-voltage/low-current signal from the amplifier’s power tubes into a low-voltage/high-current signal to power the speakers at a low impedance. It is responsible for how efficiently the audio power of an amp will transfer to the load of the speakers, and it prevents hundreds of volts (DC) from passing to the speakers.
There are different reasons why a person would want to change their output transformer—the most obvious being a blown or damaged unit. This can happen when an amp is operated without a proper load, such as not having a speaker plugged into the amp or driving a different speaker impedance than the one the output transformer is looking for. Another reason to replace a transformer is to upgrade quality and tone. Because transformers are the most expensive component of an amplifier, it is common for amp manufacturers to cut costs on the size and quality of them. A large transformer simply has more iron, so not only are the material costs higher, the weight of heavier transformer will affect a manufacturer’s shipping costs.
In regards to tone and how an output transformer affects it, it’s my opinion that an output transformer does not change an amp’s character. A new transformer will not change an amp’s DNA or make a Marshall sound like a Vox. After all, an amplifier’s tone is the sum of all of its parts—tubes, capacitors, wiring, speakers, etc. If you were to run clean water through an old, dirty water filter, you would ruin what the water had to offer before being filtered. It would still be water, but changed in a way that detracted from what it could have been. The output transformer plays a very large role, but is not everything in shaping an amp’s tone. Upgrading it takes what the amp already is, and then enhances it. Physically larger output transformers generally sound larger, since they have a larger window for tone to flow through. Tone is usually clearer, fuller and truer.
If upgrading or replacing your amp’s output transformer is in your plans, there are a few things to consider. First, and most importantly, the amp should be unplugged, all tubes should be removed, and all voltages in the amp should be fully discharged. There are lethal voltages inside an amplifier, so do not service your amp if you don’t know how to properly discharge all voltage.
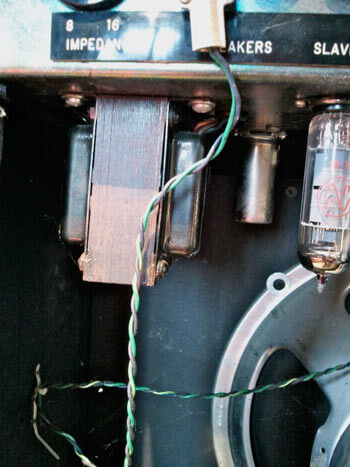 Secondly, be aware of the different mounting styles of transformers. There are three basic mounting styles: vertical, horizontal, and flat. Vertically mounted transformers sit taller than they are wide, with the laminates in a vertical position and the end bells positioned perpendicular to the chassis. Horizontally-mounted transformers are still a vertical mount, but are tipped on their sides and are wider than they are tall. Transformers that are mounted flat have the laminates facing horizontal, and the bell ends are stacked vertically. One should also note if the transformer is a two-hole or four-hole mount, and that the mounting holes will not line up exactly if the transformer you are replacing is not an exact replica. In such cases, it will be necessary to carefully mark and drill new mounting holes into the amp’s chassis.
Finally, make sure the replacement transformer will physically fit on the chassis and in the cabinet it’s going into. It is easy to forget the size of the speaker and its affect on the space left in the cabinet. Measure twice to avoid disappointment!
It is very important to note the wiring of the old output transformer. I often clip the old transformer leads and leave a little bit of the old wire so I can see the color and location of the original. Keep in mind that green or black is not always ground, and that manufacturers often use different colors for the ground. A new replacement transformer should come with a schematic, so pay careful attention to it and note the proper wiring.
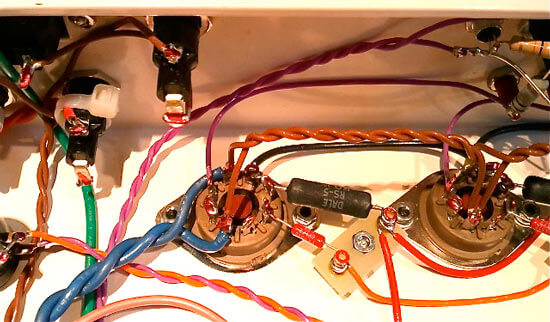
With the new transformer installed and all wiring and solder joints double-checked, it’s time to turn on the amp. Before doing so, be sure to turn all pots all the way down. If the primary leads on the transformer are reversed—a simple mistake to make—the amp will produce a loud squeal. And if the volume were to be up with this squeal, it would scare the life out of anyone. A simple swapping of the leads going to the power tube plates will take care of this issue. It is a good idea to use a variac to ramp the amp’s voltage up gradually, going easy on the new output transformer’s maiden voyage. When the amp is running at full-voltage, you should then turn the amp off, reinstall the tubes, turn it back on, and double-check the power tube bias. The new output transformer will need to break-in over time, but all that’s left now is enjoying your amplifier’s improved tone!
Remember that an amplifier’s tone is the sum of all of its parts. The output transformer is one very important part that easily gets overlooked and often suffers from cost-cutting-minded amp builders. So experiment! After all, your amp is your voice, so why not make it the best voice it can be?
Source: https://www.premierguitar.com/articles/Why_and_How_to_Replace_Your_Amplifiers_Output_Transformer
Amp Transformers, Output Transformers & Chokes
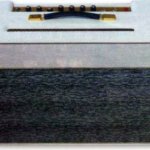
Because there are so many kits and builders in today’s DIY and boutique amp market, you no longer needed to be a super shredder or fretboard wizard to have a “signature” amp. Nope. Today, the only thing between you and the amp of your dreams is a little bit of cash.
For roughly the price of a boutique amp, you can build and customize your own rig – Tolex, grill colors and materials, cabinet plastics and wood types, tube combinations, speaker pairing and sizes, power output – virtually any idea you can think up, and chances are someone can make it a reality. I recently build a 2×12″ 18-watter to my own specifications. Here’s how I did it.
I hemmed and hawed between something more modern-looking and a traditional Tolex-covered cabinet. There are great cab builders who use all kinds of wood. Some variations of the classic tone woods (pine and Baltic birch) are wonderful – walnut, wedge, maple, mahogany, basswood all produce different qualities, and craftsmen are using combinations of them to produce interesting tones. But because I was making my own version of a classic, I decided to go with a traditional cabinet.
The one custom mod I asked Peter to include was to build the cabinet of pine; I’ve always loved the resonance and timbre of pine cabs, and it’s a bit lighter than the birch used in Marshall cabs.
Peter convinced me that while pine would work, I should stay with a birch baffle to retain some of the characteristic bite conveyed by the wood used to build the amp we’re copying.
To further the customization, and give the amp a touch of fun, I decided on white Tolex. Per my request, Peter aged the cab to give it a broken-in appearance.
While I wanted this amp to sound like a Marshall 18-watt, I also wanted more control over its tone. I wasn’t interested in tremolo or reverb as much as saturated overdrive and the ability to obtain overdrive at less than ear-bleed levels. I opted for a Ceriatone DIY kit, which they assembled for a small fee. And since I already had a drawer full of old mustard caps and NOS resistors, I figured I could upgrade some components down the road, if necessary.
Ceriatone had a two-channel Treble/Middle/Bass (T.M.B.) circuit with a Master Volume on the second channel that fit the specifics I was after. I was happy with the quality of workmanship – it had solid solder joints, all around.
I firmly believe transformer iron makes a big difference on an amp’s overall tone and character.
For an 18-watt amp based on a Marshall, you have a power transformer and an output transformer. In the 1940s and ’50s, some power transformers could handle up to eight times the output of an amp! The more muscle, the better the tone.
While an adequate power transformer insures an amp will run at optimum output and efficiency, the output transformer is what really counts when it comes to delivering tight lows and harmonics, and musical sound quality at different volumes.
There are companies making custom transformers and reissuing certain classics, and they all have distinct sounds and characteristics; some are brighter, some more harmonic, some offer crisper note separation, etc. Choosing one is, of course, a matter of taste. Since I was going for that classic dark vintage Marshall sound, I went with Mercury Magnetics, which offers a few choices when it comes to Marshall-style 18-watt output transformers, all based on classic Radiospares transformers from the ’60s and ’70s (which is what Marshall used in the 18-watters). I opted for the handwired ToneClone.
I played with various speakers – Jensen, Celestion Alnicos, old CTS speakers from a Hammond organ, and a few more mismatched combinations. But the thing that really worked was a pair of mid-’60s 20-watt Celestion greenbacks. To my ears, there’s something about an aged magnet in a speaker that makes it less harsh. The 20-watters captured that sweet spot. They’re articulate, punchy, and I really like that they don’t have the boomy low-end of their 25- and 30-watt counterparts. Aside from that, I had an old set that were signed by Alexander Dumble! Not that it makes a difference, tonally, but it’s cool!
Now, some guys wouldn’t pay that much mind to grillecloth, beyond its color. But there are dozens of variations out there… but none of them capture the look – and more importantly, the “feel” – of the vintage “Bluesbreaker” amps.
In the ’60s, Marshall used a rubbery grillecloth material that has never been accurately reproduced. It muffles and colors the amp’s sound in a way that’s unmistakable to old Marshall amps. While I wasn’t opposed to using some funky grillecloth, I really wanted to capture that classic sound. Luckily, I stumbled upon E.C. Collins, who hand-makes a near-duplicate cloth.
While there are plenty of manufacturers making quality tubes these days, I had all the vintage tubes I needed lying around from old projects. The only one I had to source was the rectifier tube, an NOS Mullard EZ81. I had two Valvo EL84s, which I used for the power tubes, and a vintage Mullard, and two vintage Amperex Bugle Boys, which I used for the three ECC83 preamp tubes.
There’s no reason to sacrifice quality to hit a price point. Sure, you might have saved a few bucks if you buy a mass-produced amp, but if you’re after tone and personality, with a little bit of time and planning, you can build the amp of your dreams.
My amp turned out better than I could’ve hoped, and since every component was sourced to my own specs, it truly speaks to me! VG
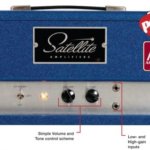
Few social groups are as resistant to the march of technology than guitarist. Even while amplifier design has witnessed drastic leaps in development and we now have incredibly versatile digital-modeling units brimming with processing power, huge sections of the electric guitar-playing populace still cling to technology that propelled records now 50 years old (or more).
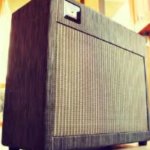
When my love affair with the guitar began some 20 years ago, most of the bands that I loved and felt a connection with had something in common: the guitar sound that I heard was aggressive, yet refined. It would roar like a wild, untamed animal, yet have a gentle purr at the same time. I soon found out that the sound I was falling for was that of the Vox AC-30 amplifier and the EL-84 tubes that it uses. Over the years I have owned many amps in my search for that sound that I heard in my head. Some of the brands include Vox, Matchless, Fender, Marshall, Mesa Boogie, and Divided by 13, just to name a few.
Let me introduce you to Joe Morgan and Morgan Amplification. Joe is fairly new in the “boutique” amp scene, but has quickly gained respect and grown to become one of the most successful and talked about names in a market that is, if anything, flooded with amp builders fighting to make a name for themselves. I’d like to give you the lowdown on an amp that has (with good reason) become one of his most successful models – The AC-30 Deluxe.
The amps are all hand built and wired one at a time by Joe himself. It is a 20 watt, cathode biased, class A amp with a switchable 12AX7/EF86 preamp. It utilizes a GZ34 rectifier, Sozo capacitors and Mercury Magnetics transformers. The controls on the faceplate include Gain, Cut and Power Level knobs as well as Normal/Brilliant and Bright switches. The Power Level By Dwayne LarringMorgan AC-20 Deluxe Ampknob acts as a master volume, but it does so by adjusting the voltage to the power tubes, taking you from 20W down to 1W without losing the tonal qualities when you turn down the volume. This amp is available as a head or as a combo. The combo comes stock with a classic Celestion Blue speaker. The cabinets are made of 13 ply voidless Baltic Birch and are handmade by a master cabinetmaker who has worked previously in the Fender Custom Shop.
One of the first things I look for in an amp is: does it make all my guitars sound like themselves? I have owned amps in the past that have had such a distinct sound that they were more like the amp than the guitars that I played through them. Let me just say this: the AC-20 Deluxe loves guitars! I started by plugging straight into the amp, and then began playing with the knobs and switches. The first thing I noticed was that there isn’t a bad sound in this thing. It was like I was able to take a tour through the history of Vox amps. I was able to get tones that ranged from the classic, smaller sound of an AC-15 all the way through to the big, warm tones of the “normal” channel, and the shimmery tones of the “brilliant” channel on an AC-30. All of this was on the 12AX7 channel. When I switched over to the EF86 channel things started to get even more exciting! Remember when I referred earlier to that “sound” that was like the roar of an untamed, wild animal? Well, I found it! If you’re not familiar with the sound of an EF86 you could just consider this the “more” switch. You can really feel the low-end bolster up and the highs get more chirpy and chimey, as well as a defining of presence and punch in the mids. Factor this in with the fact that you still have the tonal variations of the Normal/Brilliant and the Bright switches, and you really have a versatile beast on your hands.
The real test for me comes when I plug in my pedal board. I dial up a basic tone that is clean when you play with a light touch and that starts to bark at you when you dig in. This posed no problems whatsoever for the AC-20 Deluxe. I also like to use boost pedals to achieve different levels of distortion/overdrive. When I tested this out this configuration, I was very pleased with the way that the amp handled the stacking of the gain stages that ranged from clean boost, to overdrive and crazy fuzz. I never got the feeling that it was too much for it to take.
The real kicker and deal sealer for me is the “Power Level” control. You may think that it is just a good master volume but in fact, it is way, way more. It is actually a built-in Variac (voltage regulator) that controls the amount of voltage the power tubes receive. When it is wide open it is running at the full 20W. As you start to turn it down, the wattage of the amp drops and your volume decreases. What’s so special about that, you ask? Well let me tell you. With this feature you are able to dial in your tone, and then control the output volume without changing that tone! By decreasing the voltage, the tubes still act and sound the same, just at lower or higher volumes. This is absolutely genius, and in my opinion, one of the most useful features ever to be put in an amp! Now you won’t have to deal with the soundman wanting to take your amp off the stage, or having to turn your amp down to the point where you completely lose all of your tone!
If you are looking for a real amp that sounds amazing, is hand built, versatile, and won’t break your bank… this is the one! Top that off with the fact that you have the choice to order this as a combo or a head, and have many different colors to choose from to find the perfect one that’s just right for you! Overall, this amp is a winner! Morgan Amplification AC-20 Deluxe 1×12 combo with Celestion Blue – Retail $1,900
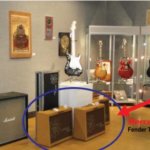
New York, NY – Collectors, fans, and musicians alike gathered on March 11 at Bonhams New York to celebrate the rock icon, Eric Clapton, whose personal collection of 75 guitars and 55 amps were auctioned off to benefit the crossroads centre in Antigua.
Hey, Jeff.
I love your column! I look forward to reading it every month. I have a ’67 blackface Super Reverb that I gig with. Really an awesome-sounding amp!
I just realized that the output transformer has been changed to a Bassman reissue or a Super reissue OT (output transformer). I’m not really big on keeping it original — it doesn’t really matter to me because I will never sell this amp — but like every other tone searcher out there, I want the best possible tone that this amp can achieve. I am curious about changing this out for a higher-quality OT. I heard the Mercury transformers are really good vintage replacements. What kind of differences in sound/tone will I hear by doing this, and is it worth it? Also what kind of tubes do you prefer in these amps? Thanks so much, and keep the awesome columns coming!
Ben
Hi Ben,
Thanks for reading PG, and thanks for writing in. It’s the much-appreciated support of the readers that enables all of us to write for such a cool publication. Now… on to that horrible amp you’re forced to gig with. I kid, of course. The Super Reverb is absolutely one of my favorite amps. The multiple 10″ speaker configuration helps give it a unique voice and sets it apart from most other combos using the ubiquitous 12″ speaker. It’s a shame that the output transformer needed to be replaced, but occasionally these things happen. A reissue Bassman or Super Reverb transformer, since they both have an output impedance of 2 ohms, will certainly get the amp working properly, but yes, you can do better.
Mercury Magnetics offers a couple of different lines, and they are some great-sounding replacement transformers. Their ToneClone series transformers are replicas of the original transformer designs, and the Axiom series takes them to the next level with design modifications for tonal improvement. Which one you choose will depend on whether you desire to have the amp sound as good as a great-sounding Super Reverb can, or to, as Emeril Lagasse says, “Kick it up a notch!” Either way, you should notice tonal improvements. Some may be very noticeable, and some may be subtler. Things like tighter, extended bottom end, smoother top end, more harmonic content and better note definition are all improvements you might expect. These attributes can all be affected by the quality of your output transformer. Whether it’s worth it or not is completely dependent on any cost limitations you put on your search for the ultimate tone.
You also asked about tube preference. This is always very subjective and depends on the type of music you play and your expectations of the amp. In general, my preferred preamp tube for amps that were not designed with heavily overdriven preamp sections is the Sovtek 12AX7LPS. Its large plates seem to make it a very full-range tube, so your guitar or effects will be very full bodied. In amps with major front-end gain, this extended frequency range can become too much of a good thing, but that’s certainly not the case with a Super Reverb like yours.
Also, here’s a little helpful tip to remember: Even new tubes can be microphonic. If you install new tubes in your amp and you experience ringing or feedback when the volume is turned up with nothing plugged in, try swapping the positions of all the tubes of a same spec. (In this case, it would be the 12AX7s. The 12AT7 tubes in Supers are in locations that are generally not too susceptible to microphonics, so they shouldn’t be an issue.) Certain locations in the circuit are more susceptible to microphonic tubes than others, so moving them often clears up the ringing, or at least minimizes it.
Preference for output tubes is much more dependent on the use of the amp and style of music. If you play mostly blues or classic rock, I would recommend going with a smaller-bottle tube that will have a nice, smooth breakup that occurs sooner — making it easier for the output stage of the amp to be pushed into clipping and achieve that glorious nirvana that is output-tube distortion! Recommendations might be the new reissue Tung-Sol 5881 or Groove Tubes GT-5881C. If you’re more into big jazz chords or country twang — or if you get your signature tones from stompboxes and prefer that the amp be as big, loud and proud as it can be — you’ll probably want to go with a larger-bottle tube. This generally yields the fullest, cleanest performance. Recommendations here might be the JJ/Tesla 6L6GC or the Ruby 6L6GCMSTR. Another suggestion here might be the new reissue Tung-Sol 6L6GC-STR. I just installed a quartet in a Twin Reverb and it was surprisingly loud ‘n proud. I hope that helps you on your way to a more super Super.
Weber output transformer
All and all not bad. The bottom is a bit boomy but it’s an easy fix. I did have to dial the bass down for the recording. The distortion seems loose and undefined. My dad likes the thickness, but he’s all about some Slow Hand’s “Woman tone.” If you’re on a budget definitely not a bad buy.
Heyboer output transformer
Clean is decent but this is probably my least favorite of the bunch. Way too muddy and grainy when distorted. I don’t like the feel of this transformer, and it has some weird mid-harmonics. It never seemed happy no matter how I set it.
Classic Tone output transformer
Clean is fantastic. Has great rich mids and terrific high-end sparkle but the bass is a bit thin. This transformer has a nice sweet spot but turning the knobs all the way up or down doesn’t have much effect on the sound. So it’s not as versatile as I would have liked. Still a little loose on the distortion but with good clarity. Definitely a great buy.
Hammond output transformer
Great Clean. The controls were very responsive but not what I’m going for with this amp. For whatever reason this pulls out all the Stevie Ray tones. My Tele always sounds like a Strat when using this transformer. It’s nice but not right for this rig. If I build a Fender in the future I might do another shoot out, and Hammond would definitely make the lineup.
Marstran Radiospares output transformer
I played this up a half step… whoops… and I blew fuse at the end of the recording and that’s why the demo is a little shorter than the others. The overall tone is harsh and I couldn’t get it smoothed out to save my life. The highs and mids are really sharp and spikey. The very top is shrill and thin. It also had some strange harmonics that just aren’t pleasant.
Mercury Magnetics Radiospares output transformer
This is by far the most versatile transformer out of the bunch. You can dial this thing any which way and it sounds great. The bass is full but not boomy. The mids are rich and smooth. The highs sing and sparkle but aren’t thin. The harmonics are ideal and even across the board. The distortion is the tightest and no matter how hard the amp is driven each note still has clarity. The touch sensitivity is unreal. With the amp almost dimmed you can play soft and hardly hear any distortion. Then you can bang out a chord or dig into some lead and the amp will scream. Yeah, it may cost four times as much, but as the old saying goes, “You get what you pay for.”
Source: https://mercurymagnetics.com/pages/news/misc/ShootOut.htm

Like the pedal business, the number of amplifiers being built by smaller builders has mushroomed into a garage and basement Skunkworks industry that is constantly changing. New guys pop to the surface and ride the momentum created by chat rooms and social media, while others quietly slip beneath the surface in an unfortunate imitation of Beach Boys drummer Dennis Wilson, never to be heard from again. The desire amongst certain guitarists and collectors to own the latest, supposedly greatest new amplifier is a power drug, and for some, a hard habit to kick. We enjoy discovering small batch alternatives to familiar archetypes and affordable production amps, too, but since we’re doing so on your behalf, our initial evaluation process lacks the unbridled enthusiasm of a new owner who has already made the plunge financially and emotionally. Still, when a giddy reader calls or writes asking us to review their new killer amp, we routinely hit the builder’s website, send an introductory email and wait for a response. Such was the case with the Tungsten Cremawheat and builder Adam Palow
Ultimately, the Cremawheat turned out to be another exceptional amplifier as our review reflects, but as is so often the case, the story behind the name on the face plate is as interesting as the amp. Listen….
TQR: You mention on your website that you were inspired and intrigued many years ago by your first tube amp. Do you recall what it was?
It was a 1965 Fender Vibro-Champ that was missing the face plate, and the grill cloth had been replaced with a red and black check material that looked like it had been on a sofa. I think I was around 16 when I got it, and no matter what I played through it, the amp sounded very musical compared to the solid state practice amps had used before. It was the beginning of an obsession. I started chasing down vintage Fender amps wherever I could, and I met a guy who showed me how to safely drain the stored voltage in an amp, how to use a soldering iron, and he explained how bigger caps produced more low end. From that point forward I was on my own, and everything I have done since has been the result of trail and error and experimentation. I’m limited in some areas because I don’t necessarily understand all the theory, but in another sense it’s empowering because I am chasing feel and working in an intuitive way rather than strictly by the “book.” My favorite part of the build is constructing the board and wiring the chassis. If there is any artistic expression in building an amplifier it’s in the way the board is constructed. Of course, in the larger picture, it’s completely meaningless.
TQR: What were the most significant things you learned through hands-on experience working with guitar amps, and the five years you spent working on Hammond organs with Bob Schleicher?
The thing that blew my mind the most once I had acquired multiple identical models of the same amplifier like the Fender Blackface Bassman and Bandmaster was how different they could sound from each other even though they were built with the same components. That also carried over into my work with Hammond organs, because every large Hammond console also had its individual voice, and I attribute that to the accepted variance in parts values, and individual and very unpredictable drift in these values over time. You also see random parts stacking where some of the capacitors may have been oriented the correct way and others not. When all the caps are pointing the right way you can have an amp that sounds faster, and when they are oriented the wrong way the amp can sound slower. On the old caps there was usually a band marking the outer foil, and whether or not they were oriented correctly often just seems like chance. Some companies paid strict attention to that and others did not. Even if I am building ten identical amplifiers in my own line, there are going to be variances between them – not only in the tolerance stacking, but in the way the tubes bias to the cathode resistor. I have an absolute minimum standard – it has to inspire me or I’m not going to ship it out, but every once in a while you drop in the right rectifier and the right power tubes and they just match up perfectly with the cathode resistor and it makes your hair stand up on end. Magical. Yet that same amplifier with a different set of tubes may not do the same thing.The Hammond organs are unique because not only do they have an extremely rich and harmonically complex signal, but they have infinite sustain with no transient attack unless you’re using the percussion feature, so when you’re dealing with Leslie power amplifiers you’re not dealing with sag. You’ve got compression going on because you’re driving it with a very wide band signal, but because there is no transient, you’re not experiencing sag, compression and release in that order. I spent a lot of time rebuilding Leslie amplifiers, and there was a very specific type of distortion coming from those 6550 Tung-Sols – a low, grinding, wooly distortion kind of like the Marshall of the organ world in a lot of ways, and I caught that sound in my head. It was very musical, and it had a lot of clean qualities, but also an outrageous amount of overdrive on tap, and even when it was driving hard there was still enough clarity to retain a musical quality in the distortion. You could really hear the notes and the intervals between them, and that’s the complaint I had with a lot of amplifiers outside the vintage world…. They swung so far into breakup and distortion that you lost the clarity of the notes. There was more noise than tone, and the place I’m coming from is a more musical place. The other aspect of my work with Hammonds is that I gained a huge amount of experience with vintage Jensen Alnico speakers.
TQR: We have always wondered if the Jensen speakers used in Hammond cabinets were similar to those made for guitar.
In the Leslie, the Alnico P15LL and later C15NLL bass driver that shoots down into the rotating horn were definitely not guitar speakers by any stretch. The 12 inch Jensens I’ve seen bear all the same markings as standard Jensens for guitar, the differences being that they have black frames with no Jensen sticker, and the Hammond code starting with the letters “AO” have been silk-screened on the frame. I have pulled P12Ns out of old Hammond A100s, as well as P12Qs, and if they were specifically designed for organ, they are also the best sounding guitar speakers I have ever heard, and I have used them to base my own speakers on made by Weber.
TQR: Which prompted the development of your own line of proprietary speakers?
Yes, and I didn’t really have to start from the ground up because they had already come close to the mark, but I wasn’t hearing the same extended frequency response that I was hearing from the vintage speakers, and it was just a matter of developing a different recipe. Fortunately, when Ted was still alive we went through the process of mixing and matching components, just trying to get that sound. I didn’t care if the parts were period-correct – I just wanted them to sound right. I tried to do the same thing with the ceramic line, but we just never nailed it and I never put them into production. Of course, the goal in developing the Alnico speakers was to produce the low-wattage, medium fidelity, $6 replacement speakers that they were originally.
TQR: Looking at the different models you build today, it’s obvious you prefer the sound of tweed-era amplifiers.
Yes, I cut my teeth on blackface amps, but when I built my first tweed Champ I became one of those guys that ditched my pedalboard and plugged straight in. For me it’s all about that very alive midrange, and the dynamic response you get out of the power section. I was instantly hooked. I also have a fondness for the lower power brown amps as well, but when it comes to what I personally want to plug in to and play, I really need to feel the response of a tweed power section.
TQR: What’s your approach to specific types of capacitors used in building your amps?
You have to let your ears be the guide, and everyone hears things differently. Every quality capacitor has its place, but I personally prefer the sound of Mallory 150s in tweed amps. Other people feel that they are too bright in the upper mids until they break in. I tend to break in my amplifiers for 72 hours and when I take breaks from building I’ll plug into every amp that’s burning in. The truth is, everything matters. In the Cremawheat, for example, there different capacitors are used in the tone circuit to color the tone in a certain way. It’s one recipe. I also use custom-wound Mercury Magnetics transformers in everything. Some of them are custom-wound because I wanted a different gauge of wire, and others because I wanted a different secondary voltage. When we’re talking about power transformers, voltage that you’re sending out to the circuit makes much more difference than the brand you’re using. With output transformers it becomes more critical. Some people want to hear a darker transformer, others high-end clarity…. Some people want a smaller core so it saturates sooner, and others want enough iron so that it never saturates. All of those factors play not only into the sound, but they hugely affect feel.
TQR: Can you briefly summarize each model you build?
The 8 inch version of the Mosaic comes with either the stock 5F1 (Champ) output transformer or the oversize version, which nets you perhaps an additional 2 watts. You get more punch rather than volume. I also build a 12 inch Mosaic Mark II with an additional tone knob, which gives you more bass.
The Cortez was intended to be my flagship model until the Cremawheat came out. The name was inspired by Neil Young’s Suma album – you can just hear the tweed all over it. Its 12W-15W with 6V6s and it bumps up to about 18W with 5881s or 6L6s. It’s basically a straight-ahead 5E3 design.
The Cremawheat is my attempt to retain the tone and feel of a great 5E3 Deluxe, while giving you the dynamic range that would otherwise be lost in the output transformer and speaker with that amp. Those were two choke points on the 5E3, and the third being the massive amount of bass that’s being sent through the circuit, which causes it to distort so early. The other significant feature in this amp is the British-voiced Scumback speaker. It adds punch to the dynamic range, and enough bass, but not the ragged and loose 5E3 style low end.
The T35 covers the 5F4, 5E5-A and 5E7 circuits for the Bandmaster, Pro and Super. They were basically the same chassis with a couple of minor resistor changes and three different speaker configurations, and I tend to prefer the 1×15 and 3×10 versions. It’s the only fixed bias amp I offer. I like the T35 series, but I tend to gravitate toward the cathode biased amps and most of my customers seem to as well.
If you took the 2-input ’55 Bassman, which shares a lot with the Super, Bandmaster and Pro amps of that era, and cathode biased it in a 2×12 speaker format, that’s kind of where the Blue Point sits. When you pay it clean, it sounds very American in the style of a mid-’50s Bassman, and as you turn it up, you get more coloration from the British-voiced speakers. It starts to cross the Atlantic into that early JTM-45 Bluesbreaker tone, but stops short of a later Plexi amp.
The Buckwheat is the follow up to the Cremawheat. It’s a 6L6-based, 30 watt with the Scumback H-75, which is their version of the pre-Rola G12H. It has a significant amount of headroom over the Cremawheat, and the speaker produces a glassier, high-headroom tone with a bigger transformer and a larger cabinet that leaves more air around the notes. If you’re a Telecaster player, for example, who wants more headroom with just a little hair, this is that amp.
TQR: Will you build specific amps with different speaker configurations as a head or combo, and what is the current lead time for an amp?
Sure, I’ll absolutely build variations on the stock models – I actually really like the 16 inch Mosaic and I have built several of them. I want to know that I’m building exactly what a customer wants. The lead time right now is eight weeks, and I always try to keep it under three months. I sell direct, and through a small dealer network, but I do enjoy working directly with customers. Depending on what a customer wants, I may suggest a specific change to the stock circuit, and I find that interaction very rewarding Introducing another 15W–20W amp in these pages is nothing new – in the past year we’ve invested a log of ink highlighting amps like Jeff Beck’s choice of a Pro Junior, our vintage ’59 Deluxe and ’76 Princeton Reverb, the Retro-King 18W and the Trace-Elliot Velocette. Why? Because we understand that such friendly decibel levels offer adequate volume for use in small clubs, mic’ed on bigger stages, yet till fill your house, studio or practice room with a mighty roar when needed. Small amps just make more sense today for most players, but like us, you might be wondering just how many ways a smallish guitar amplifier can be designed and built to produce a genuinely unique voice and vibe. You know what you’ve already got, but what might you be missing, and at what point does your quest to discover the ultimate low power amp become redundant, at best? A fair question, and given the nearly infinite variables created by the marriage of different components within different circuit designs, we are happy to report that we haven’t reached the end of the road in the quest for tone quite yet.
Viewed within the board context of the booteek amp landscape, the Tungsten Cremawheat emerges from the box as an uncommonly attractive natural blonde. Offset with gold grill cloth, it scores big in style points without even being lit up. Nor will you find any self-conscious bells and whistles added to an otherwise classic design, as if the builder wanted to get noticed by adding the kind of stuff we seldom really use – like Selmer-style rotary tone switches, pentode/triode modes and toggled boost switches (although Carr has always done those right by bypassing the tone stack). Indeed, this amp is so outwardly attractive, approachable and comely that pulling the back panel off might inspire distant memories of an anticipation experienced in concert with a one-handed thumb and forefinger bra removal technique. (We now pause to allow a moment of fond reflection. Please take your time.) Adam Palow’s skill in assembling and soldering up a circuit board culminates in nothing less than a work of art. Flip the chassis over and the custom-wound Mercury Magnetics trannies provide further evidence of Palow’s commitment to following his muse. In practical terms, you get four inputs into two channels (bright and normal), volume/volume and tone, plus a standby switch and extension speaker jack.
Our first session with the Cremawheat was agreeable enough, but repeat visits left us with a nagging impression that something was either missing, or perhaps technically present, but not being fully reflected in the sound of the amp. Naturally, we used our tweed Tremolux and Deluxe for benchmarks, and the Tungsten sounded subdued and restrained by comparison. We tried different tubes first with no appreciable change, and that’s when we focused our attention on the Scumback speaker. Admittedly, we had suspected it from the beginning, so with the original tubes back in the amp, we connected the Celestion G12H30 70th Anniversary in our ’59 Deluxe cabinet to the Cremawheat, fired it up, hit a big E chord raking a heavy Pyramid pick over the strings slowly, followed by ten minutes of unbridled delirium. Paired with the Celestion, the Tungsten bowed up with increased volume, clarity, dynamic punch, and a gloriously rich tone that easily rivals that of our Deluxe, but with a little more added sparkle. Swapping the stock Electro-Harmonix 6V6s for a pair of RCA 6L6s brought the Cremawheat to climax with an even bigger, more imposing voice, precisely in the style of our ’59. If anything, the Tungsten offered a slightly more defined and chiseled tone as a new amp should when compared to one that has undergone a half century break-in period.
To be fair, we called Adam Palow to inform him that while we absolutely loved the Cremawheat, we were not feeling the Scumback. He agreeably acknowledged that the Scumback was indeed somewhat more subtlety endowed than the Celestion, which is why he offered the G12H as an alternative for players desiring maximum girth, power and growl. Any number of modern speakers would surely sound outstanding in the Cremawheat – but we clearly preferred the more vivid soundstage created by the Celestion when the choice is narrowed to one of the two stock speakers offered. Would we buy and play the Cremawheat? Absolutely. It now reigns among the best on temporary boutique twenty watters, and in four important respects (tone, overall clarity, availability and price), the Tungsten impressed us as an irresistible alternative to a vintage Deluxe and any and all modern replicas

Unless you’ve purposefully dodged guitar-related forums or YouTube product demos for the past couple of years, you’ve likely beheld the work of madman guitarist Phil X. With millions of views of hundreds videos to his credit, Phil X is and online guitar-culture fixture
Any gear geek attending a Wilco show recently has probably noticed guitar wizard Nels Cline playing through a mysterious red amp head. Cline’s amp is a prototype hand built by gear guru Tim Schroeder, who also tackles the formidable task of maintaining Wilco’s enviably overflowing stable of gear. (Full disclosure: Schroeder also writes a regular Tech Tips column

The en vogue status of low-wattage combo amps remains a boon for any guitarist on the lookout for a compact amp. Just about every major amp company and most boutique shops are offering at least one model in the 12- to 18-watt range and that’s a great thing. What’s not to like about an amp that you can push hard without blowing out the windows or that you can throw in the front seat of your car for a gig?
Nolatone Ampworks — and the work of Paul Sanders — are already standouts in this fast-growing amp category. Hand built by Paul in Raleigh, North Carolina, using only the highest quality parts, Nolatone models like the June Bug and Chimey Limey have already made a mark for their interpretations of Fender Tweed and Vox tones. They might also be some of the sharpest looking amplifiers available today. And on both the sound and visual front, Nolatone’s 15-watt Rotten Johnny is every bit as spectacular a performer as its cousins in the Nolatone line.
The Dirt
Weighing in at a very reasonable 28 pounds with dimensions similar to a Fender Blues Junior (18″ x 16″ x 10.5″), the Rotten Johnny is an open-back 1×12 combo constructed of solid dovetail-jointed pine. Our review Rotten Johnny came in covered in two-tone brown and crème vinyl with basket weave grille cloth, and sported the signature Nolatone “V” panel TV front design. The 12″ speaker is a 25-watt Warehouse Green Beret, which is designed to sound like a broken-in Celestion greenback. The circuit is built around two JJ 6V6 power tubes (you can also request EL84s) and two 12AX7s. Everything under the hood is top-notch, including custom Mercury Magnetics iron, 1-watt carbon film resistors, F&T filter caps, Switchcraft jacks, and Carling switches laid out on a hand-wired turret board.
Unlike many lower-wattage amps, the Rotten Johnny offers far more control options than a single volume and tone control. The top panel consists of a unique 3-band EQ (Bottom, Mid, Top), as well as Pre- and Post-Gain controls and a Master volume. A Mid Lift switch (which can also be activated by a footswitch) effectively works as a boost for solos. Power and standby switches reside next to a red jewel power indicator.
The EQ section is a little more flexible than what you’ll find on a production-line low-watt amp. The Bottom control is a 6-way switch that progressively rolls off bass. The independent Mid control is not part of a typical tone stack configuration — dialing it down extends the highs and lows to create a very Fender-like mid-scooped tone. The High control, meanwhile, is a Vox-style top-boost reverse-wired to enable players to move from chiming to much darker tones by backing off the control. Borrowing a move from Nolatone’s June Bug design, the Pre- and Post-Gain controls work in tandem to control the amount of gain to the second stage and phase inverter respectively.
Rockin’ the Filament
With a Godin Icon Type 2 with Duncan P-Rails in hand, I got right down to the business of exploring the wide-open voice of the Rotten Johnny. With the Godin set to the humbucker position, I cranked the Master to full, set the Post Gain to around noon and brought up the Pre Gain until I got a rich, full distortion. The sound was raw and thick, but I wanted a little more clarity, so I dialed back the Bottom knob by a few clicks, scaling down the thickness a touch, but opening up the sound considerably. The combination was reminiscent of Frampton’s Rockin’ the Fillmore-era Humble Pie tone — a pretty huge sound for a 15-watt 1×12 combo. And if I closed my eyes, I’d swear I was listening to a full stack in miniature. For years, I’ve tried to harness 100- and 50-watt amps with attenuators and master volumes and never been totally successful. Needless to say, I was stunned when two 6V6s pushing a single 12″ gave me what I’ve been looking for—and then some.
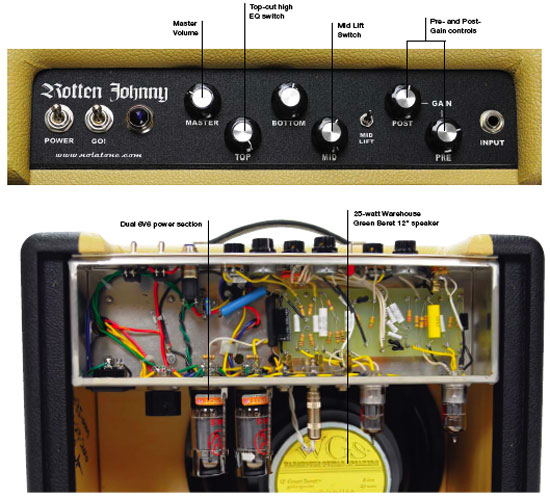
Wielding my ’74 Les Paul Custom and with the Mid control set to the non-lift position, I was able to dial in AC/DC rhythm tones with just the right amount of kerrang and chime to create the illusion of a blaring baby JTM45. And setting the Pre Gain to noon and ramping up the Post Gain added gobs of thick, juicy crunch with just enough bark to cut through a mix. This is where the Top control really shines — pulling the Top back just a touch takes some of the edge off without muddying the tone. It’s voiced for just the right amount of sheen and clarity without ever being brittle or ice-picky. The top-cut configuration also makes the effectiveness of the Mid control’s sweep range very apparent — enabling boosts in presence that aren’t too brittle.
The Mid control is almost like another gain knob, delivering more distortion and dimension the more you crank it. And with the Mid Lift engaged Rotten Johnny turns into a roaring fire-breather with more gain than most of us would ever need. I’ve rarely heard a 6V6 amp sound this way — often assuming some of the tonal qualities of EL34s and EL84s. Though it only takes cutting the Mid and backing off the Pre Gain to get back to more blackface-like territory that was a perfect match for my Strat.
For a 15-watt amp, the Rotten Johnny doesn’t lack headroom. Because there is so much control via Pre and Post gain over how hard you hit the tubes, I found myself digging deep into the wealth of Strat-friendly clean sounds you can get with less aggressive use of those controls. It was easy to conjure thick and chewy cleans with just a hint of grind by pushing the Post Gain and leaving the Master wide open. Even with the Mid Lift engaged I could still hit the guitar hard without harsh sounding breakup. And I was always able to shape the thickness with the Bottom switch, which I used extensively to match individual guitars to the amp.
The Verdict
It’s been a long time since I’ve been so excited about a new amp. The Rotten Johnny has a huge range of brilliant tones in a compact design that, at $1399, doesn’t break the bank. For bedroom or studio musicians, it’s a dream because you can coax out cranked stack sounds without knocking down walls and get the most beautiful cleans with the twist of a few knobs. The construction is top notch and the styling is classy and cool. For an amp that’s roughly the same size as a 1×12 cab and weighs less than 30 pounds, it has the sonic personality of something much larger. I only wish this little guy was around when I first started playing guitar. Thankfully, I’ll have the chance to make up for lost time — my own Rotten Johnny is on the way and I can’t wait to cut loose.
Buy if…
you want everything from Brit aggressiveness to blackface tones in a compact package at a fair price.
Skip if…
you actually need the power to blow down barns.
Rating…
![]()
![]()
![]()
![]()
![]()
Source: https://mercurymagnetics.com/pages/news/PremierGuitar/PremierG-30.htm
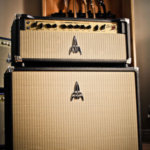
Fullerton, CA (December 21, 2010) — Electroplex Amplifiers will debut the Rocket 50-EL at the 2011 Winter NAMM Show in Anaheim, CA. The Rocket 50-EL retains all of the performance and features that have made the venerable Rocket 50 the amp of choice for performing guitarists worldwide, and adds the authoritative punch and distinctly “British” character of EL34 power tubes.
Beginning with early Marshall and Hiwatt amps and others from the UK, EL34-powered amplifiers have established a unique character and powerful presence favored by guitarists seeking the hard-driving “second-generation” British sound of Jimi Hendrix, Pete Townsend, Jimmy Page, Eric Clapton and many other rock guitar icons of the ’60s through the ’90s.
The Rocket 50-EL honors that EL34 tradition and extends it with the versatile front-end voicing of the Rocket 50 preamp. Two distinctly different channels offer a wide array of tone colors, and the Rocket’s expanded gain control allows players to precisely tailor the amount of overdrive in their sound, as well as the overdrive threshold for expressive touch control. The result is a new-generation EL34 amplifier that brings exciting new voices and capabilities to the performance stage and recording studio.
The Rocket 50-EL will be available in head/cab configurations and in multiple combo configurations, starting February, 2011. NAMM Show attendees can try out the Rocket 50-EL at the JHS booth #1212 in Hall E.
For more information:
Source: https://mercurymagnetics.com/pages/news/PremierGuitar/PremierG-29.htm
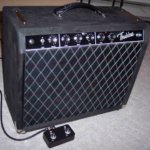
Something very cool is happening the basement of Mr. Music, Boston’s favorite family-owned music store in Allston, Massachusetts.
After a lifetime of gigging, amp repair, studio building, and tone tweaking for stars like Joe Perry of Aerosmith, master technician Rob Lohr is building some of the finest boutique tone monsters to come along in a while.
I have always been impressed with anything I heard that was built in his shop, located in the basement of Mr. Music. Rob is a person of great detail. A technical question put forward to Rob usually yields a tutorial on the workings of electrons with respect to our favorite instrument, the guitar. Through the years, Rob and I have had many conversations about what a practical amp should sound and look like. A veteran of the gig scene himself, Rob understands what the working artist needs. In my world, 50 percent of the reason why something sounds good is because it does not need a crew of roadies to transport it, set it up, and break it down. These days, as indie artists, even for high-profile shows in theatres, we usually show up with our own favorite rig. It had better be light and tone-worthy!
When I heard Rob’s Dumbalina, an amp inspired by the legendary Alexander Dumble’s Overdrive Special, I was instantly hooked. Here was an amp the size of a Fender Princeton Reverb that was a very high quality, point to point, hand-made tone machine that had a kick like amps twice its size. Rob Lohr had somehow managed to pack all of the essential features of the best Dumble-inspired amps into a space the size of a Fender Princeton Reverb. He did this with no sacrifice in power (45w) and the highest quality components!
There are many other great D-Style amps whose components are a cut below Dumbalina’s. Yet Rob charges a modest $1800.00 for the basic amp, with additional costs for any custom work. Okay, yes, I did have to pay extra for him to add my name to the front in vinyl lettering with Fender-style script. Don’t be confused though, this is not the “Thaddeus” amp!
With a switchable 4, 8, 16 ohm extension speaker output, the amp offered everything you might need to grow your rig. Small gig: use the onboard 12-inch G12-T75 and walk in with the amp in your right hand and guitar in the left. Large gig: take an extension cab and utilize all of the 45 available watts to rock the stage with two or more 12-inch speakers.
The footswitchable Overdrive channel sounded like the mating of a Dumble Overdrive Special and a Two Rock Custom Reverb Signature. Overdrive that sings without over-saturation and responds to tonal tweaks on your guitar or subtle finger ornaments. The quality of OD of this amp, I will testify, is simply one of the best I have played. The clean channel can be crystal, but if you push it, you can get a singe on the top notes and a roar on the power chords.
The +4 effects loop provides you with the opportunity to use the highest studio grade effects in the loop. Aside from being whisper quiet, plugging in a high-end effect processor seems to lend a three-dimensional quality to the amp that makes it sound much bigger than its physical proportions might suggest. Of course, you can use a dumble-ator or clone thereof to use line level floor pedals, but why not use some of the high-quality studio grade pedals that are coming out these days? TC Electronics makes a couple and so does Eventide. More and more pedal manufacturers are giving you the option of the studio level +4 signal, ready to plug into your D-style effect loop. (See previous post on Effects Loops).
The three switches that you normally find on D-clones for Bright, Mid, and Bass are neatly hidden in Dumbalina: Each tone knob (Bass, Treble, Mid) has a hidden, whisper quiet, pop-less pull-boost feature which takes the whole thing up to a different kind of 11 heaven. The Volume knob has a presence boost. When the Tone Bypass is engaged (often called Pre-Amp Bypass or PAB in other Dumbl- inspired amps) the treble pull pot doubles as a bass boost. The result is the most useful “PAB” option that I have ever seen with a corresponding increase in low end that makes this feature a very practical and useful option for me. Usually I shy away from PAB because it might sound a little gnarly, or less friendly in lower volume settings, even though it works wonders for cutting through in the heat of the mix at high volumes.
My most recent gig was a power trio gig, a Hendrix tribute concert. I used Dumbalina’s overdrive channel for the solos that were not over-the-top, so to speak. When the band started really bashing, I could get away with using my Tone Bypass to cut through the mix. Really very flexible tones on this puppy! The 45w is just what you need to sing at lower volumes. Push the envelope a bit and you get great power amp overdrive without scaring the non-guitarists out of the room. In addition, there is a master volume/loop send level that allows you to get the tones you are using at lower volumes without changing the character of the settings. A well thought out amp for the working musician. At 34 pounds, the amp is welcome at any gig that I play!
In the studio, Dumbalina reigns supreme. I have just completed tracks for a tribute cd. R&B versions of Jimi Hendrix tunes. I used Dumbalina for many of the guitar solos and rhythm tracks and, well, tune in next year in the Spring to hear what I think are pretty amazing guitar tones.
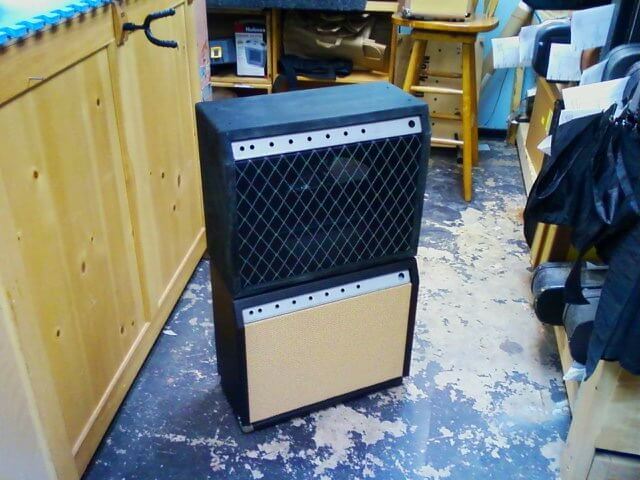
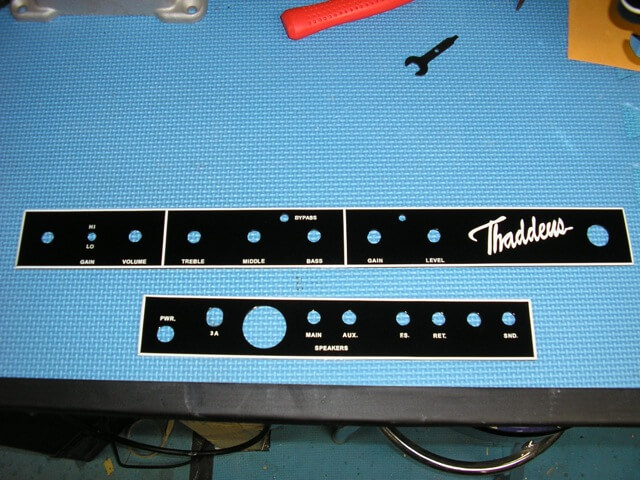
OLYMPUS DIGITAL CAMERA
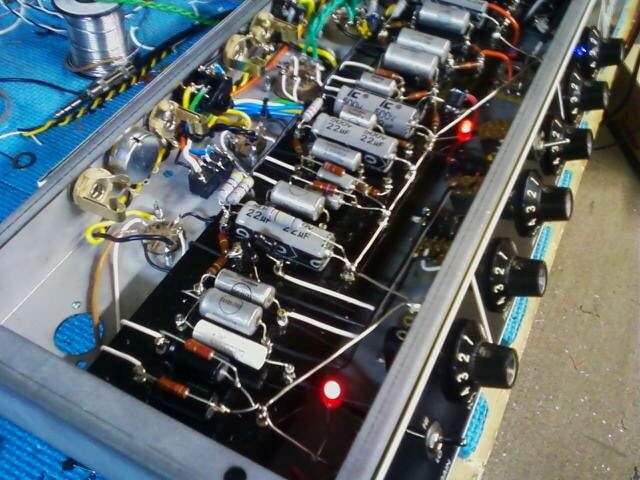 Rob builds every aspect of the amp. From the cabinet and grillcloth to the faceplate (painting and vinyl lettering)
the meticulously wired components inside this amazing amp.
Current wait time is only something like three months, since Rob is building each one by himself. I am sure as the word gets out, that list will grow and grow. It will still be worth the wait, I promise!
Here is the icing on the cake: roughly six months or so after you get the amp, after the amp has been broken in. Rob will sit there with you and do the final tweaking of the components WHILE YOU ARE IN THE SHOP! He will look at the levels and settings that you choose and tweak the internal components so that a great amp becomes an even greater amp, tuned to YOUR signature style of playing. This is an amazing benefit and it is the feature that pushes Rob to the front line of amp builders. (Isn’t that why Dumbles became so popular and expensive? Alexander Dumble would tweak them to the playing style of the owners). Rob recently spent 10 hours—yes folks, 10 hours in the basement at Mr. Music—tweaking an amp for client Alex Potts, so he could have it ready for his move to LA. In my Berklee Online course, Funk/Rock and R&B Soloing, I talk about signature tone. Folks like Robben Ford, who within a couple of notes, announce their presence on the recording whether or not you are even close enough to read the album credits. I believe that this amp can open a door to this concept, and with the post-build tweak, you just might be creating some new history.
Here is the latest version of Dumbalina that Rob is completing, with a couple of new tweaks and slightly different cosmetics on the faceplate, which include corresponding faceplate lights for the lighted footswitchable Overdrive and Tone Bypass features: Sweeeeeeet!!
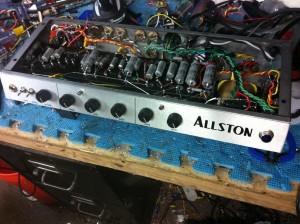
Here is the scoop on Dumbalina, from the hand of the builder himself, Rob Lohr:
CABINET-The cabinet is Grade “A” pine joined with machine cut half blind dovetail joints and internally braced with poplar. I will cover the cabinet with any available tolex and grille cloth, and you have your choice of appropriate loudspeaker*. The standard faceplate is brushed aluminum with black letters, but I can do colors for a small upcharge and you have your choice of knobs**. The handle is a good quality faux leather that comes in brown, black, or blue, and I use 1″x2″ heavy duty rubber feet and stainless steel cabinet corners and hardware.
*speaker must be of appropriate power handling.
**knobs must fit 1/4″ shaft and comply with existing chassis hole spacing.
CHASSIS– The chassis is steel with welded joints and all hardware is stainless steel. The transformers are MERCURY MAGNETICS FBFVL-P 120v power transformer, FC-VIBROL choke and FBFVLR-OS Fatstack output transformer(4,8,16 ohm selectable). I can do selectable AC input for a small upcharge. The tube compliment is: 2x 12ax-7(pre), 1x 6sl7(PI) 2x 6L6GE(output) and a GZ34(rectifier). I use Belton tube sockets and retainers. I use a combination of Alpha, Clarostat, and Bourns potentiometers, Cliff and Switchcraft jacks, plugs and switches. All shielded leads are Mogami console cable. All unshielded signal leads are teflon coated solid copper core silver clad. All power supply wiring is PVC jacketed stranded copper.
ELECTRONICS– 100 percent hand-wired point to point construction. Hand made 1/8-inch fiberglass turret board, a combination of Metal oxide, metal film and carbon composition resistors, Oil and foil signal capacitors, and high quality electrolytics. There are some other solid state components, but they are related to the switching circuits and are not in the audio path.
LIMITED LIFETIME WARRANTY– I don’t warranty speakers, tubes, or output transformers for obvious reasons …but if anything else ever breaks I will fix it for free for ever and ever. Or until I die, which ever comes first.
Here is the bullet list of Dumbalina Specs:
Output power———–45 watts
Tube compliment——–2x 6L6GE, 2x 12AX-7, 1x 6SL7, 1x GZ34
Output Impedance——4,8,16 ohm selectable
Effects loop———— post pre/ pre power half normalled break out with send level.
Foot switches———-Over-drive and tone bypass(PAB). Both can also be controlled by front panel switches and are indicated with both front panel and foot switch mounted LED’s. The footswitch over-rides the front panel switches.
Controls—————-Volume, Treble, Middle, Bass, Overdrive, Level (ratio), send level.
Pull Pots:
Pull Volume————-Bright
Pull Treble————–Hi mid boost
Pull Mid—————–Lo mid boost
Pull Bass—————-Bass boost
Speaker Celestion G12T75, 8 Ohm
Rob Lohr can be reached at Mr Music in Allston Massachusetts at 617-783-1609 or at robmadoak@hotmail.com
Here are few demo videos that I just did:
OVERVIEW:

Manufacturers Step Up to Help Nashvilles
Nashvilles, TN – in the wake of the devastating Nashvilles floods, the music community has relied to help musicians affected by the flood rebuild their rigs and their lives. Among the companies reaching out in various ways are Guitar Center, Visual Sound pedals, Mercury magnetics transformers, and Gibson- whose Nashville factory also suffered losses.
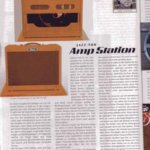
In this issue we are dealing with a subject on which I have received many inquiries in the past. It is about the selection or matching of tube amps for the best possible Jazz sound. Amplifying acoustic or semi-hollow-body guitars has always been a huge challenge because most jazz guitarists are very demanding in terms of sound and simultaneously fight against unwanted distortion and feedback. In the following article I would like to summarize some tips and tricks that get great tone and how to avoid distortion.
When I started getting involved with jazz sounds, around 1977, most guitarists in this genre used transistor amplifiers. George Benson played a Polytone, Pat Metheny an acoustic amp with a 4×10” speaker cab and Volker Kriegel and Michael Sagmeister used a Gibson LAB L9 with 15” speakers. Such examples can be found very often from that period. Although all of these guitarists had indeed very good tone, the typical depth and openness of a tube amp sound could not be reached however in its wider spectrum. Still the transistor amps had some advantages over tube amps: They sounded very compact and linear, were less prone to feedback and offered a relatively balanced frequency spectrum and a nice sustain, which was the ideal sound of many jazz guitarists. A Gibson L5 played through a LAB or a Polytone is completely convincing – even today.
One disadvantage that the transistor amps had in particularly was its dynamic behaviour, in their relatively poor response and in their tendency to not let the individual character of a particular guitar fully unfold. You could also say: Transistor amps tend to standardise tone.
I do not wish to start a discussion about tube versus transistor because transistor amplifiers will continue to play a rightful role in jazz. It is more about ways to show how one can get the typical warm jazz tone with a tube amp without all the disadvantages.
Above all I am thinking of the sounds of the early sixties, which were marked by numerous jazz guitarists including: Wes Montgomery, Kenny Burrell, the early George Benson, Herb Ellis, Joe Pass, Barney Kessel, Grant Green and Jim Hall. All of these guitarists were playing tube amps on their early recordings and getting fantastic sounds. Today tube amps are celebrating a renaissance with jazz guitarists.
Let us first take look at the most popular models from the distant past. In the fifties the combos from Fender (Tweed), Gibson, Standel or Flot-A-Tone were especially loved by jazz musicians due to their sound and their small size. These amplifiers were sufficient for jazz guitarists because they were usually accompanying musicians and they performed as a soloist only in rare cases. They often stayed in the background and did not play very loud.
Even back then, most jazz guitars were equipped with a tone control that made it possible to filter out unwanted peaks and thus to form the typical dark jazz sound. But soon the guitar became a solo instrument. Just think of the impressive sound of a cascading Les Paul, who at that time had good reason to play on a solid body. The traditional jazz players remained with their hollow bodies and now had to fight against all the disadvantages of the electrification of their sounds. Recently I read in a retrospective of Wes Montgomery that he alleged that during his entire career he was unhappy with his sound because he simply could not find the perfect amp. One might even go so far and assume that the dark jazz sound is actually created only (and eventually cultivated) because the amount of unpleasant highs tube amplifiers have, are rather imperfect sounding and also quickly led to feedback. Most guitarists wanted more of a linear and natural reproduction of their beautiful instruments that already sounded great acoustically.
Let’s now take a look in the interior of a tube amp and consider certain circuit characteristics which can be modified for a better jazz tone. The objectives of these measures are the reduction of distortion and the high frequencies, improving the mid-range and increasing the linearity of the sound.
First, a list of known suitable amplifiers for conversion to a “jazz box”: Fender Tweed Fender amps from 1956 and Brownface, Blackface and Silverface combos. Examples from this list shall be explored in following issues.
Let’s start with a Tweed Deluxe amp replica from Cream which I have converted for jazz sounds. These amps are known for their distortion when left stock and therefore not ideal for a clear jazz tone. But they are very small and handy and with around 15 watts of power ideal for use in a club. In addition, these amplifiers are connected with a so-called “split-load” phase inverter which is appropriate for our purposes because of its low gain. The only drawback is the two coupled volume pots, which restrict the volume control range on the one hand and deliver too much gain in the preamp. The aim is to reduce the gain in the preamp and increase the output power and stability of the amplifier. Only then we get enough headroom for a clear sound.
Just this once, I should like to “put the cart before the horse” because there are a number of measures to improve the amp without intervention on the circuit.
First, these amplifiers usually have an inefficient speaker. Powerful speakers with a good efficiency rating are especially suitable for jazz sounds. Those who love the Alnico sound can search out an old JBL D-120 and replace the aluminum dust cap with a counterpart out of fabric (available from Weber VST). The speaker can be helped dramatically in the highs and we get a warmer, rounder tone. Excellent was also the old Fane Crescendo Heavy-duty speaker, which is also suitable after the removal of the aluminum dome making a perfectly clear and powerful sound. These speakers were also used by David Gilmour. Another excellent choice is also an Electro-Voice 12L or a Jensen C12K with 100 watts. All these speakers better the sound of the Tweed Deluxe significantly. You only have to watch out for the thin baffle-board because vibration during transport could for example pull heavy speakers from the screw holes.
A further stabilizing method is the conversion of the power tubes to 6L6 or 5881, which I recommended at this point several times. Although the amp has only about one or two watts more output, the increase in headroom is very clear. You get more clean reserves and dynamics. Here I recommend changing the cathode resistor of the amplifier from 250 (typically with 5 watts) to 330 ohms with 10 watts. If you play a jazz guitar with humbuckers, we recommend the low input of the normal channels. Here there are less highs and the output signal of the guitar is more attenuated. It should be noted that the volume pots affect each other on the Tweed Deluxe. By turning the unused channel by not more than 70 percent, the tone is much cleaner, but also quieter.
If you don’t wish to utilize this trick, you can simply remove the cathode of the second stage capacitor (Elko 25mF/25 volts) and reduce the gain of this stage substantially, which in turn increases headroom. The amp will be clearer and somewhat linear, but also a touch softer.
Even more clear sound can be obtained by replacing the output transformer. Something I always do in such tuning. In this case I choose a Mercury Magnetics Tweed Pro Axiom FTPRO-O transformer (available at Tonehenge Amplification) with 8 ohms, which gives much more stability to a small tweed amp.
If you want to use the amp only for jazz, you can also decouple the two volume controls from each other and only one channel and a tone control remain. Now you can adjust the volume much finer and linear. The circuit can be found at www.schematicheaven.com under Fender Deluxe 6G3. Here the channels are completely separate, each with their own volume and tone control. It’s only after the volume knobs on the channels that two 220k ohm mixing resistors are mixed together again.
Since the Tweed Deluxe played with humbuckers has in general somewhat bassy sounds, I also reduce the value of the coupling capacitors from 0.1mF to 0022mF. This makes the sound tighter and more mids. Sprague “Orange Drop” P715-type fit perfectly here.
Finally we get to fine-tuning via preamp tube placement. With a good 12AY7 and a 12AX7 of your choice, you can continue to shape your favourite tone. For those of you who have not had enough, you can play with the value of the capacitor on the tone-pot. The Deluxe was originally installed with a 0005 UF capacitor but also possible are values such as 0.01mF or 0.02mF (as in the 6G3) for a slightly warmer tone. If you want to darken the sound one can bridge one of the anode resistors at the 12AY7 with a 0.003mF capacitor (as in the normal channel of the Brown Vibrolux).
The result is a truly compelling jazz amp for small clubs, feeds back less, offers more clean reserves and could compete with any Polytone but all the benefits of dynamic and harmonically rich tube sound can be enjoyed. Diana Krall’s guitarist Anthony Wilson often used a Tweed Deluxe replica from Clark and his blond Gibson Byrdland in the studio. This sound is very reminiscent of Kenny Burrell and offers a wonderfully unique character. Have fun experimenting!
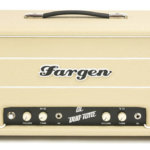
Sacremento, CA (May 24, 2010) — Fargen Amplification announced today it has enhanced its tube amplifier line with major upgrades and improvements to three existing amplifier models, and it has introduced a new model, the AC Duo-Tone.
The AC Duo-Tone is a revolutionary design featuring two distinct channels that cover a wide range of Brit-type tones. “I’ve pushed this dual EL84 tube design to its limits, offering contrasting channels, and sustain for days,” says Ben Fargen, founder and CEO. “The amp features simple controls that cover a lot of ground ranging from AC-Brit style tones to throaty tone.”
Fargen AC Duo-Tone Amp Features:
* 2 Channel design with simple easy to use controls
* 6CA4/EZ81 rectifier tube
* Custom Mercury Magnetics transformers w/ 4-8-16 ohm taps
* SoZo vintage style mustard capacitors
* Cathode Bias plug and play EL84’s (no re-bias)
* DC Filaments for ultra quiet operation
* 1/8″ aluminum chassis for the true vintage British amp sound
* Passive FX Loop
* Head – $1499 (direct)
The three existing amplifiers in the Fargen line, the Blackbird, Mini Plex MKII and Olde 800 MKII, have each received Fargen’s upgrades and a new look. “We keep an open door to our customers and have welcomed their feedback over the years. The new designs reflect their suggestions, with a touch of my innovative improvements in circuitry and cosmetics’” stated Fargen.
For more information:
Fargen Amps
Source: https://www.premierguitar.com/articles/Fargen_Amps_Releases_AC_Duo_Tone_Amp
Chatsworth, CA (May 19, 2010) — If your amp was submerged or has sustained any water damage in the Nashville Flood, call Mercury Magnetics. Mercury is offering a free amp transformer service for all flood victim amps.
Here’s how it works: Mercury has designed a technology specifically to salvage and restore flood-damaged transformers. The process includes inspection and testing, a custom process of evacuating the moisture, and re-varnishing of any transformer without charge. They’re only asking that you pay the shipping each way.
“This is a vitally important service we’re offering. And we hope that everyone takes advantage of it,” said Patrick Selfridge, Mercury’s Service & Support Network Manager. “Especially for the vintage and rare amps that otherwise are never going to sound the same if this process isn’t done correctly. There’s a potential tragedy of some historically important tone being lost forever if their transformers are not properly brought back to life. We’re proud to say that so far our engineers have a 90% success rate.”
Mercury advises owners not attempt to power up the amp without having the transformers serviced. To do so will almost certainly “fry” them. However, if a transformer was damaged beyond repair, Mercury will offer the choice of a rewind, replacement or upgrade at substantial discounts.
Contact Mercury for any questions or concerns you may have and for special shipping instructions.
For more information:
Mercury Magnetics
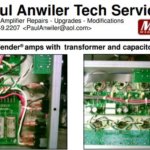
Fender amps with transformer and capacitor upgrades –
Mercury Magnetics transformers in Fender SuperSonic. Note: extra wire is service loop for power suppy board.
The Fender SuperSonic illustrates the high component density of all the circuit boards.
Mercury power transformer with tube rectifier mod in Fender Custom Vibrolux Reverb. No service loop needed.
The cap installed on end due to a lack of room. NOTE: heat shrink tubing & RTV silicone.
Cap upgrade in Fender Super Reverb (Orange Drop -716P Polypropylene Film caps with copper leads).
An additional view of the Fender SuperSonic shows the Mallory type 150M Series – metalized polyester film caps.
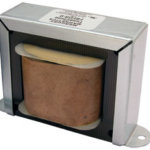
I have a cool little 1980s Fender Super Champ. It’s one of the amp models that was designed by Paul Rivera. This little guy puts out about 18 watts through a single 10″ speaker. It also features Reverb and an overdrive mode. This is a great little amp to take to jams or recording sessions. It’s an all tube design and one of the last point to point hand-wired Fender amps. A few shortcomings of this amplifier are:
Two of the three shortcomings can be fixed pretty easily and for not too much money. The one that cannot be fixed is the footswitch circuit… I’ve tried and it’s just the design… oh well. First thing is to ditch the stock speaker and put in one that’s more efficient with more clarity and better bass response. I chose an Eminence Ragin Cajun and the amp totally came to life. You can do a gig with no problem once you install the Cajun.
If you want to take the amp up another level or two then you have to replace the puny output transformer. I removed the stock unit and replaced it with a Mercury Magnetics FBFDR-O model. This is the clone of the blackface Deluxe Reverb output transformer. It is definitely bigger and if you install in on a slight angle you can catch a mounting screw hole for a terminal strip so you do not have to drill any holes in the chassis.
The result is absolutely astounding!! It has been a long time since I upgraded a transformer in an amp and this swap reminded me how effective upgrading an output transformer can be. The whole amp just opened up and the bottom end got much tighter and defined… almost piano like. The overall volume of the amp increased and the dynamic range was broadened. There was much more harmonic content and overall the amp sounded and felt much more solid. Besides sounding and feeling better this amp was now a lot more gig worthy. A simple transformer swap did all that and only took about an hour from the time I dropped the chassis until I hit the first note. To me that’s a total home run!!
If you have an amp that sounds and feels good but want to take it up a level or two then let me suggest two reasonable upgrades: New speakers and a transformer swap… at least the output transformer. These two upgrades can transform your amp into something magical. Plus it is a lot less expensive than getting a whole new amp, not to mention the time you have to invest trying a bunch of them until you find one that works for you.
I am affiliated with both Eminence and Mercury Magnetics. If you have any questions and are interested in upgrades please email me and I can help make a recommendation or two on speakers and/or transformers. You will be amazed… I am every time!!
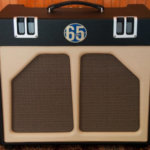
THE CREW AT 65 AMPS HAS A REPUTATION for putting considerable R&D sweat into every new amp design before it leaves the maker’s Los Angeles, California, headquarters. The Lil’ Elvis has, in the broad sense, been in development even longer than most — a stately 48 years or so, if you take into account its roots in an odd little combo owned by Vox collector and author Jim Elyea, one that Vox designer Dick Denney had built as his own personal amp, but which never went into production. Having seriously dug this prototype’s overdriven sound, 65 Amps’ Dan Boul and Peter Stroud set about tidying up the circuit, giving it a usable clean voice and a much broader vocabulary, and making it into a versatile — yet still quite simple — club-gig and studio amp for the contemporary tone fiend. The result is 65’s most diminutive offering yet, both in physical stature and output level, but as we shall see, the stated “clean output” of 12 watts can be deceiving, and this isn’t the mere bedroom brawler that such a rating might imply.
The format hints at a blend of American and British small-amp templates: from this side of the pond, a quirky split-phase inverter similar to that of Fender’s Princeton Reverb and a “bias wiggler” tube tremolo circuit not unlike that used by some Gibson and Ampeg models — from the other side of the pond, the dual EL84 output tube complement and EZ81 tube rectifier. And from California circa 2009, plenty of fresh thinking in the form of the Bump and Master Voltage circuits and the squat, chunky cab, as well as the considerable effort that went into transformer design (with Mercury Magnetics), grounding and filtering topologies, and noise reduction techniques. The Lil’ Elvis is also a somewhat simpler affair than other 65 products, and comes in at a little less coin as a result. Its Bump feature is fixed — rather than having its own Tone and Level controls like the one on the SoHo and Stone Pony — though it is footswitchable (from a pedal that also includes a stomp button for the tremolo), and EQ is limited to a single Tone control. There’s also an enigmatic Smooth switch that has no noticeable affect on clean settings, but does exactly as it says when you crank the amp up, by engaging a circuit that keeps the grid from lifting up from ground when you go into heavy distortion, thereby reducing crossover distortion at the output stage. The final control on the panel, labeled Master, actually governs a proprietary “master-voltage” circuit that lowers the preamp and power tubes’ output levels while retaining filament voltage and, hence, is purported to preserve tonal vocabulary and playing feel.
The stout 21″ wide x 18 high ” x 11.5″ deep cab wears the traditional 65 Amps two-tone cosmetics with aluminum front-edge cooling vents, and houses a single Celestion G12H-30 speaker. Inside, the workmanship lives up to everything I’ve come to expect from this high-end maker, offering a superb example of handcrafted tube amp manufacture. Of the whole package as it sits, my only minor gripe might be that it’s tricky to change the horizontally mounted tubes, requiring a blind grope inside the cab, but it’s easy enough flip the whole chassis outward, panel still attached, to do the job more carefully. Oh, and why “Lil’ Elvis”? In Boule’s own words: “No matter how small you make Elvis, he still rocks.”
I tested the Lil’ Elvis with a Fender Telecaster, a Collings 290 with Lollar P90s, and a Gibson SG with humbuckers. Played clean, it issued classic blackface-Fender-style tones, with piano-like lows and silky highs, with good headroom up to higher Volume settings than I would have expected. Cranked up, this sonic template segues into a surprisingly convincing Marshall half-stack impersonation. There’s a juicy midrange that isn’t over-baked, surprisingly solid low-end thump, and velvety smooth highs that really help your lead playing to soar — especially with the Smooth switch engaged. Stomping on Bump makes everything thicker and bigger, enabling serious rock lead and rhythm work alike from this deceptive little amp. And although it would be nice to be able to set the amount of extra boost that this feature introduces, it’s still a groovy option. The Master control works as it should, retaining body and character as you lower the output level, but it does increase the depth of your given tremolo Intensity setting, an unexpected quirk, but one that’s not too problematic given that you’ll most likely adjust it and leave it — and likewise set Speed and Intensity to taste — before you launch into playing. For its own part, this output-bias modulating tremolo circuit is a real sweetie, adding rich, chewy, chop to your sound and attaining a sense of depth and vibe at higher Intensity settings that must be heard to be appreciated.
Containing a few nods to classic amps of the early ’60s, but tied together with a lot of original design work, Lil’ Elvis is one chunky bundle of surprises. This top-notch tone machine is surprisingly versatile despite its simplicity, and it sounds way bigger and badder than you’d ever imagine 12 watts could provide. So if you’re gunning for a low-power amp that wields some serious mojo, Lil’ Elvis is the ass-kicker you’ve been waiting for.
SPECS:
CONTACT 65 Amps, (818) 760-5089, 65amps.com
MODEL Lil’ Elvis
PRICE $2,150 retail/street price N/A
CHANNELS One
CONTROLS Volume, Tone, Depth, Speed, Master, Smooth switch, Bump switch
POWER 12 watts
TUBES Three 12AX7 preamp tubes, two EL84 output tubes, one EZ81 rectifier
EXTRAS Series effects loop, two-button footswitch jack, dual speaker outs, switch for 8Ω & 16Ω impedance
SPEAKER Celestion G12H-30 (16Ω)
WEIGHT 49 lbs
KUDOS Great build quality. First-class clean and overdrive tones. Surprising versatility.
CONCERNS Tubes are tricky to change without removing chassis; tremolo strength increases as Master Voltage is decreased.
Source: https://mercurymagnetics.com/pages/news/GuitarPlayer/GPDec09.htm

In 1963, the Silvertone 1484 or “Twin Twelve” was top-of-the-line among the amplifiers offered by Sears, Roebuck and Co. It debuted with a whopping catalog price of $149.95 (the equivalent of $1000 today)! Though once headed north of $800 on the latter day collectible market, the economy has seen these tone bandits recently dip back under the $500 mark. The 1484 is one of tone expert Andy Brauer’s all-time favorite amps, and rightfully so, since this baby can rock the socks off the meanest swamp alligators!
Every time someone asks you about sleeper amps, you bring up the Twin Twelve and how it’s one of your favorites. What’s the deal?
Twin Twelves are killer – really magical. Back in the day, you could pick one up at a garage sale for $25 or $50! People sold them as speaker cabinets; they didn’t even know it was an amplifier because the head sits underneath in the cab. It’s an innovative design feature for which we can thank Nathan Daniel; he developed and supplied them to Sears.
How long ago was it they were going for $25?
In the ’70s. But even today, these amps remain very undervalued. Most I see are fairly unmolested and still have the original tubes. They’re clean, or easy to clean because for some reason they weren’t as used or abused as other amps I see in my shop – most have remained closet-classic clean.
Their values jumped, though, when The White Stripes became popular and players learned Jack White’s killer sound was through Silvertone amps.
I agree. He was using a 1485 – the 100-watt version of the 1484, with six 10s. It’s much cleaner-sounding, with more headroom, punchier, with big, tight low-end. Jack liked the clarity – the chimey highs, the thick midrange, and the whoompf on the bottom.
What makes up the heart of the 1484?
It has two 6L6s for power, three 12ZX7s in the preamp, two 6FQ7s for the phase inverter and reverb driver, and a solid-state rectifier. And there’s a funky little reverb tank in them, but most I see are broken.The example on my bench at the moment is from early 1964. Some of the post are ’63, but most are ’64 and the speakers are ’64, which leads me to believe it’s an early-’64 model. The speakers are Jensen C12Qs, ceramic, with 20- to 25-watt capacity. Their small magnetics tend to break up faster and be a little honkier.
Funny, it doesn’t sound like a modern 50-watt amp. More like20 watts.
That’s partly because the voltages on the power tubes – the first-stage plate resistors – are 229k. First-stage plate resistors on the typical Fender amp are 100k.
So the Fenders’ allow more current to flow?
Yes. This results in a lot more headroom, a lot more clarity, and more overall punch. Most modern amps run their tubes, and their entire circuit, hotter than vintage gear. They try and squeeze more bang for the buck out of their amps, sometimes mistaking louder for better.
The nice thing about Silvertone amps, and the Twin Twelve especially, is that by raising some of the resistance, and the way Nat Daniel developed the circuit, results in a very nice note compression that isn’t found in many other amps. The hard edges are taken off the notes. Also, the Twin Twelve’s tone controls are interactive – the more you turn up the Treble and Bass, the more gain you get. So if you want it real clean, turn the Volume to 3 or 4, turn the tone controls down to 2 or 3 respectively and you can get some clarity out of it. But after 3 or 4 on the dial, the amp gets gainier and gainier.
I noticed that the tremolo and reverb affect gain, as well. If you turn everything up, the amp turns into a real monster.It’s not a multi-tasking amplifier. It likes to do reverb, or it likes to do tremolo. If you do both, it gets fussy… but it sounds great, by the way! The 6L6 screen voltage is about 150 volts below plate value, so these amps are not pushing the tubes much at all. When you’re that conservative on the wattage, you reduce headroom. It’s almost like talking a Variac to the incoming voltage. When you Variac it down a touch, you lose clean headroom and get more overdrive.
These amps are not extremely loud, but what they do have is a instantly likeable, friendly tone that really grabs you and kind of encourages you to play with it. It’s very bluesy. It’s aggressive, and it’s compressed, but without the drawbacks of compression. It’s not like a 6V6-driven amp that squashes the sound, it’s more of a high-fidelity sound. It compresses the sound like an LA2A limiter – almost limiting the compression versus squashing it like a 6V6 Deluxe or like a brown Deluxe. The tone stack enhances the tone and adds gain, versus cutting or boosting lows and highs.
So, do you like to just turn everything all the way up on the Twin Twelve?
Who doesn’t like to do that every once in a while on any amp? But no, not as a general rule. Amps that I like, I set the tone controls to five, to start. From there I play with the Volume. And then, believe it or not, I’ll go around the amp with a screwdriver and a socket wrench, and start tightening bolts on the speaker, or tune the cabinet to a certain frequency to get the amp to ring. The Twin Twelve has a ported cabinet with a back panel that’s open on the bottom. One can play with the screws inside the cabinet to torque them all to the same tension, so that sound reverberates off all parts of the cabinet at the same pressure.
Kind of like tuning the head on a drum – you want even tension all the way around…
Exactly. When I do that to a cabinet and the speakers, I hear a difference.
These amps came with 25 feet of cable to separate the speaker from the head. The old Sears catalogue claimed that this was to eliminate feedback. Is there any truth to that?
That was a marketing gimmick. They wanted the musician to be able to place the head near where they were standing, and place the cab away from them, with the idea that the further the cab was from the pickups, the less chance there was for feedback.
Who are some high-profile players who use these?
Obviously, Jack White brought them into the spotlight. But I’ve seen many players – Dean Parks, Ronnie Woods, Keith Richards, Lyle Workman, Josh Homme, Ry Cooder, and David Lindley – use them. It tends to be a staple in major recording studios, so music fans have heard them on countless albums, though they may not be aware.
Do a lot of these amps come in for repairs and such?
I see the 1×12 version, the 1482. And I’ve definitely worked on my share of the 1484s. When I’m servicing a Silvertone, nine out of 10 times it’s merely pitted and dirty and just needs its pots cleaned, and maybe tension the tube sockets or re-solder something for good contact. Generally, the tubes are pretty good, and many Silvertones have original tubes.
Were the Silvertone tubes in these made specifically for Sears?
There were OEM. I’m not sure if they were RCA, GE, or Sylvania, but they were definitely American manufacture. Vintage RCA and GE tubes are considered some of the best, and the tubes in these are terrific. Consider it’s possible to purchase a Silvertones for a few hundred dollars. If original tubes are in there, that’s at least $100 just in tubes!
Are they good for mods?
Not that I’d recommend. Just restore them back to stock.
Other good Silvertones?
The bass version, the model 1483, is pretty awesome. It’s the same circuit minus the reverb and tremolo, and driven through a 1×12 cabinet. It’s 50 watts, as well. Most Silvertones were given numbers as model names, but the Twin Twelve was branded because it was top of the line. The only other amp Silvertone branded was the 1434, which was dubbed the Medalist.
How do the tremolo and reverb sound?
The reverb isn’t the best, but it’s not bad – it’s fashionably anemic. The tremolo is great – very surf-sounding and muted, in a nice way, unlike a Gibson tremolo, which is bright and pingy.
Are there a lot of Twin Twelves out there?
Yes. They were manufactured only form 1963 to ’66, but were apparently churned out in large numbers. There’s almost always one for sale in online auctions, and I often see them in music stores. As I said, they tend to be in fairly good shape, though if exposed to moisture the particleboard tends to fall apart. Aside from that, there are no major issues. They don’t always ship well, though – the reverb tanks can get messed up. But there’s nothing that can go wrong on these that can’t be fixed; all the parts are readily available. If you blow the transformer, a Mercury Magnetics replacement is available.
Another interesting feature is that if you open up the back panel on the speaker cab, you’ll see there’s a hidden shelf. It’s a baffle.
What for?
It’s a bass trap, for lower frequencies. When the bass comes off the back of the speakers, the baffle catches it and sends it forward again. You get a little bit more of a thump than with most open-back cabs. It was really kind of a revolutionary design Nat Daniel came up with, and I don’t know of any other amps that employ it. (Ed. Note: Daniel had a patent on the speaker cabinet design with inclined baffles called the “acoustical case”.)
Sonically, what would you compare this amp to?
Probably a Fender, as it has a really nice twang. But it’s a bit darker. It offers a terrific Dick Dale surf tone as well.
Cranked up?
Well, listen to any White Stripes album!
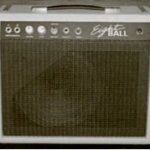
Many of you are already familiar with our resident amp tech, studio owner/engineer and advisory board member Jeff Bakos. In his spare time, Jeff occasionally builds amps for clients on request, and lately he’s been asked to build… you guessed it – small little biters. Since his personal GA-5 has been featured so often on various recording projects, Jeff toyed with the idea of recreating the Gibson GA-5 Skylark for a minute, but given the fact that vintage GA-5s remain fairly plentiful, he ultimately decided to design his own simple take on a smallish amp – the 8 Ball. Housed in a Mojo Champ cabinet, the 8 Ball is built with one of our favorite tens, the Eminence Legend Alnico 1058 (that’s a hint), Mercury Magnetics trannies and choke, and premium components, including Sozo coupling caps. With the bigger Mercury Princeton transformer set, the single 6V6 / 12AX7 / 5Y3 design is capable of producing 10 watts of power. Features include dual inputs, volume and tone controls, a front panel line out jack, and a “vintage” / ”modern” toggle switch also conveniently mounted on the front panel.
The “vintage” setting produces pristine Fendery clean tones up to 12 o’clock on the volume control, gradually followed by a progressively thicker growl with intense distortion and sustain. In this setting, the 8 Ball surpasses all the other small amps we’ve reviewed in terms of practical versatility with stronger, louder clean tones and a more gradual It’s back! We are now resuming limited production of our meticulous recreation of the original 1959 DeArmond R15 1×12 amp. You may recall that we initially produced a limited number of TQ Clarksdale amps in 2006, before our supplier for the original chassis informed us that small runs would no longer be possible. We’ve found a new supplier, and the TQ Clarksdale “DeArmonds” will be built again by Jeff Bakos with our original specs – pin cabinet construction and design identical to the original, original Mercury Magnetics Tone Clone transformer set cloned from our original ’59 DeArmond, hand-wired chassis, premium components including Sozo caps, Celestion G12H 70th Anniversary speaker, premium JJ and Tung-Sol tubes, Evidence Audio speaker cable, custom gold grill cloth and blonde Tolex covering. This 22 watt design represents one of the rarest and most toneful combos ever built. The original 1959 DeArmond 1x12s were built for just one year in Toledo, OH, and a clean example recently sold on eBay for $7000. In 2006 Jeff Bakos meticulously blue-printed our original DeArmond, Mojo created CAD drawings from the original cabinet design, and we sent the transformers to Mercury Magnetics to be cloned. The result is a phenomenal 1×12 that will generally kick any tweed Deluxe straight to the curb with a bigger, bolder voice and lush, musical distortion cranked. The 4-input, cathode-biased Clarksdale can be operated with dual 6V6s and 5Y3 rectifier for optimum burn, or a pair of 6L6s and 5AR4 for slightly more power and clean headroom. Blonde Tolex only, simply because it’s the coolest color…

Last year, Epiphone tossed a small pebble into a large pond with the introduction of its Valve Junior amplifier – and its launch caused a tsunami.
Available as a stand-alone head or a 1×8″ combo, the Junior was as basic as an amp could be for something that still produced sound. With just two tubes, two transformers, one speaker, an input jack, and a volume knob, when a player plugged into one, there was very little to get between their guitar and their ear. And the Junior turned out to be a very good-sounding amp. It’s doubtful that any owner of a pre-’67 Fender Champ sold it after hearing the little Epi, but for under $140 for the combo and only $99 for the head, the Junior was definitely the steal of the day.
Paul Smith of Mercury Magnetics was harassed into purchasing a Junior by a journalist who insisted that if Smith didn’t agree it was the best-sounding amp he’d heard for anywhere near the asking price, said journalist would eat said amp.
Smith agreed, then he hauled the Epi into his office. Mercury’s Sergio Hamernik and Alan Cyr of The Amp Exchange, in Los Angeles, mercilessly dissected the helpless Junior for weeks before deciding on the optimum power and output transformers and choke.
“We didn’t follow any established recipes for getting tone,” Sergio said of the development of the components. “It’s not a Champ or a ‘me-too’ thing. All we were interested in was getting a tone that a musician would find inspiring.”
The kit Mercury devised has new output and power transformers, a choke added to the circuit, a CD-ROM with photographic, step-by-step instructions for do-it-yourselfers, bolts and locking nuts to attach the choke to the chassis, four or five capacitors (depending on the version), five resistors and 10″ of 18-gauge insulated solid copper wire.
The Mercury Magnetics’ transformers, well, transformed the miniscule Epiphone. Side by side with a stocker, the Mercury-modded combo has way more presence. It breaks up a little earlier, and the harmonics are much more rich and even. Also, while the stock Junior had a slightly brittle or metallic edge to the distortion (especially after 12 o’clock on the volume knob), the Mercury mini monster stayed smooth all the way up to being dimed.
In addition to helping design the mod, Cyr installs the kit at his business. After installing nearly four dozen of the kits, Alan says that at least half of the mods are for professional musicians and go right to a recording studio from his shop.
“People tell me that they actually record better than their vintage amps,” says Alan. “Once someone hears the amp, they have a job for it. It’s a pretty easy sell; the modded amp sells itself, really. You wouldn’t believe the boutique amps musicians bring in to A/B against the Epiphone with the Mercury kit. They usually end up buying the Epiphone.” Alan charges about $150 for installation in addition to the cost of the amp and the kit. The cost can go up if other modifications are requested, and he figures that it would take an average amp tech about two or three hours to do the work.
Gary Roudenko, who sells Valve Juniors modded by Alan Cyr at The Amp Shop in Sherman Oaks, California, agrees with Alan that there’s little work in making the sale. “Whoever hears it wants to buy it,” says Gary.
The Mercury-modded Epiphone Valve Junior is on virtually all the time in my home studio. If my place caught fire, it would be one of the first things I’d drag out to the sidewalk before the guys in the red trucks showed up, despite its low cost.
Mercury Magnets Valve Jr. Mod Kit
Price $289 (combo kit)/$299 (head kit).
Contact Mercury Magnetics, 9167 Independence Ave., Chatsworth, CA 91311; phone (818) 998-7791; www.mercurymagnetics.com: The Amp Shop, 13701 Ventura Blvd., Sherman Oaks, CA 91423; phone (818) 386-5500.
Source: http://www.vintageguitar.com/3614/the-mercury-magnetics-epiphone-valve-junior-mod-kit/

Just Imagine is the extraordinary rock ‘n’ roll celebration of the life and music of John Lennon starring look-and-sing-alike artist Tim Piper. Just Imagine intertwines John Lennon’s songs with the stories behind them to create a unique and electrifying multimedia concert experience. Backed by rock band Working Class Hero (Greg Piper on bass; Jerry Strull on guitar, Morley Bartnof on keyboards and Jim Laspesa on drums) Piper, who bears an uncanny resemblance to the late rock ‘n’ roll icon, channels Lennon in this critically acclaimed tribute.
“Just Imagine tells Lennon’s story in what I hope is an accurate and compelling way,” says Piper. “If you were there, it’s a trip back in time. If you weren’t, it’s a musical history lesson.”
The show has played all over the U.S., Canada, Santiago, Chile, Liverpool, England, Calcutta and Bangalore, India, Canada, Spain, Italy, Mexico, China, Japan and The Caribbean.
The LA Weekly wrote, “GO! The fun of seeing and hearing Tim Piper’s great John Lennon impersonation in an intimate setting with an outstanding band, under Greg Piper’s musical direction, is just undeniable.” Agreed the Los Angeles Times, “CRITIC’S CHOICE… Nothing matches ‘Strawberry Fields Forever’ live, dense and ecstatic, raining down around your ears.” KABC Radio enthused, “Tim Piper IS John Lennon,” and KLOS 95.5’s Chris Carter raved that “[Just Imagine is] “Breakfast with the Beatles approved… if you like John Lennon, you will love this show.”
A musician, actor and songwriter Tim Piper has traveled the world performing music made famous by The Beatles and has distinguished himself as the preeminent John Lennon with roles in the CBS production The Linda McCartney Story, E! Channel’s John Lennon Story, Beatle Wives and as the singing voice of Lennon for the NBC TV movie of the week, In His Life -The John Lennon Story. With Working Class Hero, Piper has performed at numerous special events, including the only tribute act to perform at the Rock N Roll Hall Of Fame, a pre-screening performance for the re-release debut of Yellow Submarine and the John Lennon 20th anniversary memorial gathering in Central Park.
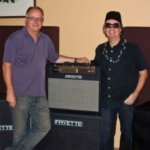
The Reunion of the steves in the Fryette Room
Check this out: Steve Hoke (left) read about amp guru Steve Fryette (right) in Premier Guitar a few months ago and wondered if it was the same Steve Frytte he knew from Seattle 40 years ago. He’d played in several brands with a Steve Fryette but had no idea if it was the same guy.
The Carry-On is part of Roy Blankenship’s LEEDS21 Series. It was designed to provide the traveling musician a small and lightweight amp to keep “that familiar sound” when taking your regular stack is not an option. Having been in the unfortunate position of having to borrow amps while on the road, I was curious about whether or not a small, 21-watt amp would deliver, especially since I use a 120-watt amp live. Looks can be deceiving — this little guy is loud, making it a worthy amplifier for both studio and live use. Employing two 12AX7s, two EL84s and a single 6CA4 rectifier, the Carry-On is voiced for the classic British tone of the ’60s, but with modern updates that may make some enthusiasts think twice about leaving the house again with their prized vintage amp. Created with the idea that less is more, the Carry-On is a sharp looking boutique amp with its cool nameplate and spade logo. At first glance, it looks like a lunch-box version of a Marshall plexi replica, with its familiar gold panels, black Tolex and Marshall-style knobs. As for features, the Carry-On’s front panel provides Volume and Tone controls, one Input, On/Off/Standby switch and a huge, bright purple jewel lamp. The back panel has a 3-way switch for 4, 8 or 16 ohms, and two speaker outs.
When I first plugged into the Carry-On, I ran a Gibson SG-X with a 500T humbucker straight in (no pedal chain) and used an Orange PPC412 cab with Eminence Governors. Going for all or nothing, I cranked the volume clockwise to 8 with the guitar volume at 10. I was instantly won over by the tonal quality of this amp. Before even touching the Tone knob I was surprised at how powerful the Carry-On was, but also how perfectly dialed in the tone was. I can’t imagine the care and time it would take to voice an amp this well with the idea of giving the player only two controls. The overall sound of the amp is crunchy, bright and responsive with excellent sustain. The Tone control adjusts the amount of low to high range; while it’s not a very extreme control, it does provide a final touch to an already killer sound. I found 6 to be to my liking, because it gave me a little more on the top end to match the Eminence Governors’ midrange. Turning up to 10 the sound didn’t fall apart, but provided even more gain and power.
Backing off my guitar volume and flipping the coil-tap switch to a single coil, I lowered the amp volume to around 4 to 6. The Carry-On provided a transparent clean sound, complimenting the bright and punchy qualities of the 500T in single-coil mode. After stumbling up the stairs and discovering that I’d been playing for about three hours straight, I was sold. While I had the amp, I got the chance to use it in the studio to double guitar tracks. I ran a ’72 Fender Telecaster reissue with Warmoth baritone neck, Rio Grande Dirty Harry single coil in the bridge and the stock Fender jumbo humbucker in the neck. The combination of the Carry-On’s raw crunch, the bite of the Telecaster and the low end of the baritone strings supplied plenty of low growl, complimenting my Sound City L120’s darker tones. The Carry-On also accepts pedals very well, if the gain provided by the amp isn’t enough. It handled all the distortion and fuzz pedals I threw at it like a champ. I only wish this amp had a line out, so I could have slaved out the Sound City for even more volume.
The Final Mojo
Though the Carry-On recreates the sound of old, there are some very modern traits to the amp that may make it more desirable than using a vintage amp live, or even in studio situations. The sturdy power supply is one. The other is that the Carry-On runs at modern voltages, unlike older amps that were made to run at lower voltages. This allows the Carry-On to achieve its full potential, giving you 1960s tone without having to change the caps on your vintage amp. Designed to give the player straight to amp tone, the Carry-On will make you forget all about a master volume (which squashes your preamp tubes anyway). While pedal effects makers and software companies may try to reproduce it and may come close, there is nothing quite as inspiring as standing in front of a revved up valve amp at full volume. Hiwatt, Sound City, and Marshall enthusiasts would do well to check out Roy Blankenship’s amp line. The Carry-On comes at a street price that makes it obtainable for a boutique amp — especially next to that plexi you’ve been watching on eBay. Now I just have to save my pennies to buy one, or skip the country with the one in my basement.
Buy if…
you’re looking for classic British tone.
Skip if…
21 watts is not enough.
Rating…
Street $1499 (includes ballistic nylon carry bag and shoulder strap) — Blankenship Amps — BlankenshipAmps.com
Source: https://mercurymagnetics.com/pages/news/PremierGuitar/PremierG-23.htm
One of the key components in Mark Karan’s live rig is the formidable Mad Professor MP101 amp. As we pondered the true intention of the MP101 and its imposing presence in our music room, it occurred to us that in all the years we have been writing amp reviews and interviews, we had never featured a 100 watt amp that was actually being used on stage by a featured player. Fifty watt versions, yes, and we have tinkered with a vintage 100 watt Marshall or two, but this was a first – a true performance amp with the power to absolutely crush a curious reviewer working in such close proximity to so much air being moved. To protect our ears from the sound pressure created by the MP101, we put up a big Clear-Sonic baffle and let fly over the course of two weeks with stellar results. We also asked the agreeable fellows in Finland at Mad Professor to explain the origins of the MP101 (which we began referring to here as the Magic Pig), and the OS21 prototype we received for review. An informative response from the chief designer of Mad Professor amps, Björn Juhl follows:
I once saw one of my favorite bands play in a stone hall and they had added a second guitarist whose sound was so shrill that I hid between the wooden benches so only the reflection of the sound reached my ears. As a musician and an ardent fan of various guitarists, I have hard all kinds of good and bad guitar tones. I’d think as a musician, one would strive for a sound that gives feedback –both the playable feedback like that which Hendrix mastered,and also the kind of sound that inspires the imagination of the musician. It seems that great sounds travel through generations – from the 15thcentury crumhorn, to the saxophone, and the modern electric guitar. Considering the amount of distorted guitar tones that emanate through speakers worldwide each day in a continuous flow, the distorted electric guitar might have had a larger impact on people than man walking on the moon. As a designer, I primarily work with sounds, studying the composition of distortion, removing unpleasant overtones and applying filtering techniques, while defining the range of the controls so they are intuitive to the user. The biggest inspiration in amplifiers were those that had a sound I didn’t like, because these amplifiers taught me what to avoid and to understand why certain sounds are not pleasing and how to avoid them. I have studied why, for example, on certain amps at full tilt you can only play one note or possibly two at a time and only on the top strings before the amp begins to become muddy and indistinct. I have also studied why E7 on the top strings can, on certain amps, sound out of tune.
The MP101 is inspired partly by feedback we received from users of the Mad Professor Model CS-40 – considerations like two foot-switchable channels, simpler controls, louder output, and a more modern, heavily distorted sound. If the Model CS-40 is a design that gives the musician the tools to sculp this own sound, the MP101 is a design in which the sounds are preset. The best comparison I can think of as far as the inspiration for the sound of the MP-101 is taken from the sound of a perfectly set up VOX AC-30 TB just below where it starts to distort, but with the transient response of a Hi watt or a Marshall Major, or the sound of a 1965 Super Reverb with the volume control set on “6” that a sailor once brought to my shop. Or perhaps the sound of just one Marshall model 1985 set on “6” at the brink of oscillation,where gain would be traded for bandwidth, causing artificial gain, but on the magic spot where distortion is dynamically controllable…. The sound of rock. For channel two, I thought of a high-gain sound with the clarity of definition of an artfully mastered recording.
The design of the MP101 is mostly about creating the feel and the range of sounds within the preamp.The power amp is only allowed to distort for the last inch of power, and since the power amp does not distort abruptly, but more gradually, power levels of near 120 watts can be drawn. Now, considering that such a loud amplifier would rarely be played at full output, what would otherwise be a magic sport in the output of the power

Zitat über Mercury Magnetics bei Boutique Verstärker Seite 139
Diese Transformatoren gehören zu den besten Ausgangsübertragern, die auf dem Markt heute erhältlich sind. Sie werden sehr aufwendig und mit den besten Materialien hergestellt, um so nah wie möglich an die wunderbaren alten Transformatoren der Firma Radiospares aus den 60er Jahre heranzukommen. Der Stahl wird noch von Hand geglüht, im Gegensatz zu modernen Transformatoren, welche eine Silizium-Stahl-Legierung verwenden. Die Sound-Unterschiede sind gravierend.
English translation: “These transformers are known as the best output transformers available on the market today. Their production is very complex and just the best materials are used to reach as close as possible the wonderful old transformers from the company ‘Radiospares’ from the sixties. The steel is still annealed by hand – compared to the modern transformers which use a silicium steel alloy. The sound differences are enormous.”
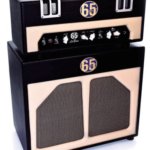
At winter NAMM this past January I had a chance to stop by the 65 Amps booth to get a peak and a listen to the Lil’ Elvis, their new 1×12, 12-watt combo. As it happened, Peter Stroud was in the booth demoing this little gem and throwing down some ridiculously tone-laden jams, and getting killer tone at varying volumes courtesy of the “Master Voltage” circuit. Of course we’ve all been beguiled by amp demos in the past
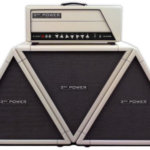
Van Halen guitar tech Tom Weber recently stopped by 3rd Power (www.3rdpoweramps.com) headquarters in Nashville, TN, to check out the all-tube HLH100 Series Guitar Amplifier System. With regard to the ’68 Plexi-inspired HD100, Weber says, “This amplifier far surpassed my expectations. There was nothing that I asked it to do that was not met by no less than stellar performance.”
This quad-powered EL34 head delivers rich distortion tones and cleans up as it should with a lighter touch and a spin of your guitar’s volume knob. Patent-pending DirecDRIV technology gives you smear-free tonality of your collection of unique instruments. “The nuances of various guitar designs and pickup choices are highly articulate when playing through the HD100,” says 3rd Power owner Jamie Scott. Foot-switchable lead boost allows users to easily alternate between preset volume levels.
Weber’s career in the music industry has spanned over 30 years. During that time, he’s designed and built and maintained an incredible array of musical instruments, amplifiers and electronic systems. From his unique perspective, Weber continues, the HD100 is “…truly what I feel the Plexi should have become by now. I certainly would love to own one of these myself!”
Photo caption: 3rd Power’s HLH100 Series Guitar Amplifier System
Source: https://mercurymagnetics.com/pages/news/GuitarWorld/GWAug09.htm

For all you know-it-alls and music gurus out there who pride yourselves on your vast knowledge of musical fact, know the name Glen Morris. If you have not yet heard of him, you have at least heard him. He is the brains and elbow grease behind Morris Amps, the brand gracing the airwaves behind guitarists like Dallas Green of Alex is on fire and James Black of Finger Eleven.
You’ll hear a Morris Amp on the latest release by the Cancer Bats and in countless studio albums from Canada’s top studios. But who is Glen Morris really? What makes him sound so good?
To understand why these artists are swearing by a Morris amp you have to understand the man, Glen Morris. He says it all started for him when he was a boy. He and a friend overloaded an old fender amp with the output of a small DeArmond amp by disconnecting the speaker and attaching it into the front of the Fender.
“It was the most amazing sound for about 10 seconds.” He says, “Before the amp exploded.”
~Glen Morris
He had to crack it open and study its glorious brains. This was his first rebuild. From that moment on, the sound and structure of an amp has been his passion. He picked up bits of knowledge wherever he could. Enough for friends to dub him Glen “Can’t-leave-it-alone” Morris.
His father was the head of the Electronics Dept. at the Stelco Steel Co. and worked with Radar during the Second World War. From him, Glen learned how to properly saturate a tube to make it sing like a rock and roll song bird.
Now he’s not all wires and solder. Glen is first a guitar player. The final sound of his amps starts at the fretboard and works its way through a patiently obsessively built hand wired circuit board before it gets the Morris brand.
“The layout,routing of the wires, is an extremely important factor in an amp,” he says. Not every guitar amp builder is a guitar player and it really shows.
Glen is a graduate of the Electronics program at George Brown College. While there, he admits that he picked the brains of one special teacher every chance he was given. This teacher was originally from the Ukraine and taught Radio/TV classes. He taught tubes and valves and knew them inside and out, right from the old school. Glen spent countless hours in the library reading old manuals and schematics.
So what’s in a Morris Amp today? Well, Glen has a longstanding relationship with Mercury Magnetics. They supply his transformers and are a vital part of his sound. Some are made exclusively for the Morris brand. He says the defining part of a sound is in the transformer. If any of you readers out there are going to start messing around inside your amp, make sure you don’t skimp on the transformer.
Lately, able artists have enjoyed the sounds of the Morris XSII and XSIII, both versatile amps for the modern rocker. Morris amps are hard working machines and most sell accordingly. He has recently designed two tube distortion pedals under his Morris brand “dismorrtion”. They imitate his bigger sound and are still hand built with tubes at a lesser price.
His new designs are an all steel cab amp head that is specially designed for the boutique pedal players.”So many guys today love to buy and swap pedals all the time. So I designed a very affordable 30-watt single-channel amp that the tone controls work mainly on the harmonics, allowing you to really dial in a great distortion sound with the pedal,” says Glen.
Sound samples and prices are all available on the Morris Amps website, www.morrisamps.com.
Source: https://www.facebook.com/note.php?note_id=237680760133
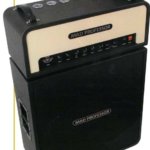
MAD PROFESSOR AMPLIfication founder Harri Koski built his reputation first by distributing high-quality effects pedals hand-made in Sweden by amp and pedal designer Bjorn Juhl, and later by building an amplifier and pedal company around Juhl’s design work. A couple years ago he decided to build a new guitar amplifier that would complement his pedals, so he teamed up again with Juhl. The culmination of their work is the MP101. A 100-watt channel-switching head, the MP101 is hand-made by Koski’s company in Finland. Dressed in black-and-tan Tolex on a Baltic birch cab, its front panel has controls for Volume for each channel, as well as Treble, Middle, Bass, Presence, Master 1, and Master 2, and a channel switch for use when the foot switch is not connected. Removing the back panel reveals a preamp section consisting of five 12AX7s, and a power section of four TADEL34Bs and two oversized Mercury Magnetics transformers that help the amp handle transients and give it tight bass response. Inside, one can see Koski and Juhl have eyes for detail, given (among other things) the MP101’s perfectly curved Baltic birch cab.
On the back panel, the MP101 has five speaker outputs, two 4-ohm, two 8-ohm, and one 16-ohm. There’s also an effects loop and a foot switch jack for channel switching. Classy-looking air vents lend an aesthetic highlight to the top and back of the cab. We plugged the MP101into a Celestion-loaded 4×12 and opted for three guitars to test the MP; a Gibson Les Paul ’59 Reissue, a PRS Swamp Ash Special, and an ’87Fender Strat. Plugging in, one is met with a number of revelations. First is how the MP101 has a tone of volume on tap, yet it’s amazingly responsive, regardless of where you set the master Volume. Plugging into Channel 1 with the PRS at a very low volume setting, the amp easily fills a room, and surprisingly, can be made to overdrive via simple pick attack. The channel is never perfectly clean with humbuckers or healthy volume-knob roll-off. Second, the amp has a very wide frequency range; this is due in part to circuit design and the oversized output tranny (SRV put a larger Bassman tranny in his Super Reverb to get clear low end). Even with the Strat, the Mad Professor produced thick lows and smooth highs.
A third revelation; with its tight power section, Channel 1 is very reminiscent of a Marshall Majoror Hi-Watt, but again, with a respon-sive preamp.
Switching to Channel 2, the dirt level rises dramatically. Even with Volume 2 on a very low setting, the amp has more than a tow-sack full of grind on-hand. This channel is a rock beast regardless of guitar or pickups! Like any amp with two channels that share an EQ section, a dedicated Middle control here would be nice. Rolling up the Master control, the amp gets louder and louder until you essentially cannot stand in the room with it! We were left scratching our heads at the 100-watt rating.
After putting the amp through its paces dry, we setup a bevy of stomp-boxes in front of it. Since the MP was designed to be pedal-friendly, it was no surprise it handled all things stomp-box. With everything from fuzz to chorus to extreme boost, the Professor was more than amicable. Echo effects through Channel 2 sounded notably better run through the effects loop.
The MP101 is a robust rock workhorse with a very high level of build quality and attention to detail.
Again, this amp has a ton of volume on tap, so it isn’t for the bed-room player or coffeehouse plunk-er. No, sir. This one is for larger venues, where it can express itself via its thunderous volume, responsive preamp, and wide frequency range. An overbuilt 100-watt head that traces its roots to high-powered British amps, the MP101 has power to pummel the average play-er and his 4×12 into complete submission!—Zac Childs
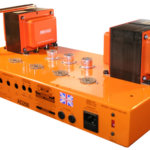
Tim digs into a stock Orange AD200 Bass MK3. He details stripping the amp to its chassis and turning it into a point-to-point handwired amp with high-quality components.
For the past couple of months, I’ve found myself acting as bass player for a new band. It’s been a bit of a change of gears for me as I’m usually playing guitar or lap steel. In playing bass, I found myself with a need for feeding my desire for headroom — a need that can only be satiated with lots of big power tubes and stacks of speakers. I purchased an Orange AD200 bass head with their matching 4×10 and 1×15 bottoms.
In its stock configuration it’s a formidable rig to be sure. I was very impressed with the power, tone and range that it had to offer, even when trying to keep up with a very loud drummer. I played it joyfully for a few months and didn’t have a single complaint. What a happy and content fellow I was… yet… I always have this little nagging voice in the back in my head saying, “what if I changed some components? Sure I’m happy now, but couldn’t I be happier?” And so it always seems to begin with the little nagging voice that I keep listening to against my better judgment. The same voice that often leaves me sitting at my bench, head in hands thinking, why did I start this project? I was so content! WHY?
The concept of changing only a few key components was quickly forgotten once I committed to this project (and had a screwdriver in hand). I gutted the amp to the bare chassis. Out came the printed circuit board (Figure 1) with its board-mounted tube sockets, pots, transformers — everything.
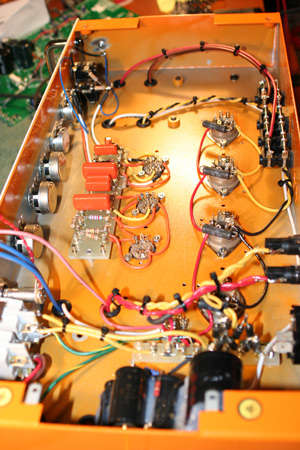
Figure 1: Before gutting.
With the chassis completely stripped, it was time to lay out, measure and drill new holes for the upgraded chassis mounted tube sockets. As the new power tube sockets needed a bit more room than the PCB mounted ones, a Dremel Tool with a coarse sanding drum bit was used to enlarge the holes. Care was taken to make sure that the pin alignment made sense with the lay of the future wires before drilling the mounting holes used to bolt the sockets to the chassis. While I had the drill in hand, I also enlarged the front panel’s pot holes to accommodate the larger upgraded pots that were going to be installed. The placement for the circuit board mounting holes were also located/drilled, as was the location of the ground lugs that were going to be used in the star grounding scheme.
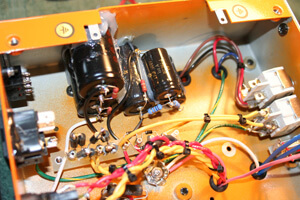
Figure 2: Removing the guts.
One of the most time consuming things for me when building a “one off” amp is the chassis layout. If done properly, it makes the rest of the assembly more of a connect-the-dots type of process. If done in a haphazard and incomplete way, one finds themselves drilling extra holes and routing wires in a way that may not be as professional looking or functional. In high gain designs, a poor layout can lead to excess noise and frustration.
Trying to work within a pre-existing framework is even more of a challenge. It would have been easier to start from scratch with a blank chassis, but I wanted to retain the “Orangeness” of the amp. After all, I am using the original schematic for the project, as it is a fantastic design. I just wanted to upgrade the components and make it a bit more serviceable and rugged.
After mounting the tube sockets (I prefer the Micalex sockets made by Belton) it was now time to select the components to be loaded onto the circuit boards. Unfortunately, this will have to wait for the next installment.
Selection of the parts to be used in a design with a given purpose is an important task. Almost every part in an amplifier makes a difference in the tone — starting with the quality of the AC coming out of the wall, to the power cord, all the way through to the speaker and into the room where the natural acoustics can make or break all of your hard work and tone. Some are pronounced differences, some a bit more subtle. If you add a dozen subtle nuances together, you get a pretty big nuance.
So, how does one wade through the endless amounts of caps, resistors, transformers and other “magical components” available on the market these days? Well, if you’re lucky enough to have the time and financial windfall that we all dream of having, then you can spend your life experimenting, buying and selling great gear without a care in the world. Hopefully, you’re able to develop a relationship with an artist or shop that you can trust and use them as a sounding board. Ultimately, you need to learn to trust your ears. Some of the best sounding amps that I’ve heard have been made with the cheapest, crummiest components. If it sounds right to you, than it is right!
A word of caution: Experimenting can be very fun and rewarding, but it’s easy to get too caught up in the bells and whistles. Don’t forget about the music. I found that when testing some different capacitors in one of my favorite amps that one of the caps sounded much “better” then the other. When I put the “better” sounding cap in and played, I found myself analyzing the sound in every way, from the bass response to the singing highs and, of course, how it felt. When I put the “inferior” cap in, I would start to play, get lost, look at the clock and realize that a half hour had blown by and I didn’t even listen to the cap because I was lost in the music! The “inferior” cap has lived in my amp ever since.
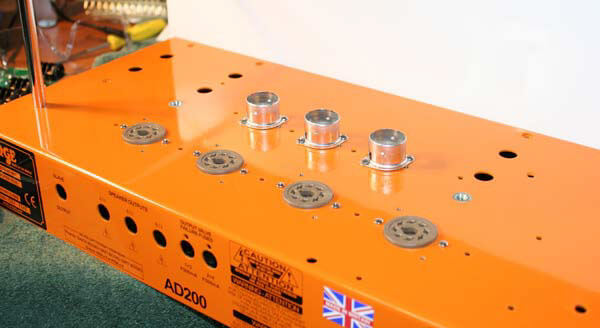
Figure 3: New sockets.
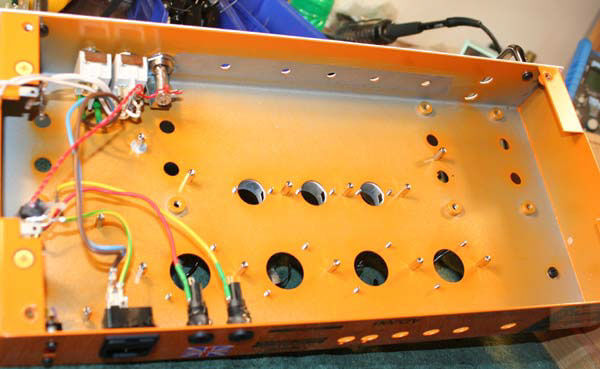
Figure 4: F&T electrolytics power supply caps.
My goal for this project was to “open up” the tone and feel of this already great amp. I wanted tight, slamming bass and open and airy highs with a bit more harmonic interaction. For the power supply caps, I used F&T electrolytics (Figure 4). I like them because of their reasonable size, cost, sound and feel. They are quiet and powerful enough to get good, solid bass without making the amp too fast and therefore not as musical or sweet.
For the coupling caps, I decided on Sprague Orange Drops. I use type 716 as they have a higher quality lead and are a bit more accurate they their 715 brethren. The Orange Drops, while perhaps not as sweet sounding as other choices, have a nice tight bass response with a slightly pinched top end that seems to help with harmonic content and punch. A client described their feel as “walking on packed sand instead of dry loose sand” — perfect for this bass amp.
For resistors, I use different types depending on where they are in the circuit. I don’t like to use carbon comps anywhere that the resistor may be tormented by excessive heat or where it may be prone to inject thermal noise into the signal. I will use them with regularity on the input, for example, but don’t like to use them as plate loads. Of course the brand of resistor has as large an impact as the overall construction. In places where matching and stability are important, I’ll use high-quality metal films.
The pots for this project were a mix of Clarostat Mil Spec. and CTS (CTS because I didn’t have all the values in the Clarostat). I use different types of wire throughout the amps that I build depending on the wire’s purpose. As signal wire, I use certain types of hook-up wire made for the audiophile market. For the B+ and power supply, along with the grounds on the star, I used a high-quality copper multi-strand.
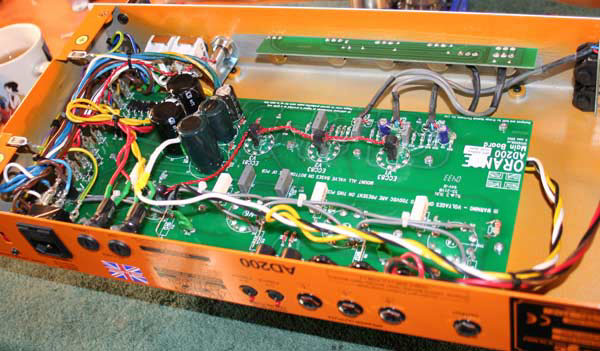
Figure 5: Components installed.
Once all of the parts are selected, they’re laid out and mounted to thick glass component boards (Figure 5) with very sturdy standoffs for ease of mounting. Silicone is applied between caps to create a cushion and help to dampen any unwanted smearing of the signal or microphonics due to rogue vibrations. Paul from Mercury Magnetics sent me a set of beefy transformers that looked quite handsome dressed in their orange end bells.
With the boards made and everything in its place and wired, it was time to fire this creature up and check the voltages at key locations. Using a Variac, voltages are brought up to full power slowly. This is done for a couple of reasons. The first reason is so the electrolytic capacitors in the power supply can form their dielectrics. The second, and perhaps more important, reason is so I can keep an eye on the voltage ratios to make certain that everything is hooked correctly before I install the tubes and risk their lives (and my wallet).
One thing that I appreciate about this design is that Orange took the time (and expense) to design a power transformer and power supply that would deliver 600+ volts to the plates of the power tubes with roughly half of that on the screens. This allows you to get the benefits of high plate voltage (headroom and power) while maintaining a safe operating environment for the power tubes. Now that we’re certain everything is safe and sound, the power tubes (Svetlana “winged c” KT88s) and preamp tubes (mix of NOS RCA and Sylvania) are installed and biased.
Though I’ve been building and modding amps daily for a few decades now, every so often I’m surprised by an end result. With the first strum of the strings, I was floored by the increased headroom, clarity and bell like tones coming out of this powerful amplifier. The change and added versatility in preamp/overdrive section was a pleasant surprise as well. While originally designed as a bass amp, it is fantastic for guitar and pedal steel as well. In retrospect, I’m very glad that I went through the trouble and expense to rebuild this amplifier. It has become my “go to” for almost every application. Long live headroom and power!
Source: https://mercurymagnetics.com/pages/news/PremierGuitar/PremierG-22.htm
You want amps? You had ’em at the 2009 NY Amp Show! Loni Specter ran another trouble free amp extravaganza at the Embassy Suites Hotel in Piscataway, New Jersey. There were approximately 64 exhibitors showing their stuff to hundreds of guitar players in attendance. So many goodies, so little time. All right let’s get down to who we had the pleasure to meet and sample some of their creations.
Now with my head spinning a little from checking out all this cool gear a small pile of daphne blue Tolex amps caught my eye. This was the Nolatone suite. Paul Sanders is the builder and designer of the Nolatone amps. He brought along the Chimey Limey (can you say fat AC15?) that has a switch on the back of the chassis to select either a 12AX7 or EF86 for the first gain stage. The 5 watt June Bug which has 3 gain stages for thick sounding overdrive and a removable baffle ring to accommodate a 10″ or 12″ speaker. And last was my personal fave the 22 Tango. This was one of the loudest, clearest 2x6V6 amps I ever heard. It reminded me of a tweed Bassman tone with tone stack controls that were much more effective. Paul says that the big, clear sound has to do with the special Mercury Magnetics RSO-type output transformer. Whatever the recipe is it sounded great and had a big amp feel to it.
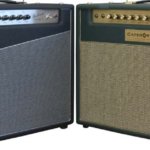
CATEGORY 5’S ANDREWAND Typhoon Joe are all-tube, handwired two-channel amps with top-of-the-line Mercury Magnetics transformers, JJ and Tech-Cap electronics, Analysis Plus speaker wire, and silver-tinned Teflon wire, all attached to a two-millimeter aluminum chassis in an 11-ply Baltic birch cabinet fitted with Jensen Neo speakers.
Both amps have multiple-impedance capability, two speaker jacks, a line-out, and an adjustable line level.
There are controls for two non switchable channels on the front panel, with Volume and Tone controls for the first, and Volume, Treble, Middle, Bass for the second. A section labeled Global affects both channels, with a single control for reverb.
Using a reissue Gibson Les Paul Special with P-90 pickups and a kit guitar with Rio Grande single-coils, the 45-watt Typhoon Joe (with four 12AX7s, two EL34s and a solid state rectifier) sounds great and is a snap to control in terms of volume. Adjusting its overall output via the Wattage control lets the amp maintain its tonal characteristics no matter how many picture frames fall from the walls! There is a slight increase in headroom as voltage is dialed up, and a softening of the edges on the distortion as the voltage goes down, but it’s very subtle. And the EQ is remarkably consistent – a relief for those who’ve played amps that require channel-volume adjustment and tone-knob tweaks if they touch the Master. An A/B comparison confirmed the characteristic was common to both amps.
With its dual EL34s and 100-watt/12” speaker, the Typhoon Joe pushed out gorgeous tones with a distinctly British voice. Channel one gives a straight-up Marshall JTM45-like tone with single-coil pickups that help it produce a combination of mid range throatiness with high-end chime. The Typhoon is relatively clean (for a Marshall-type amp) to just past half-way on the Volume dial. Keep it below that, though, and it’s oh-so-easy to get Robert Cray-style cluck. Channel 2 has a late-’65s Marshall plexi tone at lower volumes, but the distortion become screamier as the Volume knob is dialed up. Even at upper settings, there wasn’t a hint of harshness, just more sustain.The P-90s had Channel 1 singing with the Volume knob halfway up. Using the bridge pickup with the Volume at three-quarters brought out a tight, rich, distortion, while turning down the Tone smoothed out the edge without killing the highs. The neck pickup was warm,even when driven hard, but did not become muddy, revealing the sound Larry McCray described in a recent interview as “woofy.” The P-90s were pure velvet in Channel 2 from about 40percent on up – rich, with just a bit of edge to keep the notes distinct.
Although the Andrew is rated at a few watts less than the Typhoon Joe, its two 100-watt 10” speakers make it seem louder. Its two 5881 tubes give it a more American sound and, if that’s not to your liking, a bias circuit allows the Andrew to run a variety of octal power tubes, including 6V6, 6L6,EL34, KT66, and even KT77 tubes,without re-biasing. Channel one has a pre-blackface Deluxe tone, if only the Deluxe weighed about 400 pounds.Clean(er) Fender tones prevail up to about halfway on the Volume, and after that it has slightly scooped mids with hair. The bridge-pickup tone was remarkably smooth, with no brittle highs. Channel 2 continued the Fender tones and sounded like a Super, but a little cleaner, like it had mated with a Twin. While the neck pickup was glassy, the middle pickup was called into service more than usual, Channel 2 bringing out the usual warmth of a middle Strat pickup, but with more clarity and aggression.
If you like P-90s, plugging into the Andrew is going to have a serious impact on the amount of sleep you get and how often you get out of the house.The neck pickup had a slight glass-on-steel sound like any good Strat pickup, but the Andrew emphasizes it while bolstering the added mids of a P-90. With the Volume at about 60 percent, the slightly under wound neck pickup was warm, full, and just a little edgy. Combining both pickups with the three-way switch in the middle gave a B.B.-type tone, only a little darker and more menacing. The bridge pickup by itself had more snarl and bite than with the Typhoon Joe.
Though neither Category 5 amp offers channel switching, their channels are in phase, so an A/B/Y footswitch allows for days of tonal exploration. And because of the Wattage control, both amps make great bedroom and studio amps that produce full-bodied distortion at low volumes. – Bob Dragich
Soultone’s 1986ps SuperPlexi delivers classic rock tones a la the Marshall Bass head.
The opening chords to AC/DC’s “Down Payment Blues” are one of the best representations of classic overdriven British guitar tone. Those ringing, raunchy chords have a quality that goes beyond simply a wonderful sound; they can elicit other feelings and emotions as well. The driving force exhibited by the masterful rhythm playing, with the pick digging into the strings, has all of the bawdy, thick qualities that exemplify rock and roll. It conjures feelings of youth — the hair on the back of your neck rising to the occasion — accompanied by a blatant disregard for any sort of rules and the need to just rock out. It’s a cliché that’s entirely true, and only fully understood when standing in front of a raging, healthy British tube monster wielding a powerful, well-tuned axe. Soultone Amplification, based out of Chandler, AZ, has fully captured this potent sound with their line of variable power guitar amps. In addition, they have given special consideration to the appeals from players and producers who have attempted to control their rather unwieldy ancestors in the past.
The 1986ps SuperPlexi is clearly influenced by one of the most underrated amplifiers in history, the Marshall Bass head. These amps are sought after for their tonal similarities to the Lead series, with differences in the circuit that lead to more low end and softer highs. They came in two flavors, the 50-watt Bass and 100-watt Super Bass, just like their Lead counterparts. Guitarists quickly realized that not only did they sound great with a bass, but were excellent with a guitar as well. Readers who are not familiar with these amplifiers should listen to Duane Allman’s work on At Fillmore East, Malcolm Young’s AC/DC catalog, and Lemmy Kilmister’s recordings as bassist for Motorhead. That sound has gained attention from modern guitarists, such as Adam Jones [Tool], who is a major proponent of the Super Bass. Soultone has taken the iconic nature and characteristics of this sound and created their own interpretation, rife with new features and impeccable craftsmanship.
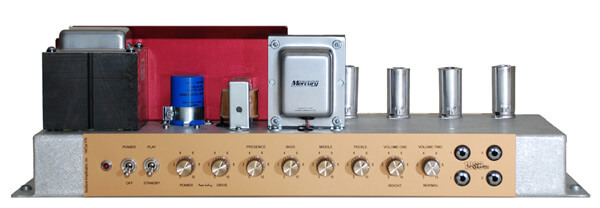 Considering how much power the guitarist has over the headroom in this amp, it is extremely easy to achieve great overdriven tone. Setting the EQ and Presence controls at noon, Power Scaling at 1 o’clock, Drive at noon, and plugging a Gibson Flying V into the upper left high-sensitivity input with Volume 1 at 10 o’clock is a great start to experience what this amp has to offer. Notes ring out with authority and punch, but without any sort of harshness that can be common in modern high-wattage master volume amps today. Beyond the satisfying, familiar crunch that the amp delivers, the there’s a surprising sensitivity to pick attack. Even with the relatively hot pickups in the Flying V, the 1986ps cleans up exceptionally well when playing with a light touch. Once you find the sweet spot, you might not even have to touch the volume knob at all to achieve a good clean — provided that you’re willing demand overdrive by smacking the strings with Nugent-like authority.
The real treat, however, was the tone achieved with a Gretsch G6118T, 125th Anniversary model. If there is one thing that the 1986ps SuperPlexi does exceptionally well, it is a great Malcolm Young tone. If Soultonedecided to change the name of the amp to The Powerage, they certainly wouldn’t be out of line. Telecaster players might want to consider the SuperPlexi too, as it performed very well with a Fender Road Worn Tele, adding some extra muscle and punch while softening the high end slightly (but not detrimentally).
The amplifier does not quit there. Packed with the head is a separate two-button footswitch. The first switch, simply labeled “Fat,” adds a 330uF bypass capacitor to the second gain stage. When engaged, there is a minor increase in volume, gain and bass. Soultone claims that it is more effective for more conservative volume settings. Its effectiveness seems to be entirely dependent on how the amp is set, however. Some settings made the Fat boost hardly noticeable at all; others can cause the amp to go from moderate to shaking the walls! There are some great sounds to be had here. The other switch either activates or deactivates a true bypass effects loop, located on the rear panel of the amplifier. With the extreme attention paid to every small detail of the construction of the 1986ps, Soultone decided that versatility should also be applied to the effects loop by adding separate Send and Return level controls.
This leads to a question: with all of the enhancements, high-quality components, low-noise circuitry and killer tone to boot, what can be said against the 1986ps? The price (starting at $2,199 with black Levant covering) is roughly comparable to the price that one of its decades-older counterparts commands now, minus all the added features and newer, more reliable components. Considering that older, single-channel British heads are in demand with players and collectors, however, scoring one at an affordable price has becoming more of a chore in recent years. Though the amp might cost a bit more than an original, the case could be made that the 1986ps would save more money in the long run on the expensive maintenance and upkeep that vintage heads sometimes require.
Modern metal rockers probably won’t be interested, although the SuperPlexi certainly has enough gain to satisfy players in the classic metal genre (late seventies to mid-eighties). Tonally, it is most definitely a classic rock-oriented amplifier, not suited for the modern rock crowd that enjoys extreme saturation and low-mid emphasis in their sound. For the player that is searching for the same type of tone on more of a budget, a simple single channel head without all the bells and whistles is probably in order.
For fans of the smooth, crisp overdrive tones of the ’60s and ’70s, the Soultone 1986ps SuperPlexi is definitely worth a good, solid test run. Players frustrated with Plexi-style amps with lack of low-end and harsh top-end sizzle should give it a try, too. I would highly recommend visiting Soultone’s website to get their detailed run down on their design and component selection process. For the price, features, solid construction and excellent tone, the 1986ps might signal the end of a tonal journey for quite a few rock guitarists.
Buy if…
Classic cleans and great British overdrive are your thing, and not having to spend a few bones on a good power attenuator suits you.
Skip if…
You need a more modern tone and the ability to switch between multiple channels, or you’re looking for the sharp, upper attack that 100-watt heads have in spades.
Rating…
![]()

Starting at $2199
Soultone Amplification
www.Soultoneamps.com
Source: https://mercurymagnetics.com/pages/news/PremierGuitar/PremierG-21.htm
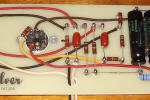
Our friends at Revolver Amplification wrote:
“A customer sent me a Valve Jr. last week and it turned into a new project. He purchased a Valve Jr. kit from you guys. I fabricated a new point-to-point board for him and thought I should send you the results. I’m now offering this mod for the amp.” —Charles Prest, Revolver Amplification
Below are photos of Charles’ work, click on either to see a full-sized version (first stage upgrade).
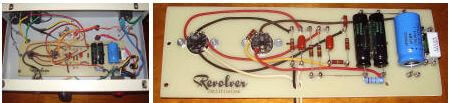
And with 6V6 modification.
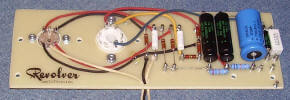
For more information please contact Revolver Amplification directly.
Source: https://mercurymagnetics.com/pages/catalog/kits/valvejr/Revolver/revolver1.htm
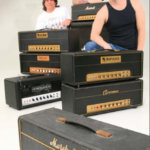
It was originally built around the design of one of Jim Marshall’s favorites, the Fender Bassman; like the Bassman, the JTM45 was actually a fantastic guitar amp. Because of its consistent popularity, Marshall has offered a reissue version of the head — more than 20 years after production of the original JTM45 ceased. While the reissue is built with modern components and assembly techniques, it retains much of the tone, responsiveness and character of the original, hand-wired versions of the early days. No wonder builders today still carry on the tradition of the JTM45, and guitarists continue to seek out the pure simplicity and touch response of this tone machine. To celebrate the JTM45, I got together with my Sunday afternoon amp group, after contacting a handful of respected amp builders who sent us their versions of the amp. We fired them all up alongside an original and a reissue JTM45 to take a listen — and to enjoy one of the best amps ever designed.
About the Authors
About 5 years ago, while playing a 9/11 benefit show, I had the good fortune to meet two people who would not only profoundly impact my life with tube amps, but would become lifelong friends. John Rossi and Tony Burns were there that day; Tony, a killer player and a regular on the Tempe/Phoenix music scene, and Johnny, his friend and amp tech, making sure Tony’s amps were running well in 115 degree heat at the outdoor amphitheater. When I saw Tony’s wall of Marshalls next to my backline of Marshalls, it was an instant conversation starter.
We spent time between sets that day discussing the various finer points of our amps and gawking at each other’s rigs. The show went great but my ’67 Super P.A. felt a bit stiff, and wasn’t reacting in the most flattering way. This incident proved to be the catalyst, as Johnny was an underground semi-retired tech and ultra-fanatic Marshall enthusiast, and he had some ideas that he wanted to try out. He invited me over the following Sunday to check out the amp, and to experiment with various preamp and power amp tubes while BBQ-ing and having a beer. Tony was there, and it became clear that we all had a deep respect for these amps; rather than modify them, we wanted to bring them back to their former glory. After five years, and dozens of hacked-up Marshalls coming back from the dead, here we are. Over that time we’ve learned more about these amazing amps than any of us ever anticipated, and we’ve have had a blast in the process. I have no doubt in my mind, based on my readings of the various amp forums, that there are plenty of groups just like us all over the world doing the same thing.
The Lineup
The lineup consisted of our own 1965 original and 1990 reissue heads, two MetroAmp JTM45s (a kit version as well as the GPM 45), a Germino Classic 45, a Wallace Amplification BKW45 and Mojave Ampworks’ new Special Edition Plexi 45 head. After searching through our collection of cabinets, we settled on both an eighties Marshall JCM800 4×12 with black back 25s, and a Mojave 2×12 cab with 1963-era Celestion Alnico Blues. It may sound strange that there were no pinstripe or basket weave cabs used for the roundup, but that wasn’t for lack of trying. Among all the members of the amp group, we actually have a pinstripe, a basket weave and a variety of Marshall 4x12s, but for some reason we always come back to the early-eighties JCM 800 cab with black back 25s.
That particular cab has more clarity, tone and authority than any other, and it remains our favorite in the bunch — despite the cool factor of the older cabs. The 2×12 with Blues was a natural choice, as that flavor shares similarities with the mid-sixties Marshall cabs and is also a popular speaker configuration for Bluesbreaker combos. The guitars we used were our standard array of Les Pauls from the ’70s, ’80s and 2000s, as well as a newer 2008 Fender Strat and two early-seventies Strats. With everything in the room (it was quite a sight!) we were ready to begin.
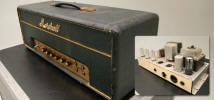 Original 1965 JTM45
To get our ears accustomed to the JTM45 sound, we began by firing up our ’65 head with a Les Paul. Normally, this head has EL34s in it, but we borrowed the Genelex KT66s from the Mojave and biased the amp to accommodate them. It made sense to us to use KT66s, because they were what the amp was designed for. With everything looking good, we flipped it from standby and beheld the beauty of this vintage masterpiece. It’s no wonder players and collectors are paying big bucks for these amps; everything we played through it sounded incredible.
What was amazing was how much of a rock ‘n roll amp this really is. Considering how long it’s been since it was conceived, the amp’s sound remains surprisingly current. The distortion is organic, full-bodied and earthy, and it allowed the personality of the guitar and player to shine through. While it was very easy to play, this is an amp that still requires a level of discipline and control to fully harness its capabilities. It makes sense that players who want to be heard would play on this style of amp, because like it or not, whatever you play through the amp is… well, amplified. It just comes out better.
We played through it for a good long time, switching guitars and speaker cabinets to hear it in as many different configurations as possible. Whether it was a Strat, a Les Paul, a 2×12 or a 4×12, the sound was always remarkable — perhaps the very definition of great tone. Subjective? Yes. Brilliant? Absolutely. Rolling back the volume on the guitars exposed a beautiful clean tone that was harmonically rich and defined, never muddy or dull. Even with the guitar’s volume knob all the way up, the dynamic response of the amp, and the way it musically fed back, was awe-inspiring.
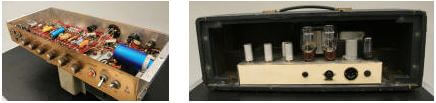 Once we had established a base tone for comparison’s sake, it was time to play and listen to the other amps. Before I break down each individual amp and builder, I must observe that each and every one of the amps had ridiculously good tone, and they all sounded like JTM45s, but each had its own unique voice. Aside from the reissue Marshall, all of the amps are hand-wired. The reissue Marshall was of PCB-construction, and used the standard parts and components that Marshall was building their amps with during that era. I spoke with Mitch Colby from Korg USA (Marshall’s US distributor), who told me that the reissues have not undergone any significant changes since their reintroduction 20 years ago. While they are using the components that Marshall builds with today, they should yield very similar tones to the earlier reissue amps.
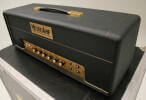 George Metropoulos is no stranger to the world of Marshall amps or to the online amp building community. Having run MetroAmp for some time now, George offers everything from fully built replicas of many classic Marshalls to ready-to-build kits and hard-to-find replacement parts for vintage Marshalls. A player, George honed his amp-tech skills by adopting a DIY approach, taking care of his own amp repairs on the road. This extended into repair work at home, and then really took off when amps began coming in for restoration rather than simple re-tubing. After his ’73 Super Lead was stolen from a gig, he realized it might be best to leave the valuable amps at home, and so he embarked on a never-ending quest to replicate the tone of the old Marshalls.
Like all the builders in the roundup, George is passionate about vintage Marshalls and obsessive over the details that make these amps so coveted. We received two amps from Metro: the JTM45 kit (which can be purchased already assembled for an additional $400) and the GPM45, George’s custom-built JTM45 using NOS vintage parts. When we fired up the MetroAmp 45s, it was clear that they both came from the same camp. Both amps were meticulously built and incredibly precise in their layouts. The main physical differences between the amps came down to the caps, resistors and tubes. Both amps shared the same iron and layout, so they also shared a lot of the inherent tone in their circuits. As George is a fan of the mid-sixties JTM45s, Metro’s transformers are based on the Drakes, rather than the earlier Radiospares iron [editor’s note: Kit also comes with optional Mercury Magnetics transformers]. Still, there was no question that the GPM45, which included NOS Phillips mustard caps, Allen Bradley carbon comp resistors and a gorgeous set of Genelex KT66s, was sweeter sounding.
While those differences accounted for a tonal upgrade, what made the differences even more compelling was the way they affected the touch factor of the amp. Much like our ‘65, the custom-built Metro had an ease about it that felt like a broken-in vintage head, making it a breeze to dig in, or to lay back on the strings and feel the amp act as an instrument. It was truly inspiring. Of all the amps in the roundup, this amp sounded most like our ’65 — frighteningly close! I should mention that the Metro kit version was actually plugged in first, and before comparing it to the GPM45, we all agreed we’d be thrilled to have one in our collection. We may be splitting hairs here to some degree, but knowing that anyone can buy a complete kit for under a grand, and have that kind of quality and tone — that says a lot.
Metro’s JTM 45 Kit:
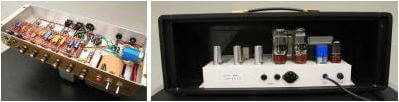
Metro’s GTM 45 Custom Build:

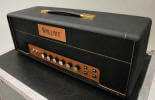 Wallace Amplification BKW45
Brian Wallace has electronics in his DNA. His father, an electronics engineer, and his grandfather, an RCA tube repairman, were both instrumental in his early education and development in tubes and electronics. When he was young his father gave him a 75-in-1 electronic projects kit and further encouraged Brian by letting him watch as he built his own projects. Like all of the builders in the roundup, Brian is a player. He began modifying amps in 1974, when he removed the speakers and baffle in his Checkmate amp and replaced them with a baffle he created and some purchased speakers — altering the sound of the amp and thus beginning his lifelong journey. In 1995, he was approached by Guytron Amplification to help out while they were getting started. A positive experience, it propelled him to the next level and led to the creation of Wallace Amplification, which now offers several amp models as well as replacement transformers under the Marstran name.
Wallace’s first amp is the BKW45, but he is more than a clone maker. Recently he introduced the Abaddon, which is a 50-watt master volume head consisting of four gain stages in the preamp. There is much more to come, including a line of pedals and a reissue of the Fuzz Ace pedal he made back in the early ’90s. The BKW45 is a unique flavor of JTM45. A hair darker in tone and possessing slightly less gain than all of the other models, including both the vintage and reissue Marshall, it yielded enormous bloom and a bold, thick, sustaining quality. Even though there was a little less gain, it didn’t affect playability, and we never struggled with the amp. It was one of the rarest qualities I’ve experienced in an amp, and certainly an unexpected bonus.
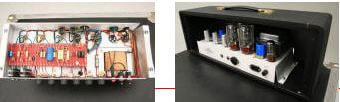 The Wallace had a magical ability to push notes through loud and clear while still being able to dish out gritty and harmonically pleasing chords that didn’t fight the non-perfect intervals they were built on. This all came out of an amp that was using tubes you can buy today without breaking the bank.
Speaking of breaking, check out the sidebar on what the BKW45 was subjected to by UPS en route to our roundup. In spite of the gorilla treatment it received, the amp arrived without shattered glass and performed flawlessly throughout the entire set of three sessions of playing and listening. That’s a testament to a solidly built and roadworthy piece of equipment. And one look inside the amp will show what a dedicated and precise builder Wallace is. In tone and build quality, the amp is a work of art.
 Ever wonder what could happen to your amp in shipping? In the case of Brian Wallace’s BKW45 amp, UPS had a field day, and decided it would be a lot of fun to throw it around. When the amp arrived, it was packed neatly in a new cardboard box with padding inside suspending the padded road case that housed the amp. That’s double-boxed and protected by a case built for heavy abuse. Sadly, it took one good slide down the end of a ramp and collided with either another box or the wall of the truck. Though the box didn’t show any signs of abuse on the outside, it was clear that something had shifted when I opened the case. Take a look at this picture of the damage and the way the entire amp was shifted to one side because of the impact. Believe it or not, the tubes didn’t shatter and the amp worked fine, but it was cosmetically damaged by a broken front Plexi panel. This isn’t the first time this has happened, but it’s the first time I’ve seen it happen with this type of road-worthy packing. Let this serve as a reminder to always insure your amps, as the shipping company can’t tell if you’ve got a bag of peanuts in a box or an amp that was lovingly built by somebody like Brian.
 Germino Amplification Classic 45
Greg Germino is another lifelong guitarist who was bitten by the tube-amp bug after catching the Allman Brothers Band back in 1972. He was so inspired by that show that he switched over from acoustic to electric guitar and began taking electronics classes in high school. In 1979, he requested schematics from both Ampeg and Unicord (Marshall’s US distributor at the time) and began his hands-on education with tube amps. He spent the ’80s at an electronics job, and by the early ’90s he was moonlighting doing tube amp repair for a few music stores. He continued to play live with both 50W and 100W Marshalls during that time and moved to Durham, NC to work at Bull City Sound — working on tube amps from the big-name amp companies.
This led to Greg’s being commissioned by Mojo Musical, where he built their Tone Machine amplifier. The following year, 2002, he began work on the prototype of his Lead 55 amp, which debuted in May of 2002. The Classic 45 model is based on the earlier Radiospares-style output transformer, rather than the Drake 1202-103used in the ’65-’66 era, and the circuit is exactly what you would find in an earlier original. The Radiospares-style OT is supplied by none other than Chris Merren, who is highly regarded in the world of Marshalls, and known to make some of the most accurate transformer replicas out there.
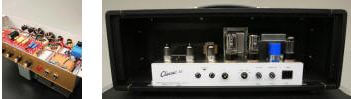 The Classic 45 was the only amp in the roundup that used 6L6 power tubes. Greg’s decision to use them was a combination of staying true to the earliest tubes Marshall used on the original JTM45 amps and his belief that the current crop of 6L6s sound and perform better than newer KT66s. NOS and vintage 6L6s are also less expensive and more plentiful than NOS KT66s. Our immediate response to the Classic 45 was that it was a lively and aggressive amp, with tons of power that made the pick explode off the strings. In ways it reminded us of our favorite ’67 Super Bass in its volume and attack, but it still retained the sound of a 45. It may very well have been the loudest amp of the bunch, and that volume translated to a feeling of excitement that made the amp extremely fun to play. It was present without being shrill and had a super-tight bottom end, no matter what guitar we played through it. While the Classic 45 had tons of natural gain on tap, it also cleaned up nicely when rolling back the volume on the guitar, revealing a bright and sparkly chime. This amp is a real beast, and it could hold its own against 100W amps without flinching.
 Mojave Ampworks Special Edition Plexi 45
Anyone familiar with the JTM45 would surely be jealous of Victor Mason. Not only has he seen more than his fair share of vintage Marshall, Vox, Hiwatt and other rare treasures come through his shop, but Victor recently acquired 26 of the all-time greatest JTM45s ever assembled via the Kronemyer collection, and he’s got the pictures to prove it! This is just one of the factors contributing to the obsessive nature of Mojave (and the associated Plexi Palace). Having been around for over a decade on the internet, Vic has been repairing, restoring, buying and selling vintage Marshalls for quite some time now. Stemming from his early desire to find out how EVH created the classic brown sound, Victor embarked on his journey through countless hours of digging into vintage amps and learning where their strengths and weaknesses lay. Mojave now offers an entire line of amps to serve the classic Marshall tones and well beyond with innovative features and designs. The Mojave Plexi 45 also has two very unique features over a stock JTM45. First is a simple feature to allow volume control by way of throttling the power level. Second is a line level output, which is adjustable and incorporates a ground lift.
Standing apart cosmetically from the rest of the amps, the Special Edition Plexi 45 is built on the same footprint as the Coyote and Scorpion designs, with a white-and-black color scheme and chrome hardware. The head is built with an open grille cage that allows for maximum airflow to keep the set of completely NOS glass cool. The 45 supplied for the roundup consisted of a pair of 1970 NOS Genelex KT66s, 3 Mullard 12AX7s and a Mullard GZ34. Like the Germino, the Plexi 45 is based on the Radiospares transformers, which are custom wound by Mercury Magnetics.
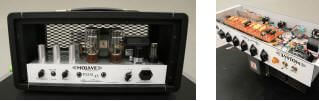 The chassis is a thing of beauty; the .09″ thick aluminum, with a high tensile strength and welded edges and seams will ensure it will not flex, bend or develop fatigue, like the early, folded, softer chassis, and will prevent the heavy transformers from causing the chassis to sink in and sag. Mojave deviates from the original JTM45 by using modern, tight-tolerance parts. Custom manufactured caps and metal film resistors allow each amp to sound as close to the one built before it as the one after it. Consistency is something that Vic definitely strives for, and it shows in the build quality and attention to detail, and the desire to add convenient functionality to his amps.
We found in testing that not only did the amp have an extremely low noise floor, but that it was an authoritative and powerfully voiced amp. There was definitely something different in the tone of the Plexi 45; it was cleaner sounding, but still very bold. Having been to Vic’s shop, I was fortunate enough to play one of the 26 JTM45s he had acquired, and I’m positive that the experience with those amps had more than a little to do with the design of the custom Mercury Magnetics’ Radiospares transformers made for his Special Edition model. The amp is built like a tank.
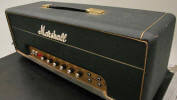 Marshall Reissue JTM45
While the reissue looked very similar to the ‘65 on the outside, especially due to the fact that it’s already 20 years old, the differences on the inside were quite pronounced. Assembled with more modern methods, and using a PCB rather than hand-wired turrets, you could easily be fooled into thinking that it wouldn’t perform like the others. This particular amp was the only one in the bunch to use EL34s rather than KT66s or 6L6s, so the sound was definitely different. It was incredibly loud and focused sounding, and actually had many of the characteristics of a Super Lead. The sustain and power of the amp was incredible, and for an amp that can be found used for around $1000, this is a sleeper bargain. Marshall has taken some flak for their amps sounding stiff and cold from the factory, but with a little attention — slightly hotter bias and good tubes — this amp is a monster. And just because it says it’s a 45-watt amp, don’t harbor any illusions that it would be a good bedroom amp. This is a loud and powerful beast, and a tone machine as well.
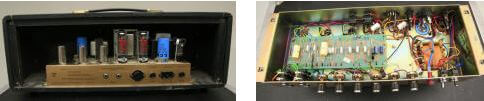
The Blindfold Test
As a final, fun test, we did a blind study, to see how accurately I could identify each of the various amps in the roundup. Johnny and Tony set up the group of amps, and I sat in a chair with my back turned away from them. With the guitar plugged in, they began to fire up the various amps, and we got rolling. Out of all the amps, I was always able to distinguish the Wallace BKW45, due to it’s slightly darker sound. The Metros were also fairly easy to spot, but I ended up guessing the kit as the custom build and vice-versa. The ‘65 was also an easy amp to recognize, but as ear-fatigue set in, the lines began to blur substantially. Pretty soon, I was confusing the Germino for the reissue JTM, the Mojave Plexi for the Wallace, and the Metros for the real JTM. It just goes to show you that all of the amps performed remarkably well, and you can be fooled when you’re not seeing what you’re playing, so never discount a PCB reissue head as a second fiddle to the real thing. In the mix of a band, these differences become small, and any one of these amps would hold their own any day of the week.
Wrapup
To have the opportunity to play through so many variations on a classic theme was not only fun, it was educational. Each one of the builders excels in creating their own unique version of the great rock and roll amp that Ken Bran, Dudley Craven and Jim Marshall built back in 1962. While like all Marshalls, the JTM45 went through changes in tubes, components and designs over its lifetime, there is a trademark flavor and color that still can be found in all of them. Not everyone can afford a vintage 45, but with the help of these builders we have the opportunity to get into that sound and have build quality that will last for years.
Source: https://mercurymagnetics.com/pages/news/PremierGuitar/PremierG-20.htm

The Laforza was only built for two years beginning in 1989, as an international joint venture between Italian companies Iveco (commercial truck maker) and Pininfarina (body specialist responsible for many Ferrari an Alfa designs), along with Cars and Concepts in Brighton, Michigan. The Pininfarina body is stainless steel outfitted with a luxurious interior reminiscent of the original Range Rover or G-Wagon. This was then mounted to Pininfarina’s own boxed ladder frame and mated to Iveco axles (solid rear leaf springs, independent torsion bar front) and shipped to Michigan, where Cars and Concepts mounted a 5.0-liter, 185hp Ford truck motor, AOD tranny and NVG 249 transfer case. At 5,250 pounds, the Laforza was hardly a quarter mile champ, even with the 302 V-8. So when Southern California resident Sergio Hamernik bought his as a pieces and-parts project, he decided the motor was the one thing he would not keep stock. When he built his Laforza (some trucks were left as incomplete when the company went belly up), he decided to install an SVO 5.0 GT-40 motor and let renowned supercharger specialist Kenne Bell and tech wizard Brett Stach of Brett Stach’s Cal-Fab work a little magic. The GT-40 motor came with optional aluminum heads, 1.94 intake valves and 1.54 exhaust valves and SVO camshaft model E303, used to enhance low-rpm grunt. The Kenne Bell Whipplecharger sits atop the stock EFI system, which has been recalibrated and upgraded to 24-pound injectors and mounted to a GT-40 manifold. Exhaust fumes exit via JBA headers, Perfection cats and a Flowmaster exhaust utilizing 3- inch tubing. Getting a supercharger and motor to perform accurately together at max boost can be a tricky puzzle, but with the electronics available today, the puzzle can be solved. Upgrades for the blower include a Mercury Magnetics® voltage control module, Crane Hi-6 CD ignition and PS-92 coil. The voltage control module boosts the voltage going to the fuel pump to compensate for the leanness at full boost, eliminating any pinging or detonation. A J&S individual cylinder anti- knock control ignition was used to automatically advance or retard the spark for each cylinder. Deciding that he wanted the “sleeper” look, Sergio left the rest of the vehicle stock with the exception of Michelin 275/70 R16 tires, cross-drilled front rotors and a 3,200rpm stall converter for the AOD. The stout stock drivetrain includes 3.90:1 gears and factory rear posi, which Sergio says is up to handling the 240-plus peak rear-wheel horsepower and 330-plus lb.-ft. of rear-wheel torque. What’s most impressive about this vehicle is that the Supercharger’s boost curve is nearly flat throughout the rpm, making over seven pounds of boost from 2,100 to 3,800 rpm. This setup is ideal for the four wheeler because consistent boost makes this relatively small V-8 perform like a big-block. Laforzas are probably some of the rarest rigs running around and this on is even more unique because of the extensive motor modifications. But this motor setup doesn’t have to be unique, it will work well on any number of Ford trucks and could be an alternative to swapping in a big-block.

The Laforza is a luxurious yet rugged Italian-penned sport utility that was ahead of its time. Sergio Hamernik, owner of Mercury Magnetics in Chatsworth, California uses his Laforza as a daily driver as well as a weekend tow rig. The intimidating sport utility was first available in 1989 via Laforza Automobiles. The trucks were designed, and the frame, body and interiors were constructed by Pininfarina in Turin, Italy. The rolling chassis were shipped to Car & Concepts (later known as C&C) in Brighton, Michigan where the fuel-injected, 185-horse 5.0-liter Ford V8 engines and AOD four- speed automatic transmissions were installed. Production only lasted a few model years and there are only about 1000 units on the road.
Since the 5250-pound Laforza really challenged the Ford 5.0-liter, Sergio updated the engine to a ‘95-vintage SVO GT40 5.0-liter. This was the only option as even shoehorning in a 351 meant major surgery. The 5.0 runs aluminum GT40 cylinder heads with valve actuation being handled by an E303 camshaft. The GT40 heads have been match ported and polished by Brett Stack of Sana Clarita, California and the GT40 Intake has been fitted with a Kenne Bell Air kit to expedite airflow.
Sergio has updated the Laforza’s factor Ford 5.0-liter with an SVO GT40 engine. The 5.0 has entered the ranks of forced induction complements of a Kenne Bell supercharger package featuring a Whipple twin-screw blower.
Before reaching the engine, incoming air is compressed by a Kenne Bell supercharger package featuring a Whipple twin- screws blower. The twin-screws compress the charge air since it is moved toward the combustion chamber. This method has two advantages. First, it does not chop the air. Chopping can heat the charge air, lessening the power gains as cooler, denser charge makes more power. Secondly, the screw action is immediate which means the Whipple delivers gobs of low-end power with crisp throttle response at most any engine speed.
The ignition system consists of a NOLOGY Power Core ignition coil energy amplifier and a set of NOLOGY HotWires. The NOLOGY products transform the OEM ignition system into a high-intensity system. The ignition system and other engine functions are commanded by a Mustang Cobra ECU that houses a Kenne Bell performance chip. For fuel enrichment needs, the Kenne Bell kit incorporates a 190 Iph in-tank fuel pump, a Kenne Bell fuel pressure regulator and a new twist in the fuel enrichment equation – a voltage control module. Developed by Kenne Bell, the module is a series type circuit which piggy-backs voltage via a pressure switch on the supercharger when boost pressure hits four psi. The module jumps output to the fuel pump from between 12 and 17 volts. A volume knob mounted in the cabin allows total adjustability of the voltage to the pump. Testing on the 5.0-liter’s 190 Iph fuel pump showed up to a 50-percent increase in fuel volume and allowed the engine to run eight psi of boost without a hiccup. Trying to do so previously would have caused pinging (light detonation). Essentially, the Boost-A-Pump allows the fuel pump to maintain the correct fuel pressure when the rail pressure is increased due to the regulator under high boost conditions. When the rail pressure is increased, it becomes harder for the fuel pump to supply adequate fuel volume to the rail. As a result, the rail pressure tapers off prematurely, robbing power. With the Boost-A-Pump, the fuel pump is shocked into delivering the extra volume of fuel needed to maintain the correct rail pressure at higher boost levels. Jim Bell of Kenne Bell says the Boost-A-Pump will be a welcome addition to performance enthusiasts who prefer forced induction because the Boost-A-Pump will negate the need to swap out in-tank pumps or add auxiliary pumps for many applications. However, Jim foresees a trend where enthusiasts who think more is better put the Boost-A-Pump on their 5.0 and for all intents and purposes drown the power out with too much fuel. Jim says there is no difference in power between an 11:1 air/fuel ratio and a 12:1 air/fuel ratio in a 5.0. In fact, throttle response and duel economy surfer when too much fuel is added. He hopes the Boost-A-Pump will cut the time and expense of upgrading pumps and provide improved performance utilizing the stock 155 Ip in-tank pump. Future uses of the voltage control module include cars, trucks and boats with high-end, high-power stereo systems that operate the stereo for long periods of time without running the engine—which puts a serious strain on the electrical system. Other possibilities may be upping the voltage to a vehicle’s ignition or the entire electrical system. A J&S Electronics Safeguard detects detonation and backs off the timing in the Laforza before harm is done. The J&S unit is an option with the Kenne Bell supercharger system. Once combustion has occurred, spent gases exit by way of JBA shorty headers and a three-inch exhaust system that features a Flow-master muffler.
The Laforza sports an independent front suspension that utilizes unequal length control arms, torsion bars and Bilstein shock absorbers to soften out the road. Out back, a live axle is suspended via a five-leaf spring set-up. This combination works equally as well on the road as it does on the trail combining luxury ride and off-road suspension travel. A Ford AOD automatic transmission and an Iveco positraction rearend with 3.90:1 gearing help put the power to the pavement. High- and low-range four-wheel drive actuation is handled by a Chrysler transfer case. The rolling stock on this hard- working SUV consists of Michelin 275/70-16 radials (the biggest Sergio could fit) and the stock Laforza wheels.
On the inside, the Laforza interior puts the drive in the lap of luxury. Trimmed in burled wood and gray leather, the cab features a custom steering wheel from Momo and VDO gauges as factory equipment. The bucket seats are deep and plush and the Laforza puts you in a commanding driving position high above traffic.
While on tow duty, the Pearl White exotic pulls a 22-foot Master-Craft MariStar 225 VRS ski boat. The Boat is motivated by a Corvette LT1 small-block V8 that utilizes Cadillac’s NorthStar ignition. The engine package, dubbed MasterCraft Power TM by Indmar, generates 319 horsepower and has been improved with a roller cam and revised intake set-up for 1996. Through Mercury Magnetics, Sergio is currently developing a supercharger system for the LT1-powered MasterCraft. Sergio purchased the MariStar through California Skier of Riverside, California and will be working closely with the dealership on the forced-induction system. The boat company plans to offer the blower package as an upscale, high-performance option in the future. Considering the weight of the Laforza and the added bulk of the boat (3000 lbs.), it is a good thing that Laforza went overkill on the truck’s cooling system. The radiator is unobstructed. There are separated coolers for engine oil, transmission fluid and even the air conditioning compressor. Most of the coolers have their own fans.
The evolution of the truck has included more than R&D on the Boost-A-Pump. The SVO engine stared its stint in the Laforza with cast-iron GT40 heads and a number of performance chips have been burned for the exotic SUV. We plan to stay on top of the Boost-A-Pump and may have a tech story on the device in an upcoming issue. Sergio is more than satisfied with how the Laforza throws its weight around and reports all towing chores to date have been met enthusiastically. He is so happy with the white beast that he says turning the truck over to Jim Bell is becoming more and more difficult.
Simple Amps’ Big Iron 6VA amp is simple, old school and responsive to your guitar’s controls.
When I received the Simple Amp for review I could hardly ignore its dimensions; it’s a pretty impressive looking package, to be sure. The cabinet weighs about 60 lbs, and the head about 30. The model I received was the Big Iron 6VA, in a head and 2×12 cabinet configuration, sporting the striking Black Widow look.
The 6VA name refers to the output tube configuration, which is two 6V6GT tubes (Tung Sol). Other models using 6L6 and EL34 are available as well; standard preamp tubes are Mullard 12AX7s. The amp also features two 5AR4 rectifier tubes, and the manufacturer states that an optional 12AU7 will give a more pristine clean tone if desired.
So Simple
The head is a thing of both beauty and simplicity. Only two knobs — Volume and Tone — are presented on the front panel. The rear panel features two output jacks, an impedance selector, AC voltage selector, and the AC input module. One cool feature here is that it carries one spare fuse inside the fuse holder for easy access, in case of an emergency. Construction is impeccable, with hand-wired turret boards, and Mercury Magnetics power transformer, output transformer and choke. The 6V6 model scopes out at about 30 Watts.
The speaker cabinet is equipped with two Celestion Alnico Gold G12 50-watt speakers, set up vertically and wired for 8 ohms. It features an open-back design and has aluminum speaker baffle and bracing. Although I didn’t have an opportunity to hear the cabinet with a wooden baffle, I’d have to say my impression was that the aluminum baffles and bracing made it a bit brighter, and certainly tighter on the low end, than most open-back cabinets I’ve played. This example was mono wired, but a stereo option is also available. The cabinet was solidly constructed of 11-ply and 13-ply Baltic birch, and sounded very tight when pushed.
Another cool thing is that the manufacturer includes both a speaker cable and an instrument cable by Solid Cables, which transfer some of the cleanest tone and response around. They want to make sure that this amp is run under optimum conditions, and it shows their dedication to getting the perfect tone out of the amp.
So What About the Sound?
The creator of this amp, Joel Jones, tells me that his idea for this design comes from the desire to turn the amp up to ten and control the whole clean/dirty sound from your guitar’s volume. Doing it this way allows for the all-important power tube saturation. It’s easy to overdrive a bunch of 12AX7 stages for distortion or overdrive, but when the power section comes into play, the whole dynamic changes. The amp can be very warm and clean at lower settings of the Volume control, especially using the bottom input, which has less gain, but touch sensitivity is also affected. The lower input might be better for some players who derive their tones from pedals, as the higher headroom would let their reverb and delay effects work better. Happily for many players, this amp has more available gain on ten than most amps of this type. The low end is smooth and tight. Some single-volume/single-tone amps sound pretty bloated when cranked in this fashion, but not this one.
The Simple Amp 6VA is also very pedal friendly. I used a Tube Screamer pedal and an old Marshall Guv’nor pedal and got amazing distortion and overdrive sounds with both a Strat and a Les Paul. The Fender Stratocaster used was a typical American Vintage 57 reissue with a maple neck and Duncan pickups. The Les Paul was a 1969 Black Custom retrofitted with original 1959 PAF pickups.
The type of tones I was able to achieve varied according to the various pedals I used. The TS808 gave me a very good rendition of SRV and Robin Trower when used with the Strat. Through this pedal with the Les Paul, the classic British rock tones — Bad Company and Zeppelin — were readily available. When I switched to the higher gain Marshall Guv’nor pedal and the Strat, I found that David Gilmour tones and even a bit of Yngwie on the neck pickup were no problem. With the Les Paul and the Guv’nor I found Gary Moore and Neil Schon type of sounds (I should mention here the volume was set at about 9, and the tone about 7).
I have to say that for heavier rock tones, you will need to use a pedal. The Strat-blues SRV thing is really no problem with this amp paired with any type of Tube Screamer. I was surprised at the volume the amp produces. This is probably the result of the two 12” speakers stacked vertically, as well as the cabinet design. The guitars cleaned up to pristine clean when their volumes were reduced, making it a very usable unit for those comfortable with controlling it this way. The Simple amp has a wonderful warm tone and texture to its sound, which is fairly hard to come by these days. I noticed exceptional touch sensitivity to the amp, and it responded well to different types of picking techniques.
The tone control on the amp was very wide ranging, going from very dark to some pretty screaming highs. On the high end the amp seems to have more gain, but even with the amp cranked and the Tone knob turned all the way treble side, the top end was not harsh. It was very easy to dial this control in to just the right amount of brightness. The dual rectifier tubes in this amp should not be confused with the similar specs of other brands. In this application they are there to provide just the right amount of sag to the power supply. I think this is probably the reason for the exceptional touch sensitivity of the amp.
The Final Mojo
I found the Simple Amps model 6VA to be an excellent amp for players who are comfortable with controlling their tones from their guitar. It may not be the best choice for players who are used to the staggering gain and sustain of Boogies and Bogners and the like. This amp is not in my opinion, a competitor to those types of amps. It does, however, produce tones that would be difficult to get from the modern high-gain amp. Old school players will love it. It is well built, and even though it is larger than most amps of its type, it is worth the effort to transport.
Buy if…
you’re looking for a great, simple amp with clean/dirty sounds you can control from your guitar’s volume.
Skip if…
you’re looking for a lightweight amp, or prefer the massive overdrive of a modern high-gain amp.
Rating…
Street $2650 (head) $1150 (cabinet, as tested)
Source: https://mercurymagnetics.com/pages/news/PremierGuitar/PremierG-19.htm

Jeff,
Your answers to questions in Premier Guitar have left me to believe that you might know what I am hearing when I use my Peavey Classic 50/410 combo. I love the tone that I get, but there seems to be an intermittent swirl sound that happens while I am playing. It doesn’t affect the amped signal, but is in the background. Sort of like a spacey, swishing hum from a bad ground. I have taken a mirror and tried to watch the tubes to see if one is having a fit and have seen nothing. I want to get the clean sound and not have that underlying noise. It doesn’t matter if I am on channel one or two, have reverb on or off, in bright or normal channel. I have it just through the combo or with the 410 extension cabinet. Also here in Central Illinois, I don’t know of any good techs to take it to for repair. If you could give me an idea what it is that is wrong and where to start looking to get this fixed I would really appreciate your advice. I just looked at the web site for Mercury Magnetics upgrades and was wondering if you had any experience with their claims. Sounds good, but is it worth it? — Dan
Hello Dan,
Thanks for reading Premier Guitar and also my “Ask Amp Man” column. Glad you enjoy it.
There are a couple of possible causes for such a symptom. I would say the first, and most easily remedied, would be a faulty tube. Many different types of noises can come from tubes, none of which could be visually determined. The first thing I would recommend would be to clean the sockets and replace the EL84 output tubes in the amp. These tubes take the most beating and should be replaced more frequently than the preamp tubes. You did not mention the last time you had done this, but a good rule of thumb nowadays is six months to two years, depending on how often and how loud you play.
In order to clean the sockets, obtain some electrical contact cleaner that does not contain lubricant. Remove the tube, spray a decent amount of cleaner into the socket and cycle the tube in and out of the socket six to ten times. Leave the tube out of the socket and move on to the next socket. When all the sockets have been cleaned, leave the tubes out and give the sockets ample time for the cleaner to evaporate — maybe fifteen to twenty minutes. Install the new tubes, fire up the amp and see if this has cured the symptom. If not, I would next replace the 12AX7 preamp tubes. One thing to remember, however, is that a new preamp tube can also produce different types of mechanical or microphonic noises. If your original symptom has been eliminated but the amp is now producing a metallic ringing or starts feeding back, move around the location of the preamp tubes to see if you can place the offending tube in a less sensitive location. If neither of these alleviates the symptom, at least the amp has a fresh set of tubes and should sound great once the cause has been found and the problem remedied.
To further explore the possible causes, I posed your question to John, an engineer friend of mine at Peavey, and I believe we may have another possible answer for you. The Classic 50 uses a wire connecting the preamp circuit board to the output tube circuit board, which provides the ground connection to the output board. This should be a black wire utilizing a white plastic connector approximately one inch long and attached to J74 on the output board (if marked). The recommended way to repair this potential cause of the problem is to upgrade the connection by removing the connector, stripping the wire and soldering the wire directly to the pin on the circuit board. This will provide the best, most reliable ground connection, without the worry of oxidized or intermittent connectors. This may be a larger task than most players are capable of and servicing tube amps should not be undertaken by anyone unfamiliar with the hazards, so find an experienced service technician to perform this kind of work. Regarding your question of such a technician in Central Illinois, I personally do not know anyone in that area. However, I’m sure if you inquired in any of the various gear forums you would find someone who is trusted.
To the last part of your question concerning the Mercury Magnetics upgrades: I have used their replacement transformers in the past and they definitely make a wonderful product. While I have not had the opportunity to install one of their recent upgrade kits, I have heard from players who have had the opportunity to compare stock and upgraded amps side by side, and they tell me the difference is quite noticeable. One even found it hard to believe they were the same model amps — so I’d have to say that if you have a discerning ear, it may be a worthwhile investment for you. I hope that helps you restore your Classic.
Source: https://mercurymagnetics.com/pages/news/PremierGuitar/PremierG-17.htm
Category 5 is a relatively new company based in Frisco, Texas that has wasted no time in developing twelve distinctly unique, hand-wired designs ranging in power from 15W–100W, while aggressively placing amps with touring players like Joe Bonamassa, Tab Benoit, Jimmy Thackery, Gary Moore and one of our favorite Texas Burstbusters, Jonn Richardson (Otis Taylor), among others. The company’s strategy for quick and lasting growth is fairly obvious with a quick scan of their website – build hand-wired tube amps to the highest standards of custom manufacturing, and offer a range of power and tone shaping options that will meet the needs of virtually any player, from low volume home and studio applications to 100 watt pro rigs suitable for cavernous venues and big stages. When it comes to fully understanding the intention of Cat 5 amps, you’ll need to do a little homework on each model, many of which are named for famously wicked hurricanes. We’ve done all the work for you on the two models reviewed here….
We received a 1×15 version of the 40 watt Andrew, which is also available in 2×10, 2×12 and 4×10 configurations. The 1×15 is equipped with our favorite current production 15” – the Eminence Legend–along with dual 5881 power tubes and an interesting combination of two separately voiced input channels. Channel 1 is described as having been inspired by the ’61 Fender brown Deluxe. Having owned a dead mint example of this very amp, we can tell you that it possessed a remarkably toneful and middy snarl, but very little usable clean headroom, which is why we ultimately let it go. Channel 1 in the Andrew produces an equally “brown”sound – rich with midrange and none of the typically scooped tones of the black face era.
Channel 1 is designed with a single tone control to shape EQ, plus the global reverb and “voltage”controls for the internal variac circuit. Of course, the reissue Tung-Sol 5881 tubes create a much more formidable voice than our brown Deluxe could ever must, which we consider to be a tremendous improvement to anything inspired by the brown Deluxe. We all experience and embrace varying sounds quite differently, so we won’t offer this as an absolute, universal truth – but to our ears at least, we prefer the tone and attitude of Andrew’s Channel 1 combined with snappy single coil pickups that can impart a stronger attack on the bass strings and happily frolic in the midst of all that midrange. Otherwise, what you hear is the sonic equivalent of a chocolate-chocolate chip double fudge cookie in the style of a late ’50s Gibson GA40– a very good thing with single coils or bright replica PAFs. Dialed in with the sole tone control, you can create a very old-school tone in Channel 1, and that does seem to be its purpose, so mission accomplished. A more nimble and versatile range of black face tones are found in Channel 2.
Channel 2 offers a full range of tone-shaping EQ, with bass, treble and midrange controls, plus the global reverb and voltage controls common on both channels. We asked Steven Scott, head of product development at Category 5to explain….
TQR: Does the voltage control essentially function as avariac, dropping voltage to the power section, or is something else involved (most people have heard of power scaling but have no idea what it really does)? Power Scaling is another name for voltage control. We don’t use the same circuit as London Power and have not licensed the trademarked name, so we can’t call it Power Scaling. The voltage control makes the B+ voltage variable from about 60VDC to about 450VDC, which allows you to dial the amp from about 5W to about 45W. This allows you to more or less keep the same tone once you’ve dialed it in, then scale it to the size of the venue. This is the feature that our customers rave about the most. The tone really does stay pretty consistent until you take the voltage way down below about 11:00 on the dial. Then it starts to brown out as the tubes are operating well blow their intended point. Another advantage of this technology is it greatly improves tube life as the bias drops as the voltage is turned down. It differs from using a variac in that only the B+ voltage is affected, meaning filament voltage stays the same and no damage to the tubes such as cathode stripping can occur.
A couple of months ago, I checked in a pile of amps for repair/freshening up for a band that was going into the studio to record another album. While reviewing this pile, I found that I was in possession of the main recording amp for the front man. It was a little vintage Supro that had certainly been around and through the ringer. While it definitely had a fantastic tone, it had noise and reliability issues due to its age. I decided to surprise the fellow and make a replica as close to the original as possible. In my own amp designs, I try to add a dash of originality into the mix, but for this project only a carbon copy would do. I pondered the project endlessly, obsessing on the creation morning, noon and night. A couple of days after deciding on a game plan, I received a call from the band’s liaison asking me if I would mind making a clone of that amp only with less noise and increased reliability. I was now on the hook. Time to put my plan into action.
The first step was to try and find a schematic for the little Supro Super. A few were found in my files and on the internet, but they didn’t seem to be of this exact incarnation. Since my plan was to be blueprinting and cloning this amp anyway, I decided to dig in and make a schematic. I traced the circuit, noting the apparent values (what was written on them) of resistors and caps etc, as well as the type (composition) along the way. All of the resistors were carbon comp, and the coupling caps were mostly ceramic discs. I then traced the circuit again, this time measuring and taking notes on the actual values and voltages of the resistors, caps, transformers, plate voltages, cathode voltages, etc. The differences were substantial. The tolerances on these amps were fairly broad to begin with; on top of that, the values of the components would certainly drift over the 40 odd years since this amp was built regardless. Now that I had the blueprint made, I needed to acquire the parts.
I placed a call to Paul Patronete of Mercury Magnetics to get transformers with the exact specs required. We do quite a bit of business together and he has always been a great help with projects like this (as well as with my DB7 trannys). Surprisingly, they had them on the shelf and ready to ship.
With those on the way, it was time to start punching the chassis. I selected an aluminum box to be used as a blank and laid out the measurements. My goal was to create a replica in tone and feel only, so I took the liberty of moving some of the component placement to cut down on the noise. For example, I spaced the transformers out a bit and took into consideration the proximity of the output tranny and the first gain stage. During the construction, I also implemented star grounding and ran shielded wire. For the resistors I used NOS carbon comp where it made sense tonally (input, plate load etc.) and a mix of carbon film and metal film in other places. At times, I had to create values using two resistors to try to match the values of the ones that had drifted.
Ok, ok, I know that I said that I was making a carbon copy clone here but I just couldn’t bring myself to use ceramic discs for the coupling caps. Instead, I used caps that we have made to our specs for our amps by a high-end manufacturer here in the U.S. They don’t have the same two-dimensional graininess as the ceramics. Instead they have a very open and airy quality to them but shift to the point of flattening out a bit when using some right hand dynamics.
With the guts assembled and all of the voltages checking out, it was now time for the speaker selection and cabinet construction. I chose to make a separate baby head and speaker cab for this project. I used pine for its tonal qualities and tried to match the size of the original combo. For the speaker itself I used an 8″ Weber VST Alnico that was a direct replacement of the original. The cabinets were then covered in a very funky black cowboy print type Tolex. Tube selection was also very important. I tried many tubes from my private stash and finally rested on an NOS RCA 6V6 for the output and NOS RCA grey plates for the preamp.
The end result was satisfactory but there was something missing. The tonal characteristics were all there but it just didn’t seem to have the “magic.” I gave it to the client and told him to play/abuse it a bit to see how the character would change when the amp/speaker had some time to break in and then I would finish the voicing. A couple of weeks later I picked it up from their studio along with a wish list of how the tone was to be sculpted. I placed the amp on my bench ready to start the voicing, plugged the head into a very weak and old 10″ Alnico Jensen that I use as one of my test speakers and strummed a chord. WOW! It sounded amazing! Hmmm, what happened I wondered?
I then plugged the amp into the cab that I had made for it. While it still had the tone, the dynamics just weren’t there. The speaker that was in my test cab seemed to be the missing ingredient! Fortunately, it was one of four that I had pulled out of an old Hammond organ cab of mine. The new speaker cab was taken apart, a 10″ hole cut in the baffle board and one of the speakers installed with hardly any room to spare. I tried again… WOW! With this combination you could play perfectly clean, sparkling chords and using right hand dynamics shift into blistering, compressed distortion. Truly outstanding! The Weber is a fantastic speaker — don’t get me wrong — it’s just that for this application I needed a really tired, old, crummy speaker to do its thing. The end result far exceeded the greatest expectations of both my client and I. Certainly well worth the time spent on a small pet project in a busy shop. But hey, who needs sleep anyway?
Source: https://mercurymagnetics.com/pages/news/PremierGuitar/PremierG-16.htm

VG READERS FIRST LEARNED about amp builder Gabriel Bucataru in 2005, when he was featured in the “Builder Profile” column, and the subsequent review of his Voxer 18 (March ’06). Gabriel’s latest amp model is the new Voxer 33 available in 1×12” or 2×12” combos as well as a separate head and cabinet.
The Voxer 33 uses a EF86 amp tube in the Bright channel, a pair of 12AX7 preamp tubes in the Normal channel, and EZ81 rectifier, and a quad of EL84 power tubes. Components and construction are top-shelf, including custom Mercury Magnetics transformers, Sprague capacitors, The Voxer 33 uses a EF86 amp tube in the Bright channel, a pair of12AX7 preamp tubes in the Normal channel, and EZ81 rectifier, and a quad of EL84 power tubes. Components and construction are top-shelf, including custom Mercury Magnetics transformers, Sprague capacitors, ceramic tube soects, a welded heavy gauge aluminum chassis, all point-to-point wiring, and a ginger jointed nine-ply Baltic birch plywood cabinet with extra bracing.
Fitted with a Celestion G12 Gold speaker (the 2×12” combo is fitted with a Celestion Greenback reissue and an AlNiCo Blue), like our first review Gabriel, the Voxer 33 was dressed in the company’s signature black and yellow tolex with gold piping, cream woven-cane grill, custom yellow chicken head knobs, a heavy duty yellow-nylon-mesh encased detachable power cord, yellow jewel light, black-and-yellow control panel silk screening and yes, even black-and-yellow speaker leads (now that’s commitment to a color scheme!). If the bumblebee look is a little to bold for you, Gabriel also offers a black-and-cream “Capuccino” and all black “Blackburn”color schemes.
Everything, from the perfectly executed tolex to the fit of all components to the laser cutout “Gabriel” logos on the foot switch, and pre-amp-tube compartment, give the Voxer 33 a high-end/high-quality vibe. Controls include a Volume and Tone control for the Bright (EF86) channel,Gain, Tone, Cut and Volume controls, and Gabriel’s exclusive six-position Tone Contour switch for Normal/crunch channel. The Voxer 33 ships with a two-button foot switch that overrides the control panel’s Gain control and allows toggling
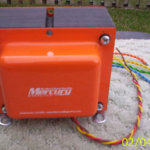
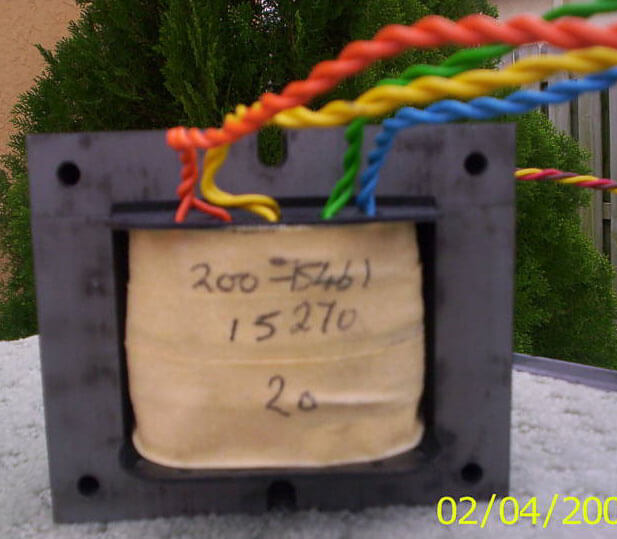
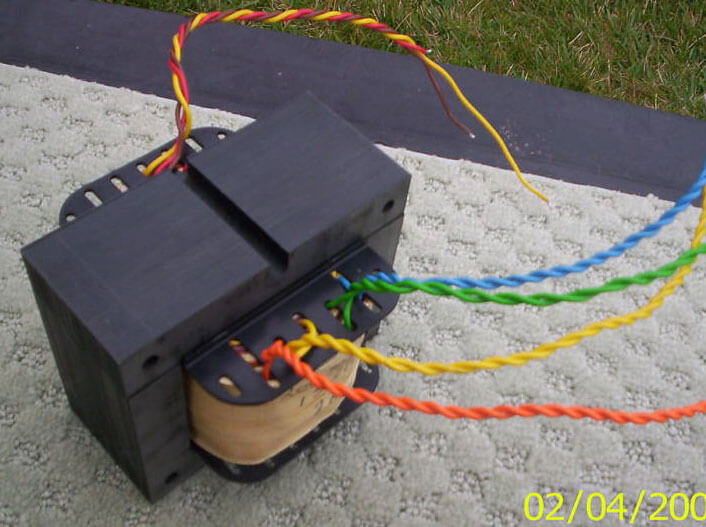
Fake Mercury transformers have been discovered in some Orange amps. It is believed that unethical eBay activity is once again the culprit and that Mercury transformers are being counterfeited to increase the resale value these, and possibly other, amps.
Mercury produces special orange-colored endbells, with white lettering and Mercury Magnetics logo, for certain Orange amps.
How to identify counterfeit Mercury transformers:
Note: The sample photos above are believed to be from an Orange AD140 or AD200.
Mercury offers a free identification service. If you suspect that you have a counterfeit transformer, send us a 2 or 3 photos, from different angles, of the transformer with an endbell removed. Expect verification, via email, the same day that the photos are received. Send your photos and email address via email or post directly to Mercury (see contact info below).
We will post more information as it becomes available.
Source: https://mercurymagnetics.com/pages/news/misc/BogusOrange.htm

Ten years after our first published amp review (the blackface Vibrolux Reverb), we still find ourselves answering readers’ questions about which amp to buy. We’re not complaining… your subscription to TQR has always included phone or email access for those contemplating a new gear purchase, but it seems that published reviews can still sometimes prompt more questions than answers. We understand, and like you, we are routinely faced with these same buying decisions just about every month as we look ahead to future issues. “Power” and “headroom” (or lack of it) seem to remain among the most daunting considerations for prospective amp buyers. This may not keep you up at night if you’re looking for a toneful box to play solely at home, but the range of clean and overdriven tones available from a single amplifier that can hang with a band is absolutely critical – the tipping point for guitarists who wish to have both clean and grittier tones available on the fly. And even the casual “bedroom” player (does anyone really play their guitars in the bedroom?) will quickly discover that big, lush guitar tones – clean or jacked into rich distortion – are often best obtained through a “bigger” amp. We’re not suggesting that we don’t love our ’58 tweed Tremolux or ’64 Deluxe – they both uniquely, timelessly epitomize great guitar tones – but an entirely different realm exists within the range of vintage Fender amps, and try as we might, we have never found another amplifier quite as versatile, user-friendly or uniquely toneful as the blackface (1965–7) 40 watt Pro Reverb – still the most under-valued and overlooked reverb amp from the entire blackface era, although aside from its 2×12 speaker configuration, the Pro is nearly identical to the Vibrolux and the Super Reverb amps.
Yes, the 2×12 Pro Reverb can move some air, just as an AC30or Matchless DC30, both highly coveted amps for good reason, do the same. Experienced in a room, 2×12 amps produce an ambient presence and a spatial quality that single 12s can’t match. That extra speaker isn’t adding volume as much as it simply disperse sound effectively by filling more space. And although the Pro Reverb is rated at 40 watts, the smaller output transformer Leo Fender chose to use delivers only 28 watts, probably in an effort to minimize speaker failure, yet the original Oxford and Jensen 12 s shipped in the Pro still blew when pushed by enthusiastic rockers. A well-maintained Pro Reverb will typically produce classically clean Fender tones with strong bass and treble and slightly diminished mids from “2” on the volume control to “5,” gradually spilling into lush Fendery distortion at higher settings. If you choose to use an overdrive device to achieve distortion at lower volume levels, the Pro will sound significantly better than most 20 watt amps because your pedal is affecting a cleaner signal, rather than adding distortion to an amp already spilling over into distortion. And as we have reported so often in the past, non-invasive and completely reversible modifications can be made, such as the addition of a 25K mid range pot utilizing the existing back panel hole for the extension speaker jack. This single mod enables the Pro to develop a very ballsy British voice as midrange is increased, while completely preserving the integrity of the original Fullerton tone with the midrange pot set at zero, rendering two outstanding amps in one. Intrigued? You should be, because we have never heard a contemporary boutique 2×12 combo amp that can approach the sound of a Pro Reverb equipped with a solid set of tubes and speakers. And with the range of speaker options available today, you can effectively custom design and shape the sound of your Pro for more of a traditional, bright“American” sound, a heavier or chimier British tone, or the two combined.
Ah, but buying old amps is risky business says you… what if I get a “dog” or it needs a lot of work? I’d rather buy some-thing new and not deal with the unknown. Fine, do that. But for those willing to reap the rewards that only a certain degree of risk can offer, it’s not that difficult to minimize your chances for disappointment. Here’s how:
No one has ever succeeded in deciphering the infinite variations manifested by the human mind — how we inhabit the same world, yet perceive and react to every moment in our lives in such profoundly different ways. Society, education and culture provide filters intended to shape how we view the world, but each human being remains different and unique for reasons that remain a mystery. And so it goes with music and musicians…. Why do some players find their voice in a Stratocaster, while others can’t imagine playing anything but a big-ass hollow body? This is “me,” and that isn’t, but for someone else it is. Most of us hear target sounds in our head that drives our selection of instruments and gear — a sound that may change with each song, while a weekend blues player might simply wish to refine a single, signature tone in the style of Jimmie Vaughan or Albert or B.B. King. The point is, we often know where we want to go, but the shortest path to our destination isn’t always so clear. To make things more interesting, some players just want to be dropped off at the right address in the Quest for Tone, preferring to find something that works with no tweaks or modifications as quickly as possible, while others view the Quest as a journey with no defined beginning or end. To them, anything is possible until proven otherwise, they enjoy exploring new sounds, and their “failures” are often as illuminating as their successes.
We learned this lesson once again with an amp that we had initially written off, only to discover four years later that it could become one of the most extraordinary guitar amplifiers we have ever owned or reviewed. What changed? Well, with the lucid, unerring clarity of hindsight, we had to dream it first, thinking of terms of possibilities — what could be, rather than focusing solely on what was missing….
Fender ’57 Twin
The 25 watt Twin originally debuted in 1952 as the first amp with separate bass and treble controls. By 1955, the model 5E8 Twin had been upgraded to 50 watts, featuring two 5U4G rectifiers — another Fender first in guitar amplification — dual 6L6s, bass, treble and Fender’s presence control, a new fixed bias power transformer, choke, and extra gain stage and second negative feed-back loop, and the new “narrow panel” cabinet with speakers mounted in each corner. In the next circuit revision (1956–57 model 5E8A), a ground switch was added and the treble tone circuit was removed from the negative feedback loop. Leo Fender couldn’t play a lick on the guitar, but he obviously never stopped thinking about how to improve the sound and performance of his amplifiers, as evidenced by the nearly constant revisions and refinements of Fender circuits. The mighty “high power” 80 watt Twin model 5F8 appeared in1958 with four 5881s, a short-lived 83 mercury vapor rectifier that would be replaced by a single GZ34 rectifier (model 5F8-A), and a new “Middle” control added to the normal bright volume, bass, treble and presence controls. For many collectors and players who can afford them, the high powered Twin ranks with the 5F6-A Bass man as the most toneful, desirable, rare and costly Fender amps ever built.

Hey Jeff,
I just finished reading your column in Premier Guitar. Great column by the way! But I was wondering if you could finally be the person to help me?
My question is, I just finished installing and wiring up a choke in place of the 400 ohm power resistor in my Peavey 6505+ head, and as far as I know it is located in the correct spot (between the screen and plate) from everyone I’ve talked to. But I must be missing something when I did this swap because when I put the head back on standby after playing it for awhile I get a “pop” when I throw the standby switch on.
Could you please advise me on just what I may be missing in this conversion to the choke? The choke is from Mercury by the way.
Thanks for your valuable time. — Scott
Hi Scott,
Thanks for your question and thanks for reading Premier Guitar.
If you installed the choke across the two terminals on the output board where the 400 ohm resistor was removed, then it is installed in the correct location in the circuit. And you are correct; this is between the main B+ supply to the output transformer and the screen grid supply. I don’t believe you “missed” anything here, but installing the choke may have changed the operation of the power supply slightly. Let me attempt to explain what I believe is happening and then pose a potential solution.
The configuration of the power supply in the 6505+, as well as in some other Peavey amplifiers, is slightly different than the standard configuration in most other manufacturers’ guitar amps. In most standard power supply configurations, when the standby switch is engaged, each section of high voltage supply powers up simultaneously. In the power supply of the Peavey, the high voltage is constantly supplied to the plates of the output tubes regardless of the standby switch setting. The standby switch simply energizes the remaining sections of the power supply. By installing the choke in place of the resistor, you have either changed the rate at which the later sections of the power supply respond to being energized or de-energized by the standby switch, or the choke is causing a spike in the power supply due to a collapsing or expanding field within the choke. You may not fully understand that explanation, but here’s the bottom line. Something is now causing a spike in the power supply and because the output tubes in the 6505+ are more “at the ready” than most other amps, they are able to reproduce this spike more quickly then an amp with a more standard power supply design. If this theory is correct and that is what’s happening, I may have a solution. It requires a bit of rewiring, but I believe it will solve the problem. Before you attempt this rewiring, please read the following disclaimer:
If you are not familiar with working around potentially lethal voltages and do not know the proper safety measures that you should take, or do not know how to employ proper and safe wiring techniques, DO NOT attempt this modification yourself. Find a knowledgeable and experienced technician.
First, trace back the two wires from the standby switch to the points on the circuit board where they’re connected. Remove the connections to the standby switch and connect those two points on the circuit board together, removing the standby switch from this point in the circuit. Next, on the side of the main circuit board where all the fuses are located, find fuse F1. Immediately to the side of F1 you’ll see two high voltage leads coming from the mains transformer. Disconnect one of these leads from the circuit board and insert the standby switch here. Either of the two leads is fine, but if you’re unsure, disconnect the lead connected to F1. Connect one lead of the switch to the transformer wire and the other end to the connection on the circuit board where the wire was removed. This will locate the standby switch at the AC input of the power supply, enabling all of the voltages to rise and fall simultaneously when you operate the standby switch. While the power supply “spike” may still happen electrically, it shouldn’t result in an audible “pop,” since the output tubes won’t be able to respond as quickly.
With the choke installation you may also notice that the amp seems a bit louder or has more gain. This is not solely due to the characteristics of a choke, as opposed to a resistor in the power supply, but it is due to the fact that the voltages in the amplifier may have risen slightly. The DC resistance of the choke is probably lower than the 400 ohm resistor it has replaced, causing voltages subsequent to the choke to rise.
There you have it. Hopefully, this will give you noise free operation of your standby switch, and we can save the Pop Phenomenon for the media!
Source: https://mercurymagnetics.com/pages/news/PremierGuitar/PremierG-18.htm
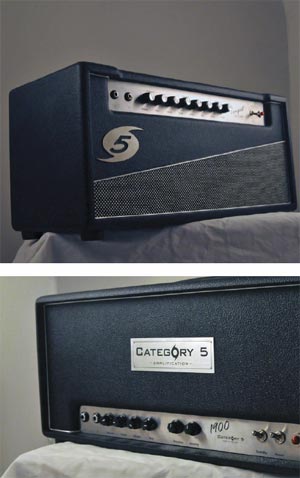 The Category 5 Tempest and 1900 brew up a storm of blues and rock built for the gigging musician.
Category 5 is built on a partnership between Don Ritter and Steve Scott that began as a way to make amplifiers and raise money (and awareness) for charity at the same time. The focus was first on charities providing relief for natural disaster victims (of the Asian tsunami and hurricanes Katrina and Rita), thus the names of the company and its amplifiers. As it has grown, so has the scope of both the products and the philanthropy, which supports an expanding list of worthy causes from Feed the Children and Voice of the Wetlands to the “Blues in the Schools” program, and Blue Star Connection, which provides musical instruments to children with life-threatening illnesses.
This is worthy of mention not only because it exemplifies the principle that you do well by doing right, but also because Cat 5’s amplifiers demonstrate the virtues of doing it right from the get-go. The designs are built on the notion that it’s the players, not the builders, who should determine what qualities an amp has. The touring pros and other players Ritter and Scott set out to satisfy needed tough, overbuilt cabinets and chassis that could handle life on the road; they needed scalable power output to achieve the same tone from the same amp at the right volume for any venue; and they needed amps that would be easily coaxed into giving up outstanding tones. In other words, the design principle and the philanthropic principle are really the same principle: try to give people what they need.
Category 5 started by making waves on the blues scene, providing back line for several festivals (where they were often asked to sell their amps right off the stage), and in a short time they’ve gathered a truly impressive list of artists. The number of signature offerings and approved charities continues to increase. If it’s not a signature model you’re after, there are nine other models — including these two — to choose from.
They also offer a variety of cabinet configurations. The one that arrived with these amps was a large, angle front, closed back 2×12, made from eleven-ply Baltic birch. It is only a tad smaller than a standard 4×12, and it’s enough to handle almost every application. Its Celestion G12H Heritage speakers provided a surprisingly generous low end with depth and control for both amps.
Each Cat 5 amp comes with a goodie bag that includes a vinyl cover, a full set of extra tubes and fuses, and Analysis Plus oval speaker cables.
The Tempest
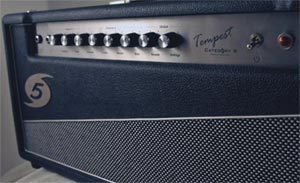 In keeping with the convention, both of our review amps are named for storms. All of the models except the Tempest are named for historical storms; the Tempest, if you remember your Shakespeare, was a magical storm sent by Prospero to daze and confuse his rivals.
The 45-watt, cathode-biased, dual EL34-powered Tempest is a touch flashier than the 1900, with a big, hurricane-shaped “5” logo, vinyl covering and basket weave grille cloth separated by diagonal silver piping, and controls located at the top of the cabinet. Channel one has only a volume and a single Tone control, while channel two provides volume and 3-band EQ controls. Global fold back reverb, power scaling, and a single On/Off/Standby switch with neon indicator complete the control set.
The back panel has some more modern amp features, like an effects loop and a mid-boost switch for channel 2, a line out jack with line level control (you’ll need to run it through a simulated speaker load before going into a board), and footswitch control of the reverb and boost.
Plugging In
Instead of the usual “clean” and “dirty” channels, Cat 5’s dual-channel amps, like the Tempest, offer two different tonal signatures, both of which go from clean to crunch with just the combination of amp and guitar volume knobs. Power scaling makes the overall volume adjustable. The idea is to have two distinct amps in one head — in this case a JTM45-inspired channel one, and a Plexi-style voicing for channel two. Although they’re not completely different, they are distinct.
Using a few different test guitars, a Gibson LP Studio with Alnico V Burstbuckers, a Gibson LP BFG with a Zebra Burstbucker 3 in the bridge and P-90 in the neck, and my Fender Contemporary Telecaster with stock pickups, I found that channel one does the Marshall-like voicing, but somewhat softer. It has good response and excellent definition. With the volume up all the way, this channel has greater clarity and presence at the top end than channel two, as well as smoother distortion. It cuts very nicely, and can be coaxed into giving up the “Beano” tone with a good, transparent boost.
Channel 2 seems to have more headroom, and much more depth and body up through the mids, with a warmer sustain. To be honest, the big, beefy cleans and creamy top end make it a great blues amp, but channel two wasn’t as much of a thrill ride as I’d hoped, and the mid-boost switch didn’t seem to give it the kick it needed. Using the two Les Pauls, the crunch could’ve been tighter, and at high volume there was some loss of definition in the middle. I’m sure this wasn’t all the amp’s fault, as it seems to prefer vintage-style pickups with lower output. The Burstbucker 3 in particular bit in too hard, audibly reducing the dynamic range and smoothness.
For the final test, I used an A/B/Y box to jumper the two channels. Yowza! The best of both channels came through with energy and conviction. Easily the best tone in the box. The bridge pickup on my Tele did a terrific “icepick” tone on this setting, and the neck pickup was all creamy blues, but with more oomph than I’m used to hearing from it. Like the other Cat 5 amps, the Tempest uses high-quality components from companies like Analysis Plus, Mercury Magnetics, SoZo, Accutronics, etc. — you get the picture. This amp is going to be with you for a while.
As Tested $2995 — Category 5 — category5amps.com
Buy if…
you’re looking for a soulful, tone-heavy amp that’s tailor made for taking your blues on the road.
Skip if…
you’re not that into the blues… or the road.
Rating… ![]()
Source: https://mercurymagnetics.com/pages/news/PremierGuitar/PremierG-13.htm

Fender’s tiny Champion 600 is aimed at the guitarist who requires rich power-tube distortion at low volume levels. With just one 6V6 power tube putting out five watts, getting the little Champ to scream is no problem. Introduced after Epiphone’s similarly-sized Valve Junior, the Champ 600 has a smaller (6” compared to the Epi’s 8”) speaker, but the Champ is much more compact at 11” wide x 12” high and 7-1/2” deep. And at only 15 pounds, travelers can appreciate that it easily fits into a large suitcase (and leaves 35 pounds for jeans, toothpaste and Rogaine before the friendly ticket agent demands an additional $25).
Introduced after Epiphone’s similarly-sized Valve Junior, the Champ 600 has a smaller (6” compared to the Epi’s8”) speaker, but the Champ is much more compact at 11” wide x12” high and 7-1/2” deep. And at only 15 pounds, travelers can appreciate that it easily fits into a large suitcase (and leaves 35 pounds for jeans, toothpaste and Rogaine before the friendly ticket agent demands an additional $25). Out of the box, the Champion 600is an acceptable practice amp.But the word “acceptable” doesn’t mean much to the folks at Mercury Magnetics. Just as they did with the Epi Junior, Mercury conscripted Alan Cyr to devise a circuit that would bring the new Champion 600closer to the sound of the coveted and increasingly rare Champ of the 1950s.
First thing to go was the speaker, which Cyr deemed the most limiting feature of the stock package. A suit-able replacement came from Ted Weber. Next thing to be addressed was – believe it or not – volume.“The stock unit was not very loud,even for five watts,” Cyr noted.“There’s a tone stack without tone controls built into the stock unit with fixed resistor values. Also, there were some slope resistors to make the tone less harsh. They were trying to mimic a ’50s amp that had an octal tube socket with a miniature nine-pin dual-triode tube. Running the signal through a resistor bleeds off high frequencies as a sort of low-pass filter.”
What Cyr ended up with was not a purely Champ circuit because it lacked a negative-feedback loop. Then Mercury changed the pre amp and power amp transformers, and added a choke to create some filtering. They also eliminated about a dozen parts, greatly reducing parasitic loss of tone, which means the circuit most closely resembled a black-face Champ with a couple of changed cap and resistor values, with the goal of keeping the character of the 6V6 tube without having to push too hard.
Mercury says anyone who has replaced pickups or a tone switch should be able to accomplish this mod in a few hours (but of course anyone should very carefully read the instructions).
Without a guitar plugged in and even with the Volume knob all the way up, the modded Champ is nearly silent. A Gibson Les Paul Special with Rio GrandeP-90s plugged into the High input produced respectable, chimey-clean tones, especially through the Special’s bridge pick up with the Champ’s Volume knob at 4 or lower. Moving the Volume dial clockwise revealed a variety of distortion tones. It starts with a nice edginess and works its way up to full song. While the stock unit got a little shrill toward the end of the dial’s sweep, the Mercury-modded amp stays smooth all the way to the stop.
Next up was an equally practical Traveler Escape EG-1with humbucker in the bridge. Plugged into the High input, the EG-1 sang away with the Volume at 5 (this amp bests Nigel Tufnel by going to 12, by the way). After 6 it’s Dickey Betts, and 10 or beyond gives a fuzz that would have felt at home four decades ago in Golden Gate Park.
Plugging into the Low draws more character from the humbucker.There’s just a little more clarity and some nice Tom-Petty-style chime on the lower volume settings with the EG’s Tone knob on max. Twisting the amp’s Volume knob brings more distortion, but in refined degrees. Note clarity and definition remain through the entire sweep, and the amp is extremely touch-sensitive,even through the humbucker.
Combining the middle and bridge pickups through notch position four on a custom Strat plugged into the Low input, the Champion offered an amazing and well-balanced cluck.Position one (neck pickup) produced all the glass and steel it was intended to make, the middle position was clear yet warm, and the bridge pick-up could be coaxed to an aggressive,Telecaster-like attack.
The High input got all three pick-ups searing with sustain in any combination at any volume setting above 5. Most notably, the bridge pick up came alive and the Champion scored a knockout by providing great note clarity in the notch two position, which combines the neck and middle pickups. If an amp is going to fail on clarity in the ninth round, this is where it’s going to happen.—Bob Dragich
A few years ago the guitar playing community experienced a resurgence of low-wattage amps. I’m not sure if it was because of the weight or the sheer volume larger stacks delivered, but the search was renewed for amps that could provide the same tone at an easily manageable weight and sound levels that didn’t make bartenders/engineers/wives scream, “Could you turn that down?”
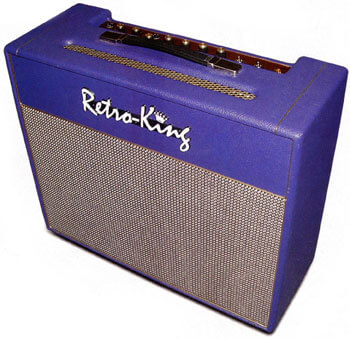 This brought renewed interest in an obscure Marshall amp, the model 1974, an unassuming 18-watt combo. Originally available as a 1×12 — and closely related to the 18-watt model 1958 (2×10) and model 1973 (2×12) combos — the amp featured two EL84 power tubes, three ECC83 preamp tubes and a 6CA4 (EZ81) rectifier tube. There was even a rare reverb-equipped model, but all of the amps featured both a normal channel and a tremolo channel. The magic of the model 1974 was that with just a Les Paul and a cable players could approximate the beloved Eric Clapton “Beano” tone used on the Bluesbreakers with Eric Clapton album. Although I should note that Eric actually relied on a JTM45 combo, interest in the Beano tone ensured the 1974’s place in guitar lore. As was to be expected, clones of this amp began popping up rapidly once the originals, now extremely rare, began fetching prohibitively high prices.
I was fortunate enough to have quite a bit of exposure to these early Marshall amps, having worked with a shop that had no less than six of the model 1974s in stock during my tenure. One exceptional example was retained for studio use. A number of renowned guitarists had used the amp over the years, and they all agreed that it was one of the best — if not the best — they had heard.
A few months ago I was invited to Houston, Texas, by guitar legend Billy Gibbons, to bring a 2×12 Marshall model 1973 to the studio for a new ZZ Top album. Billy is an avid fan of 18-watt amps and has numerous clones to choose from, in addition to two original 18-watt Marshall combos. While we were listening and comparing sounds, I noticed a green Tolex 2×12 combo called the Retro-King 18 Watt sitting in the studio. Once he plugged into it, I knew both the original of the tone and that I had to check one out for myself.
King for a Day
 The Retro-King 18 Watt is a completely custom-built amplifier, with the features you would expect to see in an amp of this class, including a solidly built, Baltic birch cabinet and handwired point-to-point construction. The fit and finish on everything from the cabinet to the Tolex covering was impeccable. The model I tested for this review had a 12″ Mojo Tone British Vintage Series speaker, although builder Chuck Dean will install others by request. The entire enclosure is substantial and provides for a big box tone from a single speaker combo. An impedance selector is included which is great for those planning to use this amp with other speakers or additional cabinets. The transformers are custom-wound to original Radiospares specs (an optional Mercury Magnetics transformer is available by request).
The 18 Watt has a couple of different features that I found to elevate this amp above some of the other 18-watt clones currently available. First, is the Master Volume control. You may ask why a Master Volume is needed for a low-wattage amp; while it does function to reduce the volume when the amp is cranked (bringing us back to that whole bartender/engineer/wives problem), it more importantly regulates how hard the power section is hit by the preamps. How the power section is driven affects everything, including the tone, overdrive and response of the amp, making the Master Volume a critical part of the circuit. The 18 Watt’s Master Volume circuit does not feel or respond like other Master Volume circuits I’ve heard; this one allowed me to get a wide variety of classic 18-watt tones, as well as the sounds of other model 1974 clones on the market. The Retro-King also features a tube biased tremolo like the original — it sounds wonderfully authentic, deep and a little Voxy. A footswitch proved to not only turn the tremolo on and off but to select between two speeds.
The second unique feature packed into Retro-King’s 18 Watt combo is a switch that allows for the selection of a tube rectifier or solid-state diode. The diode setting, while obviously not an original Marshall feature, provided more definition and headroom than the tube rectifier. When tube rectified, this amp has that sweet sag and compression that blues players love. If a player buys this low-wattage combo but is more accustomed to larger amps, this innovative feature will make it fee4l a bit more familiar — definitely a nice touch.
Of course, not all potential users of small amps are blues players. As a matter of fact, when I hooked the amp up to a Marshall Guv’nor pedal and set it for a very clean, high-headroom sound I was rewarded with a great rock sound. The tone was similar to Gary Moore, or even a bit more intense than that, if needed. The amp’s overdrive without a pedal ran from Black Crowes territory to the always-wanted, rarely granted “Beano” tone. Also surprising was that a Strat sounded excellent through this amp — something that I haven’t consistently found in other clones. The harmonics are rich, a la Billy Gibbons, especially when using pick harmonics. The 18 Watt cleaned up nicely and captured my picking dynamics perfectly.
The Final Mojo
I found the Retro-King 18 Watt 1×12 to be louder than the real thing, but with an authentic rendering of the actual tone for which these amps are famous was always there. I was also able to get higher-headroom, punchier tones that I was not able to get with the original. The original produced a slightly more compressed tone when driven hard with humbuckers but this would not have been obvious if the original had not been sitting right beside the Retro-King. In fact, the tones were so similar that I would have been guessing which one was which in a blind taste test. All in all, the Retro-King is more versatile than most other 1974 clones, without sacrificing the reason one buys an 18-watt Marshall-type amp in the first place.
Source: https://mercurymagnetics.com/pages/news/PremierGuitar/PremierG-12.htm

 The first banner on the XITS website reads: “Welcome to total design.” Welcome, indeed. This amp was handmade by Mike Koski in North Liberty, Iowa, and I have to say I think this guy is a genius. To be honest, I’m a diehard when it comes to the classic sixties Vox sound, so just hearing about the XITS got me keyed up. But the way Koski has managed to build an amp that blends together so many seemingly divergent characteristics — refined artistry with raw assertiveness, pure old school tone with state-of-the-art specs, a “come hither” look with a “Stand back, Jack!” sound — into a whole of such singular quality has really kept me keyed up. The word I keep coming back to is astonishing.
* * *
This 15/30-watt 2×12 combo is the latest in an XITS lineup that started with the Sadie XS (15W 1×12 combo or head) and the Piper XS (15/30W 1×12, 2×12, or head), both featuring a single EF86 Pentode channel. That lineup was expanded to include the twin channel Piper XTB — closest to that legendary AC30 “Top Boost” model — and a 50W model. The Piper X30 features the XITS “Top Boost” channel and a new “Hot Top Boost” channel based on Koski’s own design for the 50W model’s second channel.
Channel 1 of the Piper X30 offers a bright vintage “Top Boost” tone, and features two gain stages and a passive EQ; Channel 2 offers three gain stages and an active EQ for a hotter, rowdier tone, and plenty more grit. Each channels uses a singe high-gain input, and the Cut control is global, rolling off high frequencies in the power section as you turn clockwise.
Captivated as I am by the sound of this amp, I was somewhat surprised to discover the Piper X30 doesn’t fawningly follow the recipe that’s supposed to create that unmistakable AC30 tone. The standard tube complement is there: three 12AX7s in the preamp section, four EL84s (independently cathode biased with no negative feedback) in the power section, and a GZ34 tube rectifier. But from here, the XITS starts to part company with the past. For example, instead of single bias resistor for all four power tubes, Koski uses individual bias resistors for both push-pull pairs; that allows one pair to be removed for 15W operation without changing the bias of the remaining pair.
Another example: although common wisdom says the GZ34 rectifier eliminates the need for a Standby switch, the Piper’s got one. (Koski told me that since it didn’t affect the tone, he added it to keep the tubes warm during breaks. Good idea.) On the back of the amp, a half-power switch deselects one pair of EL84s for 15W output, and our review model also includes the optional XLOOP tube buffered (12AT7) effects loop with individual Send and Return controls, and an additional gain stage on the return. Sweet.
 All of Koski’s XITS amps use custom wound Mercury Magnetics transformers, NOS Allen Bradley carbon comp and PRP resistors, SoZo tone caps, Mallory filter caps, along with Analysis Plus Clear Oval speaker cable. Everything is true point-to-point wired in an aluminum vented chassis, handmade by Koski himself. I got a look under the hood, and it has to be one of the tidiest jobs I’ve seen.
There are a few more surprises in store. It seems at once both quieter and louder than a vintage Vox. Although I never expected the amp itself to be silent, it’s actually pretty quiet, until you don’t want it to be, that is. Then it gets loud. Very, very loud. Perhaps that’s got something to do with the loudspeakers. Made for XITS by Austin Speaker Works, the high power X70C ceramic speaker has a 70Hz cone and 80 Watts of power handling. For an additional charge, you can get the optional X70A (Alnico) speakers. They break up beautifully. For me, this put to rest the notion that the original AC30’s underpowered speakers were part of the secret of its tone.
There is more. Take, for instance, the woodwork. Rather than simply replicating a vintage British amp cab, the XITS cabinet incorporates several modifications into those time-tested designs to achieve singular tonal quality, resonance, and visual appeal. The tuned, open-backed cabinet is made from a single plank of maple, box-jointed to keep the grain aligned, and is augmented by walnut bracing and a floating baffle. Let me tell you, it shimmies and shakes like the business on my amp stand.
The entire cabinet interior is finished to furniture-grade, and the exterior is furnished with your choice of Walnut, Zircote, Cocobolo, Mahogany, Ebony, or Cardinal Bloodwood, and topped off with a polished stainless steel faceplate “Xits” logo. Our review model came with a gorgeous ebony valence and matching ebony appointments on both the control panel and the back plate (that’s right, ebony on the back plate). The exterior is covered in Chilewich woven vinyl, which looks sort of delicate but turns out not be, and then equipped with a two layer grill cloth with gold/orange, blue/turquoise, or gold/silver vinyl over black. In keeping with Koski’s unswerving attention to detail, there’s a special grill frame to separate the woven vinyl lattice from the baffle.
The backlit control panel by itself testifies to the Piper’s seamless blend of austerity and imagination. There are two channel inputs, three chicken head knobs per channel, each labeled simply B, T, or V, the global Cut control, or C, and the Power/Standby switch, which is labeled with the Japanese symbol for “fire” (Standby) and a Laurel wreath, the Greek symbol for “skill” (Power On).
“Yes, it looks great in the living room; no, you can’t play it in here.“
 For sure, the Piper X30 is posh. Its elegant design and superb craftsmanship give it a positively urbane charisma, but don’t let the understated look fool you — this amp is no poser. The sound is articulate and full of detail, but it is far from coy. Dime it out and it’ll make the last AC30 you played seem almost tame. So, although it might fit right in with your new Dutch design living room suite, to get the most out of it you’re going to have to crank it up.
In fact, what’s so refreshing about this amp, despite its perfectly groomed appearance, is how truly unpretentious it is. It’s got no frills: no master volume, no trem or reverb, no clever tone shapers or brilliance switches. In the tone department, though, it is an unambiguous contender.
When it comes to producing the raw, punchy, volatile sound of the British Invasion, the Piper X30 is a bona fide performer. At lower volumes, Channel 1 delivers pure cleans with warm, smooth mids, round low end, bell-like highs. As you increase the volume it begins to develop a bite, and the chimey ring at the top end becomes fuller and more prominent — the low end loosens up a bit, but the tone remains snappy and distinct throughout, with no trace of the midrange blurriness you sometimes get with amps like this. At top volume and treble, Channel 1 has a beautiful bark and is full of lush sparkle:
![]() Download example 1 — 15W, Ch.1, B at noon, Tat 2 O’c, V at 10 O’c, Cut at noon: recorded in SoundStudio on MacBook Pro using Digidesign Mbox (2 SM57s); Fender Contemporary Telecaster, Neck and Bridge pups, s/c.
Download example 1 — 15W, Ch.1, B at noon, Tat 2 O’c, V at 10 O’c, Cut at noon: recorded in SoundStudio on MacBook Pro using Digidesign Mbox (2 SM57s); Fender Contemporary Telecaster, Neck and Bridge pups, s/c.
As advertised, Channel 2 is more aggressive and grittier. At lower volumes, it has a big, bright attack and a heavy, percussive chime. With more volume, the mids here don’t get much fatter than Channel 1, but they sound fuller, and bottom end gets thick and slightly woolly. At high volume, the top end is a dream: sweet, dense crunch, splendid harmonics, and warm, glassy, singing sustain. The grit cleans up easily with the guitar’s volume knob. The midrange thickens nicely with humbuckers, and the crunch gets a little bit hairy. With the single coil neck pickup on my Tele, the tone gets really greasy and bluesy; with the bridge pickup it goes right to raunchy:
![]() Download example 2 — 15W, Ch.2, B at 1 O’c, T at 3 O’c, V at 11 O’c, Cut at 11 O’c; recorded in SoundStudio on a MacBook Pro using Digidesign Mbox (SM57); Fender Contemporary Tele, Bridge pup, then Neck, S/C.
Download example 2 — 15W, Ch.2, B at 1 O’c, T at 3 O’c, V at 11 O’c, Cut at 11 O’c; recorded in SoundStudio on a MacBook Pro using Digidesign Mbox (SM57); Fender Contemporary Tele, Bridge pup, then Neck, S/C.
When you dial up the treble knob on channel 2, and roll off the cut, the distinctive Voxey sparkle sharpens vividly, delivering a mouthwatering jangle:
![]() Download example 3 — 15W, Ch. 2, Bass at 3 O’c, Treb full, Vol at 11 O’c, no Cut; recorded in Sound Studio on a MacBook Pro using Digidesign Mbox (SM57); Fender Contemp. Tele, Bridge pup, S/C.
Download example 3 — 15W, Ch. 2, Bass at 3 O’c, Treb full, Vol at 11 O’c, no Cut; recorded in Sound Studio on a MacBook Pro using Digidesign Mbox (SM57); Fender Contemp. Tele, Bridge pup, S/C.
The Final Mojo
I was pretty sure the Piper X30 was something else when I got my first good look at it. After playing it and listening to it for a while, I’m convinced that Koski’s meticulous attention to both visual and sonic detail puts this amp in a class all by itself. As a total package — a seamless convergence of technical innovation, craftsmanship, and artistic temperament — this amp is just astonishing.
I’ll admit that I hesitated, at first, to use that word. It sounds so unshakably partisan. But we had the amp out at a Premier Guitar party a few weeks back, and its one-of-a-kind looks piqued the interest of not a few discriminating gear heads. Impressive, sure, but not yet astonishing. When the most frequently heard exclamation coming from the gear heads who did take a closer look at it was, “Oh! you gotta be kidding me.” I sensed we were moving past impressive. But when that inimitable tone could be heard cutting its way through a mix thick with some heavy-hitting amps, including a few 50-watters with 4×12 cabs, astonishing was the only word left.
If you’re on a quest for something that exceeds your every expectation about what a classic handmade, all-tube, AC30-inspired amplifier can be, the XITS Piper X30 is a total design Shangri-La.
Buy if…
you want a handmade amp of unsurpassed quality, exceptional good looks, and astounding tone
Skip if…
you’re looking for an amp with lots of extra features
Rating…
![]()
MSRP $3718 (2×12 Combo base) As Reviewed: $4733 (Alnico Magnet Loudspeakers $200/each, TubeBuffered Effects Loop $615)
XITS Sound
Source: https://mercurymagnetics.com/pages/news/PremierGuitar/PremierG-15.htm
THERE’S AN INHERENT dichotomy when it comes to guitar amplifiers; the more TLC that goes into their construction, the tougher they are. Think about your average mass produced amp… then consider Sommatone Roaring 40. Built with heaping helpings of TLC by James Somma and Dan Arango, the Roaring 40 employs a heavy gauge welded aluminum chassis, Mercury Magnetics transformers, stainless stell hardware, electrolytic capacitors by Sprague and F&T, silver-plated Teflon wire, four JJ EL84 power tubes with O-rings and heavy duty retainers, four JJ 12AX7 prevamp tubes (and one more in the rectifier), tubular polypropylene signal capacitors, a U.S.-made Eminence Red Coat 12” driver and 13-ply birch cabinet.
Built with heaping helpings of TLC by James Somma and Dan Arango, the Roaring 40 employs a heavy-gauge welded aluminum chassis, Mercury Magnetics transformers, stainless steel hardware, electrolytic capacitors by Sprague and F&T, silver-plated Teflon wire, four JJ EL84power tubes with O-rings and heavy duty retainers, four JJ 12AX7 pre-vamp tubes (and one more in the rectifier), tubular polypropylene signal capacitors, a U.S.-made Eminence Red Coat 12” driver and 13-ply birch cabinet. The top-shelf treatment continues on the amp’s exterior, with a well-executed Tolex application with silver piping accents and a salt-and-pepper grille, along with a minimalist approach to hardware—just a high-quality leather handle and a metal vent; nothing bulky, and no corners.
Aesthetically, the Roaring 40 gives off a definite British vibe, with it stop-mounted controls and shallow (9”) cabinet depth. Controls are straight-forward; on top are a pair of 1/4” inputs (High and Low), Volume controls for the Bright and Normal channels, as well as controls for Treble, Middle, Bass, Presence, Master Volume, and power/standby switches.The back panel has Mix and Dwell controls for there verb circuit, as well as the switchable output selector (20 or 40 watts), speaker impedance selector, fuses, and power cord socket. The control layout is straight forward and has a couple of unique features including blendable Volume controls and the uniquely voiced Presence circuit. The blendable Volumes let you use as much as each channel as you want on a single input, and mixing the Bright and Normal controls creates tones reanging from bright and thin to thick and fat with varying degrees of gain.
Playing a guitar with single-coil pickups, and with the master Volume turned up all the way (which takes it out of the circuit), noodling with the tone stack (10 o’clock to 2 o’clock) and the Volume controls (9 to 10) reveals harmonically rich British tones with thick mids, tight, round low-end, and clear high-end. With the Volume controls dimmed, the Roaring 40 produces pleasant saturation and overdrive with nice crunch. Blending the Volume controls compensates well when you transition from single-coils to humbuckers; blending more Bright with humbuckers adds chime and a bit of cut, while blending in more Normal adds thickness to single-coil tones.
While the three-band tone stack offers subtle-but-distinct control, the real star here is the Presence knob,which not only adds snap and sizzle when set between 7 and 10, but smooths out the top-end and warms up the overall tone when set between1 and 4. The best way to tweak the 40’s out-put power is by using a combination of the 20-/40-/half-watt output switch and Master Volume. The tone cleans up by simply rolling off the guitar’s Volume control and easing up with the pick. If the amp gets a big loud, rolling off the Master Volume does not appreciably degrade the tone—until you get extreme with it. And its reverb lets you dial in everything from the ultra-wet to subtle ambience. The Sommatone Roaring 40 shines for its overdrive tone, circuit design, a versatile set of controls, and top-notch components.—Phil Feser

HISTORY TELLS US THAT Leo Fender wasn’t much for “fancifying” things. More meat-and-potatoes than chicken and walnut curry, Leo was a simply guy, and that ethos carried over to the goods produced by his company, whose early amps were covered in tweed or plain black Tolex (for flavor, sometimes brown) and guitars were mostly slabs of wood cut with no fancy arches, curves, routes, or headstock angles.
So it’s no surprise that Fender’s’57 Amp looks nothing like anything created by Leo – and why the company touts it as something he might have built if one day he’d had a little too much coffee, caught a glimpse of a passing Caddy, and suddenly developed an eye for design. We kid, of course….Conceived by Fender industrial designer Shaw Greene and design engineer Nick D’Amato, along with Shane Nicholas, Marketing Director of Fender guitar amps, the ’57 Amp is a limited-edition, hand-wired 1×12”combo that boasts several distinct features that separate it from the company’s standard amps. If you like, call it Fender’s“boutique” amp!
From the fancy, auto-inspired split grille to its piano-black-lacquer finish, knurled control knobs, sleep billet-cut-aluminum “speedboat”handle, the black grille cloth, in terms of aesthetics this is truly a custom unit. Inside, the ’57 Amp sticks to what works – its chassis is the tried and true Fender 5E3(the technical designation for the circuit, referring to its rectifier tube)Deluxe, with top-shelf components and hand-wired construction. One of the darlings of the vintage world,the Deluxe was introduced in1948. It used on 12AX7 and one 12AY7 in its preamp, running into two6V6GC power tubes. The combination delivered some of the most harmonically rich, slightly compressed sounds ever produced by thermionic valves (AKA vacuum tubes). A medium-powered amp, it was designed to give guitarists enough volume to compete with drums and other instruments. And because it so adequately handled virtually any playing style, from clean country background strumming to all-out blues and rock, it has been used by players of all genres.
In the literature and a nicely produced DVD packaged with the ’57Amp, D’Amato talks about listening to vintage ’50s Deluxes and newer clones as they searched for a shining example on which to base the sound of their concept.
For the sake of testing the sounds of the ’57 Amp, what could serve better than a trusty Fender guitar from back in the day – perhaps a ’59Esquire? And for serious head-to-head fun, why not a gen-u-wine Deluxe from ’67? To establish a reference, we first plugged into the ’56. At low volume and playing a traditional bouncy country rhythm on the Esquire, the elder amp offered the trademark uncompressed clean tone that earn edits reputation – big on the bottom, crystal clear on the top. Really nice,and really mellow – fun… for a while. But for most players, the amp starts to groove for real when you take its Volume and Tone controls up to where the 6V6s start to growl (about6). Strumming a second-position G chord (alternating with an open G and D strings for flavor – think“Honky Tonk Women”), the Esquire teams with the amp to give all the“Ahhhh, yeaahhh” tone you could imagine, its stock Jensen P12Qspeaker dancing in the pine cabinet, delivering all of the Deluxe’s 12 punchy watts. Classic, unmistakable, with glorious overtones and just the right amount of gain and compression.
Sitting next to the ’56, the ’57Amplooks shiny, new and other-worldly, its glossy piano-black exterior in stark contrast to the aged tweed of the ’56. Its split grille does look like a badass old car rollin’ in your direction, and its old aluminum handle, cap-head screws, chrome-plated tube covers, and custom-engraved big-burl knobs lend obvious custom touches.In terms of circuit and tubes, the amp has much in common with the’57 Deluxe Amp tweed
Fender designed and built more than one transitional, non reverb blackface combo amp that would soon acquire reverb and a new name, including relatively small numbers of blackface Princetons, 4×10 Concerts, 1×12 Vibrolux and 1×15 Pros. We acquired a 1×15 blackface Pro, and while it ultimately proved to be an extraordinary exceptional amp, we were also reminded of the potential pitfalls that exist when buying old amps sight-unseen, as well as the potential rewards.
We found the ’64 Pro listed on eBay and bout it from a dealer after requesting a detailed photo of the chassis and circuit. Proudly described as “the best amp in the store, “the rare ’64 blackface Pro is essentially a blackface Vibroverb without the “verb.” Do we have your attention yet? Three caps had been replaced, the original baffleboard had been professionally converted to plywood with the original grill cloth remaining intact, and an on/off pot had been installed for the tremolo intensity control that bypassed the tremolo circuit when rolled to “1” with a click, adding gain that would otherwise be missing in the Vibrato channel. We pulled the JJ power tubes and assorted Russian pre-amp tubes and replaced them with lightly used,“test new” RCAs from our stash, rebiased the amp and fired up the Pro….
Sounded like shit. We had been here before with a dead-mint ’64 Vibroverb bought years ago that had passed through a certain amp guru’s hands in Pflugerville, Texas.How could a vintage Fender sound so bad we wondered? Turned out that the value of the bright cap on the Vibrato channel had been changed on the Vibroverb, rendering a thin, scalding tone that would have given Ed Jahns fits, as it did us. Changing the bright cap back to spec immediately restored the Vibroverb to its rightful pace in history, but the Pro had other problems….
The baffleboard swap and added switch on the tremolo intensity control were clues that someone had also spent time troubleshooting the amp, probably trying to detect the cause of the Pro’s weak output, thin tone and curiously harsh edgy distortion. The amp just didn’t sound right. We pulled the original, reconed Jensen C15N dating to 1964 and subbed in an Eminence Legend, but the Pro still sounded choked-off, linear and wrong, so it was off to Jeff at Bakos Amp works on the Friday afternoon before Memorial Day weekend in a frog-chokin’ Georgia thunderstorm. When the going gets weird, the weird turn pro…..Now, this is the difference between someone who really knows his craft and a hack….Jeff plugged his bench guitar into the Pro, hit a couple of chords, issued a single grunt of displeasure and caustically observed, “Something is definitely fucked up.” With the chassis on the bench, Jeff scowled at the choppy sine wave the amp produced on his scope as he checked voltages with his multimeter. “I think the output transformer is going down slow—it measures 11 volts and it should be reading 16….” He clipped in a substitute OT from a stout old Fisher hi-fi, plugged in and hit a chord… “That’s closer to what it’s supposed to sound lie….” And sure enough, the missing lows and mids were present, the raspy treble tones were subdued, and for the moment, the Pro showed promise. We called Paul at Mercury Magnetics and ordered a black-face Pro Tone Clone replacement trans-former, shut it down and wished each other a good holiday. A week later the Mercury Magnetics replacement output transformer had arrived. Jeff wired it up, and then turned his attention o three silver mica caps that had replaced the original ceramic caps in the phase inverter and tone circuits. Jeff: “Somebody probably read an article about how these would bring the high end up, but I prefer the ceramics—always have. Besides the effect of the voltage from the old output transformer being low, these silver mica caps were contributing to that brittle tone we were hearing. They are the wrong value, and they changed the entire sound of the amp.” Jeff pulled all three silver mica caps and replaced them with the correct ceramic disc caps, and since an on/off switch had already been installed for the tremolo, we mounted the 25K mid range pot in the back panel hole for the extension speaker jack. With the Pro now thoroughly put right and the midrange pot added, Jeff hit a few chords, moved the EQ and volume settings around a bit in both channels, smiled and said, “That sounds really good. Yeah, that’s it.”
Back in our music room, the final step was to re-bias the Proat 34mA with an AmperexGZ34 rectifier and our last pair of vintage RCA black plate 6L6s, which in unused, new old stock condition have soared to $400/pair. The re-labeled Tube NOS Phillips JAN 6L6 WGBs we had tried sounded good—but the smooth warmth, exceptional musicality and deep harmonic content of the RCAs just can’t be beat, and it is a difference you can definitely hear. Smoke ’em if you got ’em….
We lit up the Pro with the ’63Fender Reverb unit and reverently smiled at the jaw-dropping tones pouring from the big Eminence Legend 15. Imagine the sound of a slightly kinder, warmer sounding 40 watt Super Reverb void of the sharp, penetrating treble presence that has sooften left our ears ringing for hours after a tumble with a blackface Super. The sound of the ’64 Pro is all Fender, with solid bass that doesn’t fall apart at high volume as the smaller blackface combos can,sweet, singing treble tones, and now… a mid range control that can gradually push the amp beyond its original, clear and liquid “scooped” mid range voice to an exceptionally thick, “mid-Atlantic” roar that unleashes heavy sustain and rich, musical distortion as only a Fender can. The Pro brilliantly complements every guitar we own, producing the essence of classic Stratocaster, Tele, P90 and humbucker tones with clarity, depth and lush fidelity that literally fills the room. Yes, there are different and equally worthy tones to be had from the British classics,but we have never heard a more beautiful sounding or versatile Fender amp—one that can range from crystalline, blackface clarity to the full burn of an early blonde Fender Bassman at much friendlier volume levels. The Pro can get plenty loud, but it’s a loud that doesn’t kill you in the style of a Showman, Twin or a Super Reverb.
The irony in this unexpected discovery has not escaped us,and perhaps the weight of it is now becoming clear to you, too. This project did not begin well, and we confess to experiencing some remorse when the Pro arrived with a few bad mods, weak and thin from the original output transformer going down, and generally just sounding very wrong. Our dismay was soon displaced by genuine enthusiasm; however, as we were reminded that this is indeed what the quest for tone is all about it. We’ve acquired absolutely bone stock amps in perfect working condition that just couldn’t tote the note, so why should we expect to buy a 44 year old amp that’s been played without it needing a little repair and restoration work? The end entirely justifies the means.
Having finally experienced the Pro’s singular, exceptional sound, we wondered what had caused it to be relegated to such obscurity among all the Fender black face amps. Like the Vibrasonic and Vibroverb, perhaps it was doomed by the presence of the single 15” speaker. Like the Pro, the blackface Vibroverb 1×15 was produced for less than a year, and with the introduction of the 2x12Pro Reverb in 1965, Fender would no longer produce a 1×15 combo until the introduction of the silver face Vibrosonic in 1972. Yet, the earlier 1×16 Pros had been Fender’s flagship amps during much of the tweed era, and in 1960 the 1×15 brown Pro ranked second only to the1x16 Vibrasonic in the Fender catalog. Somewhere along the way, the 1×15 combo had clearly fallen out of favor with Fender, guitarists, or both, and given the short life span of the Vibroverb, even the addition of reverb couldn’t save it.
Twenty years later, Stevie Ray Vaughan elevated the Vibroverb to hall of fame status, otherwise, the 1×15 com-bos seem to have been perceived as “uncool” for anything bug jazz and blues, as if wearing a jacket and tie were required to play them. The Pro is a great blues amp, but it’s also a great rocker, and equally well-suited for jazz, pop and country. With far more clean head room and power than any tweed Pro and much stronger distortion, sustain and dynamic character than a brown Pro, the blackface Pro reflects Fender’s ongoing pursuit of more powerful, cleaner sounding amps, but unlike the black face Bandmaster, Tremolux and Showman, and Pro can really rock the house cranked. We suspect it’s a single 15 and missing ’verb that throws people off today, yet in’64 Pro shares its DNA with the ’64 Bassman and all the highly prized blackface combo amps, including the Deluxe Reverb, Vibrolux Reverb, Super Reverb and the heavily prized and hyped Vibroverb.
The contrast between the Vibroverb’s Holy Grail status versus the lowly blackface Pro simply underscores how easily we can be blown off course by what isn’t hyped on the Internet or in print, and by the powerful logic that suggests if anything 44 years old is truly noteworthy, “we” would already know about it. Well, apparently “they” don’t. But you do. Blackface Pros can be found for $1 500–$2,000,with originality and overall condition driving prices accordingly. Like the Deluxe, we wouldn’t buy one that has had all the blue molded capacitors or Allen-Bradley resistors replaced, but the transformers available today from Mercury will sound every bit as good or better than the originals, and as we have said so many times in the past,the Eminence Legend 15 is spectacular. Add some good,current production or NOS tubes and you will have been delivered to a place well beyond the common man’s limp and shriveled imagination. Now Quest forth….

While Michael Bloomfield was playing cranked up blonde Fender Bassman and blackface Twin Reverb amplifiers, Marshall 100 watt stacks suddently appeared thanks to The Who, Jimi Hendrix, Cream and Led Zepplin. Throughout the ’70s, rock was dominated by the sound of a Les Paul and Marshall amps, but despite its reputation as the ultimate rock machine, all four-input, 100 watt Marshall model “1959” heads are not the same….
The first 100 watt Marshall amps appeared in late 1965,and despite Marshall’s decision to drop tube rectifiers for the less forgiving, harder sound of solid state diode rectification, the “Plexi” 100 watt heads remained more closely related to earlier Marshall amps inspired by the tweed Bassman than the Super Leads that would follow. In the early ’70s, the 50 watt model “1987” head and 100 watt Super Lead were gradually modified to produce more gain faster, and the bright channel was pushed to a punishing level of thin, ear-shattering brightness, while Channel II remained too dull and bassy to be used alone.
We acquired a 1973 Super lead—the last year before Marshall switched to printed circuit boards—for the modest sum of $1,000, made possible by a recent Dagnall replacement output transformer. Two .022 mf caps had been replaced with Orange Drops and another removed altogether in a futile effort to reduce brightness and gain—other-wise, the original Super Lead circuit remained intact and unmolested. Our plan was to run the amp at approximately 60 watts with just two EL34s, requiring the amp to be set at half the rated speaker impedance of our 8 ohm 4×12 Avatar cabinet, loaded with two Celestion Gold Alnico 12s and two “Hellatone” 70th Anniversary G12H 30s.
As we discussed this project with Jeff Bakos, he mentioned that the 100 watt Super Leads not only sound very different from the 50 watt heads in ways that transcend a mere increase in power, but he also felt that the 100 watt Super Lead amps sound better with just two powertubes instead of the full compliment of four…“That’s very common down here—I know a lot of layers who prefer that sound.” We also consulted with Sergio Hamernik of Mercury Magnetics on a suitable replacement for the modern Dagnall OT, and he suggested the ToneClone’69 Marshall self-leaded version. “Self-leaded” means that the actual wires wound within the transformer are extended to connect directly to the amp, rather than smaller diameter lead wires being attached to the transformer internally. Installing a self-leaded version is a bit of a bitch, since you are cutting and bending much heavier gauge wire to fit in tight spaces, and the insulation must be scraped off the wires before soldering. But Jeff had been here before,and all was taken in stride.
We also noted that the original power transformer in our ’73 Super Lead was similar to those found in the early Plexi100 watt amps with plate voltages well above 500 volts.
Our amp measured 522 volts, while the plate voltage on most post-plexi 100 watt “1959” amps are usually lower—around 460 volts. The “hotter” transformer in our Super Lead produces a comparatively higher and less compressed distortion threshold, and if not for our pair of NOS MullardEL34s, we might need to be more selective about choosing current production tubes that can withstand +500 volts on the plates. Jeff was confident that JJs would hold up, less confident of Svetlanas.
We took the Marshall home and initially ran it with three spare Telefunken 12AX7s just to see if they sounded as sterile in a guitar as we had recalled in the past. They do. We could hear a distinct improvement in the mid and bass tones with the new transformer, but the bright channel remained far too bright to be used alone, even with a Les Paul. While we could manage to knock down some of the treble and acquire a decent tone with the bright channel set on “3” and the bass channel patch with the volume on “6,”pushing Channel II so far above the level of bright channel introduced an indistinct woofiness we didn’t care for. The next day we returned to Jeff’s shop for his standard Marshall 4-banger input channel mod, which simply involves moving the original .005 mf bright cap on the bright channel to the basier Channel II. We had done this before with our ’69 50 watt and a vintage PA20, and it unerringly transformers the sound of the notoriously dull Channel II to a fat, warm, musically rich and bright sound that works perfectly every time. We also replaced the two Orange Drop caps with Mallory 150s and pulled the super hi-fi Telefunkens, replacing them with NOS RCA 12AX7s—the warmest, creamiest pre-amp tube ever made.
With the Super Lead thus optimized and tweaked, its voice was transformed from an angry soprano chain saw to a classic Marshall with all of the requiste thick,rich, historic hall of fame tones at our fingertips. We could mine brilliant clean tones on “3” at a usable volume level that revealed all the gorgeous detail of the vintage patent number pickups in our Historic Les Pauls, and our Stratocaster, Nocaster and Les Paul Junior all sounded equally good. Add Fender outboard reverb and you do indeed have the Twin from Bloody Hell.As Jeff predicted, the big power supply in the Super Lead also produced a much more formidable and impressive presence than a typical 50W. Yes, the Super Lead is still a beast, tamed for your consideration and our enjoyment. But if classic Marshall tone is the sound you crave, a properly groomed Super Lead is hard to beat, and given today’s boteek and vintage amp prices, it’s a solid steal.

By now, you’re probably familiar with the Epiphone Valve Jr., the tiny, low-wattage, low-budget amplifier that hit store shelves a few years back and single-handedly energized a cadre of amp modders, so we won’t go into a cursory rehashing of its history. But it should be said that the amp’s simplicity — demonstrated by the lone chicken-headed volume knob that flies in the face of modern complexities — has since combined with a growing, gear-obsessed online culture to create a technological phenomenon. Like muscle cars in the sixties and Superstrats in the eighties, people are again obsessed with hot-rodding, and the Valve Jr. can be viewed as a major driver of that shift.
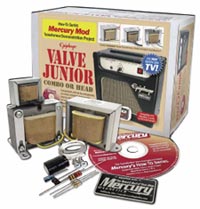 With modification tips spreading like an unrestrained virus through message boards and forums, facilitated by the tone-seeking faithful, it was only a matter of time before established companies caught wind of what was going on. One of those was Mercury Magnetics, an outfit best known for conceiving badass power and output transformers for a variety of modern and vintage amps. They wisely realized early on that the amp’s blank slate vibe would provide the perfect showcase for their talents. Mercury’sSergio Hamernik and L.A.-based amp wizard Alan Cyr went to work designing a custom set of transformers and choke for the diminutive Valve Jr. — a project that, ironically, was originally intended simply as a transformer demonstration kit.
Transformers & You
Having been intrigued with the amp’s possibilities since its conception, we’ve tested out a variety of modifications, from the homegrown (see Dirk Wacker’s web exclusive columns at www.premierguitar.com) to commercial projects, such as the popular BitMo modification kits (reviewed in October 2007). For the most part, they’ve all added some usable capabilities while maintaining the original vibe of the amp — mainly, stripped down rock tones with passable tube warmth. But while most of these mod projects have expanded the tonality and scope of the Valve Jr., none have completely changed it. Mercury Magnetics’ Epiphone Valve Jr. Kit is likely the only one on the market that can make that claim.
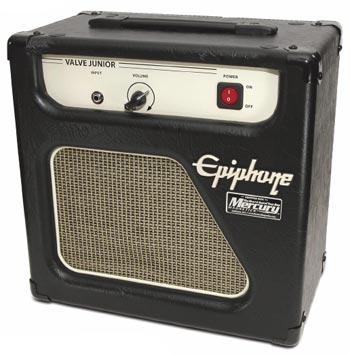 The basic gist of the modification kit involves the installation of new power and output transformers, the addition of a choke — a rarity in budget amplifiers these days — and a basic reworking of the amp’s circuitry to eliminate some of the noise and hum that plagued early models. And while opinions in our office were divided over the amp’s new sound — the amplifier’s single-ended tonality became more pronounced, and highlighted some of the weaker links in the signal chain, including the stock speaker — there was absolutely no denying that the amp had an expanded tonal range that was unheard of in this price range. With more consistent power flowing into and out of our Valve Jr., there was more of everything. The lows became instantly tighter, the highs shimmered and the entire spectrum of sound now had a beautiful fullness. As that single volume knob rotated clockwise, the Valve Jr. bristled and growled like a Rottweiler about to lunge. This thing had a newfound set of marbles and I, for one, was not complaining.
We should note that our Epiphone’s sudden meatiness did not come easily. The kit’s instructions, included on a CD-ROM, seemed conceived not by English majors but by engineers, consisting of a lengthy PDF file filled with close-up photographs instructing users to copy what they see. To the company’s credit, the photos are well done, providing enough detail in each shot, but more text would have been helpful for those of us who aren’t the best at spatial learning. In fairness, we received an early version of the manual, and Mercury Magnetics has said that a much more complete, easy-to-navigate version is now available.
“The basic gist of the modification kit involves the installation of new power and output transformers, the addition of a choke — a rarity in budget amplifiers these days — and a basic reworking of the amp’s circuitry….”
While the clipping and wiring of resistors and leads may be feasible for most readers, this project also requires some advanced know-how like cutting traces and drilling holes in the PCB. New entrants to the amp mod game will quickly find themselves in way over their heads, and might want to consider some of the other mod options available if they are set on doing it themselves. In the spirit of complete disclosure, we got through the first few steps before we were forced to hand the project over to a local amp tech. It cost a few more bucks in the end, but the results were absolutely worth it, giving us an amp that we could record with, or even take along to small gigs. And who saw that coming?
The Final Mojo
Put into a strict cost/benefit matrix, products like the BitMo might come out as the better deal for the weekend modder looking to push the Valve Jr.’s envelope. The work and price involved with the Mercury Magnetics kit might seem like a large compromise for some groups — you could take the money you’d spend here and put it towards a higher-end amp, like Orange’s Tiny Terror, without spending days etching lines in a PCB. But those people are not who this kit is aimed at — this project is meant for those amp tweakers that dream of turning a drab, utilitarian piece of equipment into a snarling, steroid-infused monster, no matter the cost. And for these guys, this kit will be both intrinsically rewarding and positively orgasmic.
Source: https://mercurymagnetics.com/pages/news/PremierGuitar/PremierG-11.htm
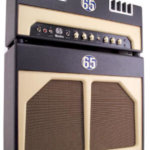
Southern California’s 65 Amps has garnered more attention in a shorter amount of time than almost any boutique amp outfit in recent memory — save, perhaps, its So-Cal-based compatriots, Divided By 13. The company has already earned due recognition for the 35-watt Marquee Club, 45-watt Royal Albert, and, in particular, the conservatively spec’d, but boisterously outspoken 18-watt London 18. All are decidedly Brit-inspired, with dual-channel preamps that employ a pair of Vox’s greatest contributions to tone: the simple EF86-based channel, and the interactive Top Boost channel. Against this backdrop, the SoHo head being reviewed here is the new kid in town, and it’s primed to bust out with a little sibling rivalry — if not an all-out Cain and Abel conflict.
Where the other 65 Amps models show a clear lineage from classic Brit tube topologies, the SoHo hints that its own conception might have occurred during a mid-morning visit from the milkman while mom was home alone. It’s a fairly simple amp compared to the two-channel, eight-knob London 18, but there’s nothing quite like it on planet rock. Ostensibly a single-channel, 20-watt, EL84-based all-tube design with simple controls, it’s the amp’s “little more” that really sets it apart.
65 Amps founders Dan Boul and Peter Stroud clearly like a challenge, and the EF86 pentode preamp tube — which can offer fat, wide, and dynamic tones when it works well — that so many makers have found trouble with again graces the first gain stage of this circuit. While just Volume, Treble, Bass, and a bypassable Master govern this pentode’s fury in “standard” (Bump Off) mode, the Bump function is what really sends this design into another dimension. It’s a footswitchable mid boost of sorts (footswitch included), but rather than being preset like most of the breed, the SoHo’s Bump has its own Tone and 6-position Level control. It can either subtly or radically affect the response and midrange content — and thereby the entire tone and gain structure — of the amplifier. And while it isn’t anything like traditional channel switching (as it only inserts another stage within the amp’s lone channel), 65 contends it’s more than enough to provide a viable lead voice at the tap of a toe.
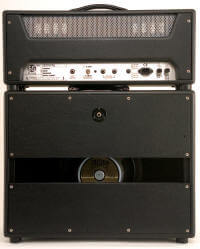
The SoHo’s speaker cabinet is a semi-open-back design loaded with a Celestion G12H-30 or an optional Celestion Alnico Blue.
To add to the novelty of the Bump function, the SoHo’s Master Volume hides a few tricks of its own. Rather than simply reining in output levels, it is what 65 calls a “reductive master,” which adds a little gain when it’s in-circuit, and it also adjusts the tone stack’s frequency response as you roll it down in order to compensate for the way the human ear perceives frequencies differently at different volumes. Flip the 1000-volt military-grade toggle switch on the front panel to Master Off, and the amp performs as if this unusual master circuit didn’t exist — because, electronically, it doesn’t.
“We wanted to have a master that retains a natural tone and feel without as much of the grit and fizz normally associated with master volumes,” says Boul. “It also had to be completely bypassable, and, when activated, it would allow the user to have a new vocabulary of tone — even at high volumes.”
The SoHo’s stylish blending of Brit-inspired retro esthetics with contemporary touches such as modern cooling vents and a brushed aluminum logo exudes a look of quality from the outside, and a probe inside the box reveals a first-class effort from every perspective. From the N.O.S. Tesla/RFT EF86 to SoZo signal caps to Mercury Magnetics transformers to ceramic and Micalex tube sockets, the SoHo is loaded with top-rate components. The workmanship is top-notch. The circuit is immaculately laid out between parallel rows of terminal strips mounted directly to the aluminum chassis, wire runs are neat and economical, and every mechanical component appears intended to last the life of the amp. In addition to the EF86 (which has a double dose of rubber insulation to guard against microphonics), there’s a pair of JJ 12AX7s, a pair of matched and tested JJ/Tesla EL84s, and an Electro-Harmonix EZ81 rectifier. The latter is a big part of the magic in many a recently issued, EL84-based AC15-inspired amp — it provides DC voltage levels that EL84s thrive on, and just enough sag to offer some tactile compression in playing feel, without going overly mushy.
Our review sample came with an open-backed 1×12″ extension cab made from rugged 11-ply Baltic birch, covered in matching two-tone vinyl, and loaded with a Celestion G12H-30 (available with Celestion Alnico Blue for $895; a 2×12 cab with one G12H-30 and one Alnico Blue is $949).
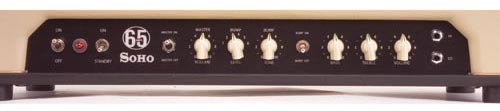
The SoHo starts with a “standard” Volume/Treble/Bass preamp, but its Bump stage and unusual Master Volume increase its versatility exponentially.
Regarding functionality, one of the first things to note is that you need to throw any conceptions of the traditional Master Volume arrangement right out the window. For example, playing with the Volume at 11 o’clock and the Master set to noon, butoff, then switching to Master On, elicits a considerable increase in volume, whereas you’d normally expect to have to set the Master full up to achieve about the same output level as with the Master off. To add to the fun, the Master maxed/Volume maxed config elicits a lot more gain than Master off/Volume maxed. None of this signifies a flaw, it’s just the way this unusual, yet effective master circuit functions. In effect, it provides yet another voice — or range of voices — rather than just a final governance of level. Nevertheless, it might have been helpful if 65 Amps had named it something else, because it really is a circuit of a different color.
Not only are there four distinctly different textures between the Master On/Off and Bump On/Off options, but the controls are all highly interactive. The Master Volume, Bump Level, and Bump Tone controls enabled me to dial in a surprisingly broad range of drive levels and tones, and the considerable difference in gain levels between the Hi and Lo inputs multiplies the variables even further. Plugged into Hi with Bump and Master off, EQ knobs set to noon, and Volume at around 11 o’clock, I achieved a chimey, buoyant tone with my Telecaster that was great for indie thranging, Beatlesy riffing, and mid-volume Brit-rock rhythm work. By upping the Treble just a little, and injecting the Tele into the Lo input, I coaxed some surprisingly satisfying twang from the SoHo, along with a dose of increased headroom that also served well for shimmery jangle parts.
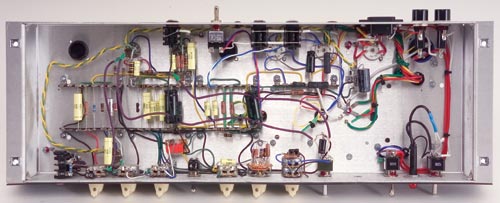
Top-grade components and tidy, handwired connections scream quality.
Jack back into the Hi input, stomp on the Bump footswitch (Bump level 3 for starters), and this Yank in Brit’s clothing exudes gnarly, raucous transatlantic tricks that approach cranked-brownface Fender Deluxe territory, with bovine mids, recessed but appealing highs, and decent low-end thump. Engage the Master Volume and the aggression intensifies, with a considerable jump in gain — even with the Master only halfway up. Plug in an SG Standard, roll the Master down to around ten o’clock, ratchet Bump up to six, and crank the Volume to four o’clock, and the SoHo belts out astoundingly convincing heavy rock chunk and grind — hairy enough for satisfying nu-metal work at pub-friendly volumes. Similar settings excel at fluty rock lead tones, with a well-partnered rhythm voice when you stomp the switch to take Bump back out of the circuit. Cranked up, there’s plenty of thump and roar here, too. With the stout 1×12 cab, the SoHo easily puts out enough volume for small- to medium-sized club gigs with just a vocal P.A., and it’s loud enough for decent self-monitoring on larger stages where guitar amps would be miked.
In terms of pure tone, the SoHo is perhaps not quite as lush and harmonically bountiful as 65’s London 18, but it punches above its weight a little more confidently, and it might just be a more appealing choice for rockers seeking some versatility in a smaller rig. The more you tweak the SoHo’s controls, the more it reveals previously untapped voices, and the package’s great looks and originality further enhance its appeal. If there really was a sibling rivalry in the 65 Amps family of boutique amps, the SoHo would definitely have to watch its back!
Source: https://mercurymagnetics.com/pages/news/GuitarPlayer/GPMar08.htm
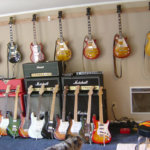
Mark Dewey is a former hair-rocker who’s graduated to the corporate world and Gibson Custom Shop Les Pauls. We were impressed by his collection of reissues, and intrigued by his custom-looking Strats, so we talked a little further with Mark about his collection and playing history. Here’s Mark’s collection, in his own words.
 “This shows pretty much my backline of amps. All of my Marshalls have been modified by Alan Cyr of the Amp Exchange in Woodland Hills, California. He is the best amp guru alive for Marshall amps. They all have Mercury iron and just blister like nothing I have ever heard. I also have a Divided by 13 FTR 37 that Fred Taccone built for me a few years ago. His stuff is very unique — super big clean sounds and a Marshall-Vox-like kind of brown sound on the click channel.
“I still pretty much plug a guitar directly into a Marshall and use the volume as a gain control for my main sound. Sometimes I will Y two amps together and have one DSL 100 with a slight delay and the other 59 HW head or 50 watt JCM 800 as pure tone.
 “In the first photo, you also see a bunch of Gibson Custom guitars and a lineup of custom-built Strats. I got a little carried away with finding the best body wood/neck combinations last year so I built 15 of them. I also have experimented with a ton of pickup manufacturers like Seymour Custom winds, Suhr, DiMarzio, Nordstrand and a few others. My favorite pickup is pretty much a BurstBucker in a Les Paul Historic. They just sound like an open vowel waiting for your strings to vibrate. They are open, airy, clean, crunchy, stingy and have a ton of balls and low end while still being very clear and well-balanced.
![]() “I have tried most [pickup] manufacturers cold and hot. For singles I like Seymour Duncan Custom calibrated set of Alnico 2: 6.5, 6.5 (RW Middle), 6.5. MJ knows what she is doing and is great to work with. The John Suhr v60 LPs are equally as awesome for single coils. I have never tried a BurstBucker in a Strat, so I stick with Seymour or DiMarzio humbuckers. I like the five-way Superstrat wiring where you take two humbuckers and split the north coils on position 2 and the south coils on position 4. Since the pickups are reverse of each other this makes all five positions humbucking. I usually use a hi-pass filter on the volume so it rolls down clean and sparkly.
“I have tried most [pickup] manufacturers cold and hot. For singles I like Seymour Duncan Custom calibrated set of Alnico 2: 6.5, 6.5 (RW Middle), 6.5. MJ knows what she is doing and is great to work with. The John Suhr v60 LPs are equally as awesome for single coils. I have never tried a BurstBucker in a Strat, so I stick with Seymour or DiMarzio humbuckers. I like the five-way Superstrat wiring where you take two humbuckers and split the north coils on position 2 and the south coils on position 4. Since the pickups are reverse of each other this makes all five positions humbucking. I usually use a hi-pass filter on the volume so it rolls down clean and sparkly.
“Most of the guitars in my Gibson Custom Collection are newer reissues from 2001 to 2008. I made the jump and bought my first ’59 from Willcutt’s guitars for $4000. It was a lot of money but quite frankly once I got the guitar, I realized I would rather have the guitar than the money so I was hooked and now have quite a few of them. The sound of a Custom Shop Les Paul is just so much better than anything else for rock guitar. I pretty much only play a Strat every now and then, especially for whammy bar gymnastics.

Ice Water Mansion (Mark is second from left).
“Here are a few of my prime Custom Shop Les Pauls a few years ago. These are some of my favorites actually. However, I have never found one guitar or amp that does it all. There is no true “favorite” — they are all different. I have never had a guitar I thought was “the one.” Perhaps this is the devil’s snare for materialism. I also could not fathom buying a real ’59 because I already worry enough when I put a ’59 reissue in the back seat of my car. Imagine getting a $300,000 guitar stolen?
About Mark
“In the eighties I was in Ice Water Mansion – a hard rock eighties hair band from upstate New York. I used to use BC Rich (USA high end), Dean (USA), Fender (USA) and Ibanez, but never liked seventies or eighties Gibsons. I bought an ’84 Explorer that just sucked. I only wish they had the custom shop of today back then.
“This was a song I wrote about being scared of the dark — “Ghosts in the mirror.” I used my Marshall JCM 800 with a Fender Strat loaded with a humbucker with a boss compressor as a boost for lead schwing.
“I don’t play in a band at the moment but I certainly play about two hours every day and all weekend. I have twp boys, ages four and five who both love guitars. My four-year-old plays drums like a man and also loves his plastic guitar collection. He has about ten, which makes me wonder if we are teaching him the sin of excess which I never meant to do myself.
“I guess at 43, I am done trying to make it big so I just focus on playing for the soul and the enjoyment. When you play a guitar, you forget about the wood in your hands and just kind of get “out there” and that is my bliss.
“I have also really enjoyed building, testing and working on gear too. I never thought I would even play guitar past 25, but I guess it now plays me!”
Listen to Mark’s Guitars
Mark was nice enough to share some YouTube clips of his guitars in action. Says Mark, “These are by no means anything but my wife holding her Sony camera sideways but you can sure hear the tone….”
Source: https://mercurymagnetics.com/pages/news/PremierGuitar/PremierG-14.htm
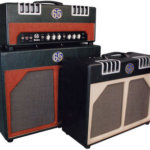
Since getting up and rolling with a single amp model — the London — in 1004, 65Amps founders Dan Boul and Peter Stroud have been awash in creativity — and tone.
One of their newest models is the SoHo, which is configured as a head/cab and combo.
Like the rest of the company’s line they’re assembled using only high-quality components like low-tolerance NOS Allen Bradley carbon resistors in all tone-affecting positions, custom tone capacitors based on the original mustard cap, custom Mercury Magnetics transformers, ceramic power-tube sockets, Micalex preamp-tube sockets, sealed military-spec toggle switches, and matching valves from Groove Tubes. It’s all assembled on an aluminum chassis and meticulously placed in high-grade Baltic birch cabinet with 12″ Celestion speakers (one Alnico Blue and one ceramic-magnet G12H30 in the cab, single G12H30 in the combo).
Both rigs are dressed up with 65Amps’ two-tone Tolex and very retro “hot rod” dual four-slot heat vents trimmed in aluminum with gold piping, split-front speaker grill, cream-colored chicken head control knobs, and stitched leather handle; the overall look and vibe are definitely old-school and distinct — and instantly recognizable when you see, for instance, Peter Stroud playing them with Sherl Crow on CNN’s “Heroes” special, or with Rickie Sambora on “Saturday Night Live.”
Tube layout includes an EF86 (covered with heat-shrink and rubber O-ring to prevent “chatter”) and a pair of Groove Tubes 7025/12AX7 in the preamps, a matched pair of Groove Tubes EL84s in the power section (producing 20 watts) and a Groove Tubes EZ81 rectifier. The front control panel layout includes a pair of 1/4″ input jacks (high and low) a toggle switch to defeat/engage a master volume control, a six position “Bump” midrange tone switch, a Bump Level control, a Bump defeat/engage toggle, Bass and Treble tone stack controls and a Volume control, as well as Power and Standby toggle switches. Engaging the Bump circuit defeats the Bass and Treble tone stack and offers six midrange tone “bumps” that are controlled in intensity by the Bump Level control. The rear panel layout consists of a detachable AC power cord socket, primary and secondary fuse holders, a speaker output jack with an 8-16 ohm toggle, and a footswitch jack for the Bump feature.
Plugging a Fender-inspired Gadow Nashville with a Lindy Fralin single-coil into the SoHo head with the Bump circuit engaged and Master Volume turned off, the amp reveals a harmonically rich, dynamic clean tone with the mildly subdued mids, tight, punchy lows, and silky high-end response. The SoHo’s front-end creates a complex harmonic footprint — thick and in-your-face, no matter how lightly the guitar is picked or played, and ranging from sparkling clean to overdriven simply by modifying one’s playing attack. While most good tube amps “clean up” by simply rolling off the guitar’s Volume control, the SoHo takes it a step further by letting one’s fingers/pick do it, and without sacrificing the rig’s natural tone. The results were the same for each guitar we plugged into the SoHo, whether with humbuckers, P-90s or single coils — a solid tweed-flavored EL84 tone that didn’t steal any thunder from the guitar or its pickups. The Gadow’s tone pots required only slight tweaking (between the 10 o’clock to 2 o’clock positions) to compensate for different pickups. With the Bump circuit engaged, the SoHo’s overall flavor changes noticeably, jumping to a sweet British EL84 tone with more drive and pronounced, complex midrange. Each of the six Bump settings produces a subtle but very musical midrange boost. Again, each guitar/pickup combination sounds the way it should combination sounds the way it should — natural, with all overtones present no matter one’s picking style.
A feature missing here compared to many boutique amps is reverb, but the SoHo’s tone suffers not one bit given its complexity.
The Master Volume circuit serves two functions; it allows the player to pull back the overall volume of the amp (great for low-volume use), and it can be used to overdrive the preamp. Some degradation to the tone is apparent, but the guitar’s tone controls can be used to make up some of the ground. The fact that the Master Volume can be completely switched out of the circuit is a very nice feature. Though producing only 20 watts output, the SoHo gets plenty loud.
For the most part, the combo and the head/2×12″ cab setups perform the same, though the 2×12″ inherently offers more high-end snap and cone saturation compared to the combo’s 1×12″ setup.
The SoHo’s ability to cover a range of EL84 tones, from classic tweed to thick British, makes it very versatile. Throw in the switchable Master Volume and you’ve got an amp that will work great at a gig, in the studio, or in your den.
Source: https://mercurymagnetics.com/pages/news/VGmag/VGMar08-65amps.htm
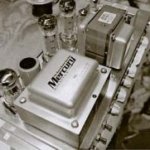
Those of you that have been with us for a while are already familiar with Jeff Bakos and Bakos Ampworks. Frankly, we would have a hard time doing what we do here without Jeff’s presence, just a few clicks west of Ponce de Leon Ave. After 15 years or so repairing, restoring amps, engineering recording sessions in his studio next door, and weathering the ‘80s and much of the ‘90s as a working bass player in a variety of bands, his enthusiasm for great tone remains undiminished.
In his spare time, when one of his customers expresses interest, Jeff has recently been building his own take on a tube-rectified Marshall JTM45. The character of the early JTM45 amps is a little more forgiving and less aggressive than the plexi and metal panel models, and this is accurately captured in the Plus 45. Like the Blankenship, the voice of the Bakos is rich, round, full and exceptionally musical, enhanced with thoughtful features developed after years repairing and tweaking hundreds of vintage Marshall amps. Jeff also built a custom version of the Plus 45 using the preamp section of a Gibson GA40 with interesting results, and both models are reviewed here. While skeptics won’t resist suggesting that we may be incapable of objectively reviewing an amp built by someone with whom we have an ongoing relationship (a member of our advisory board who also fixes our amps), we’ll assume you are better than that. Nothing gets reviewed here that doesn’t earn the ink. We asked Jeff to describe how the Plus 45 was conceived, and our review follows….
JB: What I wanted to do was build a more versatile version of a tube-rectified 45 watt Marshall. I experimented with a lot of different capacitors, tubes, transformers and front panel control features, and I would up choosing to include a switchable master volume and a tone mid-boost.
TQR: But you didn’t use the early Marshall master volume circuit….
JB: No, I used the version that is found in Orange amps and Matchless that works from the phase inverter. It’s an easy one to bypass, and it sounds good until you get below 3-4 on the volume control.
TQR: What were you chasing tone-wise?
JB: Well, originally Marshall used KT66s, and having played a lot of Marshalls, I thought the tone was better with EL34s. They seem to produce a better bass response without being too woofy, and the EL34s have some sparkle in the top end that the KT66 slack. And the Mercury Magnetics transformers selected operate at higher plate voltages that give you more head-room, cleaner tones, and even a cleaner kind of distortion. And unlike many of the early Marshalls, the tone controls really work in the way they exert an audible effect on EQ rather than everything being so notched in the mids. The old Marshall inputs were either super bright or too bassy, so I played around with the cap values on the inputs to make them more usable and versatile. It’s a combination of higher plate voltages, the output tranny design, EL34s, the master volume mod, and tweaking the cap values for each channel so that you aren’t stuck with the original dull and super bright tones in the two original channels. I also use Sozo caps, and they have a very vintage sound. It’s the sum of the parts…. I also changed the pot value for the presence control, and I added a push/pull mid range boost. It’s a very pedal friendly amp, too, because it has a lot of headroom.
TQR: What types of tubes did you choose?
JB: SvetlanaEL34s, a Chinese (Ruby) 5AR4 and a couple of EI12AX7s and a JJ. The Svetlanas have a nice mid range character where some of the others sounded a little flat.
TQR: And speakers?
JB: The Avatar Hellatone G12H 70th Anniversary seems to be really good for the combos. Great low end and very balanced and round.
TQR: And then you began experimenting with Mark Johnson’s amp, who plays busted up slide in mostly smaller venues, and the stock Plus 45 was too clean….
JB: Yeah, I toyed with the idea of building a front end using 5879 preamp tubes similar to a Gibson GA40. It sounds really good – it has a lot of high gain and it gets there really quick.It’s dynamically very responsive, and of course, far more powerful than the originalGA40… you can hear the 5879 sound with lots of gain, but with more headroom behind it.
TQR: If someone asked for a Plus 45, but with a higher or lower threshold of clean headroom, can you do that? How flexible can you be?
JB: This Bassman circuit does give you some room to work with different rectifiers and cap values, but it’s already the cleaner side of a vintage Marshall, which makes it very pedal friendly, and the gain is there when you need it – you’re just not stuck or locked with it.
TQR: What’s next? You’ve mentioned building a black-face Deluxe and the Gibson GA40.
JB: Well, I own a lot of amps and I’m inspired by them all in different ways, but yeah… what to build? Given the parts availability we have today with chassis, cabinets and transformers, building classic designs and modifying them to taste is where it’s at. I’m open to building whatever people wanton a custom basis as time permits
The “stock” version of the Plus 45 (no GA40 preamp section) reveals a strong amp with much more headroom and articulation than you’d normally associate with an early Marshall design. Features include two individually voiced channels, master volume, treble, mid, bass, presence and mid-boost. Channel 1 (bright) played with a Strat at moderate volume levels is almost Fender-clean, but stops well short of sounding too thin or sharp. What it does add is a sparkly, tactil equality to the treble tones that you’ll never squeeze from a vintage Marshall… with the mid-boost on, the tone becomes thicker with a subtle increase in sustain, yet string definition and note separation remain clear and undiminished. Channel2 is chunkier, but nothing like the dull and bassy 2nd channel in a 4-input vintage Marshall. You’ll use this one liberally without jumping it with the bright channel.
The Plus 45willingly responds to stronger pickups like hum-buckers, Telebridge and P90s with a formidable presence that dwarfs more modestly powered amplifiers, producing rock solid lows, fat and politely forward mids, and a smooth treble character that hangs tough in complex chords and single string solos. Best of all, it’s easy to move from clean tones a tan audible stage volume to varied levels of distortion and sustain intensity from the volume control on your guitar –channel switching not required. If you don’t require and can’t handle a 45 watt amp, we understand, but nothing hangs fire like big iron, and the Plus 45fills a room with thundering tone that cannot be rendered from 20 watts. In fact, it reminds us more than a little of the tube-rectified 1961 blonde Bassman 6G6 reviewed in the April 2007 issue of TQR. The master volume nimbly attenuates volume from settings above 10 o’clock with a tone that is slightly thinner than the natural over driven sound of the amp at the lower set-tings, but the results are good and definitely usable, with none of the weak, fizziness you may have experienced with other master volume circuits.The Plus 45 with GA40 preamp section is an entirely different beast, with a lower threshold of clean headroom and much faster ramp-up into a hot meltdown compliments of the dual 5879 preamps tubes. Basically, it sounds like a 45 watt GA40 that naturally mates well with single coils. With more powerful humbuckers, we had to pull a large part of the bass EQ out of the signal lest we blow up our precious Celestion Alnicogold speakers (or so it seemed). The GA4 0version of the Plus 45 is no plaything – a serious appliance for players who want to make a lasting impression. Jeff can voice this amp for more or less bass and treble response based on your preferences, band like the original Plus 45, you can choose between a head, 1×12 or 2×12 combo.
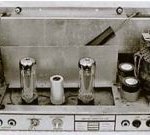
Somewhere along the way, guitar amplifier tone got carelessly shoved into two broad categories – American and British. Fender being the quintessential American tone and Marshall being the obvious default for midrangey and reverb-less British tone. Within each, of course, there are distinct variations… Ampeg, Magnatone, Valco and Gibson, for example, are also American through and through, yet they remain distinctly different in sound and construction, and would rarely be mistaken for a typical Fender. Among British amps, Hiwatt, Sound City and Vox present equally diverse varieties of “British” tone that won’t be confused with a classic plexi Marshall head. But simply adding reverb or delay to a British amplifier will often throw listeners completely off as to its origins, while plugging into the Normal channel of a vintage Fender brown or blackface amp with the right guitar can produce an exceptional “Marshall tone.” Our recent experiment with our ’62 brown Vibrolux and a Goldtop Deluxe Les Paul with Lollar mini humbuckers rammed this point home with alarming clarity…. The point is, labels don’t always serve creativity and discovery well, and in the realm of supposed “vintage amp tone” where different examples can vary so dramatically, labels are worthless in generating much more than “skull chatter,” to quote Kye Kennedy. But, we still crave “Marshall tone,” whatever our individual perceptions of that sound may be. Well, since you asked….
ZZZZZZZZZZZZZZZT!Yes, Gear Page wankers, we just did it again. Careful you don’t get a scab on that thing… it might get infected and fall off. We’ve unearthed two alternatives that will give you the bigger, bolder version of Marshall tone that you remember from your early Jeff Beck Group, Zeppelin and Cream albums, but at a volume level you can easily live with and actually enjoy in 2008.
A reader alerted us to Roy Blankenship, oh, about a year ago, and it took that long to get an amp shipped for review and develop an interview. It was worth the wait. Blankenship builds a manageable range of custom amps in Hollywood, and he seems more interesting in building what he wants, the way he wants, than going big time. We like that. So here’s an introductory dose of Roy Blankenship – an entertaining and frank fellow to e sure. Our review follows Roy’s interview.
TQR: Can you summarize your experience with electronics and guitar amps? How did you get started initially with mods and repairs, and how did that evolve into actually building your own amplifiers?
RB: First, I was born in California. My father worked for North American Aviation, and was transferred to Columbus, Ohio when I was 6 months old. Therefore, I was born crazy, but grew up normal. My father was a genius – he could build anything, and, in fact, he built my first guitar amp. It was a single-ended 6L6 design and had a field-coil speaker. It wasn’t loud enough to play in a band, but I still have it and it still works. I later discovered the cabinet he used was the extension speaker for an old film projector.
I started playing piano when I was 3, and played brass instruments in the school band. When I was a Junior in high school, I bought my first guitar. A Kent solid body, for $49.95. I finally convinced my dad to let me buy a Health kit 2×12 solid-state kit so that I could play out, and that was my first experience with electronic assembly. I was the guy in the band who would dick with all of the equipment. We bought some PA cabinets that had JBL’s in them, I refinished and rewired them, having no idea what I was doing, but it always worked. My dad had a whole workshop including lathe and drill press, so I often did small projects and repairs, like building my own speaker box to house two Jensen 6×9 speakers for the car. I wish I would have had the vision to go into production….
I was a hobbyist for the next 20 years, getting into tube hi-fi and going through a dozen Dynaco Stereo 70s, not knowing anything about them, but doing little stuff like biasing and tube exchanges. I was employed in the music biz as a sales rep for four different firms, and the pinnacle of my career was as national sales manager of Symetrixin Seattle, WA. In 1991, I had a three-state sales territory selling body shop equipment. I stopped to see my friend, Dan Abell (of Abell Audio, 909 King Ave., Columbus, OH), best tech in the world, and drop off some octal sockets my dad had left me. Dan was all upset and expressed that his assistant had quit that day and he was in a bind because he had so much work. On a whim, I said, “Hire me. I have always loved this stuff.” “Can you troubleshoot a circuit?” I said, “Not yet, but I have people skills and can do any number of things so that YOU can work.” I knew his assistant wouldn’t answer the phone or wait on customers, so, after the first day, Dan said,“Man, I can’t believe how much I was able to get done. You’re hired!” Within two weeks, I was repairing circuits. The info that opened the door was the difference between negative and positive polarity transistors. We worked together for the next four and a half years, never an angry word between us. At one point, I wanted to live in California, so I went to a NAMM show and was hired by Groove Tubes as production manager. The learning curve was straight up – there is an incredible amount of information in that place. From there I started my own place in Santa Monica. To escape the chaos that is L.A., I moved to Florida to escape. I realized the repair biz was not a big money maker, so when two clients started encouraging me to build my own designs, I was up for it. We beat it around fora while, they finally ponied up and I built two EL84 amps.They loved them, I was shocked (they were nothing special),but they were the start. I still have number 1 that I bought back from the third owner. My experience with amp repair changed when I came to L.A. People in Ohio and Florida were happy when their amps worked… players in California wanted their amps to sound good. That opened a whole new area of learning. About the same time, I was running into a lot of overly-modified amps that oscillated themselves to death, so I added “demodification” to my business card. People would call me back and say, “Man, this amp really sounds great now,” and I would reply, “Yes, I made it stock.” The only mods I deem worthy are tone-stack bypasses on Fenders and one of two master volume circuits that actually work well. They each allow you to attenuate volume without losing everything, and they both originated with Ken Fischer, amp guru, God rest his soul. Tube amplifier technology stabilized in the mid ‘60s, and very few amp builders have done anything innovative since that time. In order to separate myself from the pack, I wanted to improve on the existing circuits. When these amps were made, people were playing clean, now everyone wants to crank them up,and in order for them to deliver, my belief is that they need a stiffer power supply. I get a lot of comments on how “loud” my amps are for a given wattage rating. One client said, “I have played a lot of these amps, they give up when you hit them, but yours sounds like a big amp.”
TQR: Describe the different models you build in terms of features, construction and tone, how they differ from vintage or other custom built amps, and what you specifically wanted to accomplish and/or improve on with each model.
RB: I build my own take on American and British circuits,and I employ a stiffer power supply than most. I am currently using turret and eyelet board construction, but a printed circuit board can be useful if made properly. The compromises made by volume manufacturers is where the “circuit board-is-bad” myth started. Proper CAD design can lend itself to a quieter, more reliable product as long as the bean counters don’t try to take a nickel out of it at every turn. All of my current product is hand-wired, and as you know, there is a lot of snob appeal and dick-measuring in this business. For example, some of my clients wonder why I do not use Clarostat potentiometers… I have tested all of these devices, and I have never had a bad Alpha pot, but the Clarostats I ordered for testing were 50% defective!
In the Leeds amp, I went with different trannies than most and a stiffer power supply; this gives it more beef. In the Fatboy, I discovered an output tranny that would allow me to use 6V6’s (for 15 watts) or 6L6’s (for 25 watts) without changing the speaker load. Though the tranny was originally designed for an 8 ohm load, it actually worked more efficiently at 16. Overall, using Mercury trannies has been one of the best decisions of this whole venture. Now when I hear an amp with any other tranny, they sound flat. I took one of my amps to visit a friendly competitor, he played it and enjoyed it, then fired up his own amp, and it sounded flat. He was looking at his amp as if,“Hey, what’s going on here?” I think that was his first side-by-side comparison and he could hear the difference, much to his own chagrin.
TQR: What inspired the use of a Variac with the VariPlex? Why not just build a master volume circuit?
RB: We wanted to create a cranked-up Marshall sound at lower volumes, but people have time and again expressed their dissatisfaction with the attenuators on the market and the smashed sound of a bad master volume circuit. I credit Dave Friedman of Rack Systems with the concept and the prototyping. We tried five different kinds of coupling caps, different types and brands of resistors, different trannies…you name it. Eddie Van Halen popularized the whole Variac concept, so we modified the circuit so you could go from full tilt boogie down to 1 watt and the amp would not shut off. We have sold 40 of those amps with no marketing other than clips on a forum. We are now introducing a similar amp with a master volume for those who want it whisper quiet, but saturated. There are two master volume circuits that I know of that sound great even when turned down to speaking levels. We are using one of those and a few other mods in the new model, the Custom 45.
TQR: You describe a process on your web site in which you A/B’d the VariPlex with a friend’s ’68 Plexi and you didn’t stop tweaking the design until 10 out of 10 guitarists chose the VariPlex in a blind test. Can you elabo-rate on how those tests progressed and the changed to the circuit that you made to achieve those results?
RB: I could, but I won’t.
TQR: In your experience, how much variation in tone and component values, including transformers, have you observed in vintage Marshall amps? Isn’t it necessary to listen to a lot of different examples and then choose an exceptional amp as a benchmark?
RB: Yes. We already had “the Holy Grail” plexi in house, so we compared to that one. Most amps will respond to love, but there are some that are just exceptional. The reason for this amp-to-amp variance is manufacturing tolerances. If your trannies are built with plus or minus 20% tolerances, that means your amp could vary as much as 40% from sample to sample.
TQR: The VariPlex doesn’t sound “new” in the sense that it isn’t shrill or bright and sharp like some replica Marshall amps. How did you accomplish this?
RB:That’s my secret.
TQR: How long is the wait for one of your amps once it has been ordered?
RB:We have Carry-Ons in stock for the first time. Generally, we like to say 3-4 weeks just to be safe. Most of this is the gray area of vendor delivery on cabinets.
TQR: What’s ahead? What do you want to accomplish in the future?
RB: I want to be a thorn in someone’s side so they will offer a butt load of dough, I will sign a non-compete, and go away. Then, I can sit on the beach and light my cigars with $100 bills and sip pina coladas. The funniest thing about that picture is that I don’t drink OR smoke. Actually, we are introducing a bass amp shortly. As we gain more exposure, I am sure we will have enough to do. I am happy with people’s response to my products. I do not want to get huge, and I will probably not offer many more models – it gets too confusing. But thanks for considering me as a worthy contributor to your magazine. www.BlankenshipAmps.com (818) 530-8853
Our experience with “vintage Marshall tone” was formed with two stout examples that we were fortunate enough to own and play for years. The first was actually a late ’60 Park ’7550 watt head, followed by a metal panel 1969 Marshall50 watt. Both amps displayed the classic tone, smooth distortion and touch-sensitive dynamics we love to love and eagerly oozed the warmth and dimensionality that reissues lack. This isn’t complicated…. We’d simply drag a newish Marshall clone of some sort into the music room, compare its sound to the old one and invariably say, “Not bad, but this one sounds and feels better.”
When we fired up the Blankenship, however, not only did it sound richer and fuller with more depth than our old Marshalls, but the tone controls actually produce changes in EQ that allowed the amp to achieve a level of versatility that has always been sorely lacking in the originals. And then, of course, there is the nifty Variac that allows the VariPlex to be played at nominal volume levels with no audible deterioration in the responsiveness or tone and the amp. Essentially equipped with features that mirror an original Plexi, the VariPlex is a 2 channel/4 input design with presence, bass, mid and treble controls. Channel 1 is the bright input; channel 2 is more bassy, and the two can be jumpered and mixed to taste.
We took our time developing an impression of the VariPlex, playing it for over two months. Bottom line – it produces an authentic, old-school Marshall voice with better EQ, clarity, and fresher, more vivid harmonic content. Its voice is exceptionally smooth, yet capable of acquiring the melancholy edginess of an early Clapton recording by simply managing EQ, and the Variac as a master volume control works brilliantly. The VariPlex impressed us as a near-perfect example of an overbuild, hand-wired, low-production amp inspired by arguably the best efforts of Jim Marshall and company, circa 1968. Just as the Balls M18 became our modern benchmark for low-powered, classic Marshall tone, so goes the Blankenship VariPlex in the 50-watt range. If there is a better-sounding modern alternative toa vintage Marshall, we have yet to hear it.
We also admired the neat, clean and easy-to-read design of the VariPlex silver control panel, somewhat reminiscent of our old Park. Among all the clones being cloned with Mojo boxes, this amp is a visual standout. And as far as internal build quality is concerned, let the pictures speak for them-selves. In all respects the VariPlexis a solid piece of work,returned to the builder with as much regret as any amp we have ever reviewed. In fact, we’re still thinking about it. Plex forth….
Where did you get the idea to start an amp company?
It was the K&F that got me started. Working at Fender and knowing the entire lineage, including the K&F era, which is kind of separate, it was really intriguing to see what kind of things he came up with. Because it was so rare, the K&F was really appealing to me.
How did you discover this cool original gear while at Fender?
People would come in with things that were not in regular production and would want to have things done and have items reproduced, and people would come in for repairs too. It was a nice influx of cool equipment coming in, and we would turn around and reproduce it to the best of our ability. One of the first pieces we did while I was there was the “snake-head” Tele set, the first regular Fender-style guitar that Leo built.
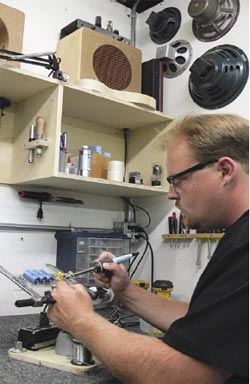 Doesn’t that predate the Nocaster?
Yes, in fact I think that guitar was a ’47 or ’48. It had a four-piece pine Telecaster-style body, two inches thick with a small, black Bakelite pickguard, volume and tone control, and one bridge pickup. The snake-head headstock was the style he was using on his K&F lap steels, so it had three-on-aside tuners, with a solid, fat, maple neck with no truss rod — he hadn’t thought about a truss rod yet! They only made a few of them, and they were made as a set with the woody Pro amp.
So, did you put truss rods in the reproductions?
No, but they are big, round, C-shaped necks, and they’re quarter sawn, so they don’t move around too much.
There are actually guys who believe that necks without truss rods sound better.
This guitar is really neat-sounding because we used antique pine. One of my first jobs there was to rough-cut these old pine boards, glue them up, and plug and fill nail holes. Looking at these old-style guitars and amplifiers in comparison to what was being manufactured at the time, I saw a night and day difference. These have a style to them that nobody does any more.
This got me started thinking about K&F. If the circuit for the woody Pro was primitive, then the K&F amp circuit was even more so. The Pro had 6L6s and a push-pull output, and a 15″ speaker — a field coil speaker, which we had a lot of problems with. The K&F amps didn’t use field-coils and were permanent-magnet.
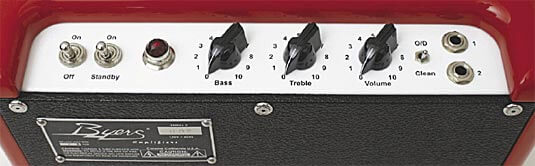
Give us a little background on K&F.
It was Doc Kauffman and Leo Fender. The information on K&F varies, so I can’t give a perfect history. They started around late 1944, and ran probably to the end of ’45 or early ’46, then they stopped making these in mid-1946. Leo had done some really interesting things — he had designed an automatic jukebox and little P.A. systems, and he was working with his radio company. Then, he had an idea for these guitars. He started making them and it became popular enough that he needed a larger investment; Doc didn’t think he could invest in something that looked like a hillbilly guitar, and at that time, that was the type of music played on them.
I remember even up until the 1960s, many jazz guitarists looked down their noses at these and told us, “When you grow up, you’ll get a real guitar,” meaning something more traditional, like a Gibson archtop.
Yeah, so Doc left and the K&F company was dissolved. Finding pieces from that time period is hard because there’s no record of how many were made and there were no advertisements for them. I do have some pictures from George Fullerton that Doc’s son gave him of the first piece that they put together, which is nothing like the ones that went into production. It’s very beautiful.
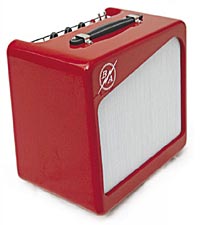 Did you get to play that original Tele that was copied for this run of instruments?
Oh, no. The story behind that guitar was that Leo was a huge stickler for not keeping prototypes around. There were two of those — the first one was cut up and the second was thrown in the trash. George pulled it out of the trash. He was young and had just started working with the company; he was a guitar player and this was his creation too! He and Leo went to little bars and shows and listened to players. Without telling them what they were up to, they asked the players what they would want in a guitar, which became the basis for their business and designs: being able to change small parts out easily and being able to easily change the neck on a guitar. There was a bit of a stigma attached to their early instruments because they weren’t craftsman pieces — they were functional instruments.
Yes, they were outside the instrument crafting tradition. This was a modernist piece of design, rather than following classical instrument-building traditions.
Exactly. So when I started researching all the K&Fs, I talked to George who was there just after Doc left, and I got as much information as I could from the closest source. Strangely, though they made guitars and amps in sets, many of the guitars still exist while most of the amps do not. I figure that the guitar is a functional piece and all you have to do is change the strings, but if you have an amp go out, it might have been easier to just go buy another amp.
Was it through the process of reproducing old gear, and speaking with George Fullerton, that you became interested in the 1940s K&F amp?
Yes, that amplifier in particular because it was so simple and because the circuit was kind of the predecessor to the Princeton, but instead of having an 8″ speaker like a Princeton, it had a big, large-magnet, alnico 20-30 watt 10″ speaker. This was late ’44 or early ’45, and these amplifiers were made from military surplus parts, so they were all different and had this unique industrial look about them. Design-wise, it wasn’t made to be the prettiest thing out there — it was made to be functional.
So it was just “The K&F Amplifier” and they only made the one model?
No, see that’s the thing, they made one, and we know the record shows from Doc’s writing on the pictures I have, that the first one they made was beautiful! It had wooden sides, a grille cloth that was embroidered with K&F on the front, and a 15″ speaker. The photo says, This is the first K&F [lap] steel, and this is the first amplifier in the U.S. with a hanging chassis and hanging tubes.” Before that, everything was put on the bottom of the amplifier and the tubes all sat up.
And that amp is gone now?
Yeah, in John Sprung’s book, Fender Amps: The First Fifty Years, he wrote that this amp was made as a custom, one-off piece, and it is likely gone now, since the only pictures we have ever seen of it were the from the 1940s.
That would be a fun one to reproduce, wouldn’t it?
Oh, it would be amazing. There was an article in the October 1998 issue of Guitar Player with a 15″ K&F — the style of the K&F that I am reproducing. It was the same cabinet shape, just larger, and it is the only time I have seen a 15 other than that one custom one-off piece.
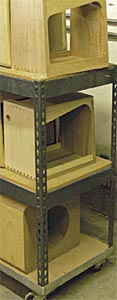 So what you had was three or four amps, all without names or model numbers which were essentially prototypes
Yes, they were “if this works we will make another just like it” sort of deals. There were two basic models that you see in published pictures. One is the 8″model that looked like a little lunch box. It had one volume knob and one or two inputs, no pilot light, no fuse, and the cord coming straight out — that was it.
The other is the 10″ model, which is the one I’m reproducing. It had two inputs, no fuse, no pilot light, one tone control, and either one or two volume controls, and two channels — which was something completely new. Each channel ran on one half of the input tube, which is what Fender did until the Blackface era in the ’60s.
It’s not a large amp at only 5-6 watts. The speaker was an unknown Jensen model that had a large, plug-style alnico magnet instead of the horseshoe magnet. I am sure every example varied because the parts all varied — the knobs, transformers, everything. The transformer on the one I am reproducing was a replacement transformer right out of an Allied catalogue made by some unknown manufacturer.
How did you originally come in contact with the amp you decided to reproduce?
I worked with Geoff Fullerton at Fender, who became a good friend of mine. Geoff is George’s son, and was Leo’s personal assistant at G&L for several years. He was a builder and engineer there as well. George’s father used to work at Fender in the wood mill where he ran this huge ripsaw, which George, Geoff and I also ran, so I had become good friends with the family.
George is a wealth of information and a really interesting man to talk to. He has great ideas about how things were done, the reason things were done, and craftsmanship. Even though his guitars were not traditional, the craftsmanship that went into them was impressive. They case-hardened every single one of the screws that went into a guitar, so if you had to repair it, you wouldn’t strip out the threads. Nobody does that kind of thing anymore because it is not cost-effective.
When I talked to George about the amp, he told me about one at the Fullerton Museum owned by Phyllis Fender, Leo’s widow. As he described the amp to me, I decided I wanted to take a look at it. Phyllis said sure, so they pulled it out of the museum for a day. I looked at it, taking every picture and measurement I possibly could. I worked with what I had, but it wasn’t enough to do a reproduction. Later on I was able to go back, and they let me take the chassis down and measure every single component. One thing I couldn’t do was turn it on.
You were able to disassemble this old amp down to the component level?
I was. I took my meters down there and measured everything. Not only did I measure it, but I cross-referenced it to the color code because those resistors and capacitors are 63 years old now and have drifted a lot. One of the things I noticed is that he used many of the components because they were the only things he could get. They weren’t exactly the right value for the position they were in, but he put them in there because they were close enough and that’s what he had.
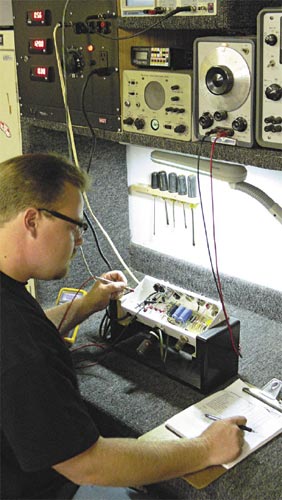 So, I’m looking at it, and George leans over and says, “You know, you’re the first person who touched the inside of that amp since Leo; you’d better be careful!” Because no one had touched it in all those years, the chassis, being made of steel and zinc plated, was pretty much pure white and powdery — I wasn’t about to leave my fingerprints in it!
Are you going to reproduce the zinc plating and everything?
Oh yeah, but I’m not going to relic it or try to make it look old.
Are there any ground issues getting through the zinc?
Yes, you have to grind away the zinc to get to the steel. And that was one of the things; there’s no circuit board, it’s all point to point, and whatever had to be grounded was run straight to the chassis right there. It was function over form.
What year was the original produced?
I don’t really know if it is one of the earlier or later ones, although I think it is earlier. There is a kind of complex cutaway on the top of the amplifier and a relief on the cord panel that is pretty much decorative. Those two things are also on the 15″ amps that we know were the first ones made. Later examples don’t have either of those features on them, so it is likely an early piece.
Did your experiences at Fender and taking apart the old K&F amp lead to your decision to start an amplifier company?
The K&F thing led directly to my own amplifiers. That amp was amazing and cool, but it was so rudimentary. Boutique amplifiers are becoming a bigger business now and I though it would be interesting to see if I could do my own interpretation of the design.
I was looking at all these beautiful Fender guitars that we were making, the amazing Custom Shop guitars with custom finishes that people wait years for. There are some really nice-looking amplifiers out there, but most of them look like big Tolex suitcases.
It all started me thinking about something that was small enough that you wouldn’t worry about it getting banged around, with the form plus the function, and replicating some of the beauty of the guitar finishes. That really appealed to me – no one was doing that. Finishing it like a guitar, the correct way, is such an art. I wanted to make them so they would match people’s prized instruments.
 Over the years, guitars and their finishes have gotten more elaborate, but you aren’t doing that with the new Model 10; it is using simple shape, texture and color for the amplifier, rather than the busy style of many expensive guitars.
I started out spending hours designing cabinets, and the right one just hits you. This one was simple; it effectively gave room for my logo, but with some different elements. I have 1″ radiuses on the corners instead of ¾”, which makes the amp look more spherical, instead of looking like a big square
It gives it a softer, more attractive appearance.
I started the design of the amp with the cabinet, and I got that nice angled swoop to the front, which was simple, not complex — you see some of the amps from the 1940s that had great grilles on them, and some were so complex. Once I got the design for the cabinet down, and I knew that I could physically produce it from a woodworking standpoint, I knew how much space I had, so I could work on the chassis and circuit layout.
Tell me about the Model 10’s circuit and electronic design, and the sounds you were going for.
Well, George introduced me to Bill Sterle who started working at Fender around 1960. Bill is an audio engineer who designed a lot of the original Blackface amps.
Having someone who was there and who designed amps telling me why they made certain decisions is so much different than starting with copies of what Fender, Gibson, or Marshall did. I learned distinction between the amps Bill made and the Fender amps of the 1950s, which were the easiest and simplest designs. The Blackface-era amps were much more complex designs and they were really trying to do different things with the preamps to keep them cleaner.
When Bill was designing things, he stressed that distortion is your enemy — that’s the school of amp design he came from. You have to have the cleanest representation possible. I went to Bill’s house for hours and he would describe everything from tube heater circuit design to what you want to get accomplished in the preamp section, the phase inverter section, and the power section. He told me once you get going on the tone controls, you can go crazy because there are so many variations in tone circuits — not only what you use, but where they are placed.
I wanted to have a 10″ speaker in there. A 10 just has a clarity that you cannot get from an 8″ speaker, and I didn’t want to go as big as a 12. 10s have a really neat sound to them if you find the right one. I knew it was going to be either a small, single-ended design or a cramped, push-pull design. I ended up starting off with a small single-ended design.
So, design wise, you met some of the original guys who developed modern guitar amps, and took it from there, as if you were in that era.
Oh yeah, and every single element that was put in the amp was based on what I was trying to accomplish in the circuit, not based on something I was trying to copy. My initial intention was to make it really straight and clean, without a ton of bells and whistles. It is a single-ended design with a 6V6 power section and a 12AX7 preamp tube.
I looked at a lot of Internet message boards for guys who are building amps, and for players in general, to find out what kind of modifications they were making and what they wanted out of an amp. I tried to keep it really simple and clean, but I did put in a few things that I thought would expand the tone a little more.
 Is there a tube rectifier?
No tube rectifier in this. In such a small, single-ended amp that putting one in would be more of a novelty than anything functional. Not putting one in allowed me to use a smaller power transformer and to clean up the power and make it more stable, along with giving me more space to do other things in the chassis. Also, when I went back and talked to Bill Sterle, he threw his hands up and said, “Tube rectifiers are absolutely worthless!” [Laughs]
My impression is that stout, well-built power supplies produce robust tones, especially at high levels. When you are pushing the amp, and you’re not clobbering the power supply, the amp doesn’t freak out as much. If I want a little sag and compression, I use a compressor!
Well, yeah. It’s all relative though, because there is a ratio between the voltage and the current that the plates see. You push harder, sand the plates, and try to draw more current. If the current isn’t there, then there is going to be a difference in the tone.
I started with a solid-state rectifier and that is the only solid-state piece in the amp. In the preamp, I used more of a Blackface preamp design, where I split the 12AX7 in the middle because the amp only has one channel. I do have two inputs on the amp, but one is just hotter than the other.
So there are only two tubes in the amp?
Only two! It’s simple — there is just a treble and a bass control. With all passive tone controls, if you use the control, there is a certain amount of insertion loss, so on bass control I put a switch so you could remove the tone controls from the circuit completely.
The Model 10 has the standard volume, bass and treble controls; then there is the switch. What does it do?
It takes out the negative feedback loop. You turn that off and bypass the tone controls and it will crunch just like an early tweed Champ. Even with only two tubes and three knobs I wanted to be able to have a range so it isn’t just for one style of play; it is an amp that you can play around with and get a cool tone out of.
It has an amazing array of tones for having so few controls.
I have designs of every shape and size, but this is where I wanted to start. In the larger models, I am going to do a 15-20 watt amp, and I may do as much as a 30-35 watt one as well, though I don’t want to come out with a 100 watt monster.
I think people are starting to re-evaluate how much wattage is really needed.
You know, one of the many helpful things I learned from Bill Sterle was how to test everything correctly. Lots of amp makers out there will say, “This is a 5-watt amp,” and that’s what they assume because a similar one was made by Fender, but Fender tested where the wattage comes up just before distortion, on every one, and that’s how we test as well.
The Model 10 puts out almost exactly 5 watts. It has a cathode bias power section and I go through and measure every single one of those tubes and every single output section of each amp to make sure it is right for this design. I don’t want to run these as hot as I possibly can to get every last watt out of them, because it is hard on tubes. I offer NOS tubes as an upgrade, and they are not making any more of them! I run them right in the middle where you get great tone and good longevity.
What tubes have you been using?
Right now I am using Electro-Harmonix preamp tubes and JJ power tubes. I think the JJ 6V6 is a really neat tube. They can handle a lot of plate current, and they sound good.
If somebody wants a Model 10, how long would it take?
I have all of the parts ready to go, but I have a six to eight week lead time on the custom-colored cabinets, including shipping. It takes about four weeks for the paint to be completely finished, because it has to be perfect. It is a guitar finish on the Model 10 and it’s done just like any expensive guitar finish. The amps are built to order, though I may stock certain colors here and there.
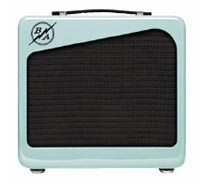 It’s exciting to see the founding of a company with such an amazing product. Do you have a price set for the Model 10?
It looks like the Model 10 will be $1050, at least as an initial release price.
You spoke earlier of having several color choices and perhaps some clear finishes on nice wood available.
The cabinets right now are poplar for the solid colors, and ash or alder depending on whether the finish is a blonde or sunburst one, just like a guitar.
If someone asked you what your amp sounds like, what would you say?
Well, what I was trying to achieve was a combination of the tweed Champ and Princeton, combined with a Blackface Champ and Princeton. I wanted to be able to combine all four of those amps together so you could get a really grungy, overdriven, tweed tone or a really clean, clear tone with or without tone controls.
Tell me about the K&F reproduction amp, is that currently in the pipeline?
That amp is 99% done. Because this amp has never been done before, and because the parts are not off-the-shelf parts, everything is different from what is currently available. Everything had to be done from scratch; transformers had to be custom wound, and chassis had to be custom made — and the chassis are not normal dimensions by any means. The tubes are all NOS tubes, because there is no current equivalent to them.
It’s an octal socket preamp tube isn’t it — a large base and pins like a power tube? What tube is that?
It’s a 6SC7 medium mu triode and a 6J5 triode in the preamp section. Each channel gets half of that triode. It’s a pretty low-gain tube actually; it’s not overdriving the preamp circuit a lot like the later 12AX7s often do. There is also a 5Y3 rectifier and a 6V6 output tube. Both input signals merge into a 6J5. Instead of putting one channel with one preamp tube, he made two channels that merged into one preamp tube. There’s one volume control for both channels. The circuit is a lot different than a modern amplifier. Leo was doing it to see if it would be functional, and it was very rudimentary and basic.
The octal preamp tubes give a really unique sound to the amp. They don’t drive it very hard, but it does put out a pretty thunderous crunch when you want. I am keeping it as historically correct as I can, with carbon comp resistors, Mallory 150s as the tone caps, and all cloth-covered wiring, which I don’t do in the Model 10. I am not trying to reproduce a look in the Model 10, but am going for the best possible sound, so I’m using all the best components and wiring by today’s standards.
You selected the components for the Model 10 by listening to them, didn’t you?
Yes, but the K&F is a little different. It’s not wired like you would wire something today; it has series heaters, so you get that hum in there that makes for a unique sound. The only changes I made were necessary for safety. Of course, there is a fuse in this one, along with a 3-prong AC plug. Other than that, it is rudimentary in every way. The tube sockets are spot-welded to the chassis.
Did you actually replicate the spot welds?
Oh yeah! Lots of guys would have riveted the sockets in place, but that was an extra expense, so they spot welded them.
It probably had a terrific ground connection.
It does. I found an original output transformer and power transformer and had Mercury Magnetics reproduce them for me. The speaker was a 10″ Alnico plug-style speaker rated at 40 watts for a 5-watt amp, so it was way over-engineered for the circuit. Most Alnico speakers have a horseshoe shaped magnet, but this one has 2½” donut-shaped magnet. It was also used for higher-end audio and larger-wattage amps. It makes for a really heavy speaker, but it’s really neat. This Weber is the closest to the original speaker that is available.
How much is the K&F reproduction amp going to cost, and when will it be available?
I’m trying so hard to get it finished! I am talking to a paint manufacturer about the wrinkle paint we need, and if that works out we’re in business with getting the K&F out. We should be ready in October at the latest, and the cost will be about $1000.
Playing the Amps
I brought my 1987 hardtail Tom Anderson to Byers‘ shop where I got to play through the first Model 10 off the line and a K&F reproduction prototype. Here is a sample of what I heard:
Model 10
The Model 10 is a beautiful amplifier. If your favorite custom guitar builder built an amp, it would look just like this.
The Model 10 is clear and detailed in the way that only minimal circuit paths can be. Set clean, with the tone controls engaged and the feedback loop in, the highs and lows are well-balanced, the tone circuits do what you wish they would, and the result is a sound that makes you want to play more. Turn off the feedback loop and things get woollier and more tweed-like. Switch off the tone controls and the amp gets a more aggressive, throaty attitude going.
K&F Reproduction
The K&F reproduction amp is totally different from the Model 10 and totally different from almost anything I have ever heard. I can almost hear Charlie Christian playing one and I suspect that today’s players will find musical uses for this tone. The K&F reproduction is very big and a bit wooly-sounding, yet not muffled or dull at all. It gets pretty powerful sounding when you push it hard.
Source: https://mercurymagnetics.com/pages/news/PremierGuitar/PremierG-10.htm
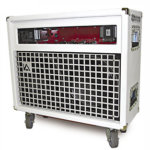
Today it seems as though there’s a boutique amp manufacturer around every corner. Don’t get me wrong — boutique amps aren’t a bad thing, but a great many of them focus on recreating the same types of tones that we’ve heard before, sapping all of the meaning from the word, “boutique.” If you were to be objective about it, you could make the argument that Leo Fender’s Bassman was the forefather of modern guitar amplification — it was the very amp that Jim Marshall and Randall Smith [Mesa Boogie] hot-rodded to make their own famous amps. But with so many small builders basing their sounds off these designs, where is the room for improvement?
With that said, I literally bumped into a mom and pop operation by the name of Industrial Amps at the Boston Guitar Festival, hosted by none other than Premier Guitar. I was wearing a Marshall T-shirt when I ran into JoAnn Niekrewicz, the co-owner of Industrial Amps; seeing my shirt’s logo, she shouted through the crowd, “Try our amps — they are Marshall killers!”
Needless to say, it was a bold statement, but curiosity got the best of me; I immediately sat down and tried all of their amps. Plugging into models like the Rock 120, Blues 60, Crunch 15 and the Overdrive 15, I soon noticed that each amp had its own special sound. The Blues 60 had a nice, hollow blues tone, while the Crunch 15 and the Overdrive 15 seemed perfect for studio recording, providing dynamic tone saturation. When I arrived at the Rock 120, I was thoroughly blown away by the depth of crunch that it produced, especially when it was played through the IA extended 4×12 speaker cabinet, loaded with Celestion Vintage 30s. To explore this amp further, I had them send the Rock 120 combo to my studio, so I could really put it through its paces in a working environment.
“The tubes, transformers and capacitors all cleverly reside behind 1/4″ thick glass, so you can experience the mesmerizing glow of electronics at work. As an added bonus, the Rock 120 is tour-ready, boasting a set of large, riveted, zinc-coated handles with grips on both sides of the case, as well as four caster wheels for easy transport.”
Industrial Rock
Right out of the box, the Rock 120 is a striking piece of modern, industrial design. The amp is constructed in a white Tolex case made from 3/4″ true 11- ply hardwood birch, with the speakers enclosed behind a heavy duty grill made from 1/4″ aluminum for kick-proof protection. As for the cabinet itself, Industrial Amps designer Tony Niekrewicz works closely with a non-profit organization called Living Classrooms in Baltimore, MD. The program gives out-of-school youth, from ages 16-19, a chance to learn carpentry hands-on in a practical work environment.
The tubes, transformers and capacitors all cleverly reside behind 1/4″ thick glass, so you can experience the mesmerizing glow of electronics at work. As an added bonus, the Rock 120 is tour-ready, boasting a set of large, riveted, zinc-coated handles with grips on both sides of the case, as well as four caster wheels for easy transport. Electronically, the amp features 120 watts, two channels — Classic and Heavy — point-to-point hand wiring and an open back cabinet fitted with two 12″ Celestion 80s. The amp itself is powered by four premium 12AX7s, four EL34s, one 12AT7 for reverb and a solid state rectifier tube.
Turning my attention first to the Classic channel, I ran several guitars through it. In particular, my Gibson double-neck Jimmy Page Model produced a gorgeous, ringing tone, much like the tone you hear on the Birds song, “8 Miles High” or even the Zeppelin classic, “The Song Remains the Same.” A word of advice: when using double humbuckers, you’ll have to back off on the guitar’s volume a bit so you won’t overdrive the amp. What worked best for me was a Fender Strat. Though the Classic channel, the single coils produced a very smooth and fresh reverberation, similar to that of a Fender Deluxe.
Switching over to the Heavy channel produced a genuinely heavy bass response, perfect for shaking your tree. Overdriven, the Rock 120 is a cross between a classic Mesa Boogie Mark II and a Soldano amp. I used the amp on several recording sessions and even had Leslie West [of Mountain] play through the amp. He was very impressed with the amp’s gain — this coming from a guy that can never have too much gain. The notes were expressive and had an authentic, singing overtone; for those of you who remember the short-lived Fender Prosonic amp, this amp has a similar, driving tone.
The Rock 120 also recorded very well, especially using a Les Paul Goldtop with a Seymour Duncan ’59 humbucker in the bridge position and a Duncan Custom in the neck position. The tones were very saturated, but without the muddiness that some overdriven amps generate, due to theMercury Magnetics transformer inside — designed to provide both clarity and bottom growl. It has that Mesa Boogie singing tone and is great with pinch harmonics. The Treble, Bass and Presence controls are quite responsive, and unlike some amps, each one of the knobs really affects the tone. As an added bonus, the Heavy channel features a Gain control and a Master, so you don’t have to sacrifice your eardrums for sweet tone.
There’s lots to love here, but IA has thought to add in plenty of little touches that will make the purchasing decision easy. Each amp features dual speaker outs, voltage and ohm selectors, military spec components, and even, “severe duty Honeywell explosion-proof aircraft quality switches.” How much more rock n’ roll can you get?
The Final Mojo
Being an avid collector of vintage tube amps, I’m always skeptical of new products claiming to have superior sound. But my experience with Industrial Amps opened my ears to what small amp builders can achieve. While the price may be equivalent to other boutique amp models out there, the Rock 120 definitely gives you a lot more, in terms of sound and power. You won’t find this amp in Guitar Center, Sam Ash or any of the others commercial retailers — this a true underground find.
Source: https://mercurymagnetics.com/pages/news/PremierGuitar/PremierG-09.htm
If you want to nail Clapton’s tone, a crucial part of the equation is the amplifier. With a little ingenuity, John Wiley shows you how to turn your reissue Bluesbreaker combo into the real deal.
A unique distinction of early Marshall amplifiers is that none of them within the same model line sound exactly alike. Partly attributable to founder Jim Marshall’s penchant for working with budding British musicians and working many of their suggestions into his designs, and partly due to the difficulties of locating reliable parts suppliers, Marshall’s early designs each had their own personality. For instance, Marshall’s Model 1962 combo was, itself, an ordinary amplifier; however, one particular Model 1962 used by Eric Clapton with John Mayall and the Bluesbreakers had such a revolutionary tone that it created a new sound in the still-young world of rock n’ roll.
In 1965, Clapton found himself the featured guitarist in John Mayall and the Bluesbreakers. Armed with a 1960 Gibson Les Paul and the Marshall Model 1962 combo amplifier, he single-handedly discovered a combination of guitar and amp that produced an extraordinary howl — Clapton achieved his trademark sound by playing the amplifier at full volume. The sound was full-bodied, authoritative, but not overly distorted; it easily cut through the other band instruments. The sustain was pure, the treble notes sang and the bass registers exhibited a “throaty” bottom. At such high volumes, the amp was prone to feeding back, and this provided an awesome effect to the overall sound.
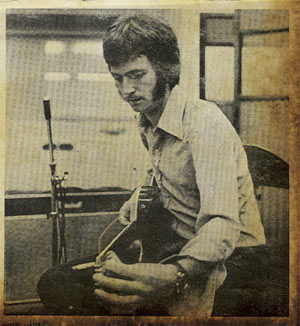
This image, from the Beano LP, shows Clapton tuning up, with his Model 1962 in the background.
The blistering tone was captured on vinyl and released to an unwitting public as John Mayall and the Bluesbreakers with Eric Clapton; also known as the “Beano” album, it quickly shot to number six on the British charts, even amongst the din of other popular British and American pop groups such as the Beatles, the Animals, the Rolling Stones and the Beach Boys. That LP’s impact soon spread to America and abroad, inspiring legions of new guitarists around the world — especially influencing musical rebels in the United States. Clapton’s playing style, combined with a ferocious amplified tone, seemed to inject a new and exciting dimension into the young blues-rock genre. But none of this could have happened without the small British amp company, Vox. Models like the AC30 would provide the “British Invasion” with its unique sound, and convinced Marshall to build a compact amplifier for his new company; the initial development of Marshall’s first combo took place in early 1964. In a 2003 interview with Musician’s Hotline magazine, he claimed the Model 1962 was built at the request of Eric Clapton. “Eric used to practice in my shop and he was one of the first guitarists to ask me to build a combo,” Marshall recalled. “He wanted one so it would be easy for him to put the whole thing in the boot [trunk] of his car.”
Unfortunately, that Model 1962 disappeared, with Clapton himself unsure of what became of it; years later, it would become known as the holy grail of combos. Although those early combos had great tone, no two sound exactly the same. Two decades later, the Marshall reissue would sound nothing like it at all.
The Reissue
For many of us, the year 1990 brought an answer to one of our greatest wishes: the Marshall Model 1962 2×12 combo was finally reissued. The idea had apparently been in the works for quite some time, as evidenced by this author’s correspondence to a Marshall factory director, Keith Carnall in the late months of 1984. Carnall’s reply stated, “We have thought many times about running a ‘vintage special,’ with valve rectification and all the other old goodies… let us just say for now that it is an idea that we will continue to work around and perhaps you will get your wish granted.” Although Clapton was not aware of the amp being reissued, Marshall christened it the “Bluesbreaker,” in his honor. When asked in a 1989 Guitar World interview he replied, “Did they really? How sweet. I didn’t even know that. How does it sound?” Marshall simultaneously introduced the Bluesbreaker and the JTM45 in 1990, along with the new JCM900 series.
At a cursory first glance, Marshall did an outstanding job recreating the Bluesbreaker, as it externally resembled the original with the distinctive and elegant Marshall styling. Just like the original, it was rated at 45 watts and came with two Celestion speakers. The cabinet dimensions measured 29.13″ wide by 23.62″ high by 9.25″ deep, and black vintage Tolex coupled with a vintage-style Bluesbreaker grill cloth completed the package. Electronically, the 1989 reissue used two 6L6 vacuum tubes for power, three ECC83 (12AX7) preamp tubes and one GZ34 rectifier tube. In 1993, Marshall replaced the 6L6s with 5881 vacuum tubes. Tonally, the Bluesbreaker reissue had a unique and fine sound of its own. It produced varying degrees of that buttery smooth sustain, while retaining that traditional Marshall crunch.
The following is a listing of the basic differences between the original Model 1962 and the Model 1962 “Bluesbreaker,” as reissued in 1990:
|
But just how close was this new variant to the original Model 1962? To the true Marshall collector, and to the rare few who actually owned the genuine article, the differences were immediately apparent. In Michael Doyle’s book, The History of Marshall, he pointed out that the cabinet was too small and the grill cloth was not right. But the major disappointment was not in the appearance, but the sound the amplifier produced. While the sound was good and had plenty of Marshall crunch, it was definitely not the sound of the original. And for that reason, I began a quest to change the sound of my reissue into something more closely resembling the original.
Hitting the streets in 1990, the Model 1962 “Bluesbreaker” reissue was plagued with discrepancies out of the box. The cabinet was undersized by some 30 percent, with a depth barely over 9″, while the original measured in at 10.5″. The reissue’s overall width was almost 30″, while the original was 32″. The most reasonable explanation for these differences would come from the use of output tubes originally selected for the Model 1962. Although the very first combos incorporated the smaller 5881 vacuum tube, Marshall designed the Model 1962 for the more prevalent but enormous Coke bottle-shaped KT66 vacuum tube. The usage of this particular tube necessitated the deeper 10.5″ cabinet.
Likewise, the cabinet’s construction differed significantly from original specs. The Model 1962 Series I was built using pine planks for the cabinet with multi-ply birch baffles; the Model 1962 Series II was completely constructed with multi-ply birch plywood (more about these series differences in a moment). The reissue used particle board for the cabinet and plywood baffles.
Finally, the speakers supplied in the original combo were G12M “Greenbacks,” rated at 20 watts each. This speaker utilized an Alnico magnet, providing sweet, warm tones and a smooth midrange — an essential ingredient for that “British chime.” At 20 watts, the speaker could barely keep up with the tremendous overdrive of the amplifier when it was at full volume. Marshall, however, equipped the Bluesbreaker reissue with 25-watt Greenbacks, featuring ceramic magnets. While they lacked the chime of an Alnico magnet, they could withstand twice the wattage and had a fine sound of their own.
The Model 1962 Back Story
However, before we dig in and modify our reissue Bluesbreaker, it would behoove us to understand where it all started. In 1964, while the Beatles made their first appearance on the Ed Sullivan Show, and the Civil Rights Act of 1964 was enacted, Marshall was busy introducing its very first combo. Because it was the very first series, it is historically referred to as the Model 1962 Series I. Interestingly, the 1962’s model number did not refer to a particular year or significant event in time. Until the 1980s, Marshall’s distributor and financial backer Rose-Morris used these numbers arbitrarily, using the prefix “19” for all of Marshall’s product line.
Jim Marshall wanted his new range of combos to be versatile; as a result, he designed the Model 1962 with two 12″ loudspeakers and used the JTM45 bass chassis (Model 1986) electronics. The Model 1962 was described in the Marshall catalogue as a “Bass/Lead” unit, making it an extremely versatile amplifier that could be used by guitarists and bass players alike.
But just how close was this new variant to the original Model 1962? To the true Marshall collector, and to the rare few who actually owned the genuine article, the differences were immediately apparent.
In addition, a second combo with four 10″ speakers — the same configuration used in the Fender Bassman — was offered to players. Marshall’s 4×10 version was referred to as the “Lead” and utilized the JTM45 treble chassis (Model 1987) electronics. This 4×10 configuration, designated the Model 1961, was designed for guitar use only. Both Model 1962 and 1961 were purposely marketed as the British equivalent to the vastly popular Fender Bassman, and they offered quite a bargain for British and European musicians. The Model 1961 retailed for a scant $165 American dollars and the Model 1962 retailed for $170, while the Fender Bassman was nearly double at $300. Both models went into production in late 1964.
Cabinet and Construction
The cabinet dimensions for the Model 1962 (2×12 configuration) were 30″ wide by 24″ high by 12″ deep. The 1961, incorporating four 10″ speakers, maintained square proportions, measuring 28″ wide by 28″ tall and 11″ deep. The Model 1962’s width is 2″ wider and 1″ deeper than the 1961’s to accommodate the dual 12″ speakers.
Marshall amplifiers would also gain a reputation for their ruggedness. Marine ply birch was used for cabinet construction, as the laminated layers of glued veneer plywood provided greater overall strength than a singular plank of yellow pine, which was the wood of choice for Fender amplifiers. These early Marshalls did not use the “finger-lock” joints that would become standard on all Marshall cabinets a few years later.
The Marshall ads above suggested the reissues matched the originals; in reality, there were significant differences.
Marshall cabinets were also visually appealing and had the look of richly appointed furniture. Black PVC (polyvinyl chloride) material, similar to the General Tire invention known as “Tolex,” was used for the entire exterior of the cabinet. This smooth, black fabric was different from the black “Levant” Tolex Marshall would use later.
Accenting the cabinets was Marshall’s elegant grill cloth. The company’s catalogue referred to this early cloth only as, “contrasting speaker grills,” not actually describing the color or pattern of the cloth material. However, it was known as the “white” grill cloth and had thin, horizontal gray lines running through it. Also included on the earliest models were three leather straps, attached to the top of the cabinet and similar to the Vox AC30. These amplifiers weighed in at a very heavy 70 pounds, and the sheer weight meant that it wasn’t long before the leather straps would stretch and break. In early 1965, an improved, single plastic strap which was stronger and larger in size replaced the leather ones.
The very first Marshall combos produced in late 1964 used what was known as “Vox-style” cooling vents, which allowed the heat produced by the transformers and vacuum tubes to escape efficiently. Two vents were installed into the top of the cabinet, similar to the Vox AC30. The vents were rectangular in shape and had a metal screen riveted inside.
Chassis Electronics and Components
The internal chassis that included all the electrical components was made of 6061 aluminum sheet metal. Aluminum has excellent non-sparking and non-magnetic characteristics, making it ideal for electrical shielding purposes and chassis use. It is, however, not as strong as steel and would fatigue and sag under the weight of the heavy power and output transformers. To remedy this, cast aluminum end blocks were riveted inside each end of the chassis to add strength and rigidity. The chassis were 2.5″ deep and purchased from a sub-contractor named Smiths.
The JTM45 used one circuit board screwed inside the aluminum chassis, providing a central platform for the various electrical components. Prior to 1965, Marshall used Tufnell perforated circuit boards; from 1965 to 1967 a subcontractor called Heathfield manufactured the circuit boards, which can be recognized by the drilled holes on the solid sheets.
The output transformer was officially known by Marshall as the “RS De Luxe.” It was light gray in color, with horseshoe end bells. The maximum output rating was only 30 watts, and all three transformers used on the JTM45 — the output, power and choke — were purchased from Radiospares, an electrical component clearing house.
The first combos produced in late 1964 were equipped with two GEC (General Electric Co.) KT66 vacuum tubes. The original design of the JTM45 called for the Tung-Sol 5881 tube; because this tube was used in the Fender Bassman, it was the tube of choice. However, supplies for the 5881 were scarce and the KT66 was used as a replacement. The KT66 provided more bite and distortion, suiting the JTM45 perfectly, and unlike the EL34, it was not overly saturated and did not sound mushy. The KT66’s bottom end was solid and exhibited clarity, while the trebles were almost “violinlike” in nature and very smooth. Much like the Fender Bassman, the JTM45 became known for its unique sound, primarily because of this tube.
Four 12AX7 (designated the ECC83 in Europe) preamp tubes were supplied in the 1961 and 1962, and both featured a tremolo circuit as a standard appointment. These amps also included tube rectification, which added to the sound’s overall smoothness. The 5AR4 rectifier tube (designated the GZ34 in Europe) was used on all JTM45 configurations, including models 1961 and 1962, and was the same rectifier used in the Fender Bassman and many other classic American amplifiers.
The JTM45 also incorporated two “can” style filter capacitors; the number of capacitors used, and their respective value, was a significant factor in the overall sound of the amplifier. One LCR Co. 32ìf x 32ìf at 450 volts was mounted on top of chassis near the power transformer, and one LCR Co. 16ìf x 16ìf at 450 volts was mounted inside the chassis just beneath the power transformer — the standard arrangement for the JTM45.
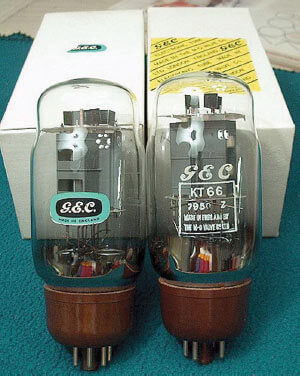
KT66 tubes as were used in Clapton’s Model 1962.
Speakers & Logo
The Model 1961 would utilize four 10″ Celestion Alnico speakers, while the Model 1962 would use two 12″ Celestion G12 speakers, handling 15 watts and featuring an Alnico magnet. The Alnico magnet contributed to the amp’s unique and sparkling sound, referred to as the “British chime.” A basic style of logo badge was used on these very first combos, and is commonly referred to as the “gold block logo.” The badge was rectangular in shape and was very simple, having only the Marshall name in bold block letters. The letters were black in color on a background of gold, although silver was sometimes used.
The Clapton-Spec Combo — One of a Kind?
The particular Model 1962 amplifier that Eric Clapton used with John Mayall and the Bluesbreakers was unfortunately lost, without knowing its exact pedigree. It was definitely an early edition of the Series II combo and was built during a continuous procession of production changes and revisions. The typical production run of any of the Marshall line could have differing components from amp to amp — it is not an exaggeration to say no two amps were exactly alike. This was primarily due to the inconsistent component suppliers Marshall used at the time, and partly because booming business made record keeping (serial numbers, production quantities, etc.) a low priority — existing serial numbers are not reliable or even logical, and production numbers are at best derived from employee recollections. Therefore, determining just how many amps were built exactly like Clapton’s is extremely difficult. The following list of features, derived from exhaustive research, best represents the Clapton’s combo specs. This particular amp is pictured on the reverse side of the “Beano” LP. The Series II cabinet was designed by Marshall’s chief designer Ken Bran, and incorporated a more modernistic styling. Its dimensions were 32″ wide by 23″ high by 10.5″ deep. The cabinet was sturdy and constructed of 3/4″ marine ply, incorporating one slot-style cooling vent and covered with black Lavent vinyl. The grill cloth was the classic gray and white striped variety later known as “Bluesbreaker” grill cloth. The cabinet was smartly accented with gold hardware attachments for the cabinet handle.
Chassis Electronics and Components
Clapton’s amplifier utilized the JTM45 bass guitar amplifier electronics known as the Model 1986 and the same chassis used in the Series I, made of 6061 aluminum sheet. One circuit board screwed inside the aluminum chassis was used and it was manufactured by the Heathfield Company.
Mounted on top of the chassis was the heart of the amplifier — the transformer. The defacto JTM45 output transformer was the “RS De Luxe;” however, since it was rated at only 30 watts, it was not ideal. Clapton’s amp may have utilized the newly acquired Drake Companytransformers. The output transformer would have been Model #784-103, with an 8K primary Z, and the power transformer would have been Model #1202-55. Utilizing the Drake transformers would explain why Clapton’s combo did not sound like a “typical” JTM45amplifier.
Clapton’s amplifier utilized two GEC KT66 output vacuum tubes. The preamp circuit included four Mullard ECC83 tubes, with one dedicated to the tremolo circuit. The Mullard GZ34 rectifier tube was again used. Two can-type filter capacitors were used: one LCR 32ìf x 32ìf at 600 volts mounted on top of the chassis near the output transformer, and a second LCR 16ìf x 16ìf at 450 volts mounted inside the chassis.
Speakers
The amp’s speakers consisted of two 12″ Celestion G12s, rated at 20 watts, 15 ohms, and with an Alnico magnet. These speakers were essentially the same as those used in Vox AC30s, and are extremely fragile when pushed beyond their limit. Because Clapton ran the amplifier at full volume, the Alnicos may have been damaged. He may have replaced them with the higher wattage, ceramic magnet Celestion Greenbacks.
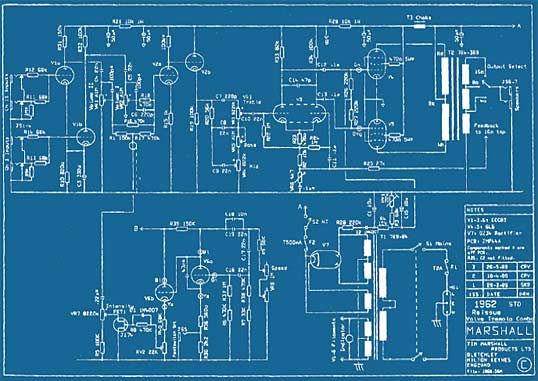
The Model 1962 reissue schematic.
The Objective: Convert a Reissue to Clapton-Spec
I started my investigation into obtaining this sound over 20 years ago. In addition to the “Beano” studio CD, there were other John Mayall albums that included “live” cuts from Eric Clapton’s time with the Bluesbreakers. Although these recordings were done with crude equipment, they captured the raw and unrestrained sound of Clapton’s guitar and amplifier. To my ears, these recordings were most realistic, as they lacked any studio treatment. I quickly knew what sound I was after.
In 1994, Mike Doyle’s book, The History of Marshall, was released and included an eye-opening chapter on the Bluesbreaker. That chapter confirmed the reissue’s lack of authentic sound, and it became obvious that in the amp’s conversion to Clapton specs the only salvageable pieces would be the electrical chassis, the control panel and some of the cabinet hardware — the cabinet and speakers would have to be replaced.
With that, I decided to do the conversion in a logical progression and planned to document the progress. I preferred a progressive approach, as it would give me a chance to analyze each change made separately. In addition, since this conversion would be fairly expensive, it would be easier on the budget to purchase items over a period of time. The changes required could be grouped into three categories:
I should note that it is possible to make deeper changes, such as replacement of the circuit board, resistors, potentiometers and components, plastic tube sockets, and rewiring of the chassis to original specifications. These additions will make the electronics of the amplifier more authentic, but will not noticeably improve the sound. These additions also significantly increase the cost and add more time to the project.
The steps I have outlined above will reproduce the amplifier tone as heard on the live cuts of Clapton with the Bluesbreakers, as well as the “Beano” record. In fact, after making these changes, your Bluesbreaker will no longer be a mere reissue — it will sound like the real thing!
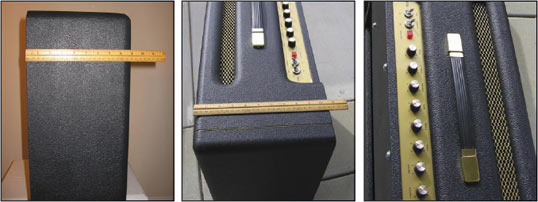
The new cabinet is over 2″ bigger than the reissue cabinet, resulting in a fuller sound.
Step 1: A Bigger Cabinet
There are now several competent amplifier cabinet makers building exact replicas of the Model 1962 Series I and II cabinets. Be sure these makers use the required multi-ply Baltic birch plywood, correct black Tolex covering, vintage gold veining and the surrounding white piping. It is also wise to have them confirm the correct cabinet dimensions, as the Series I and II are two completely different cabinets. To save some money, you could use the Marshall logo, casters and other hardware from your existing reissue. Two excellent cabinet makers available on the internet are Vibroworld.com and Swansoncabinets.com.
For the first phase, I ordered a new cabinet from a cabinet maker on the internet — to ensure accuracy, I supplied them with a CAD drawing of the Series II dimensions and features. I was very pleased with the results I received a few weeks later. I removed the chassis and speakers from my Marshall reissue and reinstalled them in the new cabinet. Even though the new cabinet included pre-drilled holes and Tnuts for the speakers, it still took some time to make this switch. While switching cabinets, be careful to ensure the speaker and amplifier connections are right.
For testing, I used a Gibson Les Paul Heritage 80 model. After re-checking the chassis and cabinet connections, I turned on the amplifier, and let it warm up. I started at low volumes and progressively turned up the volume to 10, all while keeping the other settings such as presence, bass, middle and treble at 10. Upon hearing the first chords, I was immediately struck by a new “openness.” The amplifier seemed to breathe and had a new, airy sound to it — it did not sound as tight as the smaller reissue cabinet. With 30 percent more space in the cabinet than the reissue, the trebles seemed revived and the amp now had an “airy” bottom-end. Comparative testing with another stock Bluesbreaker reissue verified the tonal improvements.
An interesting side note; in 1997, Marshall produced a limited edition white Bluesbreaker called the “Limited Edition 1997.” It was basically was the same amplifier as the 1989 reissue, with one important difference: the limited edition’s cabinet incorporated the deeper 10.5″ thickness, as can be found in the original Model 1962 Series II.
Step 2: The Electronics
Before digging into the guts of the Bluesbreaker, a word of caution: this phase deals with potentially dangerous electrical voltages and it is highly recommended that only a trained and competent amplifier repair person or skilled electrician perform these tasks.
This phase involves swapping out the reissue transformer, changing the 6L6 vacuum tubes to KT66s, and replacing the filter capacitors.
The Transformers and Tubes
There are now some good vintage transformer manufacturers around, so one has a choice in the matter. Since the original Model 1962 used a Radiospares (RS Deluxe) transformer, the objective here is to get one like it. When I did my conversion, I purchased a Mercury Magnetics Model O45RSL-8-M(MercuryMagnetics.com).
When it comes to power tubes, the only one to use here is the revered KT66. There are however, a few brand options available. One could either purchase a matched set (two are needed) of original GECs, or purchase a pair from companies offering reissue KT66s. The European and American tubes manufactured in the 1950s and 60s (new old stock) are superior in tone, quality and reliability. Tubes now manufactured in Russia and China such as Groove Tubes, the new Tung-Sol, and JJ/Tesla offer comparable tone and are reasonably priced. Since these tubes are made overseas, it is difficult to isolate a superior brand, and although tonal quality is improving with better consistency, tone remains an individual choice. For my conversion I used a matched set of Chinese Valve Art tubes, and was not disappointed.
Since we are changing out the power tubes, it is highly recommended to replace the 12AX7 (ECC83) preamp tubes as well. Again, there are several good options here which include SED Winged “C,” Electro-Harmonix and Ei/Ei-Elites. Replacing the GZ34 (5AR4) rectifier tube is also a must for optimum performance. The same tube suppliers listed above carry the GZ34, in varieties like Sino, Sovtek, or the very expensive Phillips metal base.
Filter Capacitors
Replacing the big can-style filter capacitors will definitely give your reissue more clarity. Filter capacitors are rated in the ZZxZZ format. The reissue Bluesbreaker has two 50×50ìF capacitors which must be replaced. The blue 50×50ìF filter capacitor, located closest to the GZ34 rectifier tube should be replaced with a 32×32ìF/600V capacitor. The other 50×50ìF gets replaced with a 16×16ìF/450V capacitor. JJ and F&T are two good options for filter capacitors.
Caution: These changes should only be done by a good amplifier repairperson. Also remember to have your KT66 vacuum tubes rebiased. I had renowned Bluesbreaker guru Ted Breaux finalize and tune my Bluesbreaker electronics.
Before using the amp at full volume, a suitable warm-up for the newly installed electronics should be done by simply powering up the amp and leaving it on Standby for a good hour or so. While it’s warming up, pay close attention to any unusual odors or burning, as a bad solder joint or incorrect wiring could cause a short circuit.
Once the amp has warmed up, with no guitar plugged in set the Presence, Bass, Middle and Treble controls to 10. Then start increasing the volume of Input 1 slowly, listening for any peculiar pops or sizzling noises in the process. If you don’t hear or notice anything unusual, you should be set to go.
For the “sound” test I used the same Gibson Les Paul Heritage 80; for the tonal comparison, I used the Primal Solos CD, starting with the solo in “It Hurts to Be In Love.” Before cranking the amp to 10, I employed the same gradual progression of low volume checks, listening for any unusual noises and so on. When I got to 10, I was astounded!
I was able to produce the same overtones and harmonics as the recording.
Likewise, the treble response was spectacular. I had read that Clapton used a Rangemaster treble booster with his amp, but I was getting the “sound” without one. The F9 chord in “Have You Ever Loved a Woman” shimmered and went into harmonic overload, exactly like the recording. The only notable difference was in the bass registers, as it seemed harsh at times and slightly lacking in tightness — additionally, some of the treble response seemed a little harsh. But I was definitely hearing 95 percent of that Clapton-spec sound, as no EL34 or 6L6 had ever sounded like this. It was now time for a speaker change.
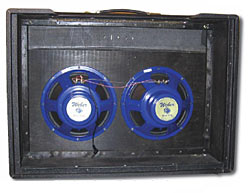
The cabinet after installing the Weber Blue Dogs.
Step 3: The Speakers
I narrowed my choice of Alnico speakers down to the Celestion G12 Alnico Blues and the Weber P12B Blue Dogs. The Celestions were rated at 15 watts while the Webers were rated at 30 watts — I decided to try the higher-wattage Weber P12B. After swapping out the reissue Greenbacks for the new Blue Dogs, I played the amp at lower volumes for several hours. At these levels (5-6), I was pleasantly introduced to the British chime of the 1960s. Early Beatles rhythm and lead guitar sounds were easily obtainable, particularly within the mid and bass ranges.
I then tried the full throttle test. At full volume, I was in for quite a shock — the mid and bass ranges nearly cut me off at the knees. The treble side was knife-edge harsh and the amp was monstrously louder. I was obviously disappointed, as none of this remotely sounded like a Bluesbreaker. I had read that Alnico speakers may require an extended “break-in” period, and I hoped that was the case here.
I removed the Blue Dogs from the Bluesbreaker cabinet and reinstalled them into a 2×12 cabinet I was using for weekend gigs. After a few weekends of extended playing, I noticed the sound changing, as I was having to re-adjust my amp head settings. After a few more weekends, I definitely noticed something happening. It was now time to re-install the Blue Dogs back into the Bluesbreaker cabinet.
Upon trying it again, something magical happened to the overall sound of the amplifier. Right there in my basement, and out of my rebuilt Bluesbreaker, came the sound. I was flabbergasted, as it sounded incredible. I must have played the amp all night. I was nailing all of Clapton’s Bluesbreaker riffs, and they sounded identical to recordings. The A minor solo break in “All Your Love” sounded amazing, and like the recording, it was drenched in sustain and overtones. “Stormy Monday” from Looking Back was spot on.
Finally, my Bluesbreaker renovation was complete. The amp sounded just like it should, some 40 years ago. Doing this yourself makes all the difference, as you become a part of the equation — with a little work and dedication, you can experience Marshall just as Clapton discovered it.
Source: https://mercurymagnetics.com/pages/news/PremierGuitar/PremierG-08.htm

You plug your prized mint-condition ’51 Fender Deluxe into the wall socket and crank it up. Next thing you know, you’re blown the transformer, the caps have puked, or you’ve toasted an original speaker. And you think to yourself, “Okay, the amp is 50 years old. It was bound to go sooner or later.” But maybe it wasn’t… an maybe age had nothing to do with it.
If you plug a vintage amplifier directly into a wall socket, chances are you’re not hearing what that amp sounded like back in the day. And that’s not because the amp is old and worn out; most old amps will run forever and sound great if treated well and maintained. But they don’t, because while that old amp may have sat in a closet for 50 years untouched, something else has changed over time — wall voltages.
Amplifiers from the 1940s, ’50s and ’60s were meant to run on 110 to 115 volts AC, while amps made in the ’70s are mostly rated at 117 volts. The back of an amp should indicate the wall voltage for which the amp is designed. The closer to new an amp is, the higher its optimal operating voltage. Depending on where you live, wall voltages fluctuate on a daily basis, and range from 100 to 130 volts! And that’s not taking into account the daily spies in power experienced on almost every line — power surges, transient voltage spikes, and of course that weird static sound that comes out of your amp, or the occasional radio station.
So, what does an extra 20 volts mean to a vintage amp? More bone-crushing power? More whump? Or is it a recipe for disaster? And is there anything you can do about that nasty static that sounds like you’re playing in Dr. Frankenstein’s lab?
Roy Blankenship, founder and president of Blankenship Amplification, recently sat down to offer some answers. Blankenship has worked as an amp repairman, production manager at Groove Tubes, and more recently — at the prodding of incessant customers — he began building a line of amplifiers. Today, he is one of the preeminent boutique builders (his Leeds 21 was one of the amps scrutinized in VG’s “5×18 = British Crunch Bliss” feature, December ’07).
* * *
VG: Is there a risk plugging a vintage amp meant to run on 110 volts into today’s standard 125- to 130-volt all current?
RB: Yes and no. Your power transformer doesn’t really care all that much, because all it’s doing is taking the voltage coming in and creating secondary voltages to send out. You’re probably not going to blow it by loading it with 20 to 30 more volts than it was rated for, depending on how much current is being drawn on the other side of it. Fortunately, most amps, like Fenders, had enough reserve built in that you will not be exceeding their specifications.
The problem is with an amp’s capacitors and filament voltages. The caps were rated for a certain value, usually about 450 volts. Most amps use 500-volt capacitors, so if you’ve got an old amp with original caps, you risk over-voltaging them. The collectors with pristine, all-original amps aren’t playing them, anyway. They sit in a closet or a glass case.
An amp’s electrolytics were designed for a shelf life of 15 to 20 years. So if you want to play your old amp — and you want it to sound good and not endanger your trannies — you need a cap job. Once you put new 500-volt caps in it, you’re going to be okay.
Some boutique makers now are doing what they call “voltage correction,” utilizing components so the amp will run at the original voltages. A certain percentage of my clients are concerned with authenticity, and this follows that vein.
The other thing you can do is just run the amp down a bit on a variac, which can accomplish a couple of things; it provides a safety margin, and lets the amp produce tube saturation at a lower volume.
VG: A lot of guys are using variacs to control output power, and your Variplex has one built in. Why the sudden boom?
RB: One of the original uses of a variac was as a diagnostic tool. When an amplifier is repaired, you turn it on using the variac starting at 0 volts. As you increase the voltage, the current draw on the “Amperes” meter (or ammeter) on the variac lets you know if there is a short within the amplifiers. On a tube amp with a tube rectifier, it’ll give an indication of current draw relating to the bias/voltage relationship. If your ammeter is slowly going through the roof, you have a bias problem. If you advance from 0 volts and the ammeter pegs itself, you have a shorted tranny, capacitor or power tube.
When Edward Van Halen came on the scene, he spoke of using a variac to alter his sound. Everyone wanted to sound like Eddie, so the variac became a fixture in a lot of people’s minds. While he initially claimed he increased the voltage on his amps, it was soon discovered he actually dropped the voltage to get his “brown” sound. Because musicians are so impressionable, I think it was a really bad idea to say this, because cranking an amp up to 140 volts can distress components to potential failure. As this information evolved, however, a lot of guys were discovering they could use the variac to reduce the line voltage, which causes an amp to break up sooner while otherwise retaining its sound.
Everybody knows that with tube amps, you’ve got to crank them to make them sound like they should. The sound of a guitar plugged straight into a naturally cranked up amp cannot be duplicated with a pedal. The variac allows you to get that same overdrive — that same touch sensitivity you get when the amp is dimed, but at a lower power level.
My friend, Bobby Carlos, who is a tech for Don Henley, uses a variac for small venues and says the amps sound fine down to 80 to 85 volts, then they lose integrity. When he was playing one of my amps with a Mercury tranny, he was down to 70 volts and it was hanging in there, illustrating that the quality of the transformer is also a consideration.
VG: Can a variac damage an amp if it’s running it at lower power?
RB: That’s a widely held belief, and one of those issues that does not have a simple answer. The problem is with the tubes, which were designed to operate on a 6.3-volt filament voltage. You can drop it some, but when you get too low, electron flow is disrupted; tubes work because of electron flow. So when you get below 80 or 85 volts, the amp sounds like crap. so that’s about as far adown as you can go in most situations.
Now, when you use a really robust transformer, you can take the amp down further. Mercury transformers make my amps work, in particular the Variplex, which stabilizes the filament voltage and varies the bias and the B+. Mercury trannies track perfectly as the variac is turned down — the sine wave on the oscilloscope does not change in character as you go from 60 watts to five watts.
I know people who’ve been using variacs for years and they’re still running the same tubers in their amps, and they still sound fine. My opinion is that you’re potentially going to have problems running the tubes down below 6.3 volts, but in the final analysis, when a preamp tube lasts 10,000 hours, if you get a sound that turns you on and makes you play, who cares if you have to replace a tube every 10,000 hours or so?
Some guys like running regulated filament supplies to make sure tube voltage stays at 6.3 volts, because that’s what the tube wants to see. Certain tubes may react differently to changes in the filament voltage.
VG: Will a variac work with every type of tube amp?
RB: It will, but the results will vary from amp to amp.
| Actual voltage | B+ | Filament | Screen | Plate | Current Draw |
| 110v | 356 | 6.05 | 292 | 345 | 34 ma |
| 125v | 406 | 6.88 | 331 | 392 | 39 ma |
| The increase of 15 volts in the AC line causes significant voltage increases in the amp. The caps in this amp were rated high enough that there was no distress, but a lot of amps are close to the ratings at 110 volts, and would be endangered by running at 125 volts. The B+ is the main operating voltage coming off the rectifier tube (which converts the AC from the power tranny to DC). The current draw is a milliamp parameter off the cathode of the tube an is what is measured when people talk about “biasing” their amplifier. This being a cathode-biased amp, the number is higher than in a fixed-bias amp. | |||||
VG: What’s the best type of variac?
RB: Well, a variac is just a voltage regulator. It’s not a precision device. All it does is regulate the voltage from the wall to the amp’s power transformer. A decent one will probably run $50 to $75. Even the Chinese ones are reliable as long as you don’t drop them. What’s more important is that you have a good-quality multimeter, which is invaluable for maintaining gear and diagnosing problems. If you want to use a variac, it’s important to measure the actual output. Just because a variac says “110 volts” doesn’t mean that’s what is coming out. In my shop, it varies 5 to7 volts from what is indicated, sometimes dependent on the time of day. I did some measurements in a ’51 tweed Deluxe to give an idea of the differences between 110 volts and what comes out of the wall these days (see chart).
VG: What the “brown sound” the premise of the Variplex?
RB: We wanted to create a great-sounding amp that you could turn down to about 5 watts, so when you play a big room you have the power, but when you play a little room you’re not killing people in the first three rows. Really, we were trying to get a great Plexi Marshall sound, not a Van Halen sound.
Now, there are other ways to achieve distortion at lower volumes. Attenuators have become popular for achieving a cranked-up sound, as have master volumes and a process called “power scaling” invented by Kevin O’Connor. We liked the sound using the variac and chose that process. A master volume smashes your preamp tubes into square waves, but the power section really isn’t working. The great appeal of the variac is that the whole amp is balls-out no matter what volume it’s running. It sounds like a cranked amp, not an effect.
VG: What about all those awful static electricity sounds, especially with older amps that don’t have grounded cords, And also, radio signals. Is there any way to get rid of them?
RB: There are numerous devices that will get rid of what’s called electromagnetic interference (EMI), and radio frequency interference (RFI). These include ETA Systems, Furman, ART, Juice Goose, Tripplite, Atlas, etc. These companies specialize in products that “clean” electrical current. And there are some amplifiers that have an EMI/RFI filter in the AC input. And remember the old Acoustic 270? It had a little resistor/capacitor network on the output as an RF filter. Any of those I’ve seen that have been in some kind of city environment have burned out from too much “dirty” electricity.
A lot of times, radio signals through your amp means you have a grounding issue in the input section. It needs a ferrite core or a .1 capacitor to the chassis at the input jack. A lot of houses, especially older ones, will get rewired with three-prong plugs in the wall sockets, but they’re not grounded. There’s a circuit tester that tells you what’s going on just by plugging into the wall. They let you know if polarity is reversed, whether there’s a ground, etc. Sometimes, this can be a lifesaver. I know guys who have played clubs where one of these tools has saved them a lot of grief because they found out the club owner allowed the bouncer to come in and rewire the place. They would have gotten the shock of their lives if they’d plugged in and played.
Another solution is to call the power company and say, “I’m getting 130 volts out of the wall, and my light bulbs are lasting six weeks.” Sometimes they’ll send a guy to diagnose and help regulate it. We had big-time noise when we moved into the our building, and they came with some cool diagnostic equipment.
VG: What else?
RB: We should talk about old speakers. The formers (the round tube the voice coil is wound on) and the cones in old speakers are almost always dry-rotted and fractured. When you find that collectable old amp, be aware that the original speaker is going to expire within a few minutes when you crank it up. So it’s better to replace an original speaker and save it — and its original cone — for when some collector is going to pay you a fortune because the amp is all-original. You may get away with it for a while — but you’ve been warned! And luckily, there are many great re-coners out there.
VG: So, in summary….
RB: Remember that everything coming into and going out of an amp makes a difference in sound and quality of sound. A lot of guys don’t think about something as seemingly minor as electricity. But it makes a huge difference. And before you jump to a variac, you might want to get any old amp a tune-up. Sometimes just changing the caps and out-of-spec components can make a real difference in sound. The bottom line is finding a sound that turns you on and makes you play, because when you’re playing through an amp that really delivers, things come out of your fingers you didn’t even know were there!
David Jung is a professional writer/screenwriter and vintage guitar enthusiast living in Los Angeles, where he hangs with some of the best amp techs and collectors in town.
Source: https://mercurymagnetics.com/pages/news/VGmag/VGFeb08-RoyB.htm

Quietly, outside of Los Angeles, Steve Trovato has been leaving blazing guitar everywhere he goes.
Currently, he is a full time instructor in the Studio Jazz Department at the University of Southern California. In addition, Steve has found the time to author over 20 instructional books for Warner Brothers and Hal Leonard, produce over 50 instructional videos for the likes of Yngwie Malmsteen and Paul Gilbert, and has even starred in five of them. His students have achieved major success and include Scott Henderson, Frank Gambale, Paul Gilbert and Norman Brown. He has performed with Chet Atkins, Albert Lee, Robben Ford, Jeff Berlin, Jerry Donahue and Scott Henderson, and contributes to five international music publications, including Guitar Player, Guitar One, Axe, Guitar Club, Guitar World and Chittar, as well as recording for too many studio and motion picture projects to list. We caught up with Steve as he completed his new release, Country Jazzmaster.
One of the things I have always wondered about is who or what influenced you to start playing guitar?
Well, I think you’ll hear this from a lot of guys; it was the Beatles. I think I was six years old, and I had been playing the piano. I did my piano recital and played “The Blue Danube Waltz.” Then I saw the Beatles on Ed Sullivan and I thought, “Wow, girls never screamed for me playing piano.” So that was it and I started playing the guitar. That was pretty much it, and I have never looked back.
Did you come across a single moment that it finally hit you? This is it, this is what I want to do the rest of my life?
I’ve never been asked that before; that’s a really good question. I would say that there were three pivotal moments: one of them was when I saw the Beatles, the second was when I heard Chet Atkins for the first time, and the third was when I was up on stage and I got a chance to play with Albert Lee — that was when I really knew I wanted to do guitar. For some reason those guys hit me hard — they played melodies — and I always loved the way I could track it even though it was guitar playing. It was really very sophisticated. When I heard Chet Atkins play, I could hear the melody. Even with all the notes that Albert Lee plays, I can still keep track of it– that’s what attracted me. I think since I’ve been playing, if I have anything, it’s the ability to play a melody.
 You’re originally from New Jersey. How did you end up on the West coast attending GIT (now the Musicians Institute)?
Like every guitar player on the East Coast, we were always hungry for information about the guitar. I used to get this magazine and I saw an ad for this place called GIT in California. I saw pictures of Larry Carlton, Tommy Tedesco and other people that I didn’t know, like Don Mock and Joe Diorio, and they were starting this school. They were sort of advertising it being for studio musicians, and that was what I wanted to be.
Now that you already have one CD under your belt, you’ve gone into the studio a second time with some outside input. How are you achieving your tones with the studio?
When I did my first album, I just took my rig into the studio with the thought that if it sounds good live, it will sound good in the studio. I’ve found that not to be true. I also realized that amps that are made specifically for recording don’t necessarily sound all that good in the studio. It really depends on the studio, the mics, and everything else. I brought every amp that I had down there — I even borrowed some amps. I ended up with five or six different amps and I had to just go through all of them to find out which one sounded the best in that studio — with that particular set up of room and microphones. I wound up actually using a boutique amp from a company in Virginia called Talos. I love those amps. It’s a 60-watt, one-twelve, and it just has two knobs on it, drive and gain.
“Well, I think you’ll hear this from a lot of guys; it was the Beatles. I think I was six years old, and I had been playing the piano. I did my piano recital and played ‘The Blue Danube Waltz.’ Then I saw the Beatles on Ed Sullivan and I thought, Wow, girls never screamed for me playing piano. So that was it and I started playing the guitar. That was pretty much it, and I have never looked back.”
What about guitars? Did you find that’s the same scenario to be true?
It’s something I suspected, but I never really had the chance to put it to the test. I usually use my G&L Legacy live, with the Kahler on it because it sounds great. You’re playing loud enough where if there’s a bass, drums and everything cranking you lose the nuances and the subtlety. But in the studio you retain those nuances and subtleties because everything is under a microscope. I found that using different guitars expresses that better.
If I want to play a sensitive, sort of Chet Atkins jazzy piece, the Legacy wouldn’t work because it sounds too thin, but with a loud phrase it will sound fine. For a quiet passage, I decided to use a Gibson — a Howard Roberts with two old humbuckers that I had. Of course, for the Straty-sounding things I used my red Legacy with a Kahler on it, which I absolutely love. For the rest of the stuff I used one of two Teles: a Fender solid body Telecaster and a G&L semi-hollow. None of them are stock. Seymour Duncan custom built the pickups for both of them.
What amps do you prefer for live performances?
I play rock, I use my Dumble. That, of course, is Alexander Dumble. It says “Built to win” and it really does, it’s just really something. I put a pedal in front of it to make sure it’s got enough overdrive. In the country bands I use a ’65 Pro Reverb, which Dumble rebuilt for me.
What do you use on the jazz side?
I use my Talos.
 Throughout your time as a guitar player, you’ve been labeled as the chameleon of guitar. Do have a huge arsenal of guitars at your disposal that you have hiding in the back room to take out whenever you need to?
For the live work I pretty much grab whatever is nearest to the front door on the way out. I was never really one to take ten guitars to a session because I figured that one guitar would sound just as good as 10 guitars, but when you really start to do this seriously, there are subtle differences between all guitars that may or may not sound better for the tracks. You really have to have an arsenal of quite a few to do the job right.
What would be an ideal arsenal?
I would have to say you have to have a solid body, Strat-type of guitar with single coil pickups, a single coil Tele-type, a Les Paul-type solid body with humbuckers, a thin semi-hollow body sound, like a 345, and a jazz box, then, of course, steel string acoustic and a nylon string.
You mentioned putting a pedal on the floor in front of one of the amps.
Live I use a Boss GT-6. I use it for time delay effects such as reverbs, delays and chorusing. It sounds great for that and it’s also great on the floor. For distortion I’ve been using the AC Booster and the RC Booster by Xotic Pedals.
The Xotic pedals are fairly new. Can you tell us some more?
Oh, I love them. Those are the kind of the boutique pedals that all the guys in town are using. Scott Henderson told me about them. Studio guys like Michael Thompson are using them. Basically, the RC Booster is a pre-amp boost that keeps it clear, but gives it a little oomph. The AC Booster is an overdrive — basically a really high-end Tube Screamer with a bass control on it. Everybody loves Tube Screamers, but it takes the bass away from it; this is a Tube Screamer that sounds a lot more transparent and smoother than normal. You can also roll the bass back in because it has bass and treble controls.
 You mentioned the Kahler Tremolo on one of your G&L’s. What do you like about it?
The thing I love about the Kahler is its flush and mounted solidly on the guitar body, versus another one. I won’t mention any names, but the initials are Floyd Rose. It is not really mounted on the body of the guitar as solidly and or as flush as a Kahler. With a Kahler, the tone sounds pretty darned good. I really like that about the Kahler. Since you have that big plate to rest against the body, you get more natural wood resonance, it doesn’t sound thin and small. The other thing that I like is the adjustable string spacing. I don’t think other bridges can do that.
On the first CD, About Time, you cover a whole spectrum of guitar playing. You do a dedication to Danny Gatton, you’re hitting a little Django, you’ve got “Somewhere Over the Rainbow” from Harold Arlen, and then you even do Billy Joel’s “Root Beer Rag.” What can we expect hear on the new CD?
When I spoke with Steve Vai, he was saying the last CD was really good but I needed a little bit better recording quality. He said the problem with the first CD, as far as marketing, is that I don’t know where to market it stylistically; it’s all over the map. I came up with this concept in my mind called “Country Jazzmaster,” with Jazzmaster being one word, like the guitar. I kept that thread in my mind as I was recording this album, and all of the songs leaned into that concept. Everything that you’re going to hear is country-jazz. Western swing, country jazz — that sort of a thing.
There’s a thread of continuity running through the whole album that you will hear. I recorded everything from the old Jerry Reed tune, “Guitar Man,” to “Back Home Again in Indiana,” “That She Could Ever Be,” “Panhandle Rag” and my ultimate version of “Ghost Riders in the Sky.”
I still remember this vivdly: a NAMM show where you, Steve Vai and I were standing around talking, and Steve hailed you as, “One of the greatest Tele players of all time.” Will we hear evidence of this on the new CD?
That was very nice of him. But, yeah, that’s what I’m hoping for, and I think that it’s really extremely well played, if I can say so myself. We all worked really hard on it.
Trovato Gearbox: Here’s what Steve is plugging in, when it’s time to shine.
Country Gigs
Guitars
Amps
Effects
Rock/Blues Gigs
Guitars
Amps
Effects
Steve Trovato: It’s About Time and the new, Country Jazzmaster, are available at: cdbaby.com / myspace.com/stevetrovatomusic
Source: https://mercurymagnetics.com/pages/news/PremierGuitar/PremierG-07.htm
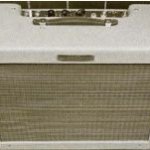
After a hiatus of 45 years or so, Fender has been carefully re-entering the business of building hand-wired tweed amplifiers with the resurrection of the narrow panel ’57 tweed Twin and the ’57 Deluxe. Of course, there are scores of small amps that have been inspired by the Deluxe, and many more 5E3 knock-offs being built today in the “subbooteek” cottage industry comprised of solo solderers who build in their spare time and often put their work up on eBay. For some cost-conscious players, a tweed Deluxe for $600–$800 is a deal that cannot be refused—even if the amp was wired up by an unknown tonehead on a basement workbench in Akron. But Fender is Fender, and while they chose to ignore the thriving boutique market for hand-wired tweed circuits that blossomed in the early ’90s with the appearance of Victoria, they have not forgotten how to put an amp together, and in the case of the Deluxe sent to us for review, it stands apart from all the rest with a very unique voice.
We asked Fender’s Shane Nicholas and Sergio Hamernik at Mercury Magnetics to explain the process of natural selection that evolved during the development of the ’57Deluxe….
TQR: Describe the process in which your design team evaluated various vantage examples of the 5E3 Deluxe, and how widely the actual sound of the vintage amps you listened to varied, specifically?
Shane:There are several guys here at Fender who own old amps, and we also have friends who do. When we were ready to begin the’57 Deluxe project, we brought in a few original vintage examples, and a couple of “boutique” versions of this type of amp. We listened to all of them with various guitars, and listened to each amp chassis hooked up to the others’ cabinets. Keep in mind that every amp—especially 50-year-oldones, will sound a little different than another one of the same model. It’s pretty well documented that Leo Fenders some times changed components “on the fly,” while the official schematic documentation would be updated later. My old Deluxe might have been built with some different stuff than yours, even though they were both “stock” 1957 5E3models. Then add in aging, abuse, repairs, etc., and it’s a wide target that needs to be narrowed. For example, we had one amp here that was much more distorted sounding than the others, so unless you are only laying 1951 Howlin’ Wolfstuff, you probably wouldn’t like that amp as much. For me, the ideal is an amp that gives a beautiful clean tone with the volume set low, and a dirty, harmonically rich tone with the volume set high. You should also be able to set it on, say, “5” and control the amp’s distortion by simply varying your pick attack. We decided that one of the old ’57s was the most desirable example of a 5E3 Deluxe, and we used it as the golden sample.
Once we got to this point, project engineer Nick D’Amato really got down to business. The final schematic and components we chose were basically picked so the prototype would sound as close as possible to our golden sample amp. Obviously, we use new parts, not 50 year old stuff from a flea market or whatever. We also had to make a few changes in order to pass modern worldwide safety regulations; things like shielding, ground wires, and the three-prong power cord, which negated the use of the old ground polarity switch. We put a Standby switch in its place, which is a good thing. These changes don’t really affect tone, but they do reduce hum and improve playability.
We also decided to go with 12AX7s in the preamp, even though the originals were designed with the 12AY7 in the front end. Our thinking was, not only is the 12AY7going to be tough for us to get in quantity, but many players in fact prefer the 12AX7s higher gain. If you are playing ZZ Top stuff, for example, you’ll probably prefer this. The12AY7 will work, however, so some owners will buy one and stick it in their amp.
The transformers are also a crucial piece of the puzzle. We auditioned quite a few prototypes, and some of them were too efficient or too distorted, etc. One of the vendors we contacted was Mercury Magnetics, whom we’ve worked with in the past They sent us five different power and output samples, each based off an original transformer set found in a vintage Deluxe amp. During A-B tests, one of these closely matched the OT in our golden sample amp. We worked with Mercury to make a few tweaks, and soon we were positive we had the right transformers.
TQR: How many different types of speakers did you consider?
Shane: Well, the original Jensen in my old Deluxe really sounds and looks perfect, like you’d expect. We found that the new Jensen P-12Q sounded close enough, so we stopped looking. In my ten years at Fender, I have discovered that no matter what speaker we supply in a tube amp, a certain percentage of customers are going to try something else. Celestion, Jensen,Eminence, and boutique guys like Weber all have their supporters and detractors. It’s human nature to tinker with your machinery, and a speaker swap is one of the easiest mods you can do to an amp.
Now, having said all that here’s where it gets fun. One of the boutique amps we tried happened to have a Celestion Blue Alnico speaker in it, and it sounded very good. So we tried that speaker with our prototype 5E3 amp, and said,“OH MY WORD!” I had heard that speaker before in different amps, but this combination was stunning. The amp became a lot louder, for one thing.We thought for a minute about using this speaker in the ’57 Tweed reissue, but it’s not really the authentic, original sound or look. It’s also a lot more expensive. So, we remained sold on the Jensen, but when we developed our limited edition, black lacquered version—the Fender 57 Amp—we decided to equip it with the Celestion Blue.
TQR: What are the unique challenges involved in building hand-wired amps, compared to those with a printed circuit board?
Shane:Making it look and perform like the old amp while using readily available parts that we can buy in quantity. I am a stickler for performance, but if our customers didn’t care to look inside, we wouldn’t worry about the looks of the components and wire so much. For example, Alexander Dumble told me he likes our new ’57 Deluxe, and was surprised that we used such heavy wire in the chassis, as it’s really not necessary. We can’t pass modern safety regulations using cloth wire, so we got the next best thing. I’d also like to mention that, while we build higher quantities of hand-wired amps than all the other boutique builders, it’s still a very small number compared with the number of PCB amps we build, like our Hot Rod series and all the sold-state models. Our factory estimates about eight times the labor in a Vibro-King versus a ’65 reissue amp with a PCB.
TQR:We would assume that Fender has a separate group of employees devoted to building the hand-wired amps.
Shane: We do have the hand-wired team in a separate area in the factory. They are highly trained, patient employees who take a lot of care with these amps. Most of them are women, same as Leo’s day, maybe because they tend to be more patient than us dudes. And women’s hands tend to be smaller, making it easier for them to run wires and solder connections in the tight confines of the amp chassis. I don’t know the training regimen off hand, but I believe many of them cut their teeth on guitar wiring before moving on to amplifiers.
TQR: With the tweed Deluxe in production, are there plans to develop additional hand-wired Fender models of the past?
Shane:Yes. The list of great old Fender amps begging for reissue is a long one!
In case you don’t know, Mercury is known for having acquired and cloned hundreds of stellar vintage transformer sets that com-prise their ToneClone and Radiospares series…
TQR: How did you become involved with the development of the 5E3 specifically?
Sergio: It call came about as a follow up to the ’57Twin-Amp reissue project that we were a part of a few years ago. Mercury designed and supplied Fender with the transformers for those amplifiers, which was a very successful endeavor—so much so that Eric Clapton made them his main amps for his own tours and the Cream reunion tour.The momentum started by the ’57 Twin-Amp project quickly created a demand for some sort of follow-up amp in this positive vibe, and Fender’s decision to reissue the 5E3tweed Deluxe came as good news to us. It is probably the most copied circuit on the planet, and I couldn’t think of abetter project to sink our tranny designer teeth into.
Years ago the late Ken Fischer, of Trainwreck, told me that the Deluxe was an early inspiration for him to get into amp building. He went as far as to refer to the Deluxe circuit as the cornerstone of the boutique market. It’s a truly different dynamic when the company that started it all wants to reintroduce a benchmark in amplified guitar tone, and especially when their goal is to make the amp sound as fresh as it did when it was first launched. We’ve worked for decades acquiring our extensive library of transformer designs that originate from variants of pre-production to pilot runs of many vintage amps, so amplifier companies often consult with us because we’re a small but dedicated group just nutty enough to be the conservators of such things.

Q: I have a 1993 Fender Blues Deluxe reissue and I love the tone but want just a little more clean headroom — maybe 50-60 watts instead of the 40 watts that the amp is rated at. I was wondering if it is possible to change the output transformer on this amp to give me an extra 10 watts or so? — Michael Cadó
A: Good question! The succinct answer is no, but there actually may be some benefit. Let me explain.
The output power of a tube amplifier is not totally determined by the output transformer, but also by the power, or mains transformer, and the voltage and current it supplies to the output tubes. The job of the output transformer is to take the power developed by the output tubes and convert it to a form that is usable by the speaker. The problem with replacing just the output transformer with a larger one is that there is simply no more power available from the power transformers and tubes to convert to more output.
However, occasionally there is a perceived increase in output when a larger output transformer is installed in an amplifier. To substantiate this, I contacted my friends Paul and Sergio at Mercury Magnetics, manufacturers of some very cool iron. Here’s what they had to say:
“By starting with the right transformer, or upgrading an inferior transformer, a player can get more out of the amp and experience extended clean-tone headroom and a noticeable presence of a bigger sound stage effect. Increasing an output transformer’s frequency and tonal capacity with more of the right kind of iron and copper will result in more inductance to the primary winding. It’s this inductance that has a profound effects on the tone and how large it sounds.”
In plain English, a larger and better quality output transformer will generally make an amp sound bigger, without actually having any additional output power. This is especially true with amplifiers that have output transformers designed to be just big enough to get the job done — a design theory that, I might add, is pretty foreign to us here at Budda. We believe in the concept of “bigger is better” and “size does matter.” (Ha, ha.)
The bottom line is you could have the output transformer in your Deluxe replaced with a larger capacity output transformer such as its big brother the Deville, or an even better upgrade transformers from Mercury, and hope that it achieves the results you desire. This modification, however, is not for the inexperienced as the PC board needs to be lifted and additional mounting holes drilled. Of course, you could go all the way and have the mains transformer replace with a Deville or upgraded transformer as well. This again is not for the inexperienced as the chassis cutout needs to be enlarged — but according to the original ’93-’94 schematics, the circuits are virtually identical, so you could have yourself a 60-watt amp in a 40-watt body, except for the 50-watt speaker.
Good luck, and have fun crusin’ with your new Deluxe Deville.
Source: https://mercurymagnetics.com/pages/news/PremierGuitar/PremierG-06.htm
To a certain degree, the Vintage Vacuum Tube Amplifiers’ Rick Derringer Hyperdrive model was born of intimidation. When VVT proprietors Tony Albany and Jim Hill began discussing a signature amp head with a guitarist Rick Derringer, whose style can shift from hard rock to blues to jazz, they figured they’d have their hands full. Derringer was already the proud owner of two VVT 6V6-based amps, but he needed something with more power for live gigs, two channels, and most important, something that could produce high gain without buzz. After testing a prototype four-6V6-powered head designed for him by Albany, Derringer was satiated, and suggested only a few cosmetic changes and the addition of a boost circuit. The VVT Rick Derringer Hyperdrive was born!
The amp uses three JJ/Tesla 12AX7tubes in the preamp (phase inverter/clean channel/OD channel)and four JJ/Tesla 6V6 power tubes producing 45 watts. It has two footswitchable channels (with footswitchable pre-amp mid boost in both channels) and the high-quality components and construction we’ve seen in other VVTamps. Including point-to-point wiring, Mercury Magnetics transformers carbon composition resistors, and an aluminum chassis.
The Hyperdrive’s clean, eye-catching aesthetics include an ivory-Tolex-covered cabinet that measures20”x9”x8”, brushed-copper control panels, copper-finished vent panels,solid cherry-wood trim and a stitched leather handle (options include black Tolex and figured maple wood trim). The front-panel includes controls for Gain and Level for the Overdrive channel, a Volume control for the Clean channel, shared Bass, Middle, Treble,and Presence controls for both channels, as well as a Master Volume control, mini-toggle switches for channel-switching and boost, and Power and Standby switches. The back panel hosts a power-cord plug, primary fuse holder, XLR footswitch jack, and four speaker-out jacks.
With the OD channel Gain and Level controls set at 8 and the Master Volume at straight-up 12 o’clock, the Hyperdrive’s overdrive channel offers a thick, harmonically rich overdrive with plenty of classic rock crunch as well as a plentiful amount of gain. Even when the Gain is dimed and Level set to 10,the amp’s high-end response never becomes harsh or buzzy and the low-end stays firm, maintaining its clarity while sustaining single notes and rolling into controllable, singing feed-back with the mid-boost engaged. The well-voiced Tone controls need be used only sparingly—between 2 o’clock and10 o’clock—to adjust for the output of humbuckers or single-coils.
The clean channel produces a usable, sparkling clean sound,and the amp’s ability to switch between a shimmering clean and blistering overdrive is handy, but given the Hyperdrive’s excellent front-end dynamic response, the majority of the players would really need only to roll off the Volume control on their guitars. The integrated/footswitchable Boost circuit essentially eliminates the need for a drive/distortion pedal, and adds just the right amount of gain and midrange to make single notes pop. A pleasant surprise is how loud and in-your-face the Hyperdrive’s gain can be without causing significant ear fatigue; its abundant natural overtones make it much less trashy-sounding than typical high-gain amps.
The Rick Derringer Hyperdrive,with its well-conceived design, harmonically rich tone, and cool vintage aesthetic, is an outstanding addition to VVT’s lineup.—Phil Fe
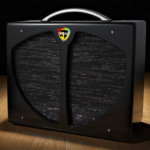
Fender ’57 Amp at-a-Glance:
New look, classic tone
Handwired all-tube design
Limited run of only 300
Fender kicked the 5E3 Deluxe platform up a notch by using a Celestion Alnico Blue speaker in a new custom-designed maple cabinet with knurled ’57 logo knobs, solid aluminum handle and custom hardware. The amp includes a leather collector’s portfolio containing a certificate of authenticity, designer notes, factory photos and some other surprises. Custom-embroidered plush-lined cover included.
Limited run of only 300
Being a reissue of a classic Fender tube amp from the ’50s, the ’57 Amp was already certain to have an almost immediate cult following, but the fact that Fender is only building 300 of these beauties ensures that the ’57 Amp will be a hot commodity.
A revamped Fender ’57 tube amp chock full of tone!
The Fender ’57 Amp is a reissue of the revered Tweed Deluxe, an amp with the classic tone that helped propel Fender tube amps to top of the “most wanted” list of guitarists the world over. Each of these all-tube beauties is handwired and built within a solid maple cabinet with a black “piano lacquer” finish.
The ’57 Amp is built around a custom set of Mercury Magnetics transformers and loaded with a pair of 12AX7 preamp tubes and a matched set of 6V6 output tubes driving a 12″ Celestion Alnico Blue speaker. The ’57 Amp is handwired with all tube circuitry on an eyelet board with a late 1950s 5E3 circuit pumping out about 12 watts of true Fender tube tone. Tube tweakers and vintage enthusiasts can swap one of the 12AX7s for a 12AY7 to capture the lower-gain tone of the original Tweed Deluxe from the ’50s. Fender also thoughtfully incorporated a 5Y3 rectifier tube, which contributes to natural tube compression and “sag” when the amp is pushed harder. The ’57 Amp is a must have for Fender fans!
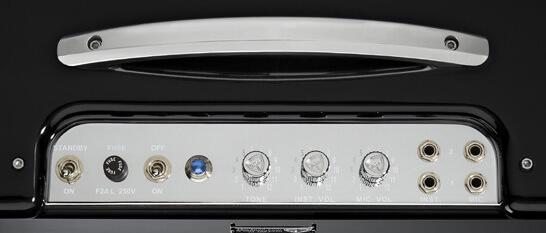
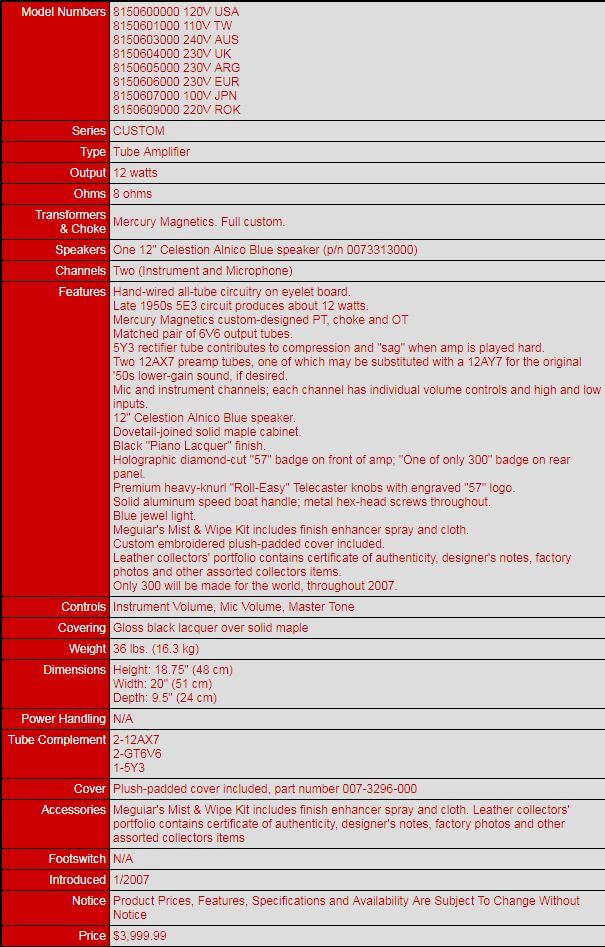
For more information, assistance, quotes or inquiries:
Source: https://mercurymagnetics.com/pages/news/misc/57Amp-Deluxe.htm
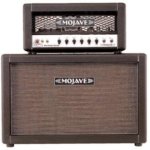
Anyone familiar with Mojave Ampworks founder Victor Mason’s other venture — a California dealership of vintage British amplifiers known as the Plexi Palace — will be aware of this amp maker’s fanaticism for classic Marshall-style tones. The Scorpion outwardly appears to take a serious stab at satiating that craving in a modern package, but don’t be too quick to label this 50-watter as simply a Marshall plexi update. While the Scorpion certainly aims squarely at the big Brit-rock tones of the late 1960s and early ’70s, it’s nowhere near to being a clone, and the design has enough clever twists to make it an entirely original creation. Although nominally a 50-watter, the Scorpion aims to provide big-box 100-watt sound and feel in a small package.
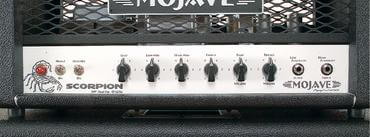 The core of the Scorpion’s sonic DNA revolves around that big, crunchy, dynamic EL34 sound with the characteristically thumping lows and singing highs. But this model redraws the roadmap that takes you there, and adds plenty of new ingredients in the name of versatility. Mojave keeps the adjustable fixed-bias output stage with a dash of negative feedback, cathode-follower tone stack, and solid-state rectification that partly define the post-1967 Marshall 50-watters, but re-labels the tone stack as Bass, Low Mid, High Mid, and Treble, with High Mid taking the job of a Presence control. It also employs a nifty trick in the preamp stage that has become something of a Mojave standard: internally ganging together two different first gain stages comprised of an independent, parallel-wired twin-triode 12AX7 for each—one voiced to emphasize bass, the other to emphasize treble—and providing a Volume control for each so you can blend them together. This is not a master volume amp, but it carries a Power Dampening control on the back panel that governs a unique proprietary circuit that reins in volume levels at the output stage, allowing you to take the Scorpion from 50 watts down to 3 watts, and anywhere in between. Other features include High and Low Sensitivity inputs, and a back panel 1/4″ Line Out jack with a Level control and ground lift alongside dual 8- and single 16-ž outputs.
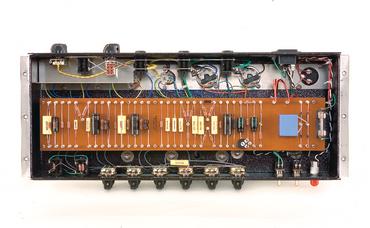 As alluring as it might be from the outside, much of the Scorpion’s appeal reveals itself when you pull the chassis from the cab. This amp is hand built to some of the most exacting standards found in the market today.
Powder-coated black metal grilles protect components front and back, and the brand is boldly represented by an acid-etched aluminum nameplate. The rugged turret board follows a linear layout from input to output stage, and the flying-lead connections to transformers, potentiometers, switches, and tube sockets (all chassis mounted) are made with Teflon-insulated, silver-plated copper wire. While many amp makers swear by old-style carbon comp resistors for “warmth” and “vintage authenticity,” Mojave uses high-grade metal film resistors because they can be obtained in more precise values, and generally result in a lower noise floor. These share the board with Sprague filter capacitors and custom-made, one-percent tolerance film and foil polypropylene signal capacitors. Transformers are all custom made for Mojave by the highly regarded Mercury Magnetics company, and the whole shebang is bolted together in a reinforced aluminum chassis. Finally, the output transformer presents a novel twist on the classic 50-watter formula, as Mojave has spec’d it for “triple-capacity,” which can handle as much as three times the Scorpion’s 50-watt output. This approach can achieve the response of a 100-watt stack in a smaller amp, resulting in firmer lows and remarkable headroom.
Our review sample came with the 2×12 semi-open-back cab loaded with Celestion G12H-30s, but a closed-back 4×12 is also available for $985 retail. The cabinet is a robust, yet portable unit with a single, recessed handle positioned top center.
I tested the Scorpion with a range of guitars, including a Fender Stratocaster and a Telecaster, a Gibson SG Special, and a PRS Singlecut Trem. The overriding impression this amp left with me was one of power, body, and massive volume — even with single-coil pickups. This is one massive sounding amplifier, and Mojave has certainly achieved the goal of attaining 100-watt-style performance in a 50-watt package. It delivers a wide, blooming soundstage with tight, but not overly booming lows, a thumping midrange, and glittery, yet nicely recessed highs. In short, you get broad, punchy, in-your-face dynamics across a frequency spectrum that’s very flattering to rock guitar.
With the Strat and Tele, the Scorpion exhibited stunning clarity and superior headroom up to about a ten o’clock position of the Volume controls, at which point it was already too loud for home studios, basement rehearsals, and many club gigs. Humbuckers and P90s brought out the raunch a little sooner. Roll it up from there, and you segue through toothsome crunch to absolutely screaming lead tones — both of which are easily cleaned up at the guitar’s Volume control. This is the fat, tactile, airy, classic sound that arena-rock dreams are made of, and when you get the volume up anywhere from one to five o’clock, it’s a rare and spine-chilling experience to just stand in front of this rig and wail. Tweak the EQ to taste, put a booster or distortion pedal in front of it as desired (all of which this amp handles very well), and there’s very little in the broad fields of rock, blues-rock and metal that it can’t do.
That said, the trend these days is toward downsizing, and plenty of players are looking for amps that sound like cranked 50-watters in 15-watt packages, not 50-watters that sound like a 100-watters. The Scorpion’s Power Dampening control is a cool feature that brings levels down as much as you’d like, but it does color the tone a little bit, and you also need to dial down the Volume controls to retain similar headroom at lower volumes. In short, this powerful monster is most cut out for serious rockers who expect to put in most of their playing hours on large stages.
The Scorpion also sounded fantastic through the 2×12 cabinet, which seemed to take everything I could throw at it without breaking a sweat. But if you plan to play this amp toward max in big venues, you might consider pairing it with Mojave’s 4×12 cab. I ran the Scorpion through a custom 4×12 with G12H-30s in my rehearsal space, and it proved an equally thrilling endeavor, with that huge kick in the gut that lets you know you’re pushing a lot of air. However, it wasn’t demonstrably louder than Mojave‘s very efficient, compact open-back 2×12, so the choice is yours. But whatever you blast it through, this is an extremely accomplished-sounding, as well as a stunning piece of craftsmanship.
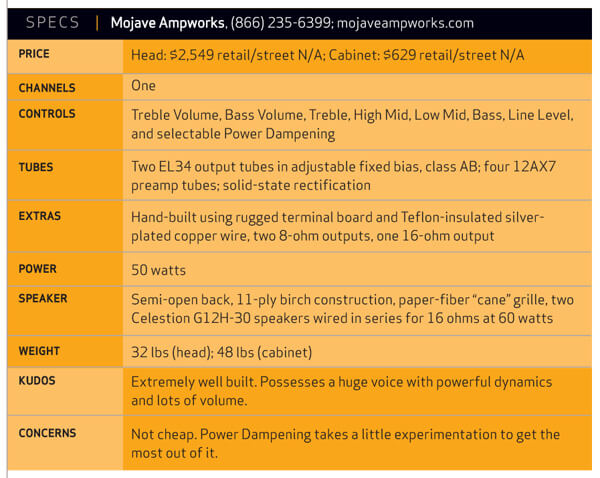
![]()
Source: https://mercurymagnetics.com/pages/news/GuitarPlayer/GPAug07.htm

 To honor and support the philanthropic efforts of legendary guitarist Eric Clapton, Fender is collaborating with Clapton to create a very special limited edition guitar and amp package featuring the new Eric Clapton Crossroads Stratocaster guitar and Crossroads ’57 Twin-Amp.
The Eric Clapton Crossroads Stratocaster guitar, or “Sun Strat” will be produced in a limited run of 100 instruments globally; the Crossroads ’57 Twin-Amps will number only 50. All profits from the project will benefit the Crossroads Centre, Antigua, the drug and alcohol addiction rehabilitation facility founded by Clapton on the small, idyllic Caribbean island in 1998.
Fifty of the guitars will be paired with the amps in exclusive Crossroads platinum packages for $30,000 each. The other 50 Crossroads guitars will be offered in packages for $20,000 each. The on-sale date is July 20, 2007 exclusively at www.fender.com—only eight days before Clapton’s monumental Crossroads Guitar Festival 2007 in Chicago on July 28.
While Fender has a long tradition of producing world-class signature series instruments with top musicians, this latest venture represents an extraordinary collaboration. Fender Custom Shop Master Builders have dedicated meticulous effort to reflect the spirit of Clapton’s artistry and philanthropy. Each guitar will be crafted to Clapton’s specification and bear a unique “Crossroads Antigua” graphic designed and originally hand-drawn by Clapton himself.
Fender’s Mike Eldred with an Eric Clapton
Crossroads Stratocaster and matching ’57 Twin-Amp
during taping of a segment for Chicago megastation WGN.
The commemorative Crossroads ’57 Twin-Amps are modeled after the original ’57 Twin — one of the most collectable amps of all time — with the classic Fender sound and design that made them so desirable. This limited-edition amplifier features a custom engraved commemorative “Crossroads 2007” badge autographed by Eric and his “Crossroads Antigua” graphic is artistically embedded on the grill cloth.
[Editor’s note: The amp’s Mercury Magnetics transformers and choke are exact clones of an exceptionally clean, vintage low-powered Tweed Twin from Fender’s private collection.]
“We are extremely honored to work with Eric on these limited edition Crossroads guitars and amps,” said Mike Eldred, Fender Custom Shop director. “At its essence, this is a passion project that allows Fender to support the Crossroads Centre, Antigua and to show our great love and appreciation for Eric.”
The Crossroads platinum package is highlighted by the Crossroads Edition ’57 Twin-Amp — the perfect sonic companion to the Crossroads guitar. The Fender ’57 Twin-Amp is Eric Clapton’s personal amp of choice for studio and stage use. This unique Crossroads premium package will also include a guitar certificate signed by Clapton; an official Crossroads tour laminate, set list and program book; Clapton guitar picks; a commemorative Crossroads guitar strap and a framed, limited edition art print of the Crossroads instrument package.
Fender has been known worldwide for half a century as a company with a spirit and tradition of pioneering innovation. That spirit and tradition is newly revitalized in this project, bringing together an incredible collaboration of passionate guitar players to create products to satisfy one of the ultimate guitar players of all time — Eric Clapton, an artist with his own tradition of pioneering innovation and social consciousness.
About Crossroads Guitar Festival 2007: Clapton’s Crossroads Guitar Festival 2007 takes place July 28 at Chicago’s Toyota Park, with a stellar lineup of blues and rock performers including Clapton, Jeff Beck, Sheryl Crow, Vince Gill, Buddy Guy, B.B. King, John Mayer, Willie Nelson, Steve Winwood and many others. The 28,000-capacity event sold out in only 15 minutes. As with the first Crossroads Guitar Festival, held in June 2004 in Dallas, proceeds from the concert benefit the Crossroads Centre, Antigua.
About Crossroads Centre, Antigua: Founded in 1998, Crossroads Centre, Antigua was created to provide treatment and education to chemically dependent persons, those with other compulsive addictive behaviors, their families and their significant others. Treatment is provided through residential care, family and aftercare programs. The pathway to recovery is founded on the movement toward a change in lifestyle. Crossroads Centre, Antigua also operates a 16-bed halfway house in Antigua called the Bevon House (exclusively for Antigua residents) and facilitates a school-based education series, Breaking the Cycle, in all Antiguan schools. The Crossroads Centre has recently expanded its program to offer transitional living for men, in line with the Crossroads Centre’s philosophy on recovery, at The Sanctuary in Delray Beach, Florida, for those who have completed a residential treatment program. For more information, visit www.crossroadsantigua.org.
For more information, visit: www.fender.com.
About Fender Musical Instruments Corporation: Fender Musical Instruments Corporation (FMIC) is the world’s foremost manufacturer of guitars, amplifiers and related equipment since 1946, and its name has become synonymous with all things rock ‘n’ roll. Iconic Fender® instruments such as the Telecaster®, Stratocaster®, Precision Bass® and Jazz Bass® guitars are known worldwide as the instruments that started the rock revolution, and they continue to be highly prized by today’s guitarists and collectors. FMIC brands include Fender®, Squier®, Guild®, Gretsch®, Jackson®, Charvel®, SWR®, EVH®, Tacoma®, Olympia® and Brand X®.
Fender Crossroads Specialty Site: www.fender.com/crossroads.
Source: https://mercurymagnetics.com/pages/news/GuitarPlayer/GPJun07.htm

To honor and support the philanthropic efforts of legendary guitarist Eric Clapton, Fender® is collaborating with Clapton to create a very special limited edition guitar and amp package featuring the new Eric Clapton Crossroads Stratocaster® guitar and Crossroads ’57 Twin-Amp™.
The Eric Clapton Crossroads Stratocaster guitar, or “Sun Strat®” will be produced in a limited run of 100 instruments globally; the Crossroads ’57 Twin-Amps will number only 50. All profits from the project will benefit the Crossroads Centre, Antigua, the drug and alcohol addiction rehabilitation facility founded by Clapton on the small, idyllic Caribbean island in 1998.
Fifty of the guitars will be paired with the amps in exclusive Crossroads platinum packages for $30,000 each. The other 50 Crossroads guitars will be offered in packages for $20,000 each. The on-sale date is July 20, 2007 exclusively atwww.fender.com—only eight days before Clapton’s monumental Crossroads Guitar Festival 2007 in Chicago on July 28.
While Fender has a long tradition of producing world-class signature series instruments with top musicians, this latest venture represents an extraordinary collaboration. Fender Custom Shop Master Builders have dedicated meticulous effort to reflect the spirit of Clapton’s artistry and philanthropy. Each guitar will be crafted to Clapton’s specification and bear a unique “Crossroads Antigua” graphic designed and originally hand-drawn by Clapton himself.
 The commemorative Crossroads ’57 Twin-Amps are modeled after the original ’57 Twin — one of the most collectable amps of all time — with the classic Fender sound and design that made them so desirable. This limited-edition amplifier features a custom engraved commemorative “Crossroads 2007” badge autographed by Eric and his “Crossroads Antigua” graphic is artistically embedded on the grill cloth. The Crossroads ’57 Twin-Amps come factory-equipped with Mercury Magnetics (www.MercuryMagnetics.com) transformers.
“We are extremely honored to work with Eric on these limited edition Crossroads guitars and amps,” said Mike Eldred, Fender Custom Shop director. “At its essence, this is a passion project that allows Fender to support the Crossroads Centre, Antigua and to show our great love and appreciation for Eric.”
The Eric Clapton Crossroads guitar is, of course a Stratocaster; an instrument indelibly linked with Clapton. It’s an elegantly enduring design classic that was so right the first time out in 1954 that it has existed unchanged ever since, along the way becoming a worldwide cultural icon in singing, howling, lilting and even screaming ways its creators couldn’t possibly have imagined.
Master-Built in Fender’s Corona, Calif., Custom Shop, the Eric Clapton Crossroads Stratocaster guitar was created with Clapton’s own guidance and supervision by the very same artisans who handcraft Eric’s personal instruments. The arm-contour upper body flank features a smiling sun “Crossroads Antigua” graphic hand-drawn by Clapton himself. The guitar comes in a custom Anvil® flight case and includes a certificate signed by Eric.
The Crossroads platinum package is highlighted by the Crossroads Edition ’57 Twin-Amp — the perfect sonic companion to the Crossroads guitar. The Fender ’57 Twin-Amp is Eric Clapton’s personal amp of choice for studio and stage use. This unique Crossroads premium package will also include a guitar certificate signed by Clapton; an official Crossroads tour laminate, set list and program book; Clapton guitar picks; a commemorative Crossroads guitar strap and a framed, limited edition art print of the Crossroads instrument package.
Fender has been known worldwide for half a century as a company with a spirit and tradition of pioneering innovation. That spirit and tradition is newly revitalized in this project, bringing together an incredible collaboration of passionate guitar players to create products to satisfy one of the ultimate guitar players of all time — Eric Clapton, an artist with his own tradition of pioneering innovation and social consciousness.
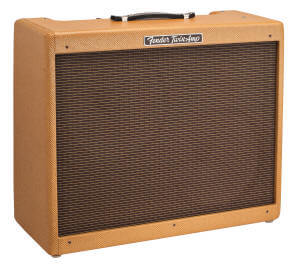 About Crossroads Guitar Festival 2007: Clapton’s Crossroads Guitar Festival 2007 took place July 28 at Chicago’s Toyota Park, with a stellar lineup of blues and rock performers including:
The 28,000-capacity event sold out in only 15 minutes. As with the first Crossroads Guitar Festival, held in June 2004 in Dallas, proceeds from the concert benefit the Crossroads Centre, Antigua.
About Crossroads Centre, Antigua: Founded in 1998, Crossroads Centre, Antigua was created to provide treatment and education to chemically dependent persons, those with other compulsive addictive behaviors, their families and their significant others. Treatment is provided through residential care, family and aftercare programs. The pathway to recovery is founded on the movement toward a change in lifestyle. Crossroads Centre, Antigua also operates a 16-bed halfway house in Antigua called the Bevon House (exclusively for Antigua residents) and facilitates a school-based education series, Breaking the Cycle, in all Antiguan schools. The Crossroads Centre has recently expanded its program to offer transitional living for men, in line with the Crossroads Centre’s philosophy on recovery, at The Sanctuary in Delray Beach, Florida, for those who have completed a residential treatment program. For more information, visit www.crossroadsantigua.org.
Source: https://mercurymagnetics.com/pages/news/misc/crossroads07/index.htm

I’m a player from Los Angeles. Even though I endorse companies like Framus and Brunetti amps, who both make fine equipment, I still rely on Marshalls for some of my favorite tones.
Last month I went on a quest—how can I make my “road-dog” amp, a Marshall JCM DSL 2000, play like my vintage 30+ year old Plexi (which stays home, of course!)?
Well, first I got a tech to change a couple little things: resistors out from the volume pot, a couple of changes with the EQ resistor’s values, etc. This made a bit of difference. Then I played with a variation of power and preamp tubes, from different companies (GT, JJ and Tesla) until I found the combination I liked best. This made a perhaps 25% difference. I was happy, but still searching for that missing ingredient because the Plexi had… well, more of everything, including more power, more clarity, faster response and fuller overall frequency. So, I kept fishing around on the web and by chance hit upon a review for Mercury replacement transformers.
As luck would have it Mercury is located 5 minutes from my home! I thought I had nothing to lose by replacing the transformers since it’s usually a fast and easy tech operation, so I went to see them.
Along with their technical knowledge, what struck me instantly was their level of care and enthusiasm. Mercury’s Sergio Hamernik explained that I could do more than upgrade the existing power and out-put trannies, such as add a real choke to the circuit, like the original Marshalls(the stock DSL has a cheapy resistor instead of a choke).
Although Mercury had something special in mind, I had a gig in a couple of days, so we decided to only replace the output tranny (OT)—then finish the job later. Not all transformers are the same within any model (or year) of amplifier, and in many cases there are radical differences. Mercury makes a particularly outstanding drop-in output that would help the JCM’s sound. Although it was a temporary “patch”this change gave me the chance to feel, let me repeat, f-e-e-l the amp at my gig, and I was positively surprised by the how it reacted and sounded. Simply stated, the improvement with the feel and tone was 50%. After the gig Mercury went to work on my amp by liter-ally re-engineering new power and output transformers specifically for the DSL. The power transformer(PT) utilizes their new “SuperStack” technology (it’s huge and looks like a skyscraper in there!) that completely eliminated the amp’s tendency to overheat! They also modified the circuit by adding a choke. The final result was nothing short of a revelation! The amp has more power, better tone, faster response, wide palette of frequencies… it has more of everything!
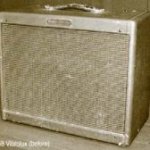
Finding and restoring old amps and cabinets is a slow process that demands patience. From the time we first began trolling eBay, ultimately scoring a tweed Vibrolux and Tremolux, to final delivery of the aged cabinets and assembly of the amps, six months had easily passed.
We first found and bid on a ’58 Vibrolux in September ’06. Sold by an eBay seller in Texas, it had been recovered in reddish-brown cloth similar to the stuff used to cover hymnals or a bad ’60s pleather recliner for the double-wide. Otherwise, it was pretty straight, with the original blown Jensen P10R intact, and the original transformers, caps and resistors. The inside of the cabinet had been painted black, but the cabinet, grill cloth, baffle and control panel were otherwise intact, and the wooden tremolo footswitch was included. We bought the Vibrolux for $1,590.00 with 4 bids placed.
Inspired by Larry Cragg’s detailed description of Neil Young’s tweed Tremolux, a1958 Tremolux surfaced on eBay in November 2006, and we scored it for just $1,082.00 from a seller in San Francisco. We suppose this amp was so cheap because the output transformer had been replaced, and the cabinet had been completely stripped and stained mahogany brown. The original speaker mounting screws in the baffle board were about to fall out. However, the original Tremolux circuit was well-preserved, and a small strip of tape remained in the chassis signed in a delicate hand by “Lilly” – one of the many women in Fullerton employed to assemble amplifiers like the Tremoluxin 1958. God bless her. The Tremolux also arrived with the original wooden foot switch.
The Vibrolux kicked some serious tail right out of the box. We send the original Jensen P10R to John Harrison at A Brown Soun (www.abrown.com) for a re cone, mounting a1965 Jensen C10Q sent by Larry Pogreba in its place – a very stout choice and original equipment in early blackface Vibrolux Reverb amps. Like the Tremolux, the tremolo circuit in the Vibrolux required some TLC,with four caps needing replacement to restore the swampy oscillator circuit to full wobble-weave. We also replaced all the newish tubes with NOS RCAs, Philips and GEs. Once we had the amp mounted in the restored and aged cabinet, we were throwing down hard with our No caster nightly, wallowing in the big sound coming from such an innocent-looking little biter, when the original output trans-former gave it up in a final, glorious gasp. A quick call to Mercury Magnetics produced a ToneClone replacement within a week and we were soon back in business,sounding better than ever.
The 10 watt, 3-input ’58 5F11 Vibrolux is housed in the same cabinet Fender used for narrow panel tweed Deluxe– a fat little featherweight with greasy tremolo and a smooth bark tailor made for a Telecaster. And 10 watts may be the perfect power notch for low-volume home recording and jamming – crystal clear, bright and drenched in gorgeous Fendery overtones at low volume (3-5), and absolutely on fire from 7-10. In all respects, the 5F11 Vibrolux is a big amp in a small package worth pursuing for its outstanding tone and personality at truly usable volume levels.
We were amazed by how Gregg had managed to remove every trace of black paint that had been sprayed inside the cabinet, and his aging job, complete with three coats of amber stain and lacquer, faint water stains along the bottom,worn seams and corners, aged L&L leather handles and scorch marks from the power tubes on the inside of the back panel were flawlessly conceived and applied. Hopkins even recreated the original tube chart with a 1958 date code after requesting that we send him the chassis number and power transformer EIA code for production verification. When we brought the restored Vibrolux to Jeff Bakos’ shop (www.bakosampworks.com), he looked it up and down as it sat on the floor of his workshop, peered into the back and said, “That is totally sick.”
The ’58 Tremolux provided a further study in what can be involved buying 40 year-old amps. Upon arrival,the amp was really smokin,’ even with the Jensen hangin’ off the baffle board. The tremolo was DOA, however, so while the stripped cabinet was getting the spa treatment in St. Louis, Jeff replaced two caps in the trem circuit, we replaced the already replaced output transformer with another from Mercury Magnetics, and stored the chassis away until we received the finished, aged Tremolux cabinet from Gregg in late March ’07.
The 5E9A (’55-’56) and 5G9 (’57-’60) Tremolux are housed in the same taller, wider cabinet Fender used for the 1×15 narrow panel tweed Pro,and the later 5G9 circuit is quite different from both the 5E3 Deluxe and the ’55 5E9ATremolux, being fixed rather than cathode biased, employing a long-tailed phase inverter common to the bigger narrow panel tweed amps, and the addition of an extra filter cap and choke enabled the power to be increased from 15W to 18W in 1957.
Compared to the narrow panel tweed Deluxe and the 5E9 Tremolux, the 5G9 Tremolux develops more volume and headroom, and should you chose to replace the 12AY7 preamp tube with a 12AX7, gain is further increased (it’s already righteous with the 12AY), while the bigger 10” x22” x 10” cabinet produces a much rounder, warmer tone with superior ambience and presence. In the month or so since we’ve had the Tremolux put together in the restored cabinet, a new Tung Sol6V6 blew (after we had opted not to use a couple of spare ’50s RCAs for safety – they are in the amp now and killin’ us with bogs of good thang),and we just took the amp back to Jeff when it began spitting some nasty distortion provoked by low frequencies from the guitar. Turned out to be a few bad solder joints.
Like the Vibrolux, Gregg had stopped short of creating a “3-legged dog with an eye patch,” taking the aging to a moderate level with frayed edges and seams on the amber tweed, a single beer can ring on the top with a foam overflow stain running down the grill cloth, a slight orange stain on one side from pine knot bleed, and assorted scuffs and light abrasions. He also repaired the baffle-board, filling in the old holes for the speaker mounting screws.
We hate doing this to you (again), but truth be told, we have to give the nod to the Tremolux as the most toneful and inspiring amp in its power class (18 watts)that we have ever heard or owned. It’s ascension to Numero Uno status was a bit of a surprise, but then again, we considered the initial source of our inspiration for finding one – Neil Young, via his tech, Larry Cragg, and in hindsight we should have expected as much. With all the attention paid to the tweed Deluxe as the big time bonerizer of the tweed family, the Tremolux seems to have been overlooked for the usual reasons…. In the nose-to-butt-crack daisy-chain march to mediocrity, the masses never seem to acquire a view beyond the first lazy dumb-ass directly in front of them. In the immortal words of the great hoosier educator and smack-down artist Earl Dosey, they are “stepping’ over dimes to pick up nickels.” Let’s hope the lemmings continue to keep their heads down.
So here’s the move…. Sad as we are to share this, our strategy was as obvious as it seems. Forget about original speakers, don’t let a replaced tranny run you off (we’ve never replaced one with a Mercury that didn’t sound better than the original), and deliberately track down the fuglies told girls you can find from the tweed era. Busted baffle boards? We luv that….Ricky-ticky cabinets are good, and the coverin’ don’t matter. What you want is a beater with a totally neglected chassis and as many of the original fat Astron caps and original resist or present as possible. Yeah, some of them may have to be replaced, but it’s far better to allow a prudent and judicious amp tech determine that rather than buying an old amp that has been raped by a hard chargin’ cowboy hooked on Sprague Orange Drops.Buy one of those and your old amp will sound new,never to sound old again, and that’s most definitely not the play you want to make here. A little component drift is good.
There is luck involved, too… not all vintage amps were created equal. Some of them left the birthing bench endowed with incredible tone – a happy accident created by the melding of variable components that resulted in extraordinary sounds. Others were created by the same roll of the dice, but with a different outcome altogether – mysteriously dull, flat, or simply lacking whatever you wish to call it… that tone, mojo, bloom, the harmonic complexity of your first Schlitz, depth, fatness… whatever. To experience the blissful afterglow of unanticipated discovery, you must be willing to risk something, which is another way of saying that faith must be exercised in the absence of a guarantee. In this respect, buying old amps is a lot like life itself…. The greatest obstacle to discovery is the flawed perception of an impossible challenge. And the window of opportunity is closing on these great old amplifiers faster than you may think. Like vintage guitars, the best old amps are being taken out of circulation by col-lectors willing to pay prices that are based on potential future value (more than they are worth today, perhaps, but less than they will be worth tomorrow). For you, hombre, the time to bust a move is now.

We asked Benjamin Fargen and Mike Piera to comment separately on the development of the Weider Signature amp. Our review follows their interviews…
TQR: Briefly describe the process that was involved dialing in the tone of the amp—how you achieved the higher threshold of clean headroom and power in Channel One, and the Distortion Channel.
Fargen: I built the original JW-40 prototype amp for Jim in late 2004 and it was tweaked over the course of two years as Jim played shows to support his album Percolator. I flew back to New York three times during the process for lone three day weekends of tone tweaking, listening and catching Jim at some live performances. Our job was to outperform Jim’s favorite, modified blackface Deluxe Reverb, which had been his main amp for many years—not an easy task since the amp has some very special qualities that were essential to capture while retaining Jim’s signature sound. We also matched it up to many other vintage Fenders and other high end amps that were in the same league, and when we finally surpassed all of them in tone and clean sustain, we knew we had a good design.
The original prototype amp had less headroom, so we decided to go with a slightly higher B+ voltage to squeeze at ad more headroom out of the amp for larger rooms and outdoor shows. We sorted through many different power transformers, output transformers and chokes from Mercury Magnetics before we found the correct match, and the feel and sound we were looking for.
TQR: The reverb seems to “sit” very nicely in the mix—not too splashy or pingy, and it doesn’t add any unwanted overtones. Did you do anything unusual in designing it?
Fargen: It’s similar to a classic Fender-style reverb with some tweaks to the overall EQ and the amount of return level reverb. I feel that the stock Fender design places too many mid and low mid frequencies in the mix,and I prefer more of a high end sparkle for the reverb to stand out. But the biggest problem with a stock Fender-style reverb is the way it can sometimes walk all over the note rather than work with it. The overall amount of reverb you allow to return to the recovery circuit is very critical to obtain a great sound.
TQR: Describe the Slope feature.
Fargen: The slope feature changes the overall frequency response of the EQ circuit to achieve greater flexibility when matching up different guitars and pickups with the JW-40. Jim and I felt it was nice to have other tonal options that changed the overall wide or narrow” character of the EQ structure. This came in really handy when switching between single coils and humbucking pickups.
TQR: Can you briefly summarize the effect the O-rings on the power tubes seem to have on the sound of the amp?
Fargen: The power/preamp tube dampening rings not only help to suppress micro-phonics and tube rattle, but they seem to produce a tighter sound with a very extended low end range. I find they are very useful for thickening up your amp tone at lower volumes, but some players may want to remove them for higher volume levels since the low end can become excessive with darker guitars or humbuckers.
TQR: What have you learned from the experienced designing, tweaking and dialing in this amp?
Fargen: Working on the JW-40project with Jim has been a great experience—he’s a great player with an amazing ear for tone. We worked very hard to achieve an amplifier design that not only exceeded Jim’s needs and expectations from a signature amp, but would be well receive by other players. We set out to deliver a classic guitar amplifier that offers a tone and feel that extends beyond even the best vintage examples that can be found, so this project really forced me to think outside of the box and develop many new techniques rather than just deliver one of my stock amplifiers to Jim with his name on it. It takes partnerships like this to shakeup your normal routine so that you can push the envelope and continue to grow as a designer/builder. Because, as we all know—if you feel you have nothing left to learn, you should just quit now.
It was clear the moment we played the first notes through the Fargen JW-40 that someone with an extraordinary ear and deep experience had influenced the way this amp is voiced. The Rhythm channel pours out more clean, Fendery headroom than one of our favorite, more powerful blackface amps—the Pro Reverb—an the clean tones are richer,fuller, more detailed, lively and deeper. With the Slope switch engaged in the Rhythm channel, the tone becomes even thicker in the upper mids, creating more of an EQ bump rather than a “boost” that ignites some kind of overdrive feature. We did notice some boominess in the low frequencies using a 4×12 cabinet loaded with Celestion’s Gold Alnico G12sand G12H30s, and in our Balls2x12 cabinet with an oval “football” open back design and British optimally voiced for an open back cabinet. There may also be some bias on our part at work here, because we have never cared much for the sound of a Fender amp with a closed back cabinet.
As noted in our discussion with Ben Fargen, the reverb in the JW-40is unique in the way it remains in the back-ground, enhancing, but not overwhelming or washing over the notes. This is undoubtedly the best reverb sound in a combo amp we have ever heard for an under-stated effect, and even players that normally don’t use reverb may find it difficult to resist.
The Lead channel controls function much like an over-drive pedal, with Drive, Level and Tone controls and a toggled Boost switch. A Midrange control is also included. You couldn’t ask for a clearer, more intelligently designed control panel, and the controls themselves are simple and intuitive. As with many overdrive or boost pedals, mixing variable settings for Drive and Level produce a wide range of intensity, from a fat clean boost to rippin’ overdrive, but unlike a typical pedal, higher Level settings do not push the volume of the amp up to extremes as the Level is increased. In practical terms, this means that you can switch between the Rhythm and Lead channels without having to make dramatic adjustments to the volume on your guitar. We also dis-covered some incredibly tasty overdriven tones at very low volumes with the Level down and the Drive up—kind of like a’50s Gibson GA20 with more fidelity and no noise, and that’s a trick you can’t pull off with many distortion pedals.The Tone control helps shape and color the distortion EQ to suit different guitars and moods, and it can also be used to subtly focus on specific harmonic overtones. But the most remarkable feature of the boost circuit is the “clean”character of the over driven tone. Mike Piera’s mention of David Gilmore is instructive in this regard. Gilmore’s fat, overdriven guitar tones on his solos are indicative of the rich fidelity produced by the JW-40. Chords are clear with distinct note separation, sustain and decay are natural rather than sounding forced or artificially contrived,and the overall sound is round, rich and warm with a sweet, clear top end.Our best description of the over driven voice of the Fargen is “majestic,”and who can’t live with that?

You’re are of the phenomenon… Suddenly a guitar, amp or some other new or pre-historic gizmo seems to come out of nowhere to achieve white hot, must-have status. The same thing can happen with previously unknown builders, too. Take Marshall 18W “clones,” for example… For the past 3-4 years these recreations of the rare originals were hot, hot, hot, with small custom builders sprouting and thriving from within the 18W Discussion Page. This was good for builders, good for players, and an unanticipated consequence was spawned — the rapid expansion of the cottage industry providing small amp builders with custom-made chassis, capacitors, transformers, cabinets, and just in time, an expanded range of guitar speakers developed by Eminence and Celestion. By the time Marshall jumped into the game with their own hand-wired 18 and 20W amps, the custom-built 18W wave had begun to crest and break, but there is now a new ripple on the horizon that we predict will soon form a formidable new wave among custom builders — the Vox AC30. Granted, Korg has already issued their own limited edition version of a hand-wired AC30 following the success of the British-made Vox AC30 TBX reissue, and we have reviewed the AC30 Custom Classic in this issue with backup color provided by The Radiators’ Dave Malone. While the Custom Classic is a very affordable and perfectly respectable alternative, it would be unreasonable to expect an economically built, mass produced amp to seriously rival a vintage JMI AC30 in original condition that has been competently serviced by an experienced tech. What about the original Matchless DC30 built by Mark Sampson? Great amp, but not the same. Players craving the authentic sound of an original AC30 have four choices today—find an restore an old JMI, buy a reissue and play it as is, have the transformers, caps and resistors in the signal path of your reissue amp upgraded, or buy booteek.
Well, it’s one thing to lovingly resurrect the rather Spartan Marshall 18W circuit, and quite another to tackle the original JMI design, which is much more complex, costly and labor-intensive. Furthermore, some builders may succumb to the temptation to significantly “improve” the original AC30 circuit. That would be a mistake. The successful builder will locate a vintage AC30 with truly bitchin’ tone (assuming they are capable of identifying said bitchin’ tone) and build more, per the specs revealed by blueprinting the old one. As far as we know, this has yet to happen on a meaningful scale. To date, we have located one potential candidate built by DST Engineering that will be reviewed next month. If anyone reading this believes there are more, please let us know.
 Meanwhile, let’s address the common belief that 45 year old Vox amps are too unreliable — dangerous, even — for ecstatic thrashing, let alone regular gigging. While it is true that the design of the AC30 (and AC50) provide precious little ventilation (the top vents are stingy at best), we have seen AC30s used by touring musicians and there were no flames shooting from the back (Daniel Lanois didn’t even bother with a backup). So we asked ace amp tech Don Butler (Toneman) to precisely describe the steps he takes to make a vintage Vox roadworthy…
Don Butler: Vintage AC-30s suffer a lot from neglect. People are under the misunderstanding that all you need to do to any vintage amp is replace valves/tubes occasionally, but it requires much more than that. Here’s what I do when I get an AC30 or AC50 in for service that hasn’t had anything done to it since the day it left JMI in Darford, Kent…
Replace the dual 16uf @ 500v can, replace the 32uf @450v cap in the supply line that goes from the bottom power amp section to the preamp, and replace the dual 8uf can in the pre-amp. Replace the 32uf @ 450v cap for the Top Boost circuit (if the amp has integral Top Boost). Replace all the 25uf @ 25v cathode bypass caps (I see a lot of Vox amps where all of the main filters have been replaced but not the cathode bypass caps. It’s really just as important to replace these as well, as they set the gain for each area of the circuit they’re in). While I’m at it… Electrolytic caps have a lifespan of 7 to 10 years. After 10 years they start to deteriorate and slowly affect the way your amp functions (and not for the better, either). If you have an amp that 35-45 years old with original filters in them, well then, you’re asking for a lot of problems by not changing them. I’ve had a few vintage amps where the filters were not changed and they eventually shorted, taking the output tranny or choke of the mains tranny with them. To me they’re cheap insurance to keep your amp working properly and sounding good. By the way, the worse thing anyone can do to any amp is not turn it on for at least an hour a month. That keeps the electrolyte in it’s liquid form and prevents it from drying out and crystallizing.
Back to JMI-land — replace the output section cathode bypass cap (250uf @25v) and the four 100 ohm resistors on each EL-84 socket. These almost always drift way out of tolerance. Use 1 2att 100 ohm carbon film. On any voltage path resistor that needs to be replaced, use a carbon film. But, in the signal path, never use anything but carbon comp, otherwise it won’t sound the same. Vox always used carbon comps for everything. These days you can get 5% tolerance carbon comp resistors — in the sixties you were lucky to et 10%, and most used + or – 20% resistors.
Check each resistor with a meter. If the resistor is more than 20% off, replace it. Check the output tranny. Measure the primary side from center tap to each anode. The center tap is always soldered onto the main supply filter can. Be sure to discharge the cans before you do this!! The anodes are hooked up to pin #7, and they should read very close to each other from the center tap to each anode. Each era had different readings. A Haddon output transformer has a different primary reading than a Woden and different from an Albion as well.
Clean each valve socket, input jack and pot with Caig DeOxit D-5 contact restorer. And here’s a bit that is as important as everything else — make sure every nut, bolt, screw and pot nut is tight. You would not believe how much you can improve the noise and hum in an AC30 simply by doing this. I’ve had amps where every one of them is loose! On the 12AX& that is used for the Normal and Brilliant channels., JMI used a wire from pins 4 & 5 to ground to keep the filament supply grounded. Cut this wire off from the pins to ground. Take two 100 ohm resistors and attach them from each side of the filament supply at the pilot lamp to ground. This is what Fender did for years to make the filament supply quiet. It’s an easy “center tap” for the 6V AC filament supply.
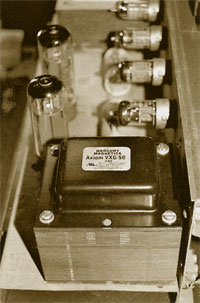 Check all your valves/tubes. Always use a matched set of EL-8rs and good 12ZX7s and a decent 12AU7. Spend the money for a good rectifier! You have to look at the cost of valves as an investment in your tone. Good preamp valves should last at least 10 years for NOS. I’ve seen many Ac30s with perfectly working Mullard GZ-34s that were 40+ years old. EL-84s get beat-up pretty good, but still important to buy quality valves. This is also important: With any and every JMI Vox Amp, use a Variac! Why? My wall voltage reads anywhere from 114v to 122v A.C. Vox amps want to see 105v to 110v MAX! The voltage selector may say 115v, but Sergio at Mercury Magnetics has told me many times that the real input voltage of old JMI amps was 110v max. If you plug your AC50 into the wall at 1222v, instead of your B- supply reading 470v like it should, you’ll get over 500v D.C. Most of the components are rated at 400v-500v max. By putting more in you run the risk of shortening the life of most of the components if not frying them outright. If you follow this advice and servicing recommendations and use a Variac, you should have a happy AC30 that will work for you for years without trouble. It doesn’t hurt every few months to tighten up all the screws, nuts, etc. If you tour or gig with an old AC30, you have to know at least a little bit about how to maintain your amp. If you’re too lazy to do that, then buy a new Custom classic and send it to me to mod into one that sounds very close to a JMI-era amp. There’s a good book you can get from a guy named Stephen Grosvenor in the U.K. called “A Service Engineer’s Guide to the Vox AC30 Valve Amplifier.” This just came out in June (’06).
TQR: Not all power tubes can take the heat that Vox amps produce. What are your favorite choices for output tubes in old AC30s and AC50s and do you have any suggestions for keeping these amps running at lower temps?
Don Butler: AC30s — Tungsrams and Polem/Telem (same manufacturer — these are made in Poland) for NOS and EI Elites for new tubes. The Tungsrams are very clear, open sounding with nice chime on the top end and a good tight bottom. Same with the Polems, but the Polems have a bit more midrange. I find Mullards very dark and flat by comparison. I’ve tried just about all the NOS EL-84 types in my Voxes and Marshall 1974X. The EI Elites are a great sounding tube but lack just a bit of the detail and harmonics of the NOS. Still, a great sounding tube compared to the rubbish that’s being made these days.
TQR: You’re known for upgrading stock “reissue” amps. Describe the typical upgrades and modifications you make to reissue AC30s and the most recent AC30 Custom Classic.
Don Butler: I replace the output tranny with a Mercury Magnetics clone, same with the choke, as the choke is a very important piece of the puzzle. I replace every resistor and cap in the signal path with carbon comp resistors and Sozo caps. I have an audio “break-in” CD that I run into the amps after I’m done. About 4-5 times simulates the amp having been played for around 80-100 hours. I do this because every output tranny takes around 20 hours to break in, and the Sozo caps take around 100 hours to break-in. This way when my customer gets their amp back it’s as if it’s already been played for a bit and should be more open and touch responsive than if it hadn’t been played. I do also play through them when I’m done. I have to make sure they sound right. I play them again after I run the CD through them, and it’s fun to hear the actual difference!
Source: https://mercurymagnetics.com/pages/news/ToneQuest/_2007/TQRJan07-1.htm
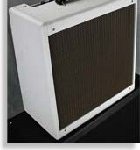
Maryland-based amplifier builder Vintage Vacuum Tube Amplifiers (you may know it as VVT) recently fielded a request from renowned pickup winder Lindy Fralin. He wasn’t looking for advice on wire or how hot to wind a pickup for best interaction with a particular VVT; rather, Fralin wanted an amp built to his specs and taste. And not just for him, but for the mass market. VVT, realizing the co-branding possibilities, jumped at the opportunity.
So, what does a tone guru like Fralin want in an amplifier? Well, he says the goal was “a clean, full-body-voiced amp that’s lightweight and able to sound good at low volume.” Sounds like something we’d like, too. So when VVT asked whether we wanted to hear it, we were happy to take up the offer.
At first glance, the VVT Lindy Fralin amp looks boutique in a way we’ve come to expect; i.e. it sports point-to-point wiring with carbon-comp resistors, an all-tube circuit, and a 12AX7-driven spring reverb and preamp. But, go deeper and you’ll quickly discover some seldom-seen features, like a trick self-biasing-cathode design that allows the player to switch between a pair of 6L6s (for 30 watt of output) and a pair of 6V6s (for 15-watts) without having to re-bias the amp. Part of its secret is a custom-wound Mercury Magnetics transformer designed specifically for the Fralin that allows the amp to switch between the 6L6s and 6V6s while maintaining stable impedance for the tubes and speaker load.
The amp ships with a pair of 6L6s, but will also accept 5881s or JJ 6V6s, for an altogether different favor. Another unique feature is Fralin’s choice of a single 15″ alnico-magnet Weber speaker instead of the more traditional pair of 10″ or single 12″ speaker.
The overall look and layout of the amp is different, as well, but still boasts a vintage vibe with a neatly executed off-white tolex, oxblood grillecloth, top-mounted controls, and heavy-duty leather handle. There are no metal or plastic corner protectors, and no extraneous piping or badging. Its look is clean, simple, and classic. The control layout is accordingly succinct, with a single 1?4″ input, a switch for Bright, and controls for Volume, Treble, Bass and Reverb, along with switches for Power and Standby. Also worthy of mention is the 11-foot power cord.
VVT shipped our tester with a matched pair of 6L6s by TAD and a matched pair of 6V6s by JJ. We started with the TAD 6L6s and our test guitars – a Fender Relic Strat and a Hofner Verythin Classic with mini-humbuckers. After plugging in the Relic Strat and letting the amp warm up, we set the Volume at 3 o’clock, Bass and Treble at 12, and then we hammered a few chords.
We were immediately impressed with the amp’s complex overtones, its round, punchy low-end response, and its snappy highs. It didn’t take much noodling or knob tweaking to realize that the tone controls on this amp, along with its Bright switch, are exceedingly well-voiced. From a player’s perspective, that means it’s easy to find likeable sounds. The Bright switch compensates nicely for the slightly darker sound of mini- or full-size humbuckers, while the wide sweep of the Bass control keeps its frequencies full and punchy with single-coils.
While the amp is voiced for clean tones, it also does a good job when it comes time to get dirty, and is very responsive to changes in pick attack or guitar output. Simply backing down the volume control on the guitar and easing up on our pick attack, the Fralin cleaned up from moderately dirty overdrive with musical overtones to a sparkling clean sound that didn’t lose any of its life or attitude.
We popped in the matched set of JJ 6V6s and checked the tone at 15 watts output. The amp broke up quickly and had a slightly more boxy sound, with reduced complexity of overtones; still very lively and punchy, just not as big as 6L6s — fantastic for low-volume situations. The tube-driven reverb is also well-voiced. At lower settings, it adds a bit of ambiance that doesn’t get in the way or wash out the amp’s tone, and at higher settings it’s suitably splashy.
The boys at Vintage Vacuum Tube do a killer job on the Fralin signature amp. It’s loaded with big, dynamic, single-coil-friendly tone (that sounds pretty good with humbuckers, too!) in a nice, lightweight package.

Following up on the successful introduction of 65 Amps’ flagship London 18W, the company has launched its second model — the Marquee. Named for the legendary Soho music venue where every ’60s British band of note once honed their craft, the Marquee is a bigger-sounding, louder version of the London 65 in some respects, endowed with great headroom and presence. We asked co-founder of 65 Amps and Sheryl Crow guitarist Peter Stroud to describe the musical intention of the Marquee, and our review follows….
TQR: What inspired the development and design of the Marquee, Peter? What did you want to accomplish specifically?
Peter Stroud: We had guitarists loving the sound of the London, but still needing either more volume or clean headroom. Personally, I wanted an amp to replace the Super Reverb in my live rig with that Fender clarity, but more of the openness and touch sensitivity of an amp like the London. Our initial idea with the Marquee was to create a more powerful version of the London 18 watter using 4 EL84s. But we also wanted something with the midrange clarity of the British amps and the clean sparkle of the American Fender Blackface sounds — just not as hard sounding as the 6L6 cleaner tone can be. On top of that, it has a higher gain tone that really roars.
TQR: To what extent were some of the design features in the Marquee such as the cascaded twin-triode operating in pentode mode and the 6-way Color control inspired by vintage amp designs?
 Peter Stroud: Our initial intention for the Cascode (note spelling) configuration in this amp was to find a sound similar to the pentode type EF86 tube we use in the London, but more quiet. Due to vibration and noise issues inherent with EF86 tubes, we were apprehensive using it in a higher powered combo. The cascode circuit, which utilizes a 12AX7, was popular in early hi-fi preamplifiers. It has a harmonic content similar to the pentode circuit but produces more even-order harmonics. Randall Aiken helped us greatly with this circuit and we’ve continuously tweaked it’s current configuration in our amp. The end result is a distinctly different sounding channel from the Treble-Mid-Bass channel — very warm and rich sounding. It sounds beautiful with single coils and 12-string electrics. So, the Marquee initially came from many inspirations. Dan (Boul) and I are big fans of the Selmer amps. A few years ago while on tour in the UK I had picked up a Selmer Treble & Bass 50 MkIII, which is the early ’70s silver metal front — the ugly one. But that amp sounds awesome, like a “British Fender Blackface” with two EL34s. We’ve since found a Mk I Treble ‘n Bass from the first year they were built.
The font end of the Marquee Treble-Mid-Bass channel was initially inspired by the Selmer, but it branched off quite a bit. We just aimed for that sound. There are also similarities with the Selmer front-end circuit and the early ’60s brown-Tolex Fenders. I know one of your favorite amps is that killer Vibrolux 1×12 you have. The (Marquee) power stage is a fairly typical British-style 4-EL84 circuit. From there we spent months tweaking the tone circuit. We wanted the Treble-Mid-Bass tone configuration for more control with a higher powered amp.
TQR: You’ve played just about every conceivable guitar amp and for years your rig consisted of a Super Reverb and Marshall 50W. To what extent does the Marquee succeed in giving you both the clean and overdriven tones you need at usable state volumes, and how do you use it specifically?
Peter Stroud: On the latest tour I used both a London and a Marquee and A/B’d between the two. The two together worked perfectly for our stage volume. I’d set the London for a slightly driven rhythm sound playing through an EF86 channel and would use the gain boost for leads. The Marquee took the place of my Super Reverb as my clean sound, and it proved to be better since the mids are more pronounced and you get the nice dynamic saturation of EL84s. It’s much more touch sensitive, which is hard to get with a clean sound without using a compressor. The only time I’d kick on both amps was for Led Zep’s “Rock N Roll,” which we play as an encore. I’d crank the Marquee to 6, hit the gain boost and boost the mids. It totally hit the “Pagey” kind of sound. You can dump the mids and boost the bass and highs and get a chimey sparkling clean tone — settings around 4 on the volume, treble and bass around 6 to 7 and midrange around 4. For a cranking rhythm I’ll set the volume around6, boost the mids to 8 or so, drop the bass around 4, treble at 5. There’s also a footswitchable gain, like on the London, so you can set a rhythm tone on the T-M-B channel and kick in the boost for lead. If you turn the amp up to 10, look out!
TQR: You mention “mustard” caps on your web site being used throughout the amp — are these modern reproductions of the original “mustard” caps used by Marshall in the ’60s?
Peter Stroud: Yes, we use the SOZO caps made by John Gaynor. John’s a Marshall enthusiast who has totally nailed (and surpassed, in our opinion) the “mustard cap” tone where you get the nice smooth mids and bell-tone clarity.
TQR: What else are you working on?
Peter Stroud: We have two new models in the works — a smaller “grab n go” 1×12 combo which actually incorporates a master volume with two EL84s. It has a great sounding master volume that has a sound of its own that can be disengaged so that the amp ha a non-master function. Sort of a “British Fender” vibe again. The thing screams, it can get chimey clean, and it’s incredibly versatile. And over the past six months, we’ve been developing a KT77 head using our Marquee as the springboard with a KT77/EL34 power stage. We had a handful of pro level artists who wanted extreme volume and headroom, where they were used to their 50 and 100 watt EL34 hears and quite a lot of volume. Plus, Dan is a big fan of the Vox AC50 and I’m the Marshall fanatic, so we got into that mindset again. We sent a prototype out for a test run with Rich Robinson of The Black Crowes and he ended up using it as his main amp for the entire last month or so of their tour. When we got it back, all the knobs were dimed. Couldn’t ask for better testing in the field! We’ll introduce both of these amps at Winter NAMM.
REVIEW — 65 Marquee
 We spent a lot of quality time with the 35W Marquee Club, and it impressed us as a feisty chameleon that can gracefully move between big, jangly clean tones and an impressive roar with a deep palette of voices available from two very different input channels.
EL84 amps typically produce a distinct, musical compression characteristic that is absent in amplifiers using 6L6 output tubes, yet the Marquee produces gobs of clean headroom — albeit British headroom rather than the trademark 6L6-fueled fidelity of a Fender amp like the Twin or Super Reverb. As far as we’re concerned, British tone in an amplifier denotes rich harmonic depth and chime, often augmented with a dominant midrange emphasis, while Fender amps (Blackface models in particular, sound scooped in the mids by comparison with a wider, broader, looser feel and toner not unlike the difference between the sound of oooh and ahhh. In the Marquee, individual strings seem “closer together,” yet still well-defined throughout its range of clean settings. EQ coloration is accomplished in the “Classic” Channel bass/mid/treble/cut controls, and in the “Normal Channel via six EQ presets on a rotary switch. This “color switch” progressively thickens tone with gradual increases in lows and mids, but the Marquee’s chime and sparkle remain audibly preserved in every setting.
The Marquee produces moderate levels of smooth, overdriven tone at higher volume settings (+6) in the Normal Channel that can be neatly managed from the volume on your guitar, while the footswitchable Boost feature in the Classic Channel yields scorching distortion and sustain that nearly rival that of a Marshall JCM 900 Series Mk III. However, the Marquee delivers a chimier crunch rather than the more linear and cutting, laser beam focus of a high-gain Marshall. It’s a prettier brand of mayhem, if you will. And unlike many vintage British amps, the Marquee succeeds in delivery an enhanced range of both clean and overdriven tones, as well as a more versatile and varied range of EQ emphasis. Overall, we found it to be an inherently bright amp with the EQ controls in neutral settings, but you are also given plenty of room to shape the voice of the Marquee, from brilliant and clangy, to thick, heavy and imposing. We had no trouble dialing in great tones with all of our guitars — thickening the Teles and Stratocasters, planting a wet kiss of treble emphasis on the humbucking Gibsons, and alternatively mining the jangly clean chime and perfect meltdown of P90s. A potent rock amp that can cover a lot of ground, the Marquee is handwired with point-to-point construction that meets the high standards we have all come to expect from custom builders today, the transformers are custom-made by Mercury Magnetics, and the fit and finish of the cabinet work were flawless. As the name implies, the Marquee is steeped in the tones that defined modern rock & roll, viewed through a properly British perspective. And as Fender’s Ritchie Fliegler is fond of saying, “If this is what you like, you’ll really love this!” Quest forth, mate.
Source: https://mercurymagnetics.com/pages/news/ToneQuest/_2007/TQRJan07-2.htm
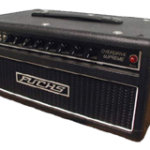
The term “imitation is the sincerest form of flattery” has particular meaning in the music industry, where popular guitars and amplifiers have long been used as templates for the creation of “new” brands. This is particularly true in the boutique amplifier market, where probably 99 percent of currently available models are based on classic designs by Fender, Marshall, and Vox. Given that reality, it’s inevitable that some of the more recent amp builders who have managed to innovate and create truly original sounds will also see their designs cloned to one degree or another. The raison d’etre for copycat products is typically that demand for the real thing outstrips the supply, or that relatively few can afford to purchase the authentic product. Both are true of the amplifiers made by Howard Dumble, and the fact that the vast majority of guitar players will never get closer to one of his Overdrive Specials than the front row seats of a concert makes it no surprise that a small number of builders offer their own takes on that extremely rare and expensive amp (we’re talking around $30,000 these days). One of those is Fuchs Audio Technology, which with its Overdrive Supreme (a name that can also be conveniently abbreviated as ODS) makes no attempt to conceal where it draws its inspiration.
But Fuchs has packed plenty of cool things into this amp that any tube freak could appreciate. A peek inside the aluminum chassis reveals a mix of neat handwired and PCB circuitry, chassis-mounted pots, jacks, and switches (the mini toggles reside on one of the three PC boards), and chassis-mounted sockets for the four Svetlana 6L6GCs, two Ruby 12AX7As, and two Groove Tubes GT12AX7Ms. For low noise, the tube filaments are heated by regulated DC voltage, and regulated high-voltage supplies the preamp stages. The fan-cooled amp sports a high-quality Mercury Magnetics output transformer, and biasing adjustments are facilitated by the addition of bias trim pots and test points for each output tube.
Not that the Overdrive Supreme is overly complicated, but a few of its functions warrant explanation. In basic terms, this amp consists of Clean and Overdrive channels (or preamps), both of which feed a common set of tone controls, a reverb, and a Master volume. The Gain knob adjusts the amplification level in the Clean preamp, which in turn feeds the Overdrive preamp when you switch to distortion mode. Then there are three Overdrive controls: an internal (but user adjustable) trimmer that determines the amount of signal flowing from the clean preamp into the first stage of the Overdrive preamp, an Input knob that sets the amount of distortion (by adjusting the drive level between the two pairs of overdrive stages), and an Output control that’s essentially a lead master volume. This combination of controls gives you the ability to precisely tailor the amp’s gain stages to suit your guitars, pickups, and playing style.
The Overdrive Supreme also has a number of switchable functions that affect its tone. The Brite switch operates on the Gain control to provide a boost in treble (which diminishes in effect as the knob is turned beyond the halfway point), the Deep switch shifts the overall tonality of the amp to emphasize lower frequencies, and the Rock/Jazz switch alters the range and depth of the tone controls to provide for more gain and a more aggressive EQ in the Rock setting, or a smoother, more neutral response in the Jazz position. There’s also a Mid-Boost pull function on the High control that shifts the range of the circuit to emphasize midrange and a Gain-Boost pull function on the Mid control that bypasses the tone controls to increase gain on both channels. Lastly, turning up the Accent control reduces negative feedback at higher frequencies in the power section to increase edge and sustain.
Auditioned with several different speaker setups (including Marshall 2×12 and 4×12 cabs and a Celestion-loaded Dr. Z 2×12), the Overdrive Supreme never failed to impress. The closed-back Dr. Z cab worked particularly well with this amp (the cab’s width was a perfect fit too), and Fuchs also offers a matching 2×12 loaded with Fuchs FAT-1S speakers ($695 retail/street N/A). But even driving two 12s, the Overdrive Supreme is a loud amp that seems to find its “sweet” spot at levels that would be overkill in a small club. You can tame the blast with the Master Volume, but as this amp struts its stuff best when let off the leash, you might want to consider one of the lower-wattage Supremes if you don’t regularly gig on big stages (head and combo configurations are available in power ratings from 30 watts to 150 watts, and at prices starting at $2,395).
In its cleanest mode with the Rock/Jazz switch in the latter position, the Overdrive Supreme delivers crisp clean tones to the limit of its output stage. If you like to play clean at high volume, this amp does the trick. These tones sounded great with a Strat, though humbuckers also elicited a good degree of sparkle, as I discovered when playing it with a new PRS 12-string. The reverb is smooth and pleasing throughout most of its range, though the higher the setting, the more detached the effect seemed to become from the notes. I couldn’t obtain any sproingy surf textures either, even with the Reverb knob turned all the way up, but Fuchs probably intentionally voiced it for more “hall” and less “beach.” Interestingly, when the effects loop is set to Series mode with nothing connected to the Send and Return jacks, all you hear is output from the reverb tank. You either need to have a device in the loop for serial operation, or keep the switch in the Parallel position, which you’ll probably want to do anyway if you’re using a delay or a digital reverb.
Switching to the Overdrive mode, the Supreme delivers soaring lead tones that are ballsy and articulate. I had no trouble obtaining massive distortion from a Strat and a Tele, and even without kicking in the extra gain boost there was no shortage of creamy “forgiveness” in the dynamic response. Pegging the Gain knob is necessary for obtaining maximum grind from this amp, but the cool thing is, when you switch back to Clean mode the sound is dead clean. I didn’t notice any significant tonal difference between the Deep switch settings, but activating the Mid Boost fattens up the sound of single-coils quite effectively. The Overdrive Supreme has a strong midrange presence anyway, a quality that allows it to cut amazingly well in a loud band. (In fact, one tester reported being able to hear this amp clearly from the opposite side of a large stage, even when standing right in the blast zone of the other guitarist). The Overdrive Supremeis also louder and definitely more aggressive with the Rock/Jazz switch in the former position.
It’s very easy to get carried away with the sheer amount of distortion that’s available in Overdrive mode, however, by backing off on the Gain and Input knobs, it was possible to get killer medium-grind tones reminiscent of a cranked Fender Deluxe’s. This is a perfect mode for loud blues playing, especially with that output stage ready to leap into action like a cornered tiger when you dig in with your pick.
There’s enough to like about the Overdrive Supreme that one can almost forgive its four-button Artist footswitch (an essential item that costs an additional $395; a standard 2-button switcher is no extra charge), which has a rather generic housing, label-machine stickers to ID its functions, and uses a fairly stiff type of high-tech cable with a multi-pin connector on the amp end — don’t count on an easy replacement if this baby fails in the field. (Fuchs states that the footswitch is being revised, and will have an aluminum bezel to replace the stick-on lettering.) A hip thing, however, is that its large LEDs are so intensely bright that you’d likely have no trouble seeing their indications even when playing at noon on the Bonneville Salt Flats.
The Overdrive Supremehas that rare quality of being able to draw you in immediately, yet continue to reward and inspire you the more you play it. Considering what it’s based on, it would be a surprise if the Overdrive Supreme wasn’t an impressive amp.
Who’s It For?
Blues, rock, and jazz-fusion players looking for Dumble-style tone and dynamics.
Kudos
Outstanding clean and overdriven tones. Compact, lightweight, and powerful.
Concerns
Footswitch is an expensive option.
Price
$3,195 retail — street price N/A
Contact
Fuchs Audio Technology
(973) 893-0225

Last year, Epiphone tossed a small pebble into a large pond with the introduction of its Valve Junior amplifiers—and its launch caused a tsunami. Available as a stand-alone head or a 1×8” combo, the Junior was as basic as an amp could be for something that still produced sound. With just two tubes, two transformers, one speaker, an input jack, and a volume knob, when a player plugged into one, there was very little to get between their guitar and their ear. And the Junior turned out to be a very good-sounding amp. It’s doubtful that any owner of a pre-’67 Fender Champ sold it after hearing the little Epi, but for under $140 for the combo and only $99 for the head, the Junior was definitely the steal of the day.
Paul Smith of Mercury Magnetics was harassed into purchasing a Junior by a journalist who insisted that if Smith didn’t agree it was the best-sounding amp he’d heard for anywhere near the asking price, said journalist would eat said amp.
Smith agreed, then he hauled the Epi into his office. Mercury’s Sergio Hamernik and Alan Cyr of The AmpExchange, in Los Angeles, mercilessly dissected the helpless Junior for weeks before deciding on the optimum power and output transformers and choke.
“We didn’t follow any established recipes for getting tone,” Sergio said of the development of the components. “It’s not a Champ or a ‘me-too’ thing. All we were interested in was getting a tone that a musician would find inspiring.”
The kit Mercury devised has new output and power transformers, a choke added to the circuit, a CD-ROM with photographic, step-by-step instructions for do-it-yourselfers, bolts and locking nuts to attach the choke to the chassis,four or five capacitors (depending on the version), five resistors and 10” of 18-gauge insulated solid copper wire.
The Mercury Magnetics’ transformers, well, transformed the miniscule Epiphone. Side by side with a stocker, the Mercury-modded combo has way more presence. It breaks up a little earlier, and the harmonics are much more rich and even. Also, while the stock Junior had a slightly brittle or metallic edge to the distortion (especially after12 o’clock on the volume knob), the Mercury mini monster stayed smooth all the way up to being dimed.
In addition to helping design the mod, Cyr installs the kit at his business. After installing nearly four dozen of the kits, Alan says that at least half of the mods are for professional musicians and go right to a recording studio from his shop.
“People tell me that they actually record better than their vintage amps,”says Alan. “Once someone hears the amp, they have a job for it. It’s a pretty easy sell; the modded amp sells itself, really. You wouldn’t believe the boutique amps musicians bring in to A/B against the Epiphone with the Mercury kit. They usually end up buying the Epiphone.” Alan charges about $150 for installation in addition to the cost of the amp and the kit. The cost can go up if other modifications are requested, and he figures that it would take an aver-age amp tech about two or three hours to do the work
Gary Roudenko, who sells Valve Juniors modded by Alan Cyr at The Amp Shop in Sherman Oaks, California, agrees with Alan that there’s little work in making the sale.“Whoever hears it wants to buy it,” says Gary

On the other hand, if you’re inspired to run down some musty Fullerton tweed, we’ll assume you are also fully prepared to bend over ’til it hurts. Well, know this… there is little correlation between the absolute certainty that you will pay a considerable premium for an unmolested, vintage tweed Fender amp today and an iron-clad promise of awe-inspiring tone. As we’ve said before, the market value for vintage instruments and amps doesn’t carry an implied warranty… You are paying a premium for a collectable amp or guitar based solely on its collectable value; the extent to which it may fulfill its intended purpose to your dismay or delight is a crapshoot unless of course you are able to try before you buy. This didn’t matter much when tweed was $50 trash, but throwing down a minimum of two grand today is no joke.
There is less risky and expensive route on the quest for tone, which is to buy a new amp made by people who have figured out how to actually design and build exceptional sounding tools with repeatable consistency. Perhaps you are the type who is risk-adverse, unwilling or afraid to adopt an old amp that may need to be fortified by skilled hands at $75/hour. Well, we’ve found another stellar new amp, and it carries the familiar name of Lindy Fralin. No, Fralin didn’t personally build it, but it is built to his specifications and personal preferences by Vintage Vacuum Tube Amps in Waldorf, Maryland, which is close enough to Lindy Fralin’s shop in Richmond, Virginia to have fostered a very productive collaborative relationship.
Lindy Fralin is one of the best known custom pickup makers in the country and an experienced guitarist with an extensive collection of vintage amps. But despite his fat collection, he found himself craving things that weren’t collectively found in any one of his vintage amps. Fralin wanted clean headroom at volume levels that could hang with a band in a small to medium-sized club. He also insisted that such an amp be portable enough to be effortlessly carried up and down the stairs in his house and back and forth to gigs. He wanted reverb, and a smooth, musical voice that was compatible with all of his many guitars, and the amp had to be a looker in a dignified, classic sense — not too plain or gaudy in an effort to appear different or unique.
Fralin and the two founders of VVT spent months working on various prototypes, which involved several rounds of experimentation with custom transformers built by Mercury Magnetics. Once the basic layout was determined, different caps, resistors, tube configurations and speakers were tested, and work continued until Fralin finally heard the sound and feel he had been craving in his head.
The result is a remarkable 30 watt, 1×15″ cathode biased beauty that can run on dual ^L^s for maximum headroom or 6V^s for slightly faster breakup. Features are simple and straightforward with just a bright switch, volume, treble, bass and reverb controls. We ran the Fralin through its paces with all of our usual test guitars, and we were consistently impressed with the sound of them all, as well as the hug spring reverb, loads of clean headroom and subtle distortion at higher volumes that adds sustain without substantially altering the beauty of the fundamental note. As we played Fralin’s amp, reoccurring visions of Peter Green’s brilliant tone came to mind… clean, exceptionally smooth, warm and round with the perfect edge, enabling the guitar to alternate between sweetness and urgency as dictated by the song. Our impression was also echoed the the other guitarist in Delta Moon, Tom Gray. Tome plays slide using acoustic Weissenborn-style guitars loaded with a Sunrise soundhole pickup. Prior to hearing the Fralin, Tom’s stage rig consisted of a Blackface Pro reverb head paired with a separate 1×15 cabinet and an Avalon preamp identical to that used by Clapton for his acoustic guitars, live. After Tom played the Fralin amp sent to us for review, he bought it, and now no longer even needs the Avalon.
Aside from looking good and weighing barely 30 pounds, Fralin’s amp incorporates an “Integral Beam Diffuser” — a wooden cross-piece cut out of the baffleboard that bisects the speaker behind the grille cloth, diffusing the sound waves as they come off the speaker cone. Fans of larger ’60s Supro amps may be familiar with a similar cross-piece found in those amps, and it does indeed produce a sound that is less beamy and linear (especially helpful when you’re crammed on to a tight stage with the amp on the floor). You really can hear it better.
VVT’s Fralin amp is simply a compact, lightweight, heavy-duty gig monster, and it definitely deserves your attention. The Weber Classic Alnico 15 thrives on every frequency you can throw at it in the Fralin, and we recommend this amp without reservation for blues, heavy rockin-blues, jazz, country, swing… everything but hard rock and metal. For that, check out the other amps built by VVT.
Source: https://mercurymagnetics.com/pages/news/ToneQuest/_2006/TQRDec06.htm
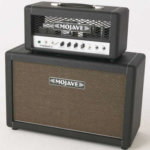
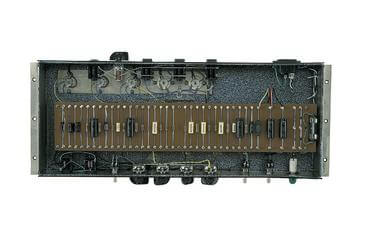 Mojave’s Victor Mason has learned much from studying the intricacies of various Ampeg, Marshall, and Vox amps, and the Coyote ($2,500 retail/$2,050 street with Celestion G12-30H) is the summation of his insights into small-amp design.
This dual-EL84, cathode-biased amp features dual independently voiced channels, which are labeled Bass Volume and Treble Volume. Each controls the two triode gain stages of a 12AX7, and the idea is that you use varying levels of each to obtain not just the amount of overdrive you want, but also the balance of bass and treble needed for your particular guitar. This dual-function system obviates the need for separate tone controls, and the only additional EQ on the Coyote is a Tone knob and 2-position Mid Cut/Emphasis switch.
Ditching the standard master volume, the Coyote features a Power Dampening control that allows you to vary the output wattage continuously over a range of less than 1 watt to a herkin’ 12 watts. By controlling the drive voltage that feeds the output stage, Power Dampening provides an efficient way to operate the amp at different loudness levels, with a side benefit of cooler running and extended life for the tubes and transformers. The Coyote is also the only amp in the group to be equipped with a variable-level line out, which incorporates a push-pull ground lift to overcome ground loop-induced hum when connecting to external gear. Sweet.
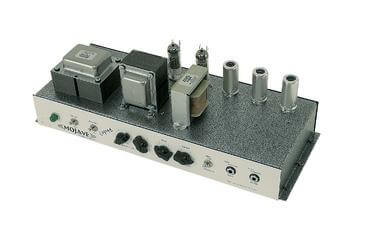 The Coyote’s Bass and Treble knobs are also the preamp gain controls, so it’s kind of like using an old Marshall with the bright and normal channels jumpered. Depending on which input you plug into, the Coyote readily offers up a good selection of stout clean and overdriven tones. The Low Sensitivity input works great with humbuckers if clean is your primary objective, but I tended to stick with the High input for all my test guitars, with good overall results. Even with humbuckers, getting a hot distortion sound with the Power Dampening knob set on the low side (say, the 2 to 4 watts range) requires that you run the Bass and Treble knobs close to wide open. The tones are pretty well balanced with both of these knobs at or close to equal settings, and any further EQ refinement can be done with the Tone knob.
The Coyote works superbly with single-coils, as you can ratchet up the Bass knob to set the gain to a happening point, and then inch up the Treble control until the brightness is just where you want it (or the other way around, if you so prefer). Using the Coyote at or near its maximum output level changes the ball game a bit, because now the power amp is adding its own overdrive content, which is considerable. In this mode, the Coyote shows its teeth as it churns out thick, harmonics-laden grind. Elements of its sound are reminiscent of an old Marshall 20 watters, but the Coyote has a broader palette of textures to play with, and it seems to instinctively want to sound good with just about any guitar.
Bottom line: If you like the idea of exploring very interactive control nuances for precise tailoring of your tones, you’ll find the Coyote a fun and exciting critter to add to your tone zoo.
Kudos — Excellent response with humbuckers and single-coils. Blendable channels. Variable power.Concerns — None.
Contact — Mojave AmpWorks • (866) 235-6399; www.MojaveAmpworks.com
Source: https://mercurymagnetics.com/pages/news/GuitarPlayer/GPFeb06.htm
It only stands to reason that a guy whose day gig involves running his own successful and renowned pickup company knows killer tone when he hears it. So when the Jones hit to seek out a custom made map that combined the best of his favorite Blackface Vibroverb and Vibrolux, Lindy Franlin called upon Tony Albany and the guys at Vintage Vacuum Tube Amps to see if they might be up to the task. And that they were.
The holy grail would be to produce a 6L6 based 30 watt tone machine capable of a beautiful clean sound as well as a smooth, crunchy overdrive and be put captive into the smallest and lightest workable cabinet.
Beginning with a 2×10 Mojotone Tweed Super amp kit for the basic prototype, VVT and Fralin tweaked their hearts out for six months until they got it right.
Residing in a rather compact 20×20 cabinet, the VVT Lindy Fralin Model strikes a vintage pose in its white Tolex with oxblood-like grill cloth.
Beginning with a 2×10 Mojo tone Tweed Super amp kit for the basic prototype, VVT and Fralin tweaked their hearts out for six months until they got it right. Residing in a rather compact 20×20 cabinet, the VVT Lindy Fralin Model strikes a vintage pose in its white Tolex with oxblood-like grill cloth.
The VVT Lindy Fralin Model is a cathode biased straight forward, no bells and whistles affair. The “Plexi”top panel is simple and clean with its Input, bright switch, volume, treble and bass controls followed by the reverb control, standby and on/off switch. Chicken-headknobs let you know where you’re at. Two TAD matched 6L6 tubes supply the power with two 12AX7s for the preamp. A pair of 12AT7s are for the reverb driver and phase inverter. Rectifyin’ is courtesy of an Electro Harmonix 5U4GE. The cool thing is that the Lindy Fralin Model can also accept a deuce of 6V6s in place of the big bottles in the power section for a whole different vibe. Because of the higher plate voltages, VVT Amps stresses that only modern tubes (like the supplied JJ Electronics) should be used. You don’t want to blow the thing up, do ya?
If you think a 15 inch speaker might get as loose and floppy as your Auntie Mabel’s arse, you might be in fora pleasant surprise. With an obviously wider bass frequency range than a 12 inch, the Weber’sbottom remains tight and punchy with a nice lower mid section as well.Single coil and humbucker equipped instruments alike snuggled up quite admirably to the Weber Classic.
First impressions? The Lindy Fralin Model with my Strat spoke with gorgeous single coil chime and harmon-ic complexity, unabashedly magnified with a full trans-parent tone and organic beefy sustain. Very articulate and touch sensitive, the amp displays a more than impressive amount of projection. Both Lindy and Tony attribute this to the cross shaped members (called an integral diffuser) placed across the speaker opening in the baffle board which help disperse the sound and tame some of the“beamy” high end.
All tone controls are unobtrusive and very musical. While the treble is subtle up to around 6 on the dial, the bass is more evident from the get go but remains trans-parent throughout its range with no muddiness. The bright switch surrounds the notes and chards alike with an airiness without compromising the inherent full tone of the amp.
In addition to the Strat, the Lindy Fralin Model warmed up nicely to my other 6 string friends. The Carvin California Carved Top sounded sweet and detailed while my Ibanez AS200spoke with a very articulate, full and warm bodied tone.
Arch tops? This little box makes a nice jazz amp as well with clear, well defined chord structures and beefy single notes. With the fat axes pushing the volume past 3-1/2 caused a little mush in the low end which could probably be remedied by changing the first preamp tube to something with a bit less gain.
The reverb fills out the sound with a pleasant mix behind the dry signal. Throughout its range, the effect is very complimentary and doesn’t send your playing out to see even when dimed. For the dirty stuff, cranking the chicken head to the red(!) produced a bubbly, organic and throaty overdrive with real honest to goodness preamp/amp interaction. Very sweet with gobs of sustain. Doing a quick swap to the matched pair of 6V6s morphed the amp into a kind of Blackface Deluxe vibe with breakup noticeable at lower levels. The bottom felt a little less tight with a bit more perceived glassiness in the top end.
Whereas the 6L6 bottles speak “tux and bow tie” the6V6s are more “t-shirt and jeans”—not quite as complex but with a grittier and nice fat tone.
Also VVT Amps’ attention to detail gets a big thumbs up for the extra long line cord and groovy little spare fuse holder inside the back of the amp.
The collaboration between VVT Amps and Lindy Fralin has turned out to be a winning combination. The VVT Lindy Fralin Model’s beautiful, three-dimensional tones are equaled only by its straight-forward and no-nonsense design.
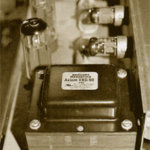
I have a Mesa Triple Rectifier that for the most part I am pretty happy with, but I’ve read about replacing output transformers, tubes and all sorts of other stuff. I just want my amp to sound more present, punchy and for the distortion to sound clearer. What do you recommend?
The Dual and Triple Rectifiers are among the top five amp models we mod the most. You can check out the details, sound clips, etc on our website, however, before you go that route you may want to experiment with some new tubes and/or a new output transformer. For power tubes we really like the tone of the Ruby 6L6GCMSTRs with a PC rating number of around 35-45. For preamp tubes we have been using the GT-12AX-C (gold series) with our Standard or Deluxe Mods, but the GT-5751M (gold series) works well in a stock Mesa Rectifier.
The output transformer can also make a significant difference and recently we have been shipping our custom VAREC180-O output transformers directly to customers. These are made to our specs by Mercury Magnetics and it gives you 4, 8 and 16 ohm impedance taps. You can take the amp to your local tech to have it installed or perform the work yourself (if you know what you’re doing). The tonal difference is literally night and day. The amp will feel much easier to play on, tighter/richer on the bottom end, pinch harmonics come out with ease and the over all tone is much more focused
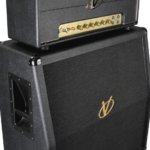
Marshall’s famed 1960s “plexi” and early-’70s 50-/100-watt amps gained notoriety for their fantastic tones. Of course, the downside was that they had to be driven hard to sound their best, which to the player (and anyone else in a milewide radius) meant volume – a lot of volume. And that sometimes meant turning speaker cabinets toward walls or employing an impromptu blanket muffler, sacrificing tone for the sake of band harmony and/or the mix. Then there was the consistency factor from one amp to the next, which meant hunting down the best-sounding Marshalls became an expensive game.
In short, when it comes to plexi tone, maybe those weren’t the “good old days.” Perhaps now, in our world of reissues, reproduction, and boutique guitars and amplifiers, guitarists are indeed in the midst of a golden age. If you doubt that’s the case, let us introduce the Voodoo Amplification V-Plex.
Voodoo Amps was founded in 1998 when hardcore tone lover Trace Allen Davis, a professional guitarist and proficient guitar/amp/pedal fixer, began modifying amplifiers. Largely dissatisfied with the offerings of the day, his idea of good tone caught on, and he quickly earned a reputation as a capable, comprehensive amp repair/modification shop.
We were offered a listen to the 50-watt V-Plex with Voodoo’s propriety-design 4×12″ slant cabinet. The hand-wired V-Plex is a four-input/two-channel amp with three 12AX7 tubes in the preamp and two EL34s in the power section. It has a single set of controls for Presence, Bass, Middle, Treble, Master and Volume – a layout identical to that of a vintage non-master-volume Marshall. The V-Plex’s Master volume is placed between the phase-inverter tube and the power tubes, which gives the player the ability to dial in plexi-like distortion starting at a very reasonable volume. On/off and standby switches, along with a red indicator, also occupy the front panel.
A look inside reveals flawless workmanship and top-quality components. Davis is, as we said, very much about the look and feel of guitar tone, and the research he put into this head is glaringly obvious. The cabinet uses four Celestion G12M “greenback” speakers, which are seen in amps all over the place.
But Voodoo’s cab is a little tricked out; aside from its propritary internal design, it is also capable of operating at either 4 ohms or 16 ohms in mono, as well as 8 ohms in stereo.
No doubt about it – the V-Plex talks the talk. But to see whether it walked the walk, we recruited a Schecter 006 solid body with two high-output humbuckers, and a Fender Stratocaster with three Duncan Alnico single-coils. We plugged in the Schecter and started with the V-Plex’s controls set in a familiar plexi manner; Bass at 10, Presence at 4, Mids at 6, Treble at 2, Master between 8 and 9, and Volume pushed to 8.
Flashback
If you’re a fan of the original Marshall JTM 45/50/100 models (if you’re a fan of real rock guitar tones, that’s you!), plugging in the V-Plex could well be the ultimate experience, especially if you’re not hip to coughing up the money to obtain (and hassle to care for) a vintage Marshal. Tone – gain-rich harmonics, with that clear, articulate crunch we’ve come to lust after – spews from the V-Plex by the truckload.
To test the effectiveness of the Master volume circuit, we rolled off the Master and brought the Volume control up a touch, and heard fistfuls of rich gain at reasonable SPLs. Yes, Virginia, you can get great plexi tone at comfortable levels.
The tone knobs reacted almost exactly like those in the original plexi circuit in that they don’t alter the tone much, but produce different textures. Backing off the volume and increasing the Master yielded a cleaner crunch that never surrendered its true character. “Jumping” input channels (a favorite trick of four-input-Marshall owners) substantially fattened the tone.
We next plugged in the Stratocaster. To keep high-end response where we liked it required rolling back the Treble and Presence controls, but the Strat also proffered fat, meaty tone from every pickup and selector-switch position. Crossing channels again, we got more meat right up until we pushed it too hard, when (in true plexi form) the signal compressed beyond the point of being enjoyable.
If you’re after the ultimate vintage plexi tone, your search could very well end right here, as the Voodoo V-Plex delivers definitive plexi tone, and has the ability to play at comfortable levels. Davis and his crew nailed it. – Bob Tekippe/Ward Meeker
VVT’s Lindy Fralin Model amplifier
Maryland-based amplifier builder Vintage Vacuum Tube Amplifiers (you may know it as VVT) recently fielded a request from renowned pickup winder Lindy Fralin. He wasn’t looking for advice on wire or how hot to wind a pickup for best interaction with a particular VVT; rather, Fralin wanted an amp built to his specs and taste. And not just for him, but for the mass market. VVT, realizing the co-branding possibilities, jumped at the opportunity.
So, what does a tone guru like Fralin want in an amplifier? Well, he says the goal was “a clean, full-body-voiced amp that’s lightweight and able to sound good at low volume.” Sounds like something we’d like, too. So when VVT asked whether we wanted to hear it, we were happy to take up the offer.
At first glance, the VVT Lindy Fralin amp looks boutique in a way we’ve come to expect; i.e. it sports point-to-point wiring with carbon-comp resistors, an all-tube circuit, and a 12AX7-driven spring reverb and preamp. But, go deeper and you’ll quickly discover some seldom-seen features, like a trick self-biasing-cathode design that allows the player to switch between a pair of 6L6s (for 30 watt of output) and a pair of 6V6s (for 15-watts) without having to re-bias the amp. Part of its secret is a custom-wound Mercury Magnetics transformer designed specifically for the Fralin that allows the amp to switch between the 6L6s and 6V6s while maintaining stable impedance for the tubes and speaker load.
The amp ships with a pair of 6L6s, but will also accept 5881s or JJ 6V6s, for an altogether different favor. Another unique feature is Fralin’s choice of a single 15″ alnico-magnet Weber speaker instead of the more traditional pair of 10″ or single 12″ speaker.
The overall look and layout of the amp is different, as well, but still boasts a vintage vibe with a neatly executed off-white tolex, oxblood grille cloth, top-mounted controls, and heavy-duty leather handle. There are no metal or plastic corner protectors, and no extraneous piping or badging. Its look is clean, simple, and classic. The control layout is accordingly succinct, with a single 1⁄4″ input, a switch for Bright, and controls for Volume, Treble, Bass and Reverb, along with switches for Power and Standby. Also worthy of mention is the 11-foot power cord.
VVT shipped our tester with a matched pair of 6L6s by TAD and a matched pair of 6V6s by JJ. We started with the TAD 6L6s and our test guitars – a Fender Relic Strat and a Hofner Verythin Classic with mini-humbuckers. After plugging in the Relic Strat and letting the amp warm up, we set the Volume at 3 o’clock, Bass and Treble at 12, and then we hammered a few chords.
We were immediately impressed with the amp’s complex overtones, its round, punchy low-end response, and its snappy highs. It didn’t take much noodling or knob tweaking to realize that the tone controls on this amp, along with its Bright switch, are exceedingly well-voiced. From a player’s perspective, that means it’s easy to find likeable sounds. The Bright switch compensates nicely for the slightly darker sound of mini- or full-size humbuckers, while the wide sweep of the Bass control keeps its frequencies full and punchy with single-coils.
While the amp is voiced for clean tones, it also does a good job when it comes time to get dirty, and is very responsive to changes in pick attack or guitar output. Simply backing down the volume control on the guitar and easing up on our pick attack, the Fralin cleaned up from moderately dirty overdrive with musical overtones to a sparkling clean sound that didn’t lose any of its life or attitude.
We popped in the matched set of JJ 6V6s and checked the tone at 15 watts output. The amp broke up quickly and had a slightly more boxy sound, with reduced complexity of overtones; still very lively and punchy, just not as big as 6L6s – fantastic for low-volume situations. The tube-driven reverb is also well-voiced. At lower settings, it adds a bit of ambiance that doesn’t get in the way or wash out the amp’s tone, and at higher settings it’s suitably splashy.
The boys at Vintage Vacuum Tube do a killer job on the Fralin signature amp. It’s loaded with big, dynamic, single-coil-friendly tone (that sounds pretty good with humbuckers, too!) in a nice, lightweight package. – Phil Feser
Of course, the perfect segue would now be to decipher the “special” nature of the original output transformer in Neil Young’s narrow panel tweed Deluxe, providing you with a timeline in which these happy accidents appeared, or better yet, a source for clones of thee special gems via, say, Mercury Magnetics. Sorry… we asked, and while the guys at Mercury had heard the same story about the output transformer in Neil’s Deluxe, we can’t offer any definitive clues to what Larry described as “the most perfect way form.” However, we can immodestly suggest that you snag a TQ Clarksdale [ed. note: built using custom Mercury Magnetics trannys]—a faithful clone of our original 1959 DeArmond 1×12. It’s Neil’s amp in spades and he doesn’t even know it. The first batch of ten have been shipped and a gutsier, louder or more soulful 20 watt 1×12 has never been built. We can’t (and don’t) take credit for the original design—that belongs to an unknown engineer at Rowe Industries in Toledo, Ohio circa 1959—but we can state without any doubt whatsoever that the Clarksdale nails the tone and attitude of the original, and the original is the most impressive 1×12 we have ever heard. It’s got more bottom end and stronger mids than a tweed Deluxe, and where a Deluxe folds up, the Clarksdale roars all the way to “10.” Ain’t no quit in the Clarksdale, and like Neil Young’s Deluxe, a lot of the mojo is found in the DeArmond’s mammoth, original output transformer.
With Young’s legendary tweed Deluxe off the board, we chose to put the vintage Vox AC50 Larry provided for Frank “Pancho” Sampedro on the Ragged Glory tour and recording sessions in play. Now, for those of you who tend to shy away from the potential complications that 40 year-old amps can present, the tale that follows will not inspire confidence, even though in the end, we did reach the promised land.
We found a 1965 gray panel Vox AC50on eBay with a “best offer” option. A search of previously completed auctions revealed that vintage AC50shad recently sold for anywhere from $900 to $1600 (more for the earliest, small box candy panel models with tube rectifiers). Since Larry’s “Pancho Vox” was a mid ’60sgray panel with silicone diode rectifiers, we made an offer of $950 for the ’65, which the seller accepted.So far so good. When the amp arrived from Florida,however, we immediately noticed that the chassis had dropped inside the cabinet. Vintage JMI Vox chassis are mounted on a plywood shelf that allows the amp to slide in and out of the cabinet, and due to the seller’s pathetic packaging job, the plywood board in the AC50had splintered and cracked beneath the weight of the chassis. The shelf was shot, but since a cursory fire-up led us to believe the amp was in good working condition as advertised, we asked for and received a $100 credit and cut a new plywood shelf for the AC50from a reproduction AC30 cabinet we had used to house a vintage ’63 AC30head. Piece of cake, and a very quick and proper fix.
In the interest of authenticity, we also ordered a 4×12 cabinet loaded with aged Celestion G12H30s (Hellatones) from Avatar Speakers. They were running a clearance sale on loaded 4x12s for just $378 and $49 shipping, so we bit, and people, this cabinet kicks the living shit out of our vintage Marshall 4×12.
With the cabinet delivered, we were anxious to uncork the AC50at full roar, and we did—for maybe five minutes. The thick sound of the Vox filled the room, the house and the block with a gorgeous,incendiary bloom through the Avatar cab and our blacktop Les Paul, until the joyous noise was suddenly contaminated with a most noxious and fear-some popping, fizzing and spitting, while we sighted a glowing red spot on the plates in one of the Svetlana EL34s. Not good. Off to Bakos Ampworks….
After an hour of probing on the bench, Jeff asked,“Do you smell that? Man, I think the output transformer is smoked. It’s probably been going out for a while.” Jeff patched in a substitute which eliminated the crackle-spit and confirmed, “It’s toast.” We immediately punched the number for Mercury Magnetics, and with our print deadline looming large, we had the Vox tranny shipped 3-day UPS from California. Jeff popped in the Mercury ToneClone tranny and replaced the original silicon diodes with FREDS. We also A/B’d an older pair of original “Winged C”Svetlana EL34s with a matched pair of NOS TeslaEL34s acquired from KCA NOS Tubes. At $80/pair,the Tesla’s are reportedly comparable to NOS Mullard sat more than three times the price. We also installed two lightly used Mullard ECC83sin the Normal channel and a spare NOS RCA 7025andNOS Teslain the Brilliant channel. But we were still missing an essential ingredient in the “Pancho” rig….
With the Vox AC50 brought back from the brink and the ’57 Junior found, we were finally poised to experi-ence Ragged Glory. We prudently set the volume controls for both channels of the Voxon “7,” following Larry’s recommendations for tone controls—treble dimed and the bass low. We’d ease into “10” on the volume controls later…. With a flick of the toggled tripwire the Vox lit up, and within 10 seconds the P90 was humming through the four Hellatones. We stepped back a few feet, brought the volume control on the Junior all the way up, turned away from the four twelves and cut loose with a tight, slashing chord progression out of E major. Digging deep into the Junior, the Vox responded as the twin EL34s became fully inflamed, gorging on 430 volts. The tone was thick, complex and gloriously ragged with a clarity, punch and trebly character that masked nothing—the perfect burning, churning, flannel and leather rhythm tone. Hit the low E string on a fat E major and it holds…. Come over the top with an upstroke on the E and B strings and the Vox responds with a gorgeous, penetrating cymbal splash that hangs as long as you wish. Need a dash more mids? Dial back the tone poton the Junior, Pow! There it is. Thanks to the FREDS, the entire rig breathes with an extraordinary touch sensitive feel, and even on “7” the Junior could easily be coaxed into howling cries of polyphonic feedback. After 15 minutes, we reached over and dimed both volume controls…. Now we were welding some very serious shit—Mississippi Queen meets Powder finger…. And this was 50 watts of classic, vintage Voxtone, mind you…. Harmonically richer, better endowed and far less linear and one-dimensional than a vintage Marshall—a cross-bred beast with a level of gain, distortion and raw heat far beyond the capabilities of any other vintage British amp unaided by a pedal. The tone, the vibe, the drama of this amp is stunning, and it left us wondering why the vintageAC50 gets so little respect. We can think of no other vintage or current production amps that do what the Vox does. Not one. Of course, your results could vary, so here are a few tips for you brave souls willing to take the plunge.
Don’t be fooled into thinking that the Voxis solely a“rock” amp. Kid Ramos blew us away at a blues gig playing an AC30with a Fender reverb box, and his was one of the best blues tones we’ve ever heard anywhere. Expect the same from an AC30.
Do not fear replaced transformers. You’ll pay less for the amp and the ToneClone replacements from Mercury Magnetics will outperform many tired originals.
Expect the unexpected and coolly deal with it. Voxamps aren’t Fenders—things like speed nuts on the chassis for the cabinet mounting screws are often missing or broken, but they can easily be replaced.Good tubes are also essential, but not every brand will provide reliable performance or the best tone in aVox. You must also exercise extraordinary caution around the AC50when handling the chassis outside the cabinet—even when performing simple tube swaps. The preamp tubes are mounted directly above two uncovered filter caps that remain hot even when the amp is unplugged. One slip and your Quest for Tone could be over.
Plan on investing in a thorough checkup by an experienced amp tech who can deal with cold solder joints, degraded components, old filter caps and proper biasing, before your amp takes a dump. Recommended amp techs follow, along with contact info for Mercury Magnetics.
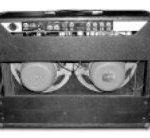
Hey, you guitar players… don’t think for a minute that you should skip the following articles because they are too technical. You’ve dropped some big money over the years on your guitars and amps, right? Transformers are the very heart of every amplifier, and your output transformer can influence your tone every bit as much as your choice of pickups, tubes, and speakers. Our attention was recently focused on output transformers after one of our all-time favorite “keeper” amps, a blackface Fender Pro Reverb with an amazing pair of Jensen Vibranto speakers went down with a bad output transformer. (By the way, Pro Reverbs remain some of the best vintage bargain tone machines every made, and why they have failed to receive the high praise and prices reserved for blackface Super and Deluxe Reverb amps is mystifying. Get yours now.) Cesar Diaz kindly sent us a new Mojo Tone replacement OT, and it was immediately apparent to us that although we had always considered the tone of our Pro to be extraordinarily good, things had improved significantly after installing the new OT. The amp had more punch and power with less sag, and that got us wondering if output transformers could slowly decay over time, subtly sapping the full potential of a great amp. We concluded that it can, which led us to consult with a couple of experts on the topic of guitar amplifiers and transformers. We asked Victoria Amplifier founder Mark Baier (aka Sam Bisbee) to comment on his experiences with OTs, along with the premier builder of custom amplifier transformers on the planet, Sergio Hamernik of Mercury Magnetics. Sergio has been blueprinting exceptional vintage examples of the great transformers of the past and supplying discerning guitarists and their technicians with accurate reproductions that succeed in delivering authentic vintage tone. Stay tuned for reviews.
TQR: Good morning Mr. Bisbee. Your mission, should you choose to accept it….
Yikes, I expected the computer to go up in a puff a smoke!
So you want to know the inner secrets of output transformers, eh? Be forewarned – once you make that commitment, you’ll be cursing the days when you slept through “Advanced Frightening Mathematics 300….” How’s this for a wake up call? The following is the very first paragraph from Chapter V of the venerable RCA Radiotron Designer’s Handbook (4th ed.).
TRANSFORMERS & IRON CORE INDUCTORS
(i) Definitions
An ideal transformer is a transformer in which the winding reactances are infinite, and in which winding resistances, core loss, leakage inductances and winding capacitances are all zero. In such a transformer the voltage ratio between any two windings is equal to the turns ratio of the windings under all conditions of loading. Also, in such a transformer the currents in any two windings are inversely proportional to the ratio of turns in the windings under all load conditions….
The entire chapter is 53 pages long!
To keep things from getting out of hand, let’s just say that there are many factors influencing output transformer performance. Aside from an obvious fault like a shorted winding, fatigue of the core (the metal laminations) is the most prominent consideration in transformer output and tonality.
Fatigue is a natural consequence of normal operation. Suffice it to say that it’s a veritable Fourth of July inside the atomic workings of your output transformer every time you bust your best licks through it. The magnetic properties of the metal used in the core, the type of laminate used, the size of the core, and many other factors contribute to the final performance and longevity of the output tranny. Actually, most guitar amplifier transformers are made of rather inexpensive materials (yeah, try telling that to your parts supplier). The real high end stuff ends up in mega bucks hi-fi and industrial applications. In the grand scheme, guitar amps don’t rate the kind of respect we tone geeks assign to them.
To understand why a tranny gets fatigued, let’s remember what’s happening in the OT. You are transforming a high voltage/low current signal into a low voltage/high current signal. There are lots of electrons jumping around from point “A” to point “B.” This creates magnetic relationships and phenomena that act to age (or fatigue) the characteristics of the iron. Over time, the constant forces acting on the core change the ability of the laminate material to perform its duty efficiently. It will saturate quicker, and it reacts differently than when it was new, thereby altering the tone and performance of the amp.
To be sure, this is a slow, incremental change, and one which will take years of use to manifest as a perceivable degradation in tone. In fact, one of the reasons we like old ’50s amps is the quicker saturation and compression of an old, fatigued tranny, so don’t get too spun out of shape thinking your tone is being sucked away by a tired transformer. It may be your personal ticket to tonal nirvana. Just remember, however, that old amps with old trannys means old everything else, too… yin and yang.
Most of us are looking for the most reactive, intuitive amp that our minds and fingers can handle. In many cases, if the amp is checking out A-OK but it’s otherwise sounding a bit soft and saggy, perhaps a popping a new transformer in is just the ticket. Replacing an output transformer is not an inexpensive procedure, but it’s a simple one, and one that is easily switched back if the results are less than fruitful. As to the question of swapping out old components like caps and resistors that test and sound good, I advise leaving the old ones in when we are dealing with vintage pieces, the qualifier being that these components should test and sound good. Unless the ’57 Bassman amp in question is going to be used on an extended 300 date tour to sold out sheds, leave it alone. Most vintage amps will let you know that they’re giving it up by an audible degradation in tone and performance. Let’s face it, a 40-year-old capacitor will most likely fail in the next couple of decades (especially filter caps), so consideration must be given to the intended application of the amp. For most weekend warriors, the original passive components will suite you fine if they test and sound good. One last thought on the use of increasingly expensive NOS tubes in an amp that is old…. You will have to determine if you want to jeopardize a $259 pair Mullard EL34s in a vintage 40-year-old amplifier. When a coupling cap decides to fail, it can put the tube in a potentially dangerous operating point, causing it to fail too. I know I’m kinda swinging both ways here, but in this case, the vintage geek wins out (let’s not forget the tales of unscrupulous techs carving all the old Astrons out of vintage amps and then turning around and selling them for big bucks – it does happen, folks).
I could go into a more, more, extra more technical explanation of what’s happening in an OT, but I don’t want to lose everybody in a run down of big math with variables like reactance, gilberts, and flux densities that would scare everybody into suicidal seclusion….

I have a 1987 model 50-watt reissue Plexi head that is completely stock. I don’t care for the sound of an attenuator, and I want this amp to sound as close to an older Plexi as it can get. What do you recommend for the best possible tone?
We get this kind of question nearly every day. I’m sure you’ve heard the phrase, “No two Plexis sound the same,” but there’s a ring of truth to that. One could surmise that if Marshall (as well as other amp manufactures of the time period) ran short of parts it would substitute the next-closest thing to keep the production line moving along, which would logically explain the numerous differences in circuitry that have been documented. Additionally, a lesser known fact is that there were also transformer differences in the early Plexis.
If, for you example, you were to substitute one power transformer for another, the B+ (high voltage) might be higher or lower, which would have a direct impact on the tone, performance and feel of the amp. This helps to explain why some Plexis are harsh, overly bright and don’t break up well, while others break up nicely, have a warmer tone and have a better overall feel.
How can you get your reissue Plexi to sound, feel and perform more like an older Plexi? First, let’s agree that tone is a matter of taste, and in matters of taste there can be no right or wrong. Simply put, it comes down to whatever works best for each individual player based on his or her preferences in regard to tone.
Transformer Upgrades: Simply changing the output transformer is enough to satisfy the needs of some players. For others it also requires upgrading the power transformer as well as the choke. I’m sure there are many of you who may wonder, “Why change the choke?” Rest assured that selecting the right choke can make as much of a difference in tone and feel as changing the output transformer, and the same can be said about upgrading the power transformer. Many companies offer Plexi-spec output transformers as well as a complete Plexi-spec replacement transformer kits. We exclusively use Mercury Magnetics and would encourage you to check them out. Look at the transformers from other companies too. If you aren’t certain what you use, please feel free to call us.
Components: This has been covered at great length on numerous forums and bulletin boards across the Internet. Can upgrading the components on the PCBs (Printed Circuit Boards) make an audible difference? Yes, absolutely. What are the best components to go with? Again, this is a subjective thing. Upgrading the coupling capacitors (caps) from the box style caps to higher-quality caps (e.g. SBE Orange Drops, Mallory, Hovland MusiCap, Solen, Auricaps, etc.) will no doubt provide an overall sonic improvement. For cathode bypass caps (caps in series with the cathode resistors in the preamp section), the majority of players seem to gravitate toward non-polarized cap cathode bypass capacitors versus the polarized bypass caps. For resistors I personally prefer metal film, since they don’t drift off value over time and will produce less noise/hiss over time. Opinions vary from one person to the next, though, so use whatever you’re most comfortable with.
Master Volumes: You can go with a pre- or a post- PI (Phase Inverter) master volume. Both have their advantages, but both have disadvantages as well. The easiest to hookup would be a pre-master volume (see JCM800 2204/2203 schematic), which is beneficial in that the EQ section (Bass, Mid, Treble) is much more active and responsive. There are various kinds of post-PI master volumes. Some are extremely transparent, while others color the tone of the amp in an undesirable way. The advantage to a post-PI master is that you can get the vintage distortion or breakup much like you do when you turn a Plexi to somewhere in the range of 5-7 (on a scale of 1-10). Our V-Plex Series amplifiers employ the post-PI master volume. Some of the Plexi reissues have not come with screen-grid or input-grid resistors. Without these resistors Plexis tend to sound squishy, muddy and smeary. For EL34’s I recommend 5-watt 1K screen-grid resistors, and for the input resistors (pin #5) I recommend .5- watt 1.5K metal film.
Feedback resistors: We have seen many different values in the older ’60s Plexis. We’ve also seen the resistor assigned to the 4-, 8- or 16-ohm tap as well as the positive side of the speaker jack. Do they all sound different? Yes, they do. Remember, there is no substitution for hands-on experience when it comes to determining what sounds and feels the best. I hope this helps you find the tone you want. Have fun tweaking your amp.

Nearly 700 guitar and bass players descended on the one day consumer music expo to plug in and compare the cream of the amplifier world. Some notable manufacturers to show their wares included: Marshall, Mercury Magnetics, Camo Cabs, Vox, Tech 21, Fargen, 65amps, E.V. Komet, Blankenship Amplification, Celestion, Peavey, Bruno Roland, and many more. Also exhibiting were a select few Guitar manufacturers such as; G&L, Minarik, Trussart, Thorn, DeTemple Guitars, U.S. Master, Dusenberg and Lapdancer.
Many talented players including Billy Gibbons, Mark Goldenberg, Carl Verheyen, Al Vescovo, and Greg Leisz were in attendance.
The Amp Show is a one of a kind event for a guitar player. Think about it, when was the last time you walked into a tradeshow packed with amps, plugged into a Bruno Cow Tipper with a 4×10 cab (turned it up to 11) and didn’t get kicked out of the place? And this was happening in about 50+ rooms throughout the day. Walking the halls players were packed into rooms for Marshall, Vox, Matchless Amps, Bruno, Soldano, and the list goes on.
The most notable event of the expo was the Tone Wizards II seminar, an open forum on all things amplifier. This years participants included: Phil Jamison (Matchless), Mitch Colby (Marshall), our man Sergio Hamernik (Mercury Magnetics), Mark Sampson (Star), Gerald Weber, and Myles Rose (moderator).
2nd ANNUAL AMP SHOW PRESENTS:
TONE WIZARDS II
Seminar & roundtable discussion with Q&A session
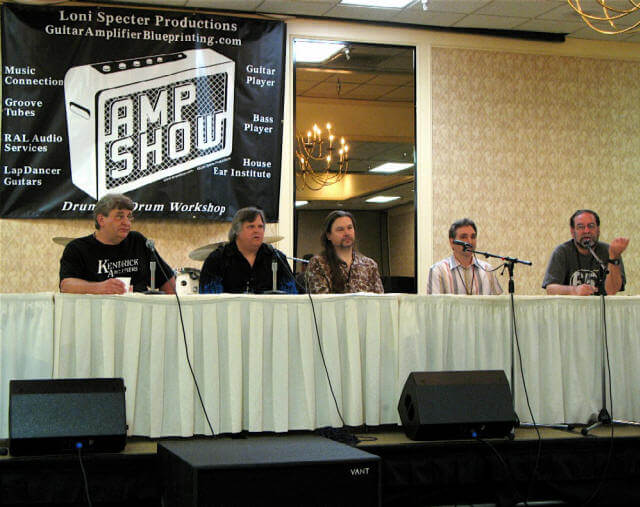
The panel L-R: Gerald Weber, Mark Sampson (Star Amplifiers), Sergio Hamernik (Mercury Magnetics), Mitch Colby (Vox-Marshall), and Myles Rose (Guitar Amplifier Blueprinting).
PHOTO BY TERRY BUDDINGH (GUITAR WORLD & BASS PLAYER MAGAZINES)
Billy Gibbons with show promoter Loni Specter.
Source: https://mercurymagnetics.com/pages/news/AmpShow/_2006/ampshow2006.htm
A number of high-end amp designers have been building their versions of the ultimate Marshall “Plexi,” but few have approached the task with a greater dedication to tone than Trace Allen Davis.
The president of Voodoo Amplifiers, Davis is known as one of the industry’s most respected amp-modification artists, and he routinely turns mild-mannered amplifiers into dream machines with seemingly supernatural tonal attributes. Davis conceived of the Voodoo Amplification V-Plex half stack after he encountered an enchanted 1968-69 “Plexi” in his shop’s service bay. He paid an exorbitant sum to acquire it from the owner and set upon discovering its secrets, engaging Mercury Magnetics to reverse-engineer the transformers and build exact replicas. The hand built V-Plex features these recreations, as well as point-to-point wiring, premium components and lustrous gold plated control knobs.
I tested the 50-watt master volume version of the V-Plex through one of Davis’ custom-designed 4×12 cabinets. As I hit some open chords on my Les Paul, with the amp’s volume controls set at noon, the V-Plex’s glorious harmonic balance practically took my breath away. Every note that I played through this extremely quiet amp was smooth, rich and warm, with a sizzling brilliance that defies description. The detail and depth of the tone was so fine; I was inspired to play slow and deliberate licks in order to experience the full evolution of each beautiful sound. Simply put, the Voodoo Amps V-Plex is the difference between a good “Plexi” and a great one. Bravo, Trace.
Source: https://mercurymagnetics.com/pages/news/GuitarWorld/GWMay06.htm
One of the common questions we receive here is, “How can I get my (fill in the blank with your favorite brand name) reissue amplifier to sound like the original?” Often times the question will contain additional information of what had been done already. “I’ve replaced the preamp and power tubes and gotten it biased, but it still sounds cold and brittle….”
My usual answer involves examining the guitarist’s rig by taking a “system” approach when looking for a particular tone. Often too much weight (i.e. blame!) is put on the amplifier, perhaps because it is the most electronically complex item in a typical signal chain. Countless times I’ve personally played with changes to an amplifier, whether modifying it, changing the tubes, etc. and still had poor results in overall tone! Now if you’ve got the wrong pickup or speakers for your needs, then obviously no change to an amp is going to help all that much….
But presuming all other areas of your guitar rig/system are covered, then let’s go back to the amp itself and talk about a particular upgrade that hasn’t gotten the attention it has deserved: the output transformer. In fact, dare I say that in many cases — for example a reissue amplifier — a change to a higher-quality output transformer will have a greater impact on improving the overall tone than playing with different brands of tubes. Essentially, if you’ve got the best tubes, or the worst tubes, but if your output transformer is a low-grade model, your tone will suffer no matter what you do.
“What the heck is the output transformer?,” you may ask. Well in layman’s terms, it’s the final connection in your tube amplifier that takes the signal from the tubes and transforms them into impedances and power suitable for your speakers. In further layman’s terms, it’s one of the big “metal blocks” that is attached to a typical tube amplifier’s chassis and is the connection link between your tubes and speakers. Most commonly, there are two large transformers in an amp — The other besides the output transformer is called the power transformer — that is the one that is responsible for taking the wall current and transforming it into the DC power used by your amplifier. While the power transformer is directly responsible for areas like supplying exactly how much voltage goes to your tubes and therefore can affect the response or “feel” of the amplifier, it is the output transformer that can dramatically affect the tone of your amplifier since audio signal is actually passing through it.
Like tubes, transformers can distort and color the sound, but in part because they are wired to an amplifier rather than just being “plug-in” devices, I feel they receive very little of the attention as to how much they can affect the tone. In fact, output transformers used to be thought of as simply items to be replaced when they failed. However, I can attest personally that in many instances a change in the output transformer to a quality unit as an upgrade can make a huge difference in tone — especially with those popular reissue Fender, Marshall, and Vox amps currently being made.
I recently was fortunate enough to try some units out made by Mercury Magnetics™ (www.MercuryMagnetics.com) with the idea being to install and listen to the various tones of some of their models of output transformers. The test-dummy amp used in the first case was a stock 1974 Marshall JMP 50 watt model 1987 Lead model — it had recently blown its output transformer after a tube had shorted a connection between two pins of the tube socket so it was the perfect candidate. The stock transformer still actually “worked” somewhat – but the power output was very low, probably about 1/5 of what the amp should have been producing.
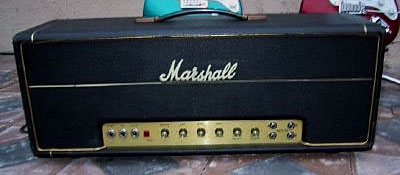 Mercury Magnetics™ offers three choices for replacement 50 watt output transformers and I had the opportunity to try two of them. The units are part of the Axiom® or ToneClone™ series which are hand-built replicas of the original transformers used in the Marshalls of various eras. In addition to the Marshall replacement transformers, Mercury Magnetics™ also makes various other Axiom® models for classic Vox and Fender amplifiers in addition to other toneful amps such as Ampeg, Gibson, Hiwatt, and many others.
The models I tested were the Axiom® 050JM, a 50 watt output transformer model based on the earliest “plexi” Marshalls, and the Axiom® 050JM-SL, a similar model with the “Self-Leads” option. Both are priced at $150. The SL model differs from the standard 050JM in that it is made just like the earliest original plexi transformers were, where the solid copper core wire that is wrapped around inside the transformer continues outside of the transformer and is also the same wire used to connect to the tubes and impedance plug, etc. The solid-core copper SL wires outside of the transformer are covered by glass-cloth fabric material, just like that used on the original ‘60s models. Conventional transformers (including the non-SL version 050JM) use a different type of wire, often Teflon, that is spliced at the end of the solid-core wire that is then wrapped around the transformer inside. So what’s the big deal about the wire type? Oddly enough, it seems to really affect the tone of the output transformer — more on this in a moment.
Mercury Magnetics™ makes another model as well, the 050JM-M ($175), that is designed to be used in conjunction with modified Marshalls that require a beefier output transformer to better match up to the higher B+ plate voltages and other modifications or changes that run the amps harder. Since the ’74 JMP Marshall guinea pig was a stock model, I focused on the two plexi model variations, the 050JM and 050JM-SL.
The 050JM-SL was installed first. Since Marshalls sound best when run hard into power tube distortion, that’s exactly the listening environment I used. The head was run through a ’71 basketweave Marshall cabinet with G12M-25 greenbacks. The guitar was my trusty Les Paul Classic with a custom-specified Seymour Duncan Seth Lover PAF-type pickup. The tone of the amplifier with the 050JM-SL installed was brighter in the upper mids as well as the highs. The gain was a bit lower than with the stock Marshall’s output transformer (when it was properly functioning), but the clarity of notes and chords was definitely improved. The 050JM-SL is a good fit for players that like classic-rock and blues tones and perhaps need a bit more high-end cut through the mix. Usually additional highs are the last things that are needed with Marshalls, especially the amps and cabs made from about the mid ‘70s onwards. However, if you play through an earlier model Marshall loaded into a basketweave cab with G12-25s, “over brightness” really is not an issue and the O50JM-SL is the right match for this earliest type plexi tone. If you’re running a later checkerboard cab and a ‘70s JMP Marshall like our test model, the O50JM-SL may prove to have a bit more top end than what you’d want.
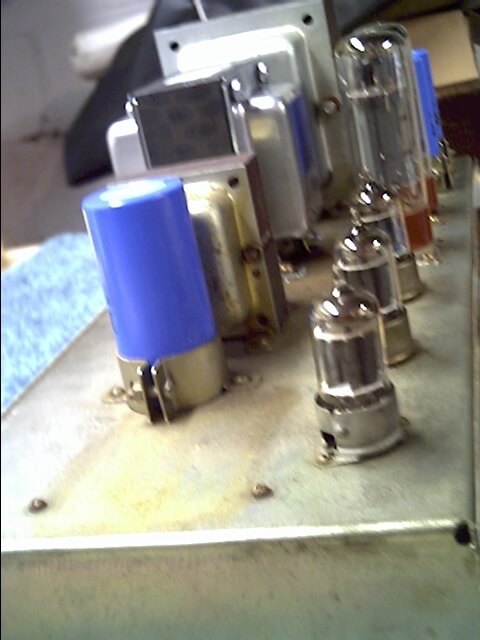 Moving over to the O50JM, I was amazed at how different this transformer sounded, even though other than the lead wires that exited the transformer, it has the same specifications and parts as used in the O50JM-SL! After installing it, I knew that the O50JM was the choice for the hard-rockers, whether using a plexi or metal panel-front Marshall. The O50JM had more distortion dirt and grind in the tone. Both transformers contributed to a very smooth response from the Marshall, but the O50JM traded off the upper frequency and some of the clarity content found in the SL model for what sonically resulted to its increased distortion and compression.
I also had the opportunity to hear the difference in a 100 watt reissue Marshall SLP after a Mercury Magnetics™ O100JM ($250: their 100 watt “plexi” output model) was installed and the results were even more staggering than the difference between the stock and upgraded 1974 Marshall 50 watts. I attributed this directly to the obviously low-grade output transformer used in the reissue Marshall. Crank up a stock Marshall SLP reissue and the transformer really does mask the tone — bright, grainy and cold are the words that come to mind as well as a pure lack of fidelity. The O100JM brought back the low-end warmth, made the top end smooth and the famous Marshall midrange crunch was back in the equation just like the original models. This is tone, pure and simple — and the reissue SLP held its own against my original ’68 100 watt Plexi Marshall.
One area worth mentioning is that Mercury Magnetics™ can also rewind original vintage transformers if you don’t want to replace your burnt out original vintage transformer. Mercury Magnetics™ replaces the internal windings and necessary parts but uses the original core and covers and then puts the transformer back to original specifications. This is ideal for the person who is looking to maintain their amp in a form that is as original as possible. This service is more costly than simply replacing the output transformer outright, but it will also help maintain an amp’s value so it makes a viable choice.
When looking into swapping out an output transformer, while it’s not extremely complex to do, it’s best to have a qualified professional technician do the job as tube amps contain lethal voltages that are stored inside the amp even when it is not plugged in. It can be a bit of a time-consuming job as you have to get underneath the amplifier’s layout/circuit board so the average charge by a technician to remove and replace the old transformer with a new one will typically run about $100 or so.
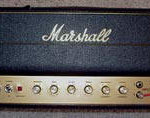
In part I of our Marshall JTM-45 transformation process, we installed a point-to-point board from Metropoulos Amplification (www.metroamp.com) and began to hear the positive results of our test Marshall as it came to new life.
Now, in Part II of our continued Marshall JTM-45 transformation, we move forward with two additional changes in addition to having the opportunity to compare the final results to an original 1964 badge-logo Marshall JTM-45. The two changes that we decided to perform were to swap out the stock output transformer to a Mercury Magnetics™ (www.MercuryMagnetics.com) Axiom® O45JT-C model as well as to upgrade the board’s capacitors to those made by SoZo Amplification. To say that we were excited as well as just plain curious about the final results, especially when we could now compare it to an original JTM-45 — is an understatement.
We contacted Paul Patronete at Mercury Magnetics™ and he hooked us up with the Axiom® output transformer. Paul added that the Axiom® O45JT-C is a custom version output using Teflon wire instead of the normal UL1015 vinyl wire. The Axiom® O45JT-C output offers 8 & 16 ohm secondary taps. When it comes to output transformers for the JTM45 amp, Mercury Magnetics™ offers a plethora of options beyond the stock, cloned, vintage replacement. Options available in the Axiom® line of output transformers are primaries optimized for KT66/6L6/5881 tubes or EL34/KT77 tubes. Secondaries with just about any output impedance combination that one could want. Many of these custom Axiom® models feature “mil-spec” Teflon wire leads with silver tinned, nineteen strands of high purity copper. All of the Axiom® transformers are hand wound from period correct specimen, vintage blueprints. One of the more popular Axiom® pieces that Mercury Magnetics™ offers is an exact clone of the highly coveted Radio Spares output transformer. The Radio Spares output is from the early original, first run Marshall JTM-45 production amplifiers. Mercury Magnetics™ offers several versions of the Radio Spares output. One of the most popular versions is a Teflon wire leaded version. The Radio Spares transformer is well-known for its association with the earliest Marshalls and according to Paul is what you’d find in the famous Eric Clapton “Bluesbreaker”-era amp.
Those that have listened to or played through a properly running Marshall JTM-45 know the sound. It’s a smooth and naturally compressed distorted tone that when pushed will provide just enough crunch to know it’s characteristically a Marshall, but without any of the “buzzing bees” preamp tones characteristic in high-gain preamp-gain emphasized amplifiers. As you push the volume controls up higher on a the best JTM-45s, it’s clearly the sound of rock with its fat bottom end, lovely harmonic overtones, and sustain that sits well with the best blues and classic rock tones heard. All of this packaged in an amp that really is one of the most dynamic and player-responsive amps ever built.
The reissue JTM-45, while certainly not a “bad” amplifier on its own, really does lack much of the detail and smoothness that is really much easier to grasp and identify when heard. For example, the reissue JTM-45 in stock form would thicken up appropriately with the expected tube compression when turned up, but it clearly was not as smooth. There are definitely some tones that sound a bit “grainy” and edgy that a properly running original JTM-45 doesn’t have.
A project such as this JTM-45 reissue transformation offers an exciting opportunity for those serious about maximizing their tone, but either don’t have or don’t want to shell out the prices for the originals. As of this writing in early 2004, script-logo JTM-45s are commanding a minimum of $4,000 and the better examples are going for more than that. Our badge logo JTM-45 featured here generously on loan for the story has a value that may well be approaching $10,000 by today’s estimates.
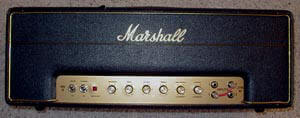 With that aside, we should start out by saying that this is not a thorough “apples-to-apples” comparison between the two amps. To be 100% fair, ALL the components would have to be altered to the exact specifications of our 1964 badge-logo Marshall JTM-45 and that really wasn’t the point. The point of these transformations was to get the stock reissue JTM-45 sounding more like the “real thing” as described above with regards to the powerful, smooth and dynamic Marshall tone.
Another issue beyond the component values is that we’ve opted to keep the power transformer in stock form for the time being in the JTM-45. As a result the transformers will supply a different amount of B+ current to the plates and so it will not respond in exactly the same way as the original Badge logo model.
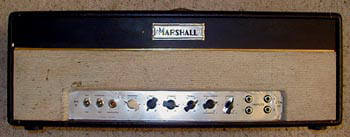 One final, and perhaps most important point, which Mercury Magnetics™ vice-president Sergio Hamernik added: “The transformer in a 30-year old amplifier will sound characteristically different as it ages compared to a new replacement, even if the replacement is built with the same materials.” And while the component materials and manufacturing methods used by Mercury Magnetics™ are made to the exact same standards as the originals (Sergio also added “Every turn, every layer, is copied and blueprinted exactly, including any original manufacturing anomalies found during our rewinding process of the original, vintage specimen, Sergio emphasized that the ToneClone™ series transformer will still sound different, but “like the original did in the amp when it was new” and not like the tone of the aged 30-year-old transformer. Since much of our favorite tones were recorded at least 20 years ago, perhaps this isn’t such a bad thing?
Sergio did suggest breaking in the new Axiom® transformer with 20 to 40 hours of hard playing time. He also said that this break-in period will get the transformer about halfway there to that 30 year seasoned tonality. Thermal cycling and running magnetizing currents through the transformer (playing the amp) will definitely sweeten things up in that period of time.
We could and may still make further changes to the reissue JTM-45 in the future and report back. However, with the point-to-point board, reduced “vintage” filtering, and tube swap that we performed last time around, along with the planned replacement of the on-board capacitors and output transformer for this second round, we thought that we’d be in really good shape with the final tonal results of this amp. And for those that missed it previously, we had previously written about Mercury Magnetics™ output transformers used in a 50 watt Marshall and were very pleased with the results. We anticipated nothing but the same results with the change in the reissue JTM-45 this time as well.
So far our project amp has KT-66 power tubes, 32x32uf and 16x16uf filter caps and a Metro Amps point-to-point circuit board. At this stage, we were very satisfied with the results. We could have stopped here and had a real tone machine, but we wanted to see if we could get even closer with a few more changes. Sonically, the reissue at this point prior to the SoZo caps and output transformer change, did exhibit more of the growl and gain of the original, but it still wasn’t nearly as smooth or as dynamically punchy as the badge logo JTM-45 was.
Mike Mullen on testing the SoZo Caps
 While waiting for our Mercury Magnetics™ output transformer, I read about some capacitors that created quite a buzz on the Plexi Palace vintage amp forum. We found that SoZo Amplification was offering custom made capacitors aptly named “mustard caps”. They are obviously mustard yellow but apparently these caps are also made to the same specifications as the yellow mustard capacitors which were originally found in tube amps from the 1960s and 1970s. These little yellow jewels keep the foil thickness, polyester film dielectric and voltage ratings the same as the originals. In addition to the material makeup of the capacitors they also share the same physical dimensions. According to the SoZo Amplification website, the physical shape has a lot to do with the sound because it changes the slew rate.
The SoZo Mustard Cap is longer and thinner as compared to most high production caps readily available today. The additional length results in a different signal delivery time, changing the harmonics of the capacitor and yields smooth, clear, thick lower-mids. Polyester film was chosen because of its deeper tonal character and aluminum foil was chosen to exactly recreate the capacitor’s original sound and performance. SoZo also chooses to use tin-coated pure copper leads, which SoZo claims aids in the retro mustard cap sound.
I promptly received the package containing five .022uF and three .1uF SoZo Mustard Caps and soldered them in. In about thirty minutes all the caps were installed and I was ready to hear the results.
I flipped on the power, plugged in a Seth Lover-loaded Gibson Les Paul and let the KT-66’s warm for a few minutes. Turning off standby, I decided to start with my best impression of Angus Young from AC/DC to entertain my neighbors. What I heard from my Celestion loaded 2×12 cabinet was clear, warm guitar tones that sounded ALIVE! The tone of the amp was basically the same, but it was much clearer, richer and more complex than what I heard before. I was very pleased with the improvement.
Anyone that is due for a cap job on his or her favorite amp should really give the SoZo “mustards” a try and change those along with the electrolytics while you’re already there. I think the results are very satisfying and the cost runs about the same as a decent guitar cable. The caps can be ordered direct from SoZoAmplification.com or from MetroAmp.com. MetroAmp.com is offering these SoZo caps individually or they can be ordered with one of their point-to-point boards.
A final point is that SoZo amplification states that there is a break-in period for the capacitors and that the tone will actually improve and be at best form sonically sometime between 40 and 70 hours of use. While I’m not there yet as far as hours of use, I definitely like what I’m hearing so far!
Installation and listening to the Mercury Magnetics™ O45JT-C Output Transformer
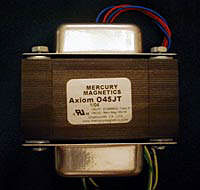 The Axiom® 045JT-C output transformer is part of the Mercury Magnetics™ Axiom® ToneClone™ series, and is 100% hand wound in the USA by Mercury Magnetics™ at their factory in Southern California. Mercury Magnetics™ offers a number of transformer clones for JTM-45 amplifiers as Marshall used a few different suppliers during different times with its own JTM-45s originally. Some people may have a preference for the earliest transformer equipped in JTM-45s, which were those built by the Radio Spares company. According to Mercury Magnetics™, the Radio Spares output transformer has more “high-fidelity” characteristics in its tone. According to Paul at Mercury Magnetics™, their Radio Spares clone is a special, intricate transformer that produces a subsequently wider frequency response and in some ways mirrors other transformers in design such as the early famous Partridge units in the Hiwatts.
However with that said, there aren’t comparatively as many JTM-45s equipped with original Radio Spares output transformers so we went with the more commonly found transformers as found in later JTM-45s. When speaking with Paul, he also noted that the original, vintage “Radio Spares” equipped JTM45 amplifiers are highly sought after and can command big dollars in the musical marketplace. Perhaps we’ll experiment with one in the future to hear the differences for ourselves.
The installation of any output transformer, while seemingly “simple” (“hey there’s only a few wires right?”) should actually only be performed by either a professional technician or by an enthusiast with a minimum of Electronics 101 knowledge, including the ability to read schematic diagrams, an understanding voltages and polarity, etc. This is the advice directly from Mercury Magnetics™.
The transformer includes a wiring diagram sheet listing the color-coded primary and secondary wires, and these may not necessarily match the wiring in your amp. Mercury Magnetics™ also warns that installers put safety first, as there are literally hundreds of AC volts that can come off of the primary. A typical technician will charge 30 to 90 minutes of labor for the installation, which can average anywhere from $50 to $150.00. Prices and the time required to install an output transformer can vary from technician to technician.
*Installation tip: anyone planning to replace both the output transformer and circuit board may want to remove the old circuit board and output transformer first and then mount the new transformer. Then you can install the point-to-point board and not have to mess with it later to get at the output transformer mounts.
After some time and with the transformer installed, it was time to play! But first, a few minutes with the badge-logo JTM-45….
Taking a Classic for a Test Drive
The original badge-logo Marshall JTM-45 is truly an example of a wonderfully responsive guitar amplifier. In its best state, it can provide a range of tones that vary between the liquid and thicker lead tones of early Clapton, to the warmer side of the Marshall crunch a la AC/DC that we all know and love. The vintage badge-logo JTM-45, that we have the good fortune of borrowing courtesy of our good friend Woody (thank you!), had recently gone through a full check-up through southern California’s own Plexi Palace, so we knew that it was in fine form.
And it certainly sounds like it. No other Marshall seems to be as well suited to provide such a wide tonal range as well as being able to provide a feel with beautiful harmonics and compression as a JTM-45 circuit. The sense of dynamics that can be controlled with one’s technique was right on the money. This JTM-45 plain and simply is THE ultimate blues and rock amplifier.
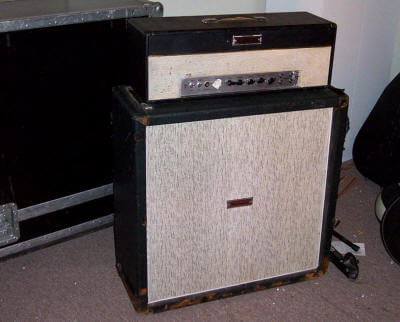 It stings and bites as musically as one could imagine with a Fender Stratocaster using the bridge position pickup with the Marshall’s channels bridged and the volumes set at about 7. With the neck pickup, the tones are fluid and with a bit of a gain boost from a floor box could easily capture the full sustain similar to what a player like Eric Johnson would get. The power output on the amp is moderately high, but at the JTM’s power range, it really is a nice match against any solid-hitting drummer and the perfect club amp for small and mid-sized venues.
With a Gibson Les Paul in hand loaded with LegendaryTones.com’s current favorite Seymour Duncan Antiquities and running the badge-logo JTM-45 through a basket weave Marshall cabinet (NOT the cabinet photographed here which is an earlier pinstripe) with original 25 watt greenbacks, the tone of the bridge pickup was pure AC/DC circa “Powerage” when running the volumes at about 6. With the volumes set at 7, the added gain and thickness moved into “Highway to Hell” territory. Switching to the neck pickup provided a wallop of a fat tone that seemed like it could sustain for days. Think early Cream here.
Listening in on the reissue JTM-45
After that experience with the 1964 badge-logo JTM-45, part of me didn’t want to turn the amp off, but alas it was time to move to our modified reissue. Running the same controls (and in fact the same tubes were used and setup in both amps) and equipment, I started playing the reissue with the Strat first. The immediate first impression: the reissue JTM-45 felt great – the same feel of compression and control of the dynamics was there. And there was also a noticeable improvement between the circuit since the change of both the output transformer and SoZo caps. Besides having a bit more power and punch in the signal, these changes really seemed to smooth out the reissue JTM-45’s tone and were definitely much more pleasing to the ear.
But specifically what were the differences between the reissue and the original? Well, the modded reissue stood out with a bit more attack in the high frequencies. It’s definitely a bit of a brighter amp than the 1964 badge-logo, but not by a great deal and not bright in such a way as to be “piercing.” The reissue JTM-45 could definitely mimic the original with a simple reduction of presence and treble controls and it did very well. Also, both SoZo Amplification and Mercury Magnetics™ told us that there is a break-in period for the parts to obtain their final adjusted tone. Again, for the SoZo caps, its 40-70 hours, and Mercury Magnetics™ stated the average break-in period should be a minimum of 20 hours of hard playing time with its transformers.
All said, we couldn’t wait that long nor did we have the time to play continuously to then report on the changes, but maybe we’ll add a brief report in the future after the break-in period.
When switching to the Les Paul with the newly transformed JTM-45, the same characteristic bold crunch with a warm full bottom end was evident. The modified reissue JTM-45 is definitely smooth when overdriven and power chords are a thrill to bash out in AC/DC style. Leads in both pickup positions of the Paul sang nicely. The neck position is always powerful with the JTM-45.
Final Thoughts….
In both amps, the feel, sustain, and tone was tremendous. The reissue in its current form has a little bit more of a faster attack, while the original badge has a bit more of a relaxed sag to it characteristically. It’s also a little bit darker. That said, we expected differences especially considering that each amp’s circuits are not identical. But what they do both share together is the original Marshall tone that we grew up on and know and love. And the fact that this tone can be captured without the need to hunt down a costly original is a nice thing for players indeed. There is something to having an original — it’s a testament to a wonderful period of musical history that NO reissue would ever be able to capture from that perspective. But at the same time, one thing that the reissue has going for it in its favor is the fact that most players would feel much more comfortable taking it out to a gig or the all-night jam. I would be a bit paranoid taking out the original personally.
It’s a shame that some of our greatest musical instruments, whether we’re talking about a ’59 Les Paul or an original Marshall amp, are so highly-valued in this day and age that it’s difficult to “enjoy” playing them. However, isn’t it a nice thing that companies such as those featured in this article are so passionate about their products and in finding ways to empower musicians with great tonal solutions today? I’ve said it before — we’re definitely living in times of a tonal renaissance with the options we have and the number of great instruments, effects, and amps that we have available to us.
And though some people may say that, “they don’t build them like they used to,” I would actually agree. In the case of these dedicated companies and people, I believe they’re in fact building them better than they used to with care and meticulous detail that may not have always been present back in the day.
Source: https://mercurymagnetics.com/pages/news/LegendaryTones/LegendaryTones-02.htm
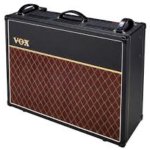
We have always considered the AC30 to be a great amp, if not the most versatile when compared to some other well-known names built during the ’60s… like Fender… arguably the most versatile amplifiers ever built.
The ToneQuest Report advisory board member and super player, James Pennebaker, first alerted us to the full potential of the AC30 when, after two decades of loyally playing vintage Fender amps, he switched to the reissue AC30 TBX as his main stage rig. Suddenly, James’ tone seemed to become his own, whether he was playing through his vintage Gretsch Country Gentleman, Cunetto-era Relic Tele or Strat, or Custom Shop Gibson ES295. Last year during the winter NAMM show in Los Angeles the considerable potential of the AC30 came to light again, thanks to west coast swing king Kid Ramos…. The Kid played two long, incredible sets in a cool little dump in Anaheim called the Doll Hut with vintage Strats and Teles through a vintage AC30 with an equally vintage Fender reverb unit, proving beyond any doubt that you can absolutely rule playing the blues and swing with an AC30 rig. The Kid’s tone was unforgettably smooth and musical in the style of an alto saxophone being expertly blown, and for an electric guitar, that’s a mind-blowing experience you won’t soon forget. So you’ll understand our interest in a mysterious and somewhat troubled AC30 that was traded in at Midtown Music. Sick as this amp first sounded, the Kid’s tone was still calling…. The amp seemed to work fine when it first arrived at Midtown, but it soon developed progressively noisy problems that eventually took it down. That’s when we volunteered to deliver the AC30 to Jeff Bakos and make it the subject of this review.
Jeff was able to diagnose and fix the AC30 in a couple of hours (merely a few bad caps and resistors in the vibrato circuit and tone stack), but the amp’s origins remained a mystery. The cabinet was in excellent, original condition and displayed all the classic marks of vintage British Vox construction, but there was no “Jennings Musical Industries” metal serial number tag on the back panel — only the heads of four brass upholstery nails that had once held a missing plastic ID tag. The gray control panel also lacked the typical Vox “JMI” stenciled logo, yet the amp was clearly built with the correct, hand-wired turret board construction, transformers, and Vox circuit. Our attempts to date the amp by the pot codes were unsuccessful because all of the originals had been replaced with CTS pots dating to the early ’90s, so we contacted Mitch Colby at Korg (Vox and Marshall USA) and sent him images of the amp with a request for help in dating it.
Mitch replied that it appeared to be a “Vox Sound Ltd.” AC30 built in England by Dallas Arbiter, the company famous for the original FuzzFace and Sound City amps made in England. Mitch also added that the Dallas Arbiter AC30s were “very nice” amps, having been built in the early ’70s, immediately following the end of the JMI era. Mystery solved. Contrary to information on the AC30s built at the Dallas Arbiter factory that we found at www.voxamps.co.uk, the cabinet of our amp is built with solid wood throughout — not particle board. And how does it sound? As good as it gets. The Celestion G12 speakers dating to 1979 had been reconed some time ago with the correct Celestion kit, all of the preamp tubes had been updated with JAN GEs, and while not a Jennings, this amp fully earned the vaunted status of vintage AC30 in every regard — punchy, fat, rich in midrange tones where the guitar really lives, with solid bass response and sweet, soaring top end.
Should you decide to explore the full potential of an AC30, you have a number of very good choices. The original vintage amps built by Jennings in England are expensive, so you need to insure originality of the transformers and internal components. A few replaced capacitors or resistors here and there are of no concern, but massive modifications by an overly zealous bench monkey are unacceptable — keep walking. Prices for amps with non-original transformers should be reduced by 30%-50%. Vintage 2×12 combos with original Celestion G12 speakers in excellent condition range from $2,800.00 for a later gray panel to as much as $3,500.00 for a red (candy) panel amp and $5,000.00-$7,000.00 for the earliest tan AC30s. Although increasingly rare, vintage heads alone can sometimes be found for around $1,600.00 and climbing. The limited edition hand-wired AC30 built several years ago by Vox/Korg features reverb and an excellent master volume feature. Outstanding and pricey, expect to pay at least $2,000.00 for this amp in gently used condition. At that price it’s a steal. The discontinued “Korg” AC30 reissue TBX amps like James Pennebaker’s are very good as is, and they can be made to sound even better by replacing the transformers and a few key, tone-shaping components. Don Butler specializes in optimizing reissue Marshall, Vox and Fender amps using premium components and Mercury Magnetics™ ToneClone™ transformers (www.tone-man.com, 661-259-4544).
Early reports on the Chinese AC30 Custom Classic ($1,600.00 with Celestion Alnico G12 speakers, blendable channels, a true bypass FX loop, spring reverb and master volume) are also very good, and Don tells us that his personal Custom Classic also benefited from the same upgrades he makes on the TBX models.
The AC30 is another great amp for players wishing to acquire a sound that sits clearly apart from typical Fender and Marshall tones. AC30s have a unique, compressed character rich in harmonic content and British chime with a versatile amount of clean headroom. More aggressive solos with heavy sustain and gain will require a boost pedal (especially with weaker single coil pickups), but the results will be stellar if you start with a good amp. And don’t buy into the collector hype about Top Boost models being the only desirable version to pursue. Vintage Jennings AC30s stamped “Bass,” “normal,” or “Treble” are equally desirable — in fact, we prefer them. Older AC30s are often a little tattered and may require a tune up and a stout matched quartet of EL84s, but these old amps will reward you with a thicker, richer tone and an intoxicating effluvia of Bitter and Rothmann’s that is lacking in modern AC30 reissues built on printed circuit boards. But oh, how you do pay for the privilege….
The most significant negative regarding all AC30 amps new and old is their considerable weight, which will quickly remind you why they are equipped with not one, but three handles. If you haven’t personally experienced the magical sound of a good AC30, perhaps it’s time. Heave forth….

Article: Let’s Ask Budda with Jeff Bober of Budda Amps
Q: I’ve got an SR Blackface ’66 amp, all original. The sound is very thin, weak and trebly. There’s nothing wrong with any of the tubes, and it has been biased correctly. I’ve tried the amp through different speakers but found the same result. The amp hasn’t been played very much over the years. Can it be old, dried-out capacitors that make the amp sound like this? Can a complete replacement of the capacitors really improve the sound – meaning to give it more twang and bottom end, or “life”? – Tobbe Sweden
A: Beautiful amp. One of my favorites… except, of course, for a Budda!
I’m assuming both channels of the amp are thin and weak. If it were only one channel that sounded bad, I would tell you that the 100K resistor in the tone stack of that channel was probably open. This would also disable the Middle and Bass control, but I’m going to assume that all the amplifier controls function properly. Since you also mentioned that the amp has been properly biased, I have to assume that the primary sections of the power supply have the correct voltages.
Considering the amp’s age and the possibility that it might have been sitting idle for some time, a power-supply cap job is probably a good idea. This might not be the source of the problem, but once any other repairs have been made it will make the amp sound stronger and tighter. Make sure the values of the power-supply resistors are checked after the filter caps have been removed. A power-supply resistor that’s substantially out of tolerance can cause degradation in tone, but usually it won’t be as drastic as the symptoms you’re describing. And don’t forget to have the bias supply cap replaced. A weak cap in the bias supply will give the amp some additional unnecessary hum. You might also want your tech to do some normal maintenance on the amp, such as cleaning all of the tube sockets and controls while he’s in there. A very dirty tube socket, especially in the phase inverter, can really suck the life out of the amp. If the amp still isn’t right after the maintenance and power-supply build, it’s time to start looking elsewhere.
Okay, let’s look at some other possible causes for an anemic Fender amp. The first thing I’d look for would be the ground connections from the circuit board. These are the buss wires that come off the circuit board behind the controls and solder to the brass grounding plate that runs under the control panel. I’d check all of these connections, but there’s a particular one that seems to be the most frequent offender. It comes off the board in the area of the tremolo and phase inverter circuits behind the tone controls for Channel 2. For some reason this solder connection tends to break, causing the phase inverter to lose its grounding. That makes the amp lose substantial power and sound thin. If any of these ground connections is broken, it takes a good deal of heat to re-solder them. So, you’ll need to use a high-wattage soldering iron or gun. If all these ground are intact, the next thing to check would be the 100-ohm (brown/black/brown) resistor in this same area. It’s the only resistor in the area that is positioned horizontally on the circuit board. It also typically suffers from a broken solder connection and will yield the same low-power situation. Re-solder the resistor, and you should be good to go. If not, it’s time to start looking at the other major cause: a bad output transformer.
The best way to determine if the output transformer is bad is to simply substitute it with one you know is okay. A good way to check it is to simply unsolder the leads coming from the original transformer and attach a replacement using clip leads. If you can’t come up with a Super Reverb transformer to try, a Twin Reverbtransformer will work well for the test. If you need a replacement transformer, I have to recommend (as I have in the past) Mercury Magnetics. Their Axiom line of transformers should have just what you need. They can be found at www.MercuryMagnetics.com.
I hope you can make your Super super again.
Source: https://mercurymagnetics.com/pages/news/PremierGuitar/MusiciansHotline-2.htm

For nearly 20 years, Dan Boul and Peter Stroud have been close friends. In a bond secured by music, particularly guitars and amps, the two have gone through the phases of life in very similar fashion, working as professional guitarists and being hardcore gearheads with a penchant for tinkering.
A couple years ago, they decided to get serious. Caught up in a wave of boutique amp builders who share information via the internet, they were inspired after hearing some of the amps built by friends.
After 18 months of experimentation, they’d devised their “dream” amp (which soon after became their first production model, the London) and though they never intended to build amps to sell, pretty much every player who heard them said, “I want one!” Next thing you know, Boul and Stroud were known collectively as 65Amps!
Stroud (featured in VG, December ’04) still plays guitar professionally, holding down the lead spot in singer/songwriter Sheryl Crow’s band, touring the world, trusty London model by his side for thousands of people to see each night. Boul, meanwhile, has switched gears to run a shop that now employs five very experienced amp builders.
After a very long wait, we were recently able to take a London model on an oh-so-brief test run before the amp had to be hustled off to New York City in time to make an appearance with Switchfoot on “Late Night With Conan O’Brien.”
Much about the London’s circuit design reflects its inspiration — the mid-’60s 18-watt Marshall Model 1958. Its four inputs (Lo and High for Normal and Tremolo channels) share controls for Volume and Tone. But each channel has a distinct voice, thanks primarily to its preamp tube; Normal employs an EF86, while Tremolo uses a 12AX7. If you’ve played a tube amp, you’re likely familiar with the bright tone and big low-end response of the 12AX7. The EF86, meanwhile, offers a smoother overall output.
All wiring and solder dress in the London is top-shelf, and it’s obvious Boul and Stroud did their legwork when choosing components; transformers are custom-wound by Mercury Magnetics, the Baltic birch plywood cabinet work is flawless, and the vinyl covering and art deco/retro vent grilles make for a very appealing visual presentation.
Setting the London apart from its Marshall inspiration is the Vox-inspired six-way Color switch, to which Boul and Stroud added a tone-sweep. The effect focuses low and low-mid frequency response.
The Normal channel sports a Boost function that can also be controlled with the footswitch. The Tremolo channel, has controls for Speed and Intensity of the effect, which is also footswitchable. The channels share a Cut control for adjusting “brilliance.” The amp’s rear panel hosts the footswitch jack and parallel speaker jacks with an impedance selector, fuse holders, and the power cord.
The London’s standard cab uses one 12″ Celestion Blue Alnico and one 12″ Celestion G12H30 speaker, with Tone Tubby speakers as an option.
We tested the London using our favorite ’70s Ibanez Artist with Wolftone Greywolf humbuckers and a ’90s Hamer Daytona with Rio Grande vintage Tallboy single-coils in the neck and middle positions, and a Rio Muddy single-coil in the bridge.
We plugged the Daytona into the Lo input of the Normal channel, set to clean, with Color switch on 1, Cut at 0, and Tone on 10. Immediately, we were greeted with a huge, fat clean tone with solid bottom punch and very ample low-mids. High-end response was sparkley, and we were also immediately impressed with the amp’s touch response.
We shuffled the Color switch through several settings and were easily able to balance the tone, across the board. Pushing the volume up, we found a nice, smooth overdrive, and switching on the Boost oh-so-appropriately bumped the volume and gain — this is a great feature for soloing. Plugging into the high input gave our sound more punch, volume, and gain that was always supremely smooth and tight.
The Color switch lets the user dial in thickness, which is an especially handy feature if your stage routine requires switching guitars/pickup configurations. Ramping up the volume, we got more gain, but the tone always remained tight. Then we got serious, pushing the amp to full volume. And we weren’t all that surprised to find that the amp remained tight and extremely focused, always with incredible tone and response. The Cut control lent subtle contour to the amp’s presence. The Overdrive was smooth, with nice sustain and great note separation. The London’s tone was great in all pickup positions.
Switching to the Tremolo channel’s Low input, we got nice fullness with less low-midrange emphasis. Rolling up the volume revealed nice blues gain with less sparkle. Using the Hi input, we got the requisite jump in volume, gain, and sparkle. This channel produces a more traditional sound, with more clarity than the Normal channel. And it produces less gain. We pushed the volume and got clear, glassy, well-balanced and punchy tone.
Dimed, the London again didn’t strain in any part of the tonal spectrum. Instead, it offered incredible responsiveness and note separation. Low-mids through the Tremolo channel aren’t as plump, but again, sound more pure.
With the Ibanez through the Normal channel’s Lo input, we again got a very clean, punchy tone, with less sparkle. And as with the single-coils, the Color switch let us “plump up” the tone to our heart’s content. The Hi input responded like it should while never surrendering tight, well-focused gain no matter how hard we pushed the Volume knob, all the way to maximum. The Tremolo channel responded similarly, with clear, focused tone with less gain, but incredible purity.
For the lagging naysayers who squeal, “Eighteen watts ain’t enough!” Rest assured, through its 16-ohm cab, the London is very loud. And the Tremolo was smooth and even, with lots of depth.
The London offers incredible sounds with virtually any guitar, delivering fantastic gain, clarity, punch, response, smoothness, tightness. And most importantly, the London does it with a tone that it can proudly claim as entirely its own. It simply sounds amazing.
Source: https://mercurymagnetics.com/pages/news/VGmag/VGDec05-65amps.htm
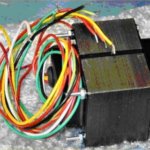
As I mentioned earlier in the article, I had not originally intended to use a Mercury Magnetics power transformer (PT), electing instead to save a little money and use the stock DRRI PT. I’ve since changed my mind. How this came to be makes for an interesting story.
About 10 days before I was scheduled to pick up my amp at Mikey’s shop, I sent out emails to all the companies that I linked in this article. This included Mercury Magnetics since Mikey was putting their output transformer, reverb transformer and choke in my amp. Shortly after sending out an email to Mercury, I heard back from Paul Patronete who graciously gave the OK to link to their site. He also took a moment to let me know in addition to the other Mercury iron I was using, their power transformer would make an improvement in the tone of my amp. Paul invited Mikey and me to give Sergio Hamernik (an owner of Mercury Magnetics) a call to discuss the benefits of the power transformer.
I really appreciated the helpful suggestion but I hadn’t ever heard of a PT making a difference in tone, thinking the other pieces of Mercury iron would make 90% of the improvement. I did let Paul know I’d add a comment in this article saying I’d heard from Mercury and the PT would make a big improvement in the tone. He wrote me back with an interesting bit of information I had never considered. Here’s a paraphrase from the email he sent me:
The stock reissue PT does an OK job of supplying the required voltages to the circuit however the overall PT’s behavior under working conditions is not the same as the original vintage Deluxe Reverb PT. Characteristics that make the reissue PT different than the original PT involve flux density, AC regulation and primary inductance. These characteristics are a very important factor for the player that wants to nail the tonality of the vintage Blackface Deluxe Reverb amp.
Paul once again encouraged me to talk to Sergio. This certainly piqued my interest so I got in touch with Mikey and discussed Paul’s comments. We decided to get Paul on a conference call and to also see if we could speak to Sergio. We called Mercury in the late afternoon, four days before I was due to pick up my amp. Although Sergio wasn’t in, Paul spent almost 1.5 hours talking with Mikey and me about their power transformer and the rest of their iron.
Paul is a guitar player first and foremost and his enthusiasm for great tone is infectious. In addition to talking about all the good things Mercury Magnetics has brought to the industry and guitar players, he talked about what some of the cutting edge builders are doing. Mikey and Paul had very similar opinions on what makes great tone and why. It was a very informative and fun conversation. At the end of it, I certainly wanted to speak to Sergio so Paul invited Mikey and I to call again in the morning.
The next day, Mikey and I called Paul and after a brief chat, he brought Sergio to the phone. It was truly a treat to talk with Sergio and I learned a LOT about tube amps, the importance of an amp’s magnetics (the iron) and primarily, the benefits of using a Mercury Magnetics power transformer engineered for a Deluxe Reverb. As we talked, I jotted down as many notes as I could manage. I’ll share them with you now, although please keep in mind I may not have captured everything Sergio was conveying. He did a fine job though of keeping his information geared to my level of understanding.
Sergio started by asking me if I knew what modulation is. Of course I’ve heard the word but I wasn’t sure what it meant in relation to tube amps. He explained that an amplifier is a modulated power supply whereby the guitar signal is used to modulate the amp and so the quality of the power transformer affects tonality. He said the power transformer (along with the rectifier tube, a 5AR4 type) is responsible for taking the AC wall current and transforming it into the DC current used in certain parts of the amplifier. He said the power supply sets everything else up and everything depends on the character of the power supply. For example, since it helps determine the AC and DC voltages going to each section of the amp and tubes, it has a big impact on the feel of the amp.
I learned that although the stock DRRI power transformer provides the right amount of volts and amps (current) to the amplifier, the DRRI power transformer is nothing like one of the original PT’s used in Deluxe Reverbs. Sergio said among other things, the flux density and primary inductance all have to be right. As a comparison, the DRRI stock power transformer has 1/2 or less inductance on the primary than a Mercury Axiom PT. (You may recall from a previous section; inductance is the opposition to changes in current.)
He said capacitance and leakage reactance are critically important and Mercury Magnetics power transformers have lower flux density and heavier iron with better permeability. Capacitance and leakage reactance between the windings, and where the filaments are in relation to the B+ supply, really matters. Now that’s a mouthful! I think I’ll need to spend some time researching the concepts mentioned in just the last two paragraphs so I can better understand the electrical theory behind his designs. One of the best things about this project and writing this article is being exposed to new concepts. This is my idea of fun!
Sergio did break this theory down into practical examples for me. He explained the Mercury Magnetics method starts with finding the very best sounding amps and examining their iron. For example, if there is a great tone on a recording, Sergio can try to find the exact amp used on the recording and use it as the model for new iron.
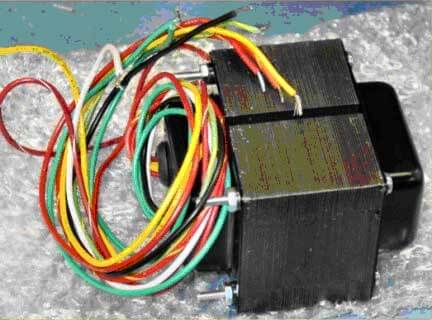
Mercury Magnetics’ Axiom power transformer for a Deluxe Reverb (not for a DRRI)
The DRRI power transformer has different physical dimensions than the one in a Blackface Deluxe Reverb. Mikey has an electronic caliper that does very precise measurements so he sent these dimensions to Paul so Mercury can provide the perfect power transformer for this amp. They have the know-how to build power transformers that will sound just like one in a Blackface Deluxe Reverb. They do this by using the very best example of an original 1965 Deluxe Reverb transformer, unwinding it and laboriously documenting every nuance of how it is constructed. Then a combination of old and new technologies is used to create the very best transformer possible.
There’s a reason why guitar players seek out older amps, and this obviously is because of better tone, which I’ve come to understand is largely due to quality magnetics. I learned the magnetics available to amp builders in the 50s and 60s were made from materials optimized for the military for WWII and the Korean War. There was a tremendous overstock from the military build-up and amp builders had ready access to very high quality materials.
Modern materials are designed to be cheaper to hit price points. Sergio told us he specs custom steel to make Mercury transformers. They do enough volume of business that he can insist his steel manufacturer hand crank the steel through a gas oven, just like it was done in the 50s and 60s. Steel and copper behave differently at different milliamps so the properties of the metal must be designed and manufactured to this end. For the guitar player, this level of quality shows up in things like the ramp rate of note attack, the feel of the pick attack and better bass note response. He also used the choke as an example, where the Q-Factor (the measure of quality in a resonance system) is quite a bit different between the stock DRRI choke and the Mercury choke, so much so that it makes for an audible difference.
Sergio explained the power transformer is rated for a lot more watts than the amp produces. For example, the Mercury Magnetics Axiom power transformer for my amp will be rated at 120 watts and is capable of supporting an audio output of up to 60 watts. The general rule-of-thumb is the power transformer needs to be rated at twice as much as the maximum audio output.
Since this power transformer has specs well in excess of what the two 6V6 tubes are capable of creating, it can safely run 6L6 tubes. 6V6 tubes require only 60% of the power of 6L6 tubes. The output transformer is also capable of handling 6L6 tubes so by getting the Mercury Magnetics power transformer, I can get more power and a different tonality out of my amp than with the 6V6’s. This is a nice bonus and one I hadn’t considered when Paul first emailed me, suggesting their PT. I prefer 6V6’s in the amp but it’s nice to have another option.
Mikey asked Sergio to describe the sonic differences we might expect with the use of the Mercury Axiom reverb transformer. Sergio said the sound differences are subtle because it is such low power but if you have good ears, you’ll hear differences in “evident detail” and a “perceived wider bandwidth.”
Mikey and Sergio talked a bit about the dramatic effects of using the Mercury output transformer. Sergio likened his output transformers to a window with no glass and no screen, allowing all of the tonality of previous sections of the amp to pass through with great clarity. He explained the excellent “phase relationship tonality” (perceived as a 3 dimensional swirl) is dependent on the quality of the construction of the transformer. By comparison, the DRRI output transformer acts as dirty glass covered by a dirty screen. I couldn’t help but be reminded of the scene from the movie “My Cousin Vinny” where Vincent Gambini (Joe Pesci) disproved the testimony of a witness by pointing out with pictures how the witness was looking through dirty glass, a bug covered screen, and through trees and bushes at a fleeing car.
As a tube amp enthusiast, I’ve been reading and learning about tube amp electronics for quite some time. In this conversation with Sergio I learned a lot of things I had never considered. Of course, by now I was completely convinced their power transformer should go in my amp! You can understand why the top amp builders call upon Sergio for his expertise, designs and remarkable archive of information.
If you take a look at the Mercury Magnetics site you will find a large selection of iron to fit just about every need (www.MercuryMagnetics.com).
Sergio and Paul both told us there were very significant differences in iron on the same models of amps from the same era. Sergio spoke of a conversation he’d had with Leo Fender about amp components. Leo told him the Fender Company experienced a swelling of demand for amps when young people became enamored of guitar. Fender was just trying to meet the enormous demand so they put out specs for things like power transformers to various suppliers. The suppliers had a lot of latitude in how they meet the specs, creating a lot of variation in the parts.
Here’s another new bit of tube amp knowledge I learned from Sergio. He told me all magnetics (iron) in an amp need to be broken in over a 20 to 40 hour period of playing time. He said initially, there’s a slight harshness in the tone, which can also be characterized as a lack of sweetness. The magnetics have to be thermally and magnetically cycled. Apparently, it is similar to breaking in a speaker. Paul later told us he’s had guitar players call him up after a month to describe the new subtleties and complexities emerging from the amp: a wonderful and unexpected surprise.
After spending about 45 minutes on the phone with Mikey and me, Sergio turned us back over to Paul. I must say it was a pleasure and an honor to speak with Sergio and he couldn’t have been more gracious in taking his time to explain all of the information I’ve relayed above.
Paul and Mikey made arrangements to take the exact measurements of the bolt placement and chassis openings in the DRRI for a new power transformer. I sat back for a bit as Paul and Mikey continued where they’d left off the night before, talking about new amp ideas Mikey has been considering, which will involve creating an amp using a wide variety of power tube options. It’s too early to go into details about that though. I’ll have to save that for another article :>)
By the way, we got to know a bit more about Paul Patronete. He is a key associate of Sergio who talks with guitar players and amp builders all the time, helping people decide which Mercury Magnetics iron is right for them. You can tell he really gets off on helping players attain tonal nirvana.
Of interest, before coming to Mercury Magnetics, Paul was the General Manager for Groove Tubes for many years. I dug out my copy of Aspen Pittman’s “The Tube Amp Book – 4th Edition” and sure enough, there is a picture of Paul on the inside of the back cover. He’s also listed in the very front of the book in the “Strokes for My Folks” page and a color photograph of his Orange amps is also in the book.
Well, I’ve gone through all of my notes from my discussions with Paul, Sergio and Mikey so I guess it is time to close this chapter. I’ll be picking up my amp tomorrow although it will have the stock DRRI power transformer in it until a new one is manufactured. I sure am glad Paul took the time to talk to me, educate me, and with Sergio’s help, convince me to get a Mercury Magnetics power transformer to go along with the rest of the Mercury iron in my amp. I’ll make another trip to Mikey’s shop in Baltimore next month and I’ll be sure to let you know how it sounds, so stay tuned.
Source: https://mercurymagnetics.com/pages/news/misc/WayneReno.htm
Andy Fuchs, a tube audio product builder from Bloomfield, New Jersey, recently sent us one of his Overdrive Supreme amp heads.
Cased in a finger-jointed pine cabinet with Tolex covering, the Overdrive Supreme definitely looks cool. The question is, “Does it live up to its name?”
But before we get into how it sounded, let’s roll through the particulars.
The all-tube 100-watt OD Supreme features four Sovtek 6L6s and four Sovtek 12 AX7s with Mercury Magnetics custom transformers and a combination of point-to-point wiring and printed circuit (PC) boards. Controls on the front panel include gain, deep and brite switches, a rock/jazz switch, high, mid and low passive tone controls, overdrive input and output knobs, master volume, accent (presence) and a reverb knob.
The back panel has effects loop jacks with send and return controls, a side chain switch, speaker output jacks and power/standby switches. And finally, the amp has a twin foot switch to remotely switch the overdrive circuit and the reverb on and off.
We plugged the Fuchs into a Marshall 1960A cab, then grabbed a Fender ’62 Reissue Strat and a Hamer Studio.
With the Strat plugged in and the amp’s overdrive circuit turned off, the first thing we noticed was a great clean sound, which was somewhat surprising for a 4×12 cab and a head. It delivered all the fat, lively tone you’d expect from a combo amp. The push/pull mid boost was perfectly voiced for the guitar’s single-coil pickups, and the brite and deep switches added just the right amount of punch and sparkle, while the jazz/rock switch gave the amp some added drive and attitude in the rock position.
With the gain turned up and the master volume turned down, we got a warm blues overdrive; but once we turned on the overdrive circuit, we were swimming in tons of very “British” distortion. A cool Richie Blackmore/Deep Purple tone – very fat, with smooth sustain and tight low end.
Switching to the Duncan humbucker-loaded Hamer went quite smoothly because, to our delight, we didn’t have to fuss with the settings to get the same great tone; we simply turned off the mid boost and made a slight adjustment to the accent control to clean up the high-end. The push/pull gain boost did thin out the low-end a bit, but with all the available gain, we didn’t really need it. And the reverb circuit was clean and lush-sounding and didn’t wash out the overall tone in the least.
Whether played clean or punched into overdrive, and regardless of whether you’re a single-coil lover or humbucker devotee, the Fuchs Audio Overdrive Supreme sounds great, with well-voiced controls and kick-ass smooth distortion.
It’s no secret to any of us that Fender’s Deluxe Reverb has long been considered the guitar player’s ultimate desert island amp. It’s lightweight, compact, incredibly sturdy and dependable, and it captures the essence of classic ’60s Fender tone. Blackface models built between 1964 and 1967 can cost as much today as a clean vintage Super Reverb, and Silverface Deluxe reverb amps built from 1968 through the mid ’70s remain a bargain, selling for $600-$900. There is very little difference between unmodified amps built during the two eras, except for a couple of caps connecting the output tube grids to ground in the Silverface amps, and a variety of stock speakers, including Jensen, CTS and Oxford. There is absolutely no reason why a Silverface Deluxe Reverb can’t sound every bit as wonderful as any Blackface amp, and some of the Silverface amps will sound better than some Blackface Deluxe’s you’ll find. Local amp wizard and advisory board member Jeff Bakos has observed that some of the exceptional Deluxe Reverb amps he’s heard (and he’s heard hundreds of Deluxes) seem to have “hotter” power transformers, and the slight inconsistencies in the way some transformers were wound can make a big difference in tone. Earlier today we heard as much in Jeff’s shop in a ’66. Unfortunately, it all comes down to the luck of the draw when finding those special amps. If there is fault to be found with the sound of a Deluxe Reverb (and it really isn’t a fault), it’s the speed at which the amps begin to break up. The clean threshold of the Deluxe is pretty low, and while this characteristic feature is an irresistible attribute to many players, we wondered what could be done to make the Deluxe Reverb even more versatile without losing its unmistakable tone. The modifications we describe here are very simple as modifications go, and all of them are easily reversible. We encourage you to try some and let us know how you like the results.
We started with a beautifully preserved ’68 Deluxe Reverb acquired on eBay for $900.00. The owner had replaced the original particleboard baffle board with pine, recovered it in vintage Blackface-era grill cloth, and installed a repro Blackface plate. We also received the original baffle board covered with the original blue and silver grill cloth, the aluminum trim, and the Silver face plate. We had acquired a replacement output transformer from Mercury Magnetics, and although the original transformer seemed to be working fine, we wanted to see what we might hear by swapping transformers. The Mercury ToneClone series transformers is the result of years of testing in which Mercury blueprinted some of the best sounding output transformers that could be found in vintage amps and painstakingly reproduced them in every detail. At first, the new transformer didn’t sound starkly different from the original – it sounded exactly like the original. But over time, it became increasingly apparent that the amp was behaving with more dynamic response. Notes and chords were imaging differently than before. Individual notes within chords were better defined, the amp responded faster to touch, and harmonics were more pronounced and complex. We’re the first to subscribe to the “don’t fix it if it ain’t broke” school of amp maintenance, but in this instance, the fix was a good one.
One of the easiest things you can do to Deluxe Reverb amps is rebias them for 6L6 power tubes. The outcome is predictable and sublime — more power, more headroom and better lows that won’t fall apart. Call it the “Beano”” treatment for your farting Deluxe. Jeff Bakos rebiased the amp after we had installed a pair of RCA black plate 6L6s, and we were mighty pleased with the results. You lose some of the compression and darker character of the 6V6 tube when you switch to 6L6s, but there is very little downside to the trade off — just big, bloomy 6L6 tone, and lots of it.
After installing the RCA 6L6s, we opted for an NOS RCA 5751 rather than the 12AX7 in V2, and it really smoothed out the tone to silky perfection. We also experimented with a Chinese 5AR4 rectifier tube, a new Sovtek 5AR4 and a Mullard 5V4. The Mullard pulled the volume back down ever so slightly, but it also seemed to sweeten the tone, rendering a throaty voice that fell nicely in between the “old”” amp with the 6V6s and the “new” one with the 6L6s. Either tube is a good choice — you’ll just have to decide which sound you prefer. Among the 5AR4s, we actually preferred the sound of the Chinese tube over the Sovtek, although the Chinese 5AR4s aren’t quite as robust. Our Deluxe came with an absolutely dreadful (recone?) non-original Fender “blue label” Oxford ceramic magnet speaker that was commonly used in the Bassman, Twin and Pro Reverb. We replaced it with n Eminence Legend V12, and this speaker turned out to be a “best buy.” The V12 features a British cone, and the tone is extremely round, well-balanced, and warmer than the Jensen C12N. It’s rated at 80W, and as usual with Eminence products, value and tone are absolutely unmatched for a speaker that sells for under $50.00. Jeff also likes the Legend 125, which is rated at 50W and built with a 1.5 inch voice coil and a slightly lighter magnet. As we observed in Eminence founder Bob Gault’s interview, the low price of an Eminence speaker is no indication of cheap construction or tone. The speakers rock, and they are voiced to appeal to a wide variety of players. We continued experimenting, and our next choice was a new Jensen C12K. We had seen this speaker in Victoria and Fender Twins, and it’s a massive thing. Built in Italy, and rated at 100W with a 2 inch voice coil and 50 oz. magnet. The C12K in a Deluxe with 6L6s yielded huge clean tone from top to bottom, with more high frequency emphasis than the Eminence speakers, and no speaker distortion whatsoever. The Jensen C12K in a Deluxe won’t be everybody’s idea of the perfect match, but it you crave a wide-open, big sound with nothing but clean speaker, the Jensen is a worthy contender at $90 retail. The last speaker we installed was a paper (not hemp) Tone Tubby from A Brown Soun. The paper-cone Tone Tubby is voiced a little brighter than the hemp cones, and we were floored by its rich, smooth character and charm. Jeff described it as being “silky smooth,” and just what he expected, with great lows, stout midrange, and creamy, creamy highs. Now, do you really need a $200 speaker to sound great? Of course not, and the price of a Tone Tubby is not for everyone. But if it’s the speaker for you, you won’t rest until you get one, and nothing we’ve heard can touch it. Enjoy yours, Eric, and enjoy milking some more of the good thang out of your Deluxe, gang. Hey… if not now, when?
4 and 8 Ohm Secondary
Reverb-O-Jet — J-12-R
SB12 — #OT-215 — Drop-in Upgrade!
GU12 — early ’70s
GU12 — early ’70s
GU12 — early ’70s
V3212 — Drop-in Upgrade!
Blackstar HT-5 — Upgrade!
Add this choke to your amp for improved tonal richness
3 Henry Mini-Choke — DCR = 92Ω — tolerance +/-10%
Blackface — no 5V winding — solid state rectifier — Fender #125P7D
Blonde — 6G6B circuit — Fender #125P7D 022814
Blackface — 5V winding — #125P5D export — Universal Voltage Primary
Blonde — #125P7D — 100V, 120V, 220V, 230V & 240V primary
Tweed — 50V bias tap — lower B+ — 325-0-325
Blackface — lowest B+ — 250-0-250
Tweed — lowest B+ — 250-0-250
Blackface Reverb — Universal Voltage Primary
Vintage 16– single 8Ω tap — two EL84 tubes — Upgrade!
Silverface Bassman 100 — #125P34A / 022756 — Upgrade! Please confirm mounting centers before ordering.
Super Six — Drop-in Upgrade!
Upgrade!
Blackface — Lower B+ — 325-0-325
Great for use with single 6L6, 5881, KT66 or EL34 tubes
Blackface — 50V bias tap — 360-0-360 unloaded B+ — Universal Voltage Primary
Fatstack — 2 1/2″ lamination stack — ok to use with two 6L6 — hole spacing 2″ x 2 1/2″
3 Henry — Drop-in Upgrade!
Silverface — Upgrade!
Add this choke to your Blues Deville for improved tonal richness
’90s Blues Deluxe
3H — add this choke to your Blues Jr. for improved tonal richness
Blonde, Brown, Blackface, Silverface
Blonde, Blackface & Silverface — 3 Henry — 2 13/16″ Mounting Centers
Brown, Blackface
Mid ’80s Blackface — Upgrade!
Brown, Blackface, Silverface
Blonde, Blackface, Silverface & Dual Showman
Brown, Blackface, Silverface — 3 Henry / 200 mA Choke — Original Fender Part #125C1A
2 13/16″ mounting centers
Blackface
Brown, Blackface
Brown
3H — add this choke to your Excelsior for improved tonal richness.
Upgrade!
Upgrade!
3H — add this choke to your Pro Jr. for improved tonal richness
Add to your amp for improved tonal richness — Upgrade!
Quadreverb
Add to your amp for improved tonal richness — Upgrade!
Add to your amp for improved tonal richness — Upgrade!
3 Henry — add this choke to your head or combo for improved tonal richness — Drop-in Upgrade!
4 x 10 — 2Ω tap
Blackface — #125P5D
Blackface era — #125P5D — mounting holes 2 3/4″ x 3 7/16″
Brown 2 x 10
Blackface — #125P5D-X — Universal Voltage Primary
Blackface — Universal Voltage Primary
Tweed — Model 5E5-A — with bias tap
Brown — #68249
Mid ’50s Tweed – 5E4-A — two 6V6 tube version — lower B+ — 335-0-335
Tweed — Model 5E5-A — with bias tap — 220V, 230V & 240V primary
Silverface Bassman 100 — 220V, 230V & 240V primary taps — Upgrade! Please confirm mounting centers before ordering.
Upgrade for ’65 & ’68 Reissue Deluxe Reverb — bolt hole spacing is 2 1/2″ x 3 1/8″ — 2″ stack
Brown — 220V, 230V & 240V primary
Drop-in Upgrade for Export Reissue Deluxe Reverb– 220V, 230V & 240V primary
Upgrade for ’65 & ’68 Reissue Deluxe Reverb with lower B+ — bolt hole spacing is 2 1/2″ x 3 1/8″ — 2″ stack
Brown reissue — use with solid state rectifier — Upgrade!
Brown reissue — use with solid state rectifier — single 240V — Upgrade!
Blackface — 8Ω tap
Blonde — early ’60s — 8Ω tap
Blackface — 4, 8 & 16Ω taps
Brown — #67233 — 6G7 version
Upgrade!
Lightning — Drop-In Upgrade!
Lightning — Drop-In Upgrade!
2 x 12 — 4Ω tap
3212– 4, 8 & 16Ω taps — Upgrade!
4, 8 & 16 ohm secondary taps — Drop-in Upgrade!
Blackface — 4, 8 & 16Ω taps
4, 8 & 16Ω taps — Upgrade! — Horizontal mount w/ Especial bracket
Bolt hole spacing is 2″ by 3 3/8″
Brown — Single 2Ω tap for 4×10 cabinet — #45249
Blue Voodoo 6212 — Upgrade! — 4 & 8Ω taps
Blue Voodoo 6212 — Upgrade! — 4 & 8Ω taps
Blue Voodoo 6212 — Upgrade! — 4 & 8Ω taps. To guarantee compatibility, please contact us before ordering.
2 x 12 4Ω cabinet — 2 & 4Ω tap
Blackface Reverb and Brown Deluxe — #125C3A — 2″ Mounting Centers
Tweed
Mid ’80s Reverb II — add this choke to your amp for improved tonal richness
’80s Bassman 20 — #19118 — Upgrade!
’80s Bassman 20 — 220V, 230V & 240V primary taps — Upgrade!
Blackface
Blackface Reverb — 4Ω tap — 125A6A (022848)
4 & 8Ω taps
135 watt version — #013692
’70s — 135 watt — #013692
Blonde — 2, 4 & 8Ω taps
Blackface Reverb — 2, 4 & 8Ω taps
4 x 10 — 2, 4 & 8Ω taps — ** 2 ohm tap is not used with stock speaker jack configuration
Bolt hole spacing for Especial mount is 2″ by 3 3/8″
2 x 12 — 2, 4 & 8Ω taps — ** 8 ohm tap is not used with stock speaker jack configuration
Bolt hole spacing for Especial mount is 2″ by 3 3/8″
Tweed
Blackface — 4, 8 & 16Ω taps
Rickenbacker M8 — single 120V primary tap
Supro Spectator — Drop-in Upgrade!
Early ‘ 70s — 160PS — 3 Henry
Early ’70s — PS300 — 3 Henry
PS400 — 3 Henry
Tweed era — 3.5 Henry — #14684 Small size — 2 13/16″ mounting centers
Jet 12T (reissue version) — two EL84 tubes — single 8Ω tap — Upgrade!
Supro Super
GA-19RVT — Please confirm mounting style before ordering
Blackface — Universal Voltage Primary
4, 8 & 16 ohm secondary taps — Upgrade!
Blackface — add this choke to your amp for improved tonal richness
Silverface
Tweed — 5E1 — 5 Henry, 370 Ω DC resistance, 40 mA current rating
2″ center to center mounting holes — same as Tweed Princeton choke
3H — 150mA
Class 5 — add this choke to your Class 5 for improved tonal richness
Blackface — 220V, 230V & 240V primary
Blackface — 220V, 230V & 240V primary — #125P1B
Blackface Vibro — 220V, 230V & 240V primary taps
Blackface — single 100V primary tap
Galaxie 25 — Upgrade! — 288-0-288 unloaded — Larger size
Tweed — #45216 — single 4 ohm tap — 3 9/16″ mounting centers
Recent/Reissue Jet 12T — two EL84 tubes — 4, 8 and 16 Ohm taps — Upgrade!
V22 — 4, 8 & 16Ω taps — Upgrade!
Vintage 16 — 4, 8 & 16Ω taps — two EL84 tubes — Upgrade!
Deluxe Reverb 4, 8 & 16Ω taps
Tweed — 2, 4 & 8Ω taps
Blackface Vibroverb Custom — single 120V primary — Drop-In Upgrade!
Tweed — 5D4 — no CT on 6.3V
Blackface Vibroverb Custom — Universal Voltage Primary — Drop-In Upgrade!
Tweed — 5D4 — no CT on 6.3V — 220V, 230V & 240V primary
“Custom” — ’95-’96 Blackface — #037610 — Upgrade!
‘”Custom” — 95-’96 Blackface — 220V, 230V & 240V primary — #049181 — Upgrade!
GA-6 — Drop-in Upgrade! Please confirm mounting style before ordering
GA-35 RVT — Drop-in Upgrade! Please confirm mounting style before ordering
GA-23 — Please confirm mounting style before ordering
350-0-350VAC unloaded B+ — Center Tapped 6.3V — 5V Rectifier Winding — Styles vary: please confirm mounting style before ordering
GA-15 — Please confirm mounting style before ordering
Wards Airline GIM 9131A — circa ’60s — single 120V primary tap
4100 — Drop-in Upgrade!
30th Anniversary 6100 — Drop-in Upgrade!
GT50H– 4, 8 & 16Ω taps — 4 6V6 tubes — Upgrade!
Vintage Club 50 Head — 2, 4 & 8Ω taps — Upgrade!
20H — 100mA
DC30 — Drop-in Upgrade!
Add this choke to your head or combo for improved tonal richness
Delta Blues — add this choke to your amp for improved tonal richness
5 Henry — Drop-in Upgrade!
5H — 200mA
7 Henry — Drop-in Upgrade!
Add this choke to your Night Train amp for improved tonal richness
2.7, 8 & 16Ω taps — Upgrade!
Partridge TG9685 — 120V, 220V, 230V & 240V primary — Partridge transformer design
Excelsior — Drop-in Upgrade!
1959 Hand-Wired reissue — Drop-in Upgrade!
3H — 150mA — Upgrade! — add this choke to your 60W head or combo for improved tonal richness
Blue Voodoo 120 watt — add this choke to your head or combo for improved tonal richness
Legacy — Add this choke to your head or combo for improved tonal richness.
SOCAL50 — Upgrade!
3 Henry choke — mid-sized — 2 13/16″ mounting centers — DCR: Approx 92 Ohms
Add this choke to your DSL100H amp for improved tonal richness
JCM2000 — 3H — 250mA — add this choke to your 100 Watt JCM2000 for improved tonal richness
TSL60 — 3H — 250mA — add this choke to your TSL60 for improved tonal richness
Add this choke to your head or combo for improved tonal richness — Upgrade!
Add this choke to your Joe Satriani Model JSX head or combo for improved tonal richness
Valve King– add this choke to your head or combo for improved tonal richness. — Upgrade!
Add this choke to your VTM60 for improved tonal richness
Add this choke to your XXX amp for improved tonal richness
Randall Model RM100 — add this choke to your head or combo for improved tonal richness
100 Watt JCM2000 — SuperStack (over 4″ of Iron!) — 5 1/2″ tall w/ top end bell
For head amp cabinets only (no combos) — Bolt hole spacing is 2 1/2″ x 3 1/8″
TSL60 — Upgrade!
10H — 100mA
1960 — add this choke to your amp for improved tonal richness
Vintage Club 15
Blues Custom
Add this choke to your Haze 40 amp for improved tonal richness
Add this choke to your head or combo for improved tonal richness
Add this choke to your 6505 for improved tonal richness
Add this choke to your head or combo for improved tonal richness
DR. Z Mini Z — Upgrade! — 2, 4 & 8Ω taps
2:90 Power Amp — Drop-in Upgrade! — Universal Voltage Primary. Check availability before ordering — #561205
F50 — Drop-in Upgrade! 120V Primary — #561054
Vertical stand up type with 2 1/2″ x 2 3/4″ mounting centers
Maverick — single 120V primary — Drop-in Upgrade!
Maverick — Drop-in Upgrade! — Universal Voltage Primary
Rocket — 110V & 120V usage — Drop-in FatStack Upgrade!
Rocket — 110V & 120V usage — Drop-in Upgrade!
DC-3 — 100V & 120V usage — Drop-in Upgrade!
Rocket 440 — 110V & 120V usage — Drop-in Upgrade!
50 Watt Combo — Drop-in Upgrade! — single 120V tap
50 Watt Combo — Drop-in Upgrade! — Universal Voltage Primary
Add this choke to your Head or Combo for improved Tonal Richness.
Add this choke to your head or combo for improved tonal richness
add this choke to your amp for improved tonal richness
Lightning
Spitfire
DSL201 — 9H — add this choke to your DSL201 for improved tonal richness
9 Henry Mini-Choke — add this choke to your amp for improved tonal richness
9 Henry Mini-Choke — add this choke to your amp for improved tonal richness
Bogner Uberschall– 4, 8 & 16Ω taps — Upgrade!
Bogner Uberschall– 4, 8 & 16Ω taps — Upgrade!
Bogner Uberschall– 4, 8 & 16Ω taps — Upgrade!
Upgrade! for B-52 100W — use with four 6L6/5881/KT66/6550/KT88 type tubes — 4, 8 & 16Ω taps
Upgrade! for B-52 100W — use with four 6L6/5881/KT66/6550/KT88 type tubes — 4, 8 & 16Ω taps
Upgrade! for B-52 100W — use with four 6L6/5881/KT66/6550/KT88 type tubes — 4, 8 & 16Ω taps
Upgrade! for B-52 100W — use with four 6L6/5881/KT66/6550/KT88 type tubes — 4, 8 & 16Ω taps
Upgrade! for B-52 100W — use with four 6L6/5881/KT66/6550/KT88 type tubes — 4, 8 & 16Ω taps
X100B — 4, 8 and 16 Ohm taps — Upgrade!
Upgrade! for B-52 100W — use with four 6L6/5881/KT66/6550/KT88 type tubes — 4, 8 & 16Ω taps
Legacy III — 4, 8 & 16Ω taps — Drop-in Upgrade!
4, 8 & 16 ohm secondary taps — Larger Size Drop-in Upgrade!
Drop-in Upgrade!
VL502 — 4, 8 & 16Ω taps — Drop-in Upgrade!
Also for the VL501
Thunder 30 — Drop-in Upgrade! — Universal Voltage Primary
Dark Terror – Single 120V primary — Drop-in Upgrade!
JTM45 — Drop-in Upgrade!
DC30 — Drop-in Upgrade!
Delta Blues — FatStack Upgrade!
Delta Blues — FatStack Upgrade! — Universal Voltage Primary
Add this choke to your head or combo for Improved tonal richness
Add this choke to your head or combo for improved tonal richness.
Legacy III — Add this choke to your head or combo for improved tonal richness.
X100B — Add this choke to your head or combo for improved tonal richness.
Upgrade!
V5 — Single ended 5 watt — 4 & 8Ω taps — Upgrade!
Epiphone Comet PT Single 120V primary
Sears Silvertone — Model 1471
’70s 100S
Vintage Club 15– 8 & 16Ω taps — 2 EL84 tubes — Upgrade!
4, 8 & 16 ohm secondary taps — Drop-in Upgrade!
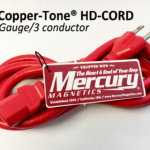
6 Foot Heavy Duty AC-Cord – Our 14 Gauge HD Coppertone Cords have twice the copper of a typical 18 gauge power cord.
You may be surprised to learn that most amps are sold with severely under-sized AC power cords. And you’ll usually find the same or incorrectly-sized AC power cords being used for everything from 5 watt to 100 watt amps. Did you know that the AC power cords supplied with virtually ALL amps were designed for everything but amps? It’s extremely rare that a manufacturer will supply a power cord beefy enough to do the job — yet virtually all tube-based amplifiers could easily benefit — and sound a lot better — with this simple, inexpensive fix.
Tech Specs: 14AWG/3 Conductor cable with USA 3 prong (NEMA 5-15P) grounded plug and IEC-C13 female connector. RoHS compliant and UL/CUL/CSA listed. Electrical rating: 15A/125V/1875W.
2 Foot Heavy Duty AC-Cord – Our 14 Gauge HD Coppertone Cords have twice the copper of a typical 18 gauge power cord.
You may be surprised to learn that most amps are sold with severely under-sized AC power cords. And you’ll usually find the same or incorrectly-sized AC power cords being used for everything from 5 watt to 100 watt amps. Did you know that the AC power cords supplied with virtually ALL amps were designed for everything but amps? It’s extremely rare that a manufacturer will supply a power cord beefy enough to do the job — yet virtually all tube-based amplifiers could easily benefit — and sound a lot better — with this simple, inexpensive fix.
Tech Specs: 14AWG/3 Conductor cable with USA 3 prong (NEMA 5-15P) grounded plug and IEC-C13 female connector. RoHS compliant and UL/CUL/CSA listed. Electrical rating: 15A/125V/1875W.
Add this choke to your Head or Combo for improved Tonal Richness.
9 Henry choke — mid-sized — DCR = 240Ω — tolerance +/- 10%
9 Henry Mini-Choke
Mercury’s exclusive multi-tap Multi-Choke – Size: Micro
1 Henry (92Ω DCR)
3 Henry (160Ω DCR)
5 Henry (210Ω DCR)
7 Henry (246Ω DCR)
9 Henry (285Ω DCR)
20 Henry
Gibson / Epiphone Spring Reverb Driver — #E-6400 — for the 4FB reverb (2 spring) 9.8K in, 1475 out — for the 9FB reverb (3 spring) 13K in, 1925 out
Correct for the Gibson Falcon amp (and others)
45 Watt — 5H — 150mA — 2″ Mounting Centers
Dynaco C354 — 1st generation
7H
Brown, Blackface & Silverface Spring Reverb Transformer — #022921 — #125A20A/B
Tweed — #14684 — **Used in early Tweed amps w/ dual rectifier tubes
2.84 Henry, 400 mA current rating
Vertical mount — bolt hole spacing of 3 1/8″ center to center
Tweed — 4 Henry. Uses Grain-Oriented Iron
3.5H / 200mA Choke — Fender Tweed Era Part #14684 — Small size — 2 13/16″ Mounting Centers
’60s — #8790/80 — larger version
JCM800 Spring Reverb transformer — reverb pan #4DB3C1D
45 Watt — 5H — 150mA — 2-3/8″ Mounting Centers
45 Watt — 7H — 150mA — 2-3/8″ Mounting Centers
3H — 250mA — 2 13/16″ Mounting Centers — DCR: Approx 92 Ohms
For DSL/TSL 100 watt amps w/o a choke
10 Henry / 250mA Choke — 3-9/16″ Mounting Centers — DCR: Approx 275 Ohms
Drop-in Upgrade! Spring Reverb driver Transformer
’70s Model T
1 Henry
Mr. Tone Controls — #0067194000
Interstellar Overdrive — #0067186000
SVT II Preamp — Drop-in Upgrade!
V4 — Toroidal Midrange EQ inductor (choke)
Killer Ant — BH1H — 14, 8 & 16 ohm taps — Upgrade!
115V primary — secondary has 120V @ 45mA winding and dual 12V windings @ 0.2A each
Add this choke to your head or combo for Improved tonal richness
Add this choke to your head or combo for Improved tonal richness
Blackstar HT1 — Upgrade! — 8Ω tap
Early ’60s
3 Henry Choke – Upgrade over stock resistor
Blackface — #125A35A
Blackface — #125A10B — #022913
Blackface Era 3 Henry / 200 mA Choke — Original Fender Part #125C1A
2 13/16″ mounting centers
Same mounting centers as the #125C1A choke — 7 Henry, 200mA — Upgrade!
Early ’60s Brown
4 Henry. Uses Grain-Oriented Iron
Early ’90s Champ 12 — single 4 & 8Ω taps — Upgrade! Uses Grain-Oriented Iron
Tweed era — 3.5 Henry — #14684 Small size — 2 13/16″ mounting centers
Blonde, Blackface, Silverface — #125C1A — 3.0 H, 95 Ω DC resistance
Mounting centers are 2 13/16″
Woodie/Woody Deluxe — ’46 era — 14K primary using single 8Ω secondary. or 7K primary using single 4Ω — #6054
Tweed (very early 1947) — single 8Ω tap
Passport — Upgrade!
#026847A
#026839 — Upgrade!
3.5H / 100mA Choke — Original Fender Part #125C3A
175 ohms DCR — 2″ mounting centers
Rhodes Suitcase Piano/Keyboard Driver Transformer — Upgrade!
Rhodes Suitcase Piano/Keyboard Driver Transformer — M6 Laminations — Upgrade!
Reverb unit
Super Champ X2 — single 8Ω tap — Upgrade! Uses Grain-Oriented Iron
4H / 500mA Choke — Fender Tweed era Part # 14684
Large vertical mount — 3 1/8″ center to center — for Bassman amps (not Champ)
Mid ’50s Tweed — single 8Ω tap — 2″ mounting center
Mid ’50s Tweed — single 4Ω tap — 2″ mounting center — medium size version
Late ’50s Tweed — single 4Ω tap — 2-3/8″ mounting center — largest version
Tweed — 8Ω tap
Early ’50s Tweed — single 4Ω tap — 1-3/4″ mounting center — smallest version
Tweed — 4, 8 & 16Ω taps
10H Tweed Era Choke — 2 13/16″ mounting centers — DCR: 192 ohms


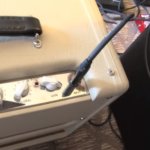


