A couple of months ago, I checked in a pile of amps for repair/freshening up for a band that was going into the studio to record another album. While reviewing this pile, I found that I was in possession of the main recording amp for the front man. It was a little vintage Supro that had certainly been around and through the ringer. While it definitely had a fantastic tone, it had noise and reliability issues due to its age. I decided to surprise the fellow and make a replica as close to the original as possible. In my own amp designs, I try to add a dash of originality into the mix, but for this project only a carbon copy would do. I pondered the project endlessly, obsessing on the creation morning, noon and night. A couple of days after deciding on a game plan, I received a call from the band’s liaison asking me if I would mind making a clone of that amp only with less noise and increased reliability. I was now on the hook. Time to put my plan into action.
The first step was to try and find a schematic for the little Supro Super. A few were found in my files and on the internet, but they didn’t seem to be of this exact incarnation. Since my plan was to be blueprinting and cloning this amp anyway, I decided to dig in and make a schematic. I traced the circuit, noting the apparent values (what was written on them) of resistors and caps etc, as well as the type (composition) along the way. All of the resistors were carbon comp, and the coupling caps were mostly ceramic discs. I then traced the circuit again, this time measuring and taking notes on the actual values and voltages of the resistors, caps, transformers, plate voltages, cathode voltages, etc. The differences were substantial. The tolerances on these amps were fairly broad to begin with; on top of that, the values of the components would certainly drift over the 40 odd years since this amp was built regardless. Now that I had the blueprint made, I needed to acquire the parts.
I placed a call to Paul Patronete of Mercury Magnetics to get transformers with the exact specs required. We do quite a bit of business together and he has always been a great help with projects like this (as well as with my DB7 trannys). Surprisingly, they had them on the shelf and ready to ship.
With those on the way, it was time to start punching the chassis. I selected an aluminum box to be used as a blank and laid out the measurements. My goal was to create a replica in tone and feel only, so I took the liberty of moving some of the component placement to cut down on the noise. For example, I spaced the transformers out a bit and took into consideration the proximity of the output tranny and the first gain stage. During the construction, I also implemented star grounding and ran shielded wire. For the resistors I used NOS carbon comp where it made sense tonally (input, plate load etc.) and a mix of carbon film and metal film in other places. At times, I had to create values using two resistors to try to match the values of the ones that had drifted.
Ok, ok, I know that I said that I was making a carbon copy clone here but I just couldn’t bring myself to use ceramic discs for the coupling caps. Instead, I used caps that we have made to our specs for our amps by a high-end manufacturer here in the U.S. They don’t have the same two-dimensional graininess as the ceramics. Instead they have a very open and airy quality to them but shift to the point of flattening out a bit when using some right hand dynamics.
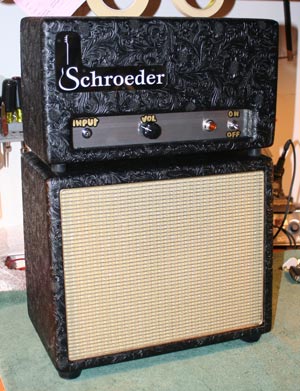
With the guts assembled and all of the voltages checking out, it was now time for the speaker selection and cabinet construction. I chose to make a separate baby head and speaker cab for this project. I used pine for its tonal qualities and tried to match the size of the original combo. For the speaker itself I used an 8″ Weber VST Alnico that was a direct replacement of the original. The cabinets were then covered in a very funky black cowboy print type Tolex. Tube selection was also very important. I tried many tubes from my private stash and finally rested on an NOS RCA 6V6 for the output and NOS RCA grey plates for the preamp.
The end result was satisfactory but there was something missing. The tonal characteristics were all there but it just didn’t seem to have the “magic.” I gave it to the client and told him to play/abuse it a bit to see how the character would change when the amp/speaker had some time to break in and then I would finish the voicing. A couple of weeks later I picked it up from their studio along with a wish list of how the tone was to be sculpted. I placed the amp on my bench ready to start the voicing, plugged the head into a very weak and old 10″ Alnico Jensen that I use as one of my test speakers and strummed a chord. WOW! It sounded amazing! Hmmm, what happened I wondered?
I then plugged the amp into the cab that I had made for it. While it still had the tone, the dynamics just weren’t there. The speaker that was in my test cab seemed to be the missing ingredient! Fortunately, it was one of four that I had pulled out of an old Hammond organ cab of mine. The new speaker cab was taken apart, a 10″ hole cut in the baffle board and one of the speakers installed with hardly any room to spare. I tried again… WOW! With this combination you could play perfectly clean, sparkling chords and using right hand dynamics shift into blistering, compressed distortion. Truly outstanding! The Weber is a fantastic speaker — don’t get me wrong — it’s just that for this application I needed a really tired, old, crummy speaker to do its thing. The end result far exceeded the greatest expectations of both my client and I. Certainly well worth the time spent on a small pet project in a busy shop. But hey, who needs sleep anyway?
Source: https://mercurymagnetics.com/pages/news/PremierGuitar/PremierG-16.htm