 With that aside, we should start out by saying that this is not a thorough “apples-to-apples” comparison between the two amps. To be 100% fair, ALL the components would have to be altered to the exact specifications of our 1964 badge-logo Marshall JTM-45 and that really wasn’t the point. The point of these transformations was to get the stock reissue JTM-45 sounding more like the “real thing” as described above with regards to the powerful, smooth and dynamic Marshall tone.
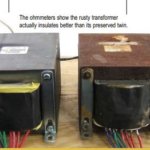
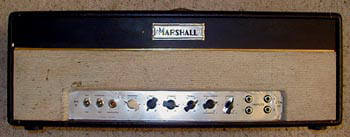 One final, and perhaps most important point, which Mercury Magnetics™ vice-president Sergio Hamernik added: “The transformer in a 30-year old amplifier will sound characteristically different as it ages compared to a new replacement, even if the replacement is built with the same materials.” And while the component materials and manufacturing methods used by Mercury Magnetics™ are made to the exact same standards as the originals (Sergio also added “Every turn, every layer, is copied and blueprinted exactly, including any original manufacturing anomalies found during our rewinding process of the original, vintage specimen, Sergio emphasized that the ToneClone™ series transformer will still sound different, but “like the original did in the amp when it was new” and not like the tone of the aged 30-year-old transformer. Since much of our favorite tones were recorded at least 20 years ago, perhaps this isn’t such a bad thing?
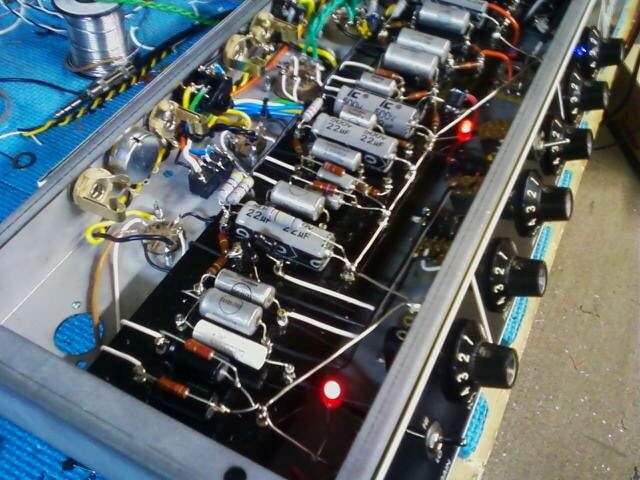
 While waiting for our Mercury Magnetics™ output transformer, I read about some capacitors that created quite a buzz on the Plexi Palace vintage amp forum. We found that SoZo Amplification was offering custom made capacitors aptly named “mustard caps”. They are obviously mustard yellow but apparently these caps are also made to the same specifications as the yellow mustard capacitors which were originally found in tube amps from the 1960s and 1970s. These little yellow jewels keep the foil thickness, polyester film dielectric and voltage ratings the same as the originals. In addition to the material makeup of the capacitors they also share the same physical dimensions. According to the SoZo Amplification website, the physical shape has a lot to do with the sound because it changes the slew rate.
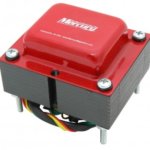
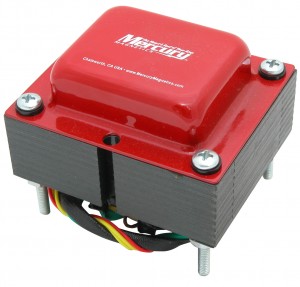
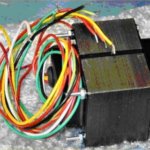
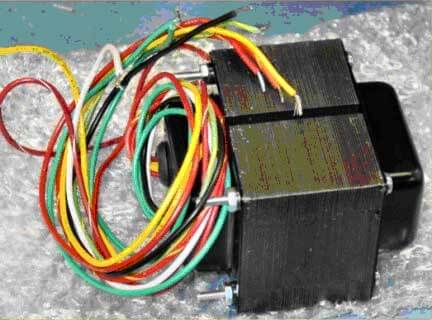
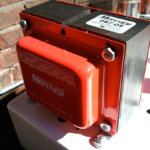
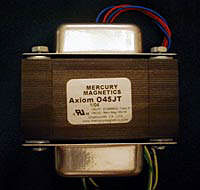 The Axiom® 045JT-C output transformer is part of the Mercury Magnetics™ Axiom® ToneClone™ series, and is 100% hand wound in the USA by Mercury Magnetics™ at their factory in Southern California. Mercury Magnetics™ offers a number of transformer clones for JTM-45 amplifiers as Marshall used a few different suppliers during different times with its own JTM-45s originally. Some people may have a preference for the earliest transformer equipped in JTM-45s, which were those built by the Radio Spares company. According to Mercury Magnetics™, the Radio Spares output transformer has more “high-fidelity” characteristics in its tone. According to Paul at Mercury Magnetics™, their Radio Spares clone is a special, intricate transformer that produces a subsequently wider frequency response and in some ways mirrors other transformers in design such as the early famous Partridge units in the Hiwatts.
 It stings and bites as musically as one could imagine with a Fender Stratocaster using the bridge position pickup with the Marshall’s channels bridged and the volumes set at about 7. With the neck pickup, the tones are fluid and with a bit of a gain boost from a floor box could easily capture the full sustain similar to what a player like Eric Johnson would get. The power output on the amp is moderately high, but at the JTM’s power range, it really is a nice match against any solid-hitting drummer and the perfect club amp for small and mid-sized venues.
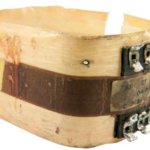
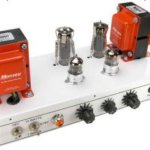
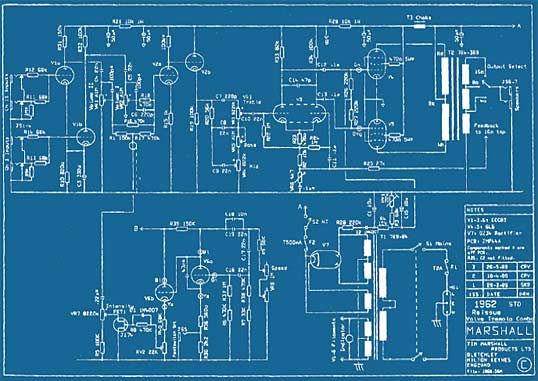
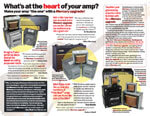
 For vintage-style transformers, Mercury starts by duplicating the transformer design, build errors and all. We use the best grade components like they did in the ’50s and ’60s. We wind every layer and every turn as if it were a circuit in itself. In fact, the diagram on the left shows an output transformer circuit equivalent. Most people would think it is an audio circuit. These things are fairly complex, and all the numbers have to be right in order to get the tone we want as musicians.
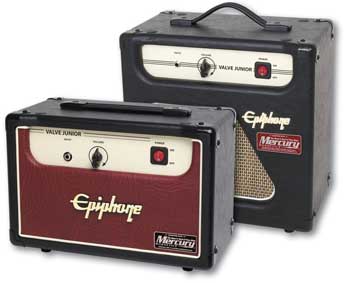 I designed all of the magnetics (the transformersandMini-Choke) and the general concept behind the Upgrade in league with Allen Cyr from the
  At the

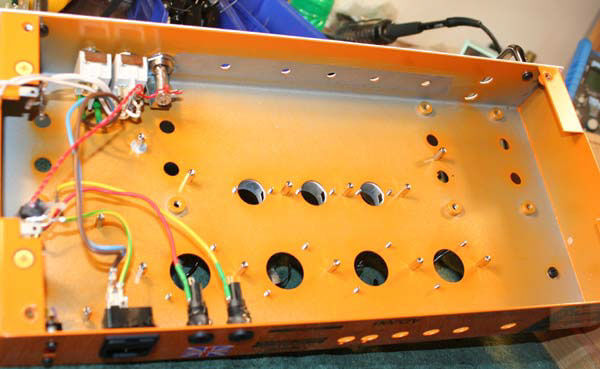
 The other piece of equipment you’re going to need for this modification is a Variac and if you don’t own one, you’ll need to borrow it. So why exactly do you need one? The Variac will allow you to slowly bring the amplifier up to its operating voltage so you can monitor the amp using a voltmeter to ensure that everything is working correctly. In this case, we pulled the fuse and metered across the terminals to ensure the amplifier was maintaining its correct working voltage. Had the voltage gone past the correct level we could quickly and safely cut the power and not damage the amplifier. If there is an issue you will see the voltage spike well above the recommended level as you are turning the variac up. Also, if you happen to start smelling smoke as you turn the Variac up then you’ll want to immediately kill the power and double check everything.
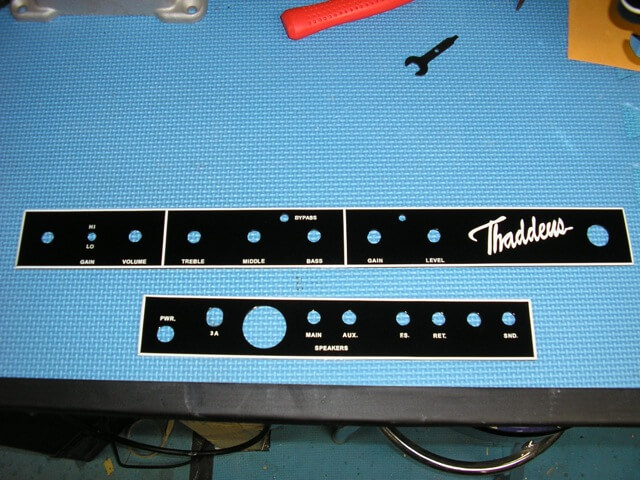
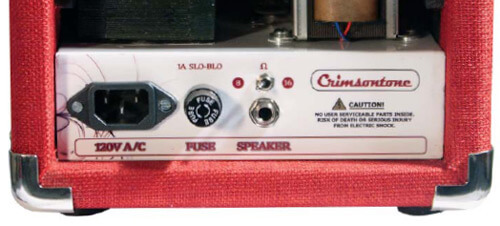
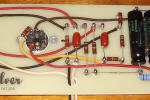
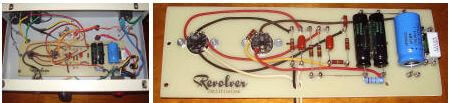
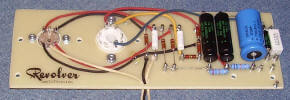
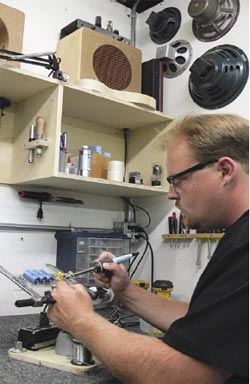
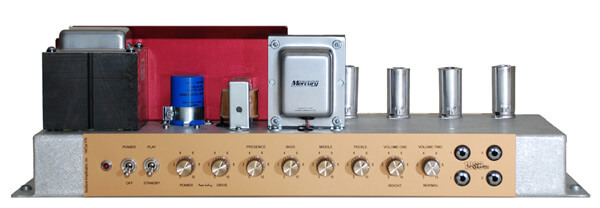
 Rob builds every aspect of the amp. From the cabinet and grillcloth to the faceplate (painting and vinyl lettering)

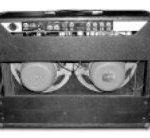
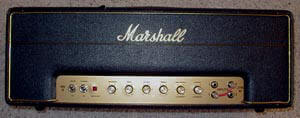
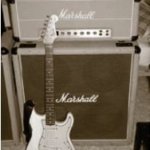
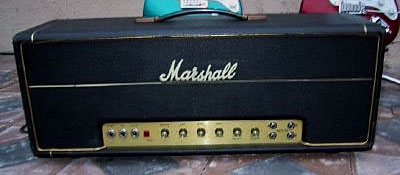
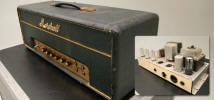 Original 1965 JTM45
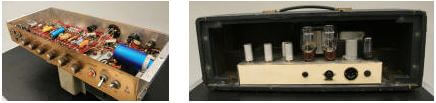 Once we had established a base tone for comparison’s sake, it was time to play and listen to the other amps. Before I break down each individual amp and builder, I must observe that each and every one of the amps had ridiculously good tone, and they all sounded like JTM45s, but each had its own unique voice. Aside from the reissue Marshall, all of the amps are hand-wired. The reissue Marshall was of PCB-construction, and used the standard parts and components that Marshall was building their amps with during that era. I spoke with Mitch Colby from Korg USA (Marshall’s US distributor), who told me that the reissues have not undergone any significant changes since their reintroduction 20 years ago. While they are using the components that Marshall builds with today, they should yield very similar tones to the earlier reissue amps.
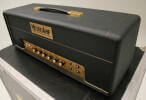 George Metropoulos is no stranger to the world of Marshall amps or to the online amp building community. Having run MetroAmp for some time now, George offers everything from fully built replicas of many classic Marshalls to ready-to-build kits and hard-to-find replacement parts for vintage Marshalls. A player, George honed his amp-tech skills by adopting a DIY approach, taking care of his own amp repairs on the road. This extended into repair work at home, and then really took off when amps began coming in for restoration rather than simple re-tubing. After his ’73 Super Lead was stolen from a gig, he realized it might be best to leave the valuable amps at home, and so he embarked on a never-ending quest to replicate the tone of the old Marshalls.
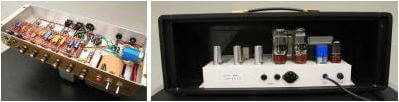

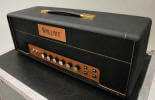 Wallace Amplification BKW45
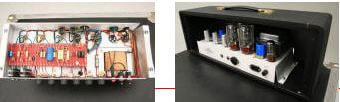 The Wallace had a magical ability to push notes through loud and clear while still being able to dish out gritty and harmonically pleasing chords that didn’t fight the non-perfect intervals they were built on. This all came out of an amp that was using tubes you can buy today without breaking the bank.
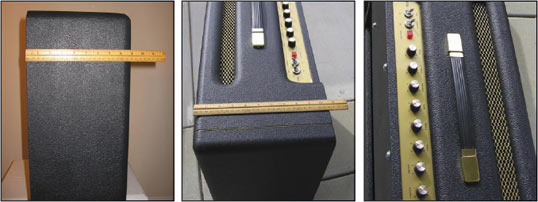
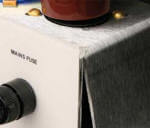 Ever wonder what could happen to your amp in shipping? In the case of Brian Wallace’s BKW45 amp, UPS had a field day, and decided it would be a lot of fun to throw it around. When the amp arrived, it was packed neatly in a new cardboard box with padding inside suspending the padded road case that housed the amp. That’s double-boxed and protected by a case built for heavy abuse. Sadly, it took one good slide down the end of a ramp and collided with either another box or the wall of the truck. Though the box didn’t show any signs of abuse on the outside, it was clear that something had shifted when I opened the case. Take a look at this picture of the damage and the way the entire amp was shifted to one side because of the impact. Believe it or not, the tubes didn’t shatter and the amp worked fine, but it was cosmetically damaged by a broken front Plexi panel. This isn’t the first time this has happened, but it’s the first time I’ve seen it happen with this type of road-worthy packing. Let this serve as a reminder to always insure your amps, as the shipping company can’t tell if you’ve got a bag of peanuts in a box or an amp that was lovingly built by somebody like Brian.
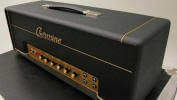 Germino Amplification Classic 45
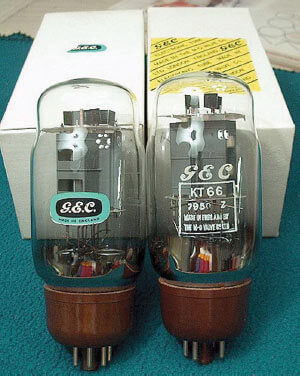
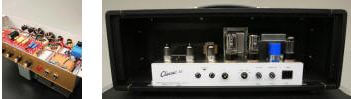 The Classic 45 was the only amp in the roundup that used 6L6 power tubes. Greg’s decision to use them was a combination of staying true to the earliest tubes Marshall used on the original JTM45 amps and his belief that the current crop of 6L6s sound and perform better than newer KT66s. NOS and vintage 6L6s are also less expensive and more plentiful than NOS KT66s. Our immediate response to the Classic 45 was that it was a lively and aggressive amp, with tons of power that made the pick explode off the strings. In ways it reminded us of our favorite ’67 Super Bass in its volume and attack, but it still retained the sound of a 45. It may very well have been the loudest amp of the bunch, and that volume translated to a feeling of excitement that made the amp extremely fun to play. It was present without being shrill and had a super-tight bottom end, no matter what guitar we played through it. While the Classic 45 had tons of natural gain on tap, it also cleaned up nicely when rolling back the volume on the guitar, revealing a bright and sparkly chime. This amp is a real beast, and it could hold its own against 100W amps without flinching.
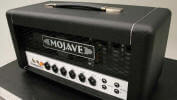 Mojave Ampworks Special Edition Plexi 45
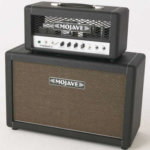
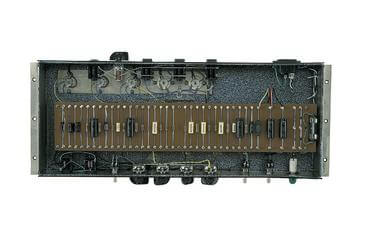
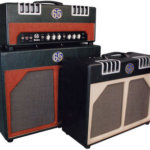
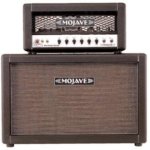
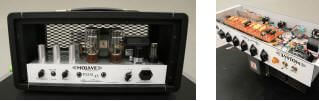 The chassis is a thing of beauty; the .09″ thick aluminum, with a high tensile strength and welded edges and seams will ensure it will not flex, bend or develop fatigue, like the early, folded, softer chassis, and will prevent the heavy transformers from causing the chassis to sink in and sag. Mojave deviates from the original JTM45 by using modern, tight-tolerance parts. Custom manufactured caps and metal film resistors allow each amp to sound as close to the one built before it as the one after it. Consistency is something that Vic definitely strives for, and it shows in the build quality and attention to detail, and the desire to add convenient functionality to his amps.
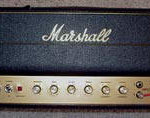
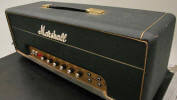 Marshall Reissue JTM45
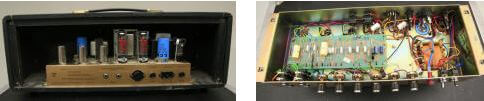

 To honor and support the philanthropic efforts of legendary guitarist Eric Clapton, Fender is collaborating with Clapton to create a very special limited edition guitar and amp package featuring the new Eric Clapton Crossroads Stratocaster guitar and

 300guitars: Why should guitar players care so much about the transformers in their amps?
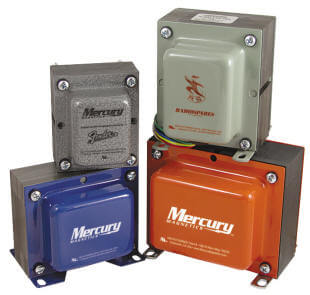 300guitars: How does the power transformer affect the sound of your guitar? The sound comes from the output transformer right?
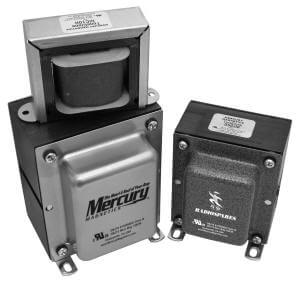 300guitars: When it comes to transformers does size matter? How?
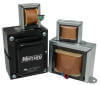
Boy have I got a treat for you guys!!! As you know I am a big fan of Mercury Magnetics transformers and have been a dealer for many years now. Their products are excellent as well as their customer service. The Mercury Magnetics line is quite extensive and they will do custom pieces as well.
I have been working with Sergio Hamernik for almost a year now on an exclusive interview all about guitar amp transformers. In this interview Sergio talks about how transformers affect your amp’s sound and feel, if transformer size matters and how it affects tone, what a choke is and much more information.
Mercury Magnetics is the leader in guitar amplifier transformer manufacturing. I have personally used their iron in many repairs, restorations and custom builds over the years. It never ceases to amaze me when I use a set and listen to the amp after the project is complete. It’s almost like a blanket was taken off of the sound and you are listening with “3D glasses.” The feel of the amplifier becomes much more dynamic as well. In my opinion “your amp’s transformers truly are the heart and soul of your amp.”
In this exclusive interview with Sergio Hamernik (the man behind the scenes at Mercury) some basic questions that all relate to the tone and feel of a guitar amplifier. His answers are forward, straight to the point and insightful.
300guitars: Why should guitar players care so much about the transformers in their amps?
Sergio Hamernik: When a player has to struggle with his amp then there’s really not much of a reason to play it. The tonal quality and performance of a tube-type guitar amp is largely determined by its transformers. Where there is great “tube tone,” you’ll always find “great sounding transformers” making it all happen!
Once you get past the player’s talent/ability, it’s all about the tone. If an amp doesn’t produce desirable tone, the window of inspiration closes and gets replaced with fatigue for both the player and the listener.
These days musicians who choose to play an electric guitar are only as good as their technical awareness and development allows them to be.
Transformers are the most important and most expensive components of guitar amp’s parts list. Also, they are the only components designed and built specifically for that amp, unlike the rest of the components — the resistors, capacitors and even vacuum tubes. These other components are considered to be “universal application” parts — meaning not just for making guitar amp tone. The electronics industry commonly uses these same components for medical, industrial, radio and many other applications. You certainly couldn’t fit or use guitar amp transformers for any of these other applications without offending someone.
Transformers are the key to providing that unique signature tone. It’s the transformers that differentiate one amp brand or sound from another. Here’s another way to look at it — all amp builders have to deal with the same limited choices from a small pool of vacuum tube manufacturers and other off-the-shelf component requirements (resistors, capacitors, etc.). This is NOT so with the transformers. Although there are plenty of generic transformer designs available that service the “power requirements” of an amp, you wouldn’t want to use these awful-sounding devices in your guitar amps. Likewise it’s not a coincidence that most of the best-sounding amp builders, modifiers, and repair techs begin their craft and finish it with enviable distinction, relying on their choice of transformers.
300guitars: Would you explain, in guitar player terms, what power and output transformers are?
Sergio Hamernik: Well, I really don’t like to lump all guitar players into one category. Making assumptions here (be it charitable or not) just doesn’t seem fair to me. Each player has their own level of interest and technical understanding on this subject. So I’ll split my answer into three different groups of definitions and let the player choose the one that suits them best.
In basic guitar player terms: It’s magic!!
In technician terms: A device applying mutual inductance in an efficient manner, so that circuits with different voltage/current requirements can correspond to each other.
In engineering terms: Transformers are electrical devices consisting of a magnetic-core and two or more coils (commonly referred to as windings) inductively coupled as circuits for the transmission of alternating-current energy from one closely coupled coil to another usually at a different voltage and current value. Transformers are also used for matching impedances between the signal generating source and the load.
300guitars: How does the power transformer affect the sound of your guitar? The sound comes from the output transformer right?
Sergio Hamernik: Yes the amplifier’s sound does come out of the output transformer, but where does it all begin? While an output transformer is vital to an amp’s ultimate tone, it simply can’t do it alone. The power transformer is the first step in building tone and in setting the standard of performance that the tubes and output transformer utilizes.
The output transformer depends on the power transformer for determining the maximum amount of power the amp can put out. The power transformer is also a major contributor for the overall feel of the amp. Such as punch through (the oomph factor), note attack, a perceived larger/wider soundstage presence and most importantly, the speed or reaction time of the amp’s audible response to the player’s sense of touch and playing technique. Tamper with that in any way by using cheap “dumbed down” power transformers and your audience may confuse your amp’s tone with the sound that is made by farting into a pillow!
A puny power transformer will deliver puny tone no matter how good the output transformer is. A good output transformer is also not intended to be a problem fixer or a turd-polisher. Garbage in is always garbage out. So please don’t shoot the messenger because the power tranny just ain’t cutting it.
Output and power transformers are actually close cousins. Doing similar tasks, one matches and isolates the speaker from the amp and the other one matches and isolates the amp from the power company. Peace keepers of a sort, preventing tubes from frying the speakers and preventing the power company’s energy from frying the amp and people connected to it.
300guitars: How does the output transformer affect the amps sound and feel?
Sergio Hamernik: An output transformer is the last component of the audio chain. The amplifier’s voice. The final word that reaches the speaker. Because all vacuum tubes were never really designed to distort intentionally, the weight of producing desirable amplified guitar tone falls heavily on the transformers. The output transformer’s job is to coax, extract and even irritate the power tubes into tone-friendly distortion. Ever wonder why solid-state amps have always played second fiddle to tube amp tone? Is that simply because of not employing tubes or of not having an output transformer? At the very least, it’s something to think about.
The output transformer determines how the amp sounds like from fully clean (sweet with a touch of sparkle) to fully over-driven (chainsaw) distortion, and everything in-between.
By the way, the term “clean” as used in guitar amp speak is a bit of a misnomer. There is no such thing as a distortion-free guitar amp. “Clean” simply refers to less distortion. There is an intimate inductive/reactive relationship between the output transformer (coils) and the speaker voice (coils) that also back-washes into the power tubes and influences that “clean to dirty” range of distortion. The quality of the output transformer determines how well the production of tone is executed by the amp — those notes that float between the strings which are created by overtones, chimes, bell tones, sustain, etc. Poorly made output transformers tend to gargle out, squash and mask those overtones.
The output transformer is also responsible for how efficiently the audio power of the amp transfers to the speaker (load). Ultimately, the player issues the final report card for the performance of the amp and the output transformer with comments like “clarity,” “articulation,” “loudness,” “break-up,” “grit,” “glassy,” “grind,” “dirty,” “woody,” “mushy,” “mashed,” “fuzzy,” “dark,” “cloudy,” and so on. There are hundreds of guitar amp speak descriptions and euphemisms out there which capture their emotional response (players and listeners alike) to what is coming out the amplifier’s window.
The mighty output transformer. Loved and hated by so many. Still one of the most misunderstood components of a guitar amp. 80 years and going strong. Go figure….
300guitars: When it comes to transformers does size matter? How?
Sergio Hamernik: I can almost hear my wife saying “now that sounds like a guy question.” Actually, in most situations, transformers and chokes make a good case for “bigger is better.”
A power transformer that is undersized for the job will run hotter than a bitch kitty. The amp is unable to be pushed — collapsing under weak, sagging voltages. It’s unable to keep up with the demands a player puts to an amp. The amp slows and has a tendency to cough out notes when played clean, and honk or bark out the notes when overdriven.
Another symptom of undersized and/or poorly designed power transformers is the phenomenon of “tone drift.” You know this is happening when the amp (common with some early Fenders and half of today’s 100 watt amps) starts off with decent tone for the first hour or so, then somewhere around two hours later the tone begins to change and not for the better. The internal temperatures of the transformer reach their peak and begin detuning the voltages and power the amp sees. This is caused by the changes to the resistance of copper. As the temperatures become excessive, the amp’s tone drifts. Remember rich amplifier tone needs to be well fed.
An undersized output transformer will act more like a suppository to amplified guitar tone than a big open window, which is its main purpose. Contrary to popular myth, there is no tone magic that occurs when you force feed an output transformer into alleged saturation or intentionally under power it with a dinky power transformer.
The term “output transformer saturation distortion” comes out of poor guessing by people who really don’t understand how tubes and transformers work together to produce music friendly harmonic distortion. If an output transformer reaches true saturation, all bass frequencies will disappear, the mid-range will sound dark and fuzzy with lower volume — leaving the treble frequencies tinny and brittle sounding. Does that sound desirable to you?
So it’s not the transformer itself generating that saturation effect on overdriven guitar tone. Good output transformers are designed to operate at low flux densities (loads of inductance). That low flux makes it difficult to saturate an output transformer. So the output transformer doesn’t get the credit or blame for that “saturated” sound. The actual source is in the push-pull power tube plate circuit reacting/saturating to the changing impedance it sees in the primary coil of the output transformer as its flux density changes with the changing frequencies and fluctuating power coming into it. The saturation phenomena (when it appears) is mostly happening in the tube.
If one wants to intentionally use a dinky power transformer to achieve tone magic (yes some have tried it, believe it or not). They could save themselves a bunch of money and buy that pillow I mentioned earlier for similar results.
Bigger is better for chokes if you have the room for it on the chassis. Assuming the same value of inductance, more iron and copper will let more power through and it will run cooler as well. This is because of lower DC voltage resistance with the extra copper involved. More voltage being available to the tubes means more power out of the amp.
300guitars: What is the choke for and why do you offer so many models?
Sergio Hamernik: Originally chokes were used in guitar amps to extend the life of vacuum tube rectifiers nearly tripling their life expectancy. They behave as a quasi current spike shock absorber. Chokes help capacitors smooth out any ripple that may be present on the DC voltage. The goal here is to always try to get the cleanest voltage to the tube circuits. Caps by themselves do a pretty job of it. But the choke is a multi-tasker. Along with doing a nifty job of smoothing out ripple, the choke does something else that makes it a significant contributor to the amp’s final tonal character. Because its connected in series with the rectifier and not tethered to ground like a cap, the choke (being an inductor) works nicely as a current regulator. And it keeps the current from decreasing as much as it would if there were only caps involved.
This nearly constant current available from the power supply, courtesy of the choke, makes for an ideal platform to make the best possible tone. Simply put, changing the value of the choke changes the tone and behavior of your amp.
Why so many varieties of chokes? Since chokes are a significant link in the audio chain, a one size fits all approach would be a great injustice to all guitar amp owners. Choke values are a finesse point, a fine tuning that helps to extract the most favorable tonal characteristics from an amp. We even offer a “shift on the fly” option with our multiple-value Multi-Chokes. One choke with several choices of inductance to help the amp builder find that sweet spot.
There is one last benefit to using chokes and it’s the most overlooked attribute. When a choke is connected between a couple of caps, a form of a low pass filter is created. What this means is the choke blocks high frequency garbage on the AC line from mixing with the guitar signal and causing all sorts of sonic collisions during the process of amplification. Let us not forget that we live in an electronic age far more complicated than the 1950s or 1960s. There are all sorts of things contaminating our power before it hits our amps. Computers, TVs, BTL cable services superimposed on our power lines, you name it, are all sources of noise we don’t want in our amps.
You’d be surprised to find out how many amp builders substitute a resistor for a choke just to save a few bucks and lose out on the choke’s very cool advantages. Almost all of the great vintage amps had chokes (Marshall 50 & 100 watt, Vox AC30, Fender Twin, Showman, Super Reverb, Vibroverb, Pro Reverb, Deluxe Reverb, etc.). The builders back then were taught tube theory and understood the relevance of the choke in their designs.
300guitars: Would a Mercury replacement reverb transformer make the reverb in an amp sound better?
Sergio Hamernik: That depends on how lousy the original one was. Reverb transformers are wound similar to guitar pickups. Lots of turns with very thin wire. Which adds to the expense of building them. Many companies skimp on materials to keep their costs down as a result.
We believe that the low level signal (barely a whisper) going into the reverb transformer is quite fragile in nature and anything less than using the best materials and winding techniques would cause it and its tone harm. According to our customers that have upgraded their reverb transformers with ours, they report better performance, higher def, a more lush-sounding reverb, etc. Based on that, my answer is yes — or your money back.
300guitars: Is it easy to upgrade an amplifier to a set of Mercury transformers?
Sergio Hamernik: Heck no! It’s not at all easy. Therein lies the rub. This is why we have the great divide between disappointing “corporate” tone and a thriving (yet inconsistent) boutique amp market.
How much hassle and expense are you willing to put up with to get your ideal tone? If merely swapping out tubes will improve tone, then why are we still missing so much of it today? If simply plugging things in or out made for better tone, then all the big amp companies would have nailed it decades ago and we wouldn’t have the need for this interview. But no, it’s not that easy. Quick, cheap and dirty (non-transformer) amp fixes are not worthwhile timesavers. They tend to act more like tinsel and don’t do much for real tone problems. My wise old grand dad once said, “Putting powdered sugar on a turd, doesn’t make it a doughnut.”
Upgrading to Mercury transformers requires technical expertise and a morbid fear of being electrocuted. There are potentially lethal voltages present, a ship load of wires coming out of these things to further complicate matters and requiring a good share of installation elbow grease to boot. A person should be schooled in electronics and not sexually frustrated. A steady hand goes a long way in doing a good install. It shouldn’t be a D.I.Y. project no matter how simple it may look to the casual observer. We have techs all over the planet that are willing to help and do a good job with safety first. Transformers are expensive and labor intensive to install.
Those who are ready to make such a commitment/sacrifice (who needs kids anyhow?) will be rewarded for their efforts. Don’t take my word for it, just read our testimonials. We have a bunch of them all unsolicited from players, amp builders and amp techs, who were impressed enough to write to us telling everyone that it was well worth it.
300guitars: It seems that tubes and big hunks of iron (transformers) are very old school technology. Is there anything new on the horizon at Mercury?
Sergio Hamernik: Playing a guitar is even older school. There isn’t anything modern about an electric guitar. But, what makes an electric guitar “electric” is the fact that it depends on the rules of magnetism. The pickups on an electric guitar are made of coils of wire responding/reacting to a changing magnetic field, so are the voice coils in speakers. And let us not forget the power transformer, choke and output transformer in an amplifier are doing their jobs through magnetic fields — literally completing the link between a player’s finger tips to the player’s and listener’s ears.
My point being that if you replace your amp’s transformers for something else, you might as well replace the electric guitar with something else. So happily, we’ll stay stuck with big hunks of iron and hang on to our electromagnetic guitars! This means that tubes, which are not magnetic devices, could eventually be replaced by other devices such as high-voltage Field Effect Transistors as long as they’re mated to right kind of transformers. This is stuff that you don’t really need to know, but it’s a point of interest. There are a lot of motivated people out there that are fed up with the poor quality of tubes today and might be able to make tube substitution a reality someday soon I hope.
What’s new on the horizon at Mercury? A bunch of stuff. A cool new line of transformers that will give the next generation of players a unique voice of their own. Vintage is great, but we also want to encourage a new generation of inspired song writers and players to continue guitar based music. It’s all about the tone that will help seed this.
We are in the process of designing, developing new Upgrade Kits, pre-packaged transformer sets for those who are not satisfied with the tone of their present day amps. It’s our passion.
And, possible amp tone clinics. If that is what players want. We are also working on things that are a bit beyond the horizon which I’ll talk about sometime later.
300guitars: Thanks Sergio for taking the time for this most informative interview!!!
Sergio Hamernik: Thanks Billy for this interview and for giving a damn about all this stuff we call tone. Your passion clearly shines through on your website. It’s people like you that keep it all going and compel us to continually raise the bar for the guitar playing community.
I also want to apologize in advance if I offended anyone’s sensibilities with any comments I may have made. I will learn to live with the guilt….


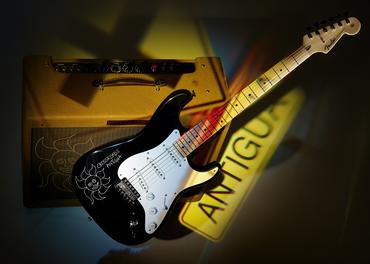 The commemorative
  About Crossroads Guitar Festival 2007: Clapton’s Crossroads Guitar Festival 2007 took place July 28 at Chicago’s Toyota Park, with a stellar lineup of blues and rock performers including:
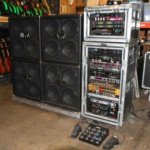
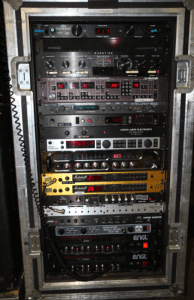 There were a lot of gear pieces I thought were notable in the Leppard rig [right] but two in particular were Vivian’s RJM Effects Gizmo, and his Marshall JMP-1 programmable preamps. BTW, the Voodoo Amp mods done to the JMP-1s are to darken the tone a bit, this is because the Palmer speaker simulator they use is so bright. Vivian was also trying out the programmable Engle preamps, and was thinking of using them instead. These programable preamps are very interesting. I’ve always loved the preamp concept. My favorite was the Reinhold Bogner Fish Amp. Wow! They sounded amazing. BTW, the Fish Amp was used by Jerry Cantrell for those great tones on the Alice and Chains records. A cool thing about a preamp is that you can get your sound at any volume depending on what power amp you use. And the midi programable ones make changing tones a snap.
 The RJM really caught my attention, check it out at: (http://www.rjmmusic.com/effectgizmo.php). Everything in Vivian’s racks are patched into it. The RJM has twelve loops and then individual or groups of effects can be inserted into the loops. In a preset you can activate any loop or group of loops and then save the preset. Whenever you activate that preset you’ll have those effects, whatever gear combinations you want. I think Wolfie told me he had 90 or so presets saved at that point, getting ready for the summer tours. The RJM also sends midi; so within the preset, Wolfie can save program change info for the JMP-1 preamp, or use midi to change presets in a delay unit so the delays are in tempo with the song.
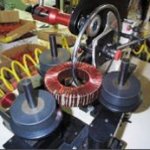


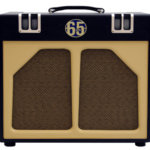
 Mojave’s Victor Mason has learned much from studying the intricacies of various Ampeg, Marshall, and Vox amps, and the Coyote ($2,500 retail/$2,050 street with Celestion G12-30H) is the summation of his insights into small-amp design.
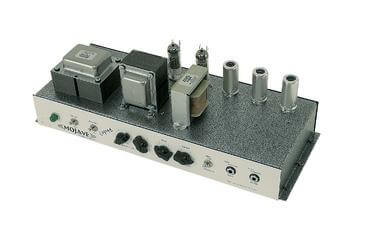 The Coyote’s Bass and Treble knobs are also the preamp gain controls, so it’s kind of like using an old Marshall with the bright and normal channels jumpered. Depending on which input you plug into, the Coyote readily offers up a good selection of stout clean and overdriven tones. The Low Sensitivity input works great with humbuckers if clean is your primary objective, but I tended to stick with the High input for all my test guitars, with good overall results. Even with humbuckers, getting a hot distortion sound with the Power Dampening knob set on the low side (say, the 2 to 4 watts range) requires that you run the Bass and Treble knobs close to wide open. The tones are pretty well balanced with both of these knobs at or close to equal settings, and any further EQ refinement can be done with the Tone knob.


 Doesn’t that predate the Nocaster?
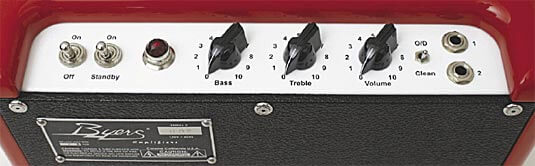
 Did you get to play that original Tele that was copied for this run of instruments?
 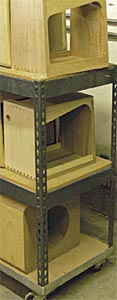 So what you had was three or four amps, all without names or model numbers which were essentially prototypes
 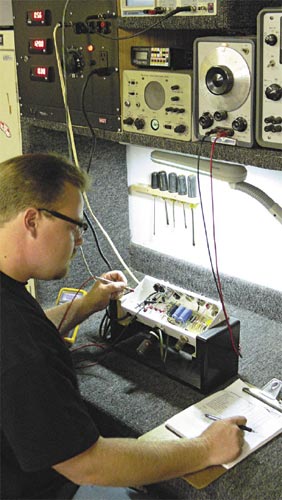 So, I’m looking at it, and George leans over and says, “You know, you’re the first person who touched the inside of that amp since Leo; you’d better be careful!” Because no one had touched it in all those years, the chassis, being made of steel and zinc plated, was pretty much pure white and powdery — I wasn’t about to leave my fingerprints in it!
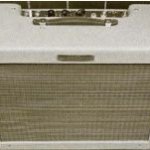
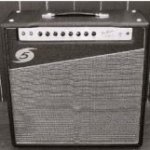
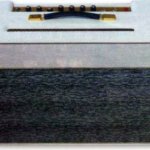
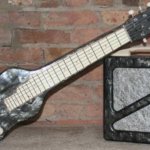
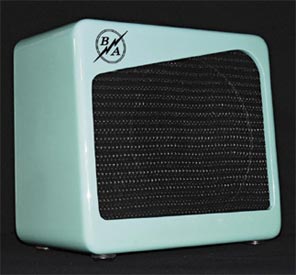 Over the years, guitars and their finishes have gotten more elaborate, but you aren’t doing that with the new Model 10; it is using simple shape, texture and color for the amplifier, rather than the busy style of many expensive guitars.
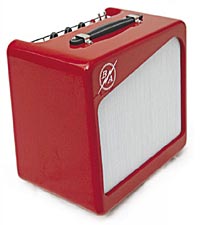
  Is there a tube rectifier?
  It’s exciting to see the founding of a company with such an amazing product. Do you have a price set for the Model 10?
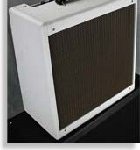

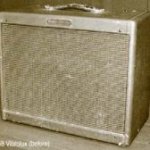
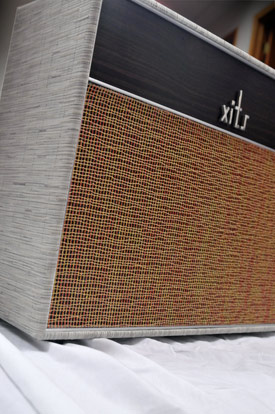 The first banner on the XITS website reads: “Welcome to total design.” Welcome, indeed. This amp was handmade by Mike Koski in North Liberty, Iowa, and I have to say I think this guy is a genius. To be honest, I’m a diehard when it comes to the classic sixties Vox sound, so just hearing about the XITS got me keyed up. But the way Koski has managed to build an amp that blends together so many seemingly divergent characteristics — refined artistry with raw assertiveness, pure old school tone with state-of-the-art specs, a “come hither” look with a “Stand back, Jack!” sound — into a whole of such singular quality has really kept me keyed up. The word I keep coming back to is astonishing.
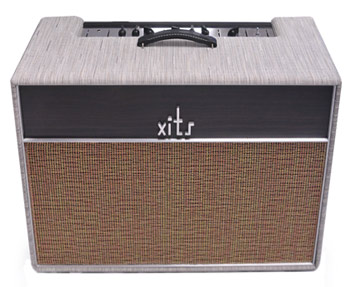 All of Koski’s XITS amps use custom wound
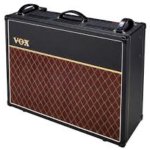
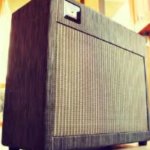
 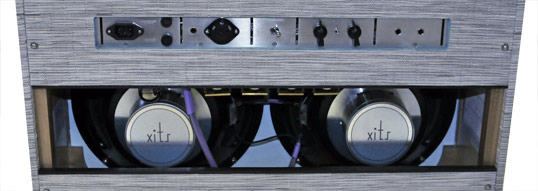 For sure, the Piper X30 is posh. Its elegant design and superb craftsmanship give it a positively urbane charisma, but don’t let the understated look fool you — this amp is no poser. The sound is articulate and full of detail, but it is far from coy. Dime it out and it’ll make the last AC30 you played seem almost tame. So, although it might fit right in with your new Dutch design living room suite, to get the most out of it you’re going to have to crank it up.
 This brought renewed interest in an obscure Marshall amp, the model 1974, an unassuming 18-watt combo. Originally available as a 1×12 — and closely related to the 18-watt model 1958 (2×10) and model 1973 (2×12) combos — the amp featured two EL84 power tubes, three ECC83 preamp tubes and a 6CA4 (EZ81) rectifier tube. There was even a rare reverb-equipped model, but all of the amps featured both a normal channel and a tremolo channel. The magic of the model 1974 was that with just a Les Paul and a cable players could approximate the beloved Eric Clapton “Beano” tone used on the Bluesbreakers with Eric Clapton album. Although I should note that Eric actually relied on a JTM45 combo, interest in the Beano tone ensured the 1974’s place in guitar lore. As was to be expected, clones of this amp began popping up rapidly once the originals, now extremely rare, began fetching prohibitively high prices.
 The Retro-King 18 Watt is a completely custom-built amplifier, with the features you would expect to see in an amp of this class, including a solidly built, Baltic birch cabinet and handwired point-to-point construction. The fit and finish on everything from the cabinet to the Tolex covering was impeccable. The model I tested for this review had a 12″ Mojo Tone British Vintage Series speaker, although builder Chuck Dean will install others by request. The entire enclosure is substantial and provides for a big box tone from a single speaker combo. An impedance selector is included which is great for those planning to use this amp with other speakers or additional cabinets. The transformers are custom-wound to original
 Peter Stroud: Our initial intention for the Cascode (note spelling) configuration in this amp was to find a sound similar to the pentode type EF86 tube we use in the London, but more quiet. Due to vibration and noise issues inherent with EF86 tubes, we were apprehensive using it in a higher powered combo. The cascode circuit, which utilizes a 12AX7, was popular in early hi-fi preamplifiers. It has a harmonic content similar to the pentode circuit but produces more even-order harmonics. Randall Aiken helped us greatly with this circuit and we’ve continuously tweaked it’s current configuration in our amp. The end result is a distinctly different sounding channel from the Treble-Mid-Bass channel — very warm and rich sounding. It sounds beautiful with single coils and 12-string electrics. So, the Marquee initially came from many inspirations. Dan (Boul) and I are big fans of the Selmer amps. A few years ago while on tour in the UK I had picked up a Selmer Treble & Bass 50 MkIII, which is the early ’70s silver metal front — the ugly one. But that amp sounds awesome, like a “British Fender Blackface” with two EL34s. We’ve since found a Mk I Treble ‘n Bass from the first year they were built.
 We spent a lot of quality time with the 35W Marquee Club, and it impressed us as a feisty chameleon that can gracefully move between big, jangly clean tones and an impressive roar with a deep palette of voices available from two very different input channels.


 You’re originally from New Jersey. How did you end up on the West coast attending GIT (now the Musicians Institute)?
 Throughout your time as a guitar player, you’ve been labeled as the chameleon of guitar. Do have a huge arsenal of guitars at your disposal that you have hiding in the back room to take out whenever you need to?
 You mentioned the Kahler Tremolo on one of your G&L’s. What do you like about it?
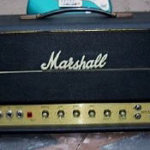
 Mercury Magnetics™ offers three choices for replacement 50 watt output transformers and I had the opportunity to try two of them. The units are part of the Axiom® or ToneClone™ series which are hand-built replicas of the original transformers used in the Marshalls of various eras. In addition to the Marshall replacement transformers, Mercury Magnetics™ also makes various other Axiom® models for classic Vox and Fender amplifiers in addition to other toneful amps such as Ampeg, Gibson, Hiwatt, and many others.
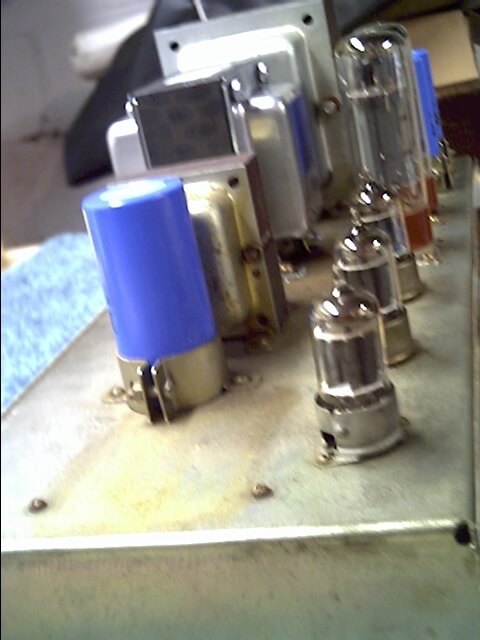 Moving over to the O50JM, I was amazed at how different this transformer sounded, even though other than the lead wires that exited the transformer, it has the same specifications and parts as used in the O50JM-SL! After installing it, I knew that the O50JM was the choice for the hard-rockers, whether using a plexi or metal panel-front Marshall. The O50JM had more distortion dirt and grind in the tone. Both transformers contributed to a very smooth response from the Marshall, but the O50JM traded off the upper frequency and some of the clarity content found in the SL model for what sonically resulted to its increased distortion and compression.
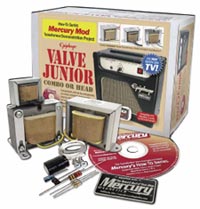 With modification tips spreading like an unrestrained virus through message boards and forums, facilitated by the tone-seeking faithful, it was only a matter of time before established companies caught wind of what was going on. One of those was
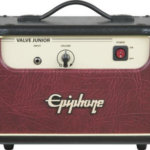
 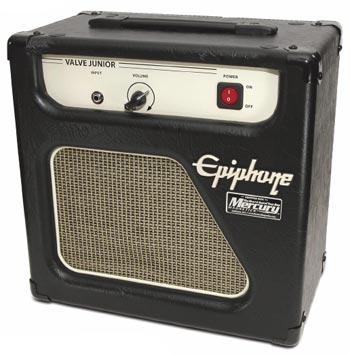 The basic gist of the modification kit involves the installation of new power and output transformers, the addition of a choke — a rarity in budget amplifiers these days — and a basic reworking of the amp’s circuitry to eliminate some of the noise and hum that plagued early models. And while opinions in our office were divided over the amp’s new sound — the amplifier’s single-ended tonality became more pronounced, and highlighted some of the weaker links in the signal chain, including the stock speaker — there was absolutely no denying that the amp had an expanded tonal range that was unheard of in this price range. With more consistent power flowing into and out of our Valve Jr., there was more of everything. The lows became instantly tighter, the highs shimmered and the entire spectrum of sound now had a beautiful fullness. As that single volume knob rotated clockwise, the Valve Jr. bristled and growled like a Rottweiler about to lunge. This thing had a newfound set of marbles and I, for one, was not complaining.


 Considering how much power the guitarist has over the headroom in this amp, it is extremely easy to achieve great overdriven tone. Setting the EQ and Presence controls at noon, Power Scaling at 1 o’clock, Drive at noon, and plugging a Gibson Flying V into the upper left high-sensitivity input with Volume 1 at 10 o’clock is a great start to experience what this amp has to offer. Notes ring out with authority and punch, but without any sort of harshness that can be common in modern high-wattage master volume amps today. Beyond the satisfying, familiar crunch that the amp delivers, the there’s a surprising sensitivity to pick attack. Even with the relatively hot pickups in the Flying V, the 1986ps cleans up exceptionally well when playing with a light touch. Once you find the sweet spot, you might not even have to touch the volume knob at all to achieve a good clean — provided that you’re willing demand overdrive by smacking the strings with Nugent-like authority.

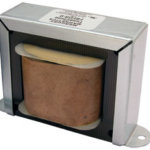
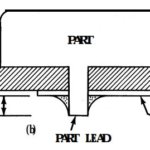
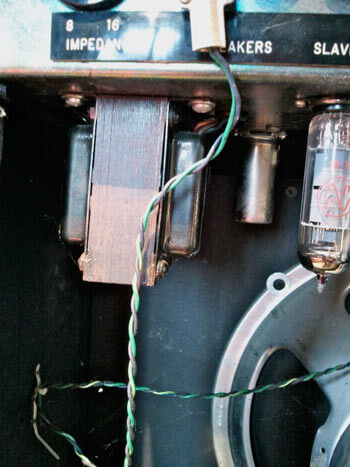 Secondly, be aware of the different mounting styles of transformers. There are three basic mounting styles: vertical, horizontal, and flat. Vertically mounted transformers sit taller than they are wide, with the laminates in a vertical position and the end bells positioned perpendicular to the chassis. Horizontally-mounted transformers are still a vertical mount, but are tipped on their sides and are wider than they are tall. Transformers that are mounted flat have the laminates facing horizontal, and the bell ends are stacked vertically. One should also note if the transformer is a two-hole or four-hole mount, and that the mounting holes will not line up exactly if the transformer you are replacing is not an exact replica. In such cases, it will be necessary to carefully mark and drill new mounting holes into the amp’s chassis.
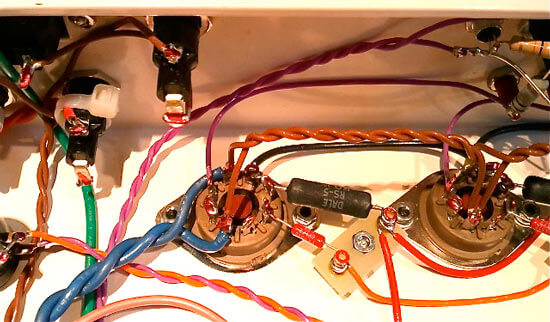


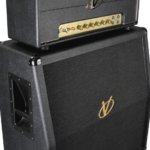
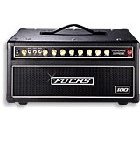
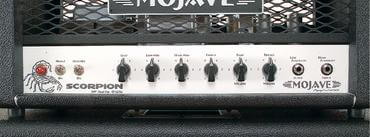 The core of the Scorpion’s sonic DNA revolves around that big, crunchy, dynamic EL34 sound with the characteristically thumping lows and singing highs. But this model redraws the roadmap that takes you there, and adds plenty of new ingredients in the name of versatility.
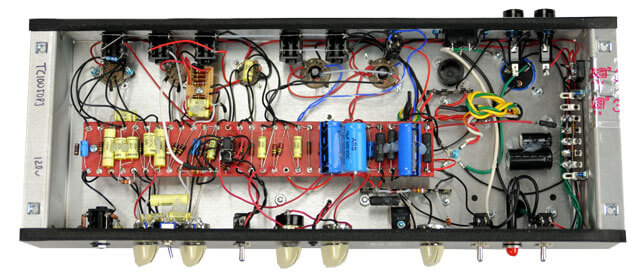
 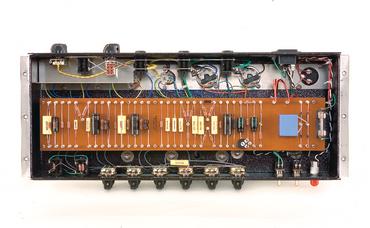 As alluring as it might be from the outside, much of the Scorpion’s appeal reveals itself when you pull the chassis from the cab. This amp is hand built to some of the most exacting standards found in the market today.


 The client was consulted and told of the dangers that lurked within this design. As he loved the look and character of the box, he gave me the go ahead to build a simple and more “modern” (late-’50s) design into the existing chassis. A promising schematic was found (a Valco of some sort) that used a 6SL7 octal preamp tube a 6V6 and a 5Y3 rectifier. This design was chosen simply because of its funky character, which was thought to be in keeping with the original design.
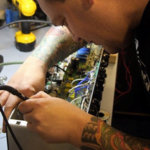

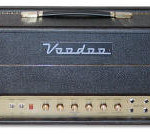
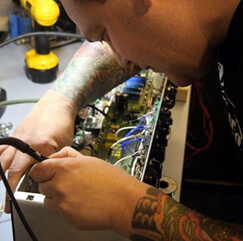 I am doing well thank you. My name is Trace Davis and I am the Founder/President of Voodoo Amplification since 1998 located in Lansing, New York USA.
 * Is there any shocking news that you want to tell us about?
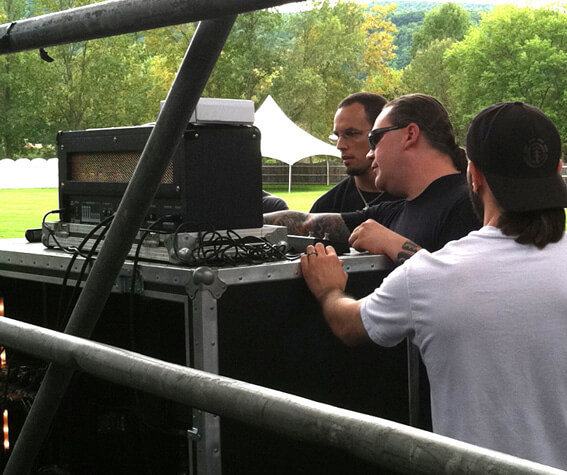
 Having worked as both a session/touring player as well as recording engineer and I understand that an amp not has to sound good but it has to equally feel good to playing. An amp has to sound good in the room so that its inspiring to the player but it also had to sound good under microphones, both live and in the recording studio.