Search Results for: choke


What’s a Choke or a Multi-Choke?

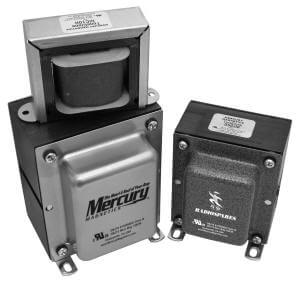
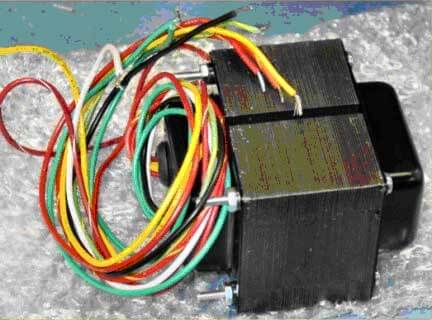
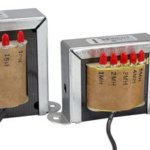
Mercury’s NEW MultiChoke offers you these important benefits:

  • The first tunable chokes to help you fine-tune your amps!
  • Quickly helps you find your amp circuit’s sweet-spot!
  • Versatility without having to do serious amp mods!
  • A BIG TONE bang for not a lot of bucks!

Think of a choke as a shock-absorber for your amp’s power transformer. Did you know that upgrading your tired old or wimpy reissue stock choke — or adding a Mercury choke to an amplifier that doesn’t have one* — will actually extend the life of your power transformer and rectifier?

*Amp manufacturers often cut costs by the use of a resistor in place of a choke. This choice has absolutely nothing to do with tone, it’s purely economic. Replacing that resistor with a choke is a low-cost upgrade that’ll usually give you a huge improvement in tone.

Your amp’s tone noticeably improves with any peaked and tweaked, hand-tuned choke from MercuryMercury users tell us that they hear a tonal richness that was not there before adding one of our chokes. Why? Because a choke provides musical smoothing to your amp’s circuit. It also has a huge impact on touch-sensitivity and tone dynamics.

choke is so much more than a simple inductor. It can also store energy like a capacitor. Better voltage regulation results from using premium-quality chokes. The choke puts less stress on your power transformer and permits higher load currents to be drawn from vacuum tube rectifiers without exceeding their peak current rating. This means life extension for your tube rectifier — and even solid-state rectifiers run happier!

Mercury’s NEW MultiChoke is in a league by itself. The MultiChoke allows you to quickly and easily audition several different choke values to determine the best possible fine-tube the tone from your amp. And, the MultiChoke saves time and money by eliminating the need to purchase a stack of single-value chokes — not to mention all of the added time needed to solder/de-solder leads for your tests.

Depending upon your needs, Mercury offers several MultiChokes with varying value sets. Currently available sets include:

  • 1, 2, 3, 4 & 5 Henrys
  • 1, 3, 5, 7 & 9 Henrys
  • 2, 5, 7, 10 & 12 Henrys
  • 5, 10, 15, 20 & 25 Henrys
  • 10, 15, 20, 25 & 30 Henrys

Mercury’s MultiChoke come in 3 sizes* with these center-hole-to-center-hole mounting dimensions:

  • “Micro” = 2 inches
  • “Mini” = 2-13/16 inches
  • “Large” = 3-9/16 inches

*Check our catalog for size availability.

For a little dough, and some help from Mercury, you will be on your way to having a better sounding amp.

Also see our adaptation of the MultiChoke to the Orange “Tiny Terror” Upgrade Kit.


Shop for Amp Chokes

Mercury Choke

Hey Jeff,

I just finished reading your column in Premier Guitar. Great column by the way! But I was wondering if you could finally be the person to help me?

My question is, I just finished installing and wiring up a choke in place of the 400 ohm power resistor in my Peavey 6505+ head, and as far as I know it is located in the correct spot (between the screen and plate) from everyone I’ve talked to. But I must be missing something when I did this swap because when I put the head back on standby after playing it for awhile I get a “pop” when I throw the standby switch on.

Could you please advise me on just what I may be missing in this conversion to the choke? The choke is from Mercury by the way.

Thanks for your valuable time. — Scott

Hi Scott,

Thanks for your question and thanks for reading Premier Guitar.

If you installed the choke across the two terminals on the output board where the 400 ohm resistor was removed, then it is installed in the correct location in the circuit. And you are correct; this is between the main B+ supply to the output transformer and the screen grid supply. I don’t believe you “missed” anything here, but installing the choke may have changed the operation of the power supply slightly. Let me attempt to explain what I believe is happening and then pose a potential solution.

The configuration of the power supply in the 6505+, as well as in some other Peavey amplifiers, is slightly different than the standard configuration in most other manufacturers’ guitar amps. In most standard power supply configurations, when the standby switch is engaged, each section of high voltage supply powers up simultaneously. In the power supply of the Peavey, the high voltage is constantly supplied to the plates of the output tubes regardless of the standby switch setting. The standby switch simply energizes the remaining sections of the power supply. By installing the choke in place of the resistor, you have either changed the rate at which the later sections of the power supply respond to being energized or de-energized by the standby switch, or the choke is causing a spike in the power supply due to a collapsing or expanding field within the choke. You may not fully understand that explanation, but here’s the bottom line. Something is now causing a spike in the power supply and because the output tubes in the 6505+ are more “at the ready” than most other amps, they are able to reproduce this spike more quickly then an amp with a more standard power supply design. If this theory is correct and that is what’s happening, I may have a solution. It requires a bit of rewiring, but I believe it will solve the problem. Before you attempt this rewiring, please read the following disclaimer:

If you are not familiar with working around potentially lethal voltages and do not know the proper safety measures that you should take, or do not know how to employ proper and safe wiring techniques, DO NOT attempt this modification yourself. Find a knowledgeable and experienced technician.

First, trace back the two wires from the standby switch to the points on the circuit board where they’re connected. Remove the connections to the standby switch and connect those two points on the circuit board together, removing the standby switch from this point in the circuit. Next, on the side of the main circuit board where all the fuses are located, find fuse F1. Immediately to the side of F1 you’ll see two high voltage leads coming from the mains transformer. Disconnect one of these leads from the circuit board and insert the standby switch here. Either of the two leads is fine, but if you’re unsure, disconnect the lead connected to F1. Connect one lead of the switch to the transformer wire and the other end to the connection on the circuit board where the wire was removed. This will locate the standby switch at the AC input of the power supply, enabling all of the voltages to rise and fall simultaneously when you operate the standby switch. While the power supply “spike” may still happen electrically, it shouldn’t result in an audible “pop,” since the output tubes won’t be able to respond as quickly.

With the choke installation you may also notice that the amp seems a bit louder or has more gain. This is not solely due to the characteristics of a choke, as opposed to a resistor in the power supply, but it is due to the fact that the voltages in the amplifier may have risen slightly. The DC resistance of the choke is probably lower than the 400 ohm resistor it has replaced, causing voltages subsequent to the choke to rise.

There you have it. Hopefully, this will give you noise free operation of your standby switch, and we can save the Pop Phenomenon for the media!

Source: https://mercurymagnetics.com/pages/news/PremierGuitar/PremierG-18.htm

Add a Real Choke

I’m a player from Los Angeles. Even though I endorse companies like Framus and Brunetti amps, who both make fine equipment, I still rely on Marshalls for some of my favorite tones.

Last month I went on a quest—how can I make my “road-dog” amp, a Marshall JCM DSL 2000, play like my vintage 30+ year old Plexi (which stays home, of course!)?

Well, first I got a tech to change a couple little things: resistors out from the volume pot, a couple of changes with the EQ resistor’s values, etc. This made a bit of difference. Then I played with a variation of power and preamp tubes, from different companies (GT, JJ and Tesla) until I found the combination I liked best. This made a perhaps 25% difference. I was happy, but still searching for that missing ingredient because the Plexi had… well, more of everything, including more power, more clarity, faster response and fuller overall frequency. So, I kept fishing around on the web and by chance hit upon a review for Mercury replacement transformers.

As luck would have it Mercury is located 5 minutes from my home! I thought I had nothing to lose by replacing the transformers since it’s usually a fast and easy tech operation, so I went to see them.

Along with their technical knowledge, what struck me instantly was their level of care and enthusiasm. Mercury’s Sergio Hamernik explained that I could do more than upgrade the existing power and out-put trannies, such as add a real choke to the circuit, like the original Marshalls(the stock DSL has a cheapy resistor instead of a choke).

Although Mercury had something special in mind, I had a gig in a couple of days, so we decided to only replace the output tranny (OT)—then finish the job later. Not all transformers are the same within any model (or year) of amplifier, and in many cases there are radical differences. Mercury makes a particularly outstanding drop-in output that would help the JCM’s sound. Although it was a temporary “patch”this change gave me the chance to feel, let me repeat, f-e-e-l the amp at my gig, and I was positively surprised by the how it reacted and sounded. Simply stated, the improvement with the feel and tone was 50%. After the gig Mercury went to work on my amp by liter-ally re-engineering new power and output transformers specifically for the DSL. The power transformer(PT) utilizes their new “SuperStack” technology (it’s huge and looks like a skyscraper in there!) that completely eliminated the amp’s tendency to overheat! They also modified the circuit by adding a choke. The final result was nothing short of a revelation! The amp has more power, better tone, faster response, wide palette of frequencies… it has more of everything!


View PDF Article

Mercury Magnetics Trannies and Choke

Many of you are already familiar with our resident amp tech, studio owner/engineer and advisory board member Jeff Bakos. In his spare time, Jeff occasionally builds amps for clients on request, and lately he’s been asked to build… you guessed it – small little biters. Since his personal GA-5 has been featured so often on various recording projects, Jeff toyed with the idea of recreating the Gibson GA-5 Skylark for a minute, but given the fact that vintage GA-5s remain fairly plentiful, he ultimately decided to design his own simple take on a smallish amp – the 8 Ball. Housed in a Mojo Champ cabinet, the 8 Ball is built with one of our favorite tens, the Eminence Legend Alnico 1058 (that’s a hint), Mercury Magnetics trannies and choke, and premium components, including Sozo coupling caps. With the bigger Mercury Princeton transformer set, the single 6V6 / 12AX7 / 5Y3 design is capable of producing 10 watts of power. Features include dual inputs, volume and tone controls, a front panel line out jack, and a “vintage” / ”modern” toggle switch also conveniently mounted on the front panel.

The “vintage” setting produces pristine Fendery clean tones up to 12 o’clock on the volume control, gradually followed by a progressively thicker growl with intense distortion and sustain. In this setting, the 8 Ball surpasses all the other small amps we’ve reviewed in terms of practical versatility with stronger, louder clean tones and a more gradual It’s back! We are now resuming limited production of our meticulous recreation of the original 1959 DeArmond R15 1×12 amp. You may recall that we initially produced a limited number of TQ Clarksdale amps in 2006, before our supplier for the original chassis informed us that small runs would no longer be possible. We’ve found a new supplier, and the TQ Clarksdale “DeArmonds” will be built again by Jeff Bakos with our original specs – pin cabinet construction and design identical to the original, original Mercury Magnetics Tone Clone transformer set cloned from our original ’59 DeArmond, hand-wired chassis, premium components including Sozo caps, Celestion G12H 70th Anniversary speaker, premium JJ and Tung-Sol tubes, Evidence Audio speaker cable, custom gold grill cloth and blonde Tolex covering. This 22 watt design represents one of the rarest and most toneful combos ever built. The original 1959 DeArmond 1x12s were built for just one year in Toledo, OH, and a clean example recently sold on eBay for $7000. In 2006 Jeff Bakos meticulously blue-printed our original DeArmond, Mojo created CAD drawings from the original cabinet design, and we sent the transformers to Mercury Magnetics to be cloned. The result is a phenomenal 1×12 that will generally kick any tweed Deluxe straight to the curb with a bigger, bolder voice and lush, musical distortion cranked. The 4-input, cathode-biased Clarksdale can be operated with dual 6V6s and 5Y3 rectifier for optimum burn, or a pair of 6L6s and 5AR4 for slightly more power and clean headroom. Blonde Tolex only, simply because it’s the coolest color…

View PDF Article

Amp Transformers, Output Transformers & Chokes

Why should guitar players care so much about the transformers in their amps?

Boy have I got a treat for you guys!!! As you know I am a big fan of Mercury Magnetics transformers and have been a dealer for many years now. Their products are excellent as well as their customer service. The Mercury Magnetics line is quite extensive and they will do custom pieces as well.
I have been working with Sergio Hamernik for almost a year now on an exclusive interview all about guitar amp transformers. In this interview Sergio talks about how transformers affect your amp’s sound and feel, if transformer size matters and how it affects tone, what a choke is and much more information.

Mercury Magnetics is the leader in guitar amplifier transformer manufacturing. I have personally used their iron in many repairs, restorations and custom builds over the years. It never ceases to amaze me when I use a set and listen to the amp after the project is complete. It’s almost like a blanket was taken off of the sound and you are listening with “3D glasses.” The feel of the amplifier becomes much more dynamic as well. In my opinion “your amp’s transformers truly are the heart and soul of your amp.”
In this exclusive interview with Sergio Hamernik (the man behind the scenes at Mercury) some basic questions that all relate to the tone and feel of a guitar amplifier. His answers are forward, straight to the point and insightful.

300guitars: Why should guitar players care so much about the transformers in their amps?

Sergio Hamernik: When a player has to struggle with his amp then there’s really not much of a reason to play it. The tonal quality and performance of a tube-type guitar amp is largely determined by its transformers. Where there is great “tube tone,” you’ll always find “great sounding transformers” making it all happen!

Once you get past the player’s talent/ability, it’s all about the tone. If an amp doesn’t produce desirable tone, the window of inspiration closes and gets replaced with fatigue for both the player and the listener.

These days musicians who choose to play an electric guitar are only as good as their technical awareness and development allows them to be.

Transformers are the most important and most expensive components of guitar amp’s parts list. Also, they are the only components designed and built specifically for that amp, unlike the rest of the components — the resistors, capacitors and even vacuum tubes. These other components are considered to be “universal application” parts — meaning not just for making guitar amp tone. The electronics industry commonly uses these same components for medical, industrial, radio and many other applications. You certainly couldn’t fit or use guitar amp transformers for any of these other applications without offending someone.

Transformers are the key to providing that unique signature tone. It’s the transformers that differentiate one amp brand or sound from another. Here’s another way to look at it — all amp builders have to deal with the same limited choices from a small pool of vacuum tube manufacturers and other off-the-shelf component requirements (resistors, capacitors, etc.). This is NOT so with the transformers. Although there are plenty of generic transformer designs available that service the “power requirements” of an amp, you wouldn’t want to use these awful-sounding devices in your guitar amps. Likewise it’s not a coincidence that most of the best-sounding amp builders, modifiers, and repair techs begin their craft and finish it with enviable distinction, relying on their choice of transformers.

300guitars: Would you explain, in guitar player terms, what power and output transformers are?

Sergio Hamernik: Well, I really don’t like to lump all guitar players into one category. Making assumptions here (be it charitable or not) just doesn’t seem fair to me. Each player has their own level of interest and technical understanding on this subject. So I’ll split my answer into three different groups of definitions and let the player choose the one that suits them best.

In basic guitar player terms: It’s magic!!

In technician terms: A device applying mutual inductance in an efficient manner, so that circuits with different voltage/current requirements can correspond to each other.

In engineering terms: Transformers are electrical devices consisting of a magnetic-core and two or more coils (commonly referred to as windings) inductively coupled as circuits for the transmission of alternating-current energy from one closely coupled coil to another usually at a different voltage and current value. Transformers are also used for matching impedances between the signal generating source and the load.

300guitars: How does the power transformer affect the sound of your guitar? The sound comes from the output transformer right?

Sergio Hamernik: Yes the amplifier’s sound does come out of the output transformer, but where does it all begin? While an output transformer is vital to an amp’s ultimate tone, it simply can’t do it alone. The power transformer is the first step in building tone and in setting the standard of performance that the tubes and output transformer utilizes.

The output transformer depends on the power transformer for determining the maximum amount of power the amp can put out. The power transformer is also a major contributor for the overall feel of the amp. Such as punch through (the oomph factor), note attack, a perceived larger/wider soundstage presence and most importantly, the speed or reaction time of the amp’s audible response to the player’s sense of touch and playing technique. Tamper with that in any way by using cheap “dumbed down” power transformers and your audience may confuse your amp’s tone with the sound that is made by farting into a pillow!

A puny power transformer will deliver puny tone no matter how good the output transformer is. A good output transformer is also not intended to be a problem fixer or a turd-polisher. Garbage in is always garbage out. So please don’t shoot the messenger because the power tranny just ain’t cutting it.

Output and power transformers are actually close cousins. Doing similar tasks, one matches and isolates the speaker from the amp and the other one matches and isolates the amp from the power company. Peace keepers of a sort, preventing tubes from frying the speakers and preventing the power company’s energy from frying the amp and people connected to it.

300guitars: How does the output transformer affect the amps sound and feel?

Sergio Hamernik: An output transformer is the last component of the audio chain. The amplifier’s voice. The final word that reaches the speaker. Because all vacuum tubes were never really designed to distort intentionally, the weight of producing desirable amplified guitar tone falls heavily on the transformers. The output transformer’s job is to coax, extract and even irritate the power tubes into tone-friendly distortion. Ever wonder why solid-state amps have always played second fiddle to tube amp tone? Is that simply because of not employing tubes or of not having an output transformer? At the very least, it’s something to think about.

The output transformer determines how the amp sounds like from fully clean (sweet with a touch of sparkle) to fully over-driven (chainsaw) distortion, and everything in-between.

By the way, the term “clean” as used in guitar amp speak is a bit of a misnomer. There is no such thing as a distortion-free guitar amp. “Clean” simply refers to less distortion. There is an intimate inductive/reactive relationship between the output transformer (coils) and the speaker voice (coils) that also back-washes into the power tubes and influences that “clean to dirty” range of distortion. The quality of the output transformer determines how well the production of tone is executed by the amp — those notes that float between the strings which are created by overtones, chimes, bell tones, sustain, etc. Poorly made output transformers tend to gargle out, squash and mask those overtones.

The output transformer is also responsible for how efficiently the audio power of the amp transfers to the speaker (load). Ultimately, the player issues the final report card for the performance of the amp and the output transformer with comments like “clarity,” “articulation,” “loudness,” “break-up,” “grit,” “glassy,” “grind,” “dirty,” “woody,” “mushy,” “mashed,” “fuzzy,” “dark,” “cloudy,” and so on. There are hundreds of guitar amp speak descriptions and euphemisms out there which capture their emotional response (players and listeners alike) to what is coming out the amplifier’s window.

The mighty output transformer. Loved and hated by so many. Still one of the most misunderstood components of a guitar amp. 80 years and going strong. Go figure….

300guitars: When it comes to transformers does size matter? How?

Sergio Hamernik: I can almost hear my wife saying “now that sounds like a guy question.” Actually, in most situations, transformers and chokes make a good case for “bigger is better.”

A power transformer that is undersized for the job will run hotter than a bitch kitty. The amp is unable to be pushed — collapsing under weak, sagging voltages. It’s unable to keep up with the demands a player puts to an amp. The amp slows and has a tendency to cough out notes when played clean, and honk or bark out the notes when overdriven.

Another symptom of undersized and/or poorly designed power transformers is the phenomenon of “tone drift.” You know this is happening when the amp (common with some early Fenders and half of today’s 100 watt amps) starts off with decent tone for the first hour or so, then somewhere around two hours later the tone begins to change and not for the better. The internal temperatures of the transformer reach their peak and begin detuning the voltages and power the amp sees. This is caused by the changes to the resistance of copper. As the temperatures become excessive, the amp’s tone drifts. Remember rich amplifier tone needs to be well fed.

An undersized output transformer will act more like a suppository to amplified guitar tone than a big open window, which is its main purpose. Contrary to popular myth, there is no tone magic that occurs when you force feed an output transformer into alleged saturation or intentionally under power it with a dinky power transformer.

The term “output transformer saturation distortion” comes out of poor guessing by people who really don’t understand how tubes and transformers work together to produce music friendly harmonic distortion. If an output transformer reaches true saturation, all bass frequencies will disappear, the mid-range will sound dark and fuzzy with lower volume — leaving the treble frequencies tinny and brittle sounding. Does that sound desirable to you?

So it’s not the transformer itself generating that saturation effect on overdriven guitar tone. Good output transformers are designed to operate at low flux densities (loads of inductance). That low flux makes it difficult to saturate an output transformer. So the output transformer doesn’t get the credit or blame for that “saturated” sound. The actual source is in the push-pull power tube plate circuit reacting/saturating to the changing impedance it sees in the primary coil of the output transformer as its flux density changes with the changing frequencies and fluctuating power coming into it. The saturation phenomena (when it appears) is mostly happening in the tube.

If one wants to intentionally use a dinky power transformer to achieve tone magic (yes some have tried it, believe it or not). They could save themselves a bunch of money and buy that pillow I mentioned earlier for similar results.

Bigger is better for chokes if you have the room for it on the chassis. Assuming the same value of inductance, more iron and copper will let more power through and it will run cooler as well. This is because of lower DC voltage resistance with the extra copper involved. More voltage being available to the tubes means more power out of the amp.

300guitars: What is the choke for and why do you offer so many models?

Sergio Hamernik: Originally chokes were used in guitar amps to extend the life of vacuum tube rectifiers nearly tripling their life expectancy. They behave as a quasi current spike shock absorber. Chokes help capacitors smooth out any ripple that may be present on the DC voltage. The goal here is to always try to get the cleanest voltage to the tube circuits. Caps by themselves do a pretty job of it. But the choke is a multi-tasker. Along with doing a nifty job of smoothing out ripple, the choke does something else that makes it a significant contributor to the amp’s final tonal character. Because its connected in series with the rectifier and not tethered to ground like a cap, the choke (being an inductor) works nicely as a current regulator. And it keeps the current from decreasing as much as it would if there were only caps involved.

This nearly constant current available from the power supply, courtesy of the choke, makes for an ideal platform to make the best possible tone. Simply put, changing the value of the choke changes the tone and behavior of your amp.

Why so many varieties of chokes? Since chokes are a significant link in the audio chain, a one size fits all approach would be a great injustice to all guitar amp owners. Choke values are a finesse point, a fine tuning that helps to extract the most favorable tonal characteristics from an amp. We even offer a “shift on the fly” option with our multiple-value Multi-Chokes. One choke with several choices of inductance to help the amp builder find that sweet spot.

There is one last benefit to using chokes and it’s the most overlooked attribute. When a choke is connected between a couple of caps, a form of a low pass filter is created. What this means is the choke blocks high frequency garbage on the AC line from mixing with the guitar signal and causing all sorts of sonic collisions during the process of amplification. Let us not forget that we live in an electronic age far more complicated than the 1950s or 1960s. There are all sorts of things contaminating our power before it hits our amps. Computers, TVs, BTL cable services superimposed on our power lines, you name it, are all sources of noise we don’t want in our amps.

You’d be surprised to find out how many amp builders substitute a resistor for a choke just to save a few bucks and lose out on the choke’s very cool advantages. Almost all of the great vintage amps had chokes (Marshall 50 & 100 watt, Vox AC30, Fender Twin, Showman, Super Reverb, Vibroverb, Pro Reverb, Deluxe Reverb, etc.). The builders back then were taught tube theory and understood the relevance of the choke in their designs.

300guitars: Would a Mercury replacement reverb transformer make the reverb in an amp sound better?

Sergio Hamernik: That depends on how lousy the original one was. Reverb transformers are wound similar to guitar pickups. Lots of turns with very thin wire. Which adds to the expense of building them. Many companies skimp on materials to keep their costs down as a result.

We believe that the low level signal (barely a whisper) going into the reverb transformer is quite fragile in nature and anything less than using the best materials and winding techniques would cause it and its tone harm. According to our customers that have upgraded their reverb transformers with ours, they report better performance, higher def, a more lush-sounding reverb, etc. Based on that, my answer is yes — or your money back.

300guitars: Is it easy to upgrade an amplifier to a set of Mercury transformers?

Sergio Hamernik: Heck no! It’s not at all easy. Therein lies the rub. This is why we have the great divide between disappointing “corporate” tone and a thriving (yet inconsistent) boutique amp market.

How much hassle and expense are you willing to put up with to get your ideal tone? If merely swapping out tubes will improve tone, then why are we still missing so much of it today? If simply plugging things in or out made for better tone, then all the big amp companies would have nailed it decades ago and we wouldn’t have the need for this interview. But no, it’s not that easy. Quick, cheap and dirty (non-transformer) amp fixes are not worthwhile timesavers. They tend to act more like tinsel and don’t do much for real tone problems. My wise old grand dad once said, “Putting powdered sugar on a turd, doesn’t make it a doughnut.”

Upgrading to Mercury transformers requires technical expertise and a morbid fear of being electrocuted. There are potentially lethal voltages present, a ship load of wires coming out of these things to further complicate matters and requiring a good share of installation elbow grease to boot. A person should be schooled in electronics and not sexually frustrated. A steady hand goes a long way in doing a good install. It shouldn’t be a D.I.Y. project no matter how simple it may look to the casual observer. We have techs all over the planet that are willing to help and do a good job with safety first. Transformers are expensive and labor intensive to install.

Those who are ready to make such a commitment/sacrifice (who needs kids anyhow?) will be rewarded for their efforts. Don’t take my word for it, just read our testimonials. We have a bunch of them all unsolicited from players, amp builders and amp techs, who were impressed enough to write to us telling everyone that it was well worth it.

300guitars: It seems that tubes and big hunks of iron (transformers) are very old school technology. Is there anything new on the horizon at Mercury?

Sergio Hamernik: Playing a guitar is even older school. There isn’t anything modern about an electric guitar. But, what makes an electric guitar “electric” is the fact that it depends on the rules of magnetism. The pickups on an electric guitar are made of coils of wire responding/reacting to a changing magnetic field, so are the voice coils in speakers. And let us not forget the power transformer, choke and output transformer in an amplifier are doing their jobs through magnetic fields — literally completing the link between a player’s finger tips to the player’s and listener’s ears.

My point being that if you replace your amp’s transformers for something else, you might as well replace the electric guitar with something else. So happily, we’ll stay stuck with big hunks of iron and hang on to our electromagnetic guitars! This means that tubes, which are not magnetic devices, could eventually be replaced by other devices such as high-voltage Field Effect Transistors as long as they’re mated to right kind of transformers. This is stuff that you don’t really need to know, but it’s a point of interest. There are a lot of motivated people out there that are fed up with the poor quality of tubes today and might be able to make tube substitution a reality someday soon I hope.

What’s new on the horizon at Mercury? A bunch of stuff. A cool new line of transformers that will give the next generation of players a unique voice of their own. Vintage is great, but we also want to encourage a new generation of inspired song writers and players to continue guitar based music. It’s all about the tone that will help seed this.

We are in the process of designing, developing new Upgrade Kits, pre-packaged transformer sets for those who are not satisfied with the tone of their present day amps. It’s our passion.

And, possible amp tone clinics. If that is what players want. We are also working on things that are a bit beyond the horizon which I’ll talk about sometime later.

300guitars: Thanks Sergio for taking the time for this most informative interview!!!

Sergio Hamernik: Thanks Billy for this interview and for giving a damn about all this stuff we call tone. Your passion clearly shines through on your website. It’s people like you that keep it all going and compel us to continually raise the bar for the guitar playing community.

I also want to apologize in advance if I offended anyone’s sensibilities with any comments I may have made. I will learn to live with the guilt….

Source:  https://mercurymagnetics.com/pages/news/300guitars/300g-02.htm


Shop for Amp Transformers

How Transformers Affect Your Amp’s Sound and Feel

By Billy Penn

Boy have I got a treat for you guys!!! As you know I am a big fan of Mercury Magnetics transformers and have been a dealer for many years now. Their products are excellent as well as their customer service. The Mercury Magnetics line is quite extensive and they will do custom pieces as well.

I have been working with Sergio Hamernik for almost a year now on an exclusive interview all about guitar amp transformers. In this interview Sergio talks about how transformers affect your amp’s sound and feel, if transformer size matters and how it affects tone, what a choke is and much more information.

Mercury Magnetics is the leader in guitar amplifier transformer manufacturing. I have personally used their iron in many repairs, restorations and custom builds over the years. It never ceases to amaze me when I use a set and listen to the amp after the project is complete. It’s almost like a blanket was taken off of the sound and you are listening with “3D glasses.” The feel of the amplifier becomes much more dynamic as well. In my opinion “your amp’s transformers truly are the heart and soul of your amp.”

In this exclusive interview with Sergio Hamernik (the man behind the scenes at Mercury) some basic questions that all relate to the tone and feel of a guitar amplifier. His answers are forward, straight to the point and insightful.

300guitars: Why should guitar players care so much about the transformers in their amps?

Sergio Hamernik: When a player has to struggle with his amp then there’s really not much of a reason to play it. The tonal quality and performance of a tube-type guitar amp is largely determined by its transformers. Where there is great “tube tone,” you’ll always find “great sounding transformers” making it all happen!

Once you get past the player’s talent/ability, it’s all about the tone. If an amp doesn’t produce desirable tone, the window of inspiration closes and gets replaced with fatigue for both the player and the listener.

These days musicians who choose to play an electric guitar are only as good as their technical awareness and development allows them to be.

Transformers are the most important and most expensive components of guitar amp’s parts list. Also, they are the only components designed and built specifically for that amp, unlike the rest of the components — the resistors, capacitors and even vacuum tubes. These other components are considered to be “universal application” parts — meaning not just for making guitar amp tone. The electronics industry commonly uses these same components for medical, industrial, radio and many other applications. You certainly couldn’t fit or use guitar amp transformers for any of these other applications without offending someone.

Transformers are the key to providing that unique signature tone. It’s the transformers that differentiate one amp brand or sound from another. Here’s another way to look at it — all amp builders have to deal with the same limited choices from a small pool of vacuum tube manufacturers and other off-the-shelf component requirements (resistors, capacitors, etc.). This is NOT so with the transformers. Although there are plenty of generic transformer designs available that service the “power requirements” of an amp, you wouldn’t want to use these awful-sounding devices in your guitar amps. Likewise it’s not a coincidence that most of the best-sounding amp builders, modifiers, and repair techs begin their craft and finish it with enviable distinction, relying on their choice of transformers.

300guitars: Would you explain, in guitar player terms, what power and output transformers are?

Sergio Hamernik: Well, I really don’t like to lump all guitar players into one category. Making assumptions here (be it charitable or not) just doesn’t seem fair to me. Each player has their own level of interest and technical understanding on this subject. So I’ll split my answer into three different groups of definitions and let the player choose the one that suits them best.

In basic guitar player terms: It’s magic!!

In technician terms: A device applying mutual inductance in an efficient manner, so that circuits with different voltage/current requirements can correspond to each other.

In engineering terms: Transformers are electrical devices consisting of a magnetic-core and two or more coils (commonly referred to as windings) inductively coupled as circuits for the transmission of alternating-current energy from one closely coupled coil to another usually at a different voltage and current value. Transformers are also used for matching impedances between the signal generating source and the load.

300guitars: How does the power transformer affect the sound of your guitar? The sound comes from the output transformer right?

Sergio Hamernik: Yes the amplifier’s sound does come out of the output transformer, but where does it all begin? While an output transformer is vital to an amp’s ultimate tone, it simply can’t do it alone. The power transformer is the first step in building tone and in setting the standard of performance that the tubes and output transformer utilizes.

The output transformer depends on the power transformer for determining the maximum amount of power the amp can put out. The power transformer is also a major contributor for the overall feel of the amp. Such as punch through (the oomph factor), note attack, a perceived larger/wider soundstage presence and most importantly, the speed or reaction time of the amp’s audible response to the player’s sense of touch and playing technique. Tamper with that in any way by using cheap “dumbed down” power transformers and your audience may confuse your amp’s tone with the sound that is made by farting into a pillow!

A puny power transformer will deliver puny tone no matter how good the output transformer is. A good output transformer is also not intended to be a problem fixer or a turd-polisher. Garbage in is always garbage out. So please don’t shoot the messenger because the power tranny just ain’t cutting it.

Output and power transformers are actually close cousins. Doing similar tasks, one matches and isolates the speaker from the amp and the other one matches and isolates the amp from the power company. Peace keepers of a sort, preventing tubes from frying the speakers and preventing the power company’s energy from frying the amp and people connected to it.

300guitars: How does the output transformer affect the amps sound and feel?

Sergio Hamernik: An output transformer is the last component of the audio chain. The amplifier’s voice. The final word that reaches the speaker. Because all vacuum tubes were never really designed to distort intentionally, the weight of producing desirable amplified guitar tone falls heavily on the transformers. The output transformer’s job is to coax, extract and even irritate the power tubes into tone-friendly distortion. Ever wonder why solid-state amps have always played second fiddle to tube amp tone? Is that simply because of not employing tubes or of not having an output transformer? At the very least, it’s something to think about.

The output transformer determines how the amp sounds like from fully clean (sweet with a touch of sparkle) to fully over-driven (chainsaw) distortion, and everything in-between.

By the way, the term “clean” as used in guitar amp speak is a bit of a misnomer. There is no such thing as a distortion-free guitar amp. “Clean” simply refers to less distortion. There is an intimate inductive/reactive relationship between the output transformer (coils) and the speaker voice (coils) that also back-washes into the power tubes and influences that “clean to dirty” range of distortion. The quality of the output transformer determines how well the production of tone is executed by the amp — those notes that float between the strings which are created by overtones, chimes, bell tones, sustain, etc. Poorly made output transformers tend to gargle out, squash and mask those overtones.

The output transformer is also responsible for how efficiently the audio power of the amp transfers to the speaker (load). Ultimately, the player issues the final report card for the performance of the amp and the output transformer with comments like “clarity,” “articulation,” “loudness,” “break-up,” “grit,” “glassy,” “grind,” “dirty,” “woody,” “mushy,” “mashed,” “fuzzy,” “dark,” “cloudy,” and so on. There are hundreds of guitar amp speak descriptions and euphemisms out there which capture their emotional response (players and listeners alike) to what is coming out the amplifier’s window.

The mighty output transformer. Loved and hated by so many. Still one of the most misunderstood components of a guitar amp. 80 years and going strong. Go figure….

300guitars: When it comes to transformers does size matter? How?

Sergio Hamernik: I can almost hear my wife saying “now that sounds like a guy question.” Actually, in most situations, transformers and chokes make a good case for “bigger is better.”

A power transformer that is undersized for the job will run hotter than a bitch kitty. The amp is unable to be pushed — collapsing under weak, sagging voltages. It’s unable to keep up with the demands a player puts to an amp. The amp slows and has a tendency to cough out notes when played clean, and honk or bark out the notes when overdriven.

Another symptom of undersized and/or poorly designed power transformers is the phenomenon of “tone drift.” You know this is happening when the amp (common with some early Fenders and half of today’s 100 watt amps) starts off with decent tone for the first hour or so, then somewhere around two hours later the tone begins to change and not for the better. The internal temperatures of the transformer reach their peak and begin detuning the voltages and power the amp sees. This is caused by the changes to the resistance of copper. As the temperatures become excessive, the amp’s tone drifts. Remember rich amplifier tone needs to be well fed.

An undersized output transformer will act more like a suppository to amplified guitar tone than a big open window, which is its main purpose. Contrary to popular myth, there is no tone magic that occurs when you force feed an output transformer into alleged saturation or intentionally under power it with a dinky power transformer.

The term “output transformer saturation distortion” comes out of poor guessing by people who really don’t understand how tubes and transformers work together to produce music friendly harmonic distortion. If an output transformer reaches true saturation, all bass frequencies will disappear, the mid-range will sound dark and fuzzy with lower volume — leaving the treble frequencies tinny and brittle sounding. Does that sound desirable to you?

So it’s not the transformer itself generating that saturation effect on overdriven guitar tone. Good output transformers are designed to operate at low flux densities (loads of inductance). That low flux makes it difficult to saturate an output transformer. So the output transformer doesn’t get the credit or blame for that “saturated” sound. The actual source is in the push-pull power tube plate circuit reacting/saturating to the changing impedance it sees in the primary coil of the output transformer as its flux density changes with the changing frequencies and fluctuating power coming into it. The saturation phenomena (when it appears) is mostly happening in the tube.

If one wants to intentionally use a dinky power transformer to achieve tone magic (yes some have tried it, believe it or not). They could save themselves a bunch of money and buy that pillow I mentioned earlier for similar results.

Bigger is better for chokes if you have the room for it on the chassis. Assuming the same value of inductance, more iron and copper will let more power through and it will run cooler as well. This is because of lower DC voltage resistance with the extra copper involved. More voltage being available to the tubes means more power out of the amp.

300guitars: What is the choke for and why do you offer so many models?

Sergio Hamernik: Originally chokes were used in guitar amps to extend the life of vacuum tube rectifiers nearly tripling their life expectancy. They behave as a quasi current spike shock absorber. Chokes help capacitors smooth out any ripple that may be present on the DC voltage. The goal here is to always try to get the cleanest voltage to the tube circuits. Caps by themselves do a pretty job of it. But the choke is a multi-tasker. Along with doing a nifty job of smoothing out ripple, the choke does something else that makes it a significant contributor to the amp’s final tonal character. Because its connected in series with the rectifier and not tethered to ground like a cap, the choke (being an inductor) works nicely as a current regulator. And it keeps the current from decreasing as much as it would if there were only caps involved.

This nearly constant current available from the power supply, courtesy of the choke, makes for an ideal platform to make the best possible tone. Simply put, changing the value of the choke changes the tone and behavior of your amp.

Why so many varieties of chokes? Since chokes are a significant link in the audio chain, a one size fits all approach would be a great injustice to all guitar amp owners. Choke values are a finesse point, a fine tuning that helps to extract the most favorable tonal characteristics from an amp. We even offer a “shift on the fly” option with our multiple-value Multi-Chokes. One choke with several choices of inductance to help the amp builder find that sweet spot.

There is one last benefit to using chokes and it’s the most overlooked attribute. When a choke is connected between a couple of caps, a form of a low pass filter is created. What this means is the choke blocks high frequency garbage on the AC line from mixing with the guitar signal and causing all sorts of sonic collisions during the process of amplification. Let us not forget that we live in an electronic age far more complicated than the 1950s or 1960s. There are all sorts of things contaminating our power before it hits our amps. Computers, TVs, BTL cable services superimposed on our power lines, you name it, are all sources of noise we don’t want in our amps.

You’d be surprised to find out how many amp builders substitute a resistor for a choke just to save a few bucks and lose out on the choke’s very cool advantages. Almost all of the great vintage amps had chokes (Marshall 50 & 100 watt, Vox AC30, Fender Twin, Showman, Super Reverb, Vibroverb, Pro Reverb, Deluxe Reverb, etc.). The builders back then were taught tube theory and understood the relevance of the choke in their designs.

300guitars: Would a Mercury replacement reverb transformer make the reverb in an amp sound better?

Sergio Hamernik: That depends on how lousy the original one was. Reverb transformers are wound similar to guitar pickups. Lots of turns with very thin wire. Which adds to the expense of building them. Many companies skimp on materials to keep their costs down as a result.

We believe that the low level signal (barely a whisper) going into the reverb transformer is quite fragile in nature and anything less than using the best materials and winding techniques would cause it and its tone harm. According to our customers that have upgraded their reverb transformers with ours, they report better performance, higher def, a more lush-sounding reverb, etc. Based on that, my answer is yes — or your money back.

300guitars: Is it easy to upgrade an amplifier to a set of Mercury transformers?

Sergio Hamernik: Heck no! It’s not at all easy. Therein lies the rub. This is why we have the great divide between disappointing “corporate” tone and a thriving (yet inconsistent) boutique amp market.

How much hassle and expense are you willing to put up with to get your ideal tone? If merely swapping out tubes will improve tone, then why are we still missing so much of it today? If simply plugging things in or out made for better tone, then all the big amp companies would have nailed it decades ago and we wouldn’t have the need for this interview. But no, it’s not that easy. Quick, cheap and dirty (non-transformer) amp fixes are not worthwhile timesavers. They tend to act more like tinsel and don’t do much for real tone problems. My wise old grand dad once said, “Putting powdered sugar on a turd, doesn’t make it a doughnut.”

Upgrading to Mercury transformers requires technical expertise and a morbid fear of being electrocuted. There are potentially lethal voltages present, a ship load of wires coming out of these things to further complicate matters and requiring a good share of installation elbow grease to boot. A person should be schooled in electronics and not sexually frustrated. A steady hand goes a long way in doing a good install. It shouldn’t be a D.I.Y. project no matter how simple it may look to the casual observer. We have techs all over the planet that are willing to help and do a good job with safety first. Transformers are expensive and labor intensive to install.

Those who are ready to make such a commitment/sacrifice (who needs kids anyhow?) will be rewarded for their efforts. Don’t take my word for it, just read our testimonials. We have a bunch of them all unsolicited from players, amp builders and amp techs, who were impressed enough to write to us telling everyone that it was well worth it.

300guitars: It seems that tubes and big hunks of iron (transformers) are very old school technology. Is there anything new on the horizon at Mercury?

Sergio Hamernik: Playing a guitar is even older school. There isn’t anything modern about an electric guitar. But, what makes an electric guitar “electric” is the fact that it depends on the rules of magnetism. The pickups on an electric guitar are made of coils of wire responding/reacting to a changing magnetic field, so are the voice coils in speakers. And let us not forget the power transformer, choke and output transformer in an amplifier are doing their jobs through magnetic fields — literally completing the link between a player’s finger tips to the player’s and listener’s ears.

My point being that if you replace your amp’s transformers for something else, you might as well replace the electric guitar with something else. So happily, we’ll stay stuck with big hunks of iron and hang on to our electromagnetic guitars! This means that tubes, which are not magnetic devices, could eventually be replaced by other devices such as high-voltage Field Effect Transistors as long as they’re mated to right kind of transformers. This is stuff that you don’t really need to know, but it’s a point of interest. There are a lot of motivated people out there that are fed up with the poor quality of tubes today and might be able to make tube substitution a reality someday soon I hope.

What’s new on the horizon at Mercury? A bunch of stuff. A cool new line of transformers that will give the next generation of players a unique voice of their own. Vintage is great, but we also want to encourage a new generation of inspired song writers and players to continue guitar based music. It’s all about the tone that will help seed this.

We are in the process of designing, developing new Upgrade Kits, pre-packaged transformer sets for those who are not satisfied with the tone of their present day amps. It’s our passion.

And, possible amp tone clinics. If that is what players want. We are also working on things that are a bit beyond the horizon which I’ll talk about sometime later.

300guitars: Thanks Sergio for taking the time for this most informative interview!!!

Sergio Hamernik: Thanks Billy for this interview and for giving a damn about all this stuff we call tone. Your passion clearly shines through on your website. It’s people like you that keep it all going and compel us to continually raise the bar for the guitar playing community.

I also want to apologize in advance if I offended anyone’s sensibilities with any comments I may have made. I will learn to live with the guilt….

Benefits of the Power Transformer

Mercury Magnetics

As I mentioned earlier in the article, I had not originally intended to use a Mercury Magnetics power transformer (PT), electing instead to save a little money and use the stock DRRI PT. I’ve since changed my mind. How this came to be makes for an interesting story.

About 10 days before I was scheduled to pick up my amp at Mikey’s shop, I sent out emails to all the companies that I linked in this article. This included Mercury Magnetics since Mikey was putting their output transformer, reverb transformer and choke in my amp. Shortly after sending out an email to Mercury, I heard back from Paul Patronete who graciously gave the OK to link to their site. He also took a moment to let me know in addition to the other Mercury iron I was using, their power transformer would make an improvement in the tone of my amp. Paul invited Mikey and me to give Sergio Hamernik (an owner of Mercury Magnetics) a call to discuss the benefits of the power transformer.

I really appreciated the helpful suggestion but I hadn’t ever heard of a PT making a difference in tone, thinking the other pieces of Mercury iron would make 90% of the improvement. I did let Paul know I’d add a comment in this article saying I’d heard from Mercury and the PT would make a big improvement in the tone. He wrote me back with an interesting bit of information I had never considered. Here’s a paraphrase from the email he sent me:

The stock reissue PT does an OK job of supplying the required voltages to the circuit however the overall PT’s behavior under working conditions is not the same as the original vintage Deluxe Reverb PT. Characteristics that make the reissue PT different than the original PT involve flux density, AC regulation and primary inductance. These characteristics are a very important factor for the player that wants to nail the tonality of the vintage Blackface Deluxe Reverb amp.

Paul once again encouraged me to talk to Sergio. This certainly piqued my interest so I got in touch with Mikey and discussed Paul’s comments. We decided to get Paul on a conference call and to also see if we could speak to Sergio. We called Mercury in the late afternoon, four days before I was due to pick up my amp. Although Sergio wasn’t in, Paul spent almost 1.5 hours talking with Mikey and me about their power transformer and the rest of their iron.

Paul is a guitar player first and foremost and his enthusiasm for great tone is infectious. In addition to talking about all the good things Mercury Magnetics has brought to the industry and guitar players, he talked about what some of the cutting edge builders are doing. Mikey and Paul had very similar opinions on what makes great tone and why. It was a very informative and fun conversation. At the end of it, I certainly wanted to speak to Sergio so Paul invited Mikey and I to call again in the morning.

The next day, Mikey and I called Paul and after a brief chat, he brought Sergio to the phone. It was truly a treat to talk with Sergio and I learned a LOT about tube amps, the importance of an amp’s magnetics (the iron) and primarily, the benefits of using a Mercury Magnetics power transformer engineered for a Deluxe Reverb. As we talked, I jotted down as many notes as I could manage. I’ll share them with you now, although please keep in mind I may not have captured everything Sergio was conveying. He did a fine job though of keeping his information geared to my level of understanding.

Sergio started by asking me if I knew what modulation is. Of course I’ve heard the word but I wasn’t sure what it meant in relation to tube amps. He explained that an amplifier is a modulated power supply whereby the guitar signal is used to modulate the amp and so the quality of the power transformer affects tonality. He said the power transformer (along with the rectifier tube, a 5AR4 type) is responsible for taking the AC wall current and transforming it into the DC current used in certain parts of the amplifier. He said the power supply sets everything else up and everything depends on the character of the power supply. For example, since it helps determine the AC and DC voltages going to each section of the amp and tubes, it has a big impact on the feel of the amp.

I learned that although the stock DRRI power transformer provides the right amount of volts and amps (current) to the amplifier, the DRRI power transformer is nothing like one of the original PT’s used in Deluxe ReverbsSergio said among other things, the flux density and primary inductance all have to be right. As a comparison, the DRRI stock power transformer has 1/2 or less inductance on the primary than a Mercury Axiom PT. (You may recall from a previous section; inductance is the opposition to changes in current.)

He said capacitance and leakage reactance are critically important and Mercury Magnetics power transformers have lower flux density and heavier iron with better permeability. Capacitance and leakage reactance between the windings, and where the filaments are in relation to the B+ supply, really matters. Now that’s a mouthful! I think I’ll need to spend some time researching the concepts mentioned in just the last two paragraphs so I can better understand the electrical theory behind his designs. One of the best things about this project and writing this article is being exposed to new concepts. This is my idea of fun!

Sergio did break this theory down into practical examples for me. He explained the Mercury Magnetics method starts with finding the very best sounding amps and examining their iron. For example, if there is a great tone on a recording, Sergio can try to find the exact amp used on the recording and use it as the model for new iron.


Mercury Magnetics’ Axiom power transformer for a Deluxe Reverb (not for a DRRI)

The DRRI power transformer has different physical dimensions than the one in a Blackface Deluxe ReverbMikey has an electronic caliper that does very precise measurements so he sent these dimensions to Paul so Mercury can provide the perfect power transformer for this amp. They have the know-how to build power transformers that will sound just like one in a Blackface Deluxe Reverb. They do this by using the very best example of an original 1965 Deluxe Reverb transformer, unwinding it and laboriously documenting every nuance of how it is constructed. Then a combination of old and new technologies is used to create the very best transformer possible.

There’s a reason why guitar players seek out older amps, and this obviously is because of better tone, which I’ve come to understand is largely due to quality magnetics. I learned the magnetics available to amp builders in the 50s and 60s were made from materials optimized for the military for WWII and the Korean War. There was a tremendous overstock from the military build-up and amp builders had ready access to very high quality materials.

Modern materials are designed to be cheaper to hit price points. Sergio told us he specs custom steel to make Mercury transformers. They do enough volume of business that he can insist his steel manufacturer hand crank the steel through a gas oven, just like it was done in the 50s and 60s. Steel and copper behave differently at different milliamps so the properties of the metal must be designed and manufactured to this end. For the guitar player, this level of quality shows up in things like the ramp rate of note attack, the feel of the pick attack and better bass note response. He also used the choke as an example, where the Q-Factor (the measure of quality in a resonance system) is quite a bit different between the stock DRRI choke and the Mercury choke, so much so that it makes for an audible difference.

Sergio explained the power transformer is rated for a lot more watts than the amp produces. For example, the Mercury Magnetics Axiom power transformer for my amp will be rated at 120 watts and is capable of supporting an audio output of up to 60 watts. The general rule-of-thumb is the power transformer needs to be rated at twice as much as the maximum audio output.

Since this power transformer has specs well in excess of what the two 6V6 tubes are capable of creating, it can safely run 6L6 tubes. 6V6 tubes require only 60% of the power of 6L6 tubes. The output transformer is also capable of handling 6L6 tubes so by getting the Mercury Magnetics power transformer, I can get more power and a different tonality out of my amp than with the 6V6’s. This is a nice bonus and one I hadn’t considered when Paul first emailed me, suggesting their PT. I prefer 6V6’s in the amp but it’s nice to have another option.

Mikey asked Sergio to describe the sonic differences we might expect with the use of the Mercury Axiom reverb transformer. Sergio said the sound differences are subtle because it is such low power but if you have good ears, you’ll hear differences in “evident detail” and a “perceived wider bandwidth.”

Mikey and Sergio talked a bit about the dramatic effects of using the Mercury output transformer. Sergio likened his output transformers to a window with no glass and no screen, allowing all of the tonality of previous sections of the amp to pass through with great clarity. He explained the excellent “phase relationship tonality” (perceived as a 3 dimensional swirl) is dependent on the quality of the construction of the transformer. By comparison, the DRRI output transformer acts as dirty glass covered by a dirty screen. I couldn’t help but be reminded of the scene from the movie “My Cousin Vinny” where Vincent Gambini (Joe Pesci) disproved the testimony of a witness by pointing out with pictures how the witness was looking through dirty glass, a bug covered screen, and through trees and bushes at a fleeing car.

As a tube amp enthusiast, I’ve been reading and learning about tube amp electronics for quite some time. In this conversation with Sergio I learned a lot of things I had never considered. Of course, by now I was completely convinced their power transformer should go in my amp! You can understand why the top amp builders call upon Sergio for his expertise, designs and remarkable archive of information.

If you take a look at the Mercury Magnetics site you will find a large selection of iron to fit just about every need (www.MercuryMagnetics.com).

Sergio and Paul both told us there were very significant differences in iron on the same models of amps from the same era. Sergio spoke of a conversation he’d had with Leo Fender about amp components. Leo told him the Fender Company experienced a swelling of demand for amps when young people became enamored of guitar. Fender was just trying to meet the enormous demand so they put out specs for things like power transformers to various suppliers. The suppliers had a lot of latitude in how they meet the specs, creating a lot of variation in the parts.

Here’s another new bit of tube amp knowledge I learned from Sergio. He told me all magnetics (iron) in an amp need to be broken in over a 20 to 40 hour period of playing time. He said initially, there’s a slight harshness in the tone, which can also be characterized as a lack of sweetness. The magnetics have to be thermally and magnetically cycled. Apparently, it is similar to breaking in a speaker. Paul later told us he’s had guitar players call him up after a month to describe the new subtleties and complexities emerging from the amp: a wonderful and unexpected surprise.

After spending about 45 minutes on the phone with Mikey and me, Sergio turned us back over to Paul. I must say it was a pleasure and an honor to speak with Sergio and he couldn’t have been more gracious in taking his time to explain all of the information I’ve relayed above.

Paul and Mikey made arrangements to take the exact measurements of the bolt placement and chassis openings in the DRRI for a new power transformer. I sat back for a bit as Paul and Mikey continued where they’d left off the night before, talking about new amp ideas Mikey has been considering, which will involve creating an amp using a wide variety of power tube options. It’s too early to go into details about that though. I’ll have to save that for another article :>)

By the way, we got to know a bit more about Paul Patronete. He is a key associate of Sergio who talks with guitar players and amp builders all the time, helping people decide which Mercury Magnetics iron is right for them. You can tell he really gets off on helping players attain tonal nirvana.

Of interest, before coming to Mercury MagneticsPaul was the General Manager for Groove Tubes for many years. I dug out my copy of Aspen Pittman’s “The Tube Amp Book – 4th Edition” and sure enough, there is a picture of Paul on the inside of the back cover. He’s also listed in the very front of the book in the “Strokes for My Folks” page and a color photograph of his Orange amps is also in the book.

Well, I’ve gone through all of my notes from my discussions with PaulSergio and Mikey so I guess it is time to close this chapter. I’ll be picking up my amp tomorrow although it will have the stock DRRI power transformer in it until a new one is manufactured. I sure am glad Paul took the time to talk to me, educate me, and with Sergio’s help, convince me to get a Mercury Magnetics power transformer to go along with the rest of the Mercury iron in my amp. I’ll make another trip to Mikey’s shop in Baltimore next month and I’ll be sure to let you know how it sounds, so stay tuned.

Source: https://mercurymagnetics.com/pages/news/misc/WayneReno.htm

OR-DARK-C

9 Henry Mini-Choke — add this choke to your amp for improved tonal richness

OR-DT-C

9 Henry Mini-Choke — add this choke to your amp for improved tonal richness

FTC

4H / 500mA Choke — Fender Tweed era Part # 14684 — 3 1/8″ center to center

*This choke is for Tweed era amps such as Bassman & Low Power Twin (not a Champ!)

FC-VIBROL

*Sizes vary – please contact us before placing your order.

For example, the BF Vibrolux Reverb used the 125C3A choke

This choke has bolt hole spacing of 2″ center to center

An Interview with Sergio Hamernik of Mercury Magnetics

In late 2009 I had the opportunity to talk with Sergio Hamernik about the history of the Mercury Magnetics, how he became involved in making transformers for guitar amplifiers, and the difference a high quality transformer can make on your tone.

How did Mercury get its start?

The company’s roots date back to the early ’50s. Mercury was started by an old General Electrics transformer engineer who was working there pre-World War II. He then went on to do a bunch of design work for the war effort. And in the early ’50s, hung a shingle and became self-employed.

The name “Mercury” came out of his passion for Mercury cars, he always drove a Mercury since the late ’40s — he loved those cars — and eventually moved from the East Coast to the West Coast where he found that there was a lot of military and aerospace work. A booming economy in the early ’50s gave him a lot of business.

I met him in the 1970s when I was an engineering student and an audio enthusiast. Back then the electronics world was well into its solid-state “evolution,” and interest in tube gear was quickly disappearing. Not for me, however. I found myself in demand as a guy who knew about those “old things”; not only the math, formulas and specifications but I also had the “ears.” I could fix and keep the old gear running. So, I worked as a hired gun for a bunch of studio heads and pro musicians.

Typically when an amp’s output transformer blew. No one seemed to know any better so it was just swapped by whatever “factory” replacement or an off-the-shelf “equivalent” catalog transformer was handy. The invariable result was that the amp’s characteristic sound was gone. And no matter what resistors, caps or tubes were used, it could not be rescued or returned to its original sound. It was the transformers, it turned out, that were the key. The problem was coming up with a way to remedy the blown transformer replacement or repair that wouldn’t alter its tone.

To further complicate things, most transformer people I dealt with just didn’t want to bother with the music industry. For the most part the established electronics industry considered the needs and opinions of the audio and MI (Music Industry) communities as subjective, run by kooks, and occupied by people who didn’t know what they are doing. Audio and MI had always been considered the illegitimate stepchildren to the rest of the industry.

Out of pure necessity I had to got involved with transformer design and manufacture. As a customer of Mercury, they had built many custom transformers to my specifications — although we had many heated, on-going debates on the subject because the company owner hated audio! He never did understand what made guitar amp transformers tick, or how musicians thought and reacted to them.

That aside, he pestered me for almost a decade to take over the company because he felt I was the only one qualified. Eventually I did, and that was when Mercury got serious about the guitar amp connection. Sometimes you end up becoming an expert at something when no one else wants to do the job.

By the time I took the helm we were developing a really good and workable understanding of the relationship of transformer design to decent tone and how amps should behave. And around 1980 we began the long and arduous task of collecting and cataloging transformer specifications for every vintage amp, from all over the world. The deeper we dug, the more apparent it became that there were all kinds of factors that no one had previously suspected that affected guitar tone. And likewise, no one seemed to be paying attention to such things.

In turn, we invented proprietary technologies to aid this work. Even after three decades, we’re still innovating and discovering new things. From that fundamental research came our now famous ToneClone series, and later the Axiom line, which is probably the most significant advancement in toneful guitar amptransformer designs since the ’50s. Both product lines, we’re proud to say, have distinctly different niches in the annals of guitar amp tone.

We’ve not only cured the old transformer tone issues, but made it possible for musicians to upgrade their existing amps. And we’ve also made it possible for amp builders to reproduce amps of the same or better grade than even the most outstanding vintage amps of the past.

When did you become involved with making transformers for guitar amplifiers?

Back in the ’70s I worked for people on a one-to-one basis, usually under confidential arrangements, with certain rock stars that just didn’t want to be bothered by their names being flaunted around. What they want was their amps running right for recording, projects, touring, etc.

The problem was that when technicians would fix the amps they’d often loose their tone. It turned out that the culprit was the replaced output transformers. A changed output transformer would completely alter the character of the amplifier. So as I was the guy doing most of the work to resolve this issue, this expertise was brought to Mercury where we began a special division to cater to the guitar heroes.

Word got around rather quickly that Mercury was able to repair, rewind, and restore the original transformers and it just grew from there. The whole “Tone Clone” thing came from artists who had these amazing irreplaceable amps, amps that often made recording history. They didn’t want to take these amps on tour. So we came up with the innovative idea of cloning their original transformers that they’d fallen in love with. With the clones we could now easily make, for the first time ever, several identical amps for them. Or they would assign their techs to drop-in the cloned transformers so they would have, for example, six amps that would all sound the same as that first perfect amp.

These artists could now go on tour and not worry about breakdowns or theft, and keep their prized-originals back at home.

I worked with Ken Fisher, the whole Trainwreck thing, and a lot of the early boutique guys — and still do with Alexander Dumble. They preferred to keep things confidential and not let too many people know who their sources were because there were so few transformer designers that catered to the guitar amp market.

There was also a slow-but-steady dumbing-down occurring in audio and all that had been the post World War II momentum. Many of the ex-military components we’d been using were high tolerance parts, with mil-spec formulations of iron and copper and so on, that had been used to win the war effort. During the ’50s and ’60s we enjoyed the benefits of those high quality components at surplus prices. But by the late ’70s, and definitely in the ’80s, steel manufacturers started to change recipes to make the iron and other materials much more affordable.

You can hear the differences between a late ’60s Marshall, a late ’80s Marshall, and a Marshall today. A good listen will really help you to understand what changes took place. Unfortunately they made so many of those changes more out of economic considerations than anything else. The amps were loud but they seemed to be losing sight of the fact that their tone was disappearing — the “recipes” had been changed.

In addition to many other factors, the iron that Mercury uses is custom-formulated specifically for us. We buy enough of it to be able to dictate the exact recipe from the foundries. And all of our iron is literally from American ore processed right here in the USA. 100% American madeto the original specs. Are there drawbacks? Well, some of the iron rusts more easily, but that’s actually a good thing because rust is a natural insulator. But the opposite is also true. When you see a modern transformer with a silvery or a shiny core just know that they aren’t worth a damn when it comes to tone.

Can you tell us more about guitar amp transformer history?

Here’s an amusing anecdote that may help explain our case for guitar amp transformers: There’s a great deal of documentation, from back in the mid-’50s, where engineers, and other technical people, were writing really scathing reports on how awful the transformers were in the audio industry. Those darn transformers! When tubes were plugged into them there was a tendency to distort! And they couldn’t have any of that! Likewise with harmonic distortion — especially even-order harmonic distortion.

Many amp builders, techs and players, today, don’t understand that tubes were originally designed to run dead clean, linear, and be efficient voltage amplifiers. That the tone we’ve all come to know and love is caused by the transformers literally “irritating” the tubes into distortion.

Which is, of course, the whole point of what we are looking for in guitar amps. Back in the ’50s, they were fighting to get rid of those nasty distortion tonal characteristics. Now we embrace them. But that was audio – guitar amps were still in they’re infancy and yet to be realized. It took a generation or two of innovative musicians to take those “undesirable” tonal characteristics and create music; to work with distortion and make it into something musical.

Ironically, it was that no-distortion engineering mindset that ushered in solid-state, and why it was so openly embraced in the ’60s. It was solid-state electronics that eliminated the output transformer.

In the late ’60s, Vox went to Thomas Organ to have solid-state amps built. They were very proud of this state-of-the-art amplifier. Curiously, I met a few of the musicians from the late ’60s that were sponsored by, and using, those amps. The tone was so awful and unbearable that they used the enclosures but hid their old tube gear inside! As you may already be aware, the vacuum tube industry is alive and well, and we’re still waiting for the solid-state industry to catch up.

Part of the confusion is that musicians assume it’s the tubes that give them their tone. There’s a lot of synergy going on in an amp, and the tubes certainly contribute, but let me illustrate this another way. Did you know that there is what we call “output transformer-less” amplifiers in the HiFi world?

These amps basically parallel a bunch of power tubes together until they get down to 16, 8, or 4 ohms. There is no output transformer, so you literally connect the speaker directly to the tubes. If you ever get the opportunity to do an audio demo with this style of amp, you will find that while it works, it sounds nearly solid-state. The output transformer is what provokes a tube into giving the characteristics that we find desirable as far as tone. Audio engineers didn’t want the tubes to distort, as tubes are basically nothing more than very clean voltage amplifiers. But when you have a reactive element like a transformer, you irritate the tubes into harmonic distortion.

Therefore, the difference between a good and mediocre transformer is based on how it works and syncs with these tubes to produce the kind of tone or distortion we are looking for. It is not as easy as winding some wire around a steel core, if it was then we would not be having this conversation.

How does a Mercurytransformer made today compare to the transformers made in the golden age of amps (the ’50s and early ’60s)?

One of the biggest mistakes existing in today’s amplifier community, especially amongst hobbyists and do-it-yourselfers, is to blindly copy every aspect of a vintage amplifier hoping to get a piece of that golden tone. At best, this method still produces very random results. One of the key reasons for this is the often-overlooked missing transformer formula. A builder will fuss around with the tiniest of other details but completely miss how the transformers fit into the equation. In short, get the transformers right, then the rest is much easier. Here’s another look at theses deceptively simple devices:

For vintage-style transformers, Mercury starts by duplicating the transformer design, build errors and all. We use the best grade components like they did in the ’50s and ’60s. We wind every layer and every turn as if it were a circuit in itself. In fact, the diagram on the left shows an output transformer circuit equivalent. Most people would think it is an audio circuit. These things are fairly complex, and all the numbers have to be right in order to get the tone we want as musicians.
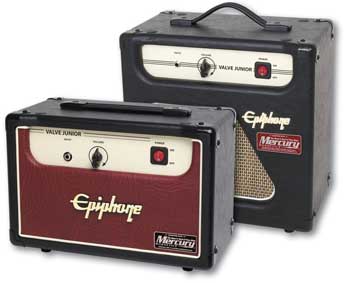
We really do follow the recipe to a point. Although we don’t repeat any of the mistakes or inconsistencies that were prevalent, but didn’t affect tone. For example, if you were into Fender tweeds or late-’60s Marshalls. To do this we would literally put the word out to rent or borrow dozens of amplifiers to find the one or two that had thesound, and dismiss the rest. There were typically many inconsistencies as well as “happy accidents” in the best-sounding examples we’ve auditioned. A lot of this has to do with the sloppy tolerances of the original transformers.

For our transformers we extract the best parts and virtues of the original best-of-breed transformers and remove all of the obstacles to tone. Perhaps just as important is that we adopted a “cost is no object” approach, making our transformers equal or better than the originals — and then add consistency. We now have this so finely tuned that if you bought a transformer from us five years ago, and then the same one today, it would sound exactly the same. You don’t want good batches and bad batches, which is precisely what made the original production runs vary so much.

Another issue is the so-called controversy between paper tubes and nylon bobbins. In the vintage years they used both. Some people think that somehow, some magical quality comes from using a paper tube winding form over a nylon bobbin. Tonally it made no difference at all. Paper tubes were widely out of tolerance most of the time because of how they were made. They would wind multiple coils on long sticks then use a saw or blade to cut off the various coils. In order for these long tubes or coils to come off of their winding forms they had to be conical. So this invariably meant that the first coil would be larger in diameter and the last coils smaller. As you can see, it’s easy to see why each of these inconsistently-made bobbins had a greater difference than the material they were made from. And there are other issues that occur over time, like paper has a tendency to disintegrate, collect moisture, etc.

When we switched to using nylon bobbins the tolerances were within 3,000’s of an inch of each other, as opposed to the wildly varying amounts found in paper tubes. If you were ever to take apart a really old transformer (pre-’70s) sometimes you’ll find wood wedges that are jammed between the paper tube and the core because that piece of paper was too wide and too sloppy to fit into the core correctly! They would force a wedge in there so the darn things wouldn’t rattle!

Which method, paper or nylon, made for the best tone? It’s the luck of the draw. We’re fortunate in that we have all these stars as clients who have these amazing-sounding amps. They went through the hassle of culling and choosing and picking the special amps that inspired them. The amps they recorded with. When we analyzed their transformers we sometimes found happy accidents or other little anomalies that would set a transformer apart from already sloppy tolerances of the standard production run.

There are little subtleties and changes from one transformer to another that make a heck of a difference tonally. So when you look online at our list of ToneClones, just know that they are from the hand-picked, best-of-the-best amps of their model and era. We continue this “weeding” process every day — and there’s apparently no end in sight. And that’s why, with some amps, we have several versions — each with its own tonal qualities — and others only a single set to choose from.

We use this process to establish new benchmarks. And you never know, tomorrow a new variant may arrive that totally blows away what we already thought was as good as it could ever get.

It is interesting that you take that approach to upgrading — the never-ending search for better-sounding benchmarks.

There is no real money or glamour in what we do, it is really all born of a passion for music. I come from a musical family, my Mom taught me as a little kid that music was a form of “food.” And that hasn’t changed. Everyone who works at Mercury is just in love with playing and listening to music, and we all believe that there is always some room for improvement or a way to raise the bar somehow.

Back in the ’70s and ’80s there wasn’t really a need for a company that designed and sold transformers to the public, so I stayed away from the general public for as long as I could and really only worked with professionals.

But at some point I realized that it was the average player who was getting ripped-off. Things were getting dumbed-down, the tone is slowly and steadily being vacuumed out of the amps. They were becoming duller-sounding, less interesting and more noisy. So, we decided to formally launch this product line so the average guy could have access to our technology. It takes an extreme amount of labor and effort it takes to build them to this standard. You know, even if someone wanted to buy 1000 transformers we would have to no-bid them because we really don’t have any way of doing things quickly.

Automation isn’t a practical solution. Everything we do is wound by hand, one at a time; it is the only way it can be done. Say you have 100 turns and 10 layers, well that would mean 10 turns per layer — that is how a machine would think of it. But what if a rock legend’s best transformer was 9 turns on one layer, 11 turns on the next, 7 on the next, 3 after that and so on, but the sum total ended up being 100 turns. Sometimes one layer can have a different winding style than the other; sometimes it is non-symmetrical meaning, if it is a push-pull, that one side of the primary doesn’t have the same turns as the other side. If that was the recipe that created the magic, we’d have to duplicate it. It’s just not practical to build machines to do that, so we end up having to do it by hand. It’s the proud old-school craftsmanship way of doing things. Something I think we could see a lot more these days.

We have a reputation for nailing tone. Our Fender transformers don’t sound like Marshalls, they sound like Fenders — and vice versa. In fact, we’ve become the industry’s new standard. If you were going to design or create a tube-based amp, it’s clear that we’re the folks to talk to.

Can you explain how a Mercurytransformer can improve an amplifier’s tone and how they outperform the stock transformers found in most amplifiers?

In designing toneful transformers specifically for guitars (and that’s all we’re talking about here, not necessarily transformers for HiFi or any other purpose), the trick is in the magnetic field and how it behaves. The nature and the speed with which the iron reacts to the changing of an alternating current, in an alternating magnetic field, is what makes tone happen.

If you have “slow” iron, you’ll have a dull, non-sparkly sound with no bell tones — no matter what you do with the amp it will always be kind of noisy and fuzzy.

Where others have tried and failed they’ve blindly followed generic transformer formulas without understanding that guitar amps are different animals. They’ve somehow missed that point despite all the evidence to the contrary. The fact is that transformers for guitar amps do not necessarily follow textbook rules.

Indeed, it should probably be noted that we’ve developed a whole new technology around transformer design specifically, and only for the guitar industry. And that these designs are essentially irrelevant to any other use. But Mercury is also in a highly unusual position. Our decades of transformer “vivisection” have revealed all manner of unconventional tips ‘n tricks to us. And we’re now the keepers of this new, but proprietary, technology.

I seriously doubt that we could have done it without the, let’s call it “archeological benefits,” of our observations. Decades of studying the good, the bad and the ugly of guitar amp transformers have revealed a great deal.

Nothing that I have found in the reissue market, transformer-wise, even resembles anything that was made during the “the golden age of tone.” They are unrelated. The inductance, magnetic fields — all of that is just completely different and far removed from the original designs and recipes. So there is no way that a reissue amp is ever going to sound vintage unless they bother putting in the right ingredients.

With our Upgrade Kits, for example we’re trying to show people that we can move forward into new sonic territory from where vintage designs and tone left off. And our Axiom series transformers are the definitive showcase for this technology. Their tone is just amazing.

To push the point even further, we don’t include any “voodoo” parts in our Upgrade Kits. With the exception of the transformers, the Kits use only common, everyday, and off-the-shelf components. And most of our Kits also include a Mini-Choke. When the circuitry is correctly designed a Mini-Choke will make a huge improvement in an amp’s tone because, in terms of its power supply, it changes the way the amp works.

A good guitar amp is only as good as its power supply. If you have a dynamic and moving power supply that reacts to the demands of the audio end you’ll get get great note separation and good bass dynamics. You start to hear chimes and other phenomenon, and even the harmonics between the strings like a “5th note.” What the heck is the “5th note”? In barbershop quartets, if they get their harmonies right, they hear the “5th note” which is basically a harmonic of all four singers. We are doing that with our guitars thanks to distorted amplifiers.

Where did the idea for offering an Upgrade Kit for amplifiers like the Champ “600” and Valve Jr. come from and who designed the Upgrade?

I designed all of the magnetics (the transformersandMini-Choke) and the general concept behind the Upgrade in league with Allen Cyr from the Amp Exchange. He is one of the most competent, finest amp designers I know of; there are only about five in the world that are true masters of the art — those who really know the math, how to read tone, how to listen to the subtleties of clean and overdriven sounds and tones, design circuits, and understand tube behaviors. As a bonus to those who appreciate this kind of thing, we always try to throw in some interesting tweaks and tricks that are unorthodox.
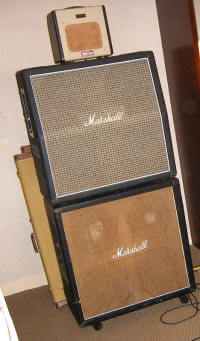
The idea is to spark some interest and perhaps get more people involved in tube-based amp tone and evolution. We expect some folks to study our Upgrade Kits, learn from what we’ve done, and take off into new territory from there. No one is offended by that.

But our initial concept was to take an inexpensive stock amplifier, one that cost no more than $100 or so, and modify it into a professional- or recording-quality amp for very few bucks. The Valve Jr. was the amp that gave us the inspiration for this project. Epiphone broke the mold with their little Valve Jr. amp. Out of the box it’s a remarkable value. So, although it was a bit of a challenge I thought it was interesting because we were not stepping on anyone’s toes — we were just taking something that already existed and designing an Upgrade Kit around it. A simple proof of concept that made the case of transformers and guitar tone. It just seemed like a cool thing to do. The project was validated when pro players began demo’ing our prototype amps — they couldn’t believe how amazingly great such a tiny amp could sound, it freaked them out, and they all wanted one of their own!

Our intention was to give the kid who was practicing guitar in his bedroom, whose parents are on a limited budget, REAL guitar tone. In a typical scenario, the parents buy a cheap little amp and guitar combo because they want to see if their kid will stick with it. But the kid doesn’t understand that the sound of the amp is fatiguing. He doesn’t understand why the amp doesn’t sound good. And he doesn’t realize that the amp is fighting him, tiring him out. I know that happened to me and so many of my friends when we were kids. Struggling with hard-to-play guitars and poor-sounding amps is probably the single-most reason so many budding young (and old) guitarists give up the pursuit of their dream. But some are rescued. One day they visit a guy, or hear someone play, who has the amp with the tone and with just the sweep a few chords they experience the “My gawd!!! I want to sound like this!” phenomenon.

That is what we’re trying to offer with these Upgrade Kits — where thetone is accessible to just about anyone. So they could have an amp that wasn’t dull or desensitized. An amp that allows them to make that real connection to the tone. Tone is not just about noise and volume, it is rather complex, and undeniably emotional.

At the LA Amp Show we had our Upgraded Fender Champion “600” running into a full Marshall stack. Here we had this little amp powering eight 12″ speakers and it sounded great. People kept asking to see the back of the amp thinking that we had somehow rigged up something, but it was just the little Champ “600” with our Upgrade Kit.

When you have a nice open tone it is not about counting watts because the window is so big and wide and the soundstage is so deep that it gives you the impression of more power. We are not putting out more power with the Upgraded “600” — but it sure sounds like it! It’s about opening up that tone window and giving you more.

It’s kind of like taking a radio whose volume is set to half way and having it placed about 20 feet away from you then bring it right next to your ear — the volume has not changed but you hear a lot more of its content.

One of the things we do when modifying a circuit is to lower the noise floor, which a lot of people overlook. Many amps, like the Valve Jr., have a nasty hum in standby. We had one that would just start to howl if you left it alone for a while! So whatever high noise floor it had would eventually feedback on itself and cause that noise.

Our focus is on inspiring people. We are trying to show people that they really can get great tone today, that there is no age that has come and gone. There is still a lot of fun things left to do with your amplifier when you are on the search for great tone.

Hearing how much these Kits improve upon the tone of the amplifiers, and how well thought-out they are, will a Mercury amplifier that is designed and built by you ever make an appearance?

No. We are a supplier of key components to the boutique industry and to several of the large amplifier companies, and that is a comfortable spot to be in.

There is no shortage of amplifier companies out there and it really is a conflict of interest if we were to start selling amps and transformers. I would rather stay out of it.

The whole point of the Upgrade Kits was an area where I didn’t see any conflict with the people who were in the amplifier business. In the end the Kits really represent a transformer demonstration. If you were to just show someone a picture of a transformer or even had one in your hand and tried to explain how much better their tone would be, no one would care — it’s a yawner. But when you build one of these inexpensive Upgrade Kits and you actually hear the difference that the transformers make, it really drives home our point that transformers are important, that they are the building blocks of guitar amp tone.

And in the end we do this because we love it, we really love what we do. We get to create all of these products that help people find their tone, and who wouldn’t what to do that?

Source: https://mercurymagnetics.com/pages/news/GuitarFixation/SHinterview/index.htm


Benefit of Using Mercury Magnetics Transformers

OK, so perhaps you’re sold on snatching a stock Pro Junior, but of course, you want it to sound the best it possibly can…. Should you wish to dig a little deeper in the quest for tone, veteran amp builder Ben Fargen has developed a line of Hot Mods for stock production amplifiers – lots of them, including the Pro Junior, and we asked him to describe the inspirational behind his concept for the Hot Mods….

“For a number of years I had a lot of people wanting me to work on their vintage Fender, Marshall and Vox amps, and I really never had the time until the economy slowed down in 2008. A local customer asked me to take a look at a Marshall JCM800, which (laughing) really isn’t the kind of amp I’d usually be interested in, but I agreed to look at it, got in touch with Mercury Magnetics, went through the schematic, and wound up turning it into a really great sounding high-gain amp that would appeal to people who like that sound. I had also done some design work for Carvin when they wanted to optimize a production design and get the most out of it, so when the economy slowed down I began taking in specific camps to upgrade, and from there we started developing mod kits. Customers went just their chassis in, which isn’t expensive to ship; we do the work and ship it back.

Through the later part of last year we were doing about one mod project a day, at first taking in just about anything, but we’ve since whittled it down to specific amps like the Pro Junior, Blues Junior, Blues Deville and the reissue blackface Deluxe Reverb, for example. With these amps it’s not the design that’s the problem – it’s just that the component selection is based on what is most practical and economical for an affordable production amp. We take those amps and optimize the sound as if production cost was not an issue, and we have customers who have had two or three different amps modded now, because they are basically getting a boutique amp and the tone that comes with it.

TQR: In the Pro Junior specifically, what areas of the circuit do you focus on for the mods?

There are really only so many ways to wire up a tube amp circuit, and in most cases we’re focusing on the same key areas in each amp – plate resistors, coupling caps in the EQ and phase inverter, and slop resistor for the EQ, and cathode resistors and cathode bypass caps are huge and often overlooked…. We hone in on the tone-shaping improvements that give us the biggest bang for the buck, and of course the Mercury transformers make a big impact. You can do any of these mods alone and improve the sound, but it’s really the cumulative benefit of using specific high quality components and the Mercury Magnetics transformers that determine the end result where you really hear the magic. We aren’t the only people doing mod kits, but you’ll notice that we use specific brands and types of caps and resistors in very specific places with our mods, and that’s the result of my having build amps for 12 years and learning what specific types of components are going to do in a particular part of the circuit.

TQR: You also added a power supply choke in the Pro Junior you modded for us….

We add the choke because it is so critical to what I call pick dynamics – the note response to pick attack, and improved sustain. Most budget amps just have a power resistor separating the B+ and the screen voltage – it works and does the job, but the correct choke in a circuit really adds a huge amount of that ying and yang you want to hear between the power amp and the preamp.

TQR: And what is the cost of the Pro Junior mod as you’ve done this amp?

With the full Mercury transformer set it’s $499 without a speaker swap. All the Hot Mods are in the $349 to $549 range until you get into 100 watt or JTM45 Marshall reissues and things like that. We’ve also done a lot of mods for the reissue Bassman…. As you know, there is nothing like a great Bassman, and there are a few revisions that Fender made that are just not happening at all, but when you get rid of those they can sound fantastic.

Here’s the deal…. You economically ship your chassis per Fargen’s instructions and they ship it back fully optimized. We asked Ben to send us a Hot Modded current production Pro Jr. for review and we directly compared it to our stock 2001 Junior, fully loaded with our NOS tubes and Jensen Vibranto. The modded amp Ben sent included stock Groove Tubes and a new Celestion Greenbackten.

As soon as we played through the Hot Modded amp, we heard the same dominate midrange push and lack of treble presence we had heard at first in our own amp. Less pronounced with brighter single coils, yes, but still too middy for our taste, so we subbed in the JensenC10Qfor the Greenback and the angels were singing again – sopranos, altos, tenors, and baritones all present I the choir. In fact, both amps sounded similar with the stock tubes in the Hot Mod Pro and our stock model with the NOS tubes – thick, rich and very smooth with excellent dynamic response and full, clear fidelity. Fargen’s Hot Modded Pro Junior possesses smoother, warmer overall tone while our Pro still sounds brighter and a little glassier overall. We suspect that a bias pot and lower voltages would tame the intensity of the distortion, but the 5751 does a nice job as an easy workaround. Fargen’s amp was also a little quieter at idle than ours, although we hadn’t noticed this until we had a quieter amp for comparison. For more information on all of Fargen’s modifications, check out the Hot Mod pages on the web site.


View PDF Article

Mercury kit has New Output and Power Transformers

Last year, Epiphone tossed a small pebble into a large pond with the introduction of its Valve Junior amplifier – and its launch caused a tsunami.

Available as a stand-alone head or a 1×8″ combo, the Junior was as basic as an amp could be for something that still produced sound. With just two tubes, two transformers, one speaker, an input jack, and a volume knob, when a player plugged into one, there was very little to get between their guitar and their ear. And the Junior turned out to be a very good-sounding amp. It’s doubtful that any owner of a pre-’67 Fender Champ sold it after hearing the little Epi, but for under $140 for the combo and only $99 for the head, the Junior was definitely the steal of the day.

Paul Smith of Mercury Magnetics was harassed into purchasing a Junior by a journalist who insisted that if Smith didn’t agree it was the best-sounding amp he’d heard for anywhere near the asking price, said journalist would eat said amp.

Smith agreed, then he hauled the Epi into his office. Mercury’s Sergio Hamernik and Alan Cyr of The Amp Exchange, in Los Angeles, mercilessly dissected the helpless Junior for weeks before deciding on the optimum power and output transformers and choke.

“We didn’t follow any established recipes for getting tone,” Sergio said of the development of the components. “It’s not a Champ or a ‘me-too’ thing. All we were interested in was getting a tone that a musician would find inspiring.”

The kit Mercury devised has new output and power transformers, a choke added to the circuit, a CD-ROM with photographic, step-by-step instructions for do-it-yourselfers, bolts and locking nuts to attach the choke to the chassis, four or five capacitors (depending on the version), five resistors and 10″ of 18-gauge insulated solid copper wire.

The Mercury Magnetics’ transformers, well, transformed the miniscule Epiphone. Side by side with a stocker, the Mercury-modded combo has way more presence. It breaks up a little earlier, and the harmonics are much more rich and even. Also, while the stock Junior had a slightly brittle or metallic edge to the distortion (especially after 12 o’clock on the volume knob), the Mercury mini monster stayed smooth all the way up to being dimed.

In addition to helping design the mod, Cyr installs the kit at his business. After installing nearly four dozen of the kits, Alan says that at least half of the mods are for professional musicians and go right to a recording studio from his shop.

“People tell me that they actually record better than their vintage amps,” says Alan. “Once someone hears the amp, they have a job for it. It’s a pretty easy sell; the modded amp sells itself, really. You wouldn’t believe the boutique amps musicians bring in to A/B against the Epiphone with the Mercury kit. They usually end up buying the Epiphone.” Alan charges about $150 for installation in addition to the cost of the amp and the kit. The cost can go up if other modifications are requested, and he figures that it would take an average amp tech about two or three hours to do the work.

Gary Roudenko, who sells Valve Juniors modded by Alan Cyr at The Amp Shop in Sherman Oaks, California, agrees with Alan that there’s little work in making the sale. “Whoever hears it wants to buy it,” says Gary.

The Mercury-modded Epiphone Valve Junior is on virtually all the time in my home studio. If my place caught fire, it would be one of the first things I’d drag out to the sidewalk before the guys in the red trucks showed up, despite its low cost.


Mercury Magnets Valve Jr. Mod Kit
Price $289 (combo kit)/$299 (head kit).
Contact Mercury Magnetics, 9167 Independence Ave., Chatsworth, CA 91311; phone (818) 998-7791; www.mercurymagnetics.com: The Amp Shop, 13701 Ventura Blvd., Sherman Oaks, CA 91423; phone (818) 386-5500.

Source: http://www.vintageguitar.com/3614/the-mercury-magnetics-epiphone-valve-junior-mod-kit/

Badass Power and Output Transformer

By now, you’re probably familiar with the Epiphone Valve Jr., the tiny, low-wattage, low-budget amplifier that hit store shelves a few years back and single-handedly energized a cadre of amp modders, so we won’t go into a cursory rehashing of its history. But it should be said that the amp’s simplicity — demonstrated by the lone chicken-headed volume knob that flies in the face of modern complexities — has since combined with a growing, gear-obsessed online culture to create a technological phenomenon. Like muscle cars in the sixties and Superstrats in the eighties, people are again obsessed with hot-rodding, and the Valve Jr. can be viewed as a major driver of that shift.

With modification tips spreading like an unrestrained virus through message boards and forums, facilitated by the tone-seeking faithful, it was only a matter of time before established companies caught wind of what was going on. One of those was Mercury Magnetics, an outfit best known for conceiving badass power and output transformers for a variety of modern and vintage amps. They wisely realized early on that the amp’s blank slate vibe would provide the perfect showcase for their talents. Mercury’sSergio Hamernik and L.A.-based amp wizard Alan Cyr went to work designing a custom set of transformers and choke for the diminutive Valve Jr. — a project that, ironically, was originally intended simply as a transformer demonstration kit.
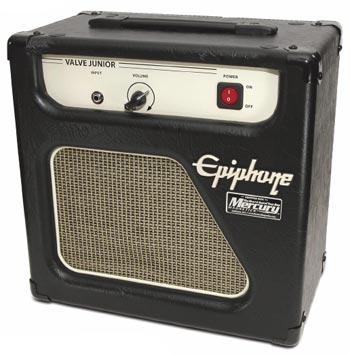
Transformers & You

Having been intrigued with the amp’s possibilities since its conception, we’ve tested out a variety of modifications, from the homegrown (see Dirk Wacker’s web exclusive columns at www.premierguitar.com) to commercial projects, such as the popular BitMo modification kits (reviewed in October 2007). For the most part, they’ve all added some usable capabilities while maintaining the original vibe of the amp — mainly, stripped down rock tones with passable tube warmth. But while most of these mod projects have expanded the tonality and scope of the Valve Jr., none have completely changed it. Mercury Magnetics’ Epiphone Valve Jr. Kit is likely the only one on the market that can make that claim.

The basic gist of the modification kit involves the installation of new power and output transformers, the addition of a choke — a rarity in budget amplifiers these days — and a basic reworking of the amp’s circuitry to eliminate some of the noise and hum that plagued early models. And while opinions in our office were divided over the amp’s new sound — the amplifier’s single-ended tonality became more pronounced, and highlighted some of the weaker links in the signal chain, including the stock speaker — there was absolutely no denying that the amp had an expanded tonal range that was unheard of in this price range. With more consistent power flowing into and out of our Valve Jr., there was more of everything. The lows became instantly tighter, the highs shimmered and the entire spectrum of sound now had a beautiful fullness. As that single volume knob rotated clockwise, the Valve Jr. bristled and growled like a Rottweiler about to lunge. This thing had a newfound set of marbles and I, for one, was not complaining.

We should note that our Epiphone’s sudden meatiness did not come easily. The kit’s instructions, included on a CD-ROM, seemed conceived not by English majors but by engineers, consisting of a lengthy PDF file filled with close-up photographs instructing users to copy what they see. To the company’s credit, the photos are well done, providing enough detail in each shot, but more text would have been helpful for those of us who aren’t the best at spatial learning. In fairness, we received an early version of the manual, and Mercury Magnetics has said that a much more complete, easy-to-navigate version is now available.

“The basic gist of the modification kit involves the installation of new power and output transformers, the addition of a choke — a rarity in budget amplifiers these days — and a basic reworking of the amp’s circuitry….”

While the clipping and wiring of resistors and leads may be feasible for most readers, this project also requires some advanced know-how like cutting traces and drilling holes in the PCB. New entrants to the amp mod game will quickly find themselves in way over their heads, and might want to consider some of the other mod options available if they are set on doing it themselves. In the spirit of complete disclosure, we got through the first few steps before we were forced to hand the project over to a local amp tech. It cost a few more bucks in the end, but the results were absolutely worth it, giving us an amp that we could record with, or even take along to small gigs. And who saw that coming?

The Final Mojo

Put into a strict cost/benefit matrix, products like the BitMo might come out as the better deal for the weekend modder looking to push the Valve Jr.’s envelope. The work and price involved with the Mercury Magnetics kit might seem like a large compromise for some groups — you could take the money you’d spend here and put it towards a higher-end amp, like Orange’s Tiny Terror, without spending days etching lines in a PCB. But those people are not who this kit is aimed at — this project is meant for those amp tweakers that dream of turning a drab, utilitarian piece of equipment into a snarling, steroid-infused monster, no matter the cost. And for these guys, this kit will be both intrinsically rewarding and positively orgasmic.

Source: https://mercurymagnetics.com/pages/news/PremierGuitar/PremierG-11.htm

The Next Big Amp

You’re are of the phenomenon… Suddenly a guitar, amp or some other new or pre-historic gizmo seems to come out of nowhere to achieve white hot, must-have status. The same thing can happen with previously unknown builders, too. Take Marshall 18W “clones,” for example… For the past 3-4 years these recreations of the rare originals were hot, hot, hot, with small custom builders sprouting and thriving from within the 18W Discussion Page. This was good for builders, good for players, and an unanticipated consequence was spawned — the rapid expansion of the cottage industry providing small amp builders with custom-made chassis, capacitors, transformers, cabinets, and just in time, an expanded range of guitar speakers developed by Eminence and Celestion. By the time Marshall jumped into the game with their own hand-wired 18 and 20W amps, the custom-built 18W wave had begun to crest and break, but there is now a new ripple on the horizon that we predict will soon form a formidable new wave among custom builders — the Vox AC30. Granted, Korg has already issued their own limited edition version of a hand-wired AC30 following the success of the British-made Vox AC30 TBX reissue, and we have reviewed the AC30 Custom Classic in this issue with backup color provided by The Radiators’ Dave Malone. While the Custom Classic is a very affordable and perfectly respectable alternative, it would be unreasonable to expect an economically built, mass produced amp to seriously rival a vintage JMI AC30 in original condition that has been competently serviced by an experienced tech. What about the original Matchless DC30 built by Mark Sampson? Great amp, but not the same. Players craving the authentic sound of an original AC30 have four choices today—find an restore an old JMI, buy a reissue and play it as is, have the transformers, caps and resistors in the signal path of your reissue amp upgraded, or buy booteek.

Well, it’s one thing to lovingly resurrect the rather Spartan Marshall 18W circuit, and quite another to tackle the original JMI design, which is much more complex, costly and labor-intensive. Furthermore, some builders may succumb to the temptation to significantly “improve” the original AC30 circuit. That would be a mistake. The successful builder will locate a vintage AC30 with truly bitchin’ tone (assuming they are capable of identifying said bitchin’ tone) and build more, per the specs revealed by blueprinting the old one. As far as we know, this has yet to happen on a meaningful scale. To date, we have located one potential candidate built by DST Engineering that will be reviewed next month. If anyone reading this believes there are more, please let us know.

Meanwhile, let’s address the common belief that 45 year old Vox amps are too unreliable — dangerous, even — for ecstatic thrashing, let alone regular gigging. While it is true that the design of the AC30 (and AC50) provide precious little ventilation (the top vents are stingy at best), we have seen AC30s used by touring musicians and there were no flames shooting from the back (Daniel Lanois didn’t even bother with a backup). So we asked ace amp tech Don Butler (Toneman) to precisely describe the steps he takes to make a vintage Vox roadworthy…
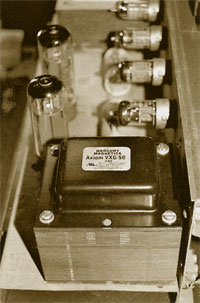
Don Butler: Vintage AC-30s suffer a lot from neglect. People are under the misunderstanding that all you need to do to any vintage amp is replace valves/tubes occasionally, but it requires much more than that. Here’s what I do when I get an AC30 or AC50 in for service that hasn’t had anything done to it since the day it left JMI in Darford, Kent…

Replace the dual 16uf @ 500v can, replace the 32uf @450v cap in the supply line that goes from the bottom power amp section to the preamp, and replace the dual 8uf can in the pre-amp. Replace the 32uf @ 450v cap for the Top Boost circuit (if the amp has integral Top Boost). Replace all the 25uf @ 25v cathode bypass caps (I see a lot of Vox amps where all of the main filters have been replaced but not the cathode bypass caps. It’s really just as important to replace these as well, as they set the gain for each area of the circuit they’re in). While I’m at it… Electrolytic caps have a lifespan of 7 to 10 years. After 10 years they start to deteriorate and slowly affect the way your amp functions (and not for the better, either). If you have an amp that 35-45 years old with original filters in them, well then, you’re asking for a lot of problems by not changing them. I’ve had a few vintage amps where the filters were not changed and they eventually shorted, taking the output tranny or choke of the mains tranny with them. To me they’re cheap insurance to keep your amp working properly and sounding good. By the way, the worse thing anyone can do to any amp is not turn it on for at least an hour a month. That keeps the electrolyte in it’s liquid form and prevents it from drying out and crystallizing.

Back to JMI-land — replace the output section cathode bypass cap (250uf @25v) and the four 100 ohm resistors on each EL-84 socket. These almost always drift way out of tolerance. Use 1 2att 100 ohm carbon film. On any voltage path resistor that needs to be replaced, use a carbon film. But, in the signal path, never use anything but carbon comp, otherwise it won’t sound the same. Vox always used carbon comps for everything. These days you can get 5% tolerance carbon comp resistors — in the sixties you were lucky to et 10%, and most used + or – 20% resistors.

Check each resistor with a meter. If the resistor is more than 20% off, replace it. Check the output tranny. Measure the primary side from center tap to each anode. The center tap is always soldered onto the main supply filter can. Be sure to discharge the cans before you do this!! The anodes are hooked up to pin #7, and they should read very close to each other from the center tap to each anode. Each era had different readings. A Haddon output transformer has a different primary reading than a Woden and different from an Albion as well.

Clean each valve socket, input jack and pot with Caig DeOxit D-5 contact restorer. And here’s a bit that is as important as everything else — make sure every nut, bolt, screw and pot nut is tight. You would not believe how much you can improve the noise and hum in an AC30 simply by doing this. I’ve had amps where every one of them is loose! On the 12AX& that is used for the Normal and Brilliant channels., JMI used a wire from pins 4 & 5 to ground to keep the filament supply grounded. Cut this wire off from the pins to ground. Take two 100 ohm resistors and attach them from each side of the filament supply at the pilot lamp to ground. This is what Fender did for years to make the filament supply quiet. It’s an easy “center tap” for the 6V AC filament supply.

Check all your valves/tubes. Always use a matched set of EL-8rs and good 12ZX7s and a decent 12AU7. Spend the money for a good rectifier! You have to look at the cost of valves as an investment in your tone. Good preamp valves should last at least 10 years for NOS. I’ve seen many Ac30s with perfectly working Mullard GZ-34s that were 40+ years old. EL-84s get beat-up pretty good, but still important to buy quality valves. This is also important: With any and every JMI Vox Amp, use a Variac! Why? My wall voltage reads anywhere from 114v to 122v A.C. Vox amps want to see 105v to 110v MAX! The voltage selector may say 115v, but Sergio at Mercury Magnetics has told me many times that the real input voltage of old JMI amps was 110v max. If you plug your AC50 into the wall at 1222v, instead of your B- supply reading 470v like it should, you’ll get over 500v D.C. Most of the components are rated at 400v-500v max. By putting more in you run the risk of shortening the life of most of the components if not frying them outright. If you follow this advice and servicing recommendations and use a Variac, you should have a happy AC30 that will work for you for years without trouble. It doesn’t hurt every few months to tighten up all the screws, nuts, etc. If you tour or gig with an old AC30, you have to know at least a little bit about how to maintain your amp. If you’re too lazy to do that, then buy a new Custom classic and send it to me to mod into one that sounds very close to a JMI-era amp. There’s a good book you can get from a guy named Stephen Grosvenor in the U.K. called “A Service Engineer’s Guide to the Vox AC30 Valve Amplifier.” This just came out in June (’06).

TQR: Not all power tubes can take the heat that Vox amps produce. What are your favorite choices for output tubes in old AC30s and AC50s and do you have any suggestions for keeping these amps running at lower temps?

Don Butler: AC30s — Tungsrams and Polem/Telem (same manufacturer — these are made in Poland) for NOS and EI Elites for new tubes. The Tungsrams are very clear, open sounding with nice chime on the top end and a good tight bottom. Same with the Polems, but the Polems have a bit more midrange. I find Mullards very dark and flat by comparison. I’ve tried just about all the NOS EL-84 types in my Voxes and Marshall 1974X. The EI Elites are a great sounding tube but lack just a bit of the detail and harmonics of the NOS. Still, a great sounding tube compared to the rubbish that’s being made these days.

TQR: You’re known for upgrading stock “reissue” amps. Describe the typical upgrades and modifications you make to reissue AC30s and the most recent AC30 Custom Classic.

Don Butler: I replace the output tranny with a Mercury Magnetics clone, same with the choke, as the choke is a very important piece of the puzzle. I replace every resistor and cap in the signal path with carbon comp resistors and Sozo caps. I have an audio “break-in” CD that I run into the amps after I’m done. About 4-5 times simulates the amp having been played for around 80-100 hours. I do this because every output tranny takes around 20 hours to break in, and the Sozo caps take around 100 hours to break-in. This way when my customer gets their amp back it’s as if it’s already been played for a bit and should be more open and touch responsive than if it hadn’t been played. I do also play through them when I’m done. I have to make sure they sound right. I play them again after I run the CD through them, and it’s fun to hear the actual difference!

Source: https://mercurymagnetics.com/pages/news/ToneQuest/_2007/TQRJan07-1.htm

Valve Junior Guitar Amplifiers

The Mercury Magnetics Valve Junior Mod Kit

Last year, Epiphone tossed a small pebble into a large pond with the introduction of its Valve Junior amplifiers—and its launch caused a tsunami. Available as a stand-alone head or a 1×8” combo, the Junior was as basic as an amp could be for something that still produced sound. With just two tubes, two transformers, one speaker, an input jack, and a volume knob, when a player plugged into one, there was very little to get between their guitar and their ear. And the Junior turned out to be a very good-sounding amp. It’s doubtful that any owner of a pre-’67 Fender Champ sold it after hearing the little Epi, but for under $140 for the combo and only $99 for the head, the Junior was definitely the steal of the day.

Paul Smith of Mercury Magnetics was harassed into purchasing a Junior by a journalist who insisted that if Smith didn’t agree it was the best-sounding amp he’d heard for anywhere near the asking price, said journalist would eat said amp.

Smith agreed, then he hauled the Epi into his office. Mercury’s Sergio Hamernik and Alan Cyr of The AmpExchange, in Los Angeles, mercilessly dissected the helpless Junior for weeks before deciding on the optimum power and output transformers and choke.

“We didn’t follow any established recipes for getting tone,” Sergio said of the development of the components. “It’s not a Champ or a ‘me-too’ thing. All we were interested in was getting a tone that a musician would find inspiring.”

The kit Mercury devised has new output and power transformers, a choke added to the circuit, a CD-ROM with photographic, step-by-step instructions for do-it-yourselfers, bolts and locking nuts to attach the choke to the chassis,four or five capacitors (depending on the version), five resistors and 10” of 18-gauge insulated solid copper wire.

The Mercury Magnetics’ transformers, well, transformed the miniscule Epiphone. Side by side with a stocker, the Mercury-modded combo has way more presence. It breaks up a little earlier, and the harmonics are much more rich and even. Also, while the stock Junior had a slightly brittle or metallic edge to the distortion (especially after12 o’clock on the volume knob), the Mercury mini monster stayed smooth all the way up to being dimed.

In addition to helping design the mod, Cyr installs the kit at his business. After installing nearly four dozen of the kits, Alan says that at least half of the mods are for professional musicians and go right to a recording studio from his shop.

“People tell me that they actually record better than their vintage amps,”says Alan. “Once someone hears the amp, they have a job for it. It’s a pretty easy sell; the modded amp sells itself, really. You wouldn’t believe the boutique amps musicians bring in to A/B against the Epiphone with the Mercury kit. They usually end up buying the Epiphone.” Alan charges about $150 for installation in addition to the cost of the amp and the kit. The cost can go up if other modifications are requested, and he figures that it would take an aver-age amp tech about two or three hours to do the work

Gary Roudenko, who sells Valve Juniors modded by Alan Cyr at The Amp Shop in Sherman Oaks, California, agrees with Alan that there’s little work in making the sale.“Whoever hears it wants to buy it,” says Gary

View PDF Article

Transformer Differences in the early Plexis

I have a 1987 model 50-watt reissue Plexi head that is completely stock. I don’t care for the sound of an attenuator, and I want this amp to sound as close to an older Plexi as it can get. What do you recommend for the best possible tone?

We get this kind of question nearly every day. I’m sure you’ve heard the phrase, “No two Plexis sound the same,” but there’s a ring of truth to that. One could surmise that if Marshall (as well as other amp manufactures of the time period) ran short of parts it would substitute the next-closest thing to keep the production line moving along, which would logically explain the numerous differences in circuitry that have been documented. Additionally, a lesser known fact is that there were also transformer differences in the early Plexis.

If, for you example, you were to substitute one power transformer for another, the B+ (high voltage) might be higher or lower, which would have a direct impact on the tone, performance and feel of the amp. This helps to explain why some Plexis are harsh, overly bright and don’t break up well, while others break up nicely, have a warmer tone and have a better overall feel.

How can you get your reissue Plexi to sound, feel and perform more like an older Plexi? First, let’s agree that tone is a matter of taste, and in matters of taste there can be no right or wrong. Simply put, it comes down to whatever works best for each individual player based on his or her preferences in regard to tone.

Transformer Upgrades: Simply changing the output transformer is enough to satisfy the needs of some players. For others it also requires upgrading the power transformer as well as the choke. I’m sure there are many of you who may wonder, “Why change the choke?” Rest assured that selecting the right choke can make as much of a difference in tone and feel as changing the output transformer, and the same can be said about upgrading the power transformer. Many companies offer Plexi-spec output transformers as well as a complete Plexi-spec replacement transformer kits. We exclusively use Mercury Magnetics and would encourage you to check them out. Look at the transformers from other companies too. If you aren’t certain what you use, please feel free to call us.

Components: This has been covered at great length on numerous forums and bulletin boards across the Internet. Can upgrading the components on the PCBs (Printed Circuit Boards) make an audible difference? Yes, absolutely. What are the best components to go with? Again, this is a subjective thing. Upgrading the coupling capacitors (caps) from the box style caps to higher-quality caps (e.g. SBE Orange Drops, Mallory, Hovland MusiCap, Solen, Auricaps, etc.) will no doubt provide an overall sonic improvement. For cathode bypass caps (caps in series with the cathode resistors in the preamp section), the majority of players seem to gravitate toward non-polarized cap cathode bypass capacitors versus the polarized bypass caps. For resistors I personally prefer metal film, since they don’t drift off value over time and will produce less noise/hiss over time. Opinions vary from one person to the next, though, so use whatever you’re most comfortable with.

Master Volumes: You can go with a pre- or a post- PI (Phase Inverter) master volume. Both have their advantages, but both have disadvantages as well. The easiest to hookup would be a pre-master volume (see JCM800 2204/2203 schematic), which is beneficial in that the EQ section (Bass, Mid, Treble) is much more active and responsive. There are various kinds of post-PI master volumes. Some are extremely transparent, while others color the tone of the amp in an undesirable way. The advantage to a post-PI master is that you can get the vintage distortion or breakup much like you do when you turn a Plexi to somewhere in the range of 5-7 (on a scale of 1-10). Our V-Plex Series amplifiers employ the post-PI master volume. Some of the Plexi reissues have not come with screen-grid or input-grid resistors. Without these resistors Plexis tend to sound squishy, muddy and smeary. For EL34’s I recommend 5-watt 1K screen-grid resistors, and for the input resistors (pin #5) I recommend .5- watt 1.5K metal film.

Feedback resistors: We have seen many different values in the older ’60s Plexis. We’ve also seen the resistor assigned to the 4-, 8- or 16-ohm tap as well as the positive side of the speaker jack. Do they all sound different? Yes, they do. Remember, there is no substitution for hands-on experience when it comes to determining what sounds and feels the best. I hope this helps you find the tone you want. Have fun tweaking your amp.

View PDF Article

DRZ-MINI-C

Add this choke to your amp for improved tonal richness

MM-3H-CH

3 Henry Mini-Choke — DCR = 92Ω — tolerance +/-10%

FBLDV-C

Add this choke to your Blues Deville for improved tonal richness

FBLDX-C

’90s to present Blues Deluxe — 3 Henry / 200 mA Choke

Original Fender Part #125C1A — 2 13/16″ mounting centers

FBLJR-C

3H — add this choke to your Blues Jr. for improved tonal richness

FC-SUP

Brown, Blackface, Silverface — 3 Henry / 200 mA Choke — Original Fender Part #125C1A

2 13/16″ mounting centers

F-EXCEL-C

3H — add this choke to your Excelsior for improved tonal richness.

FPROJR-C

3H — add this choke to your Pro Jr. for improved tonal richness

MESA-CH

3 Henry — add this choke to your head or combo for improved tonal richness — Drop-in Upgrade!

F-PRINCEII-C

Mid ’80s Reverb II — add this choke to your amp for improved tonal richness

FBFPC

Blackface — add this choke to your amp for improved tonal richness

FTCC

Tweed — 5E1 — 5 Henry, 370 Ω DC resistance, 40 mA current rating

2″ center to center mounting holes — same as Tweed Princeton choke

MCL5-C

Class 5 — add this choke to your Class 5 for improved tonal richness

P-CLASS30-C

Add this choke to your head or combo for improved tonal richness

P-DELTAB-C

Delta Blues — add this choke to your amp for improved tonal richness

VOX-NT-C

Add this choke to your Night Train amp for improved tonal richness

M-1959HW-CH

For the 1959 Hand-Wired reissue amp — 2 Henry value

Bolt hole spacing is 2 13/16″ center to center

(For a 3 Henry choke use the MAR100-C)

B52-60-C

3H — 150mA — Upgrade! — add this choke to your 60W head or combo for improved tonal richness

CRT-BV120-C

Blue Voodoo 120 watt — add this choke to your head or combo for improved tonal richness

CRV-LEGA-C

Legacy — Add this choke to your head or combo for improved tonal richness.

JETC-50W-C

3 Henry choke — mid-sized — 2 13/16″ mounting centers — DCR: Approx 92 Ohms

MAR-DSL100H-C

Add this choke to your DSL100H amp for improved tonal richness

M-JCM2000-C

JCM2000 — 3H — 250mA — add this choke to your 100 Watt JCM2000 for improved tonal richness

P-BUTCH-C

Add this choke to your head or combo for improved tonal richness — Upgrade!

P-JSX-C

Add this choke to your Joe Satriani Model JSX head or combo for improved tonal richness

P-VALVEK-C

Valve King– add this choke to your head or combo for improved tonal richness. — Upgrade!

P-VTM60-C

Add this choke to your VTM60 for improved tonal richness

P-XXX-C

Add this choke to your XXX amp for improved tonal richness

RAND-RM100-C

Randall Model RM100 — add this choke to your head or combo for improved tonal richness

BUGERA-1960-C

1960 — add this choke to your amp for improved tonal richness

MAR-HAZE-40-C

Add this choke to your Haze 40 amp for improved tonal richness

P5150-C

Add this choke to your head or combo for improved tonal richness

P-6505-C

Add this choke to your 6505 for improved tonal richness

P-CLASS20-C

Add this choke to your head or combo for improved tonal richness

JETC-20W-C

Add this choke to your Head or Combo for improved Tonal Richness.

OR-TH30-C

Add this choke to your head or combo for improved tonal richness

DRZ-CAR-G-C

add this choke to your amp for improved tonal richness

M-DSL201-C

DSL201 — 9H — add this choke to your DSL201 for improved tonal richness

BLK-STR-HT20-C

Add this choke to your head or combo for Improved tonal richness

CARV-V3-C

Add this choke to your head or combo for improved tonal richness.

CRV-LEGAIII-C

Legacy III — Add this choke to your head or combo for improved tonal richness.

CRV-X100B-C

X100B — Add this choke to your head or combo for improved tonal richness.

JETC-100HDM-C

Add this choke to your Head or Combo for improved Tonal Richness.

MM-9H-CH-M

9 Henry choke — mid-sized — DCR = 240Ω — tolerance +/- 10%

MM-9H-CH

9 Henry Mini-Choke

MM-MULTI-9C

Mercury’s exclusive multi-tap Multi-Choke – Size: Micro
1 Henry (92Ω DCR)
3 Henry (160Ω DCR)
5 Henry (210Ω DCR)
7 Henry (246Ω DCR)
9 Henry (285Ω DCR)

FTC-S

3.5H / 200mA Choke — Fender Tweed Era Part #14684 — Small size — 2 13/16″ Mounting Centers

MAR100-C

3H — 250mA — 2 13/16″ Mounting Centers — DCR: Approx 92 Ohms

For DSL/TSL 100 watt amps w/o a choke

MC10H

10 Henry / 250mA Choke — 3-9/16″ Mounting Centers — DCR: Approx 275 Ohms

EPJR-C3H

3 Henry Choke – Upgrade over stock resistor

FBFS-C3H

Blackface Era 3 Henry / 200 mA Choke — Original Fender Part #125C1A

2 13/16″ mounting centers

FBFS-C7H

Same mounting centers as the #125C1A choke — 7 Henry, 200mA — Upgrade!

FRC

3.5H / 100mA Choke — Original Fender Part #125C3A

175 ohms DCR — 2″ mounting centers

FTC-S10H

10H Tweed Era Choke — 2 13/16″ mounting centers — DCR: 192 ohms

MM-10H-CH

10 Henry choke — mid-sized — 2 13/16″ mounting centers — DCR = 210Ω

MM-1H-CH

1 Henry Mini-Choke — DCR = 28Ω — tolerance +/-10%

MM-30H-CH

Larger 30 Henry choke

MM-4H-DUAL-CH

2 & 4 Henry choke — 4 screw mount. Uses Grain-Oriented Iron

MM-6H-CH

6 Henry Mini-Choke

MM-MULTI-CH-25

Mercury’s exclusive multi-tap Multi-Choke — Size: Large
5 Henry (63Ω DCR)
10 Henry (88Ω DCR)
15 Henry (110Ω DCR)
20 Henry (125Ω DCR)
25 Henry (140Ω DCR)

MM-MULTI-MC5

Mercury’s exclusive multi-tap Multi-Choke — Size: Micro
1 Henry (93Ω DCR)
2 Henry (130Ω DCR)
3 Henry (158Ω DCR)
4 Henry (185Ω DCR)
5 Henry (205Ω DCR)

MM-20H-CH

20 Henry choke — mid-sized — DCR = 225Ω — tolerance +/-10%

MM-MULTI-L5

Mercury’s exclusive multi-tap Multi-Choke — Size: Mini
1 Henry (33Ω DCR)
2 Henry (44Ω DCR)
3 Henry (53Ω DCR)
4 Henry (61Ω DCR)
5 Henry (68Ω DCR)

MC25-H

25 Henry choke

MM-40H-CH

Larger-sized 40 Henry choke @ 50mA

MM-MULTI-12H

Mercury’s exclusive multi-tap Multi-Choke — Size: Large
2 Henry (32Ω DCR)
5 Henry (50Ω DCR)
7 Henry (58Ω DCR)
10 Henry (69Ω DCR)
12 Henry (76Ω DCR)

MM-MULTI-CH-9

Mercury’s exclusive multi-tap Multi-Choke — Size: Large
1 Henry (27Ω DCR)
3 Henry (48Ω DCR)
5 Henry (60Ω DCR)
7 Henry (71Ω DCR)
9 Henry (80Ω DCR)

MM-MULTI-CH-30

Mercury’s exclusive multi-tap Multi-Choke– Size: Large
10 Henry (110Ω DCR)
15 Henry (135Ω DCR)
20 Henry (155Ω DCR)
25 Henry (172Ω DCR)
30 Henry (190Ω DCR)

F-VAPORIZER-C

Add this choke to your Vaporizer for improved tonal richness

F-TONEM-C

3H — add this choke to your Tonemaster for improved tonal richness.

GA-AT-MED-CH

60’s Atlas Medalist Bass Amp Choke — PN TF-E3021H

MAR-JCM1-C

1W Anniversary Model — Add this choke to your amp for improved tonal richness

EP-VALSPEC-C

Add this choke to your Valve Special for improved tonal richness — Upgrade over the stock resistor

MM-MULTI-9CM

Mini Multi Choke with 1, 3, 5, 7 and 9 Henry taps — 2-3/8″ Mounting Centers

CARVIN-MTS-3200-C

Add this choke to your MTS 3200 for improved tonal richness

SILKYN-50-C

Add this choke to your Super 50 for improved tonal richness

JETC-JCA22-C

Upgrade! Add this choke to your amp for improved tonal richness

The Difference a High Quality Transformer Can Make on Your Tone

In late 2009 I had the opportunity to talk with Sergio Hamernik about the history of the Mercury Magnetics, how he became involved in making transformers for guitar amplifiers, and the difference a high quality transformer can make on your tone.

How did Mercury get its start?

The company’s roots date back to the early ’50s. Mercury was started by an old General Electrics transformer engineer who was working there pre-World War II. He then went on to do a bunch of design work for the war effort. And in the early ’50s, hung a shingle and became self-employed.

The name “Mercury” came out of his passion for Mercury cars, he always drove a Mercury since the late ’40s — he loved those cars — and eventually moved from the East Coast to the West Coast where he found that there was a lot of military and aerospace work. A booming economy in the early ’50s gave him a lot of business.

I met him in the 1970s when I was an engineering student and an audio enthusiast. Back then the electronics world was well into its solid-state “evolution,” and interest in tube gear was quickly disappearing. Not for me, however. I found myself in demand as a guy who knew about those “old things”; not only the math, formulas and specifications but I also had the “ears.” I could fix and keep the old gear running. So, I worked as a hired gun for a bunch of studio heads and pro musicians.

Typically when an amp’s output transformer blew. No one seemed to know any better so it was just swapped by whatever “factory” replacement or an off-the-shelf “equivalent” catalog transformer was handy. The invariable result was that the amp’s characteristic sound was gone. And no matter what resistors, caps or tubes were used, it could not be rescued or returned to its original sound. It was the transformers, it turned out, that were the key. The problem was coming up with a way to remedy the blown transformer replacement or repair that wouldn’t alter its tone.

To further complicate things, most transformer people I dealt with just didn’t want to bother with the music industry. For the most part the established electronics industry considered the needs and opinions of the audio and MI (Music Industry) communities as subjective, run by kooks, and occupied by people who didn’t know what they are doing. Audio and MI had always been considered the illegitimate stepchildren to the rest of the industry.

Out of pure necessity I had to got involved with transformer design and manufacture. As a customer of Mercury, they had built many custom transformers to my specifications — although we had many heated, on-going debates on the subject because the company owner hated audio! He never did understand what made guitar amp transformers tick, or how musicians thought and reacted to them.

That aside, he pestered me for almost a decade to take over the company because he felt I was the only one qualified. Eventually I did, and that was when Mercury got serious about the guitar amp connection. Sometimes you end up becoming an expert at something when no one else wants to do the job.

By the time I took the helm we were developing a really good and workable understanding of the relationship of transformer design to decent tone and how amps should behave. And around 1980 we began the long and arduous task of collecting and cataloging transformer specifications for every vintage amp, from all over the world. The deeper we dug, the more apparent it became that there were all kinds of factors that no one had previously suspected that affected guitar tone. And likewise, no one seemed to be paying attention to such things.

In turn, we invented proprietary technologies to aid this work. Even after three decades, we’re still innovating and discovering new things. From that fundamental research came our now famous ToneClone series, and later the Axiom line, which is probably the most significant advancement in toneful guitar amp transformer designs since the ’50s. Both product lines, we’re proud to say, have distinctly different niches in the annals of guitar amp tone.

We’ve not only cured the old transformer tone issues, but made it possible for musicians to upgrade their existing amps. And we’ve also made it possible for amp builders to reproduce amps of the same or better grade than even the most outstanding vintage amps of the past.

When did you become involved with making transformers for guitar amplifiers?

Back in the ’70s I worked for people on a one-to-one basis, usually under confidential arrangements, with certain rock stars that just didn’t want to be bothered by their names being flaunted around. What they want was their amps running right for recording, projects, touring, etc.

The problem was that when technicians would fix the amps they’d often loose their tone. It turned out that the culprit was the replaced output transformers. A changed output transformer would completely alter the character of the amplifier. So as I was the guy doing most of the work to resolve this issue, this expertise was brought to Mercury where we began a special division to cater to the guitar heroes.

Word got around rather quickly that Mercury was able to repair, rewind, and restore the original transformers and it just grew from there. The whole “Tone Clone” thing came from artists who had these amazing irreplaceable amps, amps that often made recording history. They didn’t want to take these amps on tour. So we came up with the innovative idea of cloning their original transformers that they’d fallen in love with. With the clones we could now easily make, for the first time ever, several identical amps for them. Or they would assign their techs to drop-in the cloned transformers so they would have, for example, six amps that would all sound the same as that first perfect amp.

These artists could now go on tour and not worry about breakdowns or theft, and keep their prized-originals back at home.

I worked with Ken Fisher, the whole Trainwreck thing, and a lot of the early boutique guys — and still do with Alexander Dumble. They preferred to keep things confidential and not let too many people know who their sources were because there were so few transformer designers that catered to the guitar amp market.

There was also a slow-but-steady dumbing-down occurring in audio and all that had been the post World War II momentum. Many of the ex-military components we’d been using were high tolerance parts, with mil-spec formulations of iron and copper and so on, that had been used to win the war effort. During the ’50s and ’60s we enjoyed the benefits of those high quality components at surplus prices. But by the late ’70s, and definitely in the ’80s, steel manufacturers started to change recipes to make the iron and other materials much more affordable.

You can hear the differences between a late ’60s Marshall, a late ’80s Marshall, and a Marshall today. A good listen will really help you to understand what changes took place. Unfortunately they made so many of those changes more out of economic considerations than anything else. The amps were loud but they seemed to be losing sight of the fact that their tone was disappearing — the “recipes” had been changed.

In addition to many other factors, the iron that Mercury uses is custom-formulated specifically for us. We buy enough of it to be able to dictate the exact recipe from the foundries. And all of our iron is literally from American ore processed right here in the USA. 100% American made to the original specs. Are there drawbacks? Well, some of the iron rusts more easily, but that’s actually a good thing because rust is a natural insulator. But the opposite is also true. When you see a modern transformer with a silvery or a shiny core just know that they aren’t worth a damn when it comes to tone.

Can you tell us more about guitar amp transformer history?

Here’s an amusing anecdote that may help explain our case for guitar amp transformers: There’s a great deal of documentation, from back in the mid-’50s, where engineers, and other technical people, were writing really scathing reports on how awful the transformers were in the audio industry. Those darn transformers! When tubes were plugged into them there was a tendency to distort! And they couldn’t have any of that! Likewise with harmonic distortion — especially even-order harmonic distortion.

Many amp builders, techs and players, today, don’t understand that tubes were originally designed to run dead clean, linear, and be efficient voltage amplifiers. That the tone we’ve all come to know and love is caused by the transformers literally “irritating” the tubes into distortion.

Which is, of course, the whole point of what we are looking for in guitar amps. Back in the ’50s, they were fighting to get rid of those nasty distortion tonal characteristics. Now we embrace them. But that was audio – guitar amps were still in they’re infancy and yet to be realized. It took a generation or two of innovative musicians to take those “undesirable” tonal characteristics and create music; to work with distortion and make it into something musical.

Ironically, it was that no-distortion engineering mindset that ushered in solid-state, and why it was so openly embraced in the ’60s. It was solid-state electronics that eliminated the output transformer.

In the late ’60s, Vox went to Thomas Organ to have solid-state amps built. They were very proud of this state-of-the-art amplifier. Curiously, I met a few of the musicians from the late ’60s that were sponsored by, and using, those amps. The tone was so awful and unbearable that they used the enclosures but hid their old tube gear inside! As you may already be aware, the vacuum tube industry is alive and well, and we’re still waiting for the solid-state industry to catch up.

Part of the confusion is that musicians assume it’s the tubes that give them their tone. There’s a lot of synergy going on in an amp, and the tubes certainly contribute, but let me illustrate this another way. Did you know that there is what we call “output transformer-less” amplifiers in the HiFi world?

These amps basically parallel a bunch of power tubes together until they get down to 16, 8, or 4 ohms. There is no output transformer, so you literally connect the speaker directly to the tubes. If you ever get the opportunity to do an audio demo with this style of amp, you will find that while it works, it sounds nearly solid-state. The output transformer is what provokes a tube into giving the characteristics that we find desirable as far as tone. Audio engineers didn’t want the tubes to distort, as tubes are basically nothing more than very clean voltage amplifiers. But when you have a reactive element like a transformer, you irritate the tubes into harmonic distortion.

Therefore, the difference between a good and mediocre transformer is based on how it works and syncs with these tubes to produce the kind of tone or distortion we are looking for. It is not as easy as winding some wire around a steel core, if it was then we would not be having this conversation.

How does a Mercury transformer made today compare to the transformers made in the golden age of amps (the ’50s and early ’60s)?

One of the biggest mistakes existing in today’s amplifier community, especially amongst hobbyists and do-it-yourselfers, is to blindly copy every aspect of a vintage amplifier hoping to get a piece of that golden tone. At best, this method still produces very random results. One of the key reasons for this is the often-overlooked missing transformer formula. A builder will fuss around with the tiniest of other details but completely miss how the transformers fit into the equation. In short, get the transformers right, then the rest is much easier. Here’s another look at theses deceptively simple devices:

For vintage-style transformers, Mercury starts by duplicating the transformer design, build errors and all. We use the best grade components like they did in the ’50s and ’60s. We wind every layer and every turn as if it were a circuit in itself. In fact, the diagram on the left shows an output transformer circuit equivalent. Most people would think it is an audio circuit. These things are fairly complex, and all the numbers have to be right in order to get the tone we want as musicians.

We really do follow the recipe to a point. Although we don’t repeat any of the mistakes or inconsistencies that were prevalent, but didn’t affect tone. For example, if you were into Fender tweeds or late-’60s Marshalls. To do this we would literally put the word out to rent or borrow dozens of amplifiers to find the one or two that had the sound, and dismiss the rest. There were typically many inconsistencies as well as “happy accidents” in the best-sounding examples we’ve auditioned. A lot of this has to do with the sloppy tolerances of the original transformers.

For our transformers we extract the best parts and virtues of the original best-of-breed transformers and remove all of the obstacles to tone. Perhaps just as important is that we adopted a “cost is no object” approach, making our transformers equal or better than the originals — and then add consistency. We now have this so finely tuned that if you bought a transformer from us five years ago, and then the same one today, it would sound exactly the same. You don’t want good batches and bad batches, which is precisely what made the original production runs vary so much.

Another issue is the so-called controversy between paper tubes and nylon bobbins. In the vintage years they used both. Some people think that somehow, some magical quality comes from using a paper tube winding form over a nylon bobbin. Tonally it made no difference at all. Paper tubes were widely out of tolerance most of the time because of how they were made. They would wind multiple coils on long sticks then use a saw or blade to cut off the various coils. In order for these long tubes or coils to come off of their winding forms they had to be conical. So this invariably meant that the first coil would be larger in diameter and the last coils smaller. As you can see, it’s easy to see why each of these inconsistently-made bobbins had a greater difference than the material they were made from. And there are other issues that occur over time, like paper has a tendency to disintegrate, collect moisture, etc.

When we switched to using nylon bobbins the tolerances were within 3,000’s of an inch of each other, as opposed to the wildly varying amounts found in paper tubes. If you were ever to take apart a really old transformer (pre-’70s) sometimes you’ll find wood wedges that are jammed between the paper tube and the core because that piece of paper was too wide and too sloppy to fit into the core correctly! They would force a wedge in there so the darn things wouldn’t rattle!

Which method, paper or nylon, made for the best tone? It’s the luck of the draw. We’re fortunate in that we have all these stars as clients who have these amazing-sounding amps. They went through the hassle of culling and choosing and picking the special amps that inspired them. The amps they recorded with. When we analyzed their transformers we sometimes found happy accidents or other little anomalies that would set a transformer apart from already sloppy tolerances of the standard production run.

There are little subtleties and changes from one transformer to another that make a heck of a difference tonally. So when you look online at our list of ToneClones, just know that they are from the hand-picked, best-of-the-best amps of their model and era. We continue this “weeding” process every day — and there’s apparently no end in sight. And that’s why, with some amps, we have several versions — each with its own tonal qualities — and others only a single set to choose from.

We use this process to establish new benchmarks. And you never know, tomorrow a new variant may arrive that totally blows away what we already thought was as good as it could ever get.

It is interesting that you take that approach to upgrading — the never-ending search for better-sounding benchmarks.

There is no real money or glamour in what we do, it is really all born of a passion for music. I come from a musical family, my Mom taught me as a little kid that music was a form of “food.” And that hasn’t changed. Everyone who works at Mercury is just in love with playing and listening to music, and we all believe that there is always some room for improvement or a way to raise the bar somehow.

Back in the ’70s and ’80s there wasn’t really a need for a company that designed and sold transformers to the public, so I stayed away from the general public for as long as I could and really only worked with professionals.

But at some point I realized that it was the average player who was getting ripped-off. Things were getting dumbed-down, the tone is slowly and steadily being vacuumed out of the amps. They were becoming duller-sounding, less interesting and more noisy. So, we decided to formally launch this product line so the average guy could have access to our technology. It takes an extreme amount of labor and effort it takes to build them to this standard. You know, even if someone wanted to buy 1000 transformers we would have to no-bid them because we really don’t have any way of doing things quickly.

Automation isn’t a practical solution. Everything we do is wound by hand, one at a time; it is the only way it can be done. Say you have 100 turns and 10 layers, well that would mean 10 turns per layer — that is how a machine would think of it. But what if a rock legend’s best transformer was 9 turns on one layer, 11 turns on the next, 7 on the next, 3 after that and so on, but the sum total ended up being 100 turns. Sometimes one layer can have a different winding style than the other; sometimes it is non-symmetrical meaning, if it is a push-pull, that one side of the primary doesn’t have the same turns as the other side. If that was the recipe that created the magic, we’d have to duplicate it. It’s just not practical to build machines to do that, so we end up having to do it by hand. It’s the proud old-school craftsmanship way of doing things. Something I think we could see a lot more these days.

We have a reputation for nailing tone. Our Fender transformers don’t sound like Marshalls, they sound like Fenders — and vice versa. In fact, we’ve become the industry’s new standard. If you were going to design or create a tube-based amp, it’s clear that we’re the folks to talk to.

Can you explain how a Mercury transformer can improve an amplifier’s tone and how they outperform the stock transformers found in most amplifiers?

In designing toneful transformers specifically for guitars (and that’s all we’re talking about here, not necessarily transformers for HiFi or any other purpose), the trick is in the magnetic field and how it behaves. The nature and the speed with which the iron reacts to the changing of an alternating current, in an alternating magnetic field, is what makes tone happen.

If you have “slow” iron, you’ll have a dull, non-sparkly sound with no bell tones — no matter what you do with the amp it will always be kind of noisy and fuzzy.

Where others have tried and failed they’ve blindly followed generic transformer formulas without understanding that guitar amps are different animals. They’ve somehow missed that point despite all the evidence to the contrary. The fact is that transformers for guitar amps do not necessarily follow textbook rules.

Indeed, it should probably be noted that we’ve developed a whole new technology around transformer design specifically, and only for the guitar industry. And that these designs are essentially irrelevant to any other use. But Mercury is also in a highly unusual position. Our decades of transformer “vivisection” have revealed all manner of unconventional tips ‘n tricks to us. And we’re now the keepers of this new, but proprietary, technology.

I seriously doubt that we could have done it without the, let’s call it “archeological benefits,” of our observations. Decades of studying the good, the bad and the ugly of guitar amp transformers have revealed a great deal.

Nothing that I have found in the reissue market, transformer-wise, even resembles anything that was made during the “the golden age of tone.” They are unrelated. The inductance, magnetic fields — all of that is just completely different and far removed from the original designs and recipes. So there is no way that a reissue amp is ever going to sound vintage unless they bother putting in the right ingredients.

With our Upgrade Kits, for example we’re trying to show people that we can move forward into new sonic territory from where vintage designs and tone left off. And our Axiom series transformers are the definitive showcase for this technology. Their tone is just amazing.

To push the point even further, we don’t include any “voodoo” parts in our Upgrade Kits. With the exception of the transformers, the Kits use only common, everyday, and off-the-shelf components. And most of our Kits also include a Mini-Choke. When the circuitry is correctly designed a Mini-Choke will make a huge improvement in an amp’s tone because, in terms of its power supply, it changes the way the amp works.

A good guitar amp is only as good as its power supply. If you have a dynamic and moving power supply that reacts to the demands of the audio end you’ll get get great note separation and good bass dynamics. You start to hear chimes and other phenomenon, and even the harmonics between the strings like a “5th note.” What the heck is the “5th note”? In barbershop quartets, if they get their harmonies right, they hear the “5th note” which is basically a harmonic of all four singers. We are doing that with our guitars thanks to distorted amplifiers.

Where did the idea for offering an Upgrade Kit for amplifiers like the Champ “600” and Valve Jr. come from and who designed the Upgrade?

I designed all of the magnetics (the transformers and Mini-Choke) and the general concept behind the Upgrade in league with Allen Cyr from the Amp Exchange. He is one of the most competent, finest amp designers I know of; there are only about five in the world that are true masters of the art — those who really know the math, how to read tone, how to listen to the subtleties of clean and overdriven sounds and tones, design circuits, and understand tube behaviors. As a bonus to those who appreciate this kind of thing, we always try to throw in some interesting tweaks and tricks that are unorthodox.

The idea is to spark some interest and perhaps get more people involved in tube-based amp tone and evolution. We expect some folks to study our Upgrade Kits, learn from what we’ve done, and take off into new territory from there. No one is offended by that.

But our initial concept was to take an inexpensive stock amplifier, one that cost no more than $100 or so, and modify it into a professional- or recording-quality amp for very few bucks. The Valve Jr. was the amp that gave us the inspiration for this project. Epiphone broke the mold with their little Valve Jr. amp. Out of the box it’s a remarkable value. So, although it was a bit of a challenge I thought it was interesting because we were not stepping on anyone’s toes — we were just taking something that already existed and designing an Upgrade Kit around it. A simple proof of concept that made the case of transformers and guitar tone. It just seemed like a cool thing to do. The project was validated when pro players began demo’ing our prototype amps — they couldn’t believe how amazingly great such a tiny amp could sound, it freaked them out, and they all wanted one of their own!

Our intention was to give the kid who was practicing guitar in his bedroom, whose parents are on a limited budget, REAL guitar tone. In a typical scenario, the parents buy a cheap little amp and guitar combo because they want to see if their kid will stick with it. But the kid doesn’t understand that the sound of the amp is fatiguing. He doesn’t understand why the amp doesn’t sound good. And he doesn’t realize that the amp is fighting him, tiring him out. I know that happened to me and so many of my friends when we were kids. Struggling with hard-to-play guitars and poor-sounding amps is probably the single-most reason so many budding young (and old) guitarists give up the pursuit of their dream. But some are rescued. One day they visit a guy, or hear someone play, who has the amp with the tone and with just the sweep a few chords they experience the “My gawd!!! I want to sound like this!” phenomenon.

That is what we’re trying to offer with these Upgrade Kits — where the tone is accessible to just about anyone. So they could have an amp that wasn’t dull or desensitized. An amp that allows them to make that real connection to the tone. Tone is not just about noise and volume, it is rather complex, and undeniably emotional.

At the LA Amp Show we had our Upgraded Fender Champion “600” running into a full Marshall stack. Here we had this little amp powering eight 12″ speakers and it sounded great. People kept asking to see the back of the amp thinking that we had somehow rigged up something, but it was just the little Champ “600” with our Upgrade Kit.

When you have a nice open tone it is not about counting watts because the window is so big and wide and the soundstage is so deep that it gives you the impression of more power. We are not putting out more power with the Upgraded “600” — but it sure sounds like it! It’s about opening up that tone window and giving you more.

It’s kind of like taking a radio whose volume is set to half way and having it placed about 20 feet away from you then bring it right next to your ear — the volume has not changed but you hear a lot more of its content.

One of the things we do when modifying a circuit is to lower the noise floor, which a lot of people overlook. Many amps, like the Valve Jr., have a nasty hum in standby. We had one that would just start to howl if you left it alone for a while! So whatever high noise floor it had would eventually feedback on itself and cause that noise.

Our focus is on inspiring people. We are trying to show people that they really can get great tone today, that there is no age that has come and gone. There is still a lot of fun things left to do with your amplifier when you are on the search for great tone.

Hearing how much these Kits improve upon the tone of the amplifiers, and how well thought-out they are, will a Mercury amplifier that is designed and built by you ever make an appearance?

No. We are a supplier of key components to the boutique industry and to several of the large amplifier companies, and that is a comfortable spot to be in.

There is no shortage of amplifier companies out there and it really is a conflict of interest if we were to start selling amps and transformers. I would rather stay out of it.

The whole point of the Upgrade Kits was an area where I didn’t see any conflict with the people who were in the amplifier business. In the end the Kits really represent a transformer demonstration. If you were to just show someone a picture of a transformer or even had one in your hand and tried to explain how much better their tone would be, no one would care — it’s a yawner. But when you build one of these inexpensive Upgrade Kits and you actually hear the difference that the transformers make, it really drives home our point that transformers are important, that they are the building blocks of guitar amp tone.

And in the end we do this because we love it, we really love what we do. We get to create all of these products that help people find their tone, and who wouldn’t what to do that?

Legalese and Stuff

Legalese and stuff:

All Mercury Magnetics® products are 100% handmade in California, USA.

Copyright © 1954-2025 by Mercury Magnetics. All Rights Reserved. Mercury Magnetics, Mercury Vintage, Partridge, FatStack, SuperStack, NewVolt, Mini-Choke, Multi-Choke, Mercury Custom Shop, Mercury Boutique, “The Heart & Soul of Your Amp,” “Holy Terror,” “Bad Guitar Tone — Whatever Its Evil Mission It Must Be Stopped!”, “Champ 600 Upgrade,” “XLG Upgrade Kit,” “Mean 13” and “The original British amp tone — shaken, but not stirred,” “Our Transformers are Stacked,” “The Essential Building Blocks of Your Tone,” “Mercury Studio-Pro Upgrade Kit for the VOX AC4tv,” UTM (Universal Transformer Mount), Amp-Saver and Copper-Tone are trademarks licensed to Mercury Magnetics. Axiom, ToneClone, Radiospares, VoodooScrew, Multiple Arrayed Geometric Inductive Coupling (M.A.G.I.C.), and APS (American Pro Series) are registered trademarks licensed to Mercury Magnetics. All other companies, products and trademarks mentioned on this website are trademarks of their respective owners. Unless otherwise noted Mercury Magnetics is not affiliated with any of these companies.

Mercury Mod and Upgrade projects and their documentation are the result of technical investigations made by the engineering staff of Mercury Magnetics. The disclosure of the information herein may pertain to proprietary rights, and the furnishing of these documents does not constitute an expressed or implied license to use such materials.

Mercury Magnetics® transformers and other products are in compliance with the European Union RoHS Directive 2020/95/EC with respect to the following substances: lead (Pb), mercury (Hg), cadmium (Cd), hexavalent chromium (CR (VI)), polybrominated biphenyls (PBB), and polybrominated diphenyl ethers (PBDE).

Mercury Magnetics® founded in Southern California in 1954 and incorporated in 1968.


CAUTION!

The voltages in your amplifier can be dangerous. Transformers and chokes are not user serviceable parts. Installation of these components should always be performed by an experienced technician.

The simple ability to use a soldering iron is not enough to qualify a “do it yourself person.” Those who are inexperienced in working with electronic circuits should never attempt to service their amplifier. Household line currents can be deadly!! Transformers, chokes and large filter capacitors can store a dangerous charge for several days or more after the amplifier has been unplugged. Never touch the terminals of such devices without being certain of their charge status. Risk of shock and damage to equipment may result from mishandling and/or improper use of these components. Please use common sense and always think safety first. After all, tone is most enjoyed when you are alive to hear it.

Mercury Magnetics’ Sergio Hamernik… Good Iron is Hard to Find

I have always had a passion for music and audio. Guitar tone through an amplifier aroused my curiosity early on because many of the design rules for hi-fi equipment didn’t apply to producing great guitar tone. In the case of vacuum tube amplifiers, transformer design has a significant influence on the characteristics of tonality. Unfortunately, there is not a lot of reference material available and many of the original designers have either retired or passed away. In the early 1980s my partner and I purchased Mercury Magnetics, a transformer design and manufacturing company, from one of the early pioneers who founded this company in 1954. Our close proximity to the Los Angeles recording industry gave us access to studio technicians and many well-known musicians. Out of necessity, and to meet the demands of this level of clientele, we had to develop precise, “no compromise” methods of documentation and assembly techniques to rebuild and replicate these transformers to exacting specifications. A past example of this was when a legendary guitarist sought our services to help solve a frustrating problem. A technician had replaced the original output transformer in his amp with a generic copy, which resulted in completely changing the character of the amp. Several breakthrough albums from the late 1960s and early 1970s were recorded using this particular amplifier, and the sound of that amplifier really had helped define his signature tone. Needless to say, most musicians are very concerned about maintaining the character and unique tonality of their amplifiers. We ended up rebuilding his original output transformer and we provided two additional clones as backup.

TQR:Are you referring to all types of guitar amps, or more specifically British amps rather than, say, vintage Fenders?

I think that in all guitar amps, regardless of origin or brand, you also supplying custom transformers to amplifier manufacturers. Our extensive collection of vintage transformer designs really began to take off at that point in time. The ongoing accumulation of the finest sounding examples we could find inspired our line of ToneClone® transformers.

TQR: What is it about those particular transformers that make them so special, and how do you evaluate them? Do you install them in an amplifier and A/B them, or is it done more or less on paper?

We do have the necessary test equipment and software to check various parameters, but ultimately the ear has to make that decision. We also plug in, play, and conduct A/B testing at our facility. I have a dedicated sound room at home that has been tuned for the purpose of testing and evaluating audio equipment. We are lucky, because the Los Angeles area offers us an amazing amount of guitar playing talent that continues to help us maintain a level of objectivity. Also, some of our best listeners are avid tone enthusiasts who work in and for the local studios. These people understand good tone and give us their experienced opinions.

TQR:And can you describe what it is that makes these transformers special? What would we hear, specifically?

Having a detailed transformer spec is only the beginning. Breaking down into fine details what materials and assembly techniques were used decades ago helps us assure our customers an accurate reproduction of vintage tone. We have carefully selected the best of new and old technology to put performance and quality ahead of economy. Our transformers are hand-wound and the cores are hand stacked. Some materials we fabricate in house, and others, like our steel laminations, are custom ordered. Because we build them one at a time, the Axiom and ToneClone series are only available in limited quantities. Consequently, there is an audible difference between a budget transformer and an Axiom or ToneClone.

TQR:Can you describe the audible differences?

A good output transformer should go beyond its job of impedance matching, and an amplifier’s overall personality depends on it. A desirable output transformer’s distortion has more detail. The harmonics seem even and smooth. Played clean, the transformer should sound natural without harshness, obviously within the boundaries of the authentic tone characteristic the player is eeking. Better said, we still can’t make an apple into an orange.

TQR: What are some of the comments that you hear from players when they hear the Axiom or ToneClone transformers that you build? Is it a matter of touch dynamics, harmonics, all of that?

Yes, and let’s not forget musicians’ colorful tone speak, such as: The amplifier sounds more open, glassy, sweet, brown, fat, with more notes perceived. Barred chords are not muddy or squashed. Chimes and bell tones are much more apparent. Good note separation, sustain improved, more definition, etc…

TQR:And these things can all be affected by the output transformer in some considerable detail….

It is pretty much the last tone filter in a series of components. Other factors like tube quality and speakers can play an important roll as well. Also, if you were to look at an amplifier circuit as a modulated power supply, then the quality of a power transformer and choke, if a choke is used in the circuit, also affects tonality. The ghost note phenomenon would be an example.

TQR:Like a few amplifier builders we know, you have taken the direct route of precisely replicating the materials and tolerances that comprised the industry standard decades ago…

I remember having a conversation with Leo Fender a number of years ago and getting a chuckle out of him as he told me how amazed he was that so much scrutiny was being given to how things were done in the early days of Fender. He said that they had taken what they were doing in the ’50s and ’60s so matter of fact back then. They were hardly thinking at the time that they were building future classics. They were trying to make an affordable, good sounding, quality amplifier while still trying to make a buck. Leo also mentioned that for reasons of cash flow and/or inventory problems, they would resort to using alternate vendors from time to time. They kept a careful eye on cost of materials, and their supply, rather than hand picking components with alleged magical tonal qualities.

TQR:They weren’t matching tubes, either. All of this can and does get out of hand, but when your rig sounds so good that you can get lost in the magic of it, as a player, wonderful doors can be opened.

Years of research led us to the conclusion that not every aspect of a vintage transformer needed to be copied. There were problems and limitations in their day, so why repeat them? We achieved better results by combining old and new technologies. Making the math work for the best tone characteristics together with improved consistency and longevity is the formula we chose to follow. There are a lot of vintage amps today with transformers that are going bad simply because they have aged. The tonal quality of the amp is deteriorating along with the transformer. Paper and certain types of varnishes used in these transformers tend to have hygroscopic properties. Moisture is absorbed over time, affecting the insulation system and increasing the chance for high voltage breakdowns. To make matters worse, the primary winding voltage is high enough to produce a corona effect whose ions help oxidize this insulation. Over time, reliability and tonality will suffer. Do you believe in transformer cancer?

TQR:That leads us to an interesting situation in which the original output transformer in our ’60s Pro Reverb died, and we noticed how much better the amp sounded when we had installed a new transformer, which was a commonly available unit sold by MojoTone. Now, the amp sounded great before the old transformer went out, but it sounded significantly better with the new transformer. I asked our tech and advisory board member Jeff Bakos if it was possible for an output transformer to gradually decay over time, dying a slow death while you continue to lose ‘tone’ in a very subtle fashion over years of use. Is that possible? It seems as if that was the case with our amp, which we had always considered to have a rather legendary vibe.

Not only is it possible, it is probable. Keep in mind that if high voltage insulation breakdown has started, there is no reversing it. Assuming that the transformers insulation system is intact, we have in the past reversed some tonal degradation in original transformers under controlled laboratory conditions. I’ve proven that point with my more cynical, high-end customers. One example of this is an amp (a Marshall JTM 45 or a Plexi – I forget which) that had been used in England for years and then brought over to the United States. The owner felt that the tone had decayed over time, seeming darker, lifeless, and the higher frequencies were less pronounced. We asked him to remove the transformer and all we did when he brought it in was to re-bake it in an oven to drive out the moisture. We then vacuum impregnated the transformer with our proprietary resin to hermetically seal it before the final bake. He put the transformer back into the amp and the results were pretty amazing… it became a lot brighter and more detailed from the upper midrange to the upper frequencies. I’m not recommending that anyone start baking their old transformers, however….

TQR: No, but it seems to be a fair statement to say that it’s possible that your good sounding old amp might sound significantly better with a new output transformer. At least that was our experience, and in hindsight, we didn’t realize what we had been missing.

That’s true. The tonal degradation I’m speaking about is very slow and gradual. Your results would be even better if you had used ToneClone transformers. Any of our transformers should outlast older vintage transformers because each are put through the same process during production.

TQR:Doesn’t it become particularly more problematic with amps like AC30s and Hiwatts, where repro transformers have typically been poor compromises at best?

I believe that Marshall, Vox and Fender, to name a few, are doing an outstanding job of building affordable vintage reissue amplifiers. When an owner of one of these fine amps wants to take his/her tone to the next level, they will usually consult someone like a Don Butler (Toneman) for example. Don is an expert in the field of amplifier upgrades and the art of tonal improvement. Don is also one of the key figures in this mini industry, which is similar to the aftermarket for automobiles and motorcycles. Much like an engine tuner, Don will replace transformers and other components in the signal path to give the customer an upgraded, outstanding sounding amp that comes much closer to capturing the original tone they were seeking.

TQR:Your website seems to be very comprehensive, but can you be contacted over the telephone for customers that either don’t see their amp listed or perhaps have additional questions?

Yes! Paul Patronete, an accomplished guitarist who has a good ear for vintage tone and heads our MI division, is happy to help those customers when I am unavailable. Our website is constantly being updated with vintage and modern transformer versions. We will probably always be two or three pages short of having all of the various models listed that people may be interested in. Of course, we can’t possibly list every one-off we’ve done. Another cool thing we offer are modern, updated versions of many of the classic transformers. We have added output impedance taps for many of the classic Fender transformers, which were never originally offered. For any make of amplifier, we offer various mounting styles from the original. We can, in addition, alter tonal characteristics to fit the unique needs of each customer.

TQR:Are you building transformers for many small builders?

Yes. If you own a high end, small production amplifier, there is a chance you will find a Mercury Magnetics label on the transformers. Some exceptions are when certain amplifier manufacturers remove labels in an effort to keep us and other vendors a secret. We do maintain a confidentiality agreement with all of our customers if this is their desire.

TQR:Schumacher was a primary supplier to Fender during the tweed era, and they are still operating, although we understand that you generally have to be capable of placing a fairly large order to get geared up. That seems to be a significant barrier to many would-be amp builders.

That company is doing a good job of supplying inexpensive transformers to a high volume market. When a lot of emphasis is placed on meeting price points, something has to give. The cost of labor and materials are logically their first consideration. The end result is a compromise, and who could blame them? Ultimately, end users will determine if the resulting tone is adequate. Someone who has paid several thousand dollars of their hard earned money for a “high end” amp is expecting to have something that excites their senses along with a build quality that justifies their investment. This is where we can assist the amp builder. It goes beyond Mercury Magnetics “sending in the clones.” We have made every effort to break those barriers by eliminating minimum buy requirements. We work closely with today’s designers and builders to provide them with a thoughtful, next-level approach to their signature tonal requirements.


View PDF Article

What services do you offer at Mercury Magnetics?

With all of the money one can spend on an amplifier, be it boutique, reissue or just a good roadworthy unit there is one area that can be overlooked, the quality of the output transformer. It is essentially the final filter in your amp chassis from the tubes to the speaker, matching the two up so you can make music! Let’s talk with Sergio Hamernik and Paul Patronete of Mercury Magnetics™ to find out what we all need to know about this overlooked most integral part of getting the best overall tone from your rig.

MH: What services do you offer at Mercury Magnetics?

MM: We offer new hand-wound transformers and chokes. We also offer a rewinding service for vintage transformers. Mercury Magnetics™ can rewind a transformer back to its original specs. Founded in Southern California in 1954 and incorporated in 1968, Mercury Magnetics™ has built a solid reputation on superior quality, reliability and customer satisfaction.

Mercury Magnetics™ has the right combination of experience and a low overhead operation to meet specific requirements. Custom designs, quality assurance and safety standards are included as part of out total customer support with no-nonsense pricing that often beats out standard “off-the-shelf” components, while not being bound to their limitations. Mercury Magnetics™ has a long standing reputation for quality and reliability. These transformers are not built “offshore” or “south of the border,” they are 100% handmade in the USA and are backed by a money back tone satisfaction guarantee. Their line of Axiom® transformers are found in some of the finest and best-sounding modern production amps manufactured. We build transformers and maintain a high standard for tone in the tradition of our forefathers, making improvements that they would have made if they had access to today’s computer assisted designs and materials.

MH: To what degree of effort do you extend yourself when restoring a vintage transformer and how does it happen?

MM: We methodically unwind the vintage transformer by hand and document each wind detailing every anomaly and turn. We then rewind the transformer by hand so it will sound exactly as it did when it was brand new. The interior of the transformer is new and the exterior of the transformer is maintained so it will look like a vintage transformer and sound vintage as well. We attempt to use every piece of the original tranny that we can use. We DO NOT attempt to improve or alter the original tone or frequency response of the vintage transformer. Our rewinding service is more time consuming and can be more expensive than purchasing a new Axiom®transformer. However, with our attention to detail and experience the customer can be assured that their vintage transformer will look AND sound terrific! Professional musicians, technicians and studios regard our rewinding services as the best. For transformers, the core material suppliers’ industry sets a +/- 20% tolerance on characteristics like permeability to begin with, so most of the industry realizes that anything that’s an inductor or transformer has that kind of tolerance unless a particular manufacturer tightens the tolerance up. But when we were dealing with high speed stick winding methods of the ’50s and ’60s, they didn’t really have time to scrutinize each coil, because these coils were wound simultaneously. There could be six or ten coils being wound at the same time. For example, we’d find missing layers, or layers that had a different number of turns than what was specified. So what I did was blueprint a transformer, documenting every layer, the space between turns, the number of turns, type of wire, and in some cases oddball gauges and half sizes. I would also take measurements of dielectric constants, leakage reactance, and other characteristics to be able to clone a transformer. So we ended up providing a service where we would fully rewind and rebuild original vintage transformers. Imagine disassembling the laminations in a core, numbering each one and putting them back in the same sequence.

MH: Do you believe that an output transformer can decay and lose its tonality over time, and if so why?

MM: Absolutely. I’ve proven that point with some of my more cynical, high-end customers, and I did it in such a way that we took a Marshall JTM 45 or a Plexi, I forget which, but the amp had been in England for years and been brought over here. The owner thought that the tone had decayed over time, it seemed darker, lifeless, and the higher frequencies weren’t as pronounced. They removed the transformer, and all that I did was rebake it in an oven and drive out the moisture. We put the transformer back into the amp and it was pretty amazing; it became a lot brighter and more detailed from the upper midrange to the upper frequencies. I’m not recommending that anyone start baking their old transformers. What we do with our transformers to avoid that degradation process is use a resin process that hermetically seals the coils. We do it in a vacuum chamber in which the coils are impregnated with the resin material and then we bake it thoroughly. Because of this process, our transformers should way outlast older transformers, including those made today.

Transformers are still being made today with the same mindset, do it as cheaply as possible while offering the customer a decent value for the money. It’s correct for the required impedances and matches all of that, but the rest of the details have been omitted because they just don’t have the time and budget to do the longer process. Years of research led us to the conclusion that not every aspect of a vintage transformer needed to be copied. There were problems and limitations in their day, so why repeat them? We achieved better results by combining old and new technologies. Making the math work for the best tone characteristics together with improved consistency and longevity is the formula we chose to follow.

There are a lot of vintage amps today with transformers that are going bad simply because they have aged. The tonal quality of the amp is deteriorating along with the transformer. Paper and certain types of varnishes used in these transformers tend to have hygroscopic properties. Moisture is absorbed over time affecting the insulation system and increasing the chance for high voltage breakdowns. To make matters worse, the primary winding voltage is high enough to produce a corona effect whose ions help oxidize this insulation. Over time, reliability and tonality will suffer. Do you believe in transformer cancer?

MH: In conclusion tell us what you think makes you the best company to work with.

MM: Our customer service is second to none! Paul Patronete heads the Axiom® division. He is an accomplished guitarist and has an experienced ear for vintage tone. Paul is more than happy to help our customers find the exact transformer to fit their tonal needs. Our website is constantly being updated with vintage and modern transformer versions. We will probably always be 2 or 3 pages short of having all of the various models listed that people may be interested in. Of course, we can’t possibly list every one-off we’ve done. We offer modern, updated versions of many of the classic transformers. We have added impedance taps for many of the classic Fender transformers, which were never originally offered. Having a detailed transformer spec is only the beginning. Breaking down into fine details what materials and assembly techniques were used decades ago help us assure our customers an accurate reproduction of vintage tone. We have carefully selected the best of new and old technology to put performance and quality ahead of economy. Our transformers are hand wound and the cores are hand stacked. Some materials we fabricate in house and others, like our steel laminations, are custom ordered. Because we build them one at a time, Axiom® Mercury Vintage™ are only available in limited quantities.

There is an audible difference between a budget transformer and an Axiom® Mercury Vintage™!

A good output transformer should go beyond its job of impedance matching. An amplifier’s overall personality depends on it. A desirable output transformer’s distortion has more detail; the harmonics seem even and smooth. Played clean, the transformer should sound natural without harshness. Obviously within the boundaries of the authentic tone characteristic the player is seeking. Better said, we still can’t make an apple into an orange. The output transformer is pretty much the last tone filter in a series of components. Other factors like tube quality and speakers can play an important roll as well. Also if you were to look at an amplifier circuit as a modulated power supply, then the quality of a power transformer and choke, if a choke is used in the circuit, it also affects tonality. The ghost note phenomenon would be an example.

A lot of the people modifying Marshall amps don’t want their transformer to break up so easily when they really overdrive their amps, and they can have a custom transformer built that will handle gobs of gain and still hold it together. A boutique amp builder might come along and specify a particular classic transformer with a few improvements. It’s all passion, really, because this is not by nature a high-dollar, profitable business. In fact, the machines that we use to hand wind the Axiom® transformers are from the 1960s.

In the early ’80s there were dozens of companies doing what we do in this area, and now there are perhaps 3 or 4. It’s frustrating for most transformer makers to have a musician describe to them a desirable tonal characteristic when that can’t really be put on paper. You have to at least be able to see things from a musician’s perspective. Paul and I have a decent guitar and amp collection, and we try to stay abreast of what’s going on. And we also have a lot of walk-ins and a sound room, so people can bring their amps in and play and talk about what they want.

Most of the current transformer manufactures sell them cheap and dirty, their approach is cookie cutter, they offer an okay value for what you get, but they mainly use bottom of the barrel materials. Unfortunately, they are barely in the ballpark of what really needs to be done if someone is serious about getting a vintage tone. If you have an inductance bridge, a simple test is to measure the primary inductance on a vintage unit and then on a new transformer. You’ll find that the inductance on the new unit is usually less than half of the vintage transformer. There is no way that transformer can sound like the original, but if you aren’t interested in achieving the authentic sound of the past, then everything that’s out there today is all right. The devil is in the details, and there is no substitute for doing things by hand. Certain items for our transformers that I couldn’t source elsewhere, I learned to make here, because there just weren’t any other sources for them.

As you can see the people at Mercury Magnetics™ go to great lengths to make their transformers sound good and “correct,” not overbuilding them to prove a point. To get that tone back into your amp have your favorite repair shop get you a custom-wound output transformer from Mercury Magnetics™. We have only skimmed the surface here in this profile; the power transformer also makes a difference in the performance of your amplifier. Mercury Magnetics™also makes transformers and chokes which we will speak with Paul and Sergio about in the future. Until then check out their website at www.MercuryMagnetics.com and never stop learning about your tone!


View PDF Article

BLK-STR-AR15-C

Add this choke to your head or combo for Improved tonal richness

BLK-STR-AR30-C

Add this choke to your head or combo for Improved tonal richness

MM-15H

15 Henry choke

MM-8H-CH

8 Henry Mini-Choke — DCR = 239Ω — tolerance +/-10%

TRAY-DARKH-C

Add this choke to your Traynor Dark Horse amp for improved tonal richness

MAR-DSCL40C-C

Add this choke to your DSCL40C for improved tonal richness

Fender Amplifiers

Founded in the mid-1940s in Fullerton, California by Leo Fender, the legendary amps produced by this company have been heard on countless recordings and are influential on countless other amp makers. In the beginning Fender paired small combo amps with lap steels and electric guitars aimed at student players, but word of the superior tone and build quality quickly spread among professional musicians. In over seventy years of existence, Fender has consistently evolved and innovated its sound from the Tweed era through the Brown and Blackface eras and beyond.

Mercury Magnetics has built a massive collection of ToneClone® Transformers and Chokes for Fender Amps available from all eras of production. Answering the needs of players and amp-builders alike, our extensive catalog of audio transformers is the ultimate resource whether you’re looking to replace a worn-out transformer in a vintage Fender amp or looking to nail a vintage tone in a new amp or amp build. The engineers at Mercury have painstakingly documented every detail and nuance of the best-of-breed vintage transformers and can faithfully produce perfect clones using the same materials and methods used on the originals.

The ToneClone+ Series from Mercury Magnetics adds more utility and options without altering the original tone. Love your amp but want to change your speaker configuration? Mercury’s ToneClone+ Output Transformers give players more impedance options like alternate and multi-tapped secondaries. Power Transformers can benefit from the “Plus” treatment as well with alternate primary voltage, Higher or Lower B+ Voltages, added current capability, and more.

Fender Woodie Amp Transformers: The earliest production amps to come out of Fullerton, Fender ‘Woodie’ amps can be identified by their hardwood cabinets and fixed handles. We are proud to offer ToneClone® transformers from this short-lived and rare Woodie era including the Woodie Deluxe (aka Model 26) and Woodie Pro.

Fender Tweed Amp Transformers: The Fender Tweed era lasted from the late forties to early sixties and a vast amount of artists from all generations have crafted their distinct tone using these amps through all genres. Notable artists include: Scotty Moore (Elvis Presley), Neil Young, Larry Carlton, Eric Clapton and Keith Richards. Mercury Magnetics has the largest catalog of vintage-correct Fender ToneClone® replacements transformers for the following models: Tweed Bandmaster, Tweed Bassman, Tweed Champ, Tweed Harvard, Tweed Princeton, Tweed Pro/Dual Professional, Tweed Super, Tweed Tremolux, Tweed Deluxe, Tweed Twin, and Tweed Vibrolux.

Fender Blonde and Brown (Brownface) Amp Transformers: Sitting on the timeline between the Tweed and Blackface Fender amps, the Blonde/Brown amps of the early sixties were most noticeably embraced by surf groups like the Beach Boys and Dick Dale. Our catalog of ToneClone® amp transformers for this era includes Brown/Blonde Bandmaster, Blonde Bassman, Blonde Showman, Blonde Tremolux, Blonde Twin, Brown Concert, Brown Deluxe, Brown Princeton, Brown Pro, Brown Super, Brown Vibrasonic, Brown Vibrolux, and Brown Vibroverb. Also see our transformers and choke for the 6G15 Reverb Unit.

Fender Blackface Amp Transformers: Easily distinguishable by their black control plates and white lettering, Fender Blackface amps began showing up on stages and recordings in the early-mid 1960s. Extremely popular among musicians then, the impressive build quality and versatile tones have kept these classic amps popular even 50 years later. Mercury Magnetics has hundreds of ToneClone® and ToneClone+ transformers and chokes for Fender Blackface Amps including: Blackface Bandmaster/Bandmaster Reverb, Blackface Bassman, Blackface Champ, Blackface Concert, Blackface Deluxe/Deluxe Reverb, Blackface Princeton/Princeton Reverb, Blackface Pro/Pro Reverb, Blackface Showman, Blackface Tremolux, Blackface Twin Reverb, Blackface Vibrochamp, Blackface Vibrolux, and Blackface Vibroverb. Also see our transformers and choke for the 6G15 Reverb Unit.


Terms of Service – Old

All Mercury Magnetics® products are 100% handmade in California, USA.

Copyright © 1954-2018 by Mercury Magnetics. All Rights Reserved. Mercury Magnetics, Mercury Vintage, Partridge, FatStack, SuperStack, NewVolt, Mini-Choke, Multi-Choke, Mercury Custom Shop, Mercury Boutique, “The Heart & Soul of Your Amp,” “Holy Terror,” “Bad Guitar Tone — Whatever Its Evil Mission It Must Be Stopped!”, “Champ 600 Upgrade,” “XLG Upgrade Kit,” “Mean 13” and “The original British amp tone — shaken, but not stirred,” “Our Transformers are Stacked,” “The Essential Building Blocks of Your Tone,” “Mercury Studio-Pro Upgrade Kit for the VOX AC4tv,” UTM (Universal Transformer Mount), Amp-Saver and Copper-Tone are trademarks licensed to Mercury Magnetics. Axiom, ToneClone, Radiospares, VoodooScrew, Multiple Arrayed Geometric Inductive Coupling (M.A.G.I.C.), and APS (American Pro Series) are registered trademarks licensed to Mercury Magnetics. All other companies, products and trademarks mentioned on this website are trademarks of their respective owners. Unless otherwise noted Mercury Magnetics is not affiliated with any of these companies.

Mercury Mod and Upgrade projects and their documentation are the result of technical investigations made by the engineering staff of Mercury Magnetics. The disclosure of the information herein may pertain to proprietary rights, and the furnishing of these documents does not constitute an expressed or implied license to use such materials.

Mercury Magnetics® transformers and other products are in compliance with the European Union RoHS Directive 2020/95/EC with respect to the following substances: lead (Pb), mercury (Hg), cadmium (Cd), hexavalent chromium (CR (VI)), polybrominated biphenyls (PBB), and polybrominated diphenyl ethers (PBDE).

Mercury Magnetics® founded in Southern California in 1954 and incorporated in 1968.


CAUTION!

The voltages in your amplifier can be dangerous. Transformers and chokes are not user serviceable parts. Installation of these components should always be performed by an experienced technician.

The simple ability to use a soldering iron is not enough to qualify a “do it yourself person.” Those who are inexperienced in working with electronic circuits should never attempt to service their amplifier. Household line currents can be deadly!! Transformers, chokes and large filter capacitors can store a dangerous charge for several days or more after the amplifier has been unplugged. Never touch the terminals of such devices without being certain of their charge status. Risk of shock and damage to equipment may result from mishandling and/or improper use of these components. Please use common sense and always think safety first. After all, tone is most enjoyed when you are alive to hear it.

BLK-STR-HT5-C

Blackstar HT-5 — Upgrade!

CER-OTS100-C

3 Henry — Drop-in Upgrade!

FBANB-C

Silverface — Upgrade!

FC-BAND

Blonde, Brown, Blackface, Silverface

FC-BASS

Blonde, Blackface & Silverface  — 3 Henry — 2 13/16″ Mounting Centers

FC-CON

Brown, Blackface

FC-CONII

Mid ’80s Blackface — Upgrade!

FC-PRO

Brown, Blackface, Silverface

FC-SHOW

Blonde, Blackface, Silverface & Dual Showman

FC-TREM

Blackface

FC-VIBROV

Brown, Blackface

FC-VIBS

Brown

FHOTRDDV-C

Upgrade!

FHOTRDL-C

Upgrade!

F-PROSON-C

Add to your amp for improved tonal richness — Upgrade!

F-QUADR-C

Quadreverb

FSUPSON-C

Add to your amp for improved tonal richness — Upgrade!

FVBKING-C

Add to your amp for improved tonal richness — Upgrade!

FBFDR-C

Blackface Reverb and Brown Deluxe — #125C3A  — 2″ Mounting Centers

FC-TTREM

Tweed

FC-TTWIN

Tweed

F-160PS

Early ‘ 70s — 160PS — 3 Henry

FC-PS300

Early ’70s — PS300 — 3 Henry

FC-PS400

PS400 — 3 Henry

FC-TPRO-S

Tweed era — 3.5 Henry — #14684 Small size — 2 13/16″ mounting centers

FSFP-C

Silverface

FTDC

3H — 150mA

MMC20H

20H — 100mA

CER-DC30-C

DC30 — Drop-in Upgrade!

CER-OTS50-C

5 Henry — 2 bolt mount, hole spacing is 2 3/8″ center to center

GIB-C-5H

5H — 200mA

CER-JTM45-C

7 Henry — Drop-in Upgrade!

EP-SOCAL50-C

SOCAL50 — Upgrade!

VXC

10H — 100mA

CRT-VC5112-C

Vintage Club 15

EP-BLU-CUST-C

Blues Custom

MAT-LIGHT-C

Lightning

MAT-SPITF-C

Spitfire

M-DSL401-C

Upgrade!

PARTRIDGE-C20H

20 Henry

CJT45W-5H

45 Watt — 5H — 150mA — 2″ Mounting Centers

DO-C-354

Dynaco C354 — 1st generation

EP-EA32RVT-C

7H

FC-2.84

Tweed — #14684 — **Used in early Tweed amps w/ dual rectifier tubes

2.84 Henry, 400 mA current rating

Vertical mount — bolt hole spacing of 3 1/8″ center to center

FC4

Tweed — 4 Henry. Uses Grain-Oriented Iron

JT45C-5H

45 Watt — 5H — 150mA — 2-3/8″ Mounting Centers

JT45C-7H

45 Watt — 7H — 150mA — 2-3/8″ Mounting Centers

SUNN-MODT-C

’70s Model T — 1 Henry — #28-3100 — bolt hole spacing 2 3/8″ center to center

** Original Model T’s used 2 ea in parallel for 500 mH, order 2 if both are bad

SUNN-SOLARUS-CH

1 Henry

DAN-EXPLORER-C

Early ’60s

FC4-HP

4 Henry. Uses Grain-Oriented Iron

FC-TWIN

Blonde, Blackface, Silverface — #125C1A — 3.0 H, 95 Ω DC resistance

Mounting centers are 2 13/16″

FTPC-55

50’s Tweed Era — 5 H / 40mA

GARNET-B190-C

9H GARNET B190 Assistant Pro

JETC-PICO-VALVE-C

5 Henry — Drop-in Upgrade!

JMI-30C

20H — 100mA — Larger size – 3 9/16″ mounting centers

Woden #76854 LX

PLUSH-P1000S-C

Plush — ’70S — 100 WATT

R103

3H — 100mA

SIL-1396-C

Sears Silvertone — Model 1396

SSTT-C

Twin Twelve — #L-480 — 7 Henry — also correct for the 1485 amp

VX50-C

200mA — 15H — Approx. 255 ohms — 2 13/16″ bolt hole centers

M-67C

’67 100 watt — 2 Henry

FWDY-DUALPRO-C

Late ’40s Woodie/Woody Pro — small A-frame mount — 9 Henry

F-BC

Larger size — Tweed era — 3.5 Henry — 3 1/8″ Mounting Centers

PARTRIDGE-C3

3 Henry

R115-C

15H — 100mA – Larger size – 3 9/16″ mounting centers

M-CH

Late ’60s 100 watt — 3.8 Henry, 100 mA — 2 13/16″ mounting centers

FC-TBAND

Sizes vary – please contact us before placing your order.

FC-BLTREM

Blonde — #125C3A. Sizes vary – please contact us before placing your order.

FC-TSUP

Sizes vary – please contact us before placing your order.

Building the Perfect Plexi with Peter Stroud, Don (Tone Man) Butler and Mercury Magnetics

Seen the price of a vintage Marshall Plexi lately? Your three grand won’t guarantee a virgin circuit or great tone, but if real Plexi tone is what you’re all about, you can get there for a lot less, guaranteed. When TQR Advisory board member and Sheryl Crow guitarist Peter Stroud decided to make a Plexi from his late ’70s fawn 100W head, we enlisted the capable assistance of our main toneman Don Butler and the team at Mercury Magnetics, home of
the ToneClone line of authentic vintage-style replacement transformers. Mercury has blueprinted and reproduced nearly every vintage transformer made for guitar amplifiers, and they can rewind any blown transformer to exact, original specs and sound. So settle back and enjoy the following discussion and review of Peter Stroud’s successful conversion of a common (they built 1,000s) Marshall 100W into a stellar 100W Plexi.

TQR: What is the origin and general history of this Marshall amp?

Peter: I bought this amp about 10 years ago with the matching straight-front 4×12, 100 watt cab from a dealer down in Texas. It’s a ’77 Super Lead 100 watt 4-input. I was big into collecting the f awn-colored Marshalls at the time – a poor man’s custom color. Around the same time, I had learned how to work on my own amps from the standpoint of preventive maintenance and tone tweaking, so I converted the amp over to a cascade-style master volume circuit like a late ’70s head or JCM800. Eventually, I missed having the 4-input sound and put it back to its original wiring.

Don: This amp was a standard 100 watt, non-master Marshall from the late ’70s. Some mods had been done and then undone. A few coupling caps had been changed as well as a few resistors

Strengths: Semi-loud. Typical PCB Marshall from this era. Better quality glass board than what’s used now.

Shortcomings: Ceramic caps. This amp was voiced for brighter sound, less bottom, and quicker distortion onset that original ’60s versions didn’t employ. It still had a couple of the original filter cans. The amp sounded exactly the same no matter what guitar was plugged up to it – no tonal distinction between any instrument at all! Very over-emphasized, weird G string odd harmonics (most likely old filter cap related). I have to add from a personal note that this was the worst sounding Marshall I’d ever heard or played! In a word – no tone!

TQR: Describe the specific improvements that you wanted to make to the amp, both from a technical perspective, and sound-wise. What components were changed and why?

Peter: I don’t know why – from my monkeying around with it perhaps (laughs), but this Marshall just sounded like crap. Every time I plugged in I would end up turning it off – totally uninspiring. I replaced tubes and a cap here and there but resigned to the notion that it might be the transformers. I had replaced all of the power supply caps, but not the 50/50mf in the preamp circuit. It could have been that – who knows? But in any case, I would have thrown it on eBay had it not been for the color. Instead, I decided to make it a guinea pig. I’ve been messing around inside my amps again recently and have had a real desire for that 100 watt Plexi sound and the cleaner, fuller tone they deliver. This head was far from it! Having read the ToneQuest interview with Sergio about Mercury Magneticstransformers and poking around their website, I figured the fawn 100 watt would be the perfect amp for a conversion – change out the transformers for high voltage models reminiscent of the Plexis and wire it up exactly like a ’67. I was determined to demystify the whole Plexi thing once and for all for my own comfort. After seeing how Mercury Magnetics had “cloned” the power and output trannies of an old Plexi, I felt the missing link had now appeared. Then you stepped in and it mushroomed into a topic for ToneQuest, and a very deserved one indeed. Nothing better than to see if any Marshall can become a Plexi, especially since the latest prices on eBay for Plexis are more than I care to spend. I need amps that are bulletproof and easy to replace. I spoke with Sergioand Paul at Mercury and they eventually hooked me up with Don Butler. I was thrilled to have Don take over the job knowing his ear for tone and knowledge of Plexis. There were three CD’s I used as a tone reference: bootlegs of Cream in ’67 and Jeff Beck in ’68, and the Hendrix at Monterey Pop Festival album.

Don: Peter wanted the amp to sound like a mid-to-late ’60s Plexi 100 watter. More specifically – a ’67. I replaced all the little green (or were they grey?) ceramic caps with polyester tubular caps and replaced any resistors that needed to be changed with carbon comp types. Polyester caps were used in the ’60s in all Marshalls for the main tone and coupling caps. I know for the higher value caps in the pico farad range, Marshall generally used the ones from Lemco or RS that were a flat mica-looking cap covered in a baked on ceramic or wax dipped coating. I used silver micas for those in Peter’s amp. I like the smoothness and more transparent quality of silver mica. The original polyester coupling and tone caps that Marshall used in the ’60s were from a company in the Czech Republic called Iskra. I believe Phillips imported those to the U.K. Those are the ones everyone refers to as the mustard caps. I used Mercury’s Plexi 100 output tranny, 10H choke and 100W Plexi power tranny that provides the B+ with around 525V DC after rectification. In my humble opinion, Mercury makes the best sounding, most accurate and most reliable clone transformers on the planet.

I also used the FRED rectifiers in place of the little cheap-o IN4007 diodes for the rectifier. I like the way they smooth out the harshness of the treble frequencies and take out that mid range bump that’s common with a solid state rectifier in amps. They also seem to add more note clarity, harmonics, and detail to the sound and tone of an amp. I replaced the components, transformers and the remaining filter cans. I then converted the circuit to what was used in 1967 in terms of how it was wired and component values.

Really, it’s not much. On the first valve/tube you remove the wire coming from pin #8 and shorten it and solder it to pin #3. The cathodes on that tube were shared and went to an 820 W resistor with a 250mf @ 25v cap paralleled with it to earth/ground. The second valve/tube did not have a cathode bypass cap in those days – only the resistor. There was a .68 cap I removed from that spot. I also removed the .004 cap from the volume pot on channel #1. That cap makes the amp distort quicker, and usually at just “2” on the volume pot you’re out of clean headroom and well into distortion land. That’s not what Peter wanted or what the old amps were like. I also used two 0.1/ 600V caps coming out of the phase inverter vs. the .022/600V caps that Marshall started using in around ’69 to brighten up their amps.

On the later Plexis you will find a 500rf and 33K slope resistor on Lead models and a 250rf & 56K slope resistor on Bass & PA models. Most, if not all of the schematics I’ve seen for early 100 watt Plexis used the 250pf & 56K in the tone stack. Peter’s amp had the 500rf and 33K. I replaced the 33K with the 56K for more bottom and hit a mid point between the 500rf & 250rf and used a 390rf cap for the treble control. Not too bright and not dark. With Some Lead amps, you have to turn the treble off and even then it can still be too much. I’ve found that by using a 390rf you get a happy medium point where the treble pot is still useable. All I did was put the amp into what Marshall’s circuit was in 1967 and used the same values and type of components they used, with a few improvements like the FRED rectifiers.

TQR:What type and brand of tubes were selected and why?

Don: I used the Svetlana EL-34s, as I’ve found them to sound extremely close to what the old Mullard xf3s offered in tone, as well as reliability. I’ve compared them side by side in my old 50-watter and in my ’64 VoxAC-50 and it’s really close. Preamp tubes – I used the new Ei Elite gold pin 12AX7s. To me they sound very nice and close to old Brimars and Mullards. Don’t forget that the Phillips Electronics Corp. once owned Mullard and Ei among many other subsidiaries. Ei seems to have made an excellent attempt at creating a good sounding, reliable 12AX7 that they pre-test before sending out. My favorite 12AX7-type of valve/tube for Marshall’s are the Brimars, as they offer a bit of that aggressive old tone that Marshall’s are famous for.


View PDF Article

Epiphone Valve Jr. Amplifier Upgrade Kit Build

So first things first: an important disclaimer. Modifying an amplifier is serious business, especially when tubes are involved. These amplifiers contain enough voltage inside to kill you, no joke. These kinds of mod kits are intended for people who know what they are doing with electronics. So if you have never used a multi meter (or don’t know what it does) and are not very handy with a soldering iron, these modifications are best left to a professional.

I had heard many good things about the Mercury Magnetics Upgrade Kit for modifying a Epiphone Valve Jr. amplifier. I believe my first encounter with the company was via an ad in Vintage Guitar Magazine (proof advertising actually works!), which prompted a little Internet sleuthing on the subject. My initial searches lead me directly to YouTube, where I found a good collection of demo videos on both the stock Epiphone Valve Jr. and Mercury modified version.

I will say right off the bat that the stock Epiphone (for its price point) is no slouch; it has a good tone for blues and rock and a classic look to it. But after watching some before-and-after videos I was convinced that it would be a worthwhile project.

So with that I purchased two Epiphone Valve Jr. heads and requested a kit from Mercury so we could modify the amp and then see how it stacked up against a stock unit. Phil Manley was the perfect guy to take on this project for GuitarFixation. Phil has a wealth of experience with electronics from building his own fuzz pedals to repairing amplifiers. Phil also has a well-stocked workbench in his garage (yes, a garage in San Francisco — there will never be a time that I don’t covet his garage) that includes a quality soldering iron with adjustable heat and a large assortment of tools, parts, and meters. Again, this is really a project for an intermediate; I would not recommend this to someone who is picking up a soldering iron for the first time.

With all of the parts together I headed over to Phil’s on a foggy San Francisco morning and we began the modification. Pulling the amplifier apart and removing the components was a simple enough task, as Mercury includes a disk with the kit that contains a huge manual and some videos. The only real issue with the instruction manual was that it had almost too much information. The manual is for all three versions of the head (current production is version three) and that made them a little hard to read because the document was referencing all the versions on one diagram. That being said, the instructions are very thorough and it is a good idea for you to read them a few times before you start. [Editor’s Note: Always RTFM, boys!]

Discharging the caps on the main board is a fairly simple task; you just want to ensure that they are totally drained as to avoid any chance of a shock. We didn’t plug in the amp before we started the modification so there was no juice to be found, but if you are going to use the old screw driver technique, you should remember to ground it. A good way to do this is by getting two alligator clips with a wire in between them and connecting one side to the screw driver and the other to a grounded source. It reminded me of when I use to work on tube television: one had to discharge the picture tube with a flat blade screwdriver — POP!

An indispensable tool for this kind of work is a solder sucker that is used to remove hot solder from a board or component. You simply heat the area till it flows and then you load the solder sucker by compressing the spring. Then simply put it over the area in question and hit the button. This will remove most of the solder from the area (you may have to do it twice to get it all), well worth it, as makes adding the new components much easier. You can get one from Radio Shack, but beware their tiny under-$10 model. Be sure to get a half decent one that has a lot of suction to clear away the solder. I recommend the “Edsyn Solder Sucker” it is the one Phil is using in the video. You can get an Edsyn from MarkerTek for about $24 — you can get it HERE.

A Dremel tool will also serve you very well for the modification of the amp. I ended up buying one after Phil had already completed all of the trace cuts on the board (sorry Phil!) The Dremel would have made these cuts worlds easier when compared to using a flat head to scrape away at the trace. If you are not going to use a Dremel then you will want to double check the trace cuts with a meter set to continuity and to ensure that the cuts are 100% or you’re in for some trouble down the road. You will also need a step bit if you decide to do the 6V6 mod, but you could always use a drill and Dremel like we ended up doing when the local hardware store came up flat in the step bit selection (see the video).

So to this point Phil had been working on the amp for a total of five hours, but we had taken a few minutes for lunch and had to make a trip to the hardware store. So in reality I would say this first section took Phil roughly two and a half hours. If you were working alone without someone pointing a camera in your face I think you could have it done in less than two hours. So far the kit is straightforward and easy enough to work on with a reasonably clear set of directions to work from (but be sure to print them in color!) The fun will continue in part two as Phil really gets into the nitty-gritty of this amp mod.

Now on to the installation of the installation of the transformers and Mini-Choke. You want to pay close attention to the directions in terms of how to twist and dress the wires in the chassis. The way you dress your wiring can mean the difference between an amp that is a quiet monster and one that is not even usable. You would not believe the difference a clean, tight wiring job makes on a tube amp!

The re-soldering of the components to the main PCB (printed circuit board) is a fairly simple task, there is not too much that you need to be on the look out for. I had mentioned in part one that you will want an iron that has a variable temperature control; this really comes in handy when you are soldering the resistors and caps. You don’t want to overheat these components as you may damage them and degrade their performance. A high-quality iron is one of the most important tools for this kind of work; it will make all the difference in the world in terms of ease of use and component damage. I also recommend that you look at getting some high quality solder. I use Cardas Quad Eutectic Solder and it is very easy to work with. This solder flows very quickly and has saved me many times from damaging components. The Cardas solder is a tin/lead/silver/copper mix and it is what I use for all of my cable and electronics projects.

Adding the resistors to the 6V6 tube socket is easy, but you will want to ensure that you have a pair of needle nose pliers. It can be tricky to navigate inside the chassis when you have the main board inside, and you’ll want to be extra careful that the iron tip doesn’t hit anything important! You might also notice that when the directions call for you to widen some of the holes on the PCB that the drill bit they call for may not widen out the hole enough. We found that some of the wires were a little too thick for some of the holes, so Phil ended up stepping up to the next bit for some extra wiggle room.

The center tap lead of the power transformer ends up being soldered to the underside of the main PCB board. The directions are not 100% clear on how to go about this, but with a little reading we found that you would need to scrape off some of the coating on the board till you get to the trace below it. For this part, you’ll need to go slowly and may not want to use the Dremel, as you will not want to cut or damage the trace below.

Once you have completed all of the steps on the board, it is helpful to double-check your work to make sure there are no cold solder joints or messy wires. This is the time to do any clean up on the board and neaten the wires. The directions include tips on making the interior nice and neat. Again, stray wires can cause you an unbelievable amount of trouble. You may also want to verify continuity on the trace cuts and the new parts that you soldered.

The other piece of equipment you’re going to need for this modification is a Variac and if you don’t own one, you’ll need to borrow it. So why exactly do you need one? The Variac will allow you to slowly bring the amplifier up to its operating voltage so you can monitor the amp using a voltmeter to ensure that everything is working correctly. In this case, we pulled the fuse and metered across the terminals to ensure the amplifier was maintaining its correct working voltage. Had the voltage gone past the correct level we could quickly and safely cut the power and not damage the amplifier. If there is an issue you will see the voltage spike well above the recommended level as you are turning the variac up. Also, if you happen to start smelling smoke as you turn the Variac up then you’ll want to immediately kill the power and double check everything.
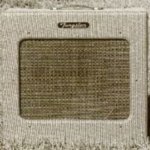
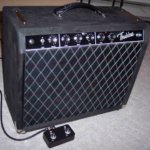
After we verified that the amplifier was working at the correct voltage it was time to plug in and turn it up! Right from the get go, you could tell that the Mercury Magnetics kit had brought new life into this little amp. The tone was immediately complex and rich, not loud or brutish, but smooth and inviting. There was also the immediate feeling of success; there is just an all around good feeling when you complete a project and hear it working for the first time.

The Output Transformer is the Final Link

The Epiphone Valve Junior is a small 5W amp head that is first most noteworthy because it is… well, cheap. Especially considering it is a tube amplifier, selling for $129 is frankly a bargain. Because of its simplicity and price, it has had a bit of an underground following being a pure-tube circuit with a single 12AX7 in the preamp stage and an EL84 as its output tube running Class A. The amp has 4, 8, and 16 ohm output jacks to enable a wide use of cabinets.

All in all, with this setup and a single volume control, players can get an idea of how tube distortion and compression changes as the volume is turned up. And it can all be done without the need to put in ear plugs that you would otherwise need when trying similar activity with a 100 watt head.

And the amp on its own sounds o.k. It’s obviously not wildly versatile, but “old school” style players can set an amp like this to obtain as much gain they’d like, then they can clean up their signal by use of their guitar’s volume control. Problem solved. Not enough volume for gigs? Throw a microphone in front of the cabinet.

The Mercury Magnetics Modification

The basics are changing the power and output transformers and adding a choke. There are some additional filtering and component changes. While the amp stock has one EL84 tube, the mod kit adds an additional 6V6 tube that gets blended to increase power.

The documentation that comes with the kit is excellent and really makes performing the mod easy. Our resident amp builder Mike Mullen took the amp further and created a new handwired board for the Valve Junior Kit — just for fun. He also flipped the chassis so that the front of the amp has the mesh screen and makes the amp look a bit more like some of the contemporary designs (you can see this look in the videos).

As one would expect with the change in transformers and the 2nd power tube, the amp is louder. In fact, it’s now loud enough to play with a full band of drums, bass, guitar and singer — unless you have a hard-hitting drummer that is! What you can expect is an overdriven sound great for rock and blues. But if you need clean headroom, you’ll still want to mic it up. The modified amp is very dynamic, with much more clarity and fullness on the lows when the amp is turned up to bring on the 6V6/EL84 combination of tube compression.

Where the modified Valve Junior may now have its strongest application use is for recording. It’s no secret that some of the greatest recorded sounds in rock and roll and blues history were done on smaller amps.

The modification kit sells for $299 through www.MercuryMagnetics.com and those with basic soldering skills can do the job with the step-by-step documentation and CD being a big help. While some may balk at the fact that they now have spent a total of about $400 for the amp, transformers are indeed the heart of the amp’s circuit, especially the output transformer. The output transformer is the final link between the tubes and the speakers, and we know from past tests what a great output transformer can do to improve the tone and fidelity of a tube amp. With the Upgrade Kit complete here, you’ve now got a custom boutique amp for about $400 — which would still be considered a bargain for many.

We recorded a couple of basic videos to show some of what the Mercury Magnetics modded Epiphone Valve Junior can do when plugged straight in just playing some basic blues and rock style lead and rhythm (no Charvel shred-style this time folks).

The first demo uses a Les Paul, the second a Stratocaster.

Source: https://mercurymagnetics.com/pages/catalog/kits/valvejr/LegendaryTones/LT-01.htm

Custom-Wound Mercury Magnetics Transformers

Like the pedal business, the number of amplifiers being built by smaller builders has mushroomed into a garage and basement Skunkworks industry that is constantly changing. New guys pop to the surface and ride the momentum created by chat rooms and social media, while others quietly slip beneath the surface in an unfortunate imitation of Beach Boys drummer Dennis Wilson, never to be heard from again. The desire amongst certain guitarists and collectors to own the latest, supposedly greatest new amplifier is a power drug, and for some, a hard habit to kick. We enjoy discovering small batch alternatives to familiar archetypes and affordable production amps, too, but since we’re doing so on your behalf, our initial evaluation process lacks the unbridled enthusiasm of a new owner who has already made the plunge financially and emotionally. Still, when a giddy reader calls or writes asking us to review their new killer amp, we routinely hit the builder’s website, send an introductory email and wait for a response. Such was the case with the Tungsten Cremawheat and builder Adam Palow

Ultimately, the Cremawheat turned out to be another exceptional amplifier as our review reflects, but as is so often the case, the story behind the name on the face plate is as interesting as the amp. Listen….

TQR: You mention on your website that you were inspired and intrigued many years ago by your first tube amp. Do you recall what it was?

It was a 1965 Fender Vibro-Champ that was missing the face plate, and the grill cloth had been replaced with a red and black check material that looked like it had been on a sofa. I think I was around 16 when I got it, and no matter what I played through it, the amp sounded very musical compared to the solid state practice amps had used before. It was the beginning of an obsession. I started chasing down vintage Fender amps wherever I could, and I met a guy who showed me how to safely drain the stored voltage in an amp, how to use a soldering iron, and he explained how bigger caps produced more low end. From that point forward I was on my own, and everything I have done since has been the result of trail and error and experimentation. I’m limited in some areas because I don’t necessarily understand all the theory, but in another sense it’s empowering because I am chasing feel and working in an intuitive way rather than strictly by the “book.” My favorite part of the build is constructing the board and wiring the chassis. If there is any artistic expression in building an amplifier it’s in the way the board is constructed. Of course, in the larger picture, it’s completely meaningless.

TQR: What were the most significant things you learned through hands-on experience working with guitar amps, and the five years you spent working on Hammond organs with Bob Schleicher?

The thing that blew my mind the most once I had acquired multiple identical models of the same amplifier like the Fender Blackface Bassman and Bandmaster was how different they could sound from each other even though they were built with the same components. That also carried over into my work with Hammond organs, because every large Hammond console also had its individual voice, and I attribute that to the accepted variance in parts values, and individual and very unpredictable drift in these values over time. You also see random parts stacking where some of the capacitors may have been oriented the correct way and others not. When all the caps are pointing the right way you can have an amp that sounds faster, and when they are oriented the wrong way the amp can sound slower. On the old caps there was usually a band marking the outer foil, and whether or not they were oriented correctly often just seems like chance. Some companies paid strict attention to that and others did not. Even if I am building ten identical amplifiers in my own line, there are going to be variances between them – not only in the tolerance stacking, but in the way the tubes bias to the cathode resistor. I have an absolute minimum standard – it has to inspire me or I’m not going to ship it out, but every once in a while you drop in the right rectifier and the right power tubes and they just match up perfectly with the cathode resistor and it makes your hair stand up on end. Magical. Yet that same amplifier with a different set of tubes may not do the same thing.The Hammond organs are unique because not only do they have an extremely rich and harmonically complex signal, but they have infinite sustain with no transient attack unless you’re using the percussion feature, so when you’re dealing with Leslie power amplifiers you’re not dealing with sag. You’ve got compression going on because you’re driving it with a very wide band signal, but because there is no transient, you’re not experiencing sag, compression and release in that order. I spent a lot of time rebuilding Leslie amplifiers, and there was a very specific type of distortion coming from those 6550 Tung-Sols – a low, grinding, wooly distortion kind of like the Marshall of the organ world in a lot of ways, and I caught that sound in my head. It was very musical, and it had a lot of clean qualities, but also an outrageous amount of overdrive on tap, and even when it was driving hard there was still enough clarity to retain a musical quality in the distortion. You could really hear the notes and the intervals between them, and that’s the complaint I had with a lot of amplifiers outside the vintage world…. They swung so far into breakup and distortion that you lost the clarity of the notes. There was more noise than tone, and the place I’m coming from is a more musical place. The other aspect of my work with Hammonds is that I gained a huge amount of experience with vintage Jensen Alnico speakers.

TQR: We have always wondered if the Jensen speakers used in Hammond cabinets were similar to those made for guitar.

In the Leslie, the Alnico P15LL and later C15NLL bass driver that shoots down into the rotating horn were definitely not guitar speakers by any stretch. The 12 inch Jensens I’ve seen bear all the same markings as standard Jensens for guitar, the differences being that they have black frames with no Jensen sticker, and the Hammond code starting with the letters “AO” have been silk-screened on the frame. I have pulled P12Ns out of old Hammond A100s, as well as P12Qs, and if they were specifically designed for organ, they are also the best sounding guitar speakers I have ever heard, and I have used them to base my own speakers on made by Weber.

TQR: Which prompted the development of your own line of proprietary speakers?

Yes, and I didn’t really have to start from the ground up because they had already come close to the mark, but I wasn’t hearing the same extended frequency response that I was hearing from the vintage speakers, and it was just a matter of developing a different recipe. Fortunately, when Ted was still alive we went through the process of mixing and matching components, just trying to get that sound. I didn’t care if the parts were period-correct – I just wanted them to sound right. I tried to do the same thing with the ceramic line, but we just never nailed it and I never put them into production. Of course, the goal in developing the Alnico speakers was to produce the low-wattage, medium fidelity, $6 replacement speakers that they were originally.

TQR: Looking at the different models you build today, it’s obvious you prefer the sound of tweed-era amplifiers.

Yes, I cut my teeth on blackface amps, but when I built my first tweed Champ I became one of those guys that ditched my pedalboard and plugged straight in. For me it’s all about that very alive midrange, and the dynamic response you get out of the power section. I was instantly hooked. I also have a fondness for the lower power brown amps as well, but when it comes to what I personally want to plug in to and play, I really need to feel the response of a tweed power section.

TQR: What’s your approach to specific types of capacitors used in building your amps?

You have to let your ears be the guide, and everyone hears things differently. Every quality capacitor has its place, but I personally prefer the sound of Mallory 150s in tweed amps. Other people feel that they are too bright in the upper mids until they break in. I tend to break in my amplifiers for 72 hours and when I take breaks from building I’ll plug into every amp that’s burning in. The truth is, everything matters. In the Cremawheat, for example, there different capacitors are used in the tone circuit to color the tone in a certain way. It’s one recipe. I also use custom-wound Mercury Magnetics transformers in everything. Some of them are custom-wound because I wanted a different gauge of wire, and others because I wanted a different secondary voltage. When we’re talking about power transformers, voltage that you’re sending out to the circuit makes much more difference than the brand you’re using. With output transformers it becomes more critical. Some people want to hear a darker transformer, others high-end clarity…. Some people want a smaller core so it saturates sooner, and others want enough iron so that it never saturates. All of those factors play not only into the sound, but they hugely affect feel.

TQR: Can you briefly summarize each model you build?

The 8 inch version of the Mosaic comes with either the stock 5F1 (Champ) output transformer or the oversize version, which nets you perhaps an additional 2 watts. You get more punch rather than volume. I also build a 12 inch Mosaic Mark II with an additional tone knob, which gives you more bass.

The Cortez was intended to be my flagship model until the Cremawheat came out. The name was inspired by Neil Young’s Suma album – you can just hear the tweed all over it. Its 12W-15W with 6V6s and it bumps up to about 18W with 5881s or 6L6s. It’s basically a straight-ahead 5E3 design.

The Cremawheat is my attempt to retain the tone and feel of a great 5E3 Deluxe, while giving you the dynamic range that would otherwise be lost in the output transformer and speaker with that amp. Those were two choke points on the 5E3, and the third being the massive amount of bass that’s being sent through the circuit, which causes it to distort so early. The other significant feature in this amp is the British-voiced Scumback speaker. It adds punch to the dynamic range, and enough bass, but not the ragged and loose 5E3 style low end.

The T35 covers the 5F4, 5E5-A and 5E7 circuits for the Bandmaster, Pro and Super. They were basically the same chassis with a couple of minor resistor changes and three different speaker configurations, and I tend to prefer the 1×15 and 3×10 versions. It’s the only fixed bias amp I offer. I like the T35 series, but I tend to gravitate toward the cathode biased amps and most of my customers seem to as well.

If you took the 2-input ’55 Bassman, which shares a lot with the Super, Bandmaster and Pro amps of that era, and cathode biased it in a 2×12 speaker format, that’s kind of where the Blue Point sits. When you pay it clean, it sounds very American in the style of a mid-’50s Bassman, and as you turn it up, you get more coloration from the British-voiced speakers. It starts to cross the Atlantic into that early JTM-45 Bluesbreaker tone, but stops short of a later Plexi amp.

The Buckwheat is the follow up to the Cremawheat. It’s a 6L6-based, 30 watt with the Scumback H-75, which is their version of the pre-Rola G12H. It has a significant amount of headroom over the Cremawheat, and the speaker produces a glassier, high-headroom tone with a bigger transformer and a larger cabinet that leaves more air around the notes. If you’re a Telecaster player, for example, who wants more headroom with just a little hair, this is that amp.

TQR: Will you build specific amps with different speaker configurations as a head or combo, and what is the current lead time for an amp?

Sure, I’ll absolutely build variations on the stock models – I actually really like the 16 inch Mosaic and I have built several of them. I want to know that I’m building exactly what a customer wants. The lead time right now is eight weeks, and I always try to keep it under three months. I sell direct, and through a small dealer network, but I do enjoy working directly with customers. Depending on what a customer wants, I may suggest a specific change to the stock circuit, and I find that interaction very rewarding Introducing another 15W–20W amp in these pages is nothing new – in the past year we’ve invested a log of ink highlighting amps like Jeff Beck’s choice of a Pro Junior, our vintage ’59 Deluxe and ’76 Princeton Reverb, the Retro-King 18W and the Trace-Elliot Velocette. Why? Because we understand that such friendly decibel levels offer adequate volume for use in small clubs, mic’ed on bigger stages, yet till fill your house, studio or practice room with a mighty roar when needed. Small amps just make more sense today for most players, but like us, you might be wondering just how many ways a smallish guitar amplifier can be designed and built to produce a genuinely unique voice and vibe. You know what you’ve already got, but what might you be missing, and at what point does your quest to discover the ultimate low power amp become redundant, at best? A fair question, and given the nearly infinite variables created by the marriage of different components within different circuit designs, we are happy to report that we haven’t reached the end of the road in the quest for tone quite yet.

Viewed within the board context of the booteek amp landscape, the Tungsten Cremawheat emerges from the box as an uncommonly attractive natural blonde. Offset with gold grill cloth, it scores big in style points without even being lit up. Nor will you find any self-conscious bells and whistles added to an otherwise classic design, as if the builder wanted to get noticed by adding the kind of stuff we seldom really use – like Selmer-style rotary tone switches, pentode/triode modes and toggled boost switches (although Carr has always done those right by bypassing the tone stack). Indeed, this amp is so outwardly attractive, approachable and comely that pulling the back panel off might inspire distant memories of an anticipation experienced in concert with a one-handed thumb and forefinger bra removal technique. (We now pause to allow a moment of fond reflection. Please take your time.) Adam Palow’s skill in assembling and soldering up a circuit board culminates in nothing less than a work of art. Flip the chassis over and the custom-wound Mercury Magnetics trannies provide further evidence of Palow’s commitment to following his muse. In practical terms, you get four inputs into two channels (bright and normal), volume/volume and tone, plus a standby switch and extension speaker jack.

Our first session with the Cremawheat was agreeable enough, but repeat visits left us with a nagging impression that something was either missing, or perhaps technically present, but not being fully reflected in the sound of the amp. Naturally, we used our tweed Tremolux and Deluxe for benchmarks, and the Tungsten sounded subdued and restrained by comparison. We tried different tubes first with no appreciable change, and that’s when we focused our attention on the Scumback speaker. Admittedly, we had suspected it from the beginning, so with the original tubes back in the amp, we connected the Celestion G12H30 70th Anniversary in our ’59 Deluxe cabinet to the Cremawheat, fired it up, hit a big E chord raking a heavy Pyramid pick over the strings slowly, followed by ten minutes of unbridled delirium. Paired with the Celestion, the Tungsten bowed up with increased volume, clarity, dynamic punch, and a gloriously rich tone that easily rivals that of our Deluxe, but with a little more added sparkle. Swapping the stock Electro-Harmonix 6V6s for a pair of RCA 6L6s brought the Cremawheat to climax with an even bigger, more imposing voice, precisely in the style of our ’59. If anything, the Tungsten offered a slightly more defined and chiseled tone as a new amp should when compared to one that has undergone a half century break-in period.

To be fair, we called Adam Palow to inform him that while we absolutely loved the Cremawheat, we were not feeling the Scumback. He agreeably acknowledged that the Scumback was indeed somewhat more subtlety endowed than the Celestion, which is why he offered the G12H as an alternative for players desiring maximum girth, power and growl. Any number of modern speakers would surely sound outstanding in the Cremawheat – but we clearly preferred the more vivid soundstage created by the Celestion when the choice is narrowed to one of the two stock speakers offered. Would we buy and play the Cremawheat? Absolutely. It now reigns among the best on temporary boutique twenty watters, and in four important respects (tone, overall clarity, availability and price), the Tungsten impressed us as an irresistible alternative to a vintage Deluxe and any and all modern replicas

View PDF Article

Dumble-Inspired Guitar Amplifiers

Something very cool is happening the basement of Mr. Music, Boston’s favorite family-owned music store in Allston, Massachusetts.

After a lifetime of gigging, amp repair, studio building, and tone tweaking for stars like Joe Perry of Aerosmith, master technician Rob Lohr is building some of the finest boutique tone monsters to come along in a while.

I have always been impressed with anything I heard that was built in his shop, located in the basement of Mr. Music. Rob is a person of great detail. A technical question put forward to Rob usually yields a tutorial on the workings of electrons with respect to our favorite instrument, the guitar. Through the years, Rob and I  have had many conversations about what a practical amp should sound and look like. A veteran of the gig scene himself, Rob understands what the working artist needs. In my world, 50 percent of the reason why something sounds good is because it does not need a crew of roadies to transport it, set it up, and break it down. These days, as indie artists, even for high-profile shows in theatres, we usually show up with our own favorite rig. It had better be light and tone-worthy!

When I heard Rob’s Dumbalina, an amp inspired by the legendary Alexander Dumble’s Overdrive Special, I was instantly hooked. Here was an amp the size of a Fender Princeton Reverb that was a very high quality, point to point, hand-made tone machine that had a kick like amps twice its size. Rob Lohr had somehow managed to pack all of the essential features of the best Dumble-inspired amps into a space the size of a Fender Princeton Reverb. He did this with no sacrifice in power (45w) and the highest quality components!

There are many other great D-Style amps whose components are a cut below Dumbalina’s. Yet Rob charges a modest $1800.00 for the basic amp, with additional costs for any custom work. Okay, yes, I did have to pay extra for him to add my name to the front in vinyl lettering with Fender-style script. Don’t be confused though, this is not the “Thaddeus” amp!

With a switchable  4, 8, 16 ohm extension speaker output, the amp offered everything you might need to grow your rig. Small gig: use the onboard 12-inch G12-T75 and walk in with the amp in your right hand and guitar in the left. Large gig: take an extension cab and utilize all of the 45 available watts to rock the stage with two or more 12-inch speakers.

The footswitchable Overdrive channel sounded like the mating of a Dumble Overdrive Special and a Two Rock Custom Reverb Signature. Overdrive that sings without over-saturation and responds to tonal tweaks on your guitar or subtle finger ornaments. The quality of OD of this amp, I will testify, is simply one of the best I have played. The clean channel can be crystal, but if you push it, you can get a singe on the top notes and a roar on the power chords.

The +4 effects loop provides you with the opportunity to use the highest studio grade effects in the loop. Aside from being whisper quiet, plugging in a high-end effect processor seems to lend a three-dimensional quality to the amp that makes it sound much bigger than its physical proportions might suggest. Of course, you can use a dumble-ator or clone thereof to use line level floor pedals, but why not use some of the high-quality studio grade pedals that are coming out these days? TC Electronics makes a couple and so does Eventide. More and more pedal manufacturers are giving you the option of the studio level +4 signal, ready to plug into your D-style effect loop. (See previous post on Effects Loops).

The three switches that you normally find on D-clones for Bright, Mid, and Bass are neatly hidden in Dumbalina: Each  tone knob (Bass, Treble, Mid) has a hidden, whisper quiet, pop-less pull-boost feature which takes the whole thing up to a different kind of 11 heaven. The Volume knob has a presence boost. When the Tone Bypass is engaged (often called Pre-Amp Bypass or PAB in other Dumbl- inspired amps) the treble pull pot doubles as a bass boost. The result is the most useful “PAB” option that I have ever seen with a corresponding increase in low end that makes this feature a very practical and useful option for me. Usually I shy away from PAB because it might sound a little gnarly, or less friendly in lower volume settings, even though it works wonders for cutting through in the heat of the mix at high volumes.

My most recent gig was a power trio gig, a Hendrix tribute concert. I used Dumbalina’s overdrive channel for the solos that were not over-the-top, so to speak. When the band started really bashing, I could get away with using my Tone Bypass to cut through the mix. Really very flexible tones on this puppy! The 45w is just what you need to sing at lower volumes. Push the envelope a bit and you get great power amp overdrive without scaring the non-guitarists out of the room. In addition, there is a master volume/loop send level that allows you to get the tones you are using at lower volumes without changing the character of the settings. A well thought out amp for the working musician. At 34 pounds, the amp is welcome at any gig that I play!

In the studio, Dumbalina reigns supreme. I have just completed tracks for a tribute cd. R&B versions of Jimi Hendrix tunes. I used Dumbalina for many of the guitar solos and rhythm tracks and, well, tune in next year in the Spring to hear what I think are pretty amazing guitar tones.

OLYMPUS DIGITAL CAMERA

Rob builds every aspect of the amp. From the cabinet and grillcloth to the faceplate (painting and vinyl lettering)
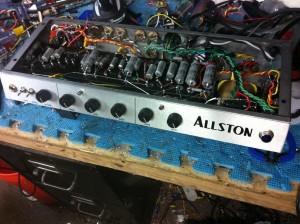
the meticulously wired components inside this amazing amp.

Current wait time is only something like three months, since Rob is building each one by himself. I am sure as the word gets out, that list will grow and grow. It will still be worth the wait, I promise!

Here is the icing on the cake: roughly six months or so after you get the amp, after the amp has been broken in. Rob will sit there with you and do the final tweaking of the components WHILE YOU ARE IN THE SHOP! He will look at the levels and settings that you choose and tweak the internal components so that a great amp becomes an even greater amp, tuned to YOUR signature style of playing. This is an amazing benefit and it is the feature that pushes Rob to the front line of amp builders. (Isn’t that why Dumbles became so popular and expensive? Alexander Dumble would tweak them to the playing style of the owners). Rob recently spent 10 hours—yes folks, 10 hours in the basement at Mr. Music—tweaking an amp for client Alex Potts, so he could have it ready for his move to LA. In my Berklee Online course, Funk/Rock and R&B Soloing, I talk about signature tone. Folks like Robben Ford, who within a couple of notes, announce their presence on the recording whether or not you are even close enough to read the album credits. I believe that this amp can open a door to this concept, and with the post-build tweak, you just might be creating some new history.

Here is the latest version of Dumbalina that Rob is completing, with a couple of new tweaks and slightly different cosmetics on the faceplate, which include corresponding faceplate lights for the lighted footswitchable Overdrive and Tone Bypass features: Sweeeeeeet!!

Here is the scoop on Dumbalina, from the hand of the builder himself, Rob Lohr:

CABINET-The cabinet is Grade “A” pine joined with machine cut half blind dovetail joints and internally braced with poplar. I will cover the cabinet with any available tolex and grille cloth, and you have your choice of appropriate loudspeaker*. The standard faceplate is brushed aluminum with black letters, but I can do colors for a small upcharge and you have your choice of knobs**. The handle is a good quality faux leather that comes in brown, black, or blue, and I use 1″x2″  heavy duty rubber feet and stainless steel cabinet corners and hardware.

*speaker must be of appropriate power handling.

**knobs must fit 1/4″ shaft and comply with existing chassis hole spacing.

CHASSIS– The chassis is steel with welded joints and all hardware is stainless steel. The transformers are MERCURY MAGNETICS FBFVL-P 120v power transformer, FC-VIBROL choke and FBFVLR-OS Fatstack output transformer(4,8,16 ohm selectable). I can do selectable AC input for a small upcharge. The tube compliment is: 2x 12ax-7(pre), 1x 6sl7(PI) 2x 6L6GE(output) and a GZ34(rectifier). I use Belton tube sockets and retainers. I use a combination of Alpha, Clarostat, and Bourns potentiometers, Cliff and Switchcraft jacks, plugs and switches. All shielded leads are Mogami console cable. All unshielded signal leads are teflon coated solid copper core silver clad. All power supply wiring is PVC jacketed stranded copper.

ELECTRONICS– 100 percent hand-wired point to point construction. Hand made 1/8-inch fiberglass turret board, a combination of Metal oxide, metal film and carbon composition resistors, Oil and foil signal capacitors, and high quality electrolytics. There are some other solid state components, but they are related to the switching circuits and are not in the audio path.

LIMITED LIFETIME WARRANTY– I don’t warranty speakers, tubes, or output transformers for obvious reasons …but if anything else ever breaks I will fix it for free for ever and ever. Or until I die, which ever comes first.

Here is the bullet list of Dumbalina Specs:

Output power———–45 watts

Tube compliment——–2x 6L6GE, 2x 12AX-7, 1x 6SL7, 1x GZ34

Output Impedance——4,8,16 ohm selectable

Effects loop———— post pre/ pre power half normalled break out with send level.

Foot switches———-Over-drive and tone bypass(PAB). Both can also be controlled by front panel switches and are indicated with both front panel and foot switch mounted LED’s. The footswitch over-rides the front panel switches.

Controls—————-Volume, Treble, Middle, Bass, Overdrive, Level (ratio), send level.

Pull Pots:

Pull Volume————-Bright

Pull Treble————–Hi mid boost

Pull Mid—————–Lo mid boost

Pull Bass—————-Bass boost

Speaker Celestion G12T75, 8 Ohm

Rob Lohr can be reached at Mr Music in Allston Massachusetts at 617-783-1609 or at  robmadoak@hotmail.com

Here are few demo videos that I just did:

OVERVIEW:

Simple Guitar Amps

Simple Amps’ Big Iron 6VA amp is simple, old school and responsive to your guitar’s controls.

When I received the Simple Amp for review I could hardly ignore its dimensions; it’s a pretty impressive looking package, to be sure. The cabinet weighs about 60 lbs, and the head about 30. The model I received was the Big Iron 6VA, in a head and 2×12 cabinet configuration, sporting the striking Black Widow look.

The 6VA name refers to the output tube configuration, which is two 6V6GT tubes (Tung Sol). Other models using 6L6 and EL34 are available as well; standard preamp tubes are Mullard 12AX7s. The amp also features two 5AR4 rectifier tubes, and the manufacturer states that an optional 12AU7 will give a more pristine clean tone if desired.

So Simple

The head is a thing of both beauty and simplicity. Only two knobs — Volume and Tone — are presented on the front panel. The rear panel features two output jacks, an impedance selector, AC voltage selector, and the AC input module. One cool feature here is that it carries one spare fuse inside the fuse holder for easy access, in case of an emergency. Construction is impeccable, with hand-wired turret boards, and Mercury Magnetics power transformer, output transformer and choke. The 6V6 model scopes out at about 30 Watts.

The speaker cabinet is equipped with two Celestion Alnico Gold G12 50-watt speakers, set up vertically and wired for 8 ohms. It features an open-back design and has aluminum speaker baffle and bracing. Although I didn’t have an opportunity to hear the cabinet with a wooden baffle, I’d have to say my impression was that the aluminum baffles and bracing made it a bit brighter, and certainly tighter on the low end, than most open-back cabinets I’ve played. This example was mono wired, but a stereo option is also available. The cabinet was solidly constructed of 11-ply and 13-ply Baltic birch, and sounded very tight when pushed.

Another cool thing is that the manufacturer includes both a speaker cable and an instrument cable by Solid Cables, which transfer some of the cleanest tone and response around. They want to make sure that this amp is run under optimum conditions, and it shows their dedication to getting the perfect tone out of the amp.

So What About the Sound?

The creator of this amp, Joel Jones, tells me that his idea for this design comes from the desire to turn the amp up to ten and control the whole clean/dirty sound from your guitar’s volume. Doing it this way allows for the all-important power tube saturation. It’s easy to overdrive a bunch of 12AX7 stages for distortion or overdrive, but when the power section comes into play, the whole dynamic changes. The amp can be very warm and clean at lower settings of the Volume control, especially using the bottom input, which has less gain, but touch sensitivity is also affected. The lower input might be better for some players who derive their tones from pedals, as the higher headroom would let their reverb and delay effects work better. Happily for many players, this amp has more available gain on ten than most amps of this type. The low end is smooth and tight. Some single-volume/single-tone amps sound pretty bloated when cranked in this fashion, but not this one.

The Simple Amp 6VA is also very pedal friendly. I used a Tube Screamer pedal and an old Marshall Guv’nor pedal and got amazing distortion and overdrive sounds with both a Strat and a Les Paul. The Fender Stratocaster used was a typical American Vintage 57 reissue with a maple neck and Duncan pickups. The Les Paul was a 1969 Black Custom retrofitted with original 1959 PAF pickups.

The type of tones I was able to achieve varied according to the various pedals I used. The TS808 gave me a very good rendition of SRV and Robin Trower when used with the Strat. Through this pedal with the Les Paul, the classic British rock tones — Bad Company and Zeppelin — were readily available. When I switched to the higher gain Marshall Guv’nor pedal and the Strat, I found that David Gilmour tones and even a bit of Yngwie on the neck pickup were no problem. With the Les Paul and the Guv’nor I found Gary Moore and Neil Schon type of sounds (I should mention here the volume was set at about 9, and the tone about 7).

I have to say that for heavier rock tones, you will need to use a pedal. The Strat-blues SRV thing is really no problem with this amp paired with any type of Tube Screamer. I was surprised at the volume the amp produces. This is probably the result of the two 12” speakers stacked vertically, as well as the cabinet design. The guitars cleaned up to pristine clean when their volumes were reduced, making it a very usable unit for those comfortable with controlling it this way. The Simple amp has a wonderful warm tone and texture to its sound, which is fairly hard to come by these days. I noticed exceptional touch sensitivity to the amp, and it responded well to different types of picking techniques.

The tone control on the amp was very wide ranging, going from very dark to some pretty screaming highs. On the high end the amp seems to have more gain, but even with the amp cranked and the Tone knob turned all the way treble side, the top end was not harsh. It was very easy to dial this control in to just the right amount of brightness. The dual rectifier tubes in this amp should not be confused with the similar specs of other brands. In this application they are there to provide just the right amount of sag to the power supply. I think this is probably the reason for the exceptional touch sensitivity of the amp.

The Final Mojo

I found the Simple Amps model 6VA to be an excellent amp for players who are comfortable with controlling their tones from their guitar. It may not be the best choice for players who are used to the staggering gain and sustain of Boogies and Bogners and the like. This amp is not in my opinion, a competitor to those types of amps. It does, however, produce tones that would be difficult to get from the modern high-gain amp. Old school players will love it. It is well built, and even though it is larger than most amps of its type, it is worth the effort to transport.

Buy if…
you’re looking for a great, simple amp with clean/dirty sounds you can control from your guitar’s volume.
Skip if…
you’re looking for a lightweight amp, or prefer the massive overdrive of a modern high-gain amp.
Rating…
Street $2650 (head) $1150 (cabinet, as tested)

Source: https://mercurymagnetics.com/pages/news/PremierGuitar/PremierG-19.htm

Most Extraordinary Guitar Amplifiers

No one has ever succeeded in deciphering the infinite variations manifested by the human mind — how we inhabit the same world, yet perceive and react to every moment in our lives in such profoundly different ways. Society, education and culture provide filters intended to shape how we view the world, but each human being remains different and unique for reasons that remain a mystery. And so it goes with music and musicians…. Why do some players find their voice in a Stratocaster, while others can’t imagine playing anything but a big-ass hollow body? This is “me,” and that isn’t, but for someone else it is. Most of us hear target sounds in our head that drives our selection of instruments and gear — a sound that may change with each song, while a weekend blues player might simply wish to refine a single, signature tone in the style of Jimmie Vaughan or Albert or B.B. King. The point is, we often know where we want to go, but the shortest path to our destination isn’t always so clear. To make things more interesting, some players just want to be dropped off at the right address in the Quest for Tone, preferring to find something that works with no tweaks or modifications as quickly as possible, while others view the Quest as a journey with no defined beginning or end. To them, anything is possible until proven otherwise, they enjoy exploring new sounds, and their “failures” are often as illuminating as their successes.

We learned this lesson once again with an amp that we had initially written off, only to discover four years later that it could become one of the most extraordinary guitar amplifiers we have ever owned or reviewed. What changed? Well, with the lucid, unerring clarity of hindsight, we had to dream it first, thinking of terms of possibilities — what could be, rather than focusing solely on what was missing….

Fender ’57 Twin

The 25 watt Twin originally debuted in 1952 as the first amp with separate bass and treble controls. By 1955, the model 5E8 Twin had been upgraded to 50 watts, featuring two 5U4G rectifiers — another Fender first in guitar amplification — dual 6L6s, bass, treble and Fender’s presence control, a new fixed bias power transformer, choke, and extra gain stage and second negative feed-back loop, and the new “narrow panel” cabinet with speakers mounted in each corner. In the next circuit revision (1956–57 model 5E8A), a ground switch was added and the treble tone circuit was removed from the negative feedback loop. Leo Fender couldn’t play a lick on the guitar, but he obviously never stopped thinking about how to improve the sound and performance of his amplifiers, as evidenced by the nearly constant revisions and refinements of Fender circuits. The mighty “high power” 80 watt Twin model 5F8 appeared in1958 with four 5881s, a short-lived 83 mercury vapor rectifier that would be replaced by a single GZ34 rectifier (model 5F8-A), and a new “Middle” control added to the normal bright volume, bass, treble and presence controls. For many collectors and players who can afford them, the high powered Twin ranks with the 5F6-A Bass man as the most toneful, desirable, rare and costly Fender amps ever built.

View PDF Article

Mercury Changed the Power Amp Transformers

Fender’s tiny Champion 600 is aimed at the guitarist who requires rich power-tube distortion at low volume levels. With just one 6V6 power tube putting out five watts, getting the little Champ to scream is no problem. Introduced after Epiphone’s similarly-sized Valve Junior, the Champ 600 has a smaller (6” compared to the Epi’s 8”) speaker, but the Champ is much more compact at 11” wide x 12” high and 7-1/2” deep. And at only 15 pounds, travelers can appreciate that it easily fits into a large suitcase (and leaves 35 pounds for jeans, toothpaste and Rogaine before the friendly ticket agent demands an additional $25).

Introduced after Epiphone’s similarly-sized Valve Junior, the Champ 600 has a smaller (6” compared to the Epi’s8”) speaker, but the Champ is much more compact at 11” wide x12” high and 7-1/2” deep. And at only 15 pounds, travelers can appreciate that it easily fits into a large suitcase (and leaves 35 pounds for jeans, toothpaste and Rogaine before the friendly ticket agent demands an additional $25). Out of the box, the Champion 600is an acceptable practice amp.But the word “acceptable” doesn’t mean much to the folks at Mercury Magnetics. Just as they did with the Epi Junior, Mercury conscripted Alan Cyr to devise a circuit that would bring the new Champion 600closer to the sound of the coveted and increasingly rare Champ of the 1950s.

First thing to go was the speaker, which Cyr deemed the most limiting feature of the stock package. A suit-able replacement came from Ted Weber. Next thing to be addressed was – believe it or not – volume.“The stock unit was not very loud,even for five watts,” Cyr noted.“There’s a tone stack without tone controls built into the stock unit with fixed resistor values. Also, there were some slope resistors to make the tone less harsh. They were trying to mimic a ’50s amp that had an octal tube socket with a miniature nine-pin dual-triode tube. Running the signal through a resistor bleeds off high frequencies as a sort of low-pass filter.”

What Cyr ended up with was not a purely Champ circuit because it lacked a negative-feedback loop. Then Mercury changed the pre amp and power amp transformers, and added a choke to create some filtering. They also eliminated about a dozen parts, greatly reducing parasitic loss of tone, which means the circuit most closely resembled a black-face Champ with a couple of changed cap and resistor values, with the goal of keeping the character of the 6V6 tube without having to push too hard.

Mercury says anyone who has replaced pickups or a tone switch should be able to accomplish this mod in a few hours (but of course anyone should very carefully read the instructions).

Without a guitar plugged in and even with the Volume knob all the way up, the modded Champ is nearly silent. A Gibson Les Paul Special with Rio GrandeP-90s plugged into the High input produced respectable, chimey-clean tones, especially through the Special’s bridge pick up with the Champ’s Volume knob at 4 or lower. Moving the Volume dial clockwise revealed a variety of distortion tones. It starts with a nice edginess and works its way up to full song. While the stock unit got a little shrill toward the end of the dial’s sweep, the Mercury-modded amp stays smooth all the way to the stop.

Next up was an equally practical Traveler Escape EG-1with humbucker in the bridge. Plugged into the High input, the EG-1 sang away with the Volume at 5 (this amp bests Nigel Tufnel by going to 12, by the way).  After 6 it’s Dickey Betts, and 10 or beyond gives a fuzz that would have felt at home four decades ago in Golden Gate Park.

Plugging into the Low draws more character from the humbucker.There’s just a little more clarity and some nice Tom-Petty-style chime on the lower volume settings with the EG’s Tone knob on max. Twisting the amp’s Volume knob brings more distortion, but in refined degrees. Note clarity and definition remain through the entire sweep, and the amp is extremely touch-sensitive,even through the humbucker.

Combining the middle and bridge pickups through notch position four on a custom Strat plugged into the Low input, the Champion offered an amazing and well-balanced cluck.Position one (neck pickup) produced all the glass and steel it was intended to make, the middle position was clear yet warm, and the bridge pick-up could be coaxed to an aggressive,Telecaster-like attack.

The High input got all three pick-ups searing with sustain in any combination at any volume setting above 5. Most notably, the bridge pick up came alive and the Champion scored a knockout by providing great note clarity in the notch two position, which combines the neck and middle pickups. If an amp is going to fail on clarity in the ninth round, this is where it’s going to happen.—Bob Dragich

View PDF Article

Marshall Guitar Amplifiers

If you want to nail Clapton’s tone, a crucial part of the equation is the amplifier. With a little ingenuity, John Wiley shows you how to turn your reissue Bluesbreaker combo into the real deal.

A unique distinction of early Marshall amplifiers is that none of them within the same model line sound exactly alike. Partly attributable to founder Jim Marshall’s penchant for working with budding British musicians and working many of their suggestions into his designs, and partly due to the difficulties of locating reliable parts suppliers, Marshall’s early designs each had their own personality. For instance, Marshall’s Model 1962 combo was, itself, an ordinary amplifier; however, one particular Model 1962 used by Eric Clapton with John Mayall and the Bluesbreakers had such a revolutionary tone that it created a new sound in the still-young world of rock n’ roll.

In 1965, Clapton found himself the featured guitarist in John Mayall and the Bluesbreakers. Armed with a 1960 Gibson Les Paul and the Marshall Model 1962 combo amplifier, he single-handedly discovered a combination of guitar and amp that produced an extraordinary howl — Clapton achieved his trademark sound by playing the amplifier at full volume. The sound was full-bodied, authoritative, but not overly distorted; it easily cut through the other band instruments. The sustain was pure, the treble notes sang and the bass registers exhibited a “throaty” bottom. At such high volumes, the amp was prone to feeding back, and this provided an awesome effect to the overall sound.

This image, from the Beano LP, shows Clapton tuning up, with his Model 1962 in the background.

The blistering tone was captured on vinyl and released to an unwitting public as John Mayall and the Bluesbreakers with Eric Clapton; also known as the “Beano” album, it quickly shot to number six on the British charts, even amongst the din of other popular British and American pop groups such as the Beatles, the Animals, the Rolling Stones and the Beach Boys. That LP’s impact soon spread to America and abroad, inspiring legions of new guitarists around the world — especially influencing musical rebels in the United States. Clapton’s playing style, combined with a ferocious amplified tone, seemed to inject a new and exciting dimension into the young blues-rock genre. But none of this could have happened without the small British amp company, Vox. Models like the AC30 would provide the “British Invasion” with its unique sound, and convinced Marshall to build a compact amplifier for his new company; the initial development of Marshall’s first combo took place in early 1964. In a 2003 interview with Musician’s Hotline magazine, he claimed the Model 1962 was built at the request of Eric Clapton. “Eric used to practice in my shop and he was one of the first guitarists to ask me to build a combo,” Marshall recalled. “He wanted one so it would be easy for him to put the whole thing in the boot [trunk] of his car.”

Unfortunately, that Model 1962 disappeared, with Clapton himself unsure of what became of it; years later, it would become known as the holy grail of combos. Although those early combos had great tone, no two sound exactly the same. Two decades later, the Marshall reissue would sound nothing like it at all.

The Reissue

For many of us, the year 1990 brought an answer to one of our greatest wishes: the Marshall Model 1962 2×12 combo was finally reissued. The idea had apparently been in the works for quite some time, as evidenced by this author’s correspondence to a Marshall factory director, Keith Carnall in the late months of 1984. Carnall’s reply stated, “We have thought many times about running a ‘vintage special,’ with valve rectification and all the other old goodies… let us just say for now that it is an idea that we will continue to work around and perhaps you will get your wish granted.” Although Clapton was not aware of the amp being reissued, Marshall christened it the “Bluesbreaker,” in his honor. When asked in a 1989 Guitar World interview he replied, “Did they really? How sweet. I didn’t even know that. How does it sound?” Marshall simultaneously introduced the Bluesbreaker and the JTM45 in 1990, along with the new JCM900 series.

At a cursory first glance, Marshall did an outstanding job recreating the Bluesbreaker, as it externally resembled the original with the distinctive and elegant Marshall styling. Just like the original, it was rated at 45 watts and came with two Celestion speakers. The cabinet dimensions measured 29.13″ wide by 23.62″ high by 9.25″ deep, and black vintage Tolex coupled with a vintage-style Bluesbreaker grill cloth completed the package. Electronically, the 1989 reissue used two 6L6 vacuum tubes for power, three ECC83 (12AX7) preamp tubes and one GZ34 rectifier tube. In 1993, Marshall replaced the 6L6s with 5881 vacuum tubes. Tonally, the Bluesbreaker reissue had a unique and fine sound of its own. It produced varying degrees of that buttery smooth sustain, while retaining that traditional Marshall crunch.

The following is a listing of the basic differences between the original Model 1962 and the Model 1962 “Bluesbreaker,” as reissued in 1990:

Model 1962 Original Reissue Bluesbreaker
Cabinet Dimensions: 32″ X 23″ X 10.5″ 29.13″ X 23″ X 9″
Cabinet Material: Birch Plywood Particle Board & Plywood
Grill Cloth: Horizontal strip Checker pattern
Output Tubes: KT66 6L6 / 5881
Speakers: Celestion 20-watt Alnico Celestion 25-watt Ceramic

But just how close was this new variant to the original Model 1962? To the true Marshall collector, and to the rare few who actually owned the genuine article, the differences were immediately apparent. In Michael Doyle’s book, The History of Marshall, he pointed out that the cabinet was too small and the grill cloth was not right. But the major disappointment was not in the appearance, but the sound the amplifier produced. While the sound was good and had plenty of Marshall crunch, it was definitely not the sound of the original. And for that reason, I began a quest to change the sound of my reissue into something more closely resembling the original.

Hitting the streets in 1990, the Model 1962 “Bluesbreaker” reissue was plagued with discrepancies out of the box. The cabinet was undersized by some 30 percent, with a depth barely over 9″, while the original measured in at 10.5″. The reissue’s overall width was almost 30″, while the original was 32″. The most reasonable explanation for these differences would come from the use of output tubes originally selected for the Model 1962. Although the very first combos incorporated the smaller 5881 vacuum tube, Marshall designed the Model 1962 for the more prevalent but enormous Coke bottle-shaped KT66 vacuum tube. The usage of this particular tube necessitated the deeper 10.5″ cabinet.

Likewise, the cabinet’s construction differed significantly from original specs. The Model 1962 Series I was built using pine planks for the cabinet with multi-ply birch baffles; the Model 1962 Series II was completely constructed with multi-ply birch plywood (more about these series differences in a moment). The reissue used particle board for the cabinet and plywood baffles.

Finally, the speakers supplied in the original combo were G12M “Greenbacks,” rated at 20 watts each. This speaker utilized an Alnico magnet, providing sweet, warm tones and a smooth midrange — an essential ingredient for that “British chime.” At 20 watts, the speaker could barely keep up with the tremendous overdrive of the amplifier when it was at full volume. Marshall, however, equipped the Bluesbreaker reissue with 25-watt Greenbacks, featuring ceramic magnets. While they lacked the chime of an Alnico magnet, they could withstand twice the wattage and had a fine sound of their own.

The Model 1962 Back Story

However, before we dig in and modify our reissue Bluesbreaker, it would behoove us to understand where it all started. In 1964, while the Beatles made their first appearance on the Ed Sullivan Show, and the Civil Rights Act of 1964 was enacted, Marshall was busy introducing its very first combo. Because it was the very first series, it is historically referred to as the Model 1962 Series I. Interestingly, the 1962’s model number did not refer to a particular year or significant event in time. Until the 1980s, Marshall’s distributor and financial backer Rose-Morris used these numbers arbitrarily, using the prefix “19” for all of Marshall’s product line.

Jim Marshall wanted his new range of combos to be versatile; as a result, he designed the Model 1962 with two 12″ loudspeakers and used the JTM45 bass chassis (Model 1986) electronics. The Model 1962 was described in the Marshall catalogue as a “Bass/Lead” unit, making it an extremely versatile amplifier that could be used by guitarists and bass players alike.

But just how close was this new variant to the original Model 1962? To the true Marshall collector, and to the rare few who actually owned the genuine article, the differences were immediately apparent.

In addition, a second combo with four 10″ speakers — the same configuration used in the Fender Bassman — was offered to players. Marshall’s 4×10 version was referred to as the “Lead” and utilized the JTM45 treble chassis (Model 1987) electronics. This 4×10 configuration, designated the Model 1961, was designed for guitar use only. Both Model 1962 and 1961 were purposely marketed as the British equivalent to the vastly popular Fender Bassman, and they offered quite a bargain for British and European musicians. The Model 1961 retailed for a scant $165 American dollars and the Model 1962 retailed for $170, while the Fender Bassman was nearly double at $300. Both models went into production in late 1964.

Cabinet and Construction

The cabinet dimensions for the Model 1962 (2×12 configuration) were 30″ wide by 24″ high by 12″ deep. The 1961, incorporating four 10″ speakers, maintained square proportions, measuring 28″ wide by 28″ tall and 11″ deep. The Model 1962’s width is 2″ wider and 1″ deeper than the 1961’s to accommodate the dual 12″ speakers.

Marshall amplifiers would also gain a reputation for their ruggedness. Marine ply birch was used for cabinet construction, as the laminated layers of glued veneer plywood provided greater overall strength than a singular plank of yellow pine, which was the wood of choice for Fender amplifiers. These early Marshalls did not use the “finger-lock” joints that would become standard on all Marshall cabinets a few years later.

The Marshall ads above suggested the reissues matched the originals; in reality, there were significant differences.

Marshall cabinets were also visually appealing and had the look of richly appointed furniture. Black PVC (polyvinyl chloride) material, similar to the General Tire invention known as “Tolex,” was used for the entire exterior of the cabinet. This smooth, black fabric was different from the black “Levant” Tolex Marshall would use later.

Accenting the cabinets was Marshall’s elegant grill cloth. The company’s catalogue referred to this early cloth only as, “contrasting speaker grills,” not actually describing the color or pattern of the cloth material. However, it was known as the “white” grill cloth and had thin, horizontal gray lines running through it. Also included on the earliest models were three leather straps, attached to the top of the cabinet and similar to the Vox AC30. These amplifiers weighed in at a very heavy 70 pounds, and the sheer weight meant that it wasn’t long before the leather straps would stretch and break. In early 1965, an improved, single plastic strap which was stronger and larger in size replaced the leather ones.

The very first Marshall combos produced in late 1964 used what was known as “Vox-style” cooling vents, which allowed the heat produced by the transformers and vacuum tubes to escape efficiently. Two vents were installed into the top of the cabinet, similar to the Vox AC30. The vents were rectangular in shape and had a metal screen riveted inside.

Chassis Electronics and Components

The internal chassis that included all the electrical components was made of 6061 aluminum sheet metal. Aluminum has excellent non-sparking and non-magnetic characteristics, making it ideal for electrical shielding purposes and chassis use. It is, however, not as strong as steel and would fatigue and sag under the weight of the heavy power and output transformers. To remedy this, cast aluminum end blocks were riveted inside each end of the chassis to add strength and rigidity. The chassis were 2.5″ deep and purchased from a sub-contractor named Smiths.

The JTM45 used one circuit board screwed inside the aluminum chassis, providing a central platform for the various electrical components. Prior to 1965, Marshall used Tufnell perforated circuit boards; from 1965 to 1967 a subcontractor called Heathfield manufactured the circuit boards, which can be recognized by the drilled holes on the solid sheets.

The output transformer was officially known by Marshall as the “RS De Luxe.” It was light gray in color, with horseshoe end bells. The maximum output rating was only 30 watts, and all three transformers used on the JTM45 — the output, power and choke — were purchased from Radiospares, an electrical component clearing house.

The first combos produced in late 1964 were equipped with two GEC (General Electric Co.) KT66 vacuum tubes. The original design of the JTM45 called for the Tung-Sol 5881 tube; because this tube was used in the Fender Bassman, it was the tube of choice. However, supplies for the 5881 were scarce and the KT66 was used as a replacement. The KT66 provided more bite and distortion, suiting the JTM45 perfectly, and unlike the EL34, it was not overly saturated and did not sound mushy. The KT66’s bottom end was solid and exhibited clarity, while the trebles were almost “violinlike” in nature and very smooth. Much like the Fender Bassman, the JTM45 became known for its unique sound, primarily because of this tube.

Four 12AX7 (designated the ECC83 in Europe) preamp tubes were supplied in the 1961 and 1962, and both featured a tremolo circuit as a standard appointment. These amps also included tube rectification, which added to the sound’s overall smoothness. The 5AR4 rectifier tube (designated the GZ34 in Europe) was used on all JTM45 configurations, including models 1961 and 1962, and was the same rectifier used in the Fender Bassman and many other classic American amplifiers.

The JTM45 also incorporated two “can” style filter capacitors; the number of capacitors used, and their respective value, was a significant factor in the overall sound of the amplifier. One LCR Co. 32ìf x 32ìf at 450 volts was mounted on top of chassis near the power transformer, and one LCR Co. 16ìf x 16ìf at 450 volts was mounted inside the chassis just beneath the power transformer — the standard arrangement for the JTM45.

KT66 tubes as were used in Clapton’s Model 1962.

Speakers & Logo

The Model 1961 would utilize four 10″ Celestion Alnico speakers, while the Model 1962 would use two 12″ Celestion G12 speakers, handling 15 watts and featuring an Alnico magnet. The Alnico magnet contributed to the amp’s unique and sparkling sound, referred to as the “British chime.” A basic style of logo badge was used on these very first combos, and is commonly referred to as the “gold block logo.” The badge was rectangular in shape and was very simple, having only the Marshall name in bold block letters. The letters were black in color on a background of gold, although silver was sometimes used.

The Clapton-Spec Combo — One of a Kind?

The particular Model 1962 amplifier that Eric Clapton used with John Mayall and the Bluesbreakers was unfortunately lost, without knowing its exact pedigree. It was definitely an early edition of the Series II combo and was built during a continuous procession of production changes and revisions. The typical production run of any of the Marshall line could have differing components from amp to amp — it is not an exaggeration to say no two amps were exactly alike. This was primarily due to the inconsistent component suppliers Marshall used at the time, and partly because booming business made record keeping (serial numbers, production quantities, etc.) a low priority — existing serial numbers are not reliable or even logical, and production numbers are at best derived from employee recollections. Therefore, determining just how many amps were built exactly like Clapton’s is extremely difficult. The following list of features, derived from exhaustive research, best represents the Clapton’s combo specs. This particular amp is pictured on the reverse side of the “Beano” LP. The Series II cabinet was designed by Marshall’s chief designer Ken Bran, and incorporated a more modernistic styling. Its dimensions were 32″ wide by 23″ high by 10.5″ deep. The cabinet was sturdy and constructed of 3/4″ marine ply, incorporating one slot-style cooling vent and covered with black Lavent vinyl. The grill cloth was the classic gray and white striped variety later known as “Bluesbreaker” grill cloth. The cabinet was smartly accented with gold hardware attachments for the cabinet handle.

Chassis Electronics and Components

Clapton’s amplifier utilized the JTM45 bass guitar amplifier electronics known as the Model 1986 and the same chassis used in the Series I, made of 6061 aluminum sheet. One circuit board screwed inside the aluminum chassis was used and it was manufactured by the Heathfield Company.

Mounted on top of the chassis was the heart of the amplifier — the transformer. The defacto JTM45 output transformer was the “RS De Luxe;” however, since it was rated at only 30 watts, it was not ideal. Clapton’s amp may have utilized the newly acquired Drake Companytransformers. The output transformer would have been Model #784-103, with an 8K primary Z, and the power transformer would have been Model #1202-55. Utilizing the Drake transformers would explain why Clapton’s combo did not sound like a “typical” JTM45amplifier.

Clapton’s amplifier utilized two GEC KT66 output vacuum tubes. The preamp circuit included four Mullard ECC83 tubes, with one dedicated to the tremolo circuit. The Mullard GZ34 rectifier tube was again used. Two can-type filter capacitors were used: one LCR 32ìf x 32ìf at 600 volts mounted on top of the chassis near the output transformer, and a second LCR 16ìf x 16ìf at 450 volts mounted inside the chassis.

Speakers

The amp’s speakers consisted of two 12″ Celestion G12s, rated at 20 watts, 15 ohms, and with an Alnico magnet. These speakers were essentially the same as those used in Vox AC30s, and are extremely fragile when pushed beyond their limit. Because Clapton ran the amplifier at full volume, the Alnicos may have been damaged. He may have replaced them with the higher wattage, ceramic magnet Celestion Greenbacks.

The Model 1962 reissue schematic.

The Objective: Convert a Reissue to Clapton-Spec

I started my investigation into obtaining this sound over 20 years ago. In addition to the “Beano” studio CD, there were other John Mayall albums that included “live” cuts from Eric Clapton’s time with the Bluesbreakers. Although these recordings were done with crude equipment, they captured the raw and unrestrained sound of Clapton’s guitar and amplifier. To my ears, these recordings were most realistic, as they lacked any studio treatment. I quickly knew what sound I was after.

In 1994, Mike Doyle’s book, The History of Marshall, was released and included an eye-opening chapter on the Bluesbreaker. That chapter confirmed the reissue’s lack of authentic sound, and it became obvious that in the amp’s conversion to Clapton specs the only salvageable pieces would be the electrical chassis, the control panel and some of the cabinet hardware — the cabinet and speakers would have to be replaced.

With that, I decided to do the conversion in a logical progression and planned to document the progress. I preferred a progressive approach, as it would give me a chance to analyze each change made separately. In addition, since this conversion would be fairly expensive, it would be easier on the budget to purchase items over a period of time. The changes required could be grouped into three categories:

  1. Cabinet: Since the reissue cabinet was too small, it could not be used. I’d have to find a new cabinet that is the correct size. The reissue’s casters, amplifier strap handle and the plastic Marshall logo badge could still be used.
  2. Electronics: Swap out the reissue output transformer for a vintage correct one, re-tube with KT66 vacuum tubes and change out the filter capacitors.
  3. Speakers: Change to an Alnico magnet type.

I should note that it is possible to make deeper changes, such as replacement of the circuit board, resistors, potentiometers and components, plastic tube sockets, and rewiring of the chassis to original specifications. These additions will make the electronics of the amplifier more authentic, but will not noticeably improve the sound. These additions also significantly increase the cost and add more time to the project.

The steps I have outlined above will reproduce the amplifier tone as heard on the live cuts of Clapton with the Bluesbreakers, as well as the “Beano” record. In fact, after making these changes, your Bluesbreaker will no longer be a mere reissue — it will sound like the real thing!

The new cabinet is over 2″ bigger than the reissue cabinet, resulting in a fuller sound.

Step 1: A Bigger Cabinet

There are now several competent amplifier cabinet makers building exact replicas of the Model 1962 Series I and II cabinets. Be sure these makers use the required multi-ply Baltic birch plywood, correct black Tolex covering, vintage gold veining and the surrounding white piping. It is also wise to have them confirm the correct cabinet dimensions, as the Series I and II are two completely different cabinets. To save some money, you could use the Marshall logo, casters and other hardware from your existing reissue. Two excellent cabinet makers available on the internet are Vibroworld.com and Swansoncabinets.com.

For the first phase, I ordered a new cabinet from a cabinet maker on the internet — to ensure accuracy, I supplied them with a CAD drawing of the Series II dimensions and features. I was very pleased with the results I received a few weeks later. I removed the chassis and speakers from my Marshall reissue and reinstalled them in the new cabinet. Even though the new cabinet included pre-drilled holes and Tnuts for the speakers, it still took some time to make this switch. While switching cabinets, be careful to ensure the speaker and amplifier connections are right.

For testing, I used a Gibson Les Paul Heritage 80 model. After re-checking the chassis and cabinet connections, I turned on the amplifier, and let it warm up. I started at low volumes and progressively turned up the volume to 10, all while keeping the other settings such as presence, bass, middle and treble at 10. Upon hearing the first chords, I was immediately struck by a new “openness.” The amplifier seemed to breathe and had a new, airy sound to it — it did not sound as tight as the smaller reissue cabinet. With 30 percent more space in the cabinet than the reissue, the trebles seemed revived and the amp now had an “airy” bottom-end. Comparative testing with another stock Bluesbreaker reissue verified the tonal improvements.

An interesting side note; in 1997, Marshall produced a limited edition white Bluesbreaker called the “Limited Edition 1997.” It was basically was the same amplifier as the 1989 reissue, with one important difference: the limited edition’s cabinet incorporated the deeper 10.5″ thickness, as can be found in the original Model 1962 Series II.

Step 2: The Electronics

Before digging into the guts of the Bluesbreaker, a word of caution: this phase deals with potentially dangerous electrical voltages and it is highly recommended that only a trained and competent amplifier repair person or skilled electrician perform these tasks.

This phase involves swapping out the reissue transformer, changing the 6L6 vacuum tubes to KT66s, and replacing the filter capacitors.

The Transformers and Tubes

There are now some good vintage transformer manufacturers around, so one has a choice in the matter. Since the original Model 1962 used a Radiospares (RS Deluxe) transformer, the objective here is to get one like it. When I did my conversion, I purchased a Mercury Magnetics Model O45RSL-8-M(MercuryMagnetics.com).

When it comes to power tubes, the only one to use here is the revered KT66. There are however, a few brand options available. One could either purchase a matched set (two are needed) of original GECs, or purchase a pair from companies offering reissue KT66s. The European and American tubes manufactured in the 1950s and 60s (new old stock) are superior in tone, quality and reliability. Tubes now manufactured in Russia and China such as Groove Tubes, the new Tung-Sol, and JJ/Tesla offer comparable tone and are reasonably priced. Since these tubes are made overseas, it is difficult to isolate a superior brand, and although tonal quality is improving with better consistency, tone remains an individual choice. For my conversion I used a matched set of Chinese Valve Art tubes, and was not disappointed.

Since we are changing out the power tubes, it is highly recommended to replace the 12AX7 (ECC83) preamp tubes as well. Again, there are several good options here which include SED Winged “C,” Electro-Harmonix and Ei/Ei-Elites. Replacing the GZ34 (5AR4) rectifier tube is also a must for optimum performance. The same tube suppliers listed above carry the GZ34, in varieties like Sino, Sovtek, or the very expensive Phillips metal base.

Filter Capacitors

Replacing the big can-style filter capacitors will definitely give your reissue more clarity. Filter capacitors are rated in the ZZxZZ format. The reissue Bluesbreaker has two 50×50ìF capacitors which must be replaced. The blue 50×50ìF filter capacitor, located closest to the GZ34 rectifier tube should be replaced with a 32×32ìF/600V capacitor. The other 50×50ìF gets replaced with a 16×16ìF/450V capacitor. JJ and F&T are two good options for filter capacitors.

Caution: These changes should only be done by a good amplifier repairperson. Also remember to have your KT66 vacuum tubes rebiased. I had renowned Bluesbreaker guru Ted Breaux finalize and tune my Bluesbreaker electronics.

Before using the amp at full volume, a suitable warm-up for the newly installed electronics should be done by simply powering up the amp and leaving it on Standby for a good hour or so. While it’s warming up, pay close attention to any unusual odors or burning, as a bad solder joint or incorrect wiring could cause a short circuit.

Once the amp has warmed up, with no guitar plugged in set the Presence, Bass, Middle and Treble controls to 10. Then start increasing the volume of Input 1 slowly, listening for any peculiar pops or sizzling noises in the process. If you don’t hear or notice anything unusual, you should be set to go.

For the “sound” test I used the same Gibson Les Paul Heritage 80; for the tonal comparison, I used the Primal Solos CD, starting with the solo in “It Hurts to Be In Love.” Before cranking the amp to 10, I employed the same gradual progression of low volume checks, listening for any unusual noises and so on. When I got to 10, I was astounded!

I was able to produce the same overtones and harmonics as the recording.

Likewise, the treble response was spectacular. I had read that Clapton used a Rangemaster treble booster with his amp, but I was getting the “sound” without one. The F9 chord in “Have You Ever Loved a Woman” shimmered and went into harmonic overload, exactly like the recording. The only notable difference was in the bass registers, as it seemed harsh at times and slightly lacking in tightness — additionally, some of the treble response seemed a little harsh. But I was definitely hearing 95 percent of that Clapton-spec sound, as no EL34 or 6L6 had ever sounded like this. It was now time for a speaker change.

The cabinet after installing the Weber Blue Dogs.

Step 3: The Speakers

I narrowed my choice of Alnico speakers down to the Celestion G12 Alnico Blues and the Weber P12B Blue Dogs. The Celestions were rated at 15 watts while the Webers were rated at 30 watts — I decided to try the higher-wattage Weber P12B. After swapping out the reissue Greenbacks for the new Blue Dogs, I played the amp at lower volumes for several hours. At these levels (5-6), I was pleasantly introduced to the British chime of the 1960s. Early Beatles rhythm and lead guitar sounds were easily obtainable, particularly within the mid and bass ranges.

I then tried the full throttle test. At full volume, I was in for quite a shock — the mid and bass ranges nearly cut me off at the knees. The treble side was knife-edge harsh and the amp was monstrously louder. I was obviously disappointed, as none of this remotely sounded like a Bluesbreaker. I had read that Alnico speakers may require an extended “break-in” period, and I hoped that was the case here.

I removed the Blue Dogs from the Bluesbreaker cabinet and reinstalled them into a 2×12 cabinet I was using for weekend gigs. After a few weekends of extended playing, I noticed the sound changing, as I was having to re-adjust my amp head settings. After a few more weekends, I definitely noticed something happening. It was now time to re-install the Blue Dogs back into the Bluesbreaker cabinet.

Upon trying it again, something magical happened to the overall sound of the amplifier. Right there in my basement, and out of my rebuilt Bluesbreaker, came the sound. I was flabbergasted, as it sounded incredible. I must have played the amp all night. I was nailing all of Clapton’s Bluesbreaker riffs, and they sounded identical to recordings. The A minor solo break in “All Your Love” sounded amazing, and like the recording, it was drenched in sustain and overtones. “Stormy Monday” from Looking Back was spot on.

Finally, my Bluesbreaker renovation was complete. The amp sounded just like it should, some 40 years ago. Doing this yourself makes all the difference, as you become a part of the equation — with a little work and dedication, you can experience Marshall just as Clapton discovered it.

Source: https://mercurymagnetics.com/pages/news/PremierGuitar/PremierG-08.htm

Amp Transformers

Guitar amp articles

Amp Transformers, Output Transformers & Chokes

Eric Clapton Limited Edition Amplifier

To honor and support the philanthropic efforts of legendary guitarist Eric Clapton, Fender is collaborating with Clapton to create a very special limited edition guitar and amp package featuring the new Eric Clapton Crossroads Stratocaster guitar and Crossroads ’57 Twin-Amp.
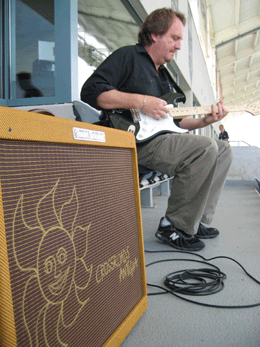
The Eric Clapton Crossroads Stratocaster guitar, or “Sun Strat” will be produced in a limited run of 100 instruments globally; the Crossroads ’57 Twin-Amps will number only 50. All profits from the project will benefit the Crossroads Centre, Antigua, the drug and alcohol addiction rehabilitation facility founded by Clapton on the small, idyllic Caribbean island in 1998.

Fifty of the guitars will be paired with the amps in exclusive Crossroads platinum packages for $30,000 each. The other 50 Crossroads guitars will be offered in packages for $20,000 each. The on-sale date is July 20, 2007 exclusively at www.fender.com—only eight days before Clapton’s monumental Crossroads Guitar Festival 2007 in Chicago on July 28.

While Fender has a long tradition of producing world-class signature series instruments with top musicians, this latest venture represents an extraordinary collaboration. Fender Custom Shop Master Builders have dedicated meticulous effort to reflect the spirit of Clapton’s artistry and philanthropy. Each guitar will be crafted to Clapton’s specification and bear a unique “Crossroads Antigua” graphic designed and originally hand-drawn by Clapton himself.

Fender’s Mike Eldred with an Eric Clapton
Crossroads Stratocaster and matching ’57 Twin-Amp
during taping of a segment for Chicago megastation WGN.

The commemorative Crossroads ’57 Twin-Amps are modeled after the original ’57 Twin — one of the most collectable amps of all time — with the classic Fender sound and design that made them so desirable. This limited-edition amplifier features a custom engraved commemorative “Crossroads 2007” badge autographed by Eric and his “Crossroads Antigua” graphic is artistically embedded on the grill cloth.

[Editor’s note: The amp’s Mercury Magnetics transformers and choke are exact clones of an exceptionally clean, vintage low-powered Tweed Twin from Fender’s private collection.]

“We are extremely honored to work with Eric on these limited edition Crossroads guitars and amps,” said Mike Eldred, Fender Custom Shop director. “At its essence, this is a passion project that allows Fender to support the Crossroads Centre, Antigua and to show our great love and appreciation for Eric.”

The Crossroads platinum package is highlighted by the Crossroads Edition ’57 Twin-Amp — the perfect sonic companion to the Crossroads guitar. The Fender ’57 Twin-Amp is Eric Clapton’s personal amp of choice for studio and stage use. This unique Crossroads premium package will also include a guitar certificate signed by Clapton; an official Crossroads tour laminate, set list and program book; Clapton guitar picks; a commemorative Crossroads guitar strap and a framed, limited edition art print of the Crossroads instrument package.

Fender has been known worldwide for half a century as a company with a spirit and tradition of pioneering innovation. That spirit and tradition is newly revitalized in this project, bringing together an incredible collaboration of passionate guitar players to create products to satisfy one of the ultimate guitar players of all time — Eric Clapton, an artist with his own tradition of pioneering innovation and social consciousness.


About Crossroads Guitar Festival 2007: Clapton’s Crossroads Guitar Festival 2007 takes place July 28 at Chicago’s Toyota Park, with a stellar lineup of blues and rock performers including Clapton, Jeff Beck, Sheryl Crow, Vince Gill, Buddy Guy, B.B. King, John Mayer, Willie Nelson, Steve Winwood and many others. The 28,000-capacity event sold out in only 15 minutes. As with the first Crossroads Guitar Festival, held in June 2004 in Dallas, proceeds from the concert benefit the Crossroads Centre, Antigua.


About Crossroads Centre, Antigua: Founded in 1998, Crossroads Centre, Antigua was created to provide treatment and education to chemically dependent persons, those with other compulsive addictive behaviors, their families and their significant others. Treatment is provided through residential care, family and aftercare programs. The pathway to recovery is founded on the movement toward a change in lifestyle. Crossroads Centre, Antigua also operates a 16-bed halfway house in Antigua called the Bevon House (exclusively for Antigua residents) and facilitates a school-based education series, Breaking the Cycle, in all Antiguan schools. The Crossroads Centre has recently expanded its program to offer transitional living for men, in line with the Crossroads Centre’s philosophy on recovery, at The Sanctuary in Delray Beach, Florida, for those who have completed a residential treatment program. For more information, visit www.crossroadsantigua.org.

For more information, visit: www.fender.com.


About Fender Musical Instruments Corporation: Fender Musical Instruments Corporation (FMIC) is the world’s foremost manufacturer of guitars, amplifiers and related equipment since 1946, and its name has become synonymous with all things rock ‘n’ roll. Iconic Fender® instruments such as the Telecaster®, Stratocaster®, Precision Bass® and Jazz Bass® guitars are known worldwide as the instruments that started the rock revolution, and they continue to be highly prized by today’s guitarists and collectors. FMIC brands include Fender®, Squier®, Guild®, Gretsch®, Jackson®, Charvel®, SWR®, EVH®, Tacoma®, Olympia® and Brand X®.

Fender Crossroads Specialty Site: www.fender.com/crossroads.

Source: https://mercurymagnetics.com/pages/news/GuitarPlayer/GPJun07.htm

Restoring Old Amps and Transformers

Finding and restoring old amps and cabinets is a slow process that demands patience. From the time we first began trolling eBay, ultimately scoring a tweed Vibrolux and Tremolux, to final delivery of the aged cabinets and assembly of the amps, six months had easily passed.

We first found and bid on a ’58 Vibrolux in September ’06. Sold by an eBay seller in Texas, it had been recovered in reddish-brown cloth similar to the stuff used to cover hymnals or a bad ’60s pleather recliner for the double-wide. Otherwise, it was pretty straight, with the original blown Jensen P10R intact, and the original transformers, caps and resistors. The inside of the cabinet had been painted black, but the cabinet, grill cloth, baffle and control panel were otherwise intact, and the wooden tremolo footswitch was included. We bought the Vibrolux for $1,590.00 with 4 bids placed.

Inspired by Larry Cragg’s detailed description of Neil Young’s tweed Tremolux, a1958 Tremolux surfaced on eBay in November 2006, and we scored it for just $1,082.00 from a seller in San Francisco. We suppose this amp was so cheap because the output transformer had been replaced, and the cabinet had been completely stripped and stained mahogany brown. The original speaker mounting screws in the baffle board were about to fall out. However, the original Tremolux circuit was well-preserved, and a small strip of tape remained in the chassis signed in a delicate hand by “Lilly” – one of the many women in Fullerton employed to assemble amplifiers like the Tremoluxin 1958. God bless her. The Tremolux also arrived with the original wooden foot switch.

The Vibrolux kicked some serious tail right out of the box. We send the original Jensen P10R to John Harrison at A Brown Soun (www.abrown.com) for a re cone, mounting a1965 Jensen C10Q sent by Larry Pogreba in its place – a very stout choice and original equipment in early blackface Vibrolux Reverb amps. Like the Tremolux, the tremolo circuit in the Vibrolux required some TLC,with four caps needing replacement to restore the swampy oscillator circuit to full wobble-weave. We also replaced all the newish tubes with NOS RCAs, Philips and GEs. Once we had the amp mounted in the restored and aged cabinet, we were throwing down hard with our No caster nightly, wallowing in the big sound coming from such an innocent-looking little biter, when the original output trans-former gave it up in a final, glorious gasp. A quick call to Mercury Magnetics produced a ToneClone replacement within a week and we were soon back in business,sounding better than ever.

The 10 watt, 3-input ’58 5F11 Vibrolux is housed in the same cabinet Fender used for narrow panel tweed Deluxe– a fat little featherweight with greasy tremolo and a smooth bark tailor made for a Telecaster. And 10 watts may be the perfect power notch for low-volume home recording and jamming – crystal clear, bright and drenched in gorgeous Fendery overtones at low volume (3-5), and absolutely on fire from 7-10. In all respects, the 5F11 Vibrolux is a big amp in a small package worth pursuing for its outstanding tone and personality at truly usable volume levels.

We were amazed by how Gregg had managed to remove every trace of black paint that had been sprayed inside the cabinet, and his aging job, complete with three coats of amber stain and lacquer, faint water stains along the bottom,worn seams and corners, aged L&L leather handles and scorch marks from the power tubes on the inside of the back panel were flawlessly conceived and applied. Hopkins even recreated the original tube chart with a 1958 date code after requesting that we send him the chassis number and power transformer EIA code for production verification. When we brought the restored Vibrolux to Jeff Bakos’ shop (www.bakosampworks.com), he looked it up and down as it sat on the floor of his workshop, peered into the back and said, “That is totally sick.”

The ’58 Tremolux provided a further study in what can be involved buying 40 year-old amps. Upon arrival,the amp was really smokin,’ even with the Jensen hangin’ off the baffle board. The tremolo was DOA, however, so while the stripped cabinet was getting the spa treatment in St. Louis, Jeff replaced two caps in the trem circuit, we replaced the already replaced output transformer with another from Mercury Magnetics, and stored the chassis away until we received the finished, aged Tremolux cabinet from Gregg in late March ’07.

The 5E9A (’55-’56) and 5G9 (’57-’60) Tremolux are housed in the same taller, wider cabinet Fender used for the 1×15 narrow panel tweed Pro,and the later 5G9 circuit is quite different from both the 5E3 Deluxe and the ’55 5E9ATremolux, being fixed rather than cathode biased, employing a long-tailed phase inverter common to the bigger narrow panel tweed amps, and the addition of an extra filter cap and choke enabled the power to be increased from 15W to 18W in 1957.

Compared to the narrow panel tweed Deluxe and the 5E9 Tremolux, the 5G9 Tremolux develops more volume and headroom, and should you chose to replace the 12AY7 preamp tube with a 12AX7, gain is further increased (it’s already righteous with the 12AY), while the bigger 10” x22” x 10” cabinet produces a much rounder, warmer tone with superior ambience and presence. In the month or so since we’ve had the Tremolux put together in the restored cabinet, a new Tung Sol6V6 blew (after we had opted not to use a couple of spare ’50s RCAs for safety – they are in the amp now and killin’ us with bogs of good thang),and we just took the amp back to Jeff when it began spitting some nasty distortion provoked by low frequencies from the guitar. Turned out to be a few bad solder joints.

Like the Vibrolux, Gregg had stopped short of creating a “3-legged dog with an eye patch,” taking the aging to a moderate level with frayed edges and seams on the amber tweed, a single beer can ring on the top with a foam overflow stain running down the grill cloth, a slight orange stain on one side from pine knot bleed, and assorted scuffs and light abrasions. He also repaired the baffle-board, filling in the old holes for the speaker mounting screws.

We hate doing this to you (again), but truth be told, we have to give the nod to the Tremolux as the most toneful and inspiring amp in its power class (18 watts)that we have ever heard or owned. It’s ascension to Numero Uno status was a bit of a surprise, but then again, we considered the initial source of our inspiration for finding one – Neil Young, via his tech, Larry Cragg, and in hindsight we should have expected as much. With all the attention paid to the tweed Deluxe as the big time bonerizer of the tweed family, the Tremolux seems to have been overlooked for the usual reasons…. In the nose-to-butt-crack daisy-chain march to mediocrity, the masses never seem to acquire a view beyond the first lazy dumb-ass directly in front of them. In the immortal words of the great hoosier educator and smack-down artist Earl Dosey, they are “stepping’ over dimes to pick up nickels.” Let’s hope the lemmings continue to keep their heads down.

So here’s the move…. Sad as we are to share this, our strategy was as obvious as it seems. Forget about original speakers, don’t let a replaced tranny run you off (we’ve never replaced one with a Mercury that didn’t sound better than the original), and deliberately track down the fuglies told girls you can find from the tweed era. Busted baffle boards? We luv that….Ricky-ticky cabinets are good, and the coverin’ don’t matter. What you want is a beater with a totally neglected chassis and as many of the original fat Astron caps and original resist or present as possible. Yeah, some of them may have to be replaced, but it’s far better to allow a prudent and judicious amp tech determine that rather than buying an old amp that has been raped by a hard chargin’ cowboy hooked on Sprague Orange Drops.Buy one of those and your old amp will sound new,never to sound old again, and that’s most definitely not the play you want to make here. A little component drift is good.

There is luck involved, too… not all vintage amps were created equal. Some of them left the birthing bench endowed with incredible tone – a happy accident created by the melding of variable components that resulted in extraordinary sounds. Others were created by the same roll of the dice, but with a different outcome altogether – mysteriously dull, flat, or simply lacking whatever you wish to call it… that tone, mojo, bloom, the harmonic complexity of your first Schlitz, depth, fatness… whatever. To experience the blissful afterglow of unanticipated discovery, you must be willing to risk something, which is another way of saying that faith must be exercised in the absence of a guarantee. In this respect, buying old amps is a lot like life itself…. The greatest obstacle to discovery is the flawed perception of an impossible challenge. And the window of opportunity is closing on these great old amplifiers faster than you may think. Like vintage guitars, the best old amps are being taken out of circulation by col-lectors willing to pay prices that are based on potential future value (more than they are worth today, perhaps, but less than they will be worth tomorrow). For you, hombre, the time to bust a move is now.


View PDF Article

M-TSL60-C

TSL60 — 3H — 250mA — add this choke to your TSL60 for improved tonal richness

AV4-MC

V4 — Toroidal Midrange EQ inductor (choke)

AC4-KIT

Whether you use your VOX AC4tv for practice, gigging or recording, take it to the pro-level with the Mercury Studio-Pro Upgrade. Experience the lush vintage tones that only Mercury transformers can give your amp.

Included in the kit:
-Axiom Power Transformer
-Axiom Output Transformer
-Axiom Mini-Choke™
-Other parts necessary to make the upgrade
-Fully illustrated step-by-step color manual, with wiring schematics and instructions

Kits are available in 120V only. Amplifier not included.

C600-KIT

Mercury’s kit has everything you need to upgrade your Reissue Fender Champion 600 amp including detailed step-by-step, full color, illustrations, schematics and photographs to help guide you through the process. Installing our Mercury Upgrade Kit dramatically transforms your Reissue Fender Champ “600” (or Gretsch Electromatic) into a keeper.

Included in the kit:
– Axiom Power Transformer
– Axiom Output Transformer
– Axiom Mini-Choke™
– Other parts necessary to make the mod
– Fully illustrated step-by-step color manual, with wiring schematics and instructions

Note: Speaker no longer included.

Available in 120V only. At this time export versions are not available. Amplifier not included.

BH5H-KIT

Complete upgrade kit for your Blackheart Little Giant amp head (BH5H) or combo (BH5-112). Our XLG Upgrade Kit requires only a transformer swap, and a few minor circuit board modifications. You can do it yourself, or we can refer you to an amp tech who can make the upgrade for you.

For our other Blackheart Little Giant Kit, see our Mean 13 kit.

Included in the kit:
-Axiom Power Transformer
-Axiom Output Transformer (4, 8, 16 Ohm Taps)
-Axiom Mini-Choke™
-Other parts necessary to make the upgrade
-Fully illustrated step-by-step color manual, with wiring schematics and instructions

Available in 120V only. At this time export versions are not available. Amplifier not included

EPJR-KIT2 (No longer available)

Upgrade Kit for the remarkably inexpensive Epiphone Valve Jr. amp (combo or head). This demonstration Upgrade Kit features high-end, pro-quality performance transformers like those in great-sounding amps costing anywhere from hundreds to thousands more. Our Upgrade Kit makes the modified Valve Jr. the lowest-cost introduction ever to the wonderful world of boutique amplifier tone.

Ever wonder how much better your amp could sound just by upgrading its transformers? Here’s your chance to discover the night and day difference.

Included in the kit:
– Axiom Power Transformer
– Axiom Output Transformer (4, 8, 16 Ohm Taps)
– Axiom Mini-Choke™
– Other parts necessary to make the mod
– Fully illustrated step-by-step color manual, with wiring schematics and instructions
– BONUS! The “6V6 Mod.” Takes your Valve Jr. to even greater heights! Retrofits a 6V6 tube into the circuit. Allows you to run the EL-84 and 6V6 separately or in tandem.

Available in 120V only. At this time export versions are not available. Amplifier not included.

TT-KIT

It’s our simplest Upgrade Kit, yet. All you (or your amp tech) do is swap the transformers and make a few minor circuit mods. The kit also includes an optional Pentode/Triode mode selector switch that expands the tonal possibilities even more!

Also included in the kit:
– Axiom Power Transformer
– Axiom Output Transformer (4, 8, 16 Ohm Taps)
– Other parts necessary to make the upgrade
– Fully illustrated step-by-step color manual, with wiring schematics and instructions

Also consider adding our 9 Henry Mini-Choke for a big affect on the overall tone and feel of your amp.

Available in 120V only. At this time export versions are not available. Amplifier not included.

MEAN13-KIT

The Mean 13 High-Power Upgrade requires a radical modification of the Little Giant’s circuit board and chassis — including the addition of twin-6V6 sockets and its full-custom transformers and choke.

Everything you need to transform your Little Giant head (BH5H) or combo (BH5-112) into a 13 Watt monster. Mercury’s kit includes detailed step-by-step, full color illustrations, schematics and photographs to help guide you through the process (tubes not included).

For our other Blackheart Little Giant Kit, see our XLG kit.

Available in 120V only. At this time export versions are not available. Amplifier not included.

Warranty – Old

Mercury’s Exclusive Tonal Satisfaction Guarantee:

Your complete tonal satisfaction is our only goal. All Mercury Magnetics® APS®, Axiom®, ToneClone®, and Radiospares® products come with a Tonal Satisfaction Guarantee. If you are not satisfied with any Mercury Magnetics® transformer or choke, for any reason, you may return it within 30 days for an exchange or refund (minus all freight). See “Exchange or Refund Policies” below for addendums.

Mercury’s Limited Workmanship Warranty Policy:

Mercury Magnetics® warrants its non-OEM transformers to be free from defects in material and workmanship, if properly installed, under normal use for a period of TEN (10) YEARS from the date of purchase, and by the original owner. Note: this warranty does not cover damage caused by external sources or user error. Defective transformers will be replaced or repaired at our discretion. To the extent permitted by law, the foregoing is exclusive and in lieu of all other warranties or representations whether expressed or implied, including any implied warranty of merchantability or fitness. In no event shall Mercury Magnetics® be liable for special or consequential damages. All warranty returns are examined by our engineering staff to determine the exact cause of failure. This warranty is void if your transformer has been tampered with. See “Exchange or Refund Policies” below for addendums.

Shipping Info:

  • All shipments are F.O.B. Chatsworth, CA

Exchange and Refund Policies:

  • For warranty inquiries on Mercury-made OEM transformers, please contact the manufacturer.
  • Please contact Mercury Magnetics® to discuss making an exchange or to obtain a refund within the thirty (30) day guarantee.
  • Insure your shipment for the invoice amount.
  • Include the original or a copy of the invoice.
  • All transformers must have their identity stickers intact.
  • CODs will not be accepted. Ship prepaid. If the product is found to be defective or in the case of a shipping error, we will issue you a refund for shipping costs.
  • Keep a record of your shipment until you receive your credit or replacement.
  • Returns or exchanges are accepted within a 30 day grace period.
  • Custom Shop orders or Mercury Vintage (restorations and/or rewinds) are covered by the Workmanship Warranty but not our Tonal Guarantee.
  • Wrong parts sent to you due to errors on our part will be replaced or credited at your option. Return freight for that product will also be credited.
  • Do not cut the lead wires until you have tested and listened to the installation. Before cutting the leads, solder and bolt the transformers in, and try them out. When you are satisfied, cut the leads and complete the installation. Cut leads to the transformer will incur a 20% restocking fee. For a refund the product must be returned in salable condition without damage or cut lead wires.
  • Transformers that have been tampered with, modified, or with unauthorized attempted repairs will be rejected. Please package all product carefully.
  • No credit will be issued for less than $5.00US.
  • The use of any type of attenuation device on any Mercury Magnetics transformer will void the 10-Year Warranty. Using “dummy load” or “power attenuators” damages transformers. These type of products wear out power tubes at an accelerated rate, and in some cases may cause RF to be generated in the output, which may destroy the output transformer.
  • Discontinued, obsolete or closeout sale items will not be accepted for return unless they qualify under our warranty.
  • The Mercury Tonal Satisfaction Guarantee and 10-Year Warranty is only extended to transformers and chokes of our upgrade kits. Mercury assumes no responsibility or liability for the amp or the work done to the amplifier.

FC-TPRO

Tweed era — 3.5 Henry — #14684 Small size — 2 13/16″ mounting centers

FEN-PASSP-C

Passport — Upgrade!

GIB-EH150-C

GIBSON EH150 12H

MMC-3H

3.3H — 200mA — for ’73-’86 Era Marshalls — DCR: Approx 112 Ohms

LES-147-C

Model 147 or 122

OR-CH

Drop-in Upgrade!

LOND-C-CH

London City — 120 watt — circa early ’70s

FPRO-10H-C

Tweed — used on original late ’40s Pro — 10 Henry — very large size — four screw mount

© Mercury Magnetics
  • This field is for validation purposes and should be left unchanged.