Where did you get the idea to start an amp company?
It was the K&F that got me started. Working at Fender and knowing the entire lineage, including the K&F era, which is kind of separate, it was really intriguing to see what kind of things he came up with. Because it was so rare, the K&F was really appealing to me.
How did you discover this cool original gear while at Fender?
People would come in with things that were not in regular production and would want to have things done and have items reproduced, and people would come in for repairs too. It was a nice influx of cool equipment coming in, and we would turn around and reproduce it to the best of our ability. One of the first pieces we did while I was there was the “snake-head” Tele set, the first regular Fender-style guitar that Leo built.
 Doesn’t that predate the Nocaster?
Yes, in fact I think that guitar was a ’47 or ’48. It had a four-piece pine Telecaster-style body, two inches thick with a small, black Bakelite pickguard, volume and tone control, and one bridge pickup. The snake-head headstock was the style he was using on his K&F lap steels, so it had three-on-aside tuners, with a solid, fat, maple neck with no truss rod — he hadn’t thought about a truss rod yet! They only made a few of them, and they were made as a set with the woody Pro amp.
So, did you put truss rods in the reproductions?
No, but they are big, round, C-shaped necks, and they’re quarter sawn, so they don’t move around too much.
There are actually guys who believe that necks without truss rods sound better.
This guitar is really neat-sounding because we used antique pine. One of my first jobs there was to rough-cut these old pine boards, glue them up, and plug and fill nail holes. Looking at these old-style guitars and amplifiers in comparison to what was being manufactured at the time, I saw a night and day difference. These have a style to them that nobody does any more.
This got me started thinking about K&F. If the circuit for the woody Pro was primitive, then the K&F amp circuit was even more so. The Pro had 6L6s and a push-pull output, and a 15″ speaker — a field coil speaker, which we had a lot of problems with. The K&F amps didn’t use field-coils and were permanent-magnet.
Give us a little background on K&F.
It was Doc Kauffman and Leo Fender. The information on K&F varies, so I can’t give a perfect history. They started around late 1944, and ran probably to the end of ’45 or early ’46, then they stopped making these in mid-1946. Leo had done some really interesting things — he had designed an automatic jukebox and little P.A. systems, and he was working with his radio company. Then, he had an idea for these guitars. He started making them and it became popular enough that he needed a larger investment; Doc didn’t think he could invest in something that looked like a hillbilly guitar, and at that time, that was the type of music played on them.
I remember even up until the 1960s, many jazz guitarists looked down their noses at these and told us, “When you grow up, you’ll get a real guitar,” meaning something more traditional, like a Gibson archtop.
Yeah, so Doc left and the K&F company was dissolved. Finding pieces from that time period is hard because there’s no record of how many were made and there were no advertisements for them. I do have some pictures from George Fullerton that Doc’s son gave him of the first piece that they put together, which is nothing like the ones that went into production. It’s very beautiful.
 Did you get to play that original Tele that was copied for this run of instruments?
Oh, no. The story behind that guitar was that Leo was a huge stickler for not keeping prototypes around. There were two of those — the first one was cut up and the second was thrown in the trash. George pulled it out of the trash. He was young and had just started working with the company; he was a guitar player and this was his creation too! He and Leo went to little bars and shows and listened to players. Without telling them what they were up to, they asked the players what they would want in a guitar, which became the basis for their business and designs: being able to change small parts out easily and being able to easily change the neck on a guitar. There was a bit of a stigma attached to their early instruments because they weren’t craftsman pieces — they were functional instruments.
Yes, they were outside the instrument crafting tradition. This was a modernist piece of design, rather than following classical instrument-building traditions.
Exactly. So when I started researching all the K&Fs, I talked to George who was there just after Doc left, and I got as much information as I could from the closest source. Strangely, though they made guitars and amps in sets, many of the guitars still exist while most of the amps do not. I figure that the guitar is a functional piece and all you have to do is change the strings, but if you have an amp go out, it might have been easier to just go buy another amp.
Was it through the process of reproducing old gear, and speaking with George Fullerton, that you became interested in the 1940s K&F amp?
Yes, that amplifier in particular because it was so simple and because the circuit was kind of the predecessor to the Princeton, but instead of having an 8″ speaker like a Princeton, it had a big, large-magnet, alnico 20-30 watt 10″ speaker. This was late ’44 or early ’45, and these amplifiers were made from military surplus parts, so they were all different and had this unique industrial look about them. Design-wise, it wasn’t made to be the prettiest thing out there — it was made to be functional.
So it was just “The K&F Amplifier” and they only made the one model?
No, see that’s the thing, they made one, and we know the record shows from Doc’s writing on the pictures I have, that the first one they made was beautiful! It had wooden sides, a grille cloth that was embroidered with K&F on the front, and a 15″ speaker. The photo says, This is the first K&F [lap] steel, and this is the first amplifier in the U.S. with a hanging chassis and hanging tubes.” Before that, everything was put on the bottom of the amplifier and the tubes all sat up.
And that amp is gone now?
Yeah, in John Sprung’s book, Fender Amps: The First Fifty Years, he wrote that this amp was made as a custom, one-off piece, and it is likely gone now, since the only pictures we have ever seen of it were the from the 1940s.
That would be a fun one to reproduce, wouldn’t it?
Oh, it would be amazing. There was an article in the October 1998 issue of Guitar Player with a 15″ K&F — the style of the K&F that I am reproducing. It was the same cabinet shape, just larger, and it is the only time I have seen a 15 other than that one custom one-off piece.
 So what you had was three or four amps, all without names or model numbers which were essentially prototypes
Yes, they were “if this works we will make another just like it” sort of deals. There were two basic models that you see in published pictures. One is the 8″model that looked like a little lunch box. It had one volume knob and one or two inputs, no pilot light, no fuse, and the cord coming straight out — that was it.
The other is the 10″ model, which is the one I’m reproducing. It had two inputs, no fuse, no pilot light, one tone control, and either one or two volume controls, and two channels — which was something completely new. Each channel ran on one half of the input tube, which is what Fender did until the Blackface era in the ’60s.
It’s not a large amp at only 5-6 watts. The speaker was an unknown Jensen model that had a large, plug-style alnico magnet instead of the horseshoe magnet. I am sure every example varied because the parts all varied — the knobs, transformers, everything. The transformer on the one I am reproducing was a replacement transformer right out of an Allied catalogue made by some unknown manufacturer.
How did you originally come in contact with the amp you decided to reproduce?
I worked with Geoff Fullerton at Fender, who became a good friend of mine. Geoff is George’s son, and was Leo’s personal assistant at G&L for several years. He was a builder and engineer there as well. George’s father used to work at Fender in the wood mill where he ran this huge ripsaw, which George, Geoff and I also ran, so I had become good friends with the family.
George is a wealth of information and a really interesting man to talk to. He has great ideas about how things were done, the reason things were done, and craftsmanship. Even though his guitars were not traditional, the craftsmanship that went into them was impressive. They case-hardened every single one of the screws that went into a guitar, so if you had to repair it, you wouldn’t strip out the threads. Nobody does that kind of thing anymore because it is not cost-effective.
When I talked to George about the amp, he told me about one at the Fullerton Museum owned by Phyllis Fender, Leo’s widow. As he described the amp to me, I decided I wanted to take a look at it. Phyllis said sure, so they pulled it out of the museum for a day. I looked at it, taking every picture and measurement I possibly could. I worked with what I had, but it wasn’t enough to do a reproduction. Later on I was able to go back, and they let me take the chassis down and measure every single component. One thing I couldn’t do was turn it on.
You were able to disassemble this old amp down to the component level?
I was. I took my meters down there and measured everything. Not only did I measure it, but I cross-referenced it to the color code because those resistors and capacitors are 63 years old now and have drifted a lot. One of the things I noticed is that he used many of the components because they were the only things he could get. They weren’t exactly the right value for the position they were in, but he put them in there because they were close enough and that’s what he had.
 So, I’m looking at it, and George leans over and says, “You know, you’re the first person who touched the inside of that amp since Leo; you’d better be careful!” Because no one had touched it in all those years, the chassis, being made of steel and zinc plated, was pretty much pure white and powdery — I wasn’t about to leave my fingerprints in it!
Are you going to reproduce the zinc plating and everything?
Oh yeah, but I’m not going to relic it or try to make it look old.
Are there any ground issues getting through the zinc?
Yes, you have to grind away the zinc to get to the steel. And that was one of the things; there’s no circuit board, it’s all point to point, and whatever had to be grounded was run straight to the chassis right there. It was function over form.
What year was the original produced?
I don’t really know if it is one of the earlier or later ones, although I think it is earlier. There is a kind of complex cutaway on the top of the amplifier and a relief on the cord panel that is pretty much decorative. Those two things are also on the 15″ amps that we know were the first ones made. Later examples don’t have either of those features on them, so it is likely an early piece.
Did your experiences at Fender and taking apart the old K&F amp lead to your decision to start an amplifier company?
The K&F thing led directly to my own amplifiers. That amp was amazing and cool, but it was so rudimentary. Boutique amplifiers are becoming a bigger business now and I though it would be interesting to see if I could do my own interpretation of the design.
I was looking at all these beautiful Fender guitars that we were making, the amazing Custom Shop guitars with custom finishes that people wait years for. There are some really nice-looking amplifiers out there, but most of them look like big Tolex suitcases.
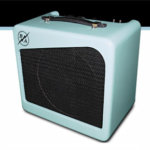
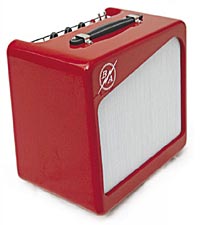
It all started me thinking about something that was small enough that you wouldn’t worry about it getting banged around, with the form plus the function, and replicating some of the beauty of the guitar finishes. That really appealed to me – no one was doing that. Finishing it like a guitar, the correct way, is such an art. I wanted to make them so they would match people’s prized instruments.
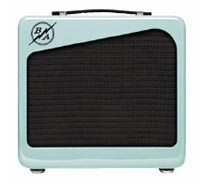
 Over the years, guitars and their finishes have gotten more elaborate, but you aren’t doing that with the new Model 10; it is using simple shape, texture and color for the amplifier, rather than the busy style of many expensive guitars.
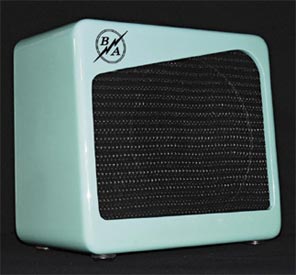
I started out spending hours designing cabinets, and the right one just hits you. This one was simple; it effectively gave room for my logo, but with some different elements. I have 1″ radiuses on the corners instead of ¾”, which makes the amp look more spherical, instead of looking like a big square
It gives it a softer, more attractive appearance.
I started the design of the amp with the cabinet, and I got that nice angled swoop to the front, which was simple, not complex — you see some of the amps from the 1940s that had great grilles on them, and some were so complex. Once I got the design for the cabinet down, and I knew that I could physically produce it from a woodworking standpoint, I knew how much space I had, so I could work on the chassis and circuit layout.
Tell me about the Model 10’s circuit and electronic design, and the sounds you were going for.
Well, George introduced me to Bill Sterle who started working at Fender around 1960. Bill is an audio engineer who designed a lot of the original Blackface amps.
Having someone who was there and who designed amps telling me why they made certain decisions is so much different than starting with copies of what Fender, Gibson, or Marshall did. I learned distinction between the amps Bill made and the Fender amps of the 1950s, which were the easiest and simplest designs. The Blackface-era amps were much more complex designs and they were really trying to do different things with the preamps to keep them cleaner.
When Bill was designing things, he stressed that distortion is your enemy — that’s the school of amp design he came from. You have to have the cleanest representation possible. I went to Bill’s house for hours and he would describe everything from tube heater circuit design to what you want to get accomplished in the preamp section, the phase inverter section, and the power section. He told me once you get going on the tone controls, you can go crazy because there are so many variations in tone circuits — not only what you use, but where they are placed.
I wanted to have a 10″ speaker in there. A 10 just has a clarity that you cannot get from an 8″ speaker, and I didn’t want to go as big as a 12. 10s have a really neat sound to them if you find the right one. I knew it was going to be either a small, single-ended design or a cramped, push-pull design. I ended up starting off with a small single-ended design.
So, design wise, you met some of the original guys who developed modern guitar amps, and took it from there, as if you were in that era.
Oh yeah, and every single element that was put in the amp was based on what I was trying to accomplish in the circuit, not based on something I was trying to copy. My initial intention was to make it really straight and clean, without a ton of bells and whistles. It is a single-ended design with a 6V6 power section and a 12AX7 preamp tube.
I looked at a lot of Internet message boards for guys who are building amps, and for players in general, to find out what kind of modifications they were making and what they wanted out of an amp. I tried to keep it really simple and clean, but I did put in a few things that I thought would expand the tone a little more.
 Is there a tube rectifier?
No tube rectifier in this. In such a small, single-ended amp that putting one in would be more of a novelty than anything functional. Not putting one in allowed me to use a smaller power transformer and to clean up the power and make it more stable, along with giving me more space to do other things in the chassis. Also, when I went back and talked to Bill Sterle, he threw his hands up and said, “Tube rectifiers are absolutely worthless!” [Laughs]
My impression is that stout, well-built power supplies produce robust tones, especially at high levels. When you are pushing the amp, and you’re not clobbering the power supply, the amp doesn’t freak out as much. If I want a little sag and compression, I use a compressor!
Well, yeah. It’s all relative though, because there is a ratio between the voltage and the current that the plates see. You push harder, sand the plates, and try to draw more current. If the current isn’t there, then there is going to be a difference in the tone.
I started with a solid-state rectifier and that is the only solid-state piece in the amp. In the preamp, I used more of a Blackface preamp design, where I split the 12AX7 in the middle because the amp only has one channel. I do have two inputs on the amp, but one is just hotter than the other.
So there are only two tubes in the amp?
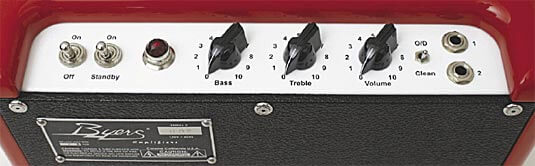
Only two! It’s simple — there is just a treble and a bass control. With all passive tone controls, if you use the control, there is a certain amount of insertion loss, so on bass control I put a switch so you could remove the tone controls from the circuit completely.
The Model 10 has the standard volume, bass and treble controls; then there is the switch. What does it do?
It takes out the negative feedback loop. You turn that off and bypass the tone controls and it will crunch just like an early tweed Champ. Even with only two tubes and three knobs I wanted to be able to have a range so it isn’t just for one style of play; it is an amp that you can play around with and get a cool tone out of.
It has an amazing array of tones for having so few controls.
I have designs of every shape and size, but this is where I wanted to start. In the larger models, I am going to do a 15-20 watt amp, and I may do as much as a 30-35 watt one as well, though I don’t want to come out with a 100 watt monster.
I think people are starting to re-evaluate how much wattage is really needed.
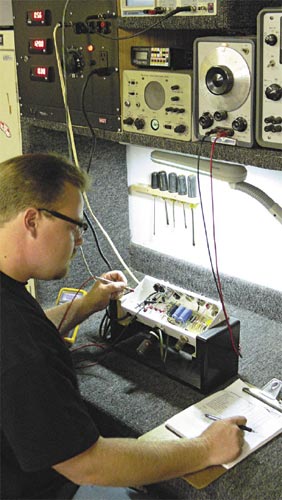
You know, one of the many helpful things I learned from Bill Sterle was how to test everything correctly. Lots of amp makers out there will say, “This is a 5-watt amp,” and that’s what they assume because a similar one was made by Fender, but Fender tested where the wattage comes up just before distortion, on every one, and that’s how we test as well.
The Model 10 puts out almost exactly 5 watts. It has a cathode bias power section and I go through and measure every single one of those tubes and every single output section of each amp to make sure it is right for this design. I don’t want to run these as hot as I possibly can to get every last watt out of them, because it is hard on tubes. I offer NOS tubes as an upgrade, and they are not making any more of them! I run them right in the middle where you get great tone and good longevity.
What tubes have you been using?
Right now I am using Electro-Harmonix preamp tubes and JJ power tubes. I think the JJ 6V6 is a really neat tube. They can handle a lot of plate current, and they sound good.
If somebody wants a Model 10, how long would it take?
I have all of the parts ready to go, but I have a six to eight week lead time on the custom-colored cabinets, including shipping. It takes about four weeks for the paint to be completely finished, because it has to be perfect. It is a guitar finish on the Model 10 and it’s done just like any expensive guitar finish. The amps are built to order, though I may stock certain colors here and there.
 It’s exciting to see the founding of a company with such an amazing product. Do you have a price set for the Model 10?
It looks like the Model 10 will be $1050, at least as an initial release price.
You spoke earlier of having several color choices and perhaps some clear finishes on nice wood available.
The cabinets right now are poplar for the solid colors, and ash or alder depending on whether the finish is a blonde or sunburst one, just like a guitar.
If someone asked you what your amp sounds like, what would you say?
Well, what I was trying to achieve was a combination of the tweed Champ and Princeton, combined with a Blackface Champ and Princeton. I wanted to be able to combine all four of those amps together so you could get a really grungy, overdriven, tweed tone or a really clean, clear tone with or without tone controls.
Tell me about the K&F reproduction amp, is that currently in the pipeline?
That amp is 99% done. Because this amp has never been done before, and because the parts are not off-the-shelf parts, everything is different from what is currently available. Everything had to be done from scratch; transformers had to be custom wound, and chassis had to be custom made — and the chassis are not normal dimensions by any means. The tubes are all NOS tubes, because there is no current equivalent to them.
It’s an octal socket preamp tube isn’t it — a large base and pins like a power tube? What tube is that?
It’s a 6SC7 medium mu triode and a 6J5 triode in the preamp section. Each channel gets half of that triode. It’s a pretty low-gain tube actually; it’s not overdriving the preamp circuit a lot like the later 12AX7s often do. There is also a 5Y3 rectifier and a 6V6 output tube. Both input signals merge into a 6J5. Instead of putting one channel with one preamp tube, he made two channels that merged into one preamp tube. There’s one volume control for both channels. The circuit is a lot different than a modern amplifier. Leo was doing it to see if it would be functional, and it was very rudimentary and basic.
The octal preamp tubes give a really unique sound to the amp. They don’t drive it very hard, but it does put out a pretty thunderous crunch when you want. I am keeping it as historically correct as I can, with carbon comp resistors, Mallory 150s as the tone caps, and all cloth-covered wiring, which I don’t do in the Model 10. I am not trying to reproduce a look in the Model 10, but am going for the best possible sound, so I’m using all the best components and wiring by today’s standards.
You selected the components for the Model 10 by listening to them, didn’t you?
Yes, but the K&F is a little different. It’s not wired like you would wire something today; it has series heaters, so you get that hum in there that makes for a unique sound. The only changes I made were necessary for safety. Of course, there is a fuse in this one, along with a 3-prong AC plug. Other than that, it is rudimentary in every way. The tube sockets are spot-welded to the chassis.
Did you actually replicate the spot welds?
Oh yeah! Lots of guys would have riveted the sockets in place, but that was an extra expense, so they spot welded them.
It probably had a terrific ground connection.
It does. I found an original output transformer and power transformer and had Mercury Magnetics reproduce them for me. The speaker was a 10″ Alnico plug-style speaker rated at 40 watts for a 5-watt amp, so it was way over-engineered for the circuit. Most Alnico speakers have a horseshoe shaped magnet, but this one has 2½” donut-shaped magnet. It was also used for higher-end audio and larger-wattage amps. It makes for a really heavy speaker, but it’s really neat. This Weber is the closest to the original speaker that is available.
How much is the K&F reproduction amp going to cost, and when will it be available?
I’m trying so hard to get it finished! I am talking to a paint manufacturer about the wrinkle paint we need, and if that works out we’re in business with getting the K&F out. We should be ready in October at the latest, and the cost will be about $1000.
Playing the Amps
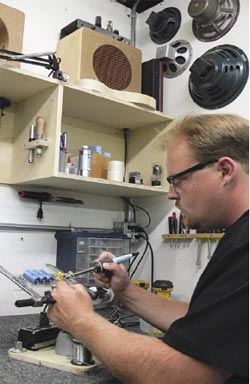
I brought my 1987 hardtail Tom Anderson to Byers‘ shop where I got to play through the first Model 10 off the line and a K&F reproduction prototype. Here is a sample of what I heard:
Model 10
The Model 10 is a beautiful amplifier. If your favorite custom guitar builder built an amp, it would look just like this.
The Model 10 is clear and detailed in the way that only minimal circuit paths can be. Set clean, with the tone controls engaged and the feedback loop in, the highs and lows are well-balanced, the tone circuits do what you wish they would, and the result is a sound that makes you want to play more. Turn off the feedback loop and things get woollier and more tweed-like. Switch off the tone controls and the amp gets a more aggressive, throaty attitude going.
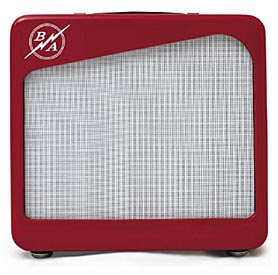
K&F Reproduction
The K&F reproduction amp is totally different from the Model 10 and totally different from almost anything I have ever heard. I can almost hear Charlie Christian playing one and I suspect that today’s players will find musical uses for this tone. The K&F reproduction is very big and a bit wooly-sounding, yet not muffled or dull at all. It gets pretty powerful sounding when you push it hard.
Source: https://mercurymagnetics.com/pages/news/PremierGuitar/PremierG-10.htm
Marshall’s famed 1960s “plexi” and early-’70s 50-/100-watt amps gained notoriety for their fantastic tones. Of course, the downside was that they had to be driven hard to sound their best, which to the player (and anyone else in a milewide radius) meant volume – a lot of volume. And that sometimes meant turning speaker cabinets toward walls or employing an impromptu blanket muffler, sacrificing tone for the sake of band harmony and/or the mix. Then there was the consistency factor from one amp to the next, which meant hunting down the best-sounding Marshalls became an expensive game.
In short, when it comes to plexi tone, maybe those weren’t the “good old days.” Perhaps now, in our world of reissues, reproduction, and boutique guitars and amplifiers, guitarists are indeed in the midst of a golden age. If you doubt that’s the case, let us introduce the Voodoo Amplification V-Plex.
Voodoo Amps was founded in 1998 when hardcore tone lover Trace Allen Davis, a professional guitarist and proficient guitar/amp/pedal fixer, began modifying amplifiers. Largely dissatisfied with the offerings of the day, his idea of good tone caught on, and he quickly earned a reputation as a capable, comprehensive amp repair/modification shop.
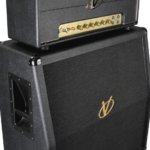
We were offered a listen to the 50-watt V-Plex with Voodoo’s propriety-design 4×12″ slant cabinet. The hand-wired V-Plex is a four-input/two-channel amp with three 12AX7 tubes in the preamp and two EL34s in the power section. It has a single set of controls for Presence, Bass, Middle, Treble, Master and Volume – a layout identical to that of a vintage non-master-volume Marshall. The V-Plex’s Master volume is placed between the phase-inverter tube and the power tubes, which gives the player the ability to dial in plexi-like distortion starting at a very reasonable volume. On/off and standby switches, along with a red indicator, also occupy the front panel.
A look inside reveals flawless workmanship and top-quality components. Davis is, as we said, very much about the look and feel of guitar tone, and the research he put into this head is glaringly obvious. The cabinet uses four Celestion G12M “greenback” speakers, which are seen in amps all over the place.
But Voodoo’s cab is a little tricked out; aside from its propritary internal design, it is also capable of operating at either 4 ohms or 16 ohms in mono, as well as 8 ohms in stereo.
No doubt about it – the V-Plex talks the talk. But to see whether it walked the walk, we recruited a Schecter 006 solid body with two high-output humbuckers, and a Fender Stratocaster with three Duncan Alnico single-coils. We plugged in the Schecter and started with the V-Plex’s controls set in a familiar plexi manner; Bass at 10, Presence at 4, Mids at 6, Treble at 2, Master between 8 and 9, and Volume pushed to 8.
Flashback
If you’re a fan of the original Marshall JTM 45/50/100 models (if you’re a fan of real rock guitar tones, that’s you!), plugging in the V-Plex could well be the ultimate experience, especially if you’re not hip to coughing up the money to obtain (and hassle to care for) a vintage Marshal. Tone – gain-rich harmonics, with that clear, articulate crunch we’ve come to lust after – spews from the V-Plex by the truckload.
To test the effectiveness of the Master volume circuit, we rolled off the Master and brought the Volume control up a touch, and heard fistfuls of rich gain at reasonable SPLs. Yes, Virginia, you can get great plexi tone at comfortable levels.
The tone knobs reacted almost exactly like those in the original plexi circuit in that they don’t alter the tone much, but produce different textures. Backing off the volume and increasing the Master yielded a cleaner crunch that never surrendered its true character. “Jumping” input channels (a favorite trick of four-input-Marshall owners) substantially fattened the tone.
We next plugged in the Stratocaster. To keep high-end response where we liked it required rolling back the Treble and Presence controls, but the Strat also proffered fat, meaty tone from every pickup and selector-switch position. Crossing channels again, we got more meat right up until we pushed it too hard, when (in true plexi form) the signal compressed beyond the point of being enjoyable.
If you’re after the ultimate vintage plexi tone, your search could very well end right here, as the Voodoo V-Plex delivers definitive plexi tone, and has the ability to play at comfortable levels. Davis and his crew nailed it. – Bob Tekippe/Ward Meeker
VVT’s Lindy Fralin Model amplifier
Maryland-based amplifier builder Vintage Vacuum Tube Amplifiers (you may know it as VVT) recently fielded a request from renowned pickup winder Lindy Fralin. He wasn’t looking for advice on wire or how hot to wind a pickup for best interaction with a particular VVT; rather, Fralin wanted an amp built to his specs and taste. And not just for him, but for the mass market. VVT, realizing the co-branding possibilities, jumped at the opportunity.
So, what does a tone guru like Fralin want in an amplifier? Well, he says the goal was “a clean, full-body-voiced amp that’s lightweight and able to sound good at low volume.” Sounds like something we’d like, too. So when VVT asked whether we wanted to hear it, we were happy to take up the offer.
At first glance, the VVT Lindy Fralin amp looks boutique in a way we’ve come to expect; i.e. it sports point-to-point wiring with carbon-comp resistors, an all-tube circuit, and a 12AX7-driven spring reverb and preamp. But, go deeper and you’ll quickly discover some seldom-seen features, like a trick self-biasing-cathode design that allows the player to switch between a pair of 6L6s (for 30 watt of output) and a pair of 6V6s (for 15-watts) without having to re-bias the amp. Part of its secret is a custom-wound Mercury Magnetics transformer designed specifically for the Fralin that allows the amp to switch between the 6L6s and 6V6s while maintaining stable impedance for the tubes and speaker load.
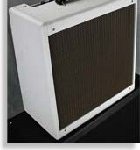
The amp ships with a pair of 6L6s, but will also accept 5881s or JJ 6V6s, for an altogether different favor. Another unique feature is Fralin’s choice of a single 15″ alnico-magnet Weber speaker instead of the more traditional pair of 10″ or single 12″ speaker.
The overall look and layout of the amp is different, as well, but still boasts a vintage vibe with a neatly executed off-white tolex, oxblood grille cloth, top-mounted controls, and heavy-duty leather handle. There are no metal or plastic corner protectors, and no extraneous piping or badging. Its look is clean, simple, and classic. The control layout is accordingly succinct, with a single 1⁄4″ input, a switch for Bright, and controls for Volume, Treble, Bass and Reverb, along with switches for Power and Standby. Also worthy of mention is the 11-foot power cord.
VVT shipped our tester with a matched pair of 6L6s by TAD and a matched pair of 6V6s by JJ. We started with the TAD 6L6s and our test guitars – a Fender Relic Strat and a Hofner Verythin Classic with mini-humbuckers. After plugging in the Relic Strat and letting the amp warm up, we set the Volume at 3 o’clock, Bass and Treble at 12, and then we hammered a few chords.
We were immediately impressed with the amp’s complex overtones, its round, punchy low-end response, and its snappy highs. It didn’t take much noodling or knob tweaking to realize that the tone controls on this amp, along with its Bright switch, are exceedingly well-voiced. From a player’s perspective, that means it’s easy to find likeable sounds. The Bright switch compensates nicely for the slightly darker sound of mini- or full-size humbuckers, while the wide sweep of the Bass control keeps its frequencies full and punchy with single-coils.
While the amp is voiced for clean tones, it also does a good job when it comes time to get dirty, and is very responsive to changes in pick attack or guitar output. Simply backing down the volume control on the guitar and easing up on our pick attack, the Fralin cleaned up from moderately dirty overdrive with musical overtones to a sparkling clean sound that didn’t lose any of its life or attitude.
We popped in the matched set of JJ 6V6s and checked the tone at 15 watts output. The amp broke up quickly and had a slightly more boxy sound, with reduced complexity of overtones; still very lively and punchy, just not as big as 6L6s – fantastic for low-volume situations. The tube-driven reverb is also well-voiced. At lower settings, it adds a bit of ambiance that doesn’t get in the way or wash out the amp’s tone, and at higher settings it’s suitably splashy.
The boys at Vintage Vacuum Tube do a killer job on the Fralin signature amp. It’s loaded with big, dynamic, single-coil-friendly tone (that sounds pretty good with humbuckers, too!) in a nice, lightweight package. – Phil Feser
Maryland-based amplifier builder Vintage Vacuum Tube Amplifiers (you may know it as VVT) recently fielded a request from renowned pickup winder Lindy Fralin. He wasn’t looking for advice on wire or how hot to wind a pickup for best interaction with a particular VVT; rather, Fralin wanted an amp built to his specs and taste. And not just for him, but for the mass market. VVT, realizing the co-branding possibilities, jumped at the opportunity.
So, what does a tone guru like Fralin want in an amplifier? Well, he says the goal was “a clean, full-body-voiced amp that’s lightweight and able to sound good at low volume.” Sounds like something we’d like, too. So when VVT asked whether we wanted to hear it, we were happy to take up the offer.
At first glance, the VVT Lindy Fralin amp looks boutique in a way we’ve come to expect; i.e. it sports point-to-point wiring with carbon-comp resistors, an all-tube circuit, and a 12AX7-driven spring reverb and preamp. But, go deeper and you’ll quickly discover some seldom-seen features, like a trick self-biasing-cathode design that allows the player to switch between a pair of 6L6s (for 30 watt of output) and a pair of 6V6s (for 15-watts) without having to re-bias the amp. Part of its secret is a custom-wound Mercury Magnetics transformer designed specifically for the Fralin that allows the amp to switch between the 6L6s and 6V6s while maintaining stable impedance for the tubes and speaker load.
The amp ships with a pair of 6L6s, but will also accept 5881s or JJ 6V6s, for an altogether different favor. Another unique feature is Fralin’s choice of a single 15″ alnico-magnet Weber speaker instead of the more traditional pair of 10″ or single 12″ speaker.
The overall look and layout of the amp is different, as well, but still boasts a vintage vibe with a neatly executed off-white tolex, oxblood grillecloth, top-mounted controls, and heavy-duty leather handle. There are no metal or plastic corner protectors, and no extraneous piping or badging. Its look is clean, simple, and classic. The control layout is accordingly succinct, with a single 1?4″ input, a switch for Bright, and controls for Volume, Treble, Bass and Reverb, along with switches for Power and Standby. Also worthy of mention is the 11-foot power cord.
VVT shipped our tester with a matched pair of 6L6s by TAD and a matched pair of 6V6s by JJ. We started with the TAD 6L6s and our test guitars – a Fender Relic Strat and a Hofner Verythin Classic with mini-humbuckers. After plugging in the Relic Strat and letting the amp warm up, we set the Volume at 3 o’clock, Bass and Treble at 12, and then we hammered a few chords.
We were immediately impressed with the amp’s complex overtones, its round, punchy low-end response, and its snappy highs. It didn’t take much noodling or knob tweaking to realize that the tone controls on this amp, along with its Bright switch, are exceedingly well-voiced. From a player’s perspective, that means it’s easy to find likeable sounds. The Bright switch compensates nicely for the slightly darker sound of mini- or full-size humbuckers, while the wide sweep of the Bass control keeps its frequencies full and punchy with single-coils.
While the amp is voiced for clean tones, it also does a good job when it comes time to get dirty, and is very responsive to changes in pick attack or guitar output. Simply backing down the volume control on the guitar and easing up on our pick attack, the Fralin cleaned up from moderately dirty overdrive with musical overtones to a sparkling clean sound that didn’t lose any of its life or attitude.
We popped in the matched set of JJ 6V6s and checked the tone at 15 watts output. The amp broke up quickly and had a slightly more boxy sound, with reduced complexity of overtones; still very lively and punchy, just not as big as 6L6s — fantastic for low-volume situations. The tube-driven reverb is also well-voiced. At lower settings, it adds a bit of ambiance that doesn’t get in the way or wash out the amp’s tone, and at higher settings it’s suitably splashy.
The boys at Vintage Vacuum Tube do a killer job on the Fralin signature amp. It’s loaded with big, dynamic, single-coil-friendly tone (that sounds pretty good with humbuckers, too!) in a nice, lightweight package.
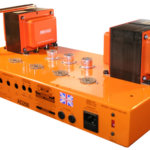
Tim digs into a stock Orange AD200 Bass MK3. He details stripping the amp to its chassis and turning it into a point-to-point handwired amp with high-quality components.
For the past couple of months, I’ve found myself acting as bass player for a new band. It’s been a bit of a change of gears for me as I’m usually playing guitar or lap steel. In playing bass, I found myself with a need for feeding my desire for headroom — a need that can only be satiated with lots of big power tubes and stacks of speakers. I purchased an Orange AD200 bass head with their matching 4×10 and 1×15 bottoms.
In its stock configuration it’s a formidable rig to be sure. I was very impressed with the power, tone and range that it had to offer, even when trying to keep up with a very loud drummer. I played it joyfully for a few months and didn’t have a single complaint. What a happy and content fellow I was… yet… I always have this little nagging voice in the back in my head saying, “what if I changed some components? Sure I’m happy now, but couldn’t I be happier?” And so it always seems to begin with the little nagging voice that I keep listening to against my better judgment. The same voice that often leaves me sitting at my bench, head in hands thinking, why did I start this project? I was so content! WHY?
The concept of changing only a few key components was quickly forgotten once I committed to this project (and had a screwdriver in hand). I gutted the amp to the bare chassis. Out came the printed circuit board (Figure 1) with its board-mounted tube sockets, pots, transformers — everything.
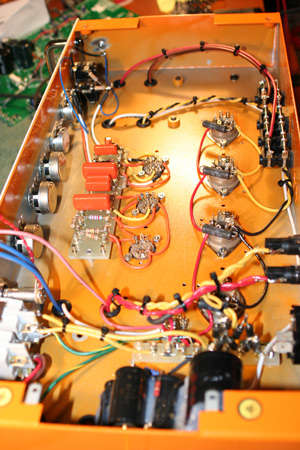
Figure 1: Before gutting.
With the chassis completely stripped, it was time to lay out, measure and drill new holes for the upgraded chassis mounted tube sockets. As the new power tube sockets needed a bit more room than the PCB mounted ones, a Dremel Tool with a coarse sanding drum bit was used to enlarge the holes. Care was taken to make sure that the pin alignment made sense with the lay of the future wires before drilling the mounting holes used to bolt the sockets to the chassis. While I had the drill in hand, I also enlarged the front panel’s pot holes to accommodate the larger upgraded pots that were going to be installed. The placement for the circuit board mounting holes were also located/drilled, as was the location of the ground lugs that were going to be used in the star grounding scheme.
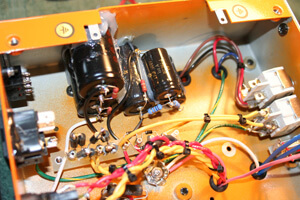
Figure 2: Removing the guts.
One of the most time consuming things for me when building a “one off” amp is the chassis layout. If done properly, it makes the rest of the assembly more of a connect-the-dots type of process. If done in a haphazard and incomplete way, one finds themselves drilling extra holes and routing wires in a way that may not be as professional looking or functional. In high gain designs, a poor layout can lead to excess noise and frustration.
Trying to work within a pre-existing framework is even more of a challenge. It would have been easier to start from scratch with a blank chassis, but I wanted to retain the “Orangeness” of the amp. After all, I am using the original schematic for the project, as it is a fantastic design. I just wanted to upgrade the components and make it a bit more serviceable and rugged.
After mounting the tube sockets (I prefer the Micalex sockets made by Belton) it was now time to select the components to be loaded onto the circuit boards. Unfortunately, this will have to wait for the next installment.
Selection of the parts to be used in a design with a given purpose is an important task. Almost every part in an amplifier makes a difference in the tone — starting with the quality of the AC coming out of the wall, to the power cord, all the way through to the speaker and into the room where the natural acoustics can make or break all of your hard work and tone. Some are pronounced differences, some a bit more subtle. If you add a dozen subtle nuances together, you get a pretty big nuance.
So, how does one wade through the endless amounts of caps, resistors, transformers and other “magical components” available on the market these days? Well, if you’re lucky enough to have the time and financial windfall that we all dream of having, then you can spend your life experimenting, buying and selling great gear without a care in the world. Hopefully, you’re able to develop a relationship with an artist or shop that you can trust and use them as a sounding board. Ultimately, you need to learn to trust your ears. Some of the best sounding amps that I’ve heard have been made with the cheapest, crummiest components. If it sounds right to you, than it is right!
A word of caution: Experimenting can be very fun and rewarding, but it’s easy to get too caught up in the bells and whistles. Don’t forget about the music. I found that when testing some different capacitors in one of my favorite amps that one of the caps sounded much “better” then the other. When I put the “better” sounding cap in and played, I found myself analyzing the sound in every way, from the bass response to the singing highs and, of course, how it felt. When I put the “inferior” cap in, I would start to play, get lost, look at the clock and realize that a half hour had blown by and I didn’t even listen to the cap because I was lost in the music! The “inferior” cap has lived in my amp ever since.
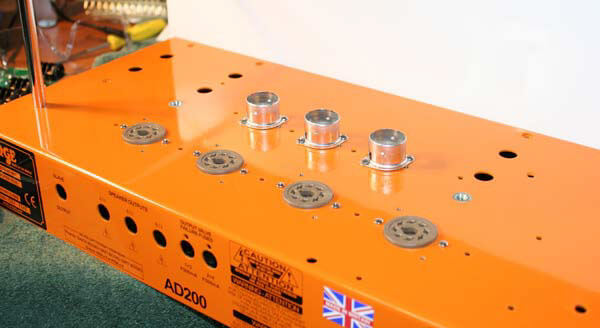
Figure 3: New sockets.
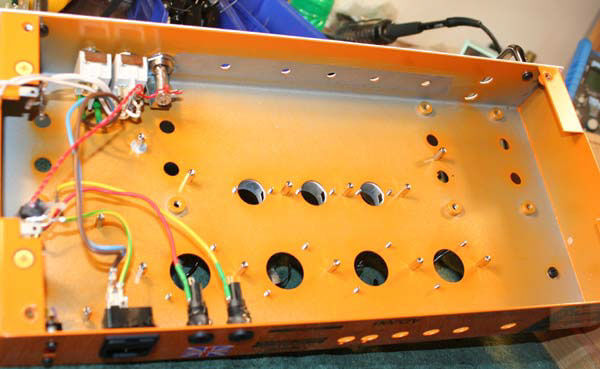
Figure 4: F&T electrolytics power supply caps.
My goal for this project was to “open up” the tone and feel of this already great amp. I wanted tight, slamming bass and open and airy highs with a bit more harmonic interaction. For the power supply caps, I used F&T electrolytics (Figure 4). I like them because of their reasonable size, cost, sound and feel. They are quiet and powerful enough to get good, solid bass without making the amp too fast and therefore not as musical or sweet.
For the coupling caps, I decided on Sprague Orange Drops. I use type 716 as they have a higher quality lead and are a bit more accurate they their 715 brethren. The Orange Drops, while perhaps not as sweet sounding as other choices, have a nice tight bass response with a slightly pinched top end that seems to help with harmonic content and punch. A client described their feel as “walking on packed sand instead of dry loose sand” — perfect for this bass amp.
For resistors, I use different types depending on where they are in the circuit. I don’t like to use carbon comps anywhere that the resistor may be tormented by excessive heat or where it may be prone to inject thermal noise into the signal. I will use them with regularity on the input, for example, but don’t like to use them as plate loads. Of course the brand of resistor has as large an impact as the overall construction. In places where matching and stability are important, I’ll use high-quality metal films.
The pots for this project were a mix of Clarostat Mil Spec. and CTS (CTS because I didn’t have all the values in the Clarostat). I use different types of wire throughout the amps that I build depending on the wire’s purpose. As signal wire, I use certain types of hook-up wire made for the audiophile market. For the B+ and power supply, along with the grounds on the star, I used a high-quality copper multi-strand.
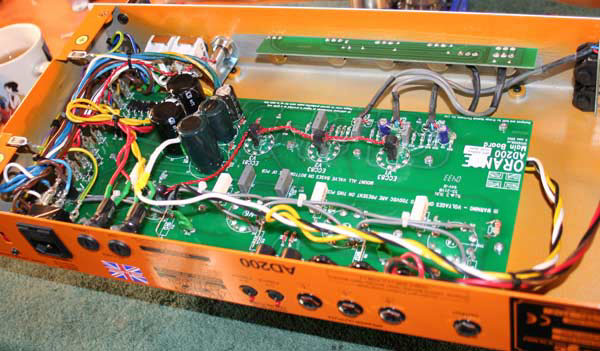
Figure 5: Components installed.
Once all of the parts are selected, they’re laid out and mounted to thick glass component boards (Figure 5) with very sturdy standoffs for ease of mounting. Silicone is applied between caps to create a cushion and help to dampen any unwanted smearing of the signal or microphonics due to rogue vibrations. Paul from Mercury Magnetics sent me a set of beefy transformers that looked quite handsome dressed in their orange end bells.
With the boards made and everything in its place and wired, it was time to fire this creature up and check the voltages at key locations. Using a Variac, voltages are brought up to full power slowly. This is done for a couple of reasons. The first reason is so the electrolytic capacitors in the power supply can form their dielectrics. The second, and perhaps more important, reason is so I can keep an eye on the voltage ratios to make certain that everything is hooked correctly before I install the tubes and risk their lives (and my wallet).
One thing that I appreciate about this design is that Orange took the time (and expense) to design a power transformer and power supply that would deliver 600+ volts to the plates of the power tubes with roughly half of that on the screens. This allows you to get the benefits of high plate voltage (headroom and power) while maintaining a safe operating environment for the power tubes. Now that we’re certain everything is safe and sound, the power tubes (Svetlana “winged c” KT88s) and preamp tubes (mix of NOS RCA and Sylvania) are installed and biased.
Though I’ve been building and modding amps daily for a few decades now, every so often I’m surprised by an end result. With the first strum of the strings, I was floored by the increased headroom, clarity and bell like tones coming out of this powerful amplifier. The change and added versatility in preamp/overdrive section was a pleasant surprise as well. While originally designed as a bass amp, it is fantastic for guitar and pedal steel as well. In retrospect, I’m very glad that I went through the trouble and expense to rebuild this amplifier. It has become my “go to” for almost every application. Long live headroom and power!
Source: https://mercurymagnetics.com/pages/news/PremierGuitar/PremierG-22.htm
We always maintain a steady flow of gear arriving for review, but sometimes we also employ a fascinating if time-consuming research strategy that involves logging onto eBay, picking a broad category such as “guitar amplifiers,” and settling in for as long as it takes to patiently scroll through every page of listings. Yeah, that’s often 50 pages or more, but since we can’t possibly think of all the items that might interest us and search for them by name, it’s far more revealing and productive to just hunker down and scroll. Rarely do we fail to find something intriguing that would have otherwise been missed, and such was the case on a morning in August when we stumbled on a listing for a 1959 tweed Deluxe. Were we looking for a tweed Deluxe? Nope. Wouldn’t have crossed our mind at the time…. We had already reviewed 5E3 reproductions from Fender, Clark and Louis Electric within the past 3 years, and we have frequently referenced our 1958 Tremolux as being our desert island #1. Isn’t a Tremolux just a tweed Deluxe with tremolo in a bigger box? No… not even close. That would be like saying you wanted to date a blonde – any blonde. For the record, our fixed bias Tremolux possesses a cleaner tone with a bigger, booming voice created by the taller Pro cabinet. The Two Fifty Nine is a completely different animal….
Sporting a February 1959 date code on the tube chart, the ’59 had been listed by a seller in Arkansas who turned out to be Tut Campbell, formerly a well-known guitar dealer in Atlanta. Still buying and selling gear, Campbell had described the Deluxe as being in original condition with the exception of a replace output transformer – a big old mono block Stancor dating to 1957. Given the otherwise original condition of the Deluxe, which included the Jensen P12R, we made Campbell a “best off” below his asking price and scored the amp for $1,850 shipped. We wouldn’t say we stole the Deluxe, but it seemed a fair price of admission for the opportunity to experience and explore still another rare classic and supremely worthy piece of Fender history on your behalf.
The Deluxe arrived with the big Stancor dangling from the chassis despite Campbell’s careful packaging. Wasn’t his fault, really – in a feeble effort to avoid any additional holes being drilled in the chassis, the fellow who installed the Stancor in the ’60s had merely tightened set screws over the small tabs at the base of the heavy tranny, which was designed to be mounted upright – not hanging upside down in a guitar amplifier. Of more concern was the fact that while the amp was lighting up, there was no sound…. Well, we’ve been here before, so we made a call to God’s Country and the Columbus, Indiana domicile of Terry Dobbs – Mr. Valco to you. We had already set aside a spare output transformer (Lenco, McHenry, IL) that had been the original replacement installed in our ’58 Tremolux when we first received it, replaced with a Mercury Magneticsfor our June ’07 review article. Mr. Valco cheerfully answered his phone and as we explained the situation with the Deluxe he agreed to walk us through the installation of the new replacement – a simple process involving four lead wires being connected to the rectifier and output tube sockets, and the speaker jack. As long as you put the correct wires in the right place, a piece of cake, and we had the new tranny in within 10 minutes. Pilot lamp and all tubes glowing, still no sound…. Valco patiently guided us through a series of diagnostics with the multi-meter and the Deluxe was running on all cylinders, pumping 380 volts. Stumped, and with the hour growing late, we called it a day. Leaving the mysteriously neutered Deluxe chassis on the bench until tomorrow.
Morning came with a whining voice delivering a plaintive wake up call – “It’s got to be something stupid and simple….” Inspired by a huge steaming mug of Jamaican High Mountain meth, we sat back down at the bench, tilted the innards of the Deluxe chassis forward beneath a bright halogen desk lamp and peered in for answers. We began slowly examining the chassis in sections, looking for broken or dull solder joints, loose or broken wires, while gently pushing and prodding wires and connections with the eraser tip of a #2 pencil as we had seen Jeff Bakos do so often at his bench. After ten minutes or so we were about to give up, when we turned our attention to several places where the circuit was grounded to the chassis adjacent to the volume and tone pots, and damned if a solder joint for one of the uninsulated ground wires hadn’t separated from the chassis. No ground, no sound, and as soon as we had restored the solder joint the Two Fifty Nine arose from the dead with a mighty A major roar.
The amp was indeed remarkably well-preserved in all respects, with the typical amber patina of old tweed. The burnished chrome control panel remained bright and clean with no corrosion, the original handle remained intact, and a couple of small ciggie burns on the edge of the cabinet added a stamp of historic legitimacy to the Deluxe’s pedigree. The top half of the Jensen’s frame was coated in a fine film of red clay dust from the Delta, and while the cone was in remarkably good shape with no tears, an audible voice coil rub called for a recone. We would send the speaker to Tom Colvin’s Speaker Workshop in Ft. Wayne, Indiana, requesting that he leave the original unbroken solder joints for the speaker wires intact if possible.
Meanwhile the first order of business was to listen to an assortment of NOS tubes from our stash, and audition no less than a half dozen speakers. Different sets of power tubes and individual preamp tubes will sound surprisingly different, so we started out with a matched pair of NOS RCA 6V6s, a GE 5Y3 rectifier, and an RCA 12AX7 and 12AY7. From there we subbed in a dozen different RCA, Amperex, Tesla and GE 12AX7s, noting varying levels of brightness, warmth and intensity among them all. For an edgier, more aggressive voice, the GEs and Amperex typically deliver the goods, while RCAs produce a slightly warmer, richer, fuller tone. We also experimented with a 12AT7 and 12AX7 in place of the lower gain 12AY7, and while those tubes ramp up gain and distortion faster and with more intensity than the 12AY7, they seemed like overkill for us. Our Deluxe possesses a tone of gain using the stock 12AY7.
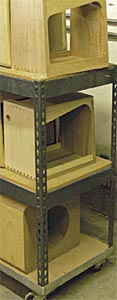
Rather than repeatedly reloading the Deluxe with different speakers, we used a Bob Burt 1×12 cabinet built from 100-year-old pine for our speaker tests. The original Jensen had never been pulled from our amp, but multiple speaker replacements in an old Fender inevitably cause the speaker mounting screws to loosen in the baffleboard, making speaker swaps unnecessarily clumsy and complicated. When we do run into loose mounting screws, we simply run a few small drops of Super Glue around the base of the screw and surrounding wood. Allow to dry and your screws will stay put provided that you don’t torque the nuts on the mounting screws like an idiot with a socket wrench. Don’t be that guy,
We tested a range of speakers that included a Celestion G12H 70thAnniversary, Colvin-reconed ’64 Jensen C12N, Eminence Wizard, Private Jack, Alnico Red Fang, Teas Heat, Screaming Eagle, Red, White & Blues, and Warehouse Green Beret, Veteran 30, Alnico Blackhawk and Alnico Black & Blue. The Alnico speakers generally produce a tighter, smoother, slightly more compressed tone, with a variable emphasis on upper mid-range and treble frequencies, while the speakers with ceramic magnets possess a wider, more open sound. Higher power ratings of 75W-100W offered by the Red, White & Blues, Screaming Eagle and Warehouse Blackhawk typically translate into more graceful handling of bass frequencies, and in a 20 watt Deluxe, zero speaker distortion, for a clean, powerful voice.
Let’s cut to the chase with speaker evaluations, shall we? It has become clear to us that even after reviewing a dozen speakers in as much detail as mere words allow in a single article, many of you remain uncertain about which speaker to choose. No kidding. We would absolutely love to hand you a single magic bullet when it comes to speaker swaps, but here’s the dirty little secret about choosing speakers…. The overall character of the amp you will be installing your new speaker in is critical, and to some extent, the type of guitars and pickups you play most often are important, too. Tailoring your sound with the unique gear you play is not a one-size fits-all proposition – you have to invest some thought into the process. Are you going for a classic “scooped” American Fendery tone, or something more British, with a bit of an aggressive edge and upper midrange voice? Are you playing guitars with single coil pickups or humbuckers? Is there a specific, signature tone you are searching for, or are you playing a wide variety of musical styles that requires a broader range of tones? Do you like the more open sound of speakers with ceramic magnets, or the smoother compression of Alnico? What are you not hearing from your amp and the speaker that’s in it now? Do you want a brighter tone, darker, better bass response, or fuller, more prominent mids? Do you want to really drive the speaker and hear it contributing to the overdriven sound of your amp, or do you want a big, clean tone with no speaker distortion in the mix? The truth is, if you don’t know what you want, you are far less likely to get it. On the other hand, nothing is accomplished with paralysis by analysis. To be perfectly honest, there are lots of speakers made by Celestion, Eminence, Warehouse and, if you can wait long enough for them to break in, Jensen, that we could and would be perfectly happy with, but we would also choose them carefully, taking into account all the factors mentioned above. After a couple of days spent swapping speakers, we ultimately concluded that we preferred the ’64 C12N for a classic tweed Deluxe tone, and a broken-in Celestion G12H 70th Anniversary for the most mind-altering 18 watt Marshall tone we have ever heard. Seriously. More on that in a minute….
Having split more than a few hairs with our speaker swaps, it was time to start picking nits off of gnats with some output transformer evaluations. We first contacted Dave Allen of Allen Amplification, who also stocks Heyboer transformers built to his specs. We found a variety of appropriate output transformers on Allen’s site that offered subtle variations on a stock original Deluxe OT, and we asked Dave to describe the TO26 model we wished to try in the Deluxe:
“The TO26 was intended as a hot rodding upgrade to a stock Deluxe Reverb OT. While maintaining the stock 3-1/8” mounting centers, its fat stack of hotter core steel and multi-tap secondary make it a good choice for builders wanting to maximize the performance of a pair of 6V6s and who may also want to push the envelope with 6L6/5881s while still being able to clear the speaker in a stock cabinet. There are physical limitations in small amps, so its short low profile is welcome. The orientation of the laminations is also good for low hum pick up from the power transformer. I found that an OT mounted the tall way (like my TO30D) picks up considerably more hum simply due to its orientation to the power transformer, so, shoe-horning a ‘tallish’ OT into your amp may cause it to pick up hum from the power transformer – not much of an upgrade. “The TO26’s 7K to 8 or 16 ohm rating makes it ideal for a pair of 6V6s as well as 3,500 ohm to 4 or 8 rating for 6L6/5881s. Notice you always have an 8 ohm option with both types of power tubes. An impedance switch could be wired (I use a blackface grounding switch) as a power tube type selector for an 8 ohm speaker to go between 6V6s and 6L6s. The TO26 will typically give slightly more output with 6V6s due to its more efficient low-loss core steel and will keep the bass clean longer for more perceived clean headroom. As it takes the most watts to reproduce the bass, you notice distortion there first, and since Fender-type amps are so bass heavy, you can quickly hit the wall with headroom, so a noticeable increase in clean bass response certainly feels like a more powerful amp with the TO26. It is kind of like you installed a new speaker with a larger ceramic magnet that is more efficient than the old speaker. The amp is a little louder and the bass a little tighter or cleaner.
“There seem to be a lot of 6L6-based 5E3 amps out there now to get a little clean headroom from a circuit normally not known for much of that. The TO26 is a good choice for that type of amp as it will fit typical available chassis and cabinets. It has extra long 12” topcoat leads ready to strip and solder. I would reckon it would handle up to about 30 watts before starting to saturate and compress – plenty of cathode-biased 6L6s. I find that the Heyboer paper stick-wound and interleaved output transformers with premium core steel and heavy core stacks have typically better clarity or definition than ‘stock’ OTs. Call it fidelity or whatever you want – just clearer distorted and complex tones and better separation of notes in chords, etc. I use the TO26 in the Allen Sweet Spot, Accomplice Jr. and Hot Fudge with Nuts amps with excellent results. All of these amps can use either 6V6 or 6L6 power tubes. You know how a 5F6-A or Super Reverb has that huge 4 bolt OT for a pair of 6L6s to get the maximum clean bottom end? That is sort of what the TO26’s OT is to a pair of 6V6s. It just doesn’t even come close to saturating.
When we informed Dave that we planned to run the Deluxe with 6L6/5881 power tubes as well as 6V6s, he recommended that we try the TO26 since it had been specifically designed for such applications. He also sent a smaller TO20 transformer, described as being designed with a wider 1-1/4′′ lamination “fat stack” that provides 60% additional core mass than typical ¾′′ stack units for improved performance. The TO20 is a direct replacement for Blues Jr. and Princeton Reverb amps, and also suitable for dual EL-84 amps with an 8 ohm load.
Mr. Valco also sent us a replacement 5E3 output transformer he had bought on sale from Clark Amplification a few years ago made for Mike Clark by Magnetics Components in Schiller Park, IL – a company that has been producing transformers since 1943, having been the primary supplier for Valco and various Gibson amps in the ’50s and ’60s. A call to the company revealed that ToneQuest ReportV12. N1. Nov. 20104the transformer Valco sent was essentially their replacement for a Deluxe Reverb, model #40-18002 without bell ends per Clark’s request. We also learned that the company offers a complete range of Classic Tone vintage power and output transformers, including a reverse-engineered clone of a ’55 Triad 5E3 output tranny, model #18022.
We also contacted Paul Patronete at Mercury and requested a ToneClone “brown Deluxe” output transformer, since Larry Cragg had provided them with specific measurements from original OT in Neil’s ’61 tweed Deluxe, confirming that it was indeed a ’61–’62 brown Deluxe tranny. With a total of 6 output transformers to listen to, we took the Deluxe to Jeff Bakos, who set up a rig on his bench that enabled us to clip in each transformer and very quickly switch back and forth between them as we played a guitar through the amp. Are we having fun yet? Here’s what we heard:
Lenco – An excellent authentic “vintage” vibe for those that prefer the classic, if somewhat murkier sound of a tweed amp being pushed, lots of sag in the low end and a jangly pop in the top. And “old,” rather “lo-fi” sound indicative of the ’50s era amps.
Magnetics Components Clark Deluxe 18002 – Similar to the Lenco, but stronger and more robust, with a prominent growling character and voice. Thick, wooly and willin’ with better treble presence and clear string definition then the Lenco, yet an entirely “vintage” character. This tranny is comparable to those found in Deluxe amps from the brown era through silverface. Excellent power, punchy and fat with exceptional clarity and tone.
Magnetic Components 5E3 Clone – Percussive and dynamic with a faster attack response than the Clark/Deluxe Reverb version, this transformer was reverse-engineered from an original ’55 Deluxe OT. IT imparts an intense, throaty tweed character with enhanced mid and treble presence, remarkable clarity, and an authentic vintage ’50s vocal tone with softer bass response and slightly less volume and power than the Deluxe 18002.
Allen/Heyboer TO20 – An interesting variation with a much more modern, percussive dynamic character. The sound was not as heavy and imposing in the vintage style, and with this transformer the Deluxe reminded us of the more refined sound of a Fender Princeton, with excellent dynamic punch for slide and Allen/Heyboer TO26 – As advertised, the low end held up loud and proud with very little sag and an audibly higher threshold of clean headroom, although beyond 6 on the volume control the Deluxe was still holding nothing back. Overall, this transformer imparts a cleaner, high fidelity tone with more clarity and stout bass response than a typical stock 5E3 transformer. An excellent choice for enhanced low-end and maximum volume.
Mercury Magnetics brown Deluxe – Immediately recognizable, the Mercury displayed a trademark sound that is smooth, exceptionally musical, warm and balanced. Sounding more “high fidelity” than the Lemco or Magnetic Components transformers, but still seductively unruly enough to get yer ya-ya’s out. Sweet, rich, detailed and sticky.
Now, you may be wondering why we would bother to audition so many output transformers…. How much difference can it make? Well, forty-odd years ago when someone rigged that old Stancor tranny in the Deluxe, the only choice available to most repair shops was whatever was on hand in the scrap pile. Today we can shape the tone and dynamic response of an amp with a variety of “vintage” or more modern, custom transformers that allow us to recapture the original sound and feel of the amp, or improve upon the original design. Why did Cesar Diaz install output transformers for a Twin Reverb in Stevie’s Super Reverb amps, and Bassman transformers in his Vibroverbs? Because the first thing that chokes and overwhelms a smaller output transformer are the bass frequencies, and Cesar wanted Stevie’s amps to produce a rock-solid, thundering low end that could handle his massive wound strings. The tone we’re celebrating with our ’59 Deluxe is quite the opposite…. The raucous sound of the amp teetering on the edge is the key to it’s exploding tone, but if you wanted to go in the opposite direction with more headroom and a tighter low end, transformers like the TO26 have been specifically designed for that purpose. We once replaced the output transformer in our Pro reverb with a bigger MercuryToneClone Bassman, and the Pro grained a tone of clean headroom and unyielding bottom. Wanna make it even harder still? Use a plug-in diode rectifier in place of the 5AR4 rectifier tube. No saggy britches now. As with so many choices we make in the Quest for tone, the final decision comes down to your mission and individual taste, and Jeff agreed that between the Heyboer TO26, both Magnetic Components trannies and the Mercury brown Deluxe, the question wasn’t which one was “best” – all four were exceptional, but different. Some players would prefer one over another for different reasons described here, but all of them represent stellar examples of just how far we’ve come since the day that old Stancor tranny was used to put the Two Fifty Nine back into service.
One last detail needed to be addressed…. Could we safely run the Deluxe with 5881s or 6L6s if we preferred that sound over 6V6s? Once again, we asked the prescient Mr. Valco for some Hoosier insight:
“The impedance mismatch in this particular amp using the 6L6s is really not a big concern, it won’t hurt the amp and will either sound good or it won’t. The 6L6s draw 1.8 amps and two 6V6s draw 0.9 amp, so using the 6L6s will add about 1 amp more current draw that the power transformer needs to supply from the 6.3 volt heater windings. On some small 6V6 amps, using 6L6s can and does cause the power transformer to run hotter because more current equates to more heat. The concern is that the power transformer in the Deluxe, not being a large one to start with, has the extra 1 amp of heater current capacity to safely use the 6L6s. One way to determine if the power transformer is really stressed out with the 6L6s is to measure the AC heater voltage on pins 2 and 7 on the power tube sockets (or on the pilot lamp) and see if the AC voltage drops significantly from the reading using 6V6s versus 6L6s. It should be a bit over 6.3 volts AC with the 6V6 anyway (since the wall voltage is higher these days than in the early ’60s) and with the 6L6s you sure don’t want to see a large drop in voltage below 6.3 volts AC. If there is a large drop it means the transformer is having trouble supplying enough current for the 6L6 heaters if given enough time with the 6L6s could damage the power transformer. If the drop is only a few 10th of a volt, and doesn’t go below 6.3 AC, then it would indicate that the transformer is supplying the demand for the heater current and should be OK. Most Fender amps used power transformers that could handle some extra current demand.
And now we arrive at the moment of truth. We’ve been steadily reeling in a parade of new and classic amps for review in these pages for 12 years now this month – Marshall, Fender, Magnatone, Hiwatt, Vox, Valco, Silvertone, Ampeg, Gibson, Gretsch, Mesa Boogie, Park, Supro, Dickerson, Traynor, Budda, Western Auto, Standel, Dumble, Cornell, Clark, Crate, Divided by 132, Reeves, Bad Cat, Gabriel, Fuchs, Koch, Star, Category 5, 65 Amps, Balls, Bakos, Callaham, Blankenship, Reinhardt, Grammatico, Siegmund, Chicago Blues Box, Roccaforte, Headstrong, Rivera, Mad Professor, Talos, Maven Peal, Reverend, BC Audio, Savage, Goodsell, Fargen, Carol-Ann, DST, Two Rock, Germino, Matchless, Louis Electric, Swart, Demeter, Juke, Aiken, Bluetron, DeArmond, Carr, Victoria, and Dr. Z, with more coming. Lots of amplifiers, multiple models from the same builders, and among the foremost classics – Fender, Marshall, Vox, Hiwatt, Gibson, Ampeg and the entire Valco catalog, we have acquired, optimized and restored dozens of amps considered to be among the most desirable vintage models ever built. In the 20 watt wheelhouse occupied by the Two Fifty Nine, it has no equal by a mile. Game over.
After a lot of back and forth testing with different sets of output tubes, we became hooked on the thundering sound produced by a pair of Philips small-bottle 6L6WGBs. Thanks to Larry Pogreba’s talent for scavenging rare tubes (in Montana, no less), we are flush with several outstanding and stout pairs of RCA 6L6s, but the brighter Philips really lit up the Deluxe with a fresh and lively attitude that mirrors the bounce of a newer amp. With the ’64 Jensen C12N loaded, the Deluxe spookily nails the tones of Neil Young’s rig on Ragged Glory – a “studio” recording cut live with the Deluxe and Old Black in a barn on Young’s ranch with Crazy Horse. With the volume backed off to 4-5 a bluesy jangle emerges anchored by solid low end, rich midrange, the sweetest treble tones imaginable, and variable levels of sustain and edgy distortion that can be controlled both by the volume on the guitar and pick attack. The Deluxe does not discriminate between single coils or humbuckers, ravaging both with equal fervor, and the responsive dynamic character of this amp simply is not of this world. Rotating the single tone control sharpens treble without dumping lows or mids, while also subtlety increasing gain, as if you were using a boost pedal. A “Y” cord plugged into the Instrument and Microphone inputs enables the two channels to be mixed with great effect. As Neil Young described, bringing the mic input volume up with the instrument volume set between 6-8 gradually deepens the tone while slowly igniting an intense explosion of thicker second order harmonics and distortion as the dynamic character of the amp softens. Pushing the Instrument volume level up into the 8-12 range brings the volume up to a perceived level that exceeds 20 watts, while provoking an angry, pissed-off cascade of astonishingly rich musical distortion as the notes swerve into controlled harmonic feedback.
Switching from the Jensen to the Celestion transforms the Deluxe into the most stunningly toneful 20 watt Marshall you could possibly imagine. To be honest, you probably can’t imagine it, because we have never heard anything like this ourselves, even after owning a couple of vintage Marshall PA20s, a rare Lead & Bass head and 1×12 cabinet, and a Balls 2×12 18 watt. We could easily live with either speaker, and the Deluxe also just kills pushing our 8 ohm 4×12 pinstripe cabinet.
For those of you who appreciate a somewhat tamer vibe, we can assure you that the Deluxe loaded with a fine pair of 6V6s is equally mind-altering. The overall sound is a wee bit smaller in girth and less imposing, yet abundantly overflowing with vivid harmonic depth, a supremely touch-sensitive response, and brilliant combination of fidelity, clarity and bloom. Compared to a black or silverface Deluxe Reverb, the ’59 presents a more musically complex soundstage, less harsh, stiff and linear, and it lacks both the sharper treble of a blackface amp, and the scooped midrange character. The tone is rounder and meatier, the treble sweeter and less dominant, with an enhanced 3-D image.
Now, if you’re the type that skeptically requires a qualifier to add a stamp of legitimacy to such an over-the-top review, here it is, Mr. Been There-Done That…. The Deluxe doesn’t and won’t spew big clean tones at stage volume. Our ’58 Tremolux produces a cleaner tone with a higher threshold of clean headroom by far at comparable volume levels, and the taller tweed cabinet encourages a stronger, cleaner resonant bass and low mid response. The Tremolux is also equipped with a Mercury ToneClone Tremolux output transformer, which creates a tone that is less wooly, raucous and indistinct.
The busted-up sound of the Tremolux above 5–6 is gloriously righteous indeed, but with more clarity and less provocative intensity than the Deluxe. Taken in context, what we’re suggesting here is that in our experience, the Deluxe has no equal as both a Fender and Marshall style 20 watt rocker (depending on speaker selection), and we’ll add “blues” to that description equipped with 6V6s and the Jensen C12N. During our 2-month test period, we also routinely used our Lee Jackson Mr. Springgy reverb, Analogman-modded Boss DD3 digital delay, and a very cool, versatile (and cheap) Flip tube tremolo pedal reviewed here. Can a modern replica of the 5E3 Deluxe deliver the same inspiring tones as the Two Fifty Nine? The closest thing we’ve heard is the Louis Electric “Buster,” but no, magical happy accidents like this Deluxe can’t be reproduced today – and that is as it should and shall always be. Quest forth…
After a hiatus of 45 years or so, Fender has been carefully re-entering the business of building hand-wired tweed amplifiers with the resurrection of the narrow panel ’57 tweed Twin and the ’57 Deluxe. Of course, there are scores of small amps that have been inspired by the Deluxe, and many more 5E3 knock-offs being built today in the “subbooteek” cottage industry comprised of solo solderers who build in their spare time and often put their work up on eBay. For some cost-conscious players, a tweed Deluxe for $600–$800 is a deal that cannot be refused—even if the amp was wired up by an unknown tonehead on a basement workbench in Akron. But Fender is Fender, and while they chose to ignore the thriving boutique market for hand-wired tweed circuits that blossomed in the early ’90s with the appearance of Victoria, they have not forgotten how to put an amp together, and in the case of the Deluxe sent to us for review, it stands apart from all the rest with a very unique voice.
We asked Fender’s Shane Nicholas and Sergio Hamernik at Mercury Magnetics to explain the process of natural selection that evolved during the development of the ’57Deluxe….
TQR: Describe the process in which your design team evaluated various vantage examples of the 5E3 Deluxe, and how widely the actual sound of the vintage amps you listened to varied, specifically?
Shane:There are several guys here at Fender who own old amps, and we also have friends who do. When we were ready to begin the’57 Deluxe project, we brought in a few original vintage examples, and a couple of “boutique” versions of this type of amp. We listened to all of them with various guitars, and listened to each amp chassis hooked up to the others’ cabinets. Keep in mind that every amp—especially 50-year-oldones, will sound a little different than another one of the same model. It’s pretty well documented that Leo Fenders some times changed components “on the fly,” while the official schematic documentation would be updated later. My old Deluxe might have been built with some different stuff than yours, even though they were both “stock” 1957 5E3models. Then add in aging, abuse, repairs, etc., and it’s a wide target that needs to be narrowed. For example, we had one amp here that was much more distorted sounding than the others, so unless you are only laying 1951 Howlin’ Wolfstuff, you probably wouldn’t like that amp as much. For me, the ideal is an amp that gives a beautiful clean tone with the volume set low, and a dirty, harmonically rich tone with the volume set high. You should also be able to set it on, say, “5” and control the amp’s distortion by simply varying your pick attack. We decided that one of the old ’57s was the most desirable example of a 5E3 Deluxe, and we used it as the golden sample.
Once we got to this point, project engineer Nick D’Amato really got down to business. The final schematic and components we chose were basically picked so the prototype would sound as close as possible to our golden sample amp. Obviously, we use new parts, not 50 year old stuff from a flea market or whatever. We also had to make a few changes in order to pass modern worldwide safety regulations; things like shielding, ground wires, and the three-prong power cord, which negated the use of the old ground polarity switch. We put a Standby switch in its place, which is a good thing. These changes don’t really affect tone, but they do reduce hum and improve playability.
We also decided to go with 12AX7s in the preamp, even though the originals were designed with the 12AY7 in the front end. Our thinking was, not only is the 12AY7going to be tough for us to get in quantity, but many players in fact prefer the 12AX7s higher gain. If you are playing ZZ Top stuff, for example, you’ll probably prefer this. The12AY7 will work, however, so some owners will buy one and stick it in their amp.
The transformers are also a crucial piece of the puzzle. We auditioned quite a few prototypes, and some of them were too efficient or too distorted, etc. One of the vendors we contacted was Mercury Magnetics, whom we’ve worked with in the past They sent us five different power and output samples, each based off an original transformer set found in a vintage Deluxe amp. During A-B tests, one of these closely matched the OT in our golden sample amp. We worked with Mercury to make a few tweaks, and soon we were positive we had the right transformers.
TQR: How many different types of speakers did you consider?
Shane: Well, the original Jensen in my old Deluxe really sounds and looks perfect, like you’d expect. We found that the new Jensen P-12Q sounded close enough, so we stopped looking. In my ten years at Fender, I have discovered that no matter what speaker we supply in a tube amp, a certain percentage of customers are going to try something else. Celestion, Jensen,Eminence, and boutique guys like Weber all have their supporters and detractors. It’s human nature to tinker with your machinery, and a speaker swap is one of the easiest mods you can do to an amp.
Now, having said all that here’s where it gets fun. One of the boutique amps we tried happened to have a Celestion Blue Alnico speaker in it, and it sounded very good. So we tried that speaker with our prototype 5E3 amp, and said,“OH MY WORD!” I had heard that speaker before in different amps, but this combination was stunning. The amp became a lot louder, for one thing.We thought for a minute about using this speaker in the ’57 Tweed reissue, but it’s not really the authentic, original sound or look. It’s also a lot more expensive. So, we remained sold on the Jensen, but when we developed our limited edition, black lacquered version—the Fender 57 Amp—we decided to equip it with the Celestion Blue.
TQR: What are the unique challenges involved in building hand-wired amps, compared to those with a printed circuit board?
Shane:Making it look and perform like the old amp while using readily available parts that we can buy in quantity. I am a stickler for performance, but if our customers didn’t care to look inside, we wouldn’t worry about the looks of the components and wire so much. For example, Alexander Dumble told me he likes our new ’57 Deluxe, and was surprised that we used such heavy wire in the chassis, as it’s really not necessary. We can’t pass modern safety regulations using cloth wire, so we got the next best thing. I’d also like to mention that, while we build higher quantities of hand-wired amps than all the other boutique builders, it’s still a very small number compared with the number of PCB amps we build, like our Hot Rod series and all the sold-state models. Our factory estimates about eight times the labor in a Vibro-King versus a ’65 reissue amp with a PCB.
TQR:We would assume that Fender has a separate group of employees devoted to building the hand-wired amps.
Shane: We do have the hand-wired team in a separate area in the factory. They are highly trained, patient employees who take a lot of care with these amps. Most of them are women, same as Leo’s day, maybe because they tend to be more patient than us dudes. And women’s hands tend to be smaller, making it easier for them to run wires and solder connections in the tight confines of the amp chassis. I don’t know the training regimen off hand, but I believe many of them cut their teeth on guitar wiring before moving on to amplifiers.
TQR: With the tweed Deluxe in production, are there plans to develop additional hand-wired Fender models of the past?
Shane:Yes. The list of great old Fender amps begging for reissue is a long one!
In case you don’t know, Mercury is known for having acquired and cloned hundreds of stellar vintage transformer sets that com-prise their ToneClone and Radiospares series…
TQR: How did you become involved with the development of the 5E3 specifically?
Sergio: It call came about as a follow up to the ’57Twin-Amp reissue project that we were a part of a few years ago. Mercury designed and supplied Fender with the transformers for those amplifiers, which was a very successful endeavor—so much so that Eric Clapton made them his main amps for his own tours and the Cream reunion tour.The momentum started by the ’57 Twin-Amp project quickly created a demand for some sort of follow-up amp in this positive vibe, and Fender’s decision to reissue the 5E3tweed Deluxe came as good news to us. It is probably the most copied circuit on the planet, and I couldn’t think of abetter project to sink our tranny designer teeth into.
Years ago the late Ken Fischer, of Trainwreck, told me that the Deluxe was an early inspiration for him to get into amp building. He went as far as to refer to the Deluxe circuit as the cornerstone of the boutique market. It’s a truly different dynamic when the company that started it all wants to reintroduce a benchmark in amplified guitar tone, and especially when their goal is to make the amp sound as fresh as it did when it was first launched. We’ve worked for decades acquiring our extensive library of transformer designs that originate from variants of pre-production to pilot runs of many vintage amps, so amplifier companies often consult with us because we’re a small but dedicated group just nutty enough to be the conservators of such things.
In recent years I received many emails from readers about boutique amps. Often the writer complained that the manufacturers usually lack the courage to go in a new direction with a new design: “Is it not possible, today, to do it a different way than Marshall, Fender and Vox have done in the past?”
Too much gets copied and regurgitated. So wrong because, in general, boutique products are already moving along well-trodden paths. The manufacturers complain that a new design is just far too expensive to produce. This is correct, because boutique amps are purchased only in small quantities by buyers. They serve a market that does not really exist. Here and there a new chassis and cab are constructed, but they always remind us of the shapes of the traditional geometry of typical role models.
“A young Canadian residing in Rastatt, Germany, wants to change that now. Bold as a Bang & Olufsen designer, Irving Blacker has devoted himself to a design that immediately splits the guitarist community. The Tonehenge Monolith is already a more than respectable visual statement about tube amp design. Like the unusual guitar designs by Auerswald, Ritterand Teuffel, this product dispenses with all known forms and reinvents it-self according to its own desire. “You will either love it or hate it,” Irving admits laconically. “But I really wanted to do something new.”
The name “Monolith” seems to be in his design message. On the whole it stands 134 centimeters high and the slender column of sound towers above all other so-called stacks. Slim, elegant and thoroughly modern. At the front, solid aluminum ribs protrude like the grille of a Rolls-Royce towards the beholder. The deep-grained wood veneer is polished to a shine, like a high-end hi-fi speaker or a grand piano. That this should actually be a rock ’n roll tool be-comes only apparent after one ponders it for a moment.
How should it be transported? How to combine it with other amps? How does such a construction hold up after the first tour? All these questions can only be answered in the future. One thing is for sure though, something like the Monolith has never been seen before. And it happens to have caused mouths to water from a few pros, too. Carl Verheyen, Joe Bonamassa and Larry Carlton were curious about plugging into the luxury model and were more than pleasantly surprised, because this unique amp sounds damn good.
The Monolith is therefore not an amp, where only the glossy facade conjures quality. To use one of our examples again: Bang & Olufsen has simple Philips technology in-stalled. The Danish noble manufacturer is primarily known as a “wrapping artist.” On the other hand, the Monolith is equipped with the latest technology under the hood. The only things traditional about this amp are the tubes, Mercury Magnetics transformers and Celestion speakers. The rest corresponds to a quality that in guitar amplifiers was previously sought in vain. Irving Blacker and his meticulously selected technical team have literally spent years to put together an optimum in components, which is beyond all known standards.
For example the high-quality potentiometers are usually found only in the most expensive hi-fi systems, as well as the internal wiring, all of which promise high-quality signal processing.
Each amp is also comes fully equipped with cable from Evidence AudioSiren II speaker cable, Mono-rail shielded cable, choice of Lyric or Forte guitar cable, and a power cord that alone is more expensive than a small combo amp from the Far-East. Everything should match together and ultimately nothing should impede an optimal sound. Inside, it looks similar to a modern computer. Instead of solder lugs and vintage plastic-sheathed cables, here is a solidly-built modern high-quality board which is so perfectly made, and as luxurious in appearance, as the gracefulness of the entire Monolith. Even behind the power socket an opulent line filter extends into the interior. Literally everything has been thought through to completion.
The block diagram looks usual for a modern amp. There is a Clean channel with Volume, Treble, Mid, Bass, and a Crunch channel with Gain, Volume, Treble, Mid, Bass. Add to this a Master section with master Volume, master Presence and master Reverb. The latter controls a built-in digital unit that has been specially programmed in Germany for the Monolith. That’s it!
On the back there is a footswitch jack for channel selection, two switchable speaker outputs with 4, 8 and 16 ohms, a variable line-out and an effects loop. It is all just as much as only necessary, but normally enough for the majority of cases. The structure of the Monolith is clear and self explanatory… no voodoo switch, no push-pull pots and no mini-switches!
The towering speaker enclosure houses a CelestionHeritageG12H and a Celestion Alnico Gold, a blend, that according to Irving Blacker, fits perfectly to the sound of the Monolith. With speaker selection though, the customer has a hand in choosing. After all, Irving Blacker sells through his company Tonehenge the Weber speakers on the European market. “There’s always room for wishes,” says Irving. “The Monolith is only a basic framework in which the customer also has a hand in creating.” This also applies to the cabinet. There are numerous alternatives for color, wood and paint. Yes, even cabs painted or carved by artists are offered. On the sample we previewed, we had the chance to admire an airbrush design with attractive guitar art. On top of that is the stunning polished high-gloss varnish. Despite all the modern ingredients of the Monolith it is a cleanly laid out and thoroughbred tube amp.
I would find it easier if I could fall back on describing the sound of known reference samples. But the product vigorously denies this as there is nothing that reminisces Fender, Marshall or Vox.
The clean channel is, for example linear and unswervingly neutral in its tuning that it recognizes neither the strengths nor the weaknesses of the famous classics. Rather, this channel brings all samples to a design of an attractive tube clean sound to a wonderfully catchy blend. You hear the player, not the guitar and the amp! The amplifier is not primarily loud, nor does it roar, but bundles all the nuances of the guitarist. And that is the way it should be! From Volume at position 5 the sound goes into a very fine and pleasing crunch sound, which should enchant mainly blues fans. The tone shines with a fantastic mid-range without any weakness. It sounds warm, dynamic and assertive with a resolution so fine that one can represent all the nuances of his playing effortlessly. Likewise, the tone controls actually work with predict-able quality. From 0-to-10, the filters work continuously and are effortless to operate when dialing in your tone. The reverb unit is reminiscent of a good studio reverb Lexicon; long and deep, without noise and clatter. And perfectly enriches the sound as you would desire it to. The crunch channel offers exactly the same qualities and character as the clean channel, but with much more gain and a little more emphasis in the midrange. The bass sound is a bit slimmer and starts from volume on 3 to really growl. Depending on the gain setting, the Monolith produces a beautiful lead sound that is great for rock and fusion alike. It is a bit reminiscent an early Dumble amp or the tones of players like Larry Carlton, Lee Ritenour and Robben Ford. In this genre, the channel might be more at home than with AC/DC. A singing lead tone with a nice mid-range and very fine-selectable distortion characteristic is the focus of this unit.
As expected in such an exquisite boutique product, the Monolith thus offers not only finest ingredients for the eyes, but also outstanding tone in all parameters. I’m very curious how this conspicuous creation will place in the market but having never encountered something as original I find it hard to believe that this amp will not find its fans. The Monolith worthy of an award, not only in terms of design, but in its technical structure and its sonic possibilities. In any amp test I have rarely been allowed to develop as much curiosity and eagerness as with this amp. Simply brilliant!