Kudos — Excellent response with humbuckers and single-coils. Blendable channels. Variable power.Concerns — None.
Contact — Mojave AmpWorks • (866) 235-6399; www.MojaveAmpworks.com
Where did you get the idea to start an amp company?
It was the K&F that got me started. Working at Fender and knowing the entire lineage, including the K&F era, which is kind of separate, it was really intriguing to see what kind of things he came up with. Because it was so rare, the K&F was really appealing to me.
How did you discover this cool original gear while at Fender?
People would come in with things that were not in regular production and would want to have things done and have items reproduced, and people would come in for repairs too. It was a nice influx of cool equipment coming in, and we would turn around and reproduce it to the best of our ability. One of the first pieces we did while I was there was the “snake-head” Tele set, the first regular Fender-style guitar that Leo built.
 Doesn’t that predate the Nocaster?
Yes, in fact I think that guitar was a ’47 or ’48. It had a four-piece pine Telecaster-style body, two inches thick with a small, black Bakelite pickguard, volume and tone control, and one bridge pickup. The snake-head headstock was the style he was using on his K&F lap steels, so it had three-on-aside tuners, with a solid, fat, maple neck with no truss rod — he hadn’t thought about a truss rod yet! They only made a few of them, and they were made as a set with the woody Pro amp.
So, did you put truss rods in the reproductions?
No, but they are big, round, C-shaped necks, and they’re quarter sawn, so they don’t move around too much.
There are actually guys who believe that necks without truss rods sound better.
This guitar is really neat-sounding because we used antique pine. One of my first jobs there was to rough-cut these old pine boards, glue them up, and plug and fill nail holes. Looking at these old-style guitars and amplifiers in comparison to what was being manufactured at the time, I saw a night and day difference. These have a style to them that nobody does any more.
This got me started thinking about K&F. If the circuit for the woody Pro was primitive, then the K&F amp circuit was even more so. The Pro had 6L6s and a push-pull output, and a 15″ speaker — a field coil speaker, which we had a lot of problems with. The K&F amps didn’t use field-coils and were permanent-magnet.
Give us a little background on K&F.
It was Doc Kauffman and Leo Fender. The information on K&F varies, so I can’t give a perfect history. They started around late 1944, and ran probably to the end of ’45 or early ’46, then they stopped making these in mid-1946. Leo had done some really interesting things — he had designed an automatic jukebox and little P.A. systems, and he was working with his radio company. Then, he had an idea for these guitars. He started making them and it became popular enough that he needed a larger investment; Doc didn’t think he could invest in something that looked like a hillbilly guitar, and at that time, that was the type of music played on them.
I remember even up until the 1960s, many jazz guitarists looked down their noses at these and told us, “When you grow up, you’ll get a real guitar,” meaning something more traditional, like a Gibson archtop.
Yeah, so Doc left and the K&F company was dissolved. Finding pieces from that time period is hard because there’s no record of how many were made and there were no advertisements for them. I do have some pictures from George Fullerton that Doc’s son gave him of the first piece that they put together, which is nothing like the ones that went into production. It’s very beautiful.
 Did you get to play that original Tele that was copied for this run of instruments?
Oh, no. The story behind that guitar was that Leo was a huge stickler for not keeping prototypes around. There were two of those — the first one was cut up and the second was thrown in the trash. George pulled it out of the trash. He was young and had just started working with the company; he was a guitar player and this was his creation too! He and Leo went to little bars and shows and listened to players. Without telling them what they were up to, they asked the players what they would want in a guitar, which became the basis for their business and designs: being able to change small parts out easily and being able to easily change the neck on a guitar. There was a bit of a stigma attached to their early instruments because they weren’t craftsman pieces — they were functional instruments.
Yes, they were outside the instrument crafting tradition. This was a modernist piece of design, rather than following classical instrument-building traditions.
Exactly. So when I started researching all the K&Fs, I talked to George who was there just after Doc left, and I got as much information as I could from the closest source. Strangely, though they made guitars and amps in sets, many of the guitars still exist while most of the amps do not. I figure that the guitar is a functional piece and all you have to do is change the strings, but if you have an amp go out, it might have been easier to just go buy another amp.
Was it through the process of reproducing old gear, and speaking with George Fullerton, that you became interested in the 1940s K&F amp?
Yes, that amplifier in particular because it was so simple and because the circuit was kind of the predecessor to the Princeton, but instead of having an 8″ speaker like a Princeton, it had a big, large-magnet, alnico 20-30 watt 10″ speaker. This was late ’44 or early ’45, and these amplifiers were made from military surplus parts, so they were all different and had this unique industrial look about them. Design-wise, it wasn’t made to be the prettiest thing out there — it was made to be functional.
So it was just “The K&F Amplifier” and they only made the one model?
No, see that’s the thing, they made one, and we know the record shows from Doc’s writing on the pictures I have, that the first one they made was beautiful! It had wooden sides, a grille cloth that was embroidered with K&F on the front, and a 15″ speaker. The photo says, This is the first K&F [lap] steel, and this is the first amplifier in the U.S. with a hanging chassis and hanging tubes.” Before that, everything was put on the bottom of the amplifier and the tubes all sat up.
And that amp is gone now?
Yeah, in John Sprung’s book, Fender Amps: The First Fifty Years, he wrote that this amp was made as a custom, one-off piece, and it is likely gone now, since the only pictures we have ever seen of it were the from the 1940s.
That would be a fun one to reproduce, wouldn’t it?
Oh, it would be amazing. There was an article in the October 1998 issue of Guitar Player with a 15″ K&F — the style of the K&F that I am reproducing. It was the same cabinet shape, just larger, and it is the only time I have seen a 15 other than that one custom one-off piece.
 So what you had was three or four amps, all without names or model numbers which were essentially prototypes
Yes, they were “if this works we will make another just like it” sort of deals. There were two basic models that you see in published pictures. One is the 8″model that looked like a little lunch box. It had one volume knob and one or two inputs, no pilot light, no fuse, and the cord coming straight out — that was it.
The other is the 10″ model, which is the one I’m reproducing. It had two inputs, no fuse, no pilot light, one tone control, and either one or two volume controls, and two channels — which was something completely new. Each channel ran on one half of the input tube, which is what Fender did until the Blackface era in the ’60s.
It’s not a large amp at only 5-6 watts. The speaker was an unknown Jensen model that had a large, plug-style alnico magnet instead of the horseshoe magnet. I am sure every example varied because the parts all varied — the knobs, transformers, everything. The transformer on the one I am reproducing was a replacement transformer right out of an Allied catalogue made by some unknown manufacturer.
How did you originally come in contact with the amp you decided to reproduce?
I worked with Geoff Fullerton at Fender, who became a good friend of mine. Geoff is George’s son, and was Leo’s personal assistant at G&L for several years. He was a builder and engineer there as well. George’s father used to work at Fender in the wood mill where he ran this huge ripsaw, which George, Geoff and I also ran, so I had become good friends with the family.
George is a wealth of information and a really interesting man to talk to. He has great ideas about how things were done, the reason things were done, and craftsmanship. Even though his guitars were not traditional, the craftsmanship that went into them was impressive. They case-hardened every single one of the screws that went into a guitar, so if you had to repair it, you wouldn’t strip out the threads. Nobody does that kind of thing anymore because it is not cost-effective.
When I talked to George about the amp, he told me about one at the Fullerton Museum owned by Phyllis Fender, Leo’s widow. As he described the amp to me, I decided I wanted to take a look at it. Phyllis said sure, so they pulled it out of the museum for a day. I looked at it, taking every picture and measurement I possibly could. I worked with what I had, but it wasn’t enough to do a reproduction. Later on I was able to go back, and they let me take the chassis down and measure every single component. One thing I couldn’t do was turn it on.
You were able to disassemble this old amp down to the component level?
I was. I took my meters down there and measured everything. Not only did I measure it, but I cross-referenced it to the color code because those resistors and capacitors are 63 years old now and have drifted a lot. One of the things I noticed is that he used many of the components because they were the only things he could get. They weren’t exactly the right value for the position they were in, but he put them in there because they were close enough and that’s what he had.
 So, I’m looking at it, and George leans over and says, “You know, you’re the first person who touched the inside of that amp since Leo; you’d better be careful!” Because no one had touched it in all those years, the chassis, being made of steel and zinc plated, was pretty much pure white and powdery — I wasn’t about to leave my fingerprints in it!
Are you going to reproduce the zinc plating and everything?
Oh yeah, but I’m not going to relic it or try to make it look old.
Are there any ground issues getting through the zinc?
Yes, you have to grind away the zinc to get to the steel. And that was one of the things; there’s no circuit board, it’s all point to point, and whatever had to be grounded was run straight to the chassis right there. It was function over form.
What year was the original produced?
I don’t really know if it is one of the earlier or later ones, although I think it is earlier. There is a kind of complex cutaway on the top of the amplifier and a relief on the cord panel that is pretty much decorative. Those two things are also on the 15″ amps that we know were the first ones made. Later examples don’t have either of those features on them, so it is likely an early piece.
Did your experiences at Fender and taking apart the old K&F amp lead to your decision to start an amplifier company?
The K&F thing led directly to my own amplifiers. That amp was amazing and cool, but it was so rudimentary. Boutique amplifiers are becoming a bigger business now and I though it would be interesting to see if I could do my own interpretation of the design.
I was looking at all these beautiful Fender guitars that we were making, the amazing Custom Shop guitars with custom finishes that people wait years for. There are some really nice-looking amplifiers out there, but most of them look like big Tolex suitcases.
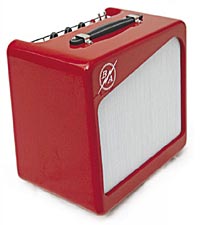
It all started me thinking about something that was small enough that you wouldn’t worry about it getting banged around, with the form plus the function, and replicating some of the beauty of the guitar finishes. That really appealed to me – no one was doing that. Finishing it like a guitar, the correct way, is such an art. I wanted to make them so they would match people’s prized instruments.
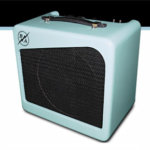
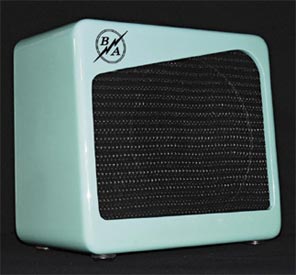 Over the years, guitars and their finishes have gotten more elaborate, but you aren’t doing that with the new Model 10; it is using simple shape, texture and color for the amplifier, rather than the busy style of many expensive guitars.
I started out spending hours designing cabinets, and the right one just hits you. This one was simple; it effectively gave room for my logo, but with some different elements. I have 1″ radiuses on the corners instead of ¾”, which makes the amp look more spherical, instead of looking like a big square
It gives it a softer, more attractive appearance.
I started the design of the amp with the cabinet, and I got that nice angled swoop to the front, which was simple, not complex — you see some of the amps from the 1940s that had great grilles on them, and some were so complex. Once I got the design for the cabinet down, and I knew that I could physically produce it from a woodworking standpoint, I knew how much space I had, so I could work on the chassis and circuit layout.
Tell me about the Model 10’s circuit and electronic design, and the sounds you were going for.
Well, George introduced me to Bill Sterle who started working at Fender around 1960. Bill is an audio engineer who designed a lot of the original Blackface amps.
Having someone who was there and who designed amps telling me why they made certain decisions is so much different than starting with copies of what Fender, Gibson, or Marshall did. I learned distinction between the amps Bill made and the Fender amps of the 1950s, which were the easiest and simplest designs. The Blackface-era amps were much more complex designs and they were really trying to do different things with the preamps to keep them cleaner.
When Bill was designing things, he stressed that distortion is your enemy — that’s the school of amp design he came from. You have to have the cleanest representation possible. I went to Bill’s house for hours and he would describe everything from tube heater circuit design to what you want to get accomplished in the preamp section, the phase inverter section, and the power section. He told me once you get going on the tone controls, you can go crazy because there are so many variations in tone circuits — not only what you use, but where they are placed.
I wanted to have a 10″ speaker in there. A 10 just has a clarity that you cannot get from an 8″ speaker, and I didn’t want to go as big as a 12. 10s have a really neat sound to them if you find the right one. I knew it was going to be either a small, single-ended design or a cramped, push-pull design. I ended up starting off with a small single-ended design.
So, design wise, you met some of the original guys who developed modern guitar amps, and took it from there, as if you were in that era.
Oh yeah, and every single element that was put in the amp was based on what I was trying to accomplish in the circuit, not based on something I was trying to copy. My initial intention was to make it really straight and clean, without a ton of bells and whistles. It is a single-ended design with a 6V6 power section and a 12AX7 preamp tube.
I looked at a lot of Internet message boards for guys who are building amps, and for players in general, to find out what kind of modifications they were making and what they wanted out of an amp. I tried to keep it really simple and clean, but I did put in a few things that I thought would expand the tone a little more.
 Is there a tube rectifier?
No tube rectifier in this. In such a small, single-ended amp that putting one in would be more of a novelty than anything functional. Not putting one in allowed me to use a smaller power transformer and to clean up the power and make it more stable, along with giving me more space to do other things in the chassis. Also, when I went back and talked to Bill Sterle, he threw his hands up and said, “Tube rectifiers are absolutely worthless!” [Laughs]
My impression is that stout, well-built power supplies produce robust tones, especially at high levels. When you are pushing the amp, and you’re not clobbering the power supply, the amp doesn’t freak out as much. If I want a little sag and compression, I use a compressor!
Well, yeah. It’s all relative though, because there is a ratio between the voltage and the current that the plates see. You push harder, sand the plates, and try to draw more current. If the current isn’t there, then there is going to be a difference in the tone.
I started with a solid-state rectifier and that is the only solid-state piece in the amp. In the preamp, I used more of a Blackface preamp design, where I split the 12AX7 in the middle because the amp only has one channel. I do have two inputs on the amp, but one is just hotter than the other.
So there are only two tubes in the amp?
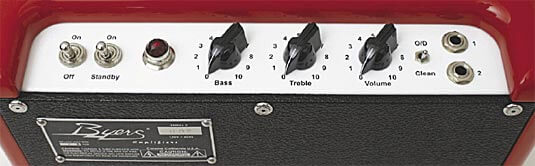
Only two! It’s simple — there is just a treble and a bass control. With all passive tone controls, if you use the control, there is a certain amount of insertion loss, so on bass control I put a switch so you could remove the tone controls from the circuit completely.
The Model 10 has the standard volume, bass and treble controls; then there is the switch. What does it do?
It takes out the negative feedback loop. You turn that off and bypass the tone controls and it will crunch just like an early tweed Champ. Even with only two tubes and three knobs I wanted to be able to have a range so it isn’t just for one style of play; it is an amp that you can play around with and get a cool tone out of.
It has an amazing array of tones for having so few controls.
I have designs of every shape and size, but this is where I wanted to start. In the larger models, I am going to do a 15-20 watt amp, and I may do as much as a 30-35 watt one as well, though I don’t want to come out with a 100 watt monster.
I think people are starting to re-evaluate how much wattage is really needed.
You know, one of the many helpful things I learned from Bill Sterle was how to test everything correctly. Lots of amp makers out there will say, “This is a 5-watt amp,” and that’s what they assume because a similar one was made by Fender, but Fender tested where the wattage comes up just before distortion, on every one, and that’s how we test as well.
The Model 10 puts out almost exactly 5 watts. It has a cathode bias power section and I go through and measure every single one of those tubes and every single output section of each amp to make sure it is right for this design. I don’t want to run these as hot as I possibly can to get every last watt out of them, because it is hard on tubes. I offer NOS tubes as an upgrade, and they are not making any more of them! I run them right in the middle where you get great tone and good longevity.
What tubes have you been using?
Right now I am using Electro-Harmonix preamp tubes and JJ power tubes. I think the JJ 6V6 is a really neat tube. They can handle a lot of plate current, and they sound good.
If somebody wants a Model 10, how long would it take?
I have all of the parts ready to go, but I have a six to eight week lead time on the custom-colored cabinets, including shipping. It takes about four weeks for the paint to be completely finished, because it has to be perfect. It is a guitar finish on the Model 10 and it’s done just like any expensive guitar finish. The amps are built to order, though I may stock certain colors here and there.
 It’s exciting to see the founding of a company with such an amazing product. Do you have a price set for the Model 10?
It looks like the Model 10 will be $1050, at least as an initial release price.
You spoke earlier of having several color choices and perhaps some clear finishes on nice wood available.
The cabinets right now are poplar for the solid colors, and ash or alder depending on whether the finish is a blonde or sunburst one, just like a guitar.
If someone asked you what your amp sounds like, what would you say?
Well, what I was trying to achieve was a combination of the tweed Champ and Princeton, combined with a Blackface Champ and Princeton. I wanted to be able to combine all four of those amps together so you could get a really grungy, overdriven, tweed tone or a really clean, clear tone with or without tone controls.
Tell me about the K&F reproduction amp, is that currently in the pipeline?
That amp is 99% done. Because this amp has never been done before, and because the parts are not off-the-shelf parts, everything is different from what is currently available. Everything had to be done from scratch; transformers had to be custom wound, and chassis had to be custom made — and the chassis are not normal dimensions by any means. The tubes are all NOS tubes, because there is no current equivalent to them.
It’s an octal socket preamp tube isn’t it — a large base and pins like a power tube? What tube is that?
It’s a 6SC7 medium mu triode and a 6J5 triode in the preamp section. Each channel gets half of that triode. It’s a pretty low-gain tube actually; it’s not overdriving the preamp circuit a lot like the later 12AX7s often do. There is also a 5Y3 rectifier and a 6V6 output tube. Both input signals merge into a 6J5. Instead of putting one channel with one preamp tube, he made two channels that merged into one preamp tube. There’s one volume control for both channels. The circuit is a lot different than a modern amplifier. Leo was doing it to see if it would be functional, and it was very rudimentary and basic.
The octal preamp tubes give a really unique sound to the amp. They don’t drive it very hard, but it does put out a pretty thunderous crunch when you want. I am keeping it as historically correct as I can, with carbon comp resistors, Mallory 150s as the tone caps, and all cloth-covered wiring, which I don’t do in the Model 10. I am not trying to reproduce a look in the Model 10, but am going for the best possible sound, so I’m using all the best components and wiring by today’s standards.
You selected the components for the Model 10 by listening to them, didn’t you?
Yes, but the K&F is a little different. It’s not wired like you would wire something today; it has series heaters, so you get that hum in there that makes for a unique sound. The only changes I made were necessary for safety. Of course, there is a fuse in this one, along with a 3-prong AC plug. Other than that, it is rudimentary in every way. The tube sockets are spot-welded to the chassis.
Did you actually replicate the spot welds?
Oh yeah! Lots of guys would have riveted the sockets in place, but that was an extra expense, so they spot welded them.
It probably had a terrific ground connection.
It does. I found an original output transformer and power transformer and had Mercury Magnetics reproduce them for me. The speaker was a 10″ Alnico plug-style speaker rated at 40 watts for a 5-watt amp, so it was way over-engineered for the circuit. Most Alnico speakers have a horseshoe shaped magnet, but this one has 2½” donut-shaped magnet. It was also used for higher-end audio and larger-wattage amps. It makes for a really heavy speaker, but it’s really neat. This Weber is the closest to the original speaker that is available.
How much is the K&F reproduction amp going to cost, and when will it be available?
I’m trying so hard to get it finished! I am talking to a paint manufacturer about the wrinkle paint we need, and if that works out we’re in business with getting the K&F out. We should be ready in October at the latest, and the cost will be about $1000.
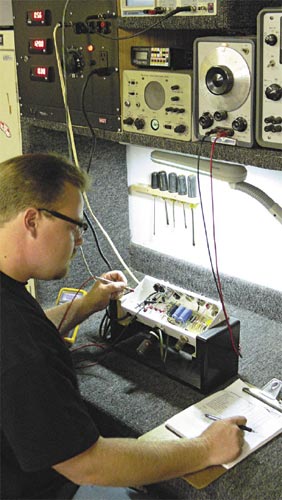
Playing the Amps
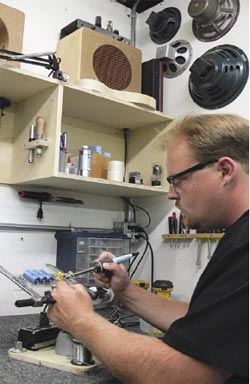
I brought my 1987 hardtail Tom Anderson to Byers‘ shop where I got to play through the first Model 10 off the line and a K&F reproduction prototype. Here is a sample of what I heard:
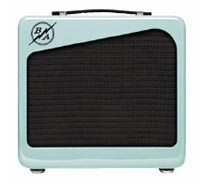
Model 10
The Model 10 is a beautiful amplifier. If your favorite custom guitar builder built an amp, it would look just like this.
The Model 10 is clear and detailed in the way that only minimal circuit paths can be. Set clean, with the tone controls engaged and the feedback loop in, the highs and lows are well-balanced, the tone circuits do what you wish they would, and the result is a sound that makes you want to play more. Turn off the feedback loop and things get woollier and more tweed-like. Switch off the tone controls and the amp gets a more aggressive, throaty attitude going.
K&F Reproduction
The K&F reproduction amp is totally different from the Model 10 and totally different from almost anything I have ever heard. I can almost hear Charlie Christian playing one and I suspect that today’s players will find musical uses for this tone. The K&F reproduction is very big and a bit wooly-sounding, yet not muffled or dull at all. It gets pretty powerful sounding when you push it hard.
Source: https://mercurymagnetics.com/pages/news/PremierGuitar/PremierG-10.htm

We told this was coming.. Tes, when readers ask us to review something, we do our best to respond, and thanks to RedPlate founder Henry Heistand, we received two RedPlates for review. We’ll start this episode by telling you that Henry Heistand appears to be a very clever fellow who is not working in the shadows of that past, which is to say that he builds feature-rich amplifiers that in no way pretend to be vintage knock-offs. Play a RedPlate and you’re firmly treading in the present, rather than mining tone out of a dusty box built by a dead man (or woman—sorry Lily). And that’s fine. There is certainly ample space in these pages for the living, and RedPlates are in fact very lively tools indeed. We asked Henry to give us a glimpse into his background and motivation, and our reviews of the TweedyVerb and BlackVerb follow….
TQR: How and when did you initially become involved in electronics and amplification?
HH: Starting around age 12 playing to the radio and jamming with friends, my first build attempt was a speaker cabinet made out of ½ plywood and covered with yellow carpeting. It had a leopard (spotted) grill cloth and contained 6 speakers recycled from various old TVs and stereos. My first real amp repair was replacing a screen resistor in a Fender Bassman in 1970. I went to college for a year and then played guitar full time until 1979 when I attended electronics school (they still taught tubes). To pay for school I got a part time job at a church organ repair shop that had a “combo” repair department and still played in club bands on weekends. Attending electronics school in the morning and repairing gear in the afternoons was a great way to instantly translate the classroom to the real world. Compared to the tube TVs and tube broadcast transmitters, the tube musical amplifiers were relatively simple. Besides Fender and Marshall, tube amps by Sunn, Ampeg, Gibson, West, Park, Hiwatt, Sound City and all the Supro/Kalamazoo/Dan Electro stuff. If I only had a nickel for every good tube I tossed in the trash back then. Many of those same companies had solid-state amps too along with companies like Acoustic, Kustom, Peavey, Randall, Lab, SG and Roland. It seems like the ’70s was the golden era of guitar amp designers. Although most tube amps have a similar topology, the differences between brands in those days ranged from truly innovative to laughable. On a few occasions when a solid-state repair would come in that was totally fubar, one of the church organ repair guys would show me how to design a new circuit right over the top of the problem area, teaching me the value of having a few simple circuit designs at the ready for emergencies. In late ’82 I got a career job in the computer field, and by ’86 purchased the part of the church organ repair shop that repaired the “combo” gear. The new company was named Music Mechanix and kept the warranty contracts with all the majors for amps, keyboards and P.A.s.
TQR: As you became more familiar with various amp designs of the past, what were your favorites and why?
HH: Thinking back to the tonal memories accumulated during those years spent repairing amps, the most musical of all of them were probably the early ’60s Fender tube amps. In addition to repairs, Music Mechanix did all the popular mods of the day (anyone remember the original Train Wreck Mod pages for Fenders?), many times we would redo almost everything inside but keeping the exterior unchanged. Most of my playing back then was strictly radio cover songs so the quest was always to find the one amp that could imitate everything. Music Mechanix was continuing the warranty station status from the previous owner (established in the ’50s) so every original manufacturer’s amplifier schematic ever released was available as a reference source, residing in 16 large file cabinets. On the side, I kept a little notebook of circuits and mods of interest to use as building blocks.
TQR: Can you describe the lasting impressions created by your study of the experiences with classic amps that have most affected your own design philosophy and preferences?
HH: As a service to friends and regular customers Music Mechanix would take a classic amp (at the time it was easy to get something like a used Bassman for $100) and do Frankenstein amps that were Fender this, Marshall that, with a sprinkling of Vox and Ampeg thrown in depending on the customer’s needs. On the weekends I was doing gigs using a pair of modified Ampeg VT-40s in stereo until somehow I ended up with a Mesa Boogie S.O.B. that had a really innovative phase inverter section controlled by a “LIMIT” knob. A bizarre variation of a PI section’s constant current source, the circuit was not in the RCA manual or on any other schematic. It sparked something in me and from hen on I started doing creative amp mods that were not copies of things I had seen on schematics.
TQR: When did you first begin to sketch out the concept for RedPlate amps, and what did you want to accomplish that would be unique and different?
HH: I had always been fascinated with “sleeper” amps that looked small but sounded big. After selling the repair business I used my free time to do a lot of experimentation on point-to-point builds in a Fender Camp sized chassis, eventually working out how to do a 7 tube, large transformer build in a Champ chassis without noise or oscillation. My favorite guitar tones were the recorded sounds of the Mesa Boogie/Dumble ODS type amps (even before I even knew what a Dumble amp was). A clean singing tone with a hint of character that sustains and blooms is my idea of the ultimate tone and the design goal of all the RedPlate models.
TQR: Can you briefly describe the unique features and differences among the current line of RedPlate models?
HH: RedPlate probably has too many models because we treat the sections as modular building blocks. We start with one of the 3 chassis sizes:
CH1. 15” width with four 9 pin sockets and two 8 pin sockets, transformers up to the 50 watt size.
CH2: 17” width with six 9 pin sockets and two 8 pin sockets, transformers up to 80 watt size.
CH3: 19” width with five 9 pin sockets and four 8 pin sockets, transformers up to 160 watts
Then we use different combinations of the building blocks with the only limitation being the number of controls (physical knob space) and the number of tube sockets available. Building blocks currently in use:
BB1. PREAMP1—Tweed—A single tone knob preamp (Tweed style).
BB2. PREAMP2—Blackface—A Treble, Middle, Bass Preamp (Blackface style).
BB3. DRIVE1—A three knob overdrive section (Gain, Drive, and Level).
BB4. DRIVE2—A six knob overdrive section (Gain, Drive, Level, Treble, Middle and Bass).
BB5. REVERB—A single knob tube reverb with medium decay tank.
BB6. EFFECTS LOOP—A fully buffered serial loop, return level is the master volume.
BB7. PHASE INVERTER—Standard Long Tail pair, very similar to the early ’60s designs.
BB8. POWER AMP #1—40 watts cathode bias (6L6GC).
BB9. POWER AMP #2—50 watts fixed bias/40 watts cathode bias (6V6GC)
BB10. POWER AMP #3—80 watts fixed bias (KT-88).
BB11. POWER AMP #4—45 watts fixed bias/18 watts cathode bias (6V6GTA)
BB12. POWER AMP #5—100 watts fixed/50 watts fixed (6L6GC).
TQR: Both of our review amps are loaded with Warehouse speakers from Kentucky, which we have reviewed before. How extensive are your evaluations of various speakers when creating a new model? Does the same process apply with transformers, tubes or other components?
HH: The current lineup is using WGS Retro 30, WGS British Lead 80 and Eminence Swamp Thang speakers in the combo amps. The decision to use these was based on side-by-side comparisons with other brands (an ongoing process).
Tube selection is mostly based on reliability (as long as the tone is still there). The current production amps use Svetlana 6L6GC, SovTek 12AX7LP (PI tube), and Electro Harmonix 6V6GTA and 12AX7s (preamp).
Selecting individual signal path components is more difficult because side-by-side comparisons can be misleading (no 2 amps are exactly alike). The signal path in current production amps use PS series Orange Drop capacitors and carbon film resistors based on low noise and musical warmth in the tone. RedPlate Amps has a good relationship with Mercury Magnetics and I like to use their transformers in most models.
TQR: How does the half power switch function in your amps, as well as the “mode” control and various voicing controls?
HH: Depending on the output section, 3 methods are used:
1. 6L6GC 100 watt/50 watt—The switch lifts two of the four tubes by 10K so they are effectively out of the circuit yet the impedance selection is still valid.
2. 6V6GTA 45 watt/18 watt—Full power runs two of the tube in cathode bias and two in fixed bias, the switch lifts the fixed bias tubes by 10K to effectively remove them without changing the output impedance.
3. 17 Watt (Hi/Lower)—This switch just lowers the voltage to the phase inverter tube so the amp breaks up sooner. There are two different styles of mode switches. On the Tweed style preamps the 6 position mode regressively reduces midrange and preamp output to imitate a Blackface style amp. On the Blackface style preamp the 6 position mode switch progressively fattens the midrange to imitate a Tweed style amp. Most of the models also include a Humbucking/single coil switch to set the amount of bass gain in the input stage.
TQR: How much individual customization or voicing do you offer for specific models when working with an artist?
HH: Unlimited customization is available, although most of the professionals that use RedPlate Amps are content playing standard models.
TQR: We noticed that you include the owner’s name on the back panel, correct? A nice touch…
HH: Yeah, the front and rear panels are done in-house, we could even put pictures of your dog on there.
TQR: What do you want to accomplish in the future? New models?
HH: “Amps that sing” being every guitar player! Going forward, curiosity and customer feedback will continue to drive the evolution of current designs and the development of new designs. For example, there will be a “shredder” amp in the near future (The ShredPlate) and possibly a bass amp. As RedPlate continues to gain name recognition with the music industry, models like the BlackVerb, MagicDust and TweedyVerb will hopefully be taken for granted as standard amplifier types.
The front and rear panels on the BlackVerb reveal an impressive array of controls, push/pull-knobs and switched pots. In fact, the printed operation guide includes a signal path diagram on the front page with a welcoming invitation to skip an in-depth review of the manual and just set all the knobs at 12 noon and play, which we did, consulting the manual as needed as we spent more time with the amp. So, is the BlackVerb too complicated for you “plug & play” guys? Not really, but the control panel is best reviewed in sections. You’re essentially working with a clean preamp circuit and a Drive section that includes Gain, Drive and Level controls for variable levels of distortion overdriven tones, but there are still many more additional tweakable features lurking within…
The first control adjacent to the single front input jack is the miniature Bright switch toggle with the center position OFF, Down producing the sound of “new strings” (an accurate description we might add), and Up rendering a brighter tone that will be familiar to those of you with a Fender Blackface amp with bright switch. We usually use the bright switch to put a little extra shimmer and spank on humbucking pickups, or neck pickups on single coils.
The Volume control includes a pull switch to engage a midrange boost that increases upper mids. The Middle control does what you’d expect, with a pull switch for a “Deep” setting that scoops mids and boosts bass frequencies—an excellent change-up for clean tones. The Bass control handles low end quite well, and it can be clicked OFF to be removed from the tone stack. Try that with a neck pickup and it produces the odd and very different EQ found in some old Valco and Gibson amps.
The Mod Selector is a 6-position rotary EQ switch that gradually produces a fatter, thicker tone as you rotate left to right from the “Funk” setting, to “Normal” and “Fat” (tweed). All this pulling and turning may sound complicated, but you’ll have it thoroughly digested in 5 minutes, and most importantly, these extra EQ controls expand the tonal capabilities of the BlackVerb in a clever and creative way that really is worth using and exploring. We have bitched about such bells and whistles on other amps having limited value, but no such questionable affectations plague the BlackVerb. Like we said, Henry is a clever fellow. On the Drive section…
This is where you mine and manage overdriven tones and distortion. The Gain control can be bypassed by clicking fully left, otherwise, you’re setting the amount of signal being sent to the first gain stage, which produces variable levels of smooth growl and grunt. The Drive control further ramps up distortion through two gain stages, and a pull switch on the knob serves as an afterburner for maximum burn and rip. At this point you will be channeling Metallica at full husky, so hide the dog. The Level control sets the output volume for this section, resulting in a progressively bigger, thicker, bolder voice. Of course, the big selling point for the BlackVerb is how all of your clean, moderately busted up and filthy dirty tones can be deftly tweaked and the volume managed with the Volume and Master volume controls. At the full power setting, you really can get this thing to sound like a 100 watt high gain amp on “7” at low decibel levels suitable for home recording and friendlier sound pressure levels.
The reverb control is what it is, and you can turn it off fully left and it’s out of the circuit. The Presence control is described as using “global negative feedback to remove low frequencies which frees up bandwidth for more midrange and highs,” and it can also be turned off when rotated fully left. Frankly, the appeal of this control escaped us, but we can imagine how it might be useful in a live situation where you may want to avoid too much low end muddying up the mix with bass and drums. The Master volume works very well without producing the dreaded master volume/low volume faux zizzz when you’re trying to light a fire at low volume levels.
One of our favorite features is the 50 watt/40 watt switch on the back panel that changes the boas from fixed to cathode for a completely different feel. With the 40 watt cathode biased setting you can also change the 6L6 output tubes to 6V6s, transforming the BlackVerb into an 18 watt cathode biased flame thrower, or bypassing the Gain section for a more tweedy character and voice. The Hi/Lo power switch changes the voltage on the input stage and the threshold for clean headroom.
The back panel Smooth switch is just that, adding slight compression in the clean preamp, and the Humbucker/Single Coil setting sets the amount of bass gain in the input stage, relieving you of perhaps resetting EQ when switching from single coils to humbuckers.
Additional utilitarian features on the back panel include a handy bias adjustment and test point, speaker impedance selector, main and extension speaker jacks, FX send and return, and footswitch jack. The footswitch gives you the capability to get in and out of the Tweed, Drive and Boost circuits. Tweed boosts upper mids while lifting the midrange control on the front panel for maximum push in the frequencies where the guitar really lies on stage. Drive engages the Drive feature, bypassing it when off at the footswitch. Boost makes everything sound bigger with a partial tone stack lift.
And now for the bottom line…. It seems to us that the intention of the BlackVerb is to be as tonefully versatile as a 1×12 combo amp can possibly be whether you are playing small clubs, bigger rooms or wide open outdoor stages. You could play nothing but smooth, clean jazz through this amp without ever venturing into the gain stages and be perfectly happy. Or you could do nothing but feast off the considerable gain and distortion lurking in the heart of the BlackVerb and be equally happy. Most gigging musicians want to range between such extremes living somewhere in the middle, and you can do that, too. Like most feature-rich amplifiers, you’ll find certain favorite settings that will be revisited with specific guitars, and after a few days you’ll have no trouble quickly accessing those settings, although the control panel is a bit difficult to read until you no longer need to read it at all.
The standard Warehouse Retro 30 speaker is a brighter version of the Veteran 30 we have favorably reviewed in the past. Given the considerable range of overdrive and distortion available in the BlackVerb, the Retro 30’s clear, articulate character and exceptional capacity to handle low frequencies makes it an excellent choice for this amplifier. Even at extreme gain and drive settings, the BlackVerb produces a rich and musical burn that does not mask or obscure essential overtones and harmonics. The clean tones are equally strong, powerful and clear, and the amp will nimbly spill into overdrive played clean at higher volume levels that can be managed with the volume on the guitar. The BlackVerb impressed with its ability to embody many different styles of amplifiers in one compact box, limited only by your capacity for experimentation and your imagination. Imagine that.
We were particularly anxious to experience the TweedyVerb because it seems to fit the power and volume requirements of so many players today, and it is a very straightforward and versatile 1×12 combo that is a breeze to hump to the next gig. Got your attention there, did we? We finally figured out why vintage blackface Pro Reverb amps have remained relatively underpriced… just pick one up.
The TweedyVerb is a cathode biased dual 6L6 amp with reverb, loaded with an 80 watt Warehouse British Lead 12” speaker. You won’t find a bad tone in this amp, and the controls are very intuitive, delivering outstanding “blackface,” “brown” and “tweed” tones via a 6-position Mode switch. The Bright switch is identical to the BlackVerb (you’ll love the “new strings” setting), with a single Volume control, simple Gain control, and a Tone control that can be clicked off fully left to bypass the tone stack for a very heavy and thick does of overdriven tones with excellent dynamic feel and touch sensitivity. The spring reverb is good—delivered form an original new old stock Accutronics pan made by Cary, IL, and the Presence control is identical to the BlackVerb, using global negative feedback to remove low frequencies and emphasize mids and highs. It also seems to decrease volume and gain, best used in our opinion for clean tones.
The 40 watt/17 watt switch on the back panel changes the voltage on the phase inverter. We preferred the sound and girth of the 40 watt setting, which still allows plenty of room for managing volume and variable distortion with the Gain and Volume controls, but the 17 watt setting is fine, too for close quarters. 6V6 power tubes can also be used at this setting without re-biasing for lower power output and volume. A footswitch is included to access both the fat Tweed setting on the Mode switch on the fly, and the Boost function, which acts as a tone stack bypass. Despite its compact size and relatively light weight, the TweedyVerb is a big-sounding amp that produces outstanding clean tones at usable stage volume, yet it can also be gradually pushed into the familiar sound of a Deluxe Reverb on “6” or even a vintage Marshall head at higher volume and gain settings. It’s a right fair chameleon, this one.
The Warehouse 80 watt British Lead 12 gracefully handles the power output of the TweedyVerb with excellent clarity, sold bass, vivid mids and a sweet and chimey top end. Like the BlackVerb, the TweedyVerb offers the sound and feel of several distinctively different amps in one box via the Mode switch, and we liked them all, from the rough and tumble Tweed, the slightly less raucous, smooth upper mid voice of the Brow, and the more scooped, open and airy Black settings. Both RedPlate models reviewed here clearly share the same DNA, which is to say that they possess a remarkably rich and music character, whether you choose to stroke big clean tones through them or dial up a tone that would make Billy Gibbons proud. Douse that light, and Quest forth….
Marshall’s famed 1960s “plexi” and early-’70s 50-/100-watt amps gained notoriety for their fantastic tones. Of course, the downside was that they had to be driven hard to sound their best, which to the player (and anyone else in a milewide radius) meant volume – a lot of volume. And that sometimes meant turning speaker cabinets toward walls or employing an impromptu blanket muffler, sacrificing tone for the sake of band harmony and/or the mix. Then there was the consistency factor from one amp to the next, which meant hunting down the best-sounding Marshalls became an expensive game.
In short, when it comes to plexi tone, maybe those weren’t the “good old days.” Perhaps now, in our world of reissues, reproduction, and boutique guitars and amplifiers, guitarists are indeed in the midst of a golden age. If you doubt that’s the case, let us introduce the Voodoo Amplification V-Plex.
Voodoo Amps was founded in 1998 when hardcore tone lover Trace Allen Davis, a professional guitarist and proficient guitar/amp/pedal fixer, began modifying amplifiers. Largely dissatisfied with the offerings of the day, his idea of good tone caught on, and he quickly earned a reputation as a capable, comprehensive amp repair/modification shop.
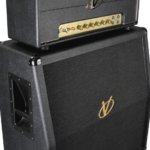
We were offered a listen to the 50-watt V-Plex with Voodoo’s propriety-design 4×12″ slant cabinet. The hand-wired V-Plex is a four-input/two-channel amp with three 12AX7 tubes in the preamp and two EL34s in the power section. It has a single set of controls for Presence, Bass, Middle, Treble, Master and Volume – a layout identical to that of a vintage non-master-volume Marshall. The V-Plex’s Master volume is placed between the phase-inverter tube and the power tubes, which gives the player the ability to dial in plexi-like distortion starting at a very reasonable volume. On/off and standby switches, along with a red indicator, also occupy the front panel.
A look inside reveals flawless workmanship and top-quality components. Davis is, as we said, very much about the look and feel of guitar tone, and the research he put into this head is glaringly obvious. The cabinet uses four Celestion G12M “greenback” speakers, which are seen in amps all over the place.
But Voodoo’s cab is a little tricked out; aside from its propritary internal design, it is also capable of operating at either 4 ohms or 16 ohms in mono, as well as 8 ohms in stereo.
No doubt about it – the V-Plex talks the talk. But to see whether it walked the walk, we recruited a Schecter 006 solid body with two high-output humbuckers, and a Fender Stratocaster with three Duncan Alnico single-coils. We plugged in the Schecter and started with the V-Plex’s controls set in a familiar plexi manner; Bass at 10, Presence at 4, Mids at 6, Treble at 2, Master between 8 and 9, and Volume pushed to 8.
Flashback
If you’re a fan of the original Marshall JTM 45/50/100 models (if you’re a fan of real rock guitar tones, that’s you!), plugging in the V-Plex could well be the ultimate experience, especially if you’re not hip to coughing up the money to obtain (and hassle to care for) a vintage Marshal. Tone – gain-rich harmonics, with that clear, articulate crunch we’ve come to lust after – spews from the V-Plex by the truckload.
To test the effectiveness of the Master volume circuit, we rolled off the Master and brought the Volume control up a touch, and heard fistfuls of rich gain at reasonable SPLs. Yes, Virginia, you can get great plexi tone at comfortable levels.
The tone knobs reacted almost exactly like those in the original plexi circuit in that they don’t alter the tone much, but produce different textures. Backing off the volume and increasing the Master yielded a cleaner crunch that never surrendered its true character. “Jumping” input channels (a favorite trick of four-input-Marshall owners) substantially fattened the tone.
We next plugged in the Stratocaster. To keep high-end response where we liked it required rolling back the Treble and Presence controls, but the Strat also proffered fat, meaty tone from every pickup and selector-switch position. Crossing channels again, we got more meat right up until we pushed it too hard, when (in true plexi form) the signal compressed beyond the point of being enjoyable.
If you’re after the ultimate vintage plexi tone, your search could very well end right here, as the Voodoo V-Plex delivers definitive plexi tone, and has the ability to play at comfortable levels. Davis and his crew nailed it. – Bob Tekippe/Ward Meeker
VVT’s Lindy Fralin Model amplifier
Maryland-based amplifier builder Vintage Vacuum Tube Amplifiers (you may know it as VVT) recently fielded a request from renowned pickup winder Lindy Fralin. He wasn’t looking for advice on wire or how hot to wind a pickup for best interaction with a particular VVT; rather, Fralin wanted an amp built to his specs and taste. And not just for him, but for the mass market. VVT, realizing the co-branding possibilities, jumped at the opportunity.
So, what does a tone guru like Fralin want in an amplifier? Well, he says the goal was “a clean, full-body-voiced amp that’s lightweight and able to sound good at low volume.” Sounds like something we’d like, too. So when VVT asked whether we wanted to hear it, we were happy to take up the offer.
At first glance, the VVT Lindy Fralin amp looks boutique in a way we’ve come to expect; i.e. it sports point-to-point wiring with carbon-comp resistors, an all-tube circuit, and a 12AX7-driven spring reverb and preamp. But, go deeper and you’ll quickly discover some seldom-seen features, like a trick self-biasing-cathode design that allows the player to switch between a pair of 6L6s (for 30 watt of output) and a pair of 6V6s (for 15-watts) without having to re-bias the amp. Part of its secret is a custom-wound Mercury Magnetics transformer designed specifically for the Fralin that allows the amp to switch between the 6L6s and 6V6s while maintaining stable impedance for the tubes and speaker load.
The amp ships with a pair of 6L6s, but will also accept 5881s or JJ 6V6s, for an altogether different favor. Another unique feature is Fralin’s choice of a single 15″ alnico-magnet Weber speaker instead of the more traditional pair of 10″ or single 12″ speaker.
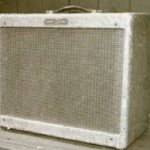
The overall look and layout of the amp is different, as well, but still boasts a vintage vibe with a neatly executed off-white tolex, oxblood grille cloth, top-mounted controls, and heavy-duty leather handle. There are no metal or plastic corner protectors, and no extraneous piping or badging. Its look is clean, simple, and classic. The control layout is accordingly succinct, with a single 1⁄4″ input, a switch for Bright, and controls for Volume, Treble, Bass and Reverb, along with switches for Power and Standby. Also worthy of mention is the 11-foot power cord.
VVT shipped our tester with a matched pair of 6L6s by TAD and a matched pair of 6V6s by JJ. We started with the TAD 6L6s and our test guitars – a Fender Relic Strat and a Hofner Verythin Classic with mini-humbuckers. After plugging in the Relic Strat and letting the amp warm up, we set the Volume at 3 o’clock, Bass and Treble at 12, and then we hammered a few chords.
We were immediately impressed with the amp’s complex overtones, its round, punchy low-end response, and its snappy highs. It didn’t take much noodling or knob tweaking to realize that the tone controls on this amp, along with its Bright switch, are exceedingly well-voiced. From a player’s perspective, that means it’s easy to find likeable sounds. The Bright switch compensates nicely for the slightly darker sound of mini- or full-size humbuckers, while the wide sweep of the Bass control keeps its frequencies full and punchy with single-coils.
While the amp is voiced for clean tones, it also does a good job when it comes time to get dirty, and is very responsive to changes in pick attack or guitar output. Simply backing down the volume control on the guitar and easing up on our pick attack, the Fralin cleaned up from moderately dirty overdrive with musical overtones to a sparkling clean sound that didn’t lose any of its life or attitude.
We popped in the matched set of JJ 6V6s and checked the tone at 15 watts output. The amp broke up quickly and had a slightly more boxy sound, with reduced complexity of overtones; still very lively and punchy, just not as big as 6L6s – fantastic for low-volume situations. The tube-driven reverb is also well-voiced. At lower settings, it adds a bit of ambiance that doesn’t get in the way or wash out the amp’s tone, and at higher settings it’s suitably splashy.
The boys at Vintage Vacuum Tube do a killer job on the Fralin signature amp. It’s loaded with big, dynamic, single-coil-friendly tone (that sounds pretty good with humbuckers, too!) in a nice, lightweight package. – Phil Feser
We always maintain a steady flow of gear arriving for review, but sometimes we also employ a fascinating if time-consuming research strategy that involves logging onto eBay, picking a broad category such as “guitar amplifiers,” and settling in for as long as it takes to patiently scroll through every page of listings. Yeah, that’s often 50 pages or more, but since we can’t possibly think of all the items that might interest us and search for them by name, it’s far more revealing and productive to just hunker down and scroll. Rarely do we fail to find something intriguing that would have otherwise been missed, and such was the case on a morning in August when we stumbled on a listing for a 1959 tweed Deluxe. Were we looking for a tweed Deluxe? Nope. Wouldn’t have crossed our mind at the time…. We had already reviewed 5E3 reproductions from Fender, Clark and Louis Electric within the past 3 years, and we have frequently referenced our 1958 Tremolux as being our desert island #1. Isn’t a Tremolux just a tweed Deluxe with tremolo in a bigger box? No… not even close. That would be like saying you wanted to date a blonde – any blonde. For the record, our fixed bias Tremolux possesses a cleaner tone with a bigger, booming voice created by the taller Pro cabinet. The Two Fifty Nine is a completely different animal….
Sporting a February 1959 date code on the tube chart, the ’59 had been listed by a seller in Arkansas who turned out to be Tut Campbell, formerly a well-known guitar dealer in Atlanta. Still buying and selling gear, Campbell had described the Deluxe as being in original condition with the exception of a replace output transformer – a big old mono block Stancor dating to 1957. Given the otherwise original condition of the Deluxe, which included the Jensen P12R, we made Campbell a “best off” below his asking price and scored the amp for $1,850 shipped. We wouldn’t say we stole the Deluxe, but it seemed a fair price of admission for the opportunity to experience and explore still another rare classic and supremely worthy piece of Fender history on your behalf.
The Deluxe arrived with the big Stancor dangling from the chassis despite Campbell’s careful packaging. Wasn’t his fault, really – in a feeble effort to avoid any additional holes being drilled in the chassis, the fellow who installed the Stancor in the ’60s had merely tightened set screws over the small tabs at the base of the heavy tranny, which was designed to be mounted upright – not hanging upside down in a guitar amplifier. Of more concern was the fact that while the amp was lighting up, there was no sound…. Well, we’ve been here before, so we made a call to God’s Country and the Columbus, Indiana domicile of Terry Dobbs – Mr. Valco to you. We had already set aside a spare output transformer (Lenco, McHenry, IL) that had been the original replacement installed in our ’58 Tremolux when we first received it, replaced with a Mercury Magneticsfor our June ’07 review article. Mr. Valco cheerfully answered his phone and as we explained the situation with the Deluxe he agreed to walk us through the installation of the new replacement – a simple process involving four lead wires being connected to the rectifier and output tube sockets, and the speaker jack. As long as you put the correct wires in the right place, a piece of cake, and we had the new tranny in within 10 minutes. Pilot lamp and all tubes glowing, still no sound…. Valco patiently guided us through a series of diagnostics with the multi-meter and the Deluxe was running on all cylinders, pumping 380 volts. Stumped, and with the hour growing late, we called it a day. Leaving the mysteriously neutered Deluxe chassis on the bench until tomorrow.
Morning came with a whining voice delivering a plaintive wake up call – “It’s got to be something stupid and simple….” Inspired by a huge steaming mug of Jamaican High Mountain meth, we sat back down at the bench, tilted the innards of the Deluxe chassis forward beneath a bright halogen desk lamp and peered in for answers. We began slowly examining the chassis in sections, looking for broken or dull solder joints, loose or broken wires, while gently pushing and prodding wires and connections with the eraser tip of a #2 pencil as we had seen Jeff Bakos do so often at his bench. After ten minutes or so we were about to give up, when we turned our attention to several places where the circuit was grounded to the chassis adjacent to the volume and tone pots, and damned if a solder joint for one of the uninsulated ground wires hadn’t separated from the chassis. No ground, no sound, and as soon as we had restored the solder joint the Two Fifty Nine arose from the dead with a mighty A major roar.
The amp was indeed remarkably well-preserved in all respects, with the typical amber patina of old tweed. The burnished chrome control panel remained bright and clean with no corrosion, the original handle remained intact, and a couple of small ciggie burns on the edge of the cabinet added a stamp of historic legitimacy to the Deluxe’s pedigree. The top half of the Jensen’s frame was coated in a fine film of red clay dust from the Delta, and while the cone was in remarkably good shape with no tears, an audible voice coil rub called for a recone. We would send the speaker to Tom Colvin’s Speaker Workshop in Ft. Wayne, Indiana, requesting that he leave the original unbroken solder joints for the speaker wires intact if possible.
Meanwhile the first order of business was to listen to an assortment of NOS tubes from our stash, and audition no less than a half dozen speakers. Different sets of power tubes and individual preamp tubes will sound surprisingly different, so we started out with a matched pair of NOS RCA 6V6s, a GE 5Y3 rectifier, and an RCA 12AX7 and 12AY7. From there we subbed in a dozen different RCA, Amperex, Tesla and GE 12AX7s, noting varying levels of brightness, warmth and intensity among them all. For an edgier, more aggressive voice, the GEs and Amperex typically deliver the goods, while RCAs produce a slightly warmer, richer, fuller tone. We also experimented with a 12AT7 and 12AX7 in place of the lower gain 12AY7, and while those tubes ramp up gain and distortion faster and with more intensity than the 12AY7, they seemed like overkill for us. Our Deluxe possesses a tone of gain using the stock 12AY7.
Rather than repeatedly reloading the Deluxe with different speakers, we used a Bob Burt 1×12 cabinet built from 100-year-old pine for our speaker tests. The original Jensen had never been pulled from our amp, but multiple speaker replacements in an old Fender inevitably cause the speaker mounting screws to loosen in the baffleboard, making speaker swaps unnecessarily clumsy and complicated. When we do run into loose mounting screws, we simply run a few small drops of Super Glue around the base of the screw and surrounding wood. Allow to dry and your screws will stay put provided that you don’t torque the nuts on the mounting screws like an idiot with a socket wrench. Don’t be that guy,
We tested a range of speakers that included a Celestion G12H 70thAnniversary, Colvin-reconed ’64 Jensen C12N, Eminence Wizard, Private Jack, Alnico Red Fang, Teas Heat, Screaming Eagle, Red, White & Blues, and Warehouse Green Beret, Veteran 30, Alnico Blackhawk and Alnico Black & Blue. The Alnico speakers generally produce a tighter, smoother, slightly more compressed tone, with a variable emphasis on upper mid-range and treble frequencies, while the speakers with ceramic magnets possess a wider, more open sound. Higher power ratings of 75W-100W offered by the Red, White & Blues, Screaming Eagle and Warehouse Blackhawk typically translate into more graceful handling of bass frequencies, and in a 20 watt Deluxe, zero speaker distortion, for a clean, powerful voice.
Let’s cut to the chase with speaker evaluations, shall we? It has become clear to us that even after reviewing a dozen speakers in as much detail as mere words allow in a single article, many of you remain uncertain about which speaker to choose. No kidding. We would absolutely love to hand you a single magic bullet when it comes to speaker swaps, but here’s the dirty little secret about choosing speakers…. The overall character of the amp you will be installing your new speaker in is critical, and to some extent, the type of guitars and pickups you play most often are important, too. Tailoring your sound with the unique gear you play is not a one-size fits-all proposition – you have to invest some thought into the process. Are you going for a classic “scooped” American Fendery tone, or something more British, with a bit of an aggressive edge and upper midrange voice? Are you playing guitars with single coil pickups or humbuckers? Is there a specific, signature tone you are searching for, or are you playing a wide variety of musical styles that requires a broader range of tones? Do you like the more open sound of speakers with ceramic magnets, or the smoother compression of Alnico? What are you not hearing from your amp and the speaker that’s in it now? Do you want a brighter tone, darker, better bass response, or fuller, more prominent mids? Do you want to really drive the speaker and hear it contributing to the overdriven sound of your amp, or do you want a big, clean tone with no speaker distortion in the mix? The truth is, if you don’t know what you want, you are far less likely to get it. On the other hand, nothing is accomplished with paralysis by analysis. To be perfectly honest, there are lots of speakers made by Celestion, Eminence, Warehouse and, if you can wait long enough for them to break in, Jensen, that we could and would be perfectly happy with, but we would also choose them carefully, taking into account all the factors mentioned above. After a couple of days spent swapping speakers, we ultimately concluded that we preferred the ’64 C12N for a classic tweed Deluxe tone, and a broken-in Celestion G12H 70th Anniversary for the most mind-altering 18 watt Marshall tone we have ever heard. Seriously. More on that in a minute….
Having split more than a few hairs with our speaker swaps, it was time to start picking nits off of gnats with some output transformer evaluations. We first contacted Dave Allen of Allen Amplification, who also stocks Heyboer transformers built to his specs. We found a variety of appropriate output transformers on Allen’s site that offered subtle variations on a stock original Deluxe OT, and we asked Dave to describe the TO26 model we wished to try in the Deluxe:
“The TO26 was intended as a hot rodding upgrade to a stock Deluxe Reverb OT. While maintaining the stock 3-1/8” mounting centers, its fat stack of hotter core steel and multi-tap secondary make it a good choice for builders wanting to maximize the performance of a pair of 6V6s and who may also want to push the envelope with 6L6/5881s while still being able to clear the speaker in a stock cabinet. There are physical limitations in small amps, so its short low profile is welcome. The orientation of the laminations is also good for low hum pick up from the power transformer. I found that an OT mounted the tall way (like my TO30D) picks up considerably more hum simply due to its orientation to the power transformer, so, shoe-horning a ‘tallish’ OT into your amp may cause it to pick up hum from the power transformer – not much of an upgrade. “The TO26’s 7K to 8 or 16 ohm rating makes it ideal for a pair of 6V6s as well as 3,500 ohm to 4 or 8 rating for 6L6/5881s. Notice you always have an 8 ohm option with both types of power tubes. An impedance switch could be wired (I use a blackface grounding switch) as a power tube type selector for an 8 ohm speaker to go between 6V6s and 6L6s. The TO26 will typically give slightly more output with 6V6s due to its more efficient low-loss core steel and will keep the bass clean longer for more perceived clean headroom. As it takes the most watts to reproduce the bass, you notice distortion there first, and since Fender-type amps are so bass heavy, you can quickly hit the wall with headroom, so a noticeable increase in clean bass response certainly feels like a more powerful amp with the TO26. It is kind of like you installed a new speaker with a larger ceramic magnet that is more efficient than the old speaker. The amp is a little louder and the bass a little tighter or cleaner.
“There seem to be a lot of 6L6-based 5E3 amps out there now to get a little clean headroom from a circuit normally not known for much of that. The TO26 is a good choice for that type of amp as it will fit typical available chassis and cabinets. It has extra long 12” topcoat leads ready to strip and solder. I would reckon it would handle up to about 30 watts before starting to saturate and compress – plenty of cathode-biased 6L6s. I find that the Heyboer paper stick-wound and interleaved output transformers with premium core steel and heavy core stacks have typically better clarity or definition than ‘stock’ OTs. Call it fidelity or whatever you want – just clearer distorted and complex tones and better separation of notes in chords, etc. I use the TO26 in the Allen Sweet Spot, Accomplice Jr. and Hot Fudge with Nuts amps with excellent results. All of these amps can use either 6V6 or 6L6 power tubes. You know how a 5F6-A or Super Reverb has that huge 4 bolt OT for a pair of 6L6s to get the maximum clean bottom end? That is sort of what the TO26’s OT is to a pair of 6V6s. It just doesn’t even come close to saturating.
When we informed Dave that we planned to run the Deluxe with 6L6/5881 power tubes as well as 6V6s, he recommended that we try the TO26 since it had been specifically designed for such applications. He also sent a smaller TO20 transformer, described as being designed with a wider 1-1/4′′ lamination “fat stack” that provides 60% additional core mass than typical ¾′′ stack units for improved performance. The TO20 is a direct replacement for Blues Jr. and Princeton Reverb amps, and also suitable for dual EL-84 amps with an 8 ohm load.
Mr. Valco also sent us a replacement 5E3 output transformer he had bought on sale from Clark Amplification a few years ago made for Mike Clark by Magnetics Components in Schiller Park, IL – a company that has been producing transformers since 1943, having been the primary supplier for Valco and various Gibson amps in the ’50s and ’60s. A call to the company revealed that ToneQuest ReportV12. N1. Nov. 20104the transformer Valco sent was essentially their replacement for a Deluxe Reverb, model #40-18002 without bell ends per Clark’s request. We also learned that the company offers a complete range of Classic Tone vintage power and output transformers, including a reverse-engineered clone of a ’55 Triad 5E3 output tranny, model #18022.
We also contacted Paul Patronete at Mercury and requested a ToneClone “brown Deluxe” output transformer, since Larry Cragg had provided them with specific measurements from original OT in Neil’s ’61 tweed Deluxe, confirming that it was indeed a ’61–’62 brown Deluxe tranny. With a total of 6 output transformers to listen to, we took the Deluxe to Jeff Bakos, who set up a rig on his bench that enabled us to clip in each transformer and very quickly switch back and forth between them as we played a guitar through the amp. Are we having fun yet? Here’s what we heard:
Lenco – An excellent authentic “vintage” vibe for those that prefer the classic, if somewhat murkier sound of a tweed amp being pushed, lots of sag in the low end and a jangly pop in the top. And “old,” rather “lo-fi” sound indicative of the ’50s era amps.
Magnetics Components Clark Deluxe 18002 – Similar to the Lenco, but stronger and more robust, with a prominent growling character and voice. Thick, wooly and willin’ with better treble presence and clear string definition then the Lenco, yet an entirely “vintage” character. This tranny is comparable to those found in Deluxe amps from the brown era through silverface. Excellent power, punchy and fat with exceptional clarity and tone.
Magnetic Components 5E3 Clone – Percussive and dynamic with a faster attack response than the Clark/Deluxe Reverb version, this transformer was reverse-engineered from an original ’55 Deluxe OT. IT imparts an intense, throaty tweed character with enhanced mid and treble presence, remarkable clarity, and an authentic vintage ’50s vocal tone with softer bass response and slightly less volume and power than the Deluxe 18002.
Allen/Heyboer TO20 – An interesting variation with a much more modern, percussive dynamic character. The sound was not as heavy and imposing in the vintage style, and with this transformer the Deluxe reminded us of the more refined sound of a Fender Princeton, with excellent dynamic punch for slide and Allen/Heyboer TO26 – As advertised, the low end held up loud and proud with very little sag and an audibly higher threshold of clean headroom, although beyond 6 on the volume control the Deluxe was still holding nothing back. Overall, this transformer imparts a cleaner, high fidelity tone with more clarity and stout bass response than a typical stock 5E3 transformer. An excellent choice for enhanced low-end and maximum volume.
Mercury Magnetics brown Deluxe – Immediately recognizable, the Mercury displayed a trademark sound that is smooth, exceptionally musical, warm and balanced. Sounding more “high fidelity” than the Lemco or Magnetic Components transformers, but still seductively unruly enough to get yer ya-ya’s out. Sweet, rich, detailed and sticky.
Now, you may be wondering why we would bother to audition so many output transformers…. How much difference can it make? Well, forty-odd years ago when someone rigged that old Stancor tranny in the Deluxe, the only choice available to most repair shops was whatever was on hand in the scrap pile. Today we can shape the tone and dynamic response of an amp with a variety of “vintage” or more modern, custom transformers that allow us to recapture the original sound and feel of the amp, or improve upon the original design. Why did Cesar Diaz install output transformers for a Twin Reverb in Stevie’s Super Reverb amps, and Bassman transformers in his Vibroverbs? Because the first thing that chokes and overwhelms a smaller output transformer are the bass frequencies, and Cesar wanted Stevie’s amps to produce a rock-solid, thundering low end that could handle his massive wound strings. The tone we’re celebrating with our ’59 Deluxe is quite the opposite…. The raucous sound of the amp teetering on the edge is the key to it’s exploding tone, but if you wanted to go in the opposite direction with more headroom and a tighter low end, transformers like the TO26 have been specifically designed for that purpose. We once replaced the output transformer in our Pro reverb with a bigger MercuryToneClone Bassman, and the Pro grained a tone of clean headroom and unyielding bottom. Wanna make it even harder still? Use a plug-in diode rectifier in place of the 5AR4 rectifier tube. No saggy britches now. As with so many choices we make in the Quest for tone, the final decision comes down to your mission and individual taste, and Jeff agreed that between the Heyboer TO26, both Magnetic Components trannies and the Mercury brown Deluxe, the question wasn’t which one was “best” – all four were exceptional, but different. Some players would prefer one over another for different reasons described here, but all of them represent stellar examples of just how far we’ve come since the day that old Stancor tranny was used to put the Two Fifty Nine back into service.
One last detail needed to be addressed…. Could we safely run the Deluxe with 5881s or 6L6s if we preferred that sound over 6V6s? Once again, we asked the prescient Mr. Valco for some Hoosier insight:
“The impedance mismatch in this particular amp using the 6L6s is really not a big concern, it won’t hurt the amp and will either sound good or it won’t. The 6L6s draw 1.8 amps and two 6V6s draw 0.9 amp, so using the 6L6s will add about 1 amp more current draw that the power transformer needs to supply from the 6.3 volt heater windings. On some small 6V6 amps, using 6L6s can and does cause the power transformer to run hotter because more current equates to more heat. The concern is that the power transformer in the Deluxe, not being a large one to start with, has the extra 1 amp of heater current capacity to safely use the 6L6s. One way to determine if the power transformer is really stressed out with the 6L6s is to measure the AC heater voltage on pins 2 and 7 on the power tube sockets (or on the pilot lamp) and see if the AC voltage drops significantly from the reading using 6V6s versus 6L6s. It should be a bit over 6.3 volts AC with the 6V6 anyway (since the wall voltage is higher these days than in the early ’60s) and with the 6L6s you sure don’t want to see a large drop in voltage below 6.3 volts AC. If there is a large drop it means the transformer is having trouble supplying enough current for the 6L6 heaters if given enough time with the 6L6s could damage the power transformer. If the drop is only a few 10th of a volt, and doesn’t go below 6.3 AC, then it would indicate that the transformer is supplying the demand for the heater current and should be OK. Most Fender amps used power transformers that could handle some extra current demand.
And now we arrive at the moment of truth. We’ve been steadily reeling in a parade of new and classic amps for review in these pages for 12 years now this month – Marshall, Fender, Magnatone, Hiwatt, Vox, Valco, Silvertone, Ampeg, Gibson, Gretsch, Mesa Boogie, Park, Supro, Dickerson, Traynor, Budda, Western Auto, Standel, Dumble, Cornell, Clark, Crate, Divided by 132, Reeves, Bad Cat, Gabriel, Fuchs, Koch, Star, Category 5, 65 Amps, Balls, Bakos, Callaham, Blankenship, Reinhardt, Grammatico, Siegmund, Chicago Blues Box, Roccaforte, Headstrong, Rivera, Mad Professor, Talos, Maven Peal, Reverend, BC Audio, Savage, Goodsell, Fargen, Carol-Ann, DST, Two Rock, Germino, Matchless, Louis Electric, Swart, Demeter, Juke, Aiken, Bluetron, DeArmond, Carr, Victoria, and Dr. Z, with more coming. Lots of amplifiers, multiple models from the same builders, and among the foremost classics – Fender, Marshall, Vox, Hiwatt, Gibson, Ampeg and the entire Valco catalog, we have acquired, optimized and restored dozens of amps considered to be among the most desirable vintage models ever built. In the 20 watt wheelhouse occupied by the Two Fifty Nine, it has no equal by a mile. Game over.
After a lot of back and forth testing with different sets of output tubes, we became hooked on the thundering sound produced by a pair of Philips small-bottle 6L6WGBs. Thanks to Larry Pogreba’s talent for scavenging rare tubes (in Montana, no less), we are flush with several outstanding and stout pairs of RCA 6L6s, but the brighter Philips really lit up the Deluxe with a fresh and lively attitude that mirrors the bounce of a newer amp. With the ’64 Jensen C12N loaded, the Deluxe spookily nails the tones of Neil Young’s rig on Ragged Glory – a “studio” recording cut live with the Deluxe and Old Black in a barn on Young’s ranch with Crazy Horse. With the volume backed off to 4-5 a bluesy jangle emerges anchored by solid low end, rich midrange, the sweetest treble tones imaginable, and variable levels of sustain and edgy distortion that can be controlled both by the volume on the guitar and pick attack. The Deluxe does not discriminate between single coils or humbuckers, ravaging both with equal fervor, and the responsive dynamic character of this amp simply is not of this world. Rotating the single tone control sharpens treble without dumping lows or mids, while also subtlety increasing gain, as if you were using a boost pedal. A “Y” cord plugged into the Instrument and Microphone inputs enables the two channels to be mixed with great effect. As Neil Young described, bringing the mic input volume up with the instrument volume set between 6-8 gradually deepens the tone while slowly igniting an intense explosion of thicker second order harmonics and distortion as the dynamic character of the amp softens. Pushing the Instrument volume level up into the 8-12 range brings the volume up to a perceived level that exceeds 20 watts, while provoking an angry, pissed-off cascade of astonishingly rich musical distortion as the notes swerve into controlled harmonic feedback.
Switching from the Jensen to the Celestion transforms the Deluxe into the most stunningly toneful 20 watt Marshall you could possibly imagine. To be honest, you probably can’t imagine it, because we have never heard anything like this ourselves, even after owning a couple of vintage Marshall PA20s, a rare Lead & Bass head and 1×12 cabinet, and a Balls 2×12 18 watt. We could easily live with either speaker, and the Deluxe also just kills pushing our 8 ohm 4×12 pinstripe cabinet.
For those of you who appreciate a somewhat tamer vibe, we can assure you that the Deluxe loaded with a fine pair of 6V6s is equally mind-altering. The overall sound is a wee bit smaller in girth and less imposing, yet abundantly overflowing with vivid harmonic depth, a supremely touch-sensitive response, and brilliant combination of fidelity, clarity and bloom. Compared to a black or silverface Deluxe Reverb, the ’59 presents a more musically complex soundstage, less harsh, stiff and linear, and it lacks both the sharper treble of a blackface amp, and the scooped midrange character. The tone is rounder and meatier, the treble sweeter and less dominant, with an enhanced 3-D image.
Now, if you’re the type that skeptically requires a qualifier to add a stamp of legitimacy to such an over-the-top review, here it is, Mr. Been There-Done That…. The Deluxe doesn’t and won’t spew big clean tones at stage volume. Our ’58 Tremolux produces a cleaner tone with a higher threshold of clean headroom by far at comparable volume levels, and the taller tweed cabinet encourages a stronger, cleaner resonant bass and low mid response. The Tremolux is also equipped with a Mercury ToneClone Tremolux output transformer, which creates a tone that is less wooly, raucous and indistinct.
The busted-up sound of the Tremolux above 5–6 is gloriously righteous indeed, but with more clarity and less provocative intensity than the Deluxe. Taken in context, what we’re suggesting here is that in our experience, the Deluxe has no equal as both a Fender and Marshall style 20 watt rocker (depending on speaker selection), and we’ll add “blues” to that description equipped with 6V6s and the Jensen C12N. During our 2-month test period, we also routinely used our Lee Jackson Mr. Springgy reverb, Analogman-modded Boss DD3 digital delay, and a very cool, versatile (and cheap) Flip tube tremolo pedal reviewed here. Can a modern replica of the 5E3 Deluxe deliver the same inspiring tones as the Two Fifty Nine? The closest thing we’ve heard is the Louis Electric “Buster,” but no, magical happy accidents like this Deluxe can’t be reproduced today – and that is as it should and shall always be. Quest forth…
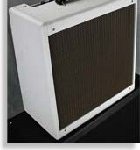
Maryland-based amplifier builder Vintage Vacuum Tube Amplifiers (you may know it as VVT) recently fielded a request from renowned pickup winder Lindy Fralin. He wasn’t looking for advice on wire or how hot to wind a pickup for best interaction with a particular VVT; rather, Fralin wanted an amp built to his specs and taste. And not just for him, but for the mass market. VVT, realizing the co-branding possibilities, jumped at the opportunity.
So, what does a tone guru like Fralin want in an amplifier? Well, he says the goal was “a clean, full-body-voiced amp that’s lightweight and able to sound good at low volume.” Sounds like something we’d like, too. So when VVT asked whether we wanted to hear it, we were happy to take up the offer.
At first glance, the VVT Lindy Fralin amp looks boutique in a way we’ve come to expect; i.e. it sports point-to-point wiring with carbon-comp resistors, an all-tube circuit, and a 12AX7-driven spring reverb and preamp. But, go deeper and you’ll quickly discover some seldom-seen features, like a trick self-biasing-cathode design that allows the player to switch between a pair of 6L6s (for 30 watt of output) and a pair of 6V6s (for 15-watts) without having to re-bias the amp. Part of its secret is a custom-wound Mercury Magnetics transformer designed specifically for the Fralin that allows the amp to switch between the 6L6s and 6V6s while maintaining stable impedance for the tubes and speaker load.
The amp ships with a pair of 6L6s, but will also accept 5881s or JJ 6V6s, for an altogether different favor. Another unique feature is Fralin’s choice of a single 15″ alnico-magnet Weber speaker instead of the more traditional pair of 10″ or single 12″ speaker.
The overall look and layout of the amp is different, as well, but still boasts a vintage vibe with a neatly executed off-white tolex, oxblood grillecloth, top-mounted controls, and heavy-duty leather handle. There are no metal or plastic corner protectors, and no extraneous piping or badging. Its look is clean, simple, and classic. The control layout is accordingly succinct, with a single 1?4″ input, a switch for Bright, and controls for Volume, Treble, Bass and Reverb, along with switches for Power and Standby. Also worthy of mention is the 11-foot power cord.
VVT shipped our tester with a matched pair of 6L6s by TAD and a matched pair of 6V6s by JJ. We started with the TAD 6L6s and our test guitars – a Fender Relic Strat and a Hofner Verythin Classic with mini-humbuckers. After plugging in the Relic Strat and letting the amp warm up, we set the Volume at 3 o’clock, Bass and Treble at 12, and then we hammered a few chords.
We were immediately impressed with the amp’s complex overtones, its round, punchy low-end response, and its snappy highs. It didn’t take much noodling or knob tweaking to realize that the tone controls on this amp, along with its Bright switch, are exceedingly well-voiced. From a player’s perspective, that means it’s easy to find likeable sounds. The Bright switch compensates nicely for the slightly darker sound of mini- or full-size humbuckers, while the wide sweep of the Bass control keeps its frequencies full and punchy with single-coils.
While the amp is voiced for clean tones, it also does a good job when it comes time to get dirty, and is very responsive to changes in pick attack or guitar output. Simply backing down the volume control on the guitar and easing up on our pick attack, the Fralin cleaned up from moderately dirty overdrive with musical overtones to a sparkling clean sound that didn’t lose any of its life or attitude.
We popped in the matched set of JJ 6V6s and checked the tone at 15 watts output. The amp broke up quickly and had a slightly more boxy sound, with reduced complexity of overtones; still very lively and punchy, just not as big as 6L6s — fantastic for low-volume situations. The tube-driven reverb is also well-voiced. At lower settings, it adds a bit of ambiance that doesn’t get in the way or wash out the amp’s tone, and at higher settings it’s suitably splashy.
The boys at Vintage Vacuum Tube do a killer job on the Fralin signature amp. It’s loaded with big, dynamic, single-coil-friendly tone (that sounds pretty good with humbuckers, too!) in a nice, lightweight package.
The Carry-On is part of Roy Blankenship’s LEEDS21 Series. It was designed to provide the traveling musician a small and lightweight amp to keep “that familiar sound” when taking your regular stack is not an option. Having been in the unfortunate position of having to borrow amps while on the road, I was curious about whether or not a small, 21-watt amp would deliver, especially since I use a 120-watt amp live. Looks can be deceiving — this little guy is loud, making it a worthy amplifier for both studio and live use. Employing two 12AX7s, two EL84s and a single 6CA4 rectifier, the Carry-On is voiced for the classic British tone of the ’60s, but with modern updates that may make some enthusiasts think twice about leaving the house again with their prized vintage amp. Created with the idea that less is more, the Carry-On is a sharp looking boutique amp with its cool nameplate and spade logo. At first glance, it looks like a lunch-box version of a Marshall plexi replica, with its familiar gold panels, black Tolex and Marshall-style knobs. As for features, the Carry-On’s front panel provides Volume and Tone controls, one Input, On/Off/Standby switch and a huge, bright purple jewel lamp. The back panel has a 3-way switch for 4, 8 or 16 ohms, and two speaker outs.
When I first plugged into the Carry-On, I ran a Gibson SG-X with a 500T humbucker straight in (no pedal chain) and used an Orange PPC412 cab with Eminence Governors. Going for all or nothing, I cranked the volume clockwise to 8 with the guitar volume at 10. I was instantly won over by the tonal quality of this amp. Before even touching the Tone knob I was surprised at how powerful the Carry-On was, but also how perfectly dialed in the tone was. I can’t imagine the care and time it would take to voice an amp this well with the idea of giving the player only two controls. The overall sound of the amp is crunchy, bright and responsive with excellent sustain. The Tone control adjusts the amount of low to high range; while it’s not a very extreme control, it does provide a final touch to an already killer sound. I found 6 to be to my liking, because it gave me a little more on the top end to match the Eminence Governors’ midrange. Turning up to 10 the sound didn’t fall apart, but provided even more gain and power.
Backing off my guitar volume and flipping the coil-tap switch to a single coil, I lowered the amp volume to around 4 to 6. The Carry-On provided a transparent clean sound, complimenting the bright and punchy qualities of the 500T in single-coil mode. After stumbling up the stairs and discovering that I’d been playing for about three hours straight, I was sold. While I had the amp, I got the chance to use it in the studio to double guitar tracks. I ran a ’72 Fender Telecaster reissue with Warmoth baritone neck, Rio Grande Dirty Harry single coil in the bridge and the stock Fender jumbo humbucker in the neck. The combination of the Carry-On’s raw crunch, the bite of the Telecaster and the low end of the baritone strings supplied plenty of low growl, complimenting my Sound City L120’s darker tones. The Carry-On also accepts pedals very well, if the gain provided by the amp isn’t enough. It handled all the distortion and fuzz pedals I threw at it like a champ. I only wish this amp had a line out, so I could have slaved out the Sound City for even more volume.
The Final Mojo
Though the Carry-On recreates the sound of old, there are some very modern traits to the amp that may make it more desirable than using a vintage amp live, or even in studio situations. The sturdy power supply is one. The other is that the Carry-On runs at modern voltages, unlike older amps that were made to run at lower voltages. This allows the Carry-On to achieve its full potential, giving you 1960s tone without having to change the caps on your vintage amp. Designed to give the player straight to amp tone, the Carry-On will make you forget all about a master volume (which squashes your preamp tubes anyway). While pedal effects makers and software companies may try to reproduce it and may come close, there is nothing quite as inspiring as standing in front of a revved up valve amp at full volume. Hiwatt, Sound City, and Marshall enthusiasts would do well to check out Roy Blankenship’s amp line. The Carry-On comes at a street price that makes it obtainable for a boutique amp — especially next to that plexi you’ve been watching on eBay. Now I just have to save my pennies to buy one, or skip the country with the one in my basement.
Buy if…
you’re looking for classic British tone.
Skip if…
21 watts is not enough.
Rating…
Street $1499 (includes ballistic nylon carry bag and shoulder strap) — Blankenship Amps — BlankenshipAmps.com
Source: https://mercurymagnetics.com/pages/news/PremierGuitar/PremierG-23.htm

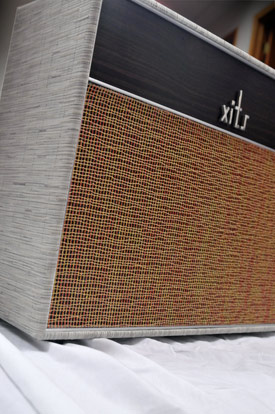 The first banner on the XITS website reads: “Welcome to total design.” Welcome, indeed. This amp was handmade by Mike Koski in North Liberty, Iowa, and I have to say I think this guy is a genius. To be honest, I’m a diehard when it comes to the classic sixties Vox sound, so just hearing about the XITS got me keyed up. But the way Koski has managed to build an amp that blends together so many seemingly divergent characteristics — refined artistry with raw assertiveness, pure old school tone with state-of-the-art specs, a “come hither” look with a “Stand back, Jack!” sound — into a whole of such singular quality has really kept me keyed up. The word I keep coming back to is astonishing.
* * *
This 15/30-watt 2×12 combo is the latest in an XITS lineup that started with the Sadie XS (15W 1×12 combo or head) and the Piper XS (15/30W 1×12, 2×12, or head), both featuring a single EF86 Pentode channel. That lineup was expanded to include the twin channel Piper XTB — closest to that legendary AC30 “Top Boost” model — and a 50W model. The Piper X30 features the XITS “Top Boost” channel and a new “Hot Top Boost” channel based on Koski’s own design for the 50W model’s second channel.
Channel 1 of the Piper X30 offers a bright vintage “Top Boost” tone, and features two gain stages and a passive EQ; Channel 2 offers three gain stages and an active EQ for a hotter, rowdier tone, and plenty more grit. Each channels uses a singe high-gain input, and the Cut control is global, rolling off high frequencies in the power section as you turn clockwise.
Captivated as I am by the sound of this amp, I was somewhat surprised to discover the Piper X30 doesn’t fawningly follow the recipe that’s supposed to create that unmistakable AC30 tone. The standard tube complement is there: three 12AX7s in the preamp section, four EL84s (independently cathode biased with no negative feedback) in the power section, and a GZ34 tube rectifier. But from here, the XITS starts to part company with the past. For example, instead of single bias resistor for all four power tubes, Koski uses individual bias resistors for both push-pull pairs; that allows one pair to be removed for 15W operation without changing the bias of the remaining pair.
Another example: although common wisdom says the GZ34 rectifier eliminates the need for a Standby switch, the Piper’s got one. (Koski told me that since it didn’t affect the tone, he added it to keep the tubes warm during breaks. Good idea.) On the back of the amp, a half-power switch deselects one pair of EL84s for 15W output, and our review model also includes the optional XLOOP tube buffered (12AT7) effects loop with individual Send and Return controls, and an additional gain stage on the return. Sweet.
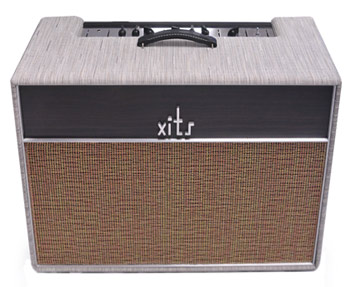 All of Koski’s XITS amps use custom wound Mercury Magnetics transformers, NOS Allen Bradley carbon comp and PRP resistors, SoZo tone caps, Mallory filter caps, along with Analysis Plus Clear Oval speaker cable. Everything is true point-to-point wired in an aluminum vented chassis, handmade by Koski himself. I got a look under the hood, and it has to be one of the tidiest jobs I’ve seen.
There are a few more surprises in store. It seems at once both quieter and louder than a vintage Vox. Although I never expected the amp itself to be silent, it’s actually pretty quiet, until you don’t want it to be, that is. Then it gets loud. Very, very loud. Perhaps that’s got something to do with the loudspeakers. Made for XITS by Austin Speaker Works, the high power X70C ceramic speaker has a 70Hz cone and 80 Watts of power handling. For an additional charge, you can get the optional X70A (Alnico) speakers. They break up beautifully. For me, this put to rest the notion that the original AC30’s underpowered speakers were part of the secret of its tone.
There is more. Take, for instance, the woodwork. Rather than simply replicating a vintage British amp cab, the XITS cabinet incorporates several modifications into those time-tested designs to achieve singular tonal quality, resonance, and visual appeal. The tuned, open-backed cabinet is made from a single plank of maple, box-jointed to keep the grain aligned, and is augmented by walnut bracing and a floating baffle. Let me tell you, it shimmies and shakes like the business on my amp stand.
The entire cabinet interior is finished to furniture-grade, and the exterior is furnished with your choice of Walnut, Zircote, Cocobolo, Mahogany, Ebony, or Cardinal Bloodwood, and topped off with a polished stainless steel faceplate “Xits” logo. Our review model came with a gorgeous ebony valence and matching ebony appointments on both the control panel and the back plate (that’s right, ebony on the back plate). The exterior is covered in Chilewich woven vinyl, which looks sort of delicate but turns out not be, and then equipped with a two layer grill cloth with gold/orange, blue/turquoise, or gold/silver vinyl over black. In keeping with Koski’s unswerving attention to detail, there’s a special grill frame to separate the woven vinyl lattice from the baffle.
The backlit control panel by itself testifies to the Piper’s seamless blend of austerity and imagination. There are two channel inputs, three chicken head knobs per channel, each labeled simply B, T, or V, the global Cut control, or C, and the Power/Standby switch, which is labeled with the Japanese symbol for “fire” (Standby) and a Laurel wreath, the Greek symbol for “skill” (Power On).
“Yes, it looks great in the living room; no, you can’t play it in here.“
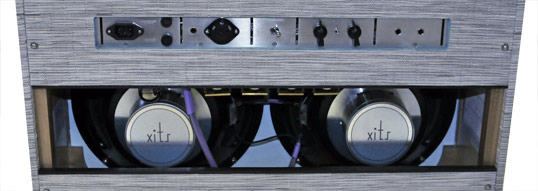 For sure, the Piper X30 is posh. Its elegant design and superb craftsmanship give it a positively urbane charisma, but don’t let the understated look fool you — this amp is no poser. The sound is articulate and full of detail, but it is far from coy. Dime it out and it’ll make the last AC30 you played seem almost tame. So, although it might fit right in with your new Dutch design living room suite, to get the most out of it you’re going to have to crank it up.
In fact, what’s so refreshing about this amp, despite its perfectly groomed appearance, is how truly unpretentious it is. It’s got no frills: no master volume, no trem or reverb, no clever tone shapers or brilliance switches. In the tone department, though, it is an unambiguous contender.
When it comes to producing the raw, punchy, volatile sound of the British Invasion, the Piper X30 is a bona fide performer. At lower volumes, Channel 1 delivers pure cleans with warm, smooth mids, round low end, bell-like highs. As you increase the volume it begins to develop a bite, and the chimey ring at the top end becomes fuller and more prominent — the low end loosens up a bit, but the tone remains snappy and distinct throughout, with no trace of the midrange blurriness you sometimes get with amps like this. At top volume and treble, Channel 1 has a beautiful bark and is full of lush sparkle:
![]() Download example 1 — 15W, Ch.1, B at noon, Tat 2 O’c, V at 10 O’c, Cut at noon: recorded in SoundStudio on MacBook Pro using Digidesign Mbox (2 SM57s); Fender Contemporary Telecaster, Neck and Bridge pups, s/c.
Download example 1 — 15W, Ch.1, B at noon, Tat 2 O’c, V at 10 O’c, Cut at noon: recorded in SoundStudio on MacBook Pro using Digidesign Mbox (2 SM57s); Fender Contemporary Telecaster, Neck and Bridge pups, s/c.
As advertised, Channel 2 is more aggressive and grittier. At lower volumes, it has a big, bright attack and a heavy, percussive chime. With more volume, the mids here don’t get much fatter than Channel 1, but they sound fuller, and bottom end gets thick and slightly woolly. At high volume, the top end is a dream: sweet, dense crunch, splendid harmonics, and warm, glassy, singing sustain. The grit cleans up easily with the guitar’s volume knob. The midrange thickens nicely with humbuckers, and the crunch gets a little bit hairy. With the single coil neck pickup on my Tele, the tone gets really greasy and bluesy; with the bridge pickup it goes right to raunchy:
![]() Download example 2 — 15W, Ch.2, B at 1 O’c, T at 3 O’c, V at 11 O’c, Cut at 11 O’c; recorded in SoundStudio on a MacBook Pro using Digidesign Mbox (SM57); Fender Contemporary Tele, Bridge pup, then Neck, S/C.
Download example 2 — 15W, Ch.2, B at 1 O’c, T at 3 O’c, V at 11 O’c, Cut at 11 O’c; recorded in SoundStudio on a MacBook Pro using Digidesign Mbox (SM57); Fender Contemporary Tele, Bridge pup, then Neck, S/C.
When you dial up the treble knob on channel 2, and roll off the cut, the distinctive Voxey sparkle sharpens vividly, delivering a mouthwatering jangle:
![]() Download example 3 — 15W, Ch. 2, Bass at 3 O’c, Treb full, Vol at 11 O’c, no Cut; recorded in Sound Studio on a MacBook Pro using Digidesign Mbox (SM57); Fender Contemp. Tele, Bridge pup, S/C.
Download example 3 — 15W, Ch. 2, Bass at 3 O’c, Treb full, Vol at 11 O’c, no Cut; recorded in Sound Studio on a MacBook Pro using Digidesign Mbox (SM57); Fender Contemp. Tele, Bridge pup, S/C.
The Final Mojo
I was pretty sure the Piper X30 was something else when I got my first good look at it. After playing it and listening to it for a while, I’m convinced that Koski’s meticulous attention to both visual and sonic detail puts this amp in a class all by itself. As a total package — a seamless convergence of technical innovation, craftsmanship, and artistic temperament — this amp is just astonishing.
I’ll admit that I hesitated, at first, to use that word. It sounds so unshakably partisan. But we had the amp out at a Premier Guitar party a few weeks back, and its one-of-a-kind looks piqued the interest of not a few discriminating gear heads. Impressive, sure, but not yet astonishing. When the most frequently heard exclamation coming from the gear heads who did take a closer look at it was, “Oh! you gotta be kidding me.” I sensed we were moving past impressive. But when that inimitable tone could be heard cutting its way through a mix thick with some heavy-hitting amps, including a few 50-watters with 4×12 cabs, astonishing was the only word left.
If you’re on a quest for something that exceeds your every expectation about what a classic handmade, all-tube, AC30-inspired amplifier can be, the XITS Piper X30 is a total design Shangri-La.
Buy if…
you want a handmade amp of unsurpassed quality, exceptional good looks, and astounding tone
Skip if…
you’re looking for an amp with lots of extra features
Rating…
![]()
MSRP $3718 (2×12 Combo base) As Reviewed: $4733 (Alnico Magnet Loudspeakers $200/each, TubeBuffered Effects Loop $615)
XITS Sound
Source: https://mercurymagnetics.com/pages/news/PremierGuitar/PremierG-15.htm
THERE’S AN INHERENT dichotomy when it comes to guitar amplifiers; the more TLC that goes into their construction, the tougher they are. Think about your average mass produced amp… then consider Sommatone Roaring 40. Built with heaping helpings of TLC by James Somma and Dan Arango, the Roaring 40 employs a heavy gauge welded aluminum chassis, Mercury Magnetics transformers, stainless stell hardware, electrolytic capacitors by Sprague and F&T, silver-plated Teflon wire, four JJ EL84 power tubes with O-rings and heavy duty retainers, four JJ 12AX7 prevamp tubes (and one more in the rectifier), tubular polypropylene signal capacitors, a U.S.-made Eminence Red Coat 12” driver and 13-ply birch cabinet.
Built with heaping helpings of TLC by James Somma and Dan Arango, the Roaring 40 employs a heavy-gauge welded aluminum chassis, Mercury Magnetics transformers, stainless steel hardware, electrolytic capacitors by Sprague and F&T, silver-plated Teflon wire, four JJ EL84power tubes with O-rings and heavy duty retainers, four JJ 12AX7 pre-vamp tubes (and one more in the rectifier), tubular polypropylene signal capacitors, a U.S.-made Eminence Red Coat 12” driver and 13-ply birch cabinet. The top-shelf treatment continues on the amp’s exterior, with a well-executed Tolex application with silver piping accents and a salt-and-pepper grille, along with a minimalist approach to hardware—just a high-quality leather handle and a metal vent; nothing bulky, and no corners.
Aesthetically, the Roaring 40 gives off a definite British vibe, with it stop-mounted controls and shallow (9”) cabinet depth. Controls are straight-forward; on top are a pair of 1/4” inputs (High and Low), Volume controls for the Bright and Normal channels, as well as controls for Treble, Middle, Bass, Presence, Master Volume, and power/standby switches.The back panel has Mix and Dwell controls for there verb circuit, as well as the switchable output selector (20 or 40 watts), speaker impedance selector, fuses, and power cord socket. The control layout is straight forward and has a couple of unique features including blendable Volume controls and the uniquely voiced Presence circuit. The blendable Volumes let you use as much as each channel as you want on a single input, and mixing the Bright and Normal controls creates tones reanging from bright and thin to thick and fat with varying degrees of gain.
Playing a guitar with single-coil pickups, and with the master Volume turned up all the way (which takes it out of the circuit), noodling with the tone stack (10 o’clock to 2 o’clock) and the Volume controls (9 to 10) reveals harmonically rich British tones with thick mids, tight, round low-end, and clear high-end. With the Volume controls dimmed, the Roaring 40 produces pleasant saturation and overdrive with nice crunch. Blending the Volume controls compensates well when you transition from single-coils to humbuckers; blending more Bright with humbuckers adds chime and a bit of cut, while blending in more Normal adds thickness to single-coil tones.
While the three-band tone stack offers subtle-but-distinct control, the real star here is the Presence knob,which not only adds snap and sizzle when set between 7 and 10, but smooths out the top-end and warms up the overall tone when set between1 and 4. The best way to tweak the 40’s out-put power is by using a combination of the 20-/40-/half-watt output switch and Master Volume. The tone cleans up by simply rolling off the guitar’s Volume control and easing up with the pick. If the amp gets a big loud, rolling off the Master Volume does not appreciably degrade the tone—until you get extreme with it. And its reverb lets you dial in everything from the ultra-wet to subtle ambience. The Sommatone Roaring 40 shines for its overdrive tone, circuit design, a versatile set of controls, and top-notch components.—Phil Feser
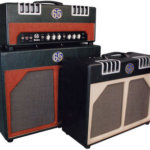
Since getting up and rolling with a single amp model — the London — in 1004, 65Amps founders Dan Boul and Peter Stroud have been awash in creativity — and tone.
One of their newest models is the SoHo, which is configured as a head/cab and combo.
Like the rest of the company’s line they’re assembled using only high-quality components like low-tolerance NOS Allen Bradley carbon resistors in all tone-affecting positions, custom tone capacitors based on the original mustard cap, custom Mercury Magnetics transformers, ceramic power-tube sockets, Micalex preamp-tube sockets, sealed military-spec toggle switches, and matching valves from Groove Tubes. It’s all assembled on an aluminum chassis and meticulously placed in high-grade Baltic birch cabinet with 12″ Celestion speakers (one Alnico Blue and one ceramic-magnet G12H30 in the cab, single G12H30 in the combo).
Both rigs are dressed up with 65Amps’ two-tone Tolex and very retro “hot rod” dual four-slot heat vents trimmed in aluminum with gold piping, split-front speaker grill, cream-colored chicken head control knobs, and stitched leather handle; the overall look and vibe are definitely old-school and distinct — and instantly recognizable when you see, for instance, Peter Stroud playing them with Sherl Crow on CNN’s “Heroes” special, or with Rickie Sambora on “Saturday Night Live.”
Tube layout includes an EF86 (covered with heat-shrink and rubber O-ring to prevent “chatter”) and a pair of Groove Tubes 7025/12AX7 in the preamps, a matched pair of Groove Tubes EL84s in the power section (producing 20 watts) and a Groove Tubes EZ81 rectifier. The front control panel layout includes a pair of 1/4″ input jacks (high and low) a toggle switch to defeat/engage a master volume control, a six position “Bump” midrange tone switch, a Bump Level control, a Bump defeat/engage toggle, Bass and Treble tone stack controls and a Volume control, as well as Power and Standby toggle switches. Engaging the Bump circuit defeats the Bass and Treble tone stack and offers six midrange tone “bumps” that are controlled in intensity by the Bump Level control. The rear panel layout consists of a detachable AC power cord socket, primary and secondary fuse holders, a speaker output jack with an 8-16 ohm toggle, and a footswitch jack for the Bump feature.
Plugging a Fender-inspired Gadow Nashville with a Lindy Fralin single-coil into the SoHo head with the Bump circuit engaged and Master Volume turned off, the amp reveals a harmonically rich, dynamic clean tone with the mildly subdued mids, tight, punchy lows, and silky high-end response. The SoHo’s front-end creates a complex harmonic footprint — thick and in-your-face, no matter how lightly the guitar is picked or played, and ranging from sparkling clean to overdriven simply by modifying one’s playing attack. While most good tube amps “clean up” by simply rolling off the guitar’s Volume control, the SoHo takes it a step further by letting one’s fingers/pick do it, and without sacrificing the rig’s natural tone. The results were the same for each guitar we plugged into the SoHo, whether with humbuckers, P-90s or single coils — a solid tweed-flavored EL84 tone that didn’t steal any thunder from the guitar or its pickups. The Gadow’s tone pots required only slight tweaking (between the 10 o’clock to 2 o’clock positions) to compensate for different pickups. With the Bump circuit engaged, the SoHo’s overall flavor changes noticeably, jumping to a sweet British EL84 tone with more drive and pronounced, complex midrange. Each of the six Bump settings produces a subtle but very musical midrange boost. Again, each guitar/pickup combination sounds the way it should combination sounds the way it should — natural, with all overtones present no matter one’s picking style.
A feature missing here compared to many boutique amps is reverb, but the SoHo’s tone suffers not one bit given its complexity.
The Master Volume circuit serves two functions; it allows the player to pull back the overall volume of the amp (great for low-volume use), and it can be used to overdrive the preamp. Some degradation to the tone is apparent, but the guitar’s tone controls can be used to make up some of the ground. The fact that the Master Volume can be completely switched out of the circuit is a very nice feature. Though producing only 20 watts output, the SoHo gets plenty loud.
For the most part, the combo and the head/2×12″ cab setups perform the same, though the 2×12″ inherently offers more high-end snap and cone saturation compared to the combo’s 1×12″ setup.
The SoHo’s ability to cover a range of EL84 tones, from classic tweed to thick British, makes it very versatile. Throw in the switchable Master Volume and you’ve got an amp that will work great at a gig, in the studio, or in your den.
Source: https://mercurymagnetics.com/pages/news/VGmag/VGMar08-65amps.htm
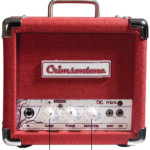
Decades ago, practice amps were effectively no-frills versions of their bigger brothers. Even so, those little amps of yesteryear became something magical in the studio. From Jimmy Page and his Supro to Joe Walsh and his Fender Champ, getting big sounds from little amps became the stuff of legend and a go-to approach for recording. Crimsontone Amplifiers embraces this philosophy in a big way—only two of the seven amps the company offers are 20 watts or more. Their newest amp—the 4-watt SE Mini—is a testament to the power of small and a cool nod to the role of low-wattage amps in the history of rock ’n’ roll.
In the Court of the Crimson
At just 7.5 pounds, the SE Mini certainly lives up to its name. The cabinet is covered in a tough red tweed fabric, and it features a sporty aluminum handle for easy transporting to the studio—or a gig in the park for that matter. Crimsontone didn’t design the SE Mini with gimmicks in mind either, which is evident in the simple feature set. It has just four controls—Gain, Tone, and Master knobs, along with a tiny Gain Boost switch.
The single-ended, all-tube head is powered by a Sovtek EL84 coupled to a JJ ECC803 preamp tube and a Mercury Magnetics GA5-P power transformer for a maximum of four watts. The GA5-P is part of Mercury Magnetics’ fantastic Toneclone Plus line, which is stocked with the company’s replicas of famous power transformers from the past. In this case, it’s a faithful reproduction of the transformer in Gibson’s 1950s Les Paul Jr. combos. I was pleased to see that the output transformer was also a Mercury Magnetics model, an FTCO-M that replicates the units in Fender’s Tweed Champ amplifiers of yore.
The SE Mini doesn’t rely on modern circuit design, but instead forgoes current technologies for a traditional, handwired, point-to-point circuit. Upon pulling out the adorably small chassis, I was treated to the sight of tidy wiring held together with clean solder joints and tight mounting. And the Components—F&T filter caps, Alpha pots, Orange Drop capacitors, carbon-comp resistors, two Xicon power resistors, and a Cliff input jack—are all top-of-the-line.
Good Things … Small Packages
Crimsontone touts the SE Mini as a practice amplifier, but it excels at hitting tones in the ’60s classic-rock vein. With a Fender 60th Anniversary Telecaster and a feed to the two 12″ speakers in a Fender Twin Reverb reissue, the Crimsontone’s clean mode belted out seriously raw, garage-rhythm jangle with a dash of classic Neil Young sting thrown in. The highs are crisp and brash, with tight lows and a gritty midrange. With a Gibson Les Paul Studio, the amp accentuated the midrange and softened highs, but the amp still retained its bold essence, staying tight in the low end and having a nice, even sag. It’s not a sound for everybody, but it speaks in the raw, unadulterated tones of no-holds-barred slingers of the first classic heavy rock era.
It’s worth noting that, while the SE Mini kicks with James Gang-worthy tones, I did have to really work with my picking hand to squeeze any real dynamics out of it. That said, that’s not uncommon with most small-wattage amps, and it certainly doesn’t mean that the amp isn’t touch sensitive. But if you’re used to using a big Marshall to get your ’70s tones, the SE Mini will feel like an entirely different animal. The amp doesn’t have excessive gain or saturation to hide behind, so it assures that you hear every single mistake. The sweet sounds that come as a trade-off are well worth it, though.
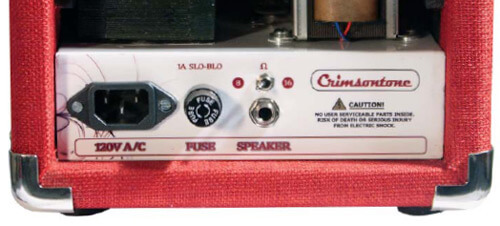
This Dog Bites
Getting the most meat and bite out of the SE Mini requires careful adjustment of the Gain and Master knobs. With the Gain Boost switch off, not much grit is available from the Gain control. Rather, it acted more like a voicing control, altering the feeling and response of the tone. Most master-volume tube amps have a gain structure that changes from tighter and crisper to warmer and spongier as you increase the Gain. Without the boost on, the Gain control on the SE Mini reacts the same way, but without adding huge amounts of saturation. Kicking in the Gain Boost adds a dose of rage to the tone, and I thoroughly enjoyed playing quick double-stops and soaring country bends with the SE Mini’s overdrive-infused, high-midrange snap.
Predictably, the boost kicks up the volume a few decibels, too. And I discovered by lowering my guitar’s Volume knob just how well the amp cleans up at even the dirtiest settings. The Gain Boost adds noticeable touch sensitivity, too. I got one of my favorite tones by dropping the Telecaster’s Volume down a quarter of the way and letting my picking-hand attack determine the amount of overdrive.
If you’re looking for more aggressive tones, it also pays to keep the Master at or near its highest levels. At practice-amp volume levels, the Telecaster sounded a little thin, and understandably so—I wasn’t pushing the single EL84 enough until I moved the Master to 3 o’clock, where there was a considerable volume jump. The sweet spot on the SE Mini’s Master is just a little higher, where it retains just the right amount of definition, while maintaining ample punch. Set the Master there and use the Gain control to set the flavor of the attack, and you’ll find a load of tone variation at your fingertips. Working within this range helped me keep the Tele’s bite under control and let the raw nature of the amp’s voicing shine through.
The Verdict
Four watts may not be the right recipe for tearing the paint off walls, but the SE Mini uses a well-designed circuit and quality components to sound much bigger than it looks— especially with a few 12″ speakers at the receiving end of its signal. Crimsontone’s SE Mini is a great choice for lovers of dirty, jangly rock guitar tones. But, like tube practice amps of yesteryear that needed to be driven and played hard to achieve their fullest tonal potential, it can require a more dynamic and forceful touch to tap into its inherent dynamics. Still, there’s nothing quite like a healthy, low-watt tube amp cranked to high heaven for creating sweet, raw, rowdy sounds. In that musical category, the SE Mini is a hit.
Buy if…
you’re a fan of dirty, to-the-point guitar tones at reasonable volumes.
Skip if…
you need to be heard over a drummer or can’t abide bone-simple feature sets.
Rating…
Street $799 – Crimsontone Amplifiers – crimsontone.com
Source: https://www.premierguitar.com/articles/Crimsontone_SE_Mini_Amp_Review
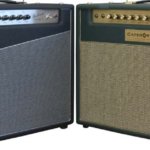
CATEGORY 5’S ANDREWAND Typhoon Joe are all-tube, handwired two-channel amps with top-of-the-line Mercury Magnetics transformers, JJ and Tech-Cap electronics, Analysis Plus speaker wire, and silver-tinned Teflon wire, all attached to a two-millimeter aluminum chassis in an 11-ply Baltic birch cabinet fitted with Jensen Neo speakers.
Both amps have multiple-impedance capability, two speaker jacks, a line-out, and an adjustable line level.
There are controls for two non switchable channels on the front panel, with Volume and Tone controls for the first, and Volume, Treble, Middle, Bass for the second. A section labeled Global affects both channels, with a single control for reverb.
Using a reissue Gibson Les Paul Special with P-90 pickups and a kit guitar with Rio Grande single-coils, the 45-watt Typhoon Joe (with four 12AX7s, two EL34s and a solid state rectifier) sounds great and is a snap to control in terms of volume. Adjusting its overall output via the Wattage control lets the amp maintain its tonal characteristics no matter how many picture frames fall from the walls! There is a slight increase in headroom as voltage is dialed up, and a softening of the edges on the distortion as the voltage goes down, but it’s very subtle. And the EQ is remarkably consistent – a relief for those who’ve played amps that require channel-volume adjustment and tone-knob tweaks if they touch the Master. An A/B comparison confirmed the characteristic was common to both amps.
With its dual EL34s and 100-watt/12” speaker, the Typhoon Joe pushed out gorgeous tones with a distinctly British voice. Channel one gives a straight-up Marshall JTM45-like tone with single-coil pickups that help it produce a combination of mid range throatiness with high-end chime. The Typhoon is relatively clean (for a Marshall-type amp) to just past half-way on the Volume dial. Keep it below that, though, and it’s oh-so-easy to get Robert Cray-style cluck. Channel 2 has a late-’65s Marshall plexi tone at lower volumes, but the distortion become screamier as the Volume knob is dialed up. Even at upper settings, there wasn’t a hint of harshness, just more sustain.The P-90s had Channel 1 singing with the Volume knob halfway up. Using the bridge pickup with the Volume at three-quarters brought out a tight, rich, distortion, while turning down the Tone smoothed out the edge without killing the highs. The neck pickup was warm,even when driven hard, but did not become muddy, revealing the sound Larry McCray described in a recent interview as “woofy.” The P-90s were pure velvet in Channel 2 from about 40percent on up – rich, with just a bit of edge to keep the notes distinct.
Although the Andrew is rated at a few watts less than the Typhoon Joe, its two 100-watt 10” speakers make it seem louder. Its two 5881 tubes give it a more American sound and, if that’s not to your liking, a bias circuit allows the Andrew to run a variety of octal power tubes, including 6V6, 6L6,EL34, KT66, and even KT77 tubes,without re-biasing. Channel one has a pre-blackface Deluxe tone, if only the Deluxe weighed about 400 pounds.Clean(er) Fender tones prevail up to about halfway on the Volume, and after that it has slightly scooped mids with hair. The bridge-pickup tone was remarkably smooth, with no brittle highs. Channel 2 continued the Fender tones and sounded like a Super, but a little cleaner, like it had mated with a Twin. While the neck pickup was glassy, the middle pickup was called into service more than usual, Channel 2 bringing out the usual warmth of a middle Strat pickup, but with more clarity and aggression.
If you like P-90s, plugging into the Andrew is going to have a serious impact on the amount of sleep you get and how often you get out of the house.The neck pickup had a slight glass-on-steel sound like any good Strat pickup, but the Andrew emphasizes it while bolstering the added mids of a P-90. With the Volume at about 60 percent, the slightly under wound neck pickup was warm, full, and just a little edgy. Combining both pickups with the three-way switch in the middle gave a B.B.-type tone, only a little darker and more menacing. The bridge pickup by itself had more snarl and bite than with the Typhoon Joe.
Though neither Category 5 amp offers channel switching, their channels are in phase, so an A/B/Y footswitch allows for days of tonal exploration. And because of the Wattage control, both amps make great bedroom and studio amps that produce full-bodied distortion at low volumes. – Bob Dragich
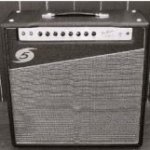
Category 5 is a relatively new company based in Frisco, Texas that has wasted no time in developing twelve distinctly unique, hand-wired designs ranging in power from 15W–100W, while aggressively placing amps with touring players like Joe Bonamassa, Tab Benoit, Jimmy Thackery, Gary Moore and one of our favorite Texas Burstbusters, Jonn Richardson (Otis Taylor), among others. The company’s strategy for quick and lasting growth is fairly obvious with a quick scan of their website – build hand-wired tube amps to the highest standards of custom manufacturing, and offer a range of power and tone shaping options that will meet the needs of virtually any player, from low volume home and studio applications to 100 watt pro rigs suitable for cavernous venues and big stages. When it comes to fully understanding the intention of Cat 5 amps, you’ll need to do a little homework on each model, many of which are named for famously wicked hurricanes. We’ve done all the work for you on the two models reviewed here….
We received a 1×15 version of the 40 watt Andrew, which is also available in 2×10, 2×12 and 4×10 configurations. The 1×15 is equipped with our favorite current production 15” – the Eminence Legend–along with dual 5881 power tubes and an interesting combination of two separately voiced input channels. Channel 1 is described as having been inspired by the ’61 Fender brown Deluxe. Having owned a dead mint example of this very amp, we can tell you that it possessed a remarkably toneful and middy snarl, but very little usable clean headroom, which is why we ultimately let it go. Channel 1 in the Andrew produces an equally “brown”sound – rich with midrange and none of the typically scooped tones of the black face era.
Channel 1 is designed with a single tone control to shape EQ, plus the global reverb and “voltage”controls for the internal variac circuit. Of course, the reissue Tung-Sol 5881 tubes create a much more formidable voice than our brown Deluxe could ever must, which we consider to be a tremendous improvement to anything inspired by the brown Deluxe. We all experience and embrace varying sounds quite differently, so we won’t offer this as an absolute, universal truth – but to our ears at least, we prefer the tone and attitude of Andrew’s Channel 1 combined with snappy single coil pickups that can impart a stronger attack on the bass strings and happily frolic in the midst of all that midrange. Otherwise, what you hear is the sonic equivalent of a chocolate-chocolate chip double fudge cookie in the style of a late ’50s Gibson GA40– a very good thing with single coils or bright replica PAFs. Dialed in with the sole tone control, you can create a very old-school tone in Channel 1, and that does seem to be its purpose, so mission accomplished. A more nimble and versatile range of black face tones are found in Channel 2.
Channel 2 offers a full range of tone-shaping EQ, with bass, treble and midrange controls, plus the global reverb and voltage controls common on both channels. We asked Steven Scott, head of product development at Category 5to explain….
TQR: Does the voltage control essentially function as avariac, dropping voltage to the power section, or is something else involved (most people have heard of power scaling but have no idea what it really does)? Power Scaling is another name for voltage control. We don’t use the same circuit as London Power and have not licensed the trademarked name, so we can’t call it Power Scaling. The voltage control makes the B+ voltage variable from about 60VDC to about 450VDC, which allows you to dial the amp from about 5W to about 45W. This allows you to more or less keep the same tone once you’ve dialed it in, then scale it to the size of the venue. This is the feature that our customers rave about the most. The tone really does stay pretty consistent until you take the voltage way down below about 11:00 on the dial. Then it starts to brown out as the tubes are operating well blow their intended point. Another advantage of this technology is it greatly improves tube life as the bias drops as the voltage is turned down. It differs from using a variac in that only the B+ voltage is affected, meaning filament voltage stays the same and no damage to the tubes such as cathode stripping can occur.

Ten years after our first published amp review (the blackface Vibrolux Reverb), we still find ourselves answering readers’ questions about which amp to buy. We’re not complaining… your subscription to TQR has always included phone or email access for those contemplating a new gear purchase, but it seems that published reviews can still sometimes prompt more questions than answers. We understand, and like you, we are routinely faced with these same buying decisions just about every month as we look ahead to future issues. “Power” and “headroom” (or lack of it) seem to remain among the most daunting considerations for prospective amp buyers. This may not keep you up at night if you’re looking for a toneful box to play solely at home, but the range of clean and overdriven tones available from a single amplifier that can hang with a band is absolutely critical – the tipping point for guitarists who wish to have both clean and grittier tones available on the fly. And even the casual “bedroom” player (does anyone really play their guitars in the bedroom?) will quickly discover that big, lush guitar tones – clean or jacked into rich distortion – are often best obtained through a “bigger” amp. We’re not suggesting that we don’t love our ’58 tweed Tremolux or ’64 Deluxe – they both uniquely, timelessly epitomize great guitar tones – but an entirely different realm exists within the range of vintage Fender amps, and try as we might, we have never found another amplifier quite as versatile, user-friendly or uniquely toneful as the blackface (1965–7) 40 watt Pro Reverb – still the most under-valued and overlooked reverb amp from the entire blackface era, although aside from its 2×12 speaker configuration, the Pro is nearly identical to the Vibrolux and the Super Reverb amps.
Yes, the 2×12 Pro Reverb can move some air, just as an AC30or Matchless DC30, both highly coveted amps for good reason, do the same. Experienced in a room, 2×12 amps produce an ambient presence and a spatial quality that single 12s can’t match. That extra speaker isn’t adding volume as much as it simply disperse sound effectively by filling more space. And although the Pro Reverb is rated at 40 watts, the smaller output transformer Leo Fender chose to use delivers only 28 watts, probably in an effort to minimize speaker failure, yet the original Oxford and Jensen 12 s shipped in the Pro still blew when pushed by enthusiastic rockers. A well-maintained Pro Reverb will typically produce classically clean Fender tones with strong bass and treble and slightly diminished mids from “2” on the volume control to “5,” gradually spilling into lush Fendery distortion at higher settings. If you choose to use an overdrive device to achieve distortion at lower volume levels, the Pro will sound significantly better than most 20 watt amps because your pedal is affecting a cleaner signal, rather than adding distortion to an amp already spilling over into distortion. And as we have reported so often in the past, non-invasive and completely reversible modifications can be made, such as the addition of a 25K mid range pot utilizing the existing back panel hole for the extension speaker jack. This single mod enables the Pro to develop a very ballsy British voice as midrange is increased, while completely preserving the integrity of the original Fullerton tone with the midrange pot set at zero, rendering two outstanding amps in one. Intrigued? You should be, because we have never heard a contemporary boutique 2×12 combo amp that can approach the sound of a Pro Reverb equipped with a solid set of tubes and speakers. And with the range of speaker options available today, you can effectively custom design and shape the sound of your Pro for more of a traditional, bright“American” sound, a heavier or chimier British tone, or the two combined.
Ah, but buying old amps is risky business says you… what if I get a “dog” or it needs a lot of work? I’d rather buy some-thing new and not deal with the unknown. Fine, do that. But for those willing to reap the rewards that only a certain degree of risk can offer, it’s not that difficult to minimize your chances for disappointment. Here’s how:
Fender designed and built more than one transitional, non reverb blackface combo amp that would soon acquire reverb and a new name, including relatively small numbers of blackface Princetons, 4×10 Concerts, 1×12 Vibrolux and 1×15 Pros. We acquired a 1×15 blackface Pro, and while it ultimately proved to be an extraordinary exceptional amp, we were also reminded of the potential pitfalls that exist when buying old amps sight-unseen, as well as the potential rewards.
We found the ’64 Pro listed on eBay and bout it from a dealer after requesting a detailed photo of the chassis and circuit. Proudly described as “the best amp in the store, “the rare ’64 blackface Pro is essentially a blackface Vibroverb without the “verb.” Do we have your attention yet? Three caps had been replaced, the original baffleboard had been professionally converted to plywood with the original grill cloth remaining intact, and an on/off pot had been installed for the tremolo intensity control that bypassed the tremolo circuit when rolled to “1” with a click, adding gain that would otherwise be missing in the Vibrato channel. We pulled the JJ power tubes and assorted Russian pre-amp tubes and replaced them with lightly used,“test new” RCAs from our stash, rebiased the amp and fired up the Pro….
Sounded like shit. We had been here before with a dead-mint ’64 Vibroverb bought years ago that had passed through a certain amp guru’s hands in Pflugerville, Texas.How could a vintage Fender sound so bad we wondered? Turned out that the value of the bright cap on the Vibrato channel had been changed on the Vibroverb, rendering a thin, scalding tone that would have given Ed Jahns fits, as it did us. Changing the bright cap back to spec immediately restored the Vibroverb to its rightful pace in history, but the Pro had other problems….
The baffleboard swap and added switch on the tremolo intensity control were clues that someone had also spent time troubleshooting the amp, probably trying to detect the cause of the Pro’s weak output, thin tone and curiously harsh edgy distortion. The amp just didn’t sound right. We pulled the original, reconed Jensen C15N dating to 1964 and subbed in an Eminence Legend, but the Pro still sounded choked-off, linear and wrong, so it was off to Jeff at Bakos Amp works on the Friday afternoon before Memorial Day weekend in a frog-chokin’ Georgia thunderstorm. When the going gets weird, the weird turn pro…..Now, this is the difference between someone who really knows his craft and a hack….Jeff plugged his bench guitar into the Pro, hit a couple of chords, issued a single grunt of displeasure and caustically observed, “Something is definitely fucked up.” With the chassis on the bench, Jeff scowled at the choppy sine wave the amp produced on his scope as he checked voltages with his multimeter. “I think the output transformer is going down slow—it measures 11 volts and it should be reading 16….” He clipped in a substitute OT from a stout old Fisher hi-fi, plugged in and hit a chord… “That’s closer to what it’s supposed to sound lie….” And sure enough, the missing lows and mids were present, the raspy treble tones were subdued, and for the moment, the Pro showed promise. We called Paul at Mercury Magnetics and ordered a black-face Pro Tone Clone replacement trans-former, shut it down and wished each other a good holiday. A week later the Mercury Magnetics replacement output transformer had arrived. Jeff wired it up, and then turned his attention o three silver mica caps that had replaced the original ceramic caps in the phase inverter and tone circuits. Jeff: “Somebody probably read an article about how these would bring the high end up, but I prefer the ceramics—always have. Besides the effect of the voltage from the old output transformer being low, these silver mica caps were contributing to that brittle tone we were hearing. They are the wrong value, and they changed the entire sound of the amp.” Jeff pulled all three silver mica caps and replaced them with the correct ceramic disc caps, and since an on/off switch had already been installed for the tremolo, we mounted the 25K mid range pot in the back panel hole for the extension speaker jack. With the Pro now thoroughly put right and the midrange pot added, Jeff hit a few chords, moved the EQ and volume settings around a bit in both channels, smiled and said, “That sounds really good. Yeah, that’s it.”
Back in our music room, the final step was to re-bias the Proat 34mA with an AmperexGZ34 rectifier and our last pair of vintage RCA black plate 6L6s, which in unused, new old stock condition have soared to $400/pair. The re-labeled Tube NOS Phillips JAN 6L6 WGBs we had tried sounded good—but the smooth warmth, exceptional musicality and deep harmonic content of the RCAs just can’t be beat, and it is a difference you can definitely hear. Smoke ’em if you got ’em….
We lit up the Pro with the ’63Fender Reverb unit and reverently smiled at the jaw-dropping tones pouring from the big Eminence Legend 15. Imagine the sound of a slightly kinder, warmer sounding 40 watt Super Reverb void of the sharp, penetrating treble presence that has sooften left our ears ringing for hours after a tumble with a blackface Super. The sound of the ’64 Pro is all Fender, with solid bass that doesn’t fall apart at high volume as the smaller blackface combos can,sweet, singing treble tones, and now… a mid range control that can gradually push the amp beyond its original, clear and liquid “scooped” mid range voice to an exceptionally thick, “mid-Atlantic” roar that unleashes heavy sustain and rich, musical distortion as only a Fender can. The Pro brilliantly complements every guitar we own, producing the essence of classic Stratocaster, Tele, P90 and humbucker tones with clarity, depth and lush fidelity that literally fills the room. Yes, there are different and equally worthy tones to be had from the British classics,but we have never heard a more beautiful sounding or versatile Fender amp—one that can range from crystalline, blackface clarity to the full burn of an early blonde Fender Bassman at much friendlier volume levels. The Pro can get plenty loud, but it’s a loud that doesn’t kill you in the style of a Showman, Twin or a Super Reverb.
The irony in this unexpected discovery has not escaped us,and perhaps the weight of it is now becoming clear to you, too. This project did not begin well, and we confess to experiencing some remorse when the Pro arrived with a few bad mods, weak and thin from the original output transformer going down, and generally just sounding very wrong. Our dismay was soon displaced by genuine enthusiasm; however, as we were reminded that this is indeed what the quest for tone is all about it. We’ve acquired absolutely bone stock amps in perfect working condition that just couldn’t tote the note, so why should we expect to buy a 44 year old amp that’s been played without it needing a little repair and restoration work? The end entirely justifies the means.
Having finally experienced the Pro’s singular, exceptional sound, we wondered what had caused it to be relegated to such obscurity among all the Fender black face amps. Like the Vibrasonic and Vibroverb, perhaps it was doomed by the presence of the single 15” speaker. Like the Pro, the blackface Vibroverb 1×15 was produced for less than a year, and with the introduction of the 2x12Pro Reverb in 1965, Fender would no longer produce a 1×15 combo until the introduction of the silver face Vibrosonic in 1972. Yet, the earlier 1×16 Pros had been Fender’s flagship amps during much of the tweed era, and in 1960 the 1×15 brown Pro ranked second only to the1x16 Vibrasonic in the Fender catalog. Somewhere along the way, the 1×15 combo had clearly fallen out of favor with Fender, guitarists, or both, and given the short life span of the Vibroverb, even the addition of reverb couldn’t save it.
Twenty years later, Stevie Ray Vaughan elevated the Vibroverb to hall of fame status, otherwise, the 1×15 com-bos seem to have been perceived as “uncool” for anything bug jazz and blues, as if wearing a jacket and tie were required to play them. The Pro is a great blues amp, but it’s also a great rocker, and equally well-suited for jazz, pop and country. With far more clean head room and power than any tweed Pro and much stronger distortion, sustain and dynamic character than a brown Pro, the blackface Pro reflects Fender’s ongoing pursuit of more powerful, cleaner sounding amps, but unlike the black face Bandmaster, Tremolux and Showman, and Pro can really rock the house cranked. We suspect it’s a single 15 and missing ’verb that throws people off today, yet in’64 Pro shares its DNA with the ’64 Bassman and all the highly prized blackface combo amps, including the Deluxe Reverb, Vibrolux Reverb, Super Reverb and the heavily prized and hyped Vibroverb.
The contrast between the Vibroverb’s Holy Grail status versus the lowly blackface Pro simply underscores how easily we can be blown off course by what isn’t hyped on the Internet or in print, and by the powerful logic that suggests if anything 44 years old is truly noteworthy, “we” would already know about it. Well, apparently “they” don’t. But you do. Blackface Pros can be found for $1 500–$2,000,with originality and overall condition driving prices accordingly. Like the Deluxe, we wouldn’t buy one that has had all the blue molded capacitors or Allen-Bradley resistors replaced, but the transformers available today from Mercury will sound every bit as good or better than the originals, and as we have said so many times in the past,the Eminence Legend 15 is spectacular. Add some good,current production or NOS tubes and you will have been delivered to a place well beyond the common man’s limp and shriveled imagination. Now Quest forth….

By now, you’re probably familiar with the Epiphone Valve Jr., the tiny, low-wattage, low-budget amplifier that hit store shelves a few years back and single-handedly energized a cadre of amp modders, so we won’t go into a cursory rehashing of its history. But it should be said that the amp’s simplicity — demonstrated by the lone chicken-headed volume knob that flies in the face of modern complexities — has since combined with a growing, gear-obsessed online culture to create a technological phenomenon. Like muscle cars in the sixties and Superstrats in the eighties, people are again obsessed with hot-rodding, and the Valve Jr. can be viewed as a major driver of that shift.
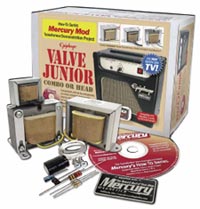 With modification tips spreading like an unrestrained virus through message boards and forums, facilitated by the tone-seeking faithful, it was only a matter of time before established companies caught wind of what was going on. One of those was Mercury Magnetics, an outfit best known for conceiving badass power and output transformers for a variety of modern and vintage amps. They wisely realized early on that the amp’s blank slate vibe would provide the perfect showcase for their talents. Mercury’sSergio Hamernik and L.A.-based amp wizard Alan Cyr went to work designing a custom set of transformers and choke for the diminutive Valve Jr. — a project that, ironically, was originally intended simply as a transformer demonstration kit.
Transformers & You
Having been intrigued with the amp’s possibilities since its conception, we’ve tested out a variety of modifications, from the homegrown (see Dirk Wacker’s web exclusive columns at www.premierguitar.com) to commercial projects, such as the popular BitMo modification kits (reviewed in October 2007). For the most part, they’ve all added some usable capabilities while maintaining the original vibe of the amp — mainly, stripped down rock tones with passable tube warmth. But while most of these mod projects have expanded the tonality and scope of the Valve Jr., none have completely changed it. Mercury Magnetics’ Epiphone Valve Jr. Kit is likely the only one on the market that can make that claim.
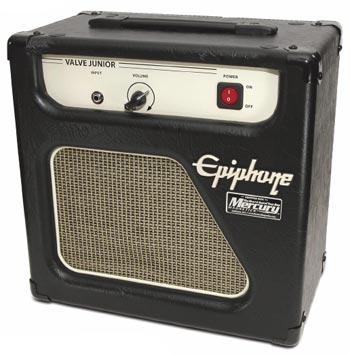 The basic gist of the modification kit involves the installation of new power and output transformers, the addition of a choke — a rarity in budget amplifiers these days — and a basic reworking of the amp’s circuitry to eliminate some of the noise and hum that plagued early models. And while opinions in our office were divided over the amp’s new sound — the amplifier’s single-ended tonality became more pronounced, and highlighted some of the weaker links in the signal chain, including the stock speaker — there was absolutely no denying that the amp had an expanded tonal range that was unheard of in this price range. With more consistent power flowing into and out of our Valve Jr., there was more of everything. The lows became instantly tighter, the highs shimmered and the entire spectrum of sound now had a beautiful fullness. As that single volume knob rotated clockwise, the Valve Jr. bristled and growled like a Rottweiler about to lunge. This thing had a newfound set of marbles and I, for one, was not complaining.
We should note that our Epiphone’s sudden meatiness did not come easily. The kit’s instructions, included on a CD-ROM, seemed conceived not by English majors but by engineers, consisting of a lengthy PDF file filled with close-up photographs instructing users to copy what they see. To the company’s credit, the photos are well done, providing enough detail in each shot, but more text would have been helpful for those of us who aren’t the best at spatial learning. In fairness, we received an early version of the manual, and Mercury Magnetics has said that a much more complete, easy-to-navigate version is now available.
“The basic gist of the modification kit involves the installation of new power and output transformers, the addition of a choke — a rarity in budget amplifiers these days — and a basic reworking of the amp’s circuitry….”
While the clipping and wiring of resistors and leads may be feasible for most readers, this project also requires some advanced know-how like cutting traces and drilling holes in the PCB. New entrants to the amp mod game will quickly find themselves in way over their heads, and might want to consider some of the other mod options available if they are set on doing it themselves. In the spirit of complete disclosure, we got through the first few steps before we were forced to hand the project over to a local amp tech. It cost a few more bucks in the end, but the results were absolutely worth it, giving us an amp that we could record with, or even take along to small gigs. And who saw that coming?
The Final Mojo
Put into a strict cost/benefit matrix, products like the BitMo might come out as the better deal for the weekend modder looking to push the Valve Jr.’s envelope. The work and price involved with the Mercury Magnetics kit might seem like a large compromise for some groups — you could take the money you’d spend here and put it towards a higher-end amp, like Orange’s Tiny Terror, without spending days etching lines in a PCB. But those people are not who this kit is aimed at — this project is meant for those amp tweakers that dream of turning a drab, utilitarian piece of equipment into a snarling, steroid-infused monster, no matter the cost. And for these guys, this kit will be both intrinsically rewarding and positively orgasmic.
Source: https://mercurymagnetics.com/pages/news/PremierGuitar/PremierG-11.htm

Quietly, outside of Los Angeles, Steve Trovato has been leaving blazing guitar everywhere he goes.
Currently, he is a full time instructor in the Studio Jazz Department at the University of Southern California. In addition, Steve has found the time to author over 20 instructional books for Warner Brothers and Hal Leonard, produce over 50 instructional videos for the likes of Yngwie Malmsteen and Paul Gilbert, and has even starred in five of them. His students have achieved major success and include Scott Henderson, Frank Gambale, Paul Gilbert and Norman Brown. He has performed with Chet Atkins, Albert Lee, Robben Ford, Jeff Berlin, Jerry Donahue and Scott Henderson, and contributes to five international music publications, including Guitar Player, Guitar One, Axe, Guitar Club, Guitar World and Chittar, as well as recording for too many studio and motion picture projects to list. We caught up with Steve as he completed his new release, Country Jazzmaster.
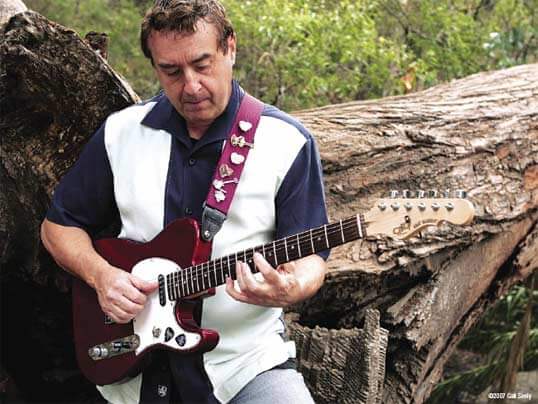
One of the things I have always wondered about is who or what influenced you to start playing guitar?
Well, I think you’ll hear this from a lot of guys; it was the Beatles. I think I was six years old, and I had been playing the piano. I did my piano recital and played “The Blue Danube Waltz.” Then I saw the Beatles on Ed Sullivan and I thought, “Wow, girls never screamed for me playing piano.” So that was it and I started playing the guitar. That was pretty much it, and I have never looked back.
Did you come across a single moment that it finally hit you? This is it, this is what I want to do the rest of my life?
I’ve never been asked that before; that’s a really good question. I would say that there were three pivotal moments: one of them was when I saw the Beatles, the second was when I heard Chet Atkins for the first time, and the third was when I was up on stage and I got a chance to play with Albert Lee — that was when I really knew I wanted to do guitar. For some reason those guys hit me hard — they played melodies — and I always loved the way I could track it even though it was guitar playing. It was really very sophisticated. When I heard Chet Atkins play, I could hear the melody. Even with all the notes that Albert Lee plays, I can still keep track of it– that’s what attracted me. I think since I’ve been playing, if I have anything, it’s the ability to play a melody.
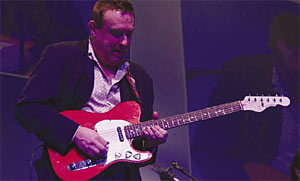 You’re originally from New Jersey. How did you end up on the West coast attending GIT (now the Musicians Institute)?
Like every guitar player on the East Coast, we were always hungry for information about the guitar. I used to get this magazine and I saw an ad for this place called GIT in California. I saw pictures of Larry Carlton, Tommy Tedesco and other people that I didn’t know, like Don Mock and Joe Diorio, and they were starting this school. They were sort of advertising it being for studio musicians, and that was what I wanted to be.
Now that you already have one CD under your belt, you’ve gone into the studio a second time with some outside input. How are you achieving your tones with the studio?
When I did my first album, I just took my rig into the studio with the thought that if it sounds good live, it will sound good in the studio. I’ve found that not to be true. I also realized that amps that are made specifically for recording don’t necessarily sound all that good in the studio. It really depends on the studio, the mics, and everything else. I brought every amp that I had down there — I even borrowed some amps. I ended up with five or six different amps and I had to just go through all of them to find out which one sounded the best in that studio — with that particular set up of room and microphones. I wound up actually using a boutique amp from a company in Virginia called Talos. I love those amps. It’s a 60-watt, one-twelve, and it just has two knobs on it, drive and gain.
“Well, I think you’ll hear this from a lot of guys; it was the Beatles. I think I was six years old, and I had been playing the piano. I did my piano recital and played ‘The Blue Danube Waltz.’ Then I saw the Beatles on Ed Sullivan and I thought, Wow, girls never screamed for me playing piano. So that was it and I started playing the guitar. That was pretty much it, and I have never looked back.”
What about guitars? Did you find that’s the same scenario to be true?
It’s something I suspected, but I never really had the chance to put it to the test. I usually use my G&L Legacy live, with the Kahler on it because it sounds great. You’re playing loud enough where if there’s a bass, drums and everything cranking you lose the nuances and the subtlety. But in the studio you retain those nuances and subtleties because everything is under a microscope. I found that using different guitars expresses that better.
If I want to play a sensitive, sort of Chet Atkins jazzy piece, the Legacy wouldn’t work because it sounds too thin, but with a loud phrase it will sound fine. For a quiet passage, I decided to use a Gibson — a Howard Roberts with two old humbuckers that I had. Of course, for the Straty-sounding things I used my red Legacy with a Kahler on it, which I absolutely love. For the rest of the stuff I used one of two Teles: a Fender solid body Telecaster and a G&L semi-hollow. None of them are stock. Seymour Duncan custom built the pickups for both of them.
What amps do you prefer for live performances?
I play rock, I use my Dumble. That, of course, is Alexander Dumble. It says “Built to win” and it really does, it’s just really something. I put a pedal in front of it to make sure it’s got enough overdrive. In the country bands I use a ’65 Pro Reverb, which Dumble rebuilt for me.
What do you use on the jazz side?
I use my Talos.
 Throughout your time as a guitar player, you’ve been labeled as the chameleon of guitar. Do have a huge arsenal of guitars at your disposal that you have hiding in the back room to take out whenever you need to?
For the live work I pretty much grab whatever is nearest to the front door on the way out. I was never really one to take ten guitars to a session because I figured that one guitar would sound just as good as 10 guitars, but when you really start to do this seriously, there are subtle differences between all guitars that may or may not sound better for the tracks. You really have to have an arsenal of quite a few to do the job right.
What would be an ideal arsenal?
I would have to say you have to have a solid body, Strat-type of guitar with single coil pickups, a single coil Tele-type, a Les Paul-type solid body with humbuckers, a thin semi-hollow body sound, like a 345, and a jazz box, then, of course, steel string acoustic and a nylon string.
You mentioned putting a pedal on the floor in front of one of the amps.
Live I use a Boss GT-6. I use it for time delay effects such as reverbs, delays and chorusing. It sounds great for that and it’s also great on the floor. For distortion I’ve been using the AC Booster and the RC Booster by Xotic Pedals.
The Xotic pedals are fairly new. Can you tell us some more?
Oh, I love them. Those are the kind of the boutique pedals that all the guys in town are using. Scott Henderson told me about them. Studio guys like Michael Thompson are using them. Basically, the RC Booster is a pre-amp boost that keeps it clear, but gives it a little oomph. The AC Booster is an overdrive — basically a really high-end Tube Screamer with a bass control on it. Everybody loves Tube Screamers, but it takes the bass away from it; this is a Tube Screamer that sounds a lot more transparent and smoother than normal. You can also roll the bass back in because it has bass and treble controls.
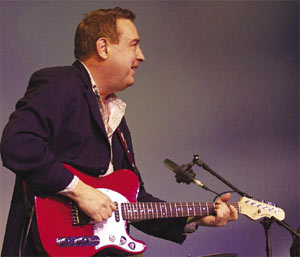 You mentioned the Kahler Tremolo on one of your G&L’s. What do you like about it?
The thing I love about the Kahler is its flush and mounted solidly on the guitar body, versus another one. I won’t mention any names, but the initials are Floyd Rose. It is not really mounted on the body of the guitar as solidly and or as flush as a Kahler. With a Kahler, the tone sounds pretty darned good. I really like that about the Kahler. Since you have that big plate to rest against the body, you get more natural wood resonance, it doesn’t sound thin and small. The other thing that I like is the adjustable string spacing. I don’t think other bridges can do that.
On the first CD, About Time, you cover a whole spectrum of guitar playing. You do a dedication to Danny Gatton, you’re hitting a little Django, you’ve got “Somewhere Over the Rainbow” from Harold Arlen, and then you even do Billy Joel’s “Root Beer Rag.” What can we expect hear on the new CD?
When I spoke with Steve Vai, he was saying the last CD was really good but I needed a little bit better recording quality. He said the problem with the first CD, as far as marketing, is that I don’t know where to market it stylistically; it’s all over the map. I came up with this concept in my mind called “Country Jazzmaster,” with Jazzmaster being one word, like the guitar. I kept that thread in my mind as I was recording this album, and all of the songs leaned into that concept. Everything that you’re going to hear is country-jazz. Western swing, country jazz — that sort of a thing.
There’s a thread of continuity running through the whole album that you will hear. I recorded everything from the old Jerry Reed tune, “Guitar Man,” to “Back Home Again in Indiana,” “That She Could Ever Be,” “Panhandle Rag” and my ultimate version of “Ghost Riders in the Sky.”
I still remember this vivdly: a NAMM show where you, Steve Vai and I were standing around talking, and Steve hailed you as, “One of the greatest Tele players of all time.” Will we hear evidence of this on the new CD?
That was very nice of him. But, yeah, that’s what I’m hoping for, and I think that it’s really extremely well played, if I can say so myself. We all worked really hard on it.
Trovato Gearbox: Here’s what Steve is plugging in, when it’s time to shine.
Country Gigs
Guitars
Amps
Effects
Rock/Blues Gigs
Guitars
Amps
Effects
Steve Trovato: It’s About Time and the new, Country Jazzmaster, are available at: cdbaby.com / myspace.com/stevetrovatomusic
Source: https://mercurymagnetics.com/pages/news/PremierGuitar/PremierG-07.htm
To a certain degree, the Vintage Vacuum Tube Amplifiers’ Rick Derringer Hyperdrive model was born of intimidation. When VVT proprietors Tony Albany and Jim Hill began discussing a signature amp head with a guitarist Rick Derringer, whose style can shift from hard rock to blues to jazz, they figured they’d have their hands full. Derringer was already the proud owner of two VVT 6V6-based amps, but he needed something with more power for live gigs, two channels, and most important, something that could produce high gain without buzz. After testing a prototype four-6V6-powered head designed for him by Albany, Derringer was satiated, and suggested only a few cosmetic changes and the addition of a boost circuit. The VVT Rick Derringer Hyperdrive was born!
The amp uses three JJ/Tesla 12AX7tubes in the preamp (phase inverter/clean channel/OD channel)and four JJ/Tesla 6V6 power tubes producing 45 watts. It has two footswitchable channels (with footswitchable pre-amp mid boost in both channels) and the high-quality components and construction we’ve seen in other VVTamps. Including point-to-point wiring, Mercury Magnetics transformers carbon composition resistors, and an aluminum chassis.
The Hyperdrive’s clean, eye-catching aesthetics include an ivory-Tolex-covered cabinet that measures20”x9”x8”, brushed-copper control panels, copper-finished vent panels,solid cherry-wood trim and a stitched leather handle (options include black Tolex and figured maple wood trim). The front-panel includes controls for Gain and Level for the Overdrive channel, a Volume control for the Clean channel, shared Bass, Middle, Treble,and Presence controls for both channels, as well as a Master Volume control, mini-toggle switches for channel-switching and boost, and Power and Standby switches. The back panel hosts a power-cord plug, primary fuse holder, XLR footswitch jack, and four speaker-out jacks.
With the OD channel Gain and Level controls set at 8 and the Master Volume at straight-up 12 o’clock, the Hyperdrive’s overdrive channel offers a thick, harmonically rich overdrive with plenty of classic rock crunch as well as a plentiful amount of gain. Even when the Gain is dimed and Level set to 10,the amp’s high-end response never becomes harsh or buzzy and the low-end stays firm, maintaining its clarity while sustaining single notes and rolling into controllable, singing feed-back with the mid-boost engaged. The well-voiced Tone controls need be used only sparingly—between 2 o’clock and10 o’clock—to adjust for the output of humbuckers or single-coils.
The clean channel produces a usable, sparkling clean sound,and the amp’s ability to switch between a shimmering clean and blistering overdrive is handy, but given the Hyperdrive’s excellent front-end dynamic response, the majority of the players would really need only to roll off the Volume control on their guitars. The integrated/footswitchable Boost circuit essentially eliminates the need for a drive/distortion pedal, and adds just the right amount of gain and midrange to make single notes pop. A pleasant surprise is how loud and in-your-face the Hyperdrive’s gain can be without causing significant ear fatigue; its abundant natural overtones make it much less trashy-sounding than typical high-gain amps.
The Rick Derringer Hyperdrive,with its well-conceived design, harmonically rich tone, and cool vintage aesthetic, is an outstanding addition to VVT’s lineup.—Phil Fe
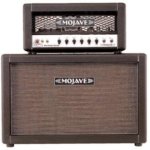
Anyone familiar with Mojave Ampworks founder Victor Mason’s other venture — a California dealership of vintage British amplifiers known as the Plexi Palace — will be aware of this amp maker’s fanaticism for classic Marshall-style tones. The Scorpion outwardly appears to take a serious stab at satiating that craving in a modern package, but don’t be too quick to label this 50-watter as simply a Marshall plexi update. While the Scorpion certainly aims squarely at the big Brit-rock tones of the late 1960s and early ’70s, it’s nowhere near to being a clone, and the design has enough clever twists to make it an entirely original creation. Although nominally a 50-watter, the Scorpion aims to provide big-box 100-watt sound and feel in a small package.
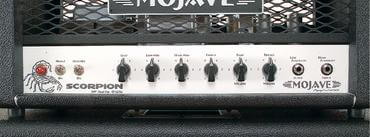 The core of the Scorpion’s sonic DNA revolves around that big, crunchy, dynamic EL34 sound with the characteristically thumping lows and singing highs. But this model redraws the roadmap that takes you there, and adds plenty of new ingredients in the name of versatility. Mojave keeps the adjustable fixed-bias output stage with a dash of negative feedback, cathode-follower tone stack, and solid-state rectification that partly define the post-1967 Marshall 50-watters, but re-labels the tone stack as Bass, Low Mid, High Mid, and Treble, with High Mid taking the job of a Presence control. It also employs a nifty trick in the preamp stage that has become something of a Mojave standard: internally ganging together two different first gain stages comprised of an independent, parallel-wired twin-triode 12AX7 for each—one voiced to emphasize bass, the other to emphasize treble—and providing a Volume control for each so you can blend them together. This is not a master volume amp, but it carries a Power Dampening control on the back panel that governs a unique proprietary circuit that reins in volume levels at the output stage, allowing you to take the Scorpion from 50 watts down to 3 watts, and anywhere in between. Other features include High and Low Sensitivity inputs, and a back panel 1/4″ Line Out jack with a Level control and ground lift alongside dual 8- and single 16-ž outputs.
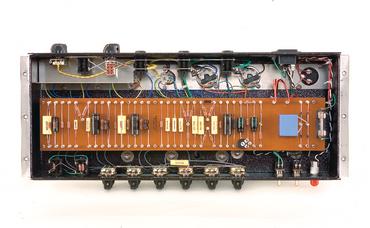 As alluring as it might be from the outside, much of the Scorpion’s appeal reveals itself when you pull the chassis from the cab. This amp is hand built to some of the most exacting standards found in the market today.
Powder-coated black metal grilles protect components front and back, and the brand is boldly represented by an acid-etched aluminum nameplate. The rugged turret board follows a linear layout from input to output stage, and the flying-lead connections to transformers, potentiometers, switches, and tube sockets (all chassis mounted) are made with Teflon-insulated, silver-plated copper wire. While many amp makers swear by old-style carbon comp resistors for “warmth” and “vintage authenticity,” Mojave uses high-grade metal film resistors because they can be obtained in more precise values, and generally result in a lower noise floor. These share the board with Sprague filter capacitors and custom-made, one-percent tolerance film and foil polypropylene signal capacitors. Transformers are all custom made for Mojave by the highly regarded Mercury Magnetics company, and the whole shebang is bolted together in a reinforced aluminum chassis. Finally, the output transformer presents a novel twist on the classic 50-watter formula, as Mojave has spec’d it for “triple-capacity,” which can handle as much as three times the Scorpion’s 50-watt output. This approach can achieve the response of a 100-watt stack in a smaller amp, resulting in firmer lows and remarkable headroom.
Our review sample came with the 2×12 semi-open-back cab loaded with Celestion G12H-30s, but a closed-back 4×12 is also available for $985 retail. The cabinet is a robust, yet portable unit with a single, recessed handle positioned top center.
I tested the Scorpion with a range of guitars, including a Fender Stratocaster and a Telecaster, a Gibson SG Special, and a PRS Singlecut Trem. The overriding impression this amp left with me was one of power, body, and massive volume — even with single-coil pickups. This is one massive sounding amplifier, and Mojave has certainly achieved the goal of attaining 100-watt-style performance in a 50-watt package. It delivers a wide, blooming soundstage with tight, but not overly booming lows, a thumping midrange, and glittery, yet nicely recessed highs. In short, you get broad, punchy, in-your-face dynamics across a frequency spectrum that’s very flattering to rock guitar.
With the Strat and Tele, the Scorpion exhibited stunning clarity and superior headroom up to about a ten o’clock position of the Volume controls, at which point it was already too loud for home studios, basement rehearsals, and many club gigs. Humbuckers and P90s brought out the raunch a little sooner. Roll it up from there, and you segue through toothsome crunch to absolutely screaming lead tones — both of which are easily cleaned up at the guitar’s Volume control. This is the fat, tactile, airy, classic sound that arena-rock dreams are made of, and when you get the volume up anywhere from one to five o’clock, it’s a rare and spine-chilling experience to just stand in front of this rig and wail. Tweak the EQ to taste, put a booster or distortion pedal in front of it as desired (all of which this amp handles very well), and there’s very little in the broad fields of rock, blues-rock and metal that it can’t do.
That said, the trend these days is toward downsizing, and plenty of players are looking for amps that sound like cranked 50-watters in 15-watt packages, not 50-watters that sound like a 100-watters. The Scorpion’s Power Dampening control is a cool feature that brings levels down as much as you’d like, but it does color the tone a little bit, and you also need to dial down the Volume controls to retain similar headroom at lower volumes. In short, this powerful monster is most cut out for serious rockers who expect to put in most of their playing hours on large stages.
The Scorpion also sounded fantastic through the 2×12 cabinet, which seemed to take everything I could throw at it without breaking a sweat. But if you plan to play this amp toward max in big venues, you might consider pairing it with Mojave’s 4×12 cab. I ran the Scorpion through a custom 4×12 with G12H-30s in my rehearsal space, and it proved an equally thrilling endeavor, with that huge kick in the gut that lets you know you’re pushing a lot of air. However, it wasn’t demonstrably louder than Mojave‘s very efficient, compact open-back 2×12, so the choice is yours. But whatever you blast it through, this is an extremely accomplished-sounding, as well as a stunning piece of craftsmanship.
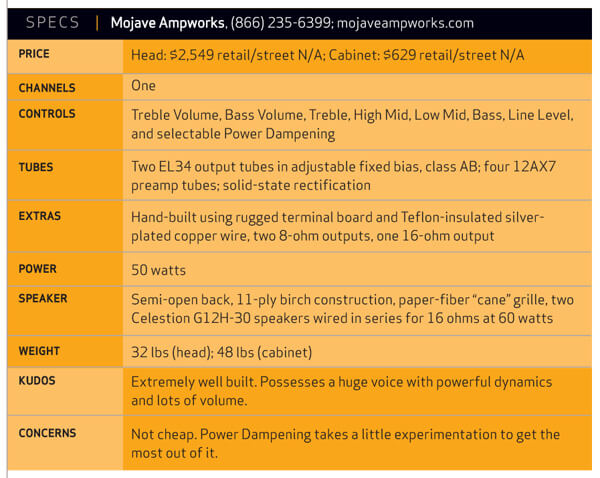
![]()
Source: https://mercurymagnetics.com/pages/news/GuitarPlayer/GPAug07.htm
It only stands to reason that a guy whose day gig involves running his own successful and renowned pickup company knows killer tone when he hears it. So when the Jones hit to seek out a custom made map that combined the best of his favorite Blackface Vibroverb and Vibrolux, Lindy Franlin called upon Tony Albany and the guys at Vintage Vacuum Tube Amps to see if they might be up to the task. And that they were.
The holy grail would be to produce a 6L6 based 30 watt tone machine capable of a beautiful clean sound as well as a smooth, crunchy overdrive and be put captive into the smallest and lightest workable cabinet.
Beginning with a 2×10 Mojotone Tweed Super amp kit for the basic prototype, VVT and Fralin tweaked their hearts out for six months until they got it right.
Residing in a rather compact 20×20 cabinet, the VVT Lindy Fralin Model strikes a vintage pose in its white Tolex with oxblood-like grill cloth.
Beginning with a 2×10 Mojo tone Tweed Super amp kit for the basic prototype, VVT and Fralin tweaked their hearts out for six months until they got it right. Residing in a rather compact 20×20 cabinet, the VVT Lindy Fralin Model strikes a vintage pose in its white Tolex with oxblood-like grill cloth.
The VVT Lindy Fralin Model is a cathode biased straight forward, no bells and whistles affair. The “Plexi”top panel is simple and clean with its Input, bright switch, volume, treble and bass controls followed by the reverb control, standby and on/off switch. Chicken-headknobs let you know where you’re at. Two TAD matched 6L6 tubes supply the power with two 12AX7s for the preamp. A pair of 12AT7s are for the reverb driver and phase inverter. Rectifyin’ is courtesy of an Electro Harmonix 5U4GE. The cool thing is that the Lindy Fralin Model can also accept a deuce of 6V6s in place of the big bottles in the power section for a whole different vibe. Because of the higher plate voltages, VVT Amps stresses that only modern tubes (like the supplied JJ Electronics) should be used. You don’t want to blow the thing up, do ya?
If you think a 15 inch speaker might get as loose and floppy as your Auntie Mabel’s arse, you might be in fora pleasant surprise. With an obviously wider bass frequency range than a 12 inch, the Weber’sbottom remains tight and punchy with a nice lower mid section as well.Single coil and humbucker equipped instruments alike snuggled up quite admirably to the Weber Classic.
First impressions? The Lindy Fralin Model with my Strat spoke with gorgeous single coil chime and harmon-ic complexity, unabashedly magnified with a full trans-parent tone and organic beefy sustain. Very articulate and touch sensitive, the amp displays a more than impressive amount of projection. Both Lindy and Tony attribute this to the cross shaped members (called an integral diffuser) placed across the speaker opening in the baffle board which help disperse the sound and tame some of the“beamy” high end.
All tone controls are unobtrusive and very musical. While the treble is subtle up to around 6 on the dial, the bass is more evident from the get go but remains trans-parent throughout its range with no muddiness. The bright switch surrounds the notes and chards alike with an airiness without compromising the inherent full tone of the amp.
In addition to the Strat, the Lindy Fralin Model warmed up nicely to my other 6 string friends. The Carvin California Carved Top sounded sweet and detailed while my Ibanez AS200spoke with a very articulate, full and warm bodied tone.
Arch tops? This little box makes a nice jazz amp as well with clear, well defined chord structures and beefy single notes. With the fat axes pushing the volume past 3-1/2 caused a little mush in the low end which could probably be remedied by changing the first preamp tube to something with a bit less gain.
The reverb fills out the sound with a pleasant mix behind the dry signal. Throughout its range, the effect is very complimentary and doesn’t send your playing out to see even when dimed. For the dirty stuff, cranking the chicken head to the red(!) produced a bubbly, organic and throaty overdrive with real honest to goodness preamp/amp interaction. Very sweet with gobs of sustain. Doing a quick swap to the matched pair of 6V6s morphed the amp into a kind of Blackface Deluxe vibe with breakup noticeable at lower levels. The bottom felt a little less tight with a bit more perceived glassiness in the top end.
Whereas the 6L6 bottles speak “tux and bow tie” the6V6s are more “t-shirt and jeans”—not quite as complex but with a grittier and nice fat tone.
Also VVT Amps’ attention to detail gets a big thumbs up for the extra long line cord and groovy little spare fuse holder inside the back of the amp.
The collaboration between VVT Amps and Lindy Fralin has turned out to be a winning combination. The VVT Lindy Fralin Model’s beautiful, three-dimensional tones are equaled only by its straight-forward and no-nonsense design.

For nearly 20 years, Dan Boul and Peter Stroud have been close friends. In a bond secured by music, particularly guitars and amps, the two have gone through the phases of life in very similar fashion, working as professional guitarists and being hardcore gearheads with a penchant for tinkering.
A couple years ago, they decided to get serious. Caught up in a wave of boutique amp builders who share information via the internet, they were inspired after hearing some of the amps built by friends.
After 18 months of experimentation, they’d devised their “dream” amp (which soon after became their first production model, the London) and though they never intended to build amps to sell, pretty much every player who heard them said, “I want one!” Next thing you know, Boul and Stroud were known collectively as 65Amps!
Stroud (featured in VG, December ’04) still plays guitar professionally, holding down the lead spot in singer/songwriter Sheryl Crow’s band, touring the world, trusty London model by his side for thousands of people to see each night. Boul, meanwhile, has switched gears to run a shop that now employs five very experienced amp builders.
After a very long wait, we were recently able to take a London model on an oh-so-brief test run before the amp had to be hustled off to New York City in time to make an appearance with Switchfoot on “Late Night With Conan O’Brien.”
Much about the London’s circuit design reflects its inspiration — the mid-’60s 18-watt Marshall Model 1958. Its four inputs (Lo and High for Normal and Tremolo channels) share controls for Volume and Tone. But each channel has a distinct voice, thanks primarily to its preamp tube; Normal employs an EF86, while Tremolo uses a 12AX7. If you’ve played a tube amp, you’re likely familiar with the bright tone and big low-end response of the 12AX7. The EF86, meanwhile, offers a smoother overall output.
All wiring and solder dress in the London is top-shelf, and it’s obvious Boul and Stroud did their legwork when choosing components; transformers are custom-wound by Mercury Magnetics, the Baltic birch plywood cabinet work is flawless, and the vinyl covering and art deco/retro vent grilles make for a very appealing visual presentation.
Setting the London apart from its Marshall inspiration is the Vox-inspired six-way Color switch, to which Boul and Stroud added a tone-sweep. The effect focuses low and low-mid frequency response.
The Normal channel sports a Boost function that can also be controlled with the footswitch. The Tremolo channel, has controls for Speed and Intensity of the effect, which is also footswitchable. The channels share a Cut control for adjusting “brilliance.” The amp’s rear panel hosts the footswitch jack and parallel speaker jacks with an impedance selector, fuse holders, and the power cord.
The London’s standard cab uses one 12″ Celestion Blue Alnico and one 12″ Celestion G12H30 speaker, with Tone Tubby speakers as an option.
We tested the London using our favorite ’70s Ibanez Artist with Wolftone Greywolf humbuckers and a ’90s Hamer Daytona with Rio Grande vintage Tallboy single-coils in the neck and middle positions, and a Rio Muddy single-coil in the bridge.
We plugged the Daytona into the Lo input of the Normal channel, set to clean, with Color switch on 1, Cut at 0, and Tone on 10. Immediately, we were greeted with a huge, fat clean tone with solid bottom punch and very ample low-mids. High-end response was sparkley, and we were also immediately impressed with the amp’s touch response.
We shuffled the Color switch through several settings and were easily able to balance the tone, across the board. Pushing the volume up, we found a nice, smooth overdrive, and switching on the Boost oh-so-appropriately bumped the volume and gain — this is a great feature for soloing. Plugging into the high input gave our sound more punch, volume, and gain that was always supremely smooth and tight.
The Color switch lets the user dial in thickness, which is an especially handy feature if your stage routine requires switching guitars/pickup configurations. Ramping up the volume, we got more gain, but the tone always remained tight. Then we got serious, pushing the amp to full volume. And we weren’t all that surprised to find that the amp remained tight and extremely focused, always with incredible tone and response. The Cut control lent subtle contour to the amp’s presence. The Overdrive was smooth, with nice sustain and great note separation. The London’s tone was great in all pickup positions.
Switching to the Tremolo channel’s Low input, we got nice fullness with less low-midrange emphasis. Rolling up the volume revealed nice blues gain with less sparkle. Using the Hi input, we got the requisite jump in volume, gain, and sparkle. This channel produces a more traditional sound, with more clarity than the Normal channel. And it produces less gain. We pushed the volume and got clear, glassy, well-balanced and punchy tone.
Dimed, the London again didn’t strain in any part of the tonal spectrum. Instead, it offered incredible responsiveness and note separation. Low-mids through the Tremolo channel aren’t as plump, but again, sound more pure.
With the Ibanez through the Normal channel’s Lo input, we again got a very clean, punchy tone, with less sparkle. And as with the single-coils, the Color switch let us “plump up” the tone to our heart’s content. The Hi input responded like it should while never surrendering tight, well-focused gain no matter how hard we pushed the Volume knob, all the way to maximum. The Tremolo channel responded similarly, with clear, focused tone with less gain, but incredible purity.
For the lagging naysayers who squeal, “Eighteen watts ain’t enough!” Rest assured, through its 16-ohm cab, the London is very loud. And the Tremolo was smooth and even, with lots of depth.
The London offers incredible sounds with virtually any guitar, delivering fantastic gain, clarity, punch, response, smoothness, tightness. And most importantly, the London does it with a tone that it can proudly claim as entirely its own. It simply sounds amazing.
Source: https://mercurymagnetics.com/pages/news/VGmag/VGDec05-65amps.htm

It doesn’t take too much digging to find a laundry list of boutique amp builders using Mercury Magnetics transformers in their products. From Mojave Ampworks to Joe Morgan Amps to kits from MetroAmp, builders have found that Mercury knows their iron. While transformers rarely receive the same level of attention of NOS tubes, speakers, or even guitar cables, they are a major contributor to tone. Think about it—the power and output transformers are the start and end of the line with any amp.
Based in Chatsworth, California, Mercury Magnetics has been building transformers for close to 60 years. I recently had a chance to talk with Mercury’s Sergio Hamernik to dig deeper into their roots, find out what one can expect from upgrading their iron, and what sets Mercury apart. Prior to our conversation, I had the opportunity to witness the remarkable transformation of an Epiphone Valve Junior modified from stock to hot-rodded, using one of their transformer upgrade kits. Not only was it a noticeable upgrade, it was a revelation in just how important the role of quality iron in an amp is. But because it is the single most expensive part of any amp, it’s no wonder we see so many modern amp manufacturers skimp on the iron to keep costs down. Let’s see what the passionate, and often hilarious, Sergio has to say about his part of the business.
I’ve been seeing Mercury transformers in amps for at least a decade. When did you get into the amp scene?
This happens to be one of our most often asked questions. Even though Mercury Magnetics’ roots go all the way back to the early 1950s, there are guitar players who are only now discovering us. But if an industry insider like you has been aware of us for at least a decade, then I suppose it means I don’t need to lay off any of our sales and marketing staff.
I would attribute most of our lingering anonymity to the old days. Back then, most of our clients from the audio community preferred to keep us as a trade secret from their competitors and the press. The typical transformer-savvy amp builder also didn’t usually want to share the credit with us, or reveal what their “unique” technical advantage was regarding audio and tone. Consequently, we were asked to maintain a low profile and generic look for our transformers for quite some time. On occasion, a customer in the know will spot a small “MM” mark on a transformer from an older piece of gear, and ask if it’s a Mercury. Odds are that it is.
It was the guitar amp crowd that pushed us to go above ground. Now Mercury gives any electric guitar player or amp restorer a taste of what the pros were using, talking about in their studios, and amongst themselves. Many players have told us their amps increased in value when upgraded with Mercury transformers, and this became evident when insurance appraisers began to contact us for verification. However, it wasn’t until the mid-1980s when we began to market our services and various brands to guitar players.
For me personally, I got into the amp scene around the mid- to late 1970s. I just found it to be a nice way to relax from the strain of oversleeping.
Your website shows a large number of amp manufacturers you have replacement/upgraded transformers for. What are your best sellers and why?
There are so many different camps loyal to their particular amp brand, so it would be difficult to single out the best sellers. The best sellers are transitory and change from week to week because guitar amp players are a fickle bunch. That’s why we’ve built the world’s largest catalog of guitar amp transformers where nobody is left out.
But trends tend to follow their own dynamics. And the current worldwide trend seems toward smaller wattage amps—regardless of brand. Conversely, the 100-watt heads are not selling like they used to. Players are gigging with no more than 15 watts and a few pedals. Regardless of playing style, they’re doing just fine abiding by sound level restrictions and kicking ass with the tone we feel Mercury upgraded amps deliver.
These players really get the fact that an amp lacking in tone can’t be fixed with higher power or covered up with a gain mod. An amp that coughs out an asthmatic tone at 50 or 100 watts easily fatigues both music listeners and guitarists. But the audience will stay until the bar closes if the band plays well and sounds great—even with as little as a few watts going through the available PA system.
What can a guitarist expect to hear when upgrading their transformers in a newer amp?
An amp’s transformers are the most important component in determining the quality of amplified guitar tone. And it’s no coincidence that they’re the most expensive parts in an amplifier. Many of the newer amps just don’t have the same “overkill” factor with their transformers as the amps in the ’50s and ’60s. Why? Ignorance and a bean-counter mentality. What’s good for accounting isn’t necessarily good for tone from an amp. Sadly, the people making these decisions are probably not players themselves and don’t seem to realize the damage they’re doing to the industry.
It’s not unusual to find a current production amp with a power transformer running hotter than hell, even without cranking the amp all the way. Or having an undersized, cheaply built output transformer whose sphincter begins to tighten the moment the guitarist reaches for the amp’s volume knob. An amp built around anemic transformers yields only to dull, thin, noisy, fuzzy mids and mushy bass. That’s what makes your notes sound more like farts through a pillow. This overkill factor is probably the only edge that some of the vintage amps have over the newer amps.
We have made it our mission to duplicate the performance of the best original transformer designs of all time. In terms of amplified guitar tone history, these transformers represent the best ever produced. – Sergio Hamernik
Have you ever noticed how most newer amps often weigh less, sometimes a lot less, than the older ones? That’s usually the weight difference between the old and new transformer designs. There is a direct relationship between weight and having transformers that seem to stay cooler and “loaf around” with power to spare, until a player demands more from their amp. It’s like they are waiting around having a card game, waiting for the player to do something. The best vintage tone was born that way. Newer amp tone can be easily improved—if the builder follows some of the same ideas.
Upgrading with quality transformers gives a second chance to a new amp owner to make things right with their tone, by reclaiming that overkill factor. Assuming there are no issues with the amp’s circuitry like bad parts or worn out tubes, a guitarist should hear and feel improvements with the very first pluck of the guitar. They should expect to hear the notes more detailed with overtones, and a quicker and more immediate response to their playing. Clean notes will have less sonic collisions with noise and reveal more bell tones, chimes, etc.
When more distortion is required, the player will sense better control of crunch and when break-up begins to happen. The coughing and hacking that happens when a stock amp is pushed, will vanish with a transformer upgrade. It will be replaced with longer sustains and notes that reach farther. The amp will also sound closer and bigger than the power it puts out—and the bass notes will have a tighter, rounder bottom end. And when pushed, she will still be able to hold that quarter from dropping—no matter how tall her high heels—something most musicians are looking for.
It’s not uncommon for guitarists to report that it took a few weeks of playing to fully realize what they’ve gained in terms of harmonic richness. These players have typically played longer and felt more inspirational emotions sucking them in, as they have invested more time into relearning and becoming reacquainted with their amps.
Many players become very attached to the transformers in their vintage amps. When you create ToneClones or Radiospares and Partridge versions of these classic transformers, how close are they get to the originals?
Radiospares and Partridge are our brand specific clones, whereas ToneClones are “best-of-breed” duplicates culled from the hundreds of other brands that have made transformers over the years.
We have made it our mission to duplicate the performance of the best original transformer designs of all time. In terms of amplified guitar tone history, these transformers represent the best ever produced. In the grand scheme of tone pursuit, these designs are incredibility important and deserve to be considered treasures.
This is an ongoing project for us, spanning almost three decades now. And it couldn’t have been accomplished without the enormous amount of assistance we’ve received from top players and amp collectors around the world.

What about Axiom transformers? Where do they fit in?
The Axiom transformer line takes over where the limitations of vintage transformer design ended. No bean counters here—simply the sincere pursuit of answering the age-old question: What if there were no constraints on budget, time, or material quality to achieve the best possible performance? That’s our objective with the Axiom line.
Axiom transformer designs represent many new approaches—new tone with the best materials and designs money can buy, so they’re not intended for the timid or the low-budget crowd. Check out our FatStacks and SuperStacks for the Marshall DSL and TSL families for interesting comparisons.
Mercury’s vintage transformer restoration service has been gaining a reputation for quality work. Why would someone want to restore a transformer instead of replacing it? And vise-versa?
Some vintage amp owners prefer to pay the extra cost of our restoration services, because it’s very important to them that their amps retain authenticity. Collectables or rarities are valuable. They’re of the “why take chances” mind. The high road. But on the flip side, we have pro musicians who insist on touring with their vintage gear. To play it safe, and not sacrifice the tone of their original transformers, they have their techs replace the stock transformers with Mercurys. By doing this, they preserve the original transformers from road abuse while taking advantage of our reputation for tone, durability, and warranty. Restoration of vintage transformers is a tricky and highly specialized art. Sadly, too many of the great originals have been lost forever due to technically inept and musically disinterested people. We see attempts at “rewinds” here all the time.
Occasionally, it appears some people confuse “demolition” with “restoration,” and the preservation of the original tone is lost forever. There’s no shortcut to doing a proper restoration.
I understand you’re doing all of your labor and get all of your materials in the USA. How does that impact your business aside from just the straight costs?
Well, we figured that someone has to do it—and we really do make everything here with 100 percent American materials. There are plenty of products out there stamped with “Made in the USA,” but are actually assembled with non-USA, low-price materials. But yeah, we’re the real deal and proud of it.
Building transformers that make an amp sound good requires highly specialized technologies, highly skilled labor, and the right kind of materials. We love music and owe it to the players out there to do all the work “in-house,” so we can keep tight control over every aspect of our transformer designs. It’s really old-school military spec style, so our transformers don’t vary at all from batch to batch. If you need a replacement transformer 10 years from now, it’ll sound exactly the same as the one it’s replacing.
We’re hard-liners when it comes to not playing shell games with a musician’s hard earned dough and quest for better tone. Perhaps I’m a fool for doing it this way, but I was brought up in a musically minded family. From a very early age, I was taught that music is as important and necessary as food. If there is a day our services are no longer needed or appreciated, I’ll pursue my dream of owning a car wash in the valley, and get into the business of making money.
Any new or exciting projects in the works at Mercury?
Yes, but we’re planning on releasing the news sometime around summer. For quite some time, we’ve been fielding requests for accessories to accompany our transformer line. We’re being asked to apply our know-how to other aspects of guitar amps.
Do you have any advice for guitar players and techs in their quest for tone?
Don’t let anybody fool you—every player has the ability to discern the difference between good or bad tone. Unfortunately, there are a few too many self-styled “experts” who irresponsibly dispense advice without having a clue. As a result, we’ve all seen amps completely lose their tone by being modded to death.
There’s no excuse for the old “damn, I’ve done it this way for many years so it must be right” mentality. More than ever, it’s so easy to seek opinion, advice, and help online and elsewhere. I highly recommend the old textbooks from the 1950s and 1960s as a good place to start on vacuum tube audio circuits.
Do your homework and follow what the smart players are doing—improving your tone isn’t that elusive. If what you have sounds good to you, leave it alone. But if you know your amp’s tone could use some improvement, then start where it begins … the transformers.
Source: https://www.premierguitar.com/articles/Builder_Profile_Mercury_Magnetics

In late 2009 I had the opportunity to talk with Sergio Hamernik about the history of the Mercury Magnetics, how he became involved in making transformers for guitar amplifiers, and the difference a high quality transformer can make on your tone.
How did Mercury get its start?
The company’s roots date back to the early ’50s. Mercury was started by an old General Electrics transformer engineer who was working there pre-World War II. He then went on to do a bunch of design work for the war effort. And in the early ’50s, hung a shingle and became self-employed.
The name “Mercury” came out of his passion for Mercury cars, he always drove a Mercury since the late ’40s — he loved those cars — and eventually moved from the East Coast to the West Coast where he found that there was a lot of military and aerospace work. A booming economy in the early ’50s gave him a lot of business.
I met him in the 1970s when I was an engineering student and an audio enthusiast. Back then the electronics world was well into its solid-state “evolution,” and interest in tube gear was quickly disappearing. Not for me, however. I found myself in demand as a guy who knew about those “old things”; not only the math, formulas and specifications but I also had the “ears.” I could fix and keep the old gear running. So, I worked as a hired gun for a bunch of studio heads and pro musicians.
Typically when an amp’s output transformer blew. No one seemed to know any better so it was just swapped by whatever “factory” replacement or an off-the-shelf “equivalent” catalog transformer was handy. The invariable result was that the amp’s characteristic sound was gone. And no matter what resistors, caps or tubes were used, it could not be rescued or returned to its original sound. It was the transformers, it turned out, that were the key. The problem was coming up with a way to remedy the blown transformer replacement or repair that wouldn’t alter its tone.
To further complicate things, most transformer people I dealt with just didn’t want to bother with the music industry. For the most part the established electronics industry considered the needs and opinions of the audio and MI (Music Industry) communities as subjective, run by kooks, and occupied by people who didn’t know what they are doing. Audio and MI had always been considered the illegitimate stepchildren to the rest of the industry.
Out of pure necessity I had to got involved with transformer design and manufacture. As a customer of Mercury, they had built many custom transformers to my specifications — although we had many heated, on-going debates on the subject because the company owner hated audio! He never did understand what made guitar amp transformers tick, or how musicians thought and reacted to them.
That aside, he pestered me for almost a decade to take over the company because he felt I was the only one qualified. Eventually I did, and that was when Mercury got serious about the guitar amp connection. Sometimes you end up becoming an expert at something when no one else wants to do the job.
By the time I took the helm we were developing a really good and workable understanding of the relationship of transformer design to decent tone and how amps should behave. And around 1980 we began the long and arduous task of collecting and cataloging transformer specifications for every vintage amp, from all over the world. The deeper we dug, the more apparent it became that there were all kinds of factors that no one had previously suspected that affected guitar tone. And likewise, no one seemed to be paying attention to such things.
In turn, we invented proprietary technologies to aid this work. Even after three decades, we’re still innovating and discovering new things. From that fundamental research came our now famous ToneClone series, and later the Axiom line, which is probably the most significant advancement in toneful guitar amptransformer designs since the ’50s. Both product lines, we’re proud to say, have distinctly different niches in the annals of guitar amp tone.
We’ve not only cured the old transformer tone issues, but made it possible for musicians to upgrade their existing amps. And we’ve also made it possible for amp builders to reproduce amps of the same or better grade than even the most outstanding vintage amps of the past.
When did you become involved with making transformers for guitar amplifiers?
Back in the ’70s I worked for people on a one-to-one basis, usually under confidential arrangements, with certain rock stars that just didn’t want to be bothered by their names being flaunted around. What they want was their amps running right for recording, projects, touring, etc.
The problem was that when technicians would fix the amps they’d often loose their tone. It turned out that the culprit was the replaced output transformers. A changed output transformer would completely alter the character of the amplifier. So as I was the guy doing most of the work to resolve this issue, this expertise was brought to Mercury where we began a special division to cater to the guitar heroes.
Word got around rather quickly that Mercury was able to repair, rewind, and restore the original transformers and it just grew from there. The whole “Tone Clone” thing came from artists who had these amazing irreplaceable amps, amps that often made recording history. They didn’t want to take these amps on tour. So we came up with the innovative idea of cloning their original transformers that they’d fallen in love with. With the clones we could now easily make, for the first time ever, several identical amps for them. Or they would assign their techs to drop-in the cloned transformers so they would have, for example, six amps that would all sound the same as that first perfect amp.
These artists could now go on tour and not worry about breakdowns or theft, and keep their prized-originals back at home.
I worked with Ken Fisher, the whole Trainwreck thing, and a lot of the early boutique guys — and still do with Alexander Dumble. They preferred to keep things confidential and not let too many people know who their sources were because there were so few transformer designers that catered to the guitar amp market.
There was also a slow-but-steady dumbing-down occurring in audio and all that had been the post World War II momentum. Many of the ex-military components we’d been using were high tolerance parts, with mil-spec formulations of iron and copper and so on, that had been used to win the war effort. During the ’50s and ’60s we enjoyed the benefits of those high quality components at surplus prices. But by the late ’70s, and definitely in the ’80s, steel manufacturers started to change recipes to make the iron and other materials much more affordable.
You can hear the differences between a late ’60s Marshall, a late ’80s Marshall, and a Marshall today. A good listen will really help you to understand what changes took place. Unfortunately they made so many of those changes more out of economic considerations than anything else. The amps were loud but they seemed to be losing sight of the fact that their tone was disappearing — the “recipes” had been changed.
In addition to many other factors, the iron that Mercury uses is custom-formulated specifically for us. We buy enough of it to be able to dictate the exact recipe from the foundries. And all of our iron is literally from American ore processed right here in the USA. 100% American madeto the original specs. Are there drawbacks? Well, some of the iron rusts more easily, but that’s actually a good thing because rust is a natural insulator. But the opposite is also true. When you see a modern transformer with a silvery or a shiny core just know that they aren’t worth a damn when it comes to tone.
Can you tell us more about guitar amp transformer history?
Here’s an amusing anecdote that may help explain our case for guitar amp transformers: There’s a great deal of documentation, from back in the mid-’50s, where engineers, and other technical people, were writing really scathing reports on how awful the transformers were in the audio industry. Those darn transformers! When tubes were plugged into them there was a tendency to distort! And they couldn’t have any of that! Likewise with harmonic distortion — especially even-order harmonic distortion.
Many amp builders, techs and players, today, don’t understand that tubes were originally designed to run dead clean, linear, and be efficient voltage amplifiers. That the tone we’ve all come to know and love is caused by the transformers literally “irritating” the tubes into distortion.
Which is, of course, the whole point of what we are looking for in guitar amps. Back in the ’50s, they were fighting to get rid of those nasty distortion tonal characteristics. Now we embrace them. But that was audio – guitar amps were still in they’re infancy and yet to be realized. It took a generation or two of innovative musicians to take those “undesirable” tonal characteristics and create music; to work with distortion and make it into something musical.
Ironically, it was that no-distortion engineering mindset that ushered in solid-state, and why it was so openly embraced in the ’60s. It was solid-state electronics that eliminated the output transformer.
In the late ’60s, Vox went to Thomas Organ to have solid-state amps built. They were very proud of this state-of-the-art amplifier. Curiously, I met a few of the musicians from the late ’60s that were sponsored by, and using, those amps. The tone was so awful and unbearable that they used the enclosures but hid their old tube gear inside! As you may already be aware, the vacuum tube industry is alive and well, and we’re still waiting for the solid-state industry to catch up.
Part of the confusion is that musicians assume it’s the tubes that give them their tone. There’s a lot of synergy going on in an amp, and the tubes certainly contribute, but let me illustrate this another way. Did you know that there is what we call “output transformer-less” amplifiers in the HiFi world?
These amps basically parallel a bunch of power tubes together until they get down to 16, 8, or 4 ohms. There is no output transformer, so you literally connect the speaker directly to the tubes. If you ever get the opportunity to do an audio demo with this style of amp, you will find that while it works, it sounds nearly solid-state. The output transformer is what provokes a tube into giving the characteristics that we find desirable as far as tone. Audio engineers didn’t want the tubes to distort, as tubes are basically nothing more than very clean voltage amplifiers. But when you have a reactive element like a transformer, you irritate the tubes into harmonic distortion.
Therefore, the difference between a good and mediocre transformer is based on how it works and syncs with these tubes to produce the kind of tone or distortion we are looking for. It is not as easy as winding some wire around a steel core, if it was then we would not be having this conversation.
How does a Mercurytransformer made today compare to the transformers made in the golden age of amps (the ’50s and early ’60s)?
One of the biggest mistakes existing in today’s amplifier community, especially amongst hobbyists and do-it-yourselfers, is to blindly copy every aspect of a vintage amplifier hoping to get a piece of that golden tone. At best, this method still produces very random results. One of the key reasons for this is the often-overlooked missing transformer formula. A builder will fuss around with the tiniest of other details but completely miss how the transformers fit into the equation. In short, get the transformers right, then the rest is much easier. Here’s another look at theses deceptively simple devices:
 For vintage-style transformers, Mercury starts by duplicating the transformer design, build errors and all. We use the best grade components like they did in the ’50s and ’60s. We wind every layer and every turn as if it were a circuit in itself. In fact, the diagram on the left shows an output transformer circuit equivalent. Most people would think it is an audio circuit. These things are fairly complex, and all the numbers have to be right in order to get the tone we want as musicians.
We really do follow the recipe to a point. Although we don’t repeat any of the mistakes or inconsistencies that were prevalent, but didn’t affect tone. For example, if you were into Fender tweeds or late-’60s Marshalls. To do this we would literally put the word out to rent or borrow dozens of amplifiers to find the one or two that had thesound, and dismiss the rest. There were typically many inconsistencies as well as “happy accidents” in the best-sounding examples we’ve auditioned. A lot of this has to do with the sloppy tolerances of the original transformers.
For our transformers we extract the best parts and virtues of the original best-of-breed transformers and remove all of the obstacles to tone. Perhaps just as important is that we adopted a “cost is no object” approach, making our transformers equal or better than the originals — and then add consistency. We now have this so finely tuned that if you bought a transformer from us five years ago, and then the same one today, it would sound exactly the same. You don’t want good batches and bad batches, which is precisely what made the original production runs vary so much.
Another issue is the so-called controversy between paper tubes and nylon bobbins. In the vintage years they used both. Some people think that somehow, some magical quality comes from using a paper tube winding form over a nylon bobbin. Tonally it made no difference at all. Paper tubes were widely out of tolerance most of the time because of how they were made. They would wind multiple coils on long sticks then use a saw or blade to cut off the various coils. In order for these long tubes or coils to come off of their winding forms they had to be conical. So this invariably meant that the first coil would be larger in diameter and the last coils smaller. As you can see, it’s easy to see why each of these inconsistently-made bobbins had a greater difference than the material they were made from. And there are other issues that occur over time, like paper has a tendency to disintegrate, collect moisture, etc.
When we switched to using nylon bobbins the tolerances were within 3,000’s of an inch of each other, as opposed to the wildly varying amounts found in paper tubes. If you were ever to take apart a really old transformer (pre-’70s) sometimes you’ll find wood wedges that are jammed between the paper tube and the core because that piece of paper was too wide and too sloppy to fit into the core correctly! They would force a wedge in there so the darn things wouldn’t rattle!
Which method, paper or nylon, made for the best tone? It’s the luck of the draw. We’re fortunate in that we have all these stars as clients who have these amazing-sounding amps. They went through the hassle of culling and choosing and picking the special amps that inspired them. The amps they recorded with. When we analyzed their transformers we sometimes found happy accidents or other little anomalies that would set a transformer apart from already sloppy tolerances of the standard production run.
There are little subtleties and changes from one transformer to another that make a heck of a difference tonally. So when you look online at our list of ToneClones, just know that they are from the hand-picked, best-of-the-best amps of their model and era. We continue this “weeding” process every day — and there’s apparently no end in sight. And that’s why, with some amps, we have several versions — each with its own tonal qualities — and others only a single set to choose from.
We use this process to establish new benchmarks. And you never know, tomorrow a new variant may arrive that totally blows away what we already thought was as good as it could ever get.
It is interesting that you take that approach to upgrading — the never-ending search for better-sounding benchmarks.
There is no real money or glamour in what we do, it is really all born of a passion for music. I come from a musical family, my Mom taught me as a little kid that music was a form of “food.” And that hasn’t changed. Everyone who works at Mercury is just in love with playing and listening to music, and we all believe that there is always some room for improvement or a way to raise the bar somehow.
Back in the ’70s and ’80s there wasn’t really a need for a company that designed and sold transformers to the public, so I stayed away from the general public for as long as I could and really only worked with professionals.
But at some point I realized that it was the average player who was getting ripped-off. Things were getting dumbed-down, the tone is slowly and steadily being vacuumed out of the amps. They were becoming duller-sounding, less interesting and more noisy. So, we decided to formally launch this product line so the average guy could have access to our technology. It takes an extreme amount of labor and effort it takes to build them to this standard. You know, even if someone wanted to buy 1000 transformers we would have to no-bid them because we really don’t have any way of doing things quickly.
Automation isn’t a practical solution. Everything we do is wound by hand, one at a time; it is the only way it can be done. Say you have 100 turns and 10 layers, well that would mean 10 turns per layer — that is how a machine would think of it. But what if a rock legend’s best transformer was 9 turns on one layer, 11 turns on the next, 7 on the next, 3 after that and so on, but the sum total ended up being 100 turns. Sometimes one layer can have a different winding style than the other; sometimes it is non-symmetrical meaning, if it is a push-pull, that one side of the primary doesn’t have the same turns as the other side. If that was the recipe that created the magic, we’d have to duplicate it. It’s just not practical to build machines to do that, so we end up having to do it by hand. It’s the proud old-school craftsmanship way of doing things. Something I think we could see a lot more these days.
We have a reputation for nailing tone. Our Fender transformers don’t sound like Marshalls, they sound like Fenders — and vice versa. In fact, we’ve become the industry’s new standard. If you were going to design or create a tube-based amp, it’s clear that we’re the folks to talk to.
Can you explain how a Mercurytransformer can improve an amplifier’s tone and how they outperform the stock transformers found in most amplifiers?
In designing toneful transformers specifically for guitars (and that’s all we’re talking about here, not necessarily transformers for HiFi or any other purpose), the trick is in the magnetic field and how it behaves. The nature and the speed with which the iron reacts to the changing of an alternating current, in an alternating magnetic field, is what makes tone happen.
If you have “slow” iron, you’ll have a dull, non-sparkly sound with no bell tones — no matter what you do with the amp it will always be kind of noisy and fuzzy.
Where others have tried and failed they’ve blindly followed generic transformer formulas without understanding that guitar amps are different animals. They’ve somehow missed that point despite all the evidence to the contrary. The fact is that transformers for guitar amps do not necessarily follow textbook rules.
Indeed, it should probably be noted that we’ve developed a whole new technology around transformer design specifically, and only for the guitar industry. And that these designs are essentially irrelevant to any other use. But Mercury is also in a highly unusual position. Our decades of transformer “vivisection” have revealed all manner of unconventional tips ‘n tricks to us. And we’re now the keepers of this new, but proprietary, technology.
I seriously doubt that we could have done it without the, let’s call it “archeological benefits,” of our observations. Decades of studying the good, the bad and the ugly of guitar amp transformers have revealed a great deal.
Nothing that I have found in the reissue market, transformer-wise, even resembles anything that was made during the “the golden age of tone.” They are unrelated. The inductance, magnetic fields — all of that is just completely different and far removed from the original designs and recipes. So there is no way that a reissue amp is ever going to sound vintage unless they bother putting in the right ingredients.
With our Upgrade Kits, for example we’re trying to show people that we can move forward into new sonic territory from where vintage designs and tone left off. And our Axiom series transformers are the definitive showcase for this technology. Their tone is just amazing.
To push the point even further, we don’t include any “voodoo” parts in our Upgrade Kits. With the exception of the transformers, the Kits use only common, everyday, and off-the-shelf components. And most of our Kits also include a Mini-Choke. When the circuitry is correctly designed a Mini-Choke will make a huge improvement in an amp’s tone because, in terms of its power supply, it changes the way the amp works.
A good guitar amp is only as good as its power supply. If you have a dynamic and moving power supply that reacts to the demands of the audio end you’ll get get great note separation and good bass dynamics. You start to hear chimes and other phenomenon, and even the harmonics between the strings like a “5th note.” What the heck is the “5th note”? In barbershop quartets, if they get their harmonies right, they hear the “5th note” which is basically a harmonic of all four singers. We are doing that with our guitars thanks to distorted amplifiers.
Where did the idea for offering an Upgrade Kit for amplifiers like the Champ “600” and Valve Jr. come from and who designed the Upgrade?
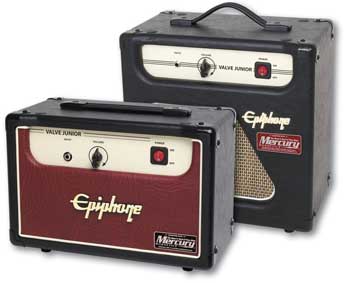 I designed all of the magnetics (the transformersandMini-Choke) and the general concept behind the Upgrade in league with Allen Cyr from the Amp Exchange. He is one of the most competent, finest amp designers I know of; there are only about five in the world that are true masters of the art — those who really know the math, how to read tone, how to listen to the subtleties of clean and overdriven sounds and tones, design circuits, and understand tube behaviors. As a bonus to those who appreciate this kind of thing, we always try to throw in some interesting tweaks and tricks that are unorthodox.
The idea is to spark some interest and perhaps get more people involved in tube-based amp tone and evolution. We expect some folks to study our Upgrade Kits, learn from what we’ve done, and take off into new territory from there. No one is offended by that.
But our initial concept was to take an inexpensive stock amplifier, one that cost no more than $100 or so, and modify it into a professional- or recording-quality amp for very few bucks. The Valve Jr. was the amp that gave us the inspiration for this project. Epiphone broke the mold with their little Valve Jr. amp. Out of the box it’s a remarkable value. So, although it was a bit of a challenge I thought it was interesting because we were not stepping on anyone’s toes — we were just taking something that already existed and designing an Upgrade Kit around it. A simple proof of concept that made the case of transformers and guitar tone. It just seemed like a cool thing to do. The project was validated when pro players began demo’ing our prototype amps — they couldn’t believe how amazingly great such a tiny amp could sound, it freaked them out, and they all wanted one of their own!
Our intention was to give the kid who was practicing guitar in his bedroom, whose parents are on a limited budget, REAL guitar tone. In a typical scenario, the parents buy a cheap little amp and guitar combo because they want to see if their kid will stick with it. But the kid doesn’t understand that the sound of the amp is fatiguing. He doesn’t understand why the amp doesn’t sound good. And he doesn’t realize that the amp is fighting him, tiring him out. I know that happened to me and so many of my friends when we were kids. Struggling with hard-to-play guitars and poor-sounding amps is probably the single-most reason so many budding young (and old) guitarists give up the pursuit of their dream. But some are rescued. One day they visit a guy, or hear someone play, who has the amp with the tone and with just the sweep a few chords they experience the “My gawd!!! I want to sound like this!” phenomenon.
That is what we’re trying to offer with these Upgrade Kits — where thetone is accessible to just about anyone. So they could have an amp that wasn’t dull or desensitized. An amp that allows them to make that real connection to the tone. Tone is not just about noise and volume, it is rather complex, and undeniably emotional.
 At the LA Amp Show we had our Upgraded Fender Champion “600” running into a full Marshall stack. Here we had this little amp powering eight 12″ speakers and it sounded great. People kept asking to see the back of the amp thinking that we had somehow rigged up something, but it was just the little Champ “600” with our Upgrade Kit.
When you have a nice open tone it is not about counting watts because the window is so big and wide and the soundstage is so deep that it gives you the impression of more power. We are not putting out more power with the Upgraded “600” — but it sure sounds like it! It’s about opening up that tone window and giving you more.
It’s kind of like taking a radio whose volume is set to half way and having it placed about 20 feet away from you then bring it right next to your ear — the volume has not changed but you hear a lot more of its content.
One of the things we do when modifying a circuit is to lower the noise floor, which a lot of people overlook. Many amps, like the Valve Jr., have a nasty hum in standby. We had one that would just start to howl if you left it alone for a while! So whatever high noise floor it had would eventually feedback on itself and cause that noise.
Our focus is on inspiring people. We are trying to show people that they really can get great tone today, that there is no age that has come and gone. There is still a lot of fun things left to do with your amplifier when you are on the search for great tone.
Hearing how much these Kits improve upon the tone of the amplifiers, and how well thought-out they are, will a Mercury amplifier that is designed and built by you ever make an appearance?
No. We are a supplier of key components to the boutique industry and to several of the large amplifier companies, and that is a comfortable spot to be in.
There is no shortage of amplifier companies out there and it really is a conflict of interest if we were to start selling amps and transformers. I would rather stay out of it.
The whole point of the Upgrade Kits was an area where I didn’t see any conflict with the people who were in the amplifier business. In the end the Kits really represent a transformer demonstration. If you were to just show someone a picture of a transformer or even had one in your hand and tried to explain how much better their tone would be, no one would care — it’s a yawner. But when you build one of these inexpensive Upgrade Kits and you actually hear the difference that the transformers make, it really drives home our point that transformers are important, that they are the building blocks of guitar amp tone.
And in the end we do this because we love it, we really love what we do. We get to create all of these products that help people find their tone, and who wouldn’t what to do that?
Source: https://mercurymagnetics.com/pages/news/GuitarFixation/SHinterview/index.htm

VG: Tell us a little about the background of Mercury Magnetics?
Sergio Hamernik: Although Mercury was founded in 1954 it was around 1980 that we fully recommitted ourselves to designing and building transformers specifically for tube-based electric guitar amplification.
Most of us know that by the late 1970s the audio electronics world was going solid-state. Although it now seems absurd, back then tube-based amplification was being abandoned. We were amongst a relatively small group of hold-outs. We were also acutely aware that if someone didn’t step in to preserve the technology that decades of know-how (not to mention the essence of tone) would be lost forever.
We put out the word about Mercury’s mission and immediately began to work directly with a select number of top players and amp designers who were like-minded.
VG: Who came knocking?
Sergio Hamernik: We were surprised that much of the early interest came from British artists. They had the resources and seemed to understand the transformer connection to great-sounding amps. But it didn’t take long for the word to spread. Soon artists from all over the world were bringing us transformers from their most prized amps to study and clone. The feedback from this period set the pace for Mercury and we haven’t strayed since.
Today Mercury’s friends and customers include pretty much the entire upper echelon of professional players and recording studios. In the builder community our friends range from the legendary Alexander Dumble and Ken Fischer, to passionate enthusiasts building amps on their kitchen tables. I’ve always been amazed at the caliber of talent we’ve attracted and the level of interest in our goals.
VG: How did Mercury determine which transformer designs had superior tone?
Sergio Hamernik: Think of what we’re doing as transformer archeology — not unlike opening ancient scrolls for the first time. Over the years we’ve unearthed some real sonic treasures!
Artists and amp collectors continue to bring us transformers from their most coveted amps to analyze, restore, duplicate or upgrade. They’re hard-won converts because they’ve all tried other replacements only to discover that the magic was gone.
By tradition, transformers have always been hap-hazard and inconsistent in design and build quality. Many of these amps were the freaks, factory prototypes, or often with one-of-a-kind transformers that just blew everything else away.
These are the transformers we have always been most interested in studying. Unfortunately, when it came to analysis, we discovered that the conventional methods only gave us a piece of the puzzle. Mercury had to devise its own proprietary methods of determining what made these outstanding transformers sound so amazing. Their “recipes” if you will.
“… if someone didn’t step in to preserve the technology that decades of accumulated knowledge (not to mention the essence of tone) would be lost forever.”
It can take up to a week to properly analyze a single transformer. Aside from the need to catalog and replicate these gems, we’ve tackled these projects for other important reasons. What makes a great-sounding transformer tick is no longer mysterious. Prior to our research the engineering community did not fully comprehend the characteristics of a good electric guitar amp transformer. We’ve used this hard-won knowledge to look beyond the confines of conventional engineering to find the previously undiscovered rules behind the most desired electric guitar amp tones.
VG: If a transformer dies will a replacement change my tone?
Sergio Hamernik: Until Mercury got involved if your transformer tanked there was a good chance that your sound would be lost forever. An amp tech could spend a lifetime fiddling around with caps, resistors and tubes and never find your sound again. The missing component in the equation was the transformers.
Oddly enough, duplicating build quality so that each and every transformer of a particular model, or period, sounds exactly the same had been a struggle in the past. Traditional manufacturing methods have always produced inconsistent-sounding transformers. Literally no two had the same sound. This only makes sense when you realize that few were aware of the transformer connection with tone. This also explains why the average amp tech uses random and generic transformers. They just didn’t know any better. The ability to buy an identical replacement transformer, or an upgrade for that matter, is a major breakthrough in amp tone — there’s no doubt about it.
There’s also a side benefit to consistent build quality that some players and amp techs are just beginning to discover. Mercury catalogs many design variations for all the popular amps. This means that you can easily and reliably experiment with the tone-enhancing qualities of other transformer designs and amp configurations.
VG: Why are transformer magnetics so vital to guitar amp sound?
Sergio Hamernik: Once you understand that generic “by the book” transformers can actually neuter your tone — the battle is over. Your choice in transformers opens the door to MAJOR tonal possibilities.
When you listen to all the different tube amps made over the years, it’s brutally obvious that the really bad-sounding variations had junky transformers (even though they were usually within design spec). We know this because when you simply replace the stock transformers with quality units they come alive.
There’s a curious phenomena associated with cheap magnetics — they tend to make an amp fatiguing to the ear — uninspiring to play or listen to. Boring, actually. With tonally dull transformers you just can’t get the other components to sound as they should. And the fun doesn’t stop there—inferior transformers result in amps that are unreliable, have a tendency to overheat, etc. You can easily identify them by their uninteresting, thin-sounding and harmonically anemic tone. Unless one is stone deaf, the sonic superiority of quality magnetics is obvious.
“Once you understand that ‘by the book’ transformers can actually neuter your tone — the battle is over.”
It’s important to understand that the pioneers of the electric guitar amplifier and most of the techs that followed were self-taught. It only makes sense that much of what they came up with were results from happy accidents. But despite their trial-and-error methods with tubes, speakers, and other components, many of them misunderstood the role of the amp’s magnetics (transformers) as it relates to electric guitar tone.
Over the years there’s been an overwhelming number of hit-n-miss transformer designs used in guitar amps — even within specific models. Mercury has had the benefit of the rear-view-mirror, looking back over time, discovering what sounded great and what didn’t.
Mercury’s holistic approach has taught us that the unique nature of the amplifier seldom lends itself to just one ideal set of transformers. Can you imagine that for the Bassman sound alone Mercury inventories over 2,000 transformer combinations? The differences may be slight, but we cover just about every conceivable tonal and configuration variation for that model amp — factory, mod or custom built. And that’s just one amp line out of hundreds — Mercury’s growing library is approaching every amp ever made (including the odd-balls!), from 1948 to 2006!
Our current library consists of hundreds of unique transformer designs and their variants. Aside from vintage, we also have our enhanced next-generation Axiom designs. They incorporate many of the discoveries we’ve developed for even better-sounding, more inspirational amps.
VG: I understand Mercury has three separate electric guitar amp transformer lines?
Sergio Hamernik: Everything we do has evolved from the real needs, wants and requests of our user base. Mercury’s products are all logical extensions of each other, but there are actually four separate offerings.
Mercury Vintage — our one-off service where we repair or restore otherwise valuable, usually vintage transformers. There are no modifications or enhancements added. These one-off restorations are ordered by players who are aware that their original (and valuable!) transformers are expiring but want to continue using the amp because they love its tone.
ToneClones are tonal duplicates of best-of-breed vintage amps. We have hundreds of designs and every one of them is from a stellar-sounding original. Indeed, it was our customers who helped to invent the ToneClone line. If you want to make your vintage-style amp sound as close as possible to the best-sounding amp of a specific period — you need to hear our ToneClone series transformers.
The Axiom series is a totally new concept in tube-based amp transformer design. They marry the best of the vintage-era and Mercury’s breakthrough discoveries. Axiom-ized amps give you more tonal “bloom” — vintage-sounding but more, a lot more. There’s a growing group of boutique amp builders, as well as tech-savvy players, that have been working with them. Of all the raves and testimonials we receive daily, the most emotional are those by our Axiom users. I’m particularly proud of the Axiom series because we believe they represent the future of tube-based amp designs.
And finally, custom transformer designs. Non-disclosure agreements prevent us from discussing our clients, but there are quite a few boutique as well as major brand manufactured amps out there with our custom designs in them.
“Think of what we’re doing as transformer archeology — not unlike opening ancient scrolls for the first time. Over the years we’ve unearthed some real treasures!“
All of our products are built like no other transformers in the world. We may be the only manufacturer who uses custom-formulated, American-made materials. Every single transformer is handmade, hand-tuned and tested by us before it leaves Mercury. Our proprietary processes and expertise are unique. We design and make every one of our transformers here in California — no work is farmed out to other countries.
VG: Where do we go from here?
Sergio Hamernik: Our work is fascinating, and as our advertising reflects, we’re having a good time doing it. But we wouldn’t have gone through all the drama of creating these exceptional-sounding transformers if it wasn’t for the support and encouragement we’ve received from so many brilliant artists and passionate players. Their passion has fueled our drive.
We view Mercury is a catalyst — reintroducing what inspirational, non-fatiguing real tone is all about. We’re also confident that we’ve also raised the bar for the “old” guys who long for the tone they grew up with. Can you imagine playing modern equipment that sounds even better than you remember it did back then? It was transformer and tube-based sound that originally turned the world onto electric guitar tone — the tonal qualities you feel more than just hear. At Mercury we believe that transformers are the last key to the tonal puzzle.
Source: https://mercurymagnetics.com/pages/news/VGmag/VGbuilderprof06.htm
It doesn’t take too much digging to find a laundry list of boutique amp builders using Mercury Magnetics transformers in their products. From Mojave Ampworks to Joe Morgan Amps to kits from MetroAmp, builders have found that Mercury knows their iron. While transformers rarely receive the same level of attention of NOS tubes, speakers, or even guitar cables, they are a major contributor to tone. Think about it—the power and output transformers are the start and end of the line with any amp.
Based in Chatsworth, California, Mercury Magnetics has been building transformers for close to 60 years. I recently had a chance to talk with Mercury’s Sergio Hamernik to dig deeper into their roots, find out what one can expect from upgrading their iron, and what sets Mercury apart. Prior to our conversation, I had the opportunity to witness the remarkable transformation of an Epiphone Valve Junior modified from stock to hot-rodded, using one of their transformer upgrade kits. Not only was it a noticeable upgrade, it was a revelation in just how important the role of quality iron in an amp is. But because it is the single most expensive part of any amp, it’s no wonder we see so many modern amp manufacturers skimp on the iron to keep costs down. Let’s see what the passionate, and often hilarious, Sergio has to say about his part of the business.
PG: I’ve been seeing Mercury transformers in amps for at least a decade. When did you get into the amp scene?
SH: This happens to be one of our most often asked questions. Even though Mercury Magnetics’ roots go all the way back to the early 1950s, there are guitar players who are only now discovering us. But if an industry insider like you has been aware of us for at least a decade, then I suppose it means I don’t need to lay off any of our sales and marketing staff.
I would attribute most of our lingering anonymity to the old days. Back then, most of our clients from the audio community preferred to keep us as a trade secret from their competitors and the press. The typical transformer-savvy amp builder also didn’t usually want to share the credit with us, or reveal what their “unique” technical advantage was regarding audio and tone. Consequently, we were asked to maintain a low profile and generic look for our transformers for quite some time. On occasion, a customer in the know will spot a small “MM” mark on a transformer from an older piece of gear, and ask if it’s a Mercury. Odds are that it is.
It was the guitar amp crowd that pushed us to go above ground. Now Mercury gives any electric guitar player or amp restorer a taste of what the pros were using, talking about in their studios, and among themselves. Many players have told us their amps increased in value when upgraded with Mercury transformers, and this became evident when insurance appraisers began to contact us for verification. However, it wasn’t until the mid-1980s when we began to market our services and various brands to guitar players.
For me personally, I got into the amp scene around the mid- to late 1970s. I just found it to be a nice way to relax from the strain of oversleeping.
PG: Your website shows a large number of amp manufacturers you have replacement/upgraded transformers for. What are your best sellers and why?
SH: There are so many different camps loyal to their particular amp brand, so it would be difficult to single out the best sellers. The best sellers are transitory and change from week to week because guitar amp players are a fickle bunch. That’s why we’ve built the world’s largest catalog of guitar amp transformers where nobody is left out.
But trends tend to follow their own dynamics. And the current worldwide trend seems toward smaller wattage amps—regardless of brand. Conversely, the 100-watt heads are not selling like they used to. Players are gigging with no more than 15 watts and a few pedals. Regardless of playing style, they’re doing just fine abiding by sound level restrictions and kicking ass with the tone we feel Mercury upgraded amps deliver.
These players really get the fact that an amp lacking in tone can’t be fixed with higher power or covered up with a gain mod. An amp that coughs out an asthmatic tone at 50 or 100 watts easily fatigues both music listeners and guitarists. But the audience will stay until the bar closes if the band plays well and sounds great—even with as little as a few watts going through the available PA system.
PG: What can a guitarist expect to hear when upgrading their transformers in a newer amp?
SH: An amp’s transformers are the most important component in determining the quality of amplified guitar tone. And it’s no coincidence that they’re the most expensive parts in an amplifier. Many of the newer amps just don’t have the same “overkill” factor with their transformers as the amps in the ’50s and ’60s. Why? Ignorance and a bean-counter mentality. What’s good for accounting isn’t necessarily good for tone from an amp. Sadly, the people making these decisions are probably not players themselves and don’t seem to realize the damage they’re doing to the industry.
It’s not unusual to find a current production amp with a power transformer running hotter than hell, even without cranking the amp all the way. Or having an undersized, cheaply built output transformer whose sphincter begins to tighten the moment the guitarist reaches for the amp’s volume knob. An amp built around anemic transformers yields only to dull, thin, noisy, fuzzy mids and mushy bass. That’s what makes your notes sound more like farts through a pillow. This overkill factor is probably the only edge that some of the vintage amps have over the newer amps.
We have made it our mission to duplicate the performance of the best original transformer designs of all time. In terms of amplified guitar tone history, these transformers represent the best ever produced.—Sergio Hamernik
Have you ever noticed how most newer amps often weigh less, sometimes a lot less, than the older ones? That’s usually the weight difference between the old and new transformer designs. There is a direct relationship between weight and having transformers that seem to stay cooler and “loaf around” with power to spare, until a player demands more from their amp. It’s like they are waiting around having a card game, waiting for the player to do something. The best vintage tone was born that way. Newer amp tone can be easily improved—if the builder follows some of the same ideas.
Upgrading with quality transformers gives a second chance to a new amp owner to make things right with their tone, by reclaiming that overkill factor. Assuming there are no issues with the amp’s circuitry like bad parts or worn out tubes, a guitarist should hear and feel improvements with the very first pluck of the guitar. They should expect to hear the notes more detailed with overtones, and a quicker and more immediate response to their playing. Clean notes will have less sonic collisions with noise and reveal more bell tones, chimes, etc.
When more distortion is required, the player will sense better control of crunch and when break-up begins to happen. The coughing and hacking that happens when a stock amp is pushed, will vanish with a transformer upgrade. It will be replaced with longer sustains and notes that reach farther. The amp will also sound closer and bigger than the power it puts out—and the bass notes will have a tighter, rounder bottom end. And when pushed, she will still be able to hold that quarter from dropping—no matter how tall her high heels—something most musicians are looking for.
It’s not uncommon for guitarists to report that it took a few weeks of playing to fully realize what they’ve gained in terms of harmonic richness. These players have typically played longer and felt more inspirational emotions sucking them in, as they have invested more time into relearning and becoming reacquainted with their amps.
PG: Many players become very attached to the transformers in their vintage amps. When you create ToneClones or Radiospares and Partridge versions of these classic transformers, how close are they get to the originals?
SH: Radiospares and Partridge are our brand specific clones, whereas ToneClones are “best-of-breed” duplicates culled from the hundreds of other brands that have made transformers over the years.
We have made it our mission to duplicate the performance of the best original transformer designs of all time. In terms of amplified guitar tone history, these transformers represent the best ever produced. In the grand scheme of tone pursuit, these designs are incredibility important and deserve to be considered treasures.
This is an ongoing project for us, spanning almost three decades now. And it couldn’t have been accomplished without the enormous amount of assistance we’ve received from top players and amp collectors around the world.
What about Axiom transformers? Where do they fit in?
The Axiom transformer line takes over where the limitations of vintage transformer design ended. No bean counters here—simply the sincere pursuit of answering the age-old question: What if there were no constraints on budget, time, or material quality to achieve the best possible performance? That’s our objective with the Axiom line.
Axiom transformer designs represent many new approaches—new tone with the best materials and designs money can buy, so they’re not intended for the timid or the low-budget crowd. Check out our FatStacks and SuperStacks for the Marshall DSL and TSL families for interesting comparisons.
PG: Mercury’s vintage transformer restoration service has been gaining a reputation for quality work. Why would someone want to restore a transformer instead of replacing it? And vise-versa?
SH: Some vintage amp owners prefer to pay the extra cost of our restoration services, because it’s very important to them that their amps retain authenticity. Collectables or rarities are valuable. They’re of the “why take chances” mind. The high road. But on the flip side, we have pro musicians who insist on touring with their vintage gear. To play it safe, and not sacrifice the tone of their original transformers, they have their techs replace the stock transformers with Mercury’s. By doing this, they preserve the original transformers from road abuse while taking advantage of our reputation for tone, durability, and warranty. Restoration of vintage transformers is a tricky and highly specialized art. Sadly, too many of the great originals have been lost forever due to technically inept and musically disinterested people. We see attempts at “rewinds” here all the time.
Occasionally, it appears some people confuse “demolition” with “restoration,” and the preservation of the original tone is lost forever. There’s no shortcut to doing a proper restoration.
PG: I understand you’re doing all of your labor and get all of your materials in the USA. How does that impact your business aside from just the straight costs?
SH: Well, we figured that someone has to do it—and we really do make everything here with 100 percent American materials. There are plenty of products out there stamped with “Made in the USA,” but are actually assembled with non-USA, low-price materials. But yeah, we’re the real deal and proud of it.
Building transformers that make an amp sound good requires highly specialized technologies, highly skilled labor, and the right kind of materials. We love music and owe it to the players out there to do all the work “in-house,” so we can keep tight control over every aspect of our transformer designs. It’s really old-school military spec style, so our transformers don’t vary at all from batch to batch. If you need a replacement transformer 10 years from now, it’ll sound exactly the same as the one it’s replacing.
We’re hard-liners when it comes to not playing shell games with a musician’s hard earned dough and quest for better tone. Perhaps I’m a fool for doing it this way, but I was brought up in a musically minded family. From a very early age, I was taught that music is as important and necessary as food. If there is a day our services are no longer needed or appreciated, I’ll pursue my dream of owning a car wash in the valley, and get into the business of making money.
PG: Any new or exciting projects in the works at Mercury?
SH: Yes, but we’re planning on releasing the news sometime around summer. For quite some time, we’ve been fielding requests for accessories to accompany our transformer line. We’re being asked to apply our know-how to other aspects of guitar amps.
PG: Do you have any advice for guitar players and techs in their quest for tone?
SH: Don’t let anybody fool you—every player has the ability to discern the difference between good or bad tone. Unfortunately, there are a few too many self-styled “experts” who irresponsibly dispense advice without having a clue. As a result, we’ve all seen amps completely lose their tone by being modded to death.
There’s no excuse for the old “damn, I’ve done it this way for many years so it must be right” mentality. More than ever, it’s so easy to seek opinion, advice, and help online and elsewhere. I highly recommend the old textbooks from the 1950s and 1960s as a good place to start on vacuum tube audio circuits.
Do your homework and follow what the smart players are doing—improving your tone isn’t that elusive. If what you have sounds good to you, leave it alone. But if you know your amp’s tone could use some improvement, then start where it begins… the transformers. PG
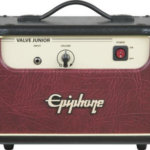
The Epiphone Valve Junior is a small 5W amp head that is first most noteworthy because it is… well, cheap. Especially considering it is a tube amplifier, selling for $129 is frankly a bargain. Because of its simplicity and price, it has had a bit of an underground following being a pure-tube circuit with a single 12AX7 in the preamp stage and an EL84 as its output tube running Class A. The amp has 4, 8, and 16 ohm output jacks to enable a wide use of cabinets.
All in all, with this setup and a single volume control, players can get an idea of how tube distortion and compression changes as the volume is turned up. And it can all be done without the need to put in ear plugs that you would otherwise need when trying similar activity with a 100 watt head.
And the amp on its own sounds o.k. It’s obviously not wildly versatile, but “old school” style players can set an amp like this to obtain as much gain they’d like, then they can clean up their signal by use of their guitar’s volume control. Problem solved. Not enough volume for gigs? Throw a microphone in front of the cabinet.
The Mercury Magnetics Modification
The basics are changing the power and output transformers and adding a choke. There are some additional filtering and component changes. While the amp stock has one EL84 tube, the mod kit adds an additional 6V6 tube that gets blended to increase power.
The documentation that comes with the kit is excellent and really makes performing the mod easy. Our resident amp builder Mike Mullen took the amp further and created a new handwired board for the Valve Junior Kit — just for fun. He also flipped the chassis so that the front of the amp has the mesh screen and makes the amp look a bit more like some of the contemporary designs (you can see this look in the videos).
As one would expect with the change in transformers and the 2nd power tube, the amp is louder. In fact, it’s now loud enough to play with a full band of drums, bass, guitar and singer — unless you have a hard-hitting drummer that is! What you can expect is an overdriven sound great for rock and blues. But if you need clean headroom, you’ll still want to mic it up. The modified amp is very dynamic, with much more clarity and fullness on the lows when the amp is turned up to bring on the 6V6/EL84 combination of tube compression.
Where the modified Valve Junior may now have its strongest application use is for recording. It’s no secret that some of the greatest recorded sounds in rock and roll and blues history were done on smaller amps.
The modification kit sells for $299 through www.MercuryMagnetics.com and those with basic soldering skills can do the job with the step-by-step documentation and CD being a big help. While some may balk at the fact that they now have spent a total of about $400 for the amp, transformers are indeed the heart of the amp’s circuit, especially the output transformer. The output transformer is the final link between the tubes and the speakers, and we know from past tests what a great output transformer can do to improve the tone and fidelity of a tube amp. With the Upgrade Kit complete here, you’ve now got a custom boutique amp for about $400 — which would still be considered a bargain for many.
We recorded a couple of basic videos to show some of what the Mercury Magnetics modded Epiphone Valve Junior can do when plugged straight in just playing some basic blues and rock style lead and rhythm (no Charvel shred-style this time folks).
The first demo uses a Les Paul, the second a Stratocaster.
Source: https://mercurymagnetics.com/pages/catalog/kits/valvejr/LegendaryTones/LT-01.htm
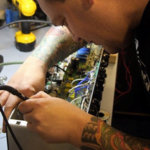
“I’m extremely picky about my tone & Voodoo is the only amp Mod company that gets it right.” Jason Hook of Five Finger Death Punch said.
Trace Davis is Founder and President of Voodoo Amplification, He started his business in the mid 1990s with a small shop in Ithaca, New York, repairing and modifying production guitar amps with his own custom circuits. And now he and his company produce and design some amps that are favoured by such great guitar players Vivian Campbell, Doug Aldrich, Jon Schaffer and George Lynch.

* Hi Trace, how are you doing? please introduce yourself and your company for our readers
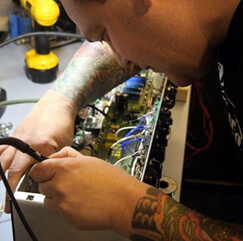 I am doing well thank you. My name is Trace Davis and I am the Founder/President of Voodoo Amplification since 1998 located in Lansing, New York USA.
* Voodoo amp were in the LA amp show 2011, how did the show go for you? Can you tell me about the feedback from people who attended?
This was our first time exhibiting at the LA Amp Show in Van Nuys California. The show was a great success for us and we could not be more pleased. All feedback we received was very positive and we met a lot of great players. It was good to see a lot of old friends and meet many new friends. A good time was had by all and I am happy we decided to do the show.
* Which Voodoo products were shown there?
The rooms were smaller so we had to take limited gear.
We are constantly striving to improve on all aspects of what we do, be it our own high end products or our Modifications. It has always been our goal to not only meet a players need but to exceed them. With this comes improving every aspect of what we do as no player wants an amp that is destined to break down or requires continuous visits to the repair shop because it was poorly designed. Through our Modifications, we strive to improve reliability as well as tone and performance. The Voodoo Amps products manufacture are designed to last a life time.
 * Is there any shocking news that you want to tell us about?
We are proud to announce Mark Tremonti of Creed & Alter Bridge is now using/touring with our V-Rock DL100. It goes without saying that Mark is a great player and we could not be happier to have him onboard.
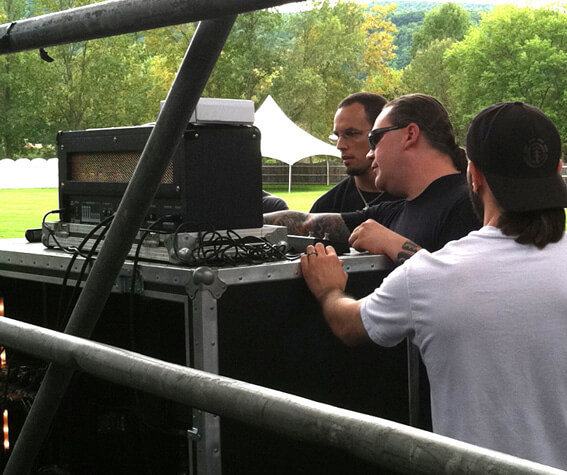
Dialing In Tones on Voodoo V-Rock DL100. From left to right – Mark Tremonti, Trace Davis and Anthony Cacciotti (09-09-2011)
* Great musicians and guitar players like George Lynch, Vivian Campbell, Doug Aldrich and Phil Collen choose to use Voodoo amps products, how did that happen? i meant how do they find out about your products?
That is a good question and unfortunately it is one that has no specific answer as it varies greatly from one player to the next. We have seen every scenario you can imagine but to generalize it I would say it comes through referrals. Some players are gear-heads and are in-the-know through the internet though often times it comes through the referral of their guitar tech and/or another player who is in a band they are touring with.
* and tell me do you have meetings with your clients to discuss their needs?
Yes and that comes in the form of meeting in person and/or though phone calls. It really comes down to what works best for the artist and their schedule. Meeting at trade shows is all well and good (NAMM, etc) but any great player who tours will tell you that they need to hear the amp at stage volume and I whole heartedly agree, which is we always meet players on the road when they are touring.
The V-Plex was the first amp we released. This is a bit of a long story so in the interests of your readers I will try to keep this as short as possible; I used to own an amazing 68 plexi but one day I was playing the amp and lightening struck very close to the building and shorted the output tubes as well as the output transformer. Unfortunately the amp never sounded the same again, which ironically is also what lead me to getting into this business full time (trying to get back a tone that I had lost). Several years later a gentleman brought a very late 68 or early 69 plexi to shop to be serviced. We refurbish/service a great deal of older Marshalls but this was the first amp that sounded the same as my old plexi had and I couldn’t believe it! Naturally the gentleman did not want to part with it so after several offers he finally agreed to sell the amp to us. This amp was the basis for our V-Plex series. , including every minute detail as I wanted to offer an amp that would allow every player to be able to experience the magic is a great sounding plexi, without having to buy/sell numerous older ones in the hopes of finding a gem.
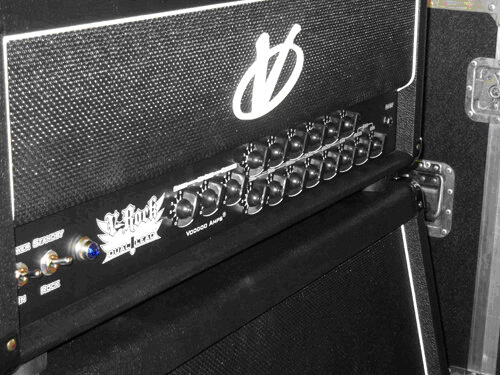
V-Rock-DL100
* What ‘s the company plans for the future? Do you think we will see the day when Voodoo amps are used the same way as Marshall are now?
That is one of our goals, as lofty as it may be. Our primary goal is to continue to build the company the proper way, which is by continually offering the highest quality products and services at the best possible price we can.
Having Modified thousands of tube amps gives us an advantage over others. IE: we see many short comings such as but not limited to; factory defects, premature failures, poor layout (hand wired or PCB/printed circuit boards), etc. This knowledge directly helps us to build a more reliable and bullet proof amplifier that will last a lift time.
Joe Stump & Trace Davis, NY Amp Show
* Tell me about yourself, how did you choose this path for your career? how did you find that you’re interested in designing guitar amps and creating new products?
I actually grew up around it. My father worked for Westinghouse Corporation making and over seeing the manufacturing of vacuum tubes. As many know Westinghouse made their own high quality brand of tubes but they also OEM’ed tubes for other well known companies such as RCA, GE and others. I also come from being a session player, recording engineer and a live/touring player. I truly cannot imagine doing what I do without having all this experience to draw from.
Our goal is to continually grow the Voodoo Amps brand to be as large as possible without sacrificing our high standards through which we built this company. I was raised with the mantra that “anything worth doing is worth doing well” and I intend to adhere to that.
What many may not realize is that we design products for other amplifier and pedal companies and have been doing so for the past 5 years. There are many larger companies that manufacture in China however Voodoo Amps has no plans of doing so. As such we offer our services to help design a better quality product that can still maintain its present price points. Having literally Modified thousands of amplifiers we have seen all the short comings (IE: design flaws, factory defects, etc) and this gives us a unique edge when designing. More to the point, we know what not to do and as such product reliability can be vastly improved with little to no additional cost.
As we are bound by NDA (Non-Discloser Agreements) I am not at liberty to disclose names at this time. Many reading this may ask why I would bother and the answer is simple; there are young kids cannot who cannot yet afford the products Voodoo Amps manufactures. I come from humble beginnings so I can relate to that on many levels. Learning to play guitar changed my life and as such I believe it’s important to inspire kids to play. If I can help to do that by taking part in improving/developing a product they can afford – I am more than happy to do so.
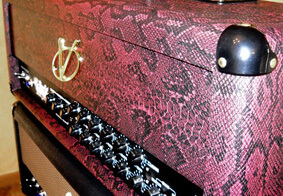
Custom-Shop V-Rock DL100
As the largest Modification company in the world we fully realize that one-sizefits- all does not work for everyone. There are players who have specific needs and/or are looking for tones that go outside of what is commonly. We are here to meet those needs, which is why we offer Custom Modifications. To follow suit we also have our Voodoo Custom Mod Shop. Through the Custom Shop we offer both single channel as well as multi channel models and are set up to meet the most demanding needs.
A great deal of time and experience goes into the production models we design and manufacture. Our products (and Mods) have been on tour all around the world numerous times and continue to perform flawlessly night after night.
This is a common question and one I receive at least once a week. What I am about to say is not meant to deter one from entering this business but rather it is an honest assessment at the time of this writing. This is a difficult and hard business to enter, it is honestly a labor of love. If working on amps is a passion then I would recommend doing it on the side (IE: have a good day job/career to rely on). The good news is that the cream always rises to the top and yes it can take some time.
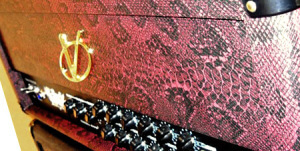 Having worked as both a session/touring player as well as recording engineer and I understand that an amp not has to sound good but it has to equally feel good to playing. An amp has to sound good in the room so that its inspiring to the player but it also had to sound good under microphones, both live and in the recording studio.
I always strive to learn some thing new every day. We are constantly looking for new ways to improve our products and the journey to understanding every aspect of what effects tone is part of the alchemy or the art if what we do. Mathematics and oscilloscopes only take you so far, from there you need to use your ears to tell you what sounds right and use your hands to know what it feels like when playing on the amp. More over, having worked on some of the most famous amps in the business and having been blessed to work with so many talented players has given us all helped to give us a distinct advantage.
In short – we are obsessed with tone. We have worked with some of the most demanding players out there and I always look forward to the challenge. Tone is a matter of taste and as with all matters of taste there can be no right or wrong.
Thank you Trace, Wish you all the best.

The en vogue status of low-wattage combo amps remains a boon for any guitarist on the lookout for a compact amp. Just about every major amp company and most boutique shops are offering at least one model in the 12- to 18-watt range and that’s a great thing. What’s not to like about an amp that you can push hard without blowing out the windows or that you can throw in the front seat of your car for a gig?
Nolatone Ampworks — and the work of Paul Sanders — are already standouts in this fast-growing amp category. Hand built by Paul in Raleigh, North Carolina, using only the highest quality parts, Nolatone models like the June Bug and Chimey Limey have already made a mark for their interpretations of Fender Tweed and Vox tones. They might also be some of the sharpest looking amplifiers available today. And on both the sound and visual front, Nolatone’s 15-watt Rotten Johnny is every bit as spectacular a performer as its cousins in the Nolatone line.
The Dirt
Weighing in at a very reasonable 28 pounds with dimensions similar to a Fender Blues Junior (18″ x 16″ x 10.5″), the Rotten Johnny is an open-back 1×12 combo constructed of solid dovetail-jointed pine. Our review Rotten Johnny came in covered in two-tone brown and crème vinyl with basket weave grille cloth, and sported the signature Nolatone “V” panel TV front design. The 12″ speaker is a 25-watt Warehouse Green Beret, which is designed to sound like a broken-in Celestion greenback. The circuit is built around two JJ 6V6 power tubes (you can also request EL84s) and two 12AX7s. Everything under the hood is top-notch, including custom Mercury Magnetics iron, 1-watt carbon film resistors, F&T filter caps, Switchcraft jacks, and Carling switches laid out on a hand-wired turret board.
Unlike many lower-wattage amps, the Rotten Johnny offers far more control options than a single volume and tone control. The top panel consists of a unique 3-band EQ (Bottom, Mid, Top), as well as Pre- and Post-Gain controls and a Master volume. A Mid Lift switch (which can also be activated by a footswitch) effectively works as a boost for solos. Power and standby switches reside next to a red jewel power indicator.
The EQ section is a little more flexible than what you’ll find on a production-line low-watt amp. The Bottom control is a 6-way switch that progressively rolls off bass. The independent Mid control is not part of a typical tone stack configuration — dialing it down extends the highs and lows to create a very Fender-like mid-scooped tone. The High control, meanwhile, is a Vox-style top-boost reverse-wired to enable players to move from chiming to much darker tones by backing off the control. Borrowing a move from Nolatone’s June Bug design, the Pre- and Post-Gain controls work in tandem to control the amount of gain to the second stage and phase inverter respectively.
Rockin’ the Filament
With a Godin Icon Type 2 with Duncan P-Rails in hand, I got right down to the business of exploring the wide-open voice of the Rotten Johnny. With the Godin set to the humbucker position, I cranked the Master to full, set the Post Gain to around noon and brought up the Pre Gain until I got a rich, full distortion. The sound was raw and thick, but I wanted a little more clarity, so I dialed back the Bottom knob by a few clicks, scaling down the thickness a touch, but opening up the sound considerably. The combination was reminiscent of Frampton’s Rockin’ the Fillmore-era Humble Pie tone — a pretty huge sound for a 15-watt 1×12 combo. And if I closed my eyes, I’d swear I was listening to a full stack in miniature. For years, I’ve tried to harness 100- and 50-watt amps with attenuators and master volumes and never been totally successful. Needless to say, I was stunned when two 6V6s pushing a single 12″ gave me what I’ve been looking for—and then some.
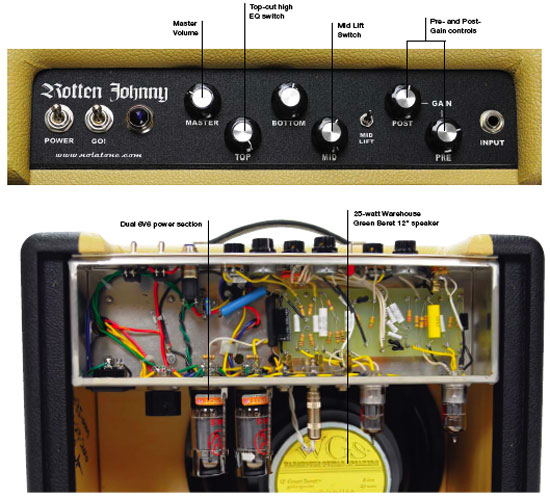
Wielding my ’74 Les Paul Custom and with the Mid control set to the non-lift position, I was able to dial in AC/DC rhythm tones with just the right amount of kerrang and chime to create the illusion of a blaring baby JTM45. And setting the Pre Gain to noon and ramping up the Post Gain added gobs of thick, juicy crunch with just enough bark to cut through a mix. This is where the Top control really shines — pulling the Top back just a touch takes some of the edge off without muddying the tone. It’s voiced for just the right amount of sheen and clarity without ever being brittle or ice-picky. The top-cut configuration also makes the effectiveness of the Mid control’s sweep range very apparent — enabling boosts in presence that aren’t too brittle.
The Mid control is almost like another gain knob, delivering more distortion and dimension the more you crank it. And with the Mid Lift engaged Rotten Johnny turns into a roaring fire-breather with more gain than most of us would ever need. I’ve rarely heard a 6V6 amp sound this way — often assuming some of the tonal qualities of EL34s and EL84s. Though it only takes cutting the Mid and backing off the Pre Gain to get back to more blackface-like territory that was a perfect match for my Strat.
For a 15-watt amp, the Rotten Johnny doesn’t lack headroom. Because there is so much control via Pre and Post gain over how hard you hit the tubes, I found myself digging deep into the wealth of Strat-friendly clean sounds you can get with less aggressive use of those controls. It was easy to conjure thick and chewy cleans with just a hint of grind by pushing the Post Gain and leaving the Master wide open. Even with the Mid Lift engaged I could still hit the guitar hard without harsh sounding breakup. And I was always able to shape the thickness with the Bottom switch, which I used extensively to match individual guitars to the amp.
The Verdict
It’s been a long time since I’ve been so excited about a new amp. The Rotten Johnny has a huge range of brilliant tones in a compact design that, at $1399, doesn’t break the bank. For bedroom or studio musicians, it’s a dream because you can coax out cranked stack sounds without knocking down walls and get the most beautiful cleans with the twist of a few knobs. The construction is top notch and the styling is classy and cool. For an amp that’s roughly the same size as a 1×12 cab and weighs less than 30 pounds, it has the sonic personality of something much larger. I only wish this little guy was around when I first started playing guitar. Thankfully, I’ll have the chance to make up for lost time — my own Rotten Johnny is on the way and I can’t wait to cut loose.
Buy if…
you want everything from Brit aggressiveness to blackface tones in a compact package at a fair price.
Skip if…
you actually need the power to blow down barns.
Rating…
![]()
![]()
![]()
![]()
![]()
Source: https://mercurymagnetics.com/pages/news/PremierGuitar/PremierG-30.htm
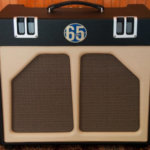
THE CREW AT 65 AMPS HAS A REPUTATION for putting considerable R&D sweat into every new amp design before it leaves the maker’s Los Angeles, California, headquarters. The Lil’ Elvis has, in the broad sense, been in development even longer than most — a stately 48 years or so, if you take into account its roots in an odd little combo owned by Vox collector and author Jim Elyea, one that Vox designer Dick Denney had built as his own personal amp, but which never went into production. Having seriously dug this prototype’s overdriven sound, 65 Amps’ Dan Boul and Peter Stroud set about tidying up the circuit, giving it a usable clean voice and a much broader vocabulary, and making it into a versatile — yet still quite simple — club-gig and studio amp for the contemporary tone fiend. The result is 65’s most diminutive offering yet, both in physical stature and output level, but as we shall see, the stated “clean output” of 12 watts can be deceiving, and this isn’t the mere bedroom brawler that such a rating might imply.
The format hints at a blend of American and British small-amp templates: from this side of the pond, a quirky split-phase inverter similar to that of Fender’s Princeton Reverb and a “bias wiggler” tube tremolo circuit not unlike that used by some Gibson and Ampeg models — from the other side of the pond, the dual EL84 output tube complement and EZ81 tube rectifier. And from California circa 2009, plenty of fresh thinking in the form of the Bump and Master Voltage circuits and the squat, chunky cab, as well as the considerable effort that went into transformer design (with Mercury Magnetics), grounding and filtering topologies, and noise reduction techniques. The Lil’ Elvis is also a somewhat simpler affair than other 65 products, and comes in at a little less coin as a result. Its Bump feature is fixed — rather than having its own Tone and Level controls like the one on the SoHo and Stone Pony — though it is footswitchable (from a pedal that also includes a stomp button for the tremolo), and EQ is limited to a single Tone control. There’s also an enigmatic Smooth switch that has no noticeable affect on clean settings, but does exactly as it says when you crank the amp up, by engaging a circuit that keeps the grid from lifting up from ground when you go into heavy distortion, thereby reducing crossover distortion at the output stage. The final control on the panel, labeled Master, actually governs a proprietary “master-voltage” circuit that lowers the preamp and power tubes’ output levels while retaining filament voltage and, hence, is purported to preserve tonal vocabulary and playing feel.
The stout 21″ wide x 18 high ” x 11.5″ deep cab wears the traditional 65 Amps two-tone cosmetics with aluminum front-edge cooling vents, and houses a single Celestion G12H-30 speaker. Inside, the workmanship lives up to everything I’ve come to expect from this high-end maker, offering a superb example of handcrafted tube amp manufacture. Of the whole package as it sits, my only minor gripe might be that it’s tricky to change the horizontally mounted tubes, requiring a blind grope inside the cab, but it’s easy enough flip the whole chassis outward, panel still attached, to do the job more carefully. Oh, and why “Lil’ Elvis”? In Boule’s own words: “No matter how small you make Elvis, he still rocks.”
I tested the Lil’ Elvis with a Fender Telecaster, a Collings 290 with Lollar P90s, and a Gibson SG with humbuckers. Played clean, it issued classic blackface-Fender-style tones, with piano-like lows and silky highs, with good headroom up to higher Volume settings than I would have expected. Cranked up, this sonic template segues into a surprisingly convincing Marshall half-stack impersonation. There’s a juicy midrange that isn’t over-baked, surprisingly solid low-end thump, and velvety smooth highs that really help your lead playing to soar — especially with the Smooth switch engaged. Stomping on Bump makes everything thicker and bigger, enabling serious rock lead and rhythm work alike from this deceptive little amp. And although it would be nice to be able to set the amount of extra boost that this feature introduces, it’s still a groovy option. The Master control works as it should, retaining body and character as you lower the output level, but it does increase the depth of your given tremolo Intensity setting, an unexpected quirk, but one that’s not too problematic given that you’ll most likely adjust it and leave it — and likewise set Speed and Intensity to taste — before you launch into playing. For its own part, this output-bias modulating tremolo circuit is a real sweetie, adding rich, chewy, chop to your sound and attaining a sense of depth and vibe at higher Intensity settings that must be heard to be appreciated.
Containing a few nods to classic amps of the early ’60s, but tied together with a lot of original design work, Lil’ Elvis is one chunky bundle of surprises. This top-notch tone machine is surprisingly versatile despite its simplicity, and it sounds way bigger and badder than you’d ever imagine 12 watts could provide. So if you’re gunning for a low-power amp that wields some serious mojo, Lil’ Elvis is the ass-kicker you’ve been waiting for.
SPECS:
CONTACT 65 Amps, (818) 760-5089, 65amps.com
MODEL Lil’ Elvis
PRICE $2,150 retail/street price N/A
CHANNELS One
CONTROLS Volume, Tone, Depth, Speed, Master, Smooth switch, Bump switch
POWER 12 watts
TUBES Three 12AX7 preamp tubes, two EL84 output tubes, one EZ81 rectifier
EXTRAS Series effects loop, two-button footswitch jack, dual speaker outs, switch for 8Ω & 16Ω impedance
SPEAKER Celestion G12H-30 (16Ω)
WEIGHT 49 lbs
KUDOS Great build quality. First-class clean and overdrive tones. Surprising versatility.
CONCERNS Tubes are tricky to change without removing chassis; tremolo strength increases as Master Voltage is decreased.
Source: https://mercurymagnetics.com/pages/news/GuitarPlayer/GPDec09.htm
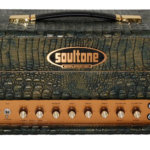
Soultone’s 1986ps SuperPlexi delivers classic rock tones a la the Marshall Bass head.
The opening chords to AC/DC’s “Down Payment Blues” are one of the best representations of classic overdriven British guitar tone. Those ringing, raunchy chords have a quality that goes beyond simply a wonderful sound; they can elicit other feelings and emotions as well. The driving force exhibited by the masterful rhythm playing, with the pick digging into the strings, has all of the bawdy, thick qualities that exemplify rock and roll. It conjures feelings of youth — the hair on the back of your neck rising to the occasion — accompanied by a blatant disregard for any sort of rules and the need to just rock out. It’s a cliché that’s entirely true, and only fully understood when standing in front of a raging, healthy British tube monster wielding a powerful, well-tuned axe. Soultone Amplification, based out of Chandler, AZ, has fully captured this potent sound with their line of variable power guitar amps. In addition, they have given special consideration to the appeals from players and producers who have attempted to control their rather unwieldy ancestors in the past.
The 1986ps SuperPlexi is clearly influenced by one of the most underrated amplifiers in history, the Marshall Bass head. These amps are sought after for their tonal similarities to the Lead series, with differences in the circuit that lead to more low end and softer highs. They came in two flavors, the 50-watt Bass and 100-watt Super Bass, just like their Lead counterparts. Guitarists quickly realized that not only did they sound great with a bass, but were excellent with a guitar as well. Readers who are not familiar with these amplifiers should listen to Duane Allman’s work on At Fillmore East, Malcolm Young’s AC/DC catalog, and Lemmy Kilmister’s recordings as bassist for Motorhead. That sound has gained attention from modern guitarists, such as Adam Jones [Tool], who is a major proponent of the Super Bass. Soultone has taken the iconic nature and characteristics of this sound and created their own interpretation, rife with new features and impeccable craftsmanship.
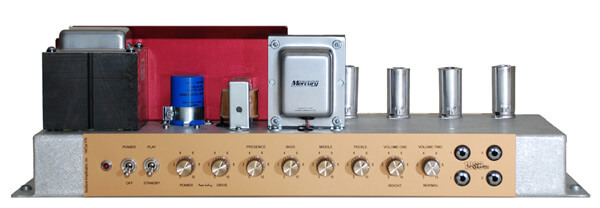 Considering how much power the guitarist has over the headroom in this amp, it is extremely easy to achieve great overdriven tone. Setting the EQ and Presence controls at noon, Power Scaling at 1 o’clock, Drive at noon, and plugging a Gibson Flying V into the upper left high-sensitivity input with Volume 1 at 10 o’clock is a great start to experience what this amp has to offer. Notes ring out with authority and punch, but without any sort of harshness that can be common in modern high-wattage master volume amps today. Beyond the satisfying, familiar crunch that the amp delivers, the there’s a surprising sensitivity to pick attack. Even with the relatively hot pickups in the Flying V, the 1986ps cleans up exceptionally well when playing with a light touch. Once you find the sweet spot, you might not even have to touch the volume knob at all to achieve a good clean — provided that you’re willing demand overdrive by smacking the strings with Nugent-like authority.
The real treat, however, was the tone achieved with a Gretsch G6118T, 125th Anniversary model. If there is one thing that the 1986ps SuperPlexi does exceptionally well, it is a great Malcolm Young tone. If Soultonedecided to change the name of the amp to The Powerage, they certainly wouldn’t be out of line. Telecaster players might want to consider the SuperPlexi too, as it performed very well with a Fender Road Worn Tele, adding some extra muscle and punch while softening the high end slightly (but not detrimentally).
The amplifier does not quit there. Packed with the head is a separate two-button footswitch. The first switch, simply labeled “Fat,” adds a 330uF bypass capacitor to the second gain stage. When engaged, there is a minor increase in volume, gain and bass. Soultone claims that it is more effective for more conservative volume settings. Its effectiveness seems to be entirely dependent on how the amp is set, however. Some settings made the Fat boost hardly noticeable at all; others can cause the amp to go from moderate to shaking the walls! There are some great sounds to be had here. The other switch either activates or deactivates a true bypass effects loop, located on the rear panel of the amplifier. With the extreme attention paid to every small detail of the construction of the 1986ps, Soultone decided that versatility should also be applied to the effects loop by adding separate Send and Return level controls.
This leads to a question: with all of the enhancements, high-quality components, low-noise circuitry and killer tone to boot, what can be said against the 1986ps? The price (starting at $2,199 with black Levant covering) is roughly comparable to the price that one of its decades-older counterparts commands now, minus all the added features and newer, more reliable components. Considering that older, single-channel British heads are in demand with players and collectors, however, scoring one at an affordable price has becoming more of a chore in recent years. Though the amp might cost a bit more than an original, the case could be made that the 1986ps would save more money in the long run on the expensive maintenance and upkeep that vintage heads sometimes require.
Modern metal rockers probably won’t be interested, although the SuperPlexi certainly has enough gain to satisfy players in the classic metal genre (late seventies to mid-eighties). Tonally, it is most definitely a classic rock-oriented amplifier, not suited for the modern rock crowd that enjoys extreme saturation and low-mid emphasis in their sound. For the player that is searching for the same type of tone on more of a budget, a simple single channel head without all the bells and whistles is probably in order.
For fans of the smooth, crisp overdrive tones of the ’60s and ’70s, the Soultone 1986ps SuperPlexi is definitely worth a good, solid test run. Players frustrated with Plexi-style amps with lack of low-end and harsh top-end sizzle should give it a try, too. I would highly recommend visiting Soultone’s website to get their detailed run down on their design and component selection process. For the price, features, solid construction and excellent tone, the 1986ps might signal the end of a tonal journey for quite a few rock guitarists.
Buy if…
Classic cleans and great British overdrive are your thing, and not having to spend a few bones on a good power attenuator suits you.
Skip if…
You need a more modern tone and the ability to switch between multiple channels, or you’re looking for the sharp, upper attack that 100-watt heads have in spades.
Rating…
![]()

Starting at $2199
Soultone Amplification
www.Soultoneamps.com
Source: https://mercurymagnetics.com/pages/news/PremierGuitar/PremierG-21.htm
Simple Amps’ Big Iron 6VA amp is simple, old school and responsive to your guitar’s controls.
When I received the Simple Amp for review I could hardly ignore its dimensions; it’s a pretty impressive looking package, to be sure. The cabinet weighs about 60 lbs, and the head about 30. The model I received was the Big Iron 6VA, in a head and 2×12 cabinet configuration, sporting the striking Black Widow look.
The 6VA name refers to the output tube configuration, which is two 6V6GT tubes (Tung Sol). Other models using 6L6 and EL34 are available as well; standard preamp tubes are Mullard 12AX7s. The amp also features two 5AR4 rectifier tubes, and the manufacturer states that an optional 12AU7 will give a more pristine clean tone if desired.
So Simple
The head is a thing of both beauty and simplicity. Only two knobs — Volume and Tone — are presented on the front panel. The rear panel features two output jacks, an impedance selector, AC voltage selector, and the AC input module. One cool feature here is that it carries one spare fuse inside the fuse holder for easy access, in case of an emergency. Construction is impeccable, with hand-wired turret boards, and Mercury Magnetics power transformer, output transformer and choke. The 6V6 model scopes out at about 30 Watts.
The speaker cabinet is equipped with two Celestion Alnico Gold G12 50-watt speakers, set up vertically and wired for 8 ohms. It features an open-back design and has aluminum speaker baffle and bracing. Although I didn’t have an opportunity to hear the cabinet with a wooden baffle, I’d have to say my impression was that the aluminum baffles and bracing made it a bit brighter, and certainly tighter on the low end, than most open-back cabinets I’ve played. This example was mono wired, but a stereo option is also available. The cabinet was solidly constructed of 11-ply and 13-ply Baltic birch, and sounded very tight when pushed.
Another cool thing is that the manufacturer includes both a speaker cable and an instrument cable by Solid Cables, which transfer some of the cleanest tone and response around. They want to make sure that this amp is run under optimum conditions, and it shows their dedication to getting the perfect tone out of the amp.
So What About the Sound?
The creator of this amp, Joel Jones, tells me that his idea for this design comes from the desire to turn the amp up to ten and control the whole clean/dirty sound from your guitar’s volume. Doing it this way allows for the all-important power tube saturation. It’s easy to overdrive a bunch of 12AX7 stages for distortion or overdrive, but when the power section comes into play, the whole dynamic changes. The amp can be very warm and clean at lower settings of the Volume control, especially using the bottom input, which has less gain, but touch sensitivity is also affected. The lower input might be better for some players who derive their tones from pedals, as the higher headroom would let their reverb and delay effects work better. Happily for many players, this amp has more available gain on ten than most amps of this type. The low end is smooth and tight. Some single-volume/single-tone amps sound pretty bloated when cranked in this fashion, but not this one.
The Simple Amp 6VA is also very pedal friendly. I used a Tube Screamer pedal and an old Marshall Guv’nor pedal and got amazing distortion and overdrive sounds with both a Strat and a Les Paul. The Fender Stratocaster used was a typical American Vintage 57 reissue with a maple neck and Duncan pickups. The Les Paul was a 1969 Black Custom retrofitted with original 1959 PAF pickups.
The type of tones I was able to achieve varied according to the various pedals I used. The TS808 gave me a very good rendition of SRV and Robin Trower when used with the Strat. Through this pedal with the Les Paul, the classic British rock tones — Bad Company and Zeppelin — were readily available. When I switched to the higher gain Marshall Guv’nor pedal and the Strat, I found that David Gilmour tones and even a bit of Yngwie on the neck pickup were no problem. With the Les Paul and the Guv’nor I found Gary Moore and Neil Schon type of sounds (I should mention here the volume was set at about 9, and the tone about 7).
I have to say that for heavier rock tones, you will need to use a pedal. The Strat-blues SRV thing is really no problem with this amp paired with any type of Tube Screamer. I was surprised at the volume the amp produces. This is probably the result of the two 12” speakers stacked vertically, as well as the cabinet design. The guitars cleaned up to pristine clean when their volumes were reduced, making it a very usable unit for those comfortable with controlling it this way. The Simple amp has a wonderful warm tone and texture to its sound, which is fairly hard to come by these days. I noticed exceptional touch sensitivity to the amp, and it responded well to different types of picking techniques.
The tone control on the amp was very wide ranging, going from very dark to some pretty screaming highs. On the high end the amp seems to have more gain, but even with the amp cranked and the Tone knob turned all the way treble side, the top end was not harsh. It was very easy to dial this control in to just the right amount of brightness. The dual rectifier tubes in this amp should not be confused with the similar specs of other brands. In this application they are there to provide just the right amount of sag to the power supply. I think this is probably the reason for the exceptional touch sensitivity of the amp.
The Final Mojo
I found the Simple Amps model 6VA to be an excellent amp for players who are comfortable with controlling their tones from their guitar. It may not be the best choice for players who are used to the staggering gain and sustain of Boogies and Bogners and the like. This amp is not in my opinion, a competitor to those types of amps. It does, however, produce tones that would be difficult to get from the modern high-gain amp. Old school players will love it. It is well built, and even though it is larger than most amps of its type, it is worth the effort to transport.
Buy if…
you’re looking for a great, simple amp with clean/dirty sounds you can control from your guitar’s volume.
Skip if…
you’re looking for a lightweight amp, or prefer the massive overdrive of a modern high-gain amp.
Rating…
Street $2650 (head) $1150 (cabinet, as tested)
Source: https://mercurymagnetics.com/pages/news/PremierGuitar/PremierG-19.htm
No one has ever succeeded in deciphering the infinite variations manifested by the human mind — how we inhabit the same world, yet perceive and react to every moment in our lives in such profoundly different ways. Society, education and culture provide filters intended to shape how we view the world, but each human being remains different and unique for reasons that remain a mystery. And so it goes with music and musicians…. Why do some players find their voice in a Stratocaster, while others can’t imagine playing anything but a big-ass hollow body? This is “me,” and that isn’t, but for someone else it is. Most of us hear target sounds in our head that drives our selection of instruments and gear — a sound that may change with each song, while a weekend blues player might simply wish to refine a single, signature tone in the style of Jimmie Vaughan or Albert or B.B. King. The point is, we often know where we want to go, but the shortest path to our destination isn’t always so clear. To make things more interesting, some players just want to be dropped off at the right address in the Quest for Tone, preferring to find something that works with no tweaks or modifications as quickly as possible, while others view the Quest as a journey with no defined beginning or end. To them, anything is possible until proven otherwise, they enjoy exploring new sounds, and their “failures” are often as illuminating as their successes.
We learned this lesson once again with an amp that we had initially written off, only to discover four years later that it could become one of the most extraordinary guitar amplifiers we have ever owned or reviewed. What changed? Well, with the lucid, unerring clarity of hindsight, we had to dream it first, thinking of terms of possibilities — what could be, rather than focusing solely on what was missing….
Fender ’57 Twin
The 25 watt Twin originally debuted in 1952 as the first amp with separate bass and treble controls. By 1955, the model 5E8 Twin had been upgraded to 50 watts, featuring two 5U4G rectifiers — another Fender first in guitar amplification — dual 6L6s, bass, treble and Fender’s presence control, a new fixed bias power transformer, choke, and extra gain stage and second negative feed-back loop, and the new “narrow panel” cabinet with speakers mounted in each corner. In the next circuit revision (1956–57 model 5E8A), a ground switch was added and the treble tone circuit was removed from the negative feedback loop. Leo Fender couldn’t play a lick on the guitar, but he obviously never stopped thinking about how to improve the sound and performance of his amplifiers, as evidenced by the nearly constant revisions and refinements of Fender circuits. The mighty “high power” 80 watt Twin model 5F8 appeared in1958 with four 5881s, a short-lived 83 mercury vapor rectifier that would be replaced by a single GZ34 rectifier (model 5F8-A), and a new “Middle” control added to the normal bright volume, bass, treble and presence controls. For many collectors and players who can afford them, the high powered Twin ranks with the 5F6-A Bass man as the most toneful, desirable, rare and costly Fender amps ever built.
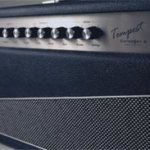
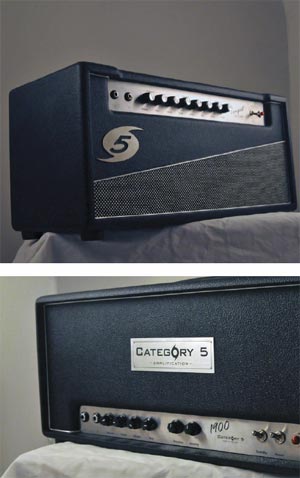 The Category 5 Tempest and 1900 brew up a storm of blues and rock built for the gigging musician.
Category 5 is built on a partnership between Don Ritter and Steve Scott that began as a way to make amplifiers and raise money (and awareness) for charity at the same time. The focus was first on charities providing relief for natural disaster victims (of the Asian tsunami and hurricanes Katrina and Rita), thus the names of the company and its amplifiers. As it has grown, so has the scope of both the products and the philanthropy, which supports an expanding list of worthy causes from Feed the Children and Voice of the Wetlands to the “Blues in the Schools” program, and Blue Star Connection, which provides musical instruments to children with life-threatening illnesses.
This is worthy of mention not only because it exemplifies the principle that you do well by doing right, but also because Cat 5’s amplifiers demonstrate the virtues of doing it right from the get-go. The designs are built on the notion that it’s the players, not the builders, who should determine what qualities an amp has. The touring pros and other players Ritter and Scott set out to satisfy needed tough, overbuilt cabinets and chassis that could handle life on the road; they needed scalable power output to achieve the same tone from the same amp at the right volume for any venue; and they needed amps that would be easily coaxed into giving up outstanding tones. In other words, the design principle and the philanthropic principle are really the same principle: try to give people what they need.
Category 5 started by making waves on the blues scene, providing back line for several festivals (where they were often asked to sell their amps right off the stage), and in a short time they’ve gathered a truly impressive list of artists. The number of signature offerings and approved charities continues to increase. If it’s not a signature model you’re after, there are nine other models — including these two — to choose from.
They also offer a variety of cabinet configurations. The one that arrived with these amps was a large, angle front, closed back 2×12, made from eleven-ply Baltic birch. It is only a tad smaller than a standard 4×12, and it’s enough to handle almost every application. Its Celestion G12H Heritage speakers provided a surprisingly generous low end with depth and control for both amps.
Each Cat 5 amp comes with a goodie bag that includes a vinyl cover, a full set of extra tubes and fuses, and Analysis Plus oval speaker cables.
The Tempest
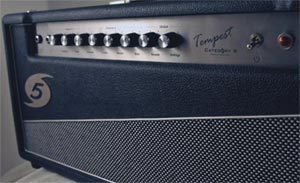 In keeping with the convention, both of our review amps are named for storms. All of the models except the Tempest are named for historical storms; the Tempest, if you remember your Shakespeare, was a magical storm sent by Prospero to daze and confuse his rivals.
The 45-watt, cathode-biased, dual EL34-powered Tempest is a touch flashier than the 1900, with a big, hurricane-shaped “5” logo, vinyl covering and basket weave grille cloth separated by diagonal silver piping, and controls located at the top of the cabinet. Channel one has only a volume and a single Tone control, while channel two provides volume and 3-band EQ controls. Global fold back reverb, power scaling, and a single On/Off/Standby switch with neon indicator complete the control set.
The back panel has some more modern amp features, like an effects loop and a mid-boost switch for channel 2, a line out jack with line level control (you’ll need to run it through a simulated speaker load before going into a board), and footswitch control of the reverb and boost.
Plugging In
Instead of the usual “clean” and “dirty” channels, Cat 5’s dual-channel amps, like the Tempest, offer two different tonal signatures, both of which go from clean to crunch with just the combination of amp and guitar volume knobs. Power scaling makes the overall volume adjustable. The idea is to have two distinct amps in one head — in this case a JTM45-inspired channel one, and a Plexi-style voicing for channel two. Although they’re not completely different, they are distinct.
Using a few different test guitars, a Gibson LP Studio with Alnico V Burstbuckers, a Gibson LP BFG with a Zebra Burstbucker 3 in the bridge and P-90 in the neck, and my Fender Contemporary Telecaster with stock pickups, I found that channel one does the Marshall-like voicing, but somewhat softer. It has good response and excellent definition. With the volume up all the way, this channel has greater clarity and presence at the top end than channel two, as well as smoother distortion. It cuts very nicely, and can be coaxed into giving up the “Beano” tone with a good, transparent boost.
Channel 2 seems to have more headroom, and much more depth and body up through the mids, with a warmer sustain. To be honest, the big, beefy cleans and creamy top end make it a great blues amp, but channel two wasn’t as much of a thrill ride as I’d hoped, and the mid-boost switch didn’t seem to give it the kick it needed. Using the two Les Pauls, the crunch could’ve been tighter, and at high volume there was some loss of definition in the middle. I’m sure this wasn’t all the amp’s fault, as it seems to prefer vintage-style pickups with lower output. The Burstbucker 3 in particular bit in too hard, audibly reducing the dynamic range and smoothness.
For the final test, I used an A/B/Y box to jumper the two channels. Yowza! The best of both channels came through with energy and conviction. Easily the best tone in the box. The bridge pickup on my Tele did a terrific “icepick” tone on this setting, and the neck pickup was all creamy blues, but with more oomph than I’m used to hearing from it. Like the other Cat 5 amps, the Tempest uses high-quality components from companies like Analysis Plus, Mercury Magnetics, SoZo, Accutronics, etc. — you get the picture. This amp is going to be with you for a while.
As Tested $2995 — Category 5 — category5amps.com
Buy if…
you’re looking for a soulful, tone-heavy amp that’s tailor made for taking your blues on the road.
Skip if…
you’re not that into the blues… or the road.
Rating… ![]()
Source: https://mercurymagnetics.com/pages/news/PremierGuitar/PremierG-13.htm
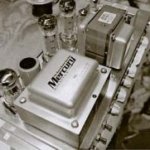
Those of you that have been with us for a while are already familiar with Jeff Bakos and Bakos Ampworks. Frankly, we would have a hard time doing what we do here without Jeff’s presence, just a few clicks west of Ponce de Leon Ave. After 15 years or so repairing, restoring amps, engineering recording sessions in his studio next door, and weathering the ‘80s and much of the ‘90s as a working bass player in a variety of bands, his enthusiasm for great tone remains undiminished.
In his spare time, when one of his customers expresses interest, Jeff has recently been building his own take on a tube-rectified Marshall JTM45. The character of the early JTM45 amps is a little more forgiving and less aggressive than the plexi and metal panel models, and this is accurately captured in the Plus 45. Like the Blankenship, the voice of the Bakos is rich, round, full and exceptionally musical, enhanced with thoughtful features developed after years repairing and tweaking hundreds of vintage Marshall amps. Jeff also built a custom version of the Plus 45 using the preamp section of a Gibson GA40 with interesting results, and both models are reviewed here. While skeptics won’t resist suggesting that we may be incapable of objectively reviewing an amp built by someone with whom we have an ongoing relationship (a member of our advisory board who also fixes our amps), we’ll assume you are better than that. Nothing gets reviewed here that doesn’t earn the ink. We asked Jeff to describe how the Plus 45 was conceived, and our review follows….
JB: What I wanted to do was build a more versatile version of a tube-rectified 45 watt Marshall. I experimented with a lot of different capacitors, tubes, transformers and front panel control features, and I would up choosing to include a switchable master volume and a tone mid-boost.
TQR: But you didn’t use the early Marshall master volume circuit….
JB: No, I used the version that is found in Orange amps and Matchless that works from the phase inverter. It’s an easy one to bypass, and it sounds good until you get below 3-4 on the volume control.
TQR: What were you chasing tone-wise?
JB: Well, originally Marshall used KT66s, and having played a lot of Marshalls, I thought the tone was better with EL34s. They seem to produce a better bass response without being too woofy, and the EL34s have some sparkle in the top end that the KT66 slack. And the Mercury Magnetics transformers selected operate at higher plate voltages that give you more head-room, cleaner tones, and even a cleaner kind of distortion. And unlike many of the early Marshalls, the tone controls really work in the way they exert an audible effect on EQ rather than everything being so notched in the mids. The old Marshall inputs were either super bright or too bassy, so I played around with the cap values on the inputs to make them more usable and versatile. It’s a combination of higher plate voltages, the output tranny design, EL34s, the master volume mod, and tweaking the cap values for each channel so that you aren’t stuck with the original dull and super bright tones in the two original channels. I also use Sozo caps, and they have a very vintage sound. It’s the sum of the parts…. I also changed the pot value for the presence control, and I added a push/pull mid range boost. It’s a very pedal friendly amp, too, because it has a lot of headroom.
TQR: What types of tubes did you choose?
JB: SvetlanaEL34s, a Chinese (Ruby) 5AR4 and a couple of EI12AX7s and a JJ. The Svetlanas have a nice mid range character where some of the others sounded a little flat.
TQR: And speakers?
JB: The Avatar Hellatone G12H 70th Anniversary seems to be really good for the combos. Great low end and very balanced and round.
TQR: And then you began experimenting with Mark Johnson’s amp, who plays busted up slide in mostly smaller venues, and the stock Plus 45 was too clean….
JB: Yeah, I toyed with the idea of building a front end using 5879 preamp tubes similar to a Gibson GA40. It sounds really good – it has a lot of high gain and it gets there really quick.It’s dynamically very responsive, and of course, far more powerful than the originalGA40… you can hear the 5879 sound with lots of gain, but with more headroom behind it.
TQR: If someone asked for a Plus 45, but with a higher or lower threshold of clean headroom, can you do that? How flexible can you be?
JB: This Bassman circuit does give you some room to work with different rectifiers and cap values, but it’s already the cleaner side of a vintage Marshall, which makes it very pedal friendly, and the gain is there when you need it – you’re just not stuck or locked with it.
TQR: What’s next? You’ve mentioned building a black-face Deluxe and the Gibson GA40.
JB: Well, I own a lot of amps and I’m inspired by them all in different ways, but yeah… what to build? Given the parts availability we have today with chassis, cabinets and transformers, building classic designs and modifying them to taste is where it’s at. I’m open to building whatever people wanton a custom basis as time permits
The “stock” version of the Plus 45 (no GA40 preamp section) reveals a strong amp with much more headroom and articulation than you’d normally associate with an early Marshall design. Features include two individually voiced channels, master volume, treble, mid, bass, presence and mid-boost. Channel 1 (bright) played with a Strat at moderate volume levels is almost Fender-clean, but stops well short of sounding too thin or sharp. What it does add is a sparkly, tactil equality to the treble tones that you’ll never squeeze from a vintage Marshall… with the mid-boost on, the tone becomes thicker with a subtle increase in sustain, yet string definition and note separation remain clear and undiminished. Channel2 is chunkier, but nothing like the dull and bassy 2nd channel in a 4-input vintage Marshall. You’ll use this one liberally without jumping it with the bright channel.
The Plus 45willingly responds to stronger pickups like hum-buckers, Telebridge and P90s with a formidable presence that dwarfs more modestly powered amplifiers, producing rock solid lows, fat and politely forward mids, and a smooth treble character that hangs tough in complex chords and single string solos. Best of all, it’s easy to move from clean tones a tan audible stage volume to varied levels of distortion and sustain intensity from the volume control on your guitar –channel switching not required. If you don’t require and can’t handle a 45 watt amp, we understand, but nothing hangs fire like big iron, and the Plus 45fills a room with thundering tone that cannot be rendered from 20 watts. In fact, it reminds us more than a little of the tube-rectified 1961 blonde Bassman 6G6 reviewed in the April 2007 issue of TQR. The master volume nimbly attenuates volume from settings above 10 o’clock with a tone that is slightly thinner than the natural over driven sound of the amp at the lower set-tings, but the results are good and definitely usable, with none of the weak, fizziness you may have experienced with other master volume circuits.The Plus 45 with GA40 preamp section is an entirely different beast, with a lower threshold of clean headroom and much faster ramp-up into a hot meltdown compliments of the dual 5879 preamps tubes. Basically, it sounds like a 45 watt GA40 that naturally mates well with single coils. With more powerful humbuckers, we had to pull a large part of the bass EQ out of the signal lest we blow up our precious Celestion Alnicogold speakers (or so it seemed). The GA4 0version of the Plus 45 is no plaything – a serious appliance for players who want to make a lasting impression. Jeff can voice this amp for more or less bass and treble response based on your preferences, band like the original Plus 45, you can choose between a head, 1×12 or 2×12 combo.
If you want to nail Clapton’s tone, a crucial part of the equation is the amplifier. With a little ingenuity, John Wiley shows you how to turn your reissue Bluesbreaker combo into the real deal.
A unique distinction of early Marshall amplifiers is that none of them within the same model line sound exactly alike. Partly attributable to founder Jim Marshall’s penchant for working with budding British musicians and working many of their suggestions into his designs, and partly due to the difficulties of locating reliable parts suppliers, Marshall’s early designs each had their own personality. For instance, Marshall’s Model 1962 combo was, itself, an ordinary amplifier; however, one particular Model 1962 used by Eric Clapton with John Mayall and the Bluesbreakers had such a revolutionary tone that it created a new sound in the still-young world of rock n’ roll.
In 1965, Clapton found himself the featured guitarist in John Mayall and the Bluesbreakers. Armed with a 1960 Gibson Les Paul and the Marshall Model 1962 combo amplifier, he single-handedly discovered a combination of guitar and amp that produced an extraordinary howl — Clapton achieved his trademark sound by playing the amplifier at full volume. The sound was full-bodied, authoritative, but not overly distorted; it easily cut through the other band instruments. The sustain was pure, the treble notes sang and the bass registers exhibited a “throaty” bottom. At such high volumes, the amp was prone to feeding back, and this provided an awesome effect to the overall sound.
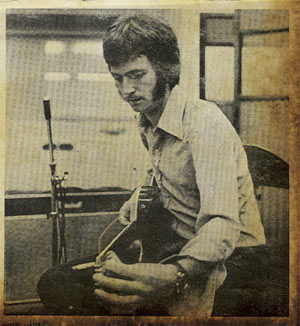
This image, from the Beano LP, shows Clapton tuning up, with his Model 1962 in the background.
The blistering tone was captured on vinyl and released to an unwitting public as John Mayall and the Bluesbreakers with Eric Clapton; also known as the “Beano” album, it quickly shot to number six on the British charts, even amongst the din of other popular British and American pop groups such as the Beatles, the Animals, the Rolling Stones and the Beach Boys. That LP’s impact soon spread to America and abroad, inspiring legions of new guitarists around the world — especially influencing musical rebels in the United States. Clapton’s playing style, combined with a ferocious amplified tone, seemed to inject a new and exciting dimension into the young blues-rock genre. But none of this could have happened without the small British amp company, Vox. Models like the AC30 would provide the “British Invasion” with its unique sound, and convinced Marshall to build a compact amplifier for his new company; the initial development of Marshall’s first combo took place in early 1964. In a 2003 interview with Musician’s Hotline magazine, he claimed the Model 1962 was built at the request of Eric Clapton. “Eric used to practice in my shop and he was one of the first guitarists to ask me to build a combo,” Marshall recalled. “He wanted one so it would be easy for him to put the whole thing in the boot [trunk] of his car.”
Unfortunately, that Model 1962 disappeared, with Clapton himself unsure of what became of it; years later, it would become known as the holy grail of combos. Although those early combos had great tone, no two sound exactly the same. Two decades later, the Marshall reissue would sound nothing like it at all.
The Reissue
For many of us, the year 1990 brought an answer to one of our greatest wishes: the Marshall Model 1962 2×12 combo was finally reissued. The idea had apparently been in the works for quite some time, as evidenced by this author’s correspondence to a Marshall factory director, Keith Carnall in the late months of 1984. Carnall’s reply stated, “We have thought many times about running a ‘vintage special,’ with valve rectification and all the other old goodies… let us just say for now that it is an idea that we will continue to work around and perhaps you will get your wish granted.” Although Clapton was not aware of the amp being reissued, Marshall christened it the “Bluesbreaker,” in his honor. When asked in a 1989 Guitar World interview he replied, “Did they really? How sweet. I didn’t even know that. How does it sound?” Marshall simultaneously introduced the Bluesbreaker and the JTM45 in 1990, along with the new JCM900 series.
At a cursory first glance, Marshall did an outstanding job recreating the Bluesbreaker, as it externally resembled the original with the distinctive and elegant Marshall styling. Just like the original, it was rated at 45 watts and came with two Celestion speakers. The cabinet dimensions measured 29.13″ wide by 23.62″ high by 9.25″ deep, and black vintage Tolex coupled with a vintage-style Bluesbreaker grill cloth completed the package. Electronically, the 1989 reissue used two 6L6 vacuum tubes for power, three ECC83 (12AX7) preamp tubes and one GZ34 rectifier tube. In 1993, Marshall replaced the 6L6s with 5881 vacuum tubes. Tonally, the Bluesbreaker reissue had a unique and fine sound of its own. It produced varying degrees of that buttery smooth sustain, while retaining that traditional Marshall crunch.
The following is a listing of the basic differences between the original Model 1962 and the Model 1962 “Bluesbreaker,” as reissued in 1990:
|
But just how close was this new variant to the original Model 1962? To the true Marshall collector, and to the rare few who actually owned the genuine article, the differences were immediately apparent. In Michael Doyle’s book, The History of Marshall, he pointed out that the cabinet was too small and the grill cloth was not right. But the major disappointment was not in the appearance, but the sound the amplifier produced. While the sound was good and had plenty of Marshall crunch, it was definitely not the sound of the original. And for that reason, I began a quest to change the sound of my reissue into something more closely resembling the original.
Hitting the streets in 1990, the Model 1962 “Bluesbreaker” reissue was plagued with discrepancies out of the box. The cabinet was undersized by some 30 percent, with a depth barely over 9″, while the original measured in at 10.5″. The reissue’s overall width was almost 30″, while the original was 32″. The most reasonable explanation for these differences would come from the use of output tubes originally selected for the Model 1962. Although the very first combos incorporated the smaller 5881 vacuum tube, Marshall designed the Model 1962 for the more prevalent but enormous Coke bottle-shaped KT66 vacuum tube. The usage of this particular tube necessitated the deeper 10.5″ cabinet.
Likewise, the cabinet’s construction differed significantly from original specs. The Model 1962 Series I was built using pine planks for the cabinet with multi-ply birch baffles; the Model 1962 Series II was completely constructed with multi-ply birch plywood (more about these series differences in a moment). The reissue used particle board for the cabinet and plywood baffles.
Finally, the speakers supplied in the original combo were G12M “Greenbacks,” rated at 20 watts each. This speaker utilized an Alnico magnet, providing sweet, warm tones and a smooth midrange — an essential ingredient for that “British chime.” At 20 watts, the speaker could barely keep up with the tremendous overdrive of the amplifier when it was at full volume. Marshall, however, equipped the Bluesbreaker reissue with 25-watt Greenbacks, featuring ceramic magnets. While they lacked the chime of an Alnico magnet, they could withstand twice the wattage and had a fine sound of their own.
The Model 1962 Back Story
However, before we dig in and modify our reissue Bluesbreaker, it would behoove us to understand where it all started. In 1964, while the Beatles made their first appearance on the Ed Sullivan Show, and the Civil Rights Act of 1964 was enacted, Marshall was busy introducing its very first combo. Because it was the very first series, it is historically referred to as the Model 1962 Series I. Interestingly, the 1962’s model number did not refer to a particular year or significant event in time. Until the 1980s, Marshall’s distributor and financial backer Rose-Morris used these numbers arbitrarily, using the prefix “19” for all of Marshall’s product line.
Jim Marshall wanted his new range of combos to be versatile; as a result, he designed the Model 1962 with two 12″ loudspeakers and used the JTM45 bass chassis (Model 1986) electronics. The Model 1962 was described in the Marshall catalogue as a “Bass/Lead” unit, making it an extremely versatile amplifier that could be used by guitarists and bass players alike.
But just how close was this new variant to the original Model 1962? To the true Marshall collector, and to the rare few who actually owned the genuine article, the differences were immediately apparent.
In addition, a second combo with four 10″ speakers — the same configuration used in the Fender Bassman — was offered to players. Marshall’s 4×10 version was referred to as the “Lead” and utilized the JTM45 treble chassis (Model 1987) electronics. This 4×10 configuration, designated the Model 1961, was designed for guitar use only. Both Model 1962 and 1961 were purposely marketed as the British equivalent to the vastly popular Fender Bassman, and they offered quite a bargain for British and European musicians. The Model 1961 retailed for a scant $165 American dollars and the Model 1962 retailed for $170, while the Fender Bassman was nearly double at $300. Both models went into production in late 1964.
Cabinet and Construction
The cabinet dimensions for the Model 1962 (2×12 configuration) were 30″ wide by 24″ high by 12″ deep. The 1961, incorporating four 10″ speakers, maintained square proportions, measuring 28″ wide by 28″ tall and 11″ deep. The Model 1962’s width is 2″ wider and 1″ deeper than the 1961’s to accommodate the dual 12″ speakers.
Marshall amplifiers would also gain a reputation for their ruggedness. Marine ply birch was used for cabinet construction, as the laminated layers of glued veneer plywood provided greater overall strength than a singular plank of yellow pine, which was the wood of choice for Fender amplifiers. These early Marshalls did not use the “finger-lock” joints that would become standard on all Marshall cabinets a few years later.
The Marshall ads above suggested the reissues matched the originals; in reality, there were significant differences.
Marshall cabinets were also visually appealing and had the look of richly appointed furniture. Black PVC (polyvinyl chloride) material, similar to the General Tire invention known as “Tolex,” was used for the entire exterior of the cabinet. This smooth, black fabric was different from the black “Levant” Tolex Marshall would use later.
Accenting the cabinets was Marshall’s elegant grill cloth. The company’s catalogue referred to this early cloth only as, “contrasting speaker grills,” not actually describing the color or pattern of the cloth material. However, it was known as the “white” grill cloth and had thin, horizontal gray lines running through it. Also included on the earliest models were three leather straps, attached to the top of the cabinet and similar to the Vox AC30. These amplifiers weighed in at a very heavy 70 pounds, and the sheer weight meant that it wasn’t long before the leather straps would stretch and break. In early 1965, an improved, single plastic strap which was stronger and larger in size replaced the leather ones.
The very first Marshall combos produced in late 1964 used what was known as “Vox-style” cooling vents, which allowed the heat produced by the transformers and vacuum tubes to escape efficiently. Two vents were installed into the top of the cabinet, similar to the Vox AC30. The vents were rectangular in shape and had a metal screen riveted inside.
Chassis Electronics and Components
The internal chassis that included all the electrical components was made of 6061 aluminum sheet metal. Aluminum has excellent non-sparking and non-magnetic characteristics, making it ideal for electrical shielding purposes and chassis use. It is, however, not as strong as steel and would fatigue and sag under the weight of the heavy power and output transformers. To remedy this, cast aluminum end blocks were riveted inside each end of the chassis to add strength and rigidity. The chassis were 2.5″ deep and purchased from a sub-contractor named Smiths.
The JTM45 used one circuit board screwed inside the aluminum chassis, providing a central platform for the various electrical components. Prior to 1965, Marshall used Tufnell perforated circuit boards; from 1965 to 1967 a subcontractor called Heathfield manufactured the circuit boards, which can be recognized by the drilled holes on the solid sheets.
The output transformer was officially known by Marshall as the “RS De Luxe.” It was light gray in color, with horseshoe end bells. The maximum output rating was only 30 watts, and all three transformers used on the JTM45 — the output, power and choke — were purchased from Radiospares, an electrical component clearing house.
The first combos produced in late 1964 were equipped with two GEC (General Electric Co.) KT66 vacuum tubes. The original design of the JTM45 called for the Tung-Sol 5881 tube; because this tube was used in the Fender Bassman, it was the tube of choice. However, supplies for the 5881 were scarce and the KT66 was used as a replacement. The KT66 provided more bite and distortion, suiting the JTM45 perfectly, and unlike the EL34, it was not overly saturated and did not sound mushy. The KT66’s bottom end was solid and exhibited clarity, while the trebles were almost “violinlike” in nature and very smooth. Much like the Fender Bassman, the JTM45 became known for its unique sound, primarily because of this tube.
Four 12AX7 (designated the ECC83 in Europe) preamp tubes were supplied in the 1961 and 1962, and both featured a tremolo circuit as a standard appointment. These amps also included tube rectification, which added to the sound’s overall smoothness. The 5AR4 rectifier tube (designated the GZ34 in Europe) was used on all JTM45 configurations, including models 1961 and 1962, and was the same rectifier used in the Fender Bassman and many other classic American amplifiers.
The JTM45 also incorporated two “can” style filter capacitors; the number of capacitors used, and their respective value, was a significant factor in the overall sound of the amplifier. One LCR Co. 32ìf x 32ìf at 450 volts was mounted on top of chassis near the power transformer, and one LCR Co. 16ìf x 16ìf at 450 volts was mounted inside the chassis just beneath the power transformer — the standard arrangement for the JTM45.
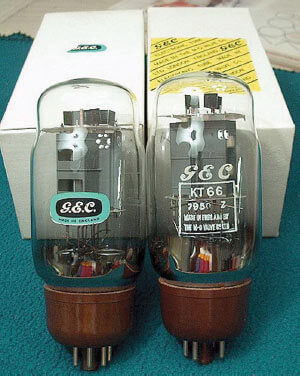
KT66 tubes as were used in Clapton’s Model 1962.
Speakers & Logo
The Model 1961 would utilize four 10″ Celestion Alnico speakers, while the Model 1962 would use two 12″ Celestion G12 speakers, handling 15 watts and featuring an Alnico magnet. The Alnico magnet contributed to the amp’s unique and sparkling sound, referred to as the “British chime.” A basic style of logo badge was used on these very first combos, and is commonly referred to as the “gold block logo.” The badge was rectangular in shape and was very simple, having only the Marshall name in bold block letters. The letters were black in color on a background of gold, although silver was sometimes used.
The Clapton-Spec Combo — One of a Kind?
The particular Model 1962 amplifier that Eric Clapton used with John Mayall and the Bluesbreakers was unfortunately lost, without knowing its exact pedigree. It was definitely an early edition of the Series II combo and was built during a continuous procession of production changes and revisions. The typical production run of any of the Marshall line could have differing components from amp to amp — it is not an exaggeration to say no two amps were exactly alike. This was primarily due to the inconsistent component suppliers Marshall used at the time, and partly because booming business made record keeping (serial numbers, production quantities, etc.) a low priority — existing serial numbers are not reliable or even logical, and production numbers are at best derived from employee recollections. Therefore, determining just how many amps were built exactly like Clapton’s is extremely difficult. The following list of features, derived from exhaustive research, best represents the Clapton’s combo specs. This particular amp is pictured on the reverse side of the “Beano” LP. The Series II cabinet was designed by Marshall’s chief designer Ken Bran, and incorporated a more modernistic styling. Its dimensions were 32″ wide by 23″ high by 10.5″ deep. The cabinet was sturdy and constructed of 3/4″ marine ply, incorporating one slot-style cooling vent and covered with black Lavent vinyl. The grill cloth was the classic gray and white striped variety later known as “Bluesbreaker” grill cloth. The cabinet was smartly accented with gold hardware attachments for the cabinet handle.
Chassis Electronics and Components
Clapton’s amplifier utilized the JTM45 bass guitar amplifier electronics known as the Model 1986 and the same chassis used in the Series I, made of 6061 aluminum sheet. One circuit board screwed inside the aluminum chassis was used and it was manufactured by the Heathfield Company.
Mounted on top of the chassis was the heart of the amplifier — the transformer. The defacto JTM45 output transformer was the “RS De Luxe;” however, since it was rated at only 30 watts, it was not ideal. Clapton’s amp may have utilized the newly acquired Drake Companytransformers. The output transformer would have been Model #784-103, with an 8K primary Z, and the power transformer would have been Model #1202-55. Utilizing the Drake transformers would explain why Clapton’s combo did not sound like a “typical” JTM45amplifier.
Clapton’s amplifier utilized two GEC KT66 output vacuum tubes. The preamp circuit included four Mullard ECC83 tubes, with one dedicated to the tremolo circuit. The Mullard GZ34 rectifier tube was again used. Two can-type filter capacitors were used: one LCR 32ìf x 32ìf at 600 volts mounted on top of the chassis near the output transformer, and a second LCR 16ìf x 16ìf at 450 volts mounted inside the chassis.
Speakers
The amp’s speakers consisted of two 12″ Celestion G12s, rated at 20 watts, 15 ohms, and with an Alnico magnet. These speakers were essentially the same as those used in Vox AC30s, and are extremely fragile when pushed beyond their limit. Because Clapton ran the amplifier at full volume, the Alnicos may have been damaged. He may have replaced them with the higher wattage, ceramic magnet Celestion Greenbacks.
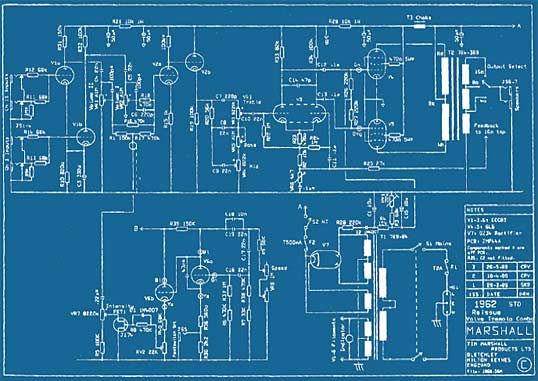
The Model 1962 reissue schematic.
The Objective: Convert a Reissue to Clapton-Spec
I started my investigation into obtaining this sound over 20 years ago. In addition to the “Beano” studio CD, there were other John Mayall albums that included “live” cuts from Eric Clapton’s time with the Bluesbreakers. Although these recordings were done with crude equipment, they captured the raw and unrestrained sound of Clapton’s guitar and amplifier. To my ears, these recordings were most realistic, as they lacked any studio treatment. I quickly knew what sound I was after.
In 1994, Mike Doyle’s book, The History of Marshall, was released and included an eye-opening chapter on the Bluesbreaker. That chapter confirmed the reissue’s lack of authentic sound, and it became obvious that in the amp’s conversion to Clapton specs the only salvageable pieces would be the electrical chassis, the control panel and some of the cabinet hardware — the cabinet and speakers would have to be replaced.
With that, I decided to do the conversion in a logical progression and planned to document the progress. I preferred a progressive approach, as it would give me a chance to analyze each change made separately. In addition, since this conversion would be fairly expensive, it would be easier on the budget to purchase items over a period of time. The changes required could be grouped into three categories:
I should note that it is possible to make deeper changes, such as replacement of the circuit board, resistors, potentiometers and components, plastic tube sockets, and rewiring of the chassis to original specifications. These additions will make the electronics of the amplifier more authentic, but will not noticeably improve the sound. These additions also significantly increase the cost and add more time to the project.
The steps I have outlined above will reproduce the amplifier tone as heard on the live cuts of Clapton with the Bluesbreakers, as well as the “Beano” record. In fact, after making these changes, your Bluesbreaker will no longer be a mere reissue — it will sound like the real thing!
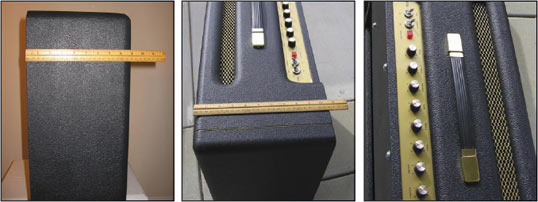
The new cabinet is over 2″ bigger than the reissue cabinet, resulting in a fuller sound.
Step 1: A Bigger Cabinet
There are now several competent amplifier cabinet makers building exact replicas of the Model 1962 Series I and II cabinets. Be sure these makers use the required multi-ply Baltic birch plywood, correct black Tolex covering, vintage gold veining and the surrounding white piping. It is also wise to have them confirm the correct cabinet dimensions, as the Series I and II are two completely different cabinets. To save some money, you could use the Marshall logo, casters and other hardware from your existing reissue. Two excellent cabinet makers available on the internet are Vibroworld.com and Swansoncabinets.com.
For the first phase, I ordered a new cabinet from a cabinet maker on the internet — to ensure accuracy, I supplied them with a CAD drawing of the Series II dimensions and features. I was very pleased with the results I received a few weeks later. I removed the chassis and speakers from my Marshall reissue and reinstalled them in the new cabinet. Even though the new cabinet included pre-drilled holes and Tnuts for the speakers, it still took some time to make this switch. While switching cabinets, be careful to ensure the speaker and amplifier connections are right.
For testing, I used a Gibson Les Paul Heritage 80 model. After re-checking the chassis and cabinet connections, I turned on the amplifier, and let it warm up. I started at low volumes and progressively turned up the volume to 10, all while keeping the other settings such as presence, bass, middle and treble at 10. Upon hearing the first chords, I was immediately struck by a new “openness.” The amplifier seemed to breathe and had a new, airy sound to it — it did not sound as tight as the smaller reissue cabinet. With 30 percent more space in the cabinet than the reissue, the trebles seemed revived and the amp now had an “airy” bottom-end. Comparative testing with another stock Bluesbreaker reissue verified the tonal improvements.
An interesting side note; in 1997, Marshall produced a limited edition white Bluesbreaker called the “Limited Edition 1997.” It was basically was the same amplifier as the 1989 reissue, with one important difference: the limited edition’s cabinet incorporated the deeper 10.5″ thickness, as can be found in the original Model 1962 Series II.
Step 2: The Electronics
Before digging into the guts of the Bluesbreaker, a word of caution: this phase deals with potentially dangerous electrical voltages and it is highly recommended that only a trained and competent amplifier repair person or skilled electrician perform these tasks.
This phase involves swapping out the reissue transformer, changing the 6L6 vacuum tubes to KT66s, and replacing the filter capacitors.
The Transformers and Tubes
There are now some good vintage transformer manufacturers around, so one has a choice in the matter. Since the original Model 1962 used a Radiospares (RS Deluxe) transformer, the objective here is to get one like it. When I did my conversion, I purchased a Mercury Magnetics Model O45RSL-8-M(MercuryMagnetics.com).
When it comes to power tubes, the only one to use here is the revered KT66. There are however, a few brand options available. One could either purchase a matched set (two are needed) of original GECs, or purchase a pair from companies offering reissue KT66s. The European and American tubes manufactured in the 1950s and 60s (new old stock) are superior in tone, quality and reliability. Tubes now manufactured in Russia and China such as Groove Tubes, the new Tung-Sol, and JJ/Tesla offer comparable tone and are reasonably priced. Since these tubes are made overseas, it is difficult to isolate a superior brand, and although tonal quality is improving with better consistency, tone remains an individual choice. For my conversion I used a matched set of Chinese Valve Art tubes, and was not disappointed.
Since we are changing out the power tubes, it is highly recommended to replace the 12AX7 (ECC83) preamp tubes as well. Again, there are several good options here which include SED Winged “C,” Electro-Harmonix and Ei/Ei-Elites. Replacing the GZ34 (5AR4) rectifier tube is also a must for optimum performance. The same tube suppliers listed above carry the GZ34, in varieties like Sino, Sovtek, or the very expensive Phillips metal base.
Filter Capacitors
Replacing the big can-style filter capacitors will definitely give your reissue more clarity. Filter capacitors are rated in the ZZxZZ format. The reissue Bluesbreaker has two 50×50ìF capacitors which must be replaced. The blue 50×50ìF filter capacitor, located closest to the GZ34 rectifier tube should be replaced with a 32×32ìF/600V capacitor. The other 50×50ìF gets replaced with a 16×16ìF/450V capacitor. JJ and F&T are two good options for filter capacitors.
Caution: These changes should only be done by a good amplifier repairperson. Also remember to have your KT66 vacuum tubes rebiased. I had renowned Bluesbreaker guru Ted Breaux finalize and tune my Bluesbreaker electronics.
Before using the amp at full volume, a suitable warm-up for the newly installed electronics should be done by simply powering up the amp and leaving it on Standby for a good hour or so. While it’s warming up, pay close attention to any unusual odors or burning, as a bad solder joint or incorrect wiring could cause a short circuit.
Once the amp has warmed up, with no guitar plugged in set the Presence, Bass, Middle and Treble controls to 10. Then start increasing the volume of Input 1 slowly, listening for any peculiar pops or sizzling noises in the process. If you don’t hear or notice anything unusual, you should be set to go.
For the “sound” test I used the same Gibson Les Paul Heritage 80; for the tonal comparison, I used the Primal Solos CD, starting with the solo in “It Hurts to Be In Love.” Before cranking the amp to 10, I employed the same gradual progression of low volume checks, listening for any unusual noises and so on. When I got to 10, I was astounded!
I was able to produce the same overtones and harmonics as the recording.
Likewise, the treble response was spectacular. I had read that Clapton used a Rangemaster treble booster with his amp, but I was getting the “sound” without one. The F9 chord in “Have You Ever Loved a Woman” shimmered and went into harmonic overload, exactly like the recording. The only notable difference was in the bass registers, as it seemed harsh at times and slightly lacking in tightness — additionally, some of the treble response seemed a little harsh. But I was definitely hearing 95 percent of that Clapton-spec sound, as no EL34 or 6L6 had ever sounded like this. It was now time for a speaker change.
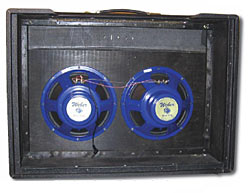
The cabinet after installing the Weber Blue Dogs.
Step 3: The Speakers
I narrowed my choice of Alnico speakers down to the Celestion G12 Alnico Blues and the Weber P12B Blue Dogs. The Celestions were rated at 15 watts while the Webers were rated at 30 watts — I decided to try the higher-wattage Weber P12B. After swapping out the reissue Greenbacks for the new Blue Dogs, I played the amp at lower volumes for several hours. At these levels (5-6), I was pleasantly introduced to the British chime of the 1960s. Early Beatles rhythm and lead guitar sounds were easily obtainable, particularly within the mid and bass ranges.
I then tried the full throttle test. At full volume, I was in for quite a shock — the mid and bass ranges nearly cut me off at the knees. The treble side was knife-edge harsh and the amp was monstrously louder. I was obviously disappointed, as none of this remotely sounded like a Bluesbreaker. I had read that Alnico speakers may require an extended “break-in” period, and I hoped that was the case here.
I removed the Blue Dogs from the Bluesbreaker cabinet and reinstalled them into a 2×12 cabinet I was using for weekend gigs. After a few weekends of extended playing, I noticed the sound changing, as I was having to re-adjust my amp head settings. After a few more weekends, I definitely noticed something happening. It was now time to re-install the Blue Dogs back into the Bluesbreaker cabinet.
Upon trying it again, something magical happened to the overall sound of the amplifier. Right there in my basement, and out of my rebuilt Bluesbreaker, came the sound. I was flabbergasted, as it sounded incredible. I must have played the amp all night. I was nailing all of Clapton’s Bluesbreaker riffs, and they sounded identical to recordings. The A minor solo break in “All Your Love” sounded amazing, and like the recording, it was drenched in sustain and overtones. “Stormy Monday” from Looking Back was spot on.
Finally, my Bluesbreaker renovation was complete. The amp sounded just like it should, some 40 years ago. Doing this yourself makes all the difference, as you become a part of the equation — with a little work and dedication, you can experience Marshall just as Clapton discovered it.
Source: https://mercurymagnetics.com/pages/news/PremierGuitar/PremierG-08.htm
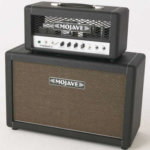
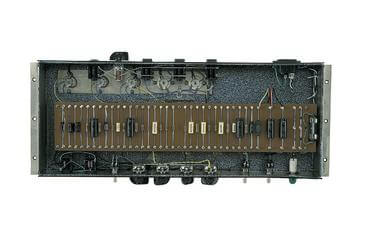 Mojave’s Victor Mason has learned much from studying the intricacies of various Ampeg, Marshall, and Vox amps, and the Coyote ($2,500 retail/$2,050 street with Celestion G12-30H) is the summation of his insights into small-amp design.
This dual-EL84, cathode-biased amp features dual independently voiced channels, which are labeled Bass Volume and Treble Volume. Each controls the two triode gain stages of a 12AX7, and the idea is that you use varying levels of each to obtain not just the amount of overdrive you want, but also the balance of bass and treble needed for your particular guitar. This dual-function system obviates the need for separate tone controls, and the only additional EQ on the Coyote is a Tone knob and 2-position Mid Cut/Emphasis switch.
Ditching the standard master volume, the Coyote features a Power Dampening control that allows you to vary the output wattage continuously over a range of less than 1 watt to a herkin’ 12 watts. By controlling the drive voltage that feeds the output stage, Power Dampening provides an efficient way to operate the amp at different loudness levels, with a side benefit of cooler running and extended life for the tubes and transformers. The Coyote is also the only amp in the group to be equipped with a variable-level line out, which incorporates a push-pull ground lift to overcome ground loop-induced hum when connecting to external gear. Sweet.
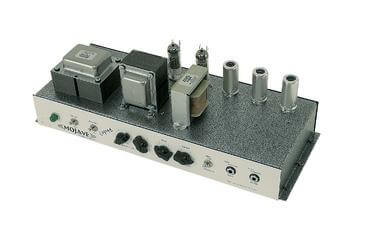 The Coyote’s Bass and Treble knobs are also the preamp gain controls, so it’s kind of like using an old Marshall with the bright and normal channels jumpered. Depending on which input you plug into, the Coyote readily offers up a good selection of stout clean and overdriven tones. The Low Sensitivity input works great with humbuckers if clean is your primary objective, but I tended to stick with the High input for all my test guitars, with good overall results. Even with humbuckers, getting a hot distortion sound with the Power Dampening knob set on the low side (say, the 2 to 4 watts range) requires that you run the Bass and Treble knobs close to wide open. The tones are pretty well balanced with both of these knobs at or close to equal settings, and any further EQ refinement can be done with the Tone knob.
The Coyote works superbly with single-coils, as you can ratchet up the Bass knob to set the gain to a happening point, and then inch up the Treble control until the brightness is just where you want it (or the other way around, if you so prefer). Using the Coyote at or near its maximum output level changes the ball game a bit, because now the power amp is adding its own overdrive content, which is considerable. In this mode, the Coyote shows its teeth as it churns out thick, harmonics-laden grind. Elements of its sound are reminiscent of an old Marshall 20 watters, but the Coyote has a broader palette of textures to play with, and it seems to instinctively want to sound good with just about any guitar.
Bottom line: If you like the idea of exploring very interactive control nuances for precise tailoring of your tones, you’ll find the Coyote a fun and exciting critter to add to your tone zoo.
Kudos — Excellent response with humbuckers and single-coils. Blendable channels. Variable power.Concerns — None.
Contact — Mojave AmpWorks • (866) 235-6399; www.MojaveAmpworks.com
Source: https://mercurymagnetics.com/pages/news/GuitarPlayer/GPFeb06.htm
Andy Fuchs, a tube audio product builder from Bloomfield, New Jersey, recently sent us one of his Overdrive Supreme amp heads.
Cased in a finger-jointed pine cabinet with Tolex covering, the Overdrive Supreme definitely looks cool. The question is, “Does it live up to its name?”
But before we get into how it sounded, let’s roll through the particulars.
The all-tube 100-watt OD Supreme features four Sovtek 6L6s and four Sovtek 12 AX7s with Mercury Magnetics custom transformers and a combination of point-to-point wiring and printed circuit (PC) boards. Controls on the front panel include gain, deep and brite switches, a rock/jazz switch, high, mid and low passive tone controls, overdrive input and output knobs, master volume, accent (presence) and a reverb knob.
The back panel has effects loop jacks with send and return controls, a side chain switch, speaker output jacks and power/standby switches. And finally, the amp has a twin foot switch to remotely switch the overdrive circuit and the reverb on and off.
We plugged the Fuchs into a Marshall 1960A cab, then grabbed a Fender ’62 Reissue Strat and a Hamer Studio.
With the Strat plugged in and the amp’s overdrive circuit turned off, the first thing we noticed was a great clean sound, which was somewhat surprising for a 4×12 cab and a head. It delivered all the fat, lively tone you’d expect from a combo amp. The push/pull mid boost was perfectly voiced for the guitar’s single-coil pickups, and the brite and deep switches added just the right amount of punch and sparkle, while the jazz/rock switch gave the amp some added drive and attitude in the rock position.
With the gain turned up and the master volume turned down, we got a warm blues overdrive; but once we turned on the overdrive circuit, we were swimming in tons of very “British” distortion. A cool Richie Blackmore/Deep Purple tone – very fat, with smooth sustain and tight low end.
Switching to the Duncan humbucker-loaded Hamer went quite smoothly because, to our delight, we didn’t have to fuss with the settings to get the same great tone; we simply turned off the mid boost and made a slight adjustment to the accent control to clean up the high-end. The push/pull gain boost did thin out the low-end a bit, but with all the available gain, we didn’t really need it. And the reverb circuit was clean and lush-sounding and didn’t wash out the overall tone in the least.
Whether played clean or punched into overdrive, and regardless of whether you’re a single-coil lover or humbucker devotee, the Fuchs Audio Overdrive Supreme sounds great, with well-voiced controls and kick-ass smooth distortion.
Woodie/Woody Deluxe — ’46 era — 14K primary using single 8Ω secondary. or 7K primary using single 4Ω — #6054
Single ended — single 4Ω tap
Single ended — single 8Ω tap
Single ended — 9k primary — Single 4 Ohm tap
Single Rectifier Recto 50 — 4 & 8 Ohm taps — Drop-in Upgrade!
Single ended — 8k primary — single 16 Ohm secondary
Single ended — 9k primary — single 16 Ohm tap
Single Ended — 6K primary — Single 8 Ohm Secondary
In late 2009 I had the opportunity to talk with Sergio Hamernik about the history of the Mercury Magnetics, how he became involved in making transformers for guitar amplifiers, and the difference a high quality transformer can make on your tone.
How did Mercury get its start?
The company’s roots date back to the early ’50s. Mercury was started by an old General Electrics transformer engineer who was working there pre-World War II. He then went on to do a bunch of design work for the war effort. And in the early ’50s, hung a shingle and became self-employed.
The name “Mercury” came out of his passion for Mercury cars, he always drove a Mercury since the late ’40s — he loved those cars — and eventually moved from the East Coast to the West Coast where he found that there was a lot of military and aerospace work. A booming economy in the early ’50s gave him a lot of business.
I met him in the 1970s when I was an engineering student and an audio enthusiast. Back then the electronics world was well into its solid-state “evolution,” and interest in tube gear was quickly disappearing. Not for me, however. I found myself in demand as a guy who knew about those “old things”; not only the math, formulas and specifications but I also had the “ears.” I could fix and keep the old gear running. So, I worked as a hired gun for a bunch of studio heads and pro musicians.
Typically when an amp’s output transformer blew. No one seemed to know any better so it was just swapped by whatever “factory” replacement or an off-the-shelf “equivalent” catalog transformer was handy. The invariable result was that the amp’s characteristic sound was gone. And no matter what resistors, caps or tubes were used, it could not be rescued or returned to its original sound. It was the transformers, it turned out, that were the key. The problem was coming up with a way to remedy the blown transformer replacement or repair that wouldn’t alter its tone.
To further complicate things, most transformer people I dealt with just didn’t want to bother with the music industry. For the most part the established electronics industry considered the needs and opinions of the audio and MI (Music Industry) communities as subjective, run by kooks, and occupied by people who didn’t know what they are doing. Audio and MI had always been considered the illegitimate stepchildren to the rest of the industry.
Out of pure necessity I had to got involved with transformer design and manufacture. As a customer of Mercury, they had built many custom transformers to my specifications — although we had many heated, on-going debates on the subject because the company owner hated audio! He never did understand what made guitar amp transformers tick, or how musicians thought and reacted to them.
That aside, he pestered me for almost a decade to take over the company because he felt I was the only one qualified. Eventually I did, and that was when Mercury got serious about the guitar amp connection. Sometimes you end up becoming an expert at something when no one else wants to do the job.
By the time I took the helm we were developing a really good and workable understanding of the relationship of transformer design to decent tone and how amps should behave. And around 1980 we began the long and arduous task of collecting and cataloging transformer specifications for every vintage amp, from all over the world. The deeper we dug, the more apparent it became that there were all kinds of factors that no one had previously suspected that affected guitar tone. And likewise, no one seemed to be paying attention to such things.
In turn, we invented proprietary technologies to aid this work. Even after three decades, we’re still innovating and discovering new things. From that fundamental research came our now famous ToneClone series, and later the Axiom line, which is probably the most significant advancement in toneful guitar amp transformer designs since the ’50s. Both product lines, we’re proud to say, have distinctly different niches in the annals of guitar amp tone.
We’ve not only cured the old transformer tone issues, but made it possible for musicians to upgrade their existing amps. And we’ve also made it possible for amp builders to reproduce amps of the same or better grade than even the most outstanding vintage amps of the past.
When did you become involved with making transformers for guitar amplifiers?
Back in the ’70s I worked for people on a one-to-one basis, usually under confidential arrangements, with certain rock stars that just didn’t want to be bothered by their names being flaunted around. What they want was their amps running right for recording, projects, touring, etc.
The problem was that when technicians would fix the amps they’d often loose their tone. It turned out that the culprit was the replaced output transformers. A changed output transformer would completely alter the character of the amplifier. So as I was the guy doing most of the work to resolve this issue, this expertise was brought to Mercury where we began a special division to cater to the guitar heroes.
Word got around rather quickly that Mercury was able to repair, rewind, and restore the original transformers and it just grew from there. The whole “Tone Clone” thing came from artists who had these amazing irreplaceable amps, amps that often made recording history. They didn’t want to take these amps on tour. So we came up with the innovative idea of cloning their original transformers that they’d fallen in love with. With the clones we could now easily make, for the first time ever, several identical amps for them. Or they would assign their techs to drop-in the cloned transformers so they would have, for example, six amps that would all sound the same as that first perfect amp.
These artists could now go on tour and not worry about breakdowns or theft, and keep their prized-originals back at home.
I worked with Ken Fisher, the whole Trainwreck thing, and a lot of the early boutique guys — and still do with Alexander Dumble. They preferred to keep things confidential and not let too many people know who their sources were because there were so few transformer designers that catered to the guitar amp market.
There was also a slow-but-steady dumbing-down occurring in audio and all that had been the post World War II momentum. Many of the ex-military components we’d been using were high tolerance parts, with mil-spec formulations of iron and copper and so on, that had been used to win the war effort. During the ’50s and ’60s we enjoyed the benefits of those high quality components at surplus prices. But by the late ’70s, and definitely in the ’80s, steel manufacturers started to change recipes to make the iron and other materials much more affordable.
You can hear the differences between a late ’60s Marshall, a late ’80s Marshall, and a Marshall today. A good listen will really help you to understand what changes took place. Unfortunately they made so many of those changes more out of economic considerations than anything else. The amps were loud but they seemed to be losing sight of the fact that their tone was disappearing — the “recipes” had been changed.
In addition to many other factors, the iron that Mercury uses is custom-formulated specifically for us. We buy enough of it to be able to dictate the exact recipe from the foundries. And all of our iron is literally from American ore processed right here in the USA. 100% American made to the original specs. Are there drawbacks? Well, some of the iron rusts more easily, but that’s actually a good thing because rust is a natural insulator. But the opposite is also true. When you see a modern transformer with a silvery or a shiny core just know that they aren’t worth a damn when it comes to tone.
Can you tell us more about guitar amp transformer history?
Here’s an amusing anecdote that may help explain our case for guitar amp transformers: There’s a great deal of documentation, from back in the mid-’50s, where engineers, and other technical people, were writing really scathing reports on how awful the transformers were in the audio industry. Those darn transformers! When tubes were plugged into them there was a tendency to distort! And they couldn’t have any of that! Likewise with harmonic distortion — especially even-order harmonic distortion.
Many amp builders, techs and players, today, don’t understand that tubes were originally designed to run dead clean, linear, and be efficient voltage amplifiers. That the tone we’ve all come to know and love is caused by the transformers literally “irritating” the tubes into distortion.
Which is, of course, the whole point of what we are looking for in guitar amps. Back in the ’50s, they were fighting to get rid of those nasty distortion tonal characteristics. Now we embrace them. But that was audio – guitar amps were still in they’re infancy and yet to be realized. It took a generation or two of innovative musicians to take those “undesirable” tonal characteristics and create music; to work with distortion and make it into something musical.
Ironically, it was that no-distortion engineering mindset that ushered in solid-state, and why it was so openly embraced in the ’60s. It was solid-state electronics that eliminated the output transformer.
In the late ’60s, Vox went to Thomas Organ to have solid-state amps built. They were very proud of this state-of-the-art amplifier. Curiously, I met a few of the musicians from the late ’60s that were sponsored by, and using, those amps. The tone was so awful and unbearable that they used the enclosures but hid their old tube gear inside! As you may already be aware, the vacuum tube industry is alive and well, and we’re still waiting for the solid-state industry to catch up.
Part of the confusion is that musicians assume it’s the tubes that give them their tone. There’s a lot of synergy going on in an amp, and the tubes certainly contribute, but let me illustrate this another way. Did you know that there is what we call “output transformer-less” amplifiers in the HiFi world?
These amps basically parallel a bunch of power tubes together until they get down to 16, 8, or 4 ohms. There is no output transformer, so you literally connect the speaker directly to the tubes. If you ever get the opportunity to do an audio demo with this style of amp, you will find that while it works, it sounds nearly solid-state. The output transformer is what provokes a tube into giving the characteristics that we find desirable as far as tone. Audio engineers didn’t want the tubes to distort, as tubes are basically nothing more than very clean voltage amplifiers. But when you have a reactive element like a transformer, you irritate the tubes into harmonic distortion.
Therefore, the difference between a good and mediocre transformer is based on how it works and syncs with these tubes to produce the kind of tone or distortion we are looking for. It is not as easy as winding some wire around a steel core, if it was then we would not be having this conversation.
How does a Mercury transformer made today compare to the transformers made in the golden age of amps (the ’50s and early ’60s)?
One of the biggest mistakes existing in today’s amplifier community, especially amongst hobbyists and do-it-yourselfers, is to blindly copy every aspect of a vintage amplifier hoping to get a piece of that golden tone. At best, this method still produces very random results. One of the key reasons for this is the often-overlooked missing transformer formula. A builder will fuss around with the tiniest of other details but completely miss how the transformers fit into the equation. In short, get the transformers right, then the rest is much easier. Here’s another look at theses deceptively simple devices:
For vintage-style transformers, Mercury starts by duplicating the transformer design, build errors and all. We use the best grade components like they did in the ’50s and ’60s. We wind every layer and every turn as if it were a circuit in itself. In fact, the diagram on the left shows an output transformer circuit equivalent. Most people would think it is an audio circuit. These things are fairly complex, and all the numbers have to be right in order to get the tone we want as musicians.
We really do follow the recipe to a point. Although we don’t repeat any of the mistakes or inconsistencies that were prevalent, but didn’t affect tone. For example, if you were into Fender tweeds or late-’60s Marshalls. To do this we would literally put the word out to rent or borrow dozens of amplifiers to find the one or two that had the sound, and dismiss the rest. There were typically many inconsistencies as well as “happy accidents” in the best-sounding examples we’ve auditioned. A lot of this has to do with the sloppy tolerances of the original transformers.
For our transformers we extract the best parts and virtues of the original best-of-breed transformers and remove all of the obstacles to tone. Perhaps just as important is that we adopted a “cost is no object” approach, making our transformers equal or better than the originals — and then add consistency. We now have this so finely tuned that if you bought a transformer from us five years ago, and then the same one today, it would sound exactly the same. You don’t want good batches and bad batches, which is precisely what made the original production runs vary so much.
Another issue is the so-called controversy between paper tubes and nylon bobbins. In the vintage years they used both. Some people think that somehow, some magical quality comes from using a paper tube winding form over a nylon bobbin. Tonally it made no difference at all. Paper tubes were widely out of tolerance most of the time because of how they were made. They would wind multiple coils on long sticks then use a saw or blade to cut off the various coils. In order for these long tubes or coils to come off of their winding forms they had to be conical. So this invariably meant that the first coil would be larger in diameter and the last coils smaller. As you can see, it’s easy to see why each of these inconsistently-made bobbins had a greater difference than the material they were made from. And there are other issues that occur over time, like paper has a tendency to disintegrate, collect moisture, etc.
When we switched to using nylon bobbins the tolerances were within 3,000’s of an inch of each other, as opposed to the wildly varying amounts found in paper tubes. If you were ever to take apart a really old transformer (pre-’70s) sometimes you’ll find wood wedges that are jammed between the paper tube and the core because that piece of paper was too wide and too sloppy to fit into the core correctly! They would force a wedge in there so the darn things wouldn’t rattle!
Which method, paper or nylon, made for the best tone? It’s the luck of the draw. We’re fortunate in that we have all these stars as clients who have these amazing-sounding amps. They went through the hassle of culling and choosing and picking the special amps that inspired them. The amps they recorded with. When we analyzed their transformers we sometimes found happy accidents or other little anomalies that would set a transformer apart from already sloppy tolerances of the standard production run.
There are little subtleties and changes from one transformer to another that make a heck of a difference tonally. So when you look online at our list of ToneClones, just know that they are from the hand-picked, best-of-the-best amps of their model and era. We continue this “weeding” process every day — and there’s apparently no end in sight. And that’s why, with some amps, we have several versions — each with its own tonal qualities — and others only a single set to choose from.
We use this process to establish new benchmarks. And you never know, tomorrow a new variant may arrive that totally blows away what we already thought was as good as it could ever get.
It is interesting that you take that approach to upgrading — the never-ending search for better-sounding benchmarks.
There is no real money or glamour in what we do, it is really all born of a passion for music. I come from a musical family, my Mom taught me as a little kid that music was a form of “food.” And that hasn’t changed. Everyone who works at Mercury is just in love with playing and listening to music, and we all believe that there is always some room for improvement or a way to raise the bar somehow.
Back in the ’70s and ’80s there wasn’t really a need for a company that designed and sold transformers to the public, so I stayed away from the general public for as long as I could and really only worked with professionals.
But at some point I realized that it was the average player who was getting ripped-off. Things were getting dumbed-down, the tone is slowly and steadily being vacuumed out of the amps. They were becoming duller-sounding, less interesting and more noisy. So, we decided to formally launch this product line so the average guy could have access to our technology. It takes an extreme amount of labor and effort it takes to build them to this standard. You know, even if someone wanted to buy 1000 transformers we would have to no-bid them because we really don’t have any way of doing things quickly.
Automation isn’t a practical solution. Everything we do is wound by hand, one at a time; it is the only way it can be done. Say you have 100 turns and 10 layers, well that would mean 10 turns per layer — that is how a machine would think of it. But what if a rock legend’s best transformer was 9 turns on one layer, 11 turns on the next, 7 on the next, 3 after that and so on, but the sum total ended up being 100 turns. Sometimes one layer can have a different winding style than the other; sometimes it is non-symmetrical meaning, if it is a push-pull, that one side of the primary doesn’t have the same turns as the other side. If that was the recipe that created the magic, we’d have to duplicate it. It’s just not practical to build machines to do that, so we end up having to do it by hand. It’s the proud old-school craftsmanship way of doing things. Something I think we could see a lot more these days.
We have a reputation for nailing tone. Our Fender transformers don’t sound like Marshalls, they sound like Fenders — and vice versa. In fact, we’ve become the industry’s new standard. If you were going to design or create a tube-based amp, it’s clear that we’re the folks to talk to.
Can you explain how a Mercury transformer can improve an amplifier’s tone and how they outperform the stock transformers found in most amplifiers?
In designing toneful transformers specifically for guitars (and that’s all we’re talking about here, not necessarily transformers for HiFi or any other purpose), the trick is in the magnetic field and how it behaves. The nature and the speed with which the iron reacts to the changing of an alternating current, in an alternating magnetic field, is what makes tone happen.
If you have “slow” iron, you’ll have a dull, non-sparkly sound with no bell tones — no matter what you do with the amp it will always be kind of noisy and fuzzy.
Where others have tried and failed they’ve blindly followed generic transformer formulas without understanding that guitar amps are different animals. They’ve somehow missed that point despite all the evidence to the contrary. The fact is that transformers for guitar amps do not necessarily follow textbook rules.
Indeed, it should probably be noted that we’ve developed a whole new technology around transformer design specifically, and only for the guitar industry. And that these designs are essentially irrelevant to any other use. But Mercury is also in a highly unusual position. Our decades of transformer “vivisection” have revealed all manner of unconventional tips ‘n tricks to us. And we’re now the keepers of this new, but proprietary, technology.
I seriously doubt that we could have done it without the, let’s call it “archeological benefits,” of our observations. Decades of studying the good, the bad and the ugly of guitar amp transformers have revealed a great deal.
Nothing that I have found in the reissue market, transformer-wise, even resembles anything that was made during the “the golden age of tone.” They are unrelated. The inductance, magnetic fields — all of that is just completely different and far removed from the original designs and recipes. So there is no way that a reissue amp is ever going to sound vintage unless they bother putting in the right ingredients.
With our Upgrade Kits, for example we’re trying to show people that we can move forward into new sonic territory from where vintage designs and tone left off. And our Axiom series transformers are the definitive showcase for this technology. Their tone is just amazing.
To push the point even further, we don’t include any “voodoo” parts in our Upgrade Kits. With the exception of the transformers, the Kits use only common, everyday, and off-the-shelf components. And most of our Kits also include a Mini-Choke. When the circuitry is correctly designed a Mini-Choke will make a huge improvement in an amp’s tone because, in terms of its power supply, it changes the way the amp works.
A good guitar amp is only as good as its power supply. If you have a dynamic and moving power supply that reacts to the demands of the audio end you’ll get get great note separation and good bass dynamics. You start to hear chimes and other phenomenon, and even the harmonics between the strings like a “5th note.” What the heck is the “5th note”? In barbershop quartets, if they get their harmonies right, they hear the “5th note” which is basically a harmonic of all four singers. We are doing that with our guitars thanks to distorted amplifiers.
Where did the idea for offering an Upgrade Kit for amplifiers like the Champ “600” and Valve Jr. come from and who designed the Upgrade?
I designed all of the magnetics (the transformers and Mini-Choke) and the general concept behind the Upgrade in league with Allen Cyr from the Amp Exchange. He is one of the most competent, finest amp designers I know of; there are only about five in the world that are true masters of the art — those who really know the math, how to read tone, how to listen to the subtleties of clean and overdriven sounds and tones, design circuits, and understand tube behaviors. As a bonus to those who appreciate this kind of thing, we always try to throw in some interesting tweaks and tricks that are unorthodox.
The idea is to spark some interest and perhaps get more people involved in tube-based amp tone and evolution. We expect some folks to study our Upgrade Kits, learn from what we’ve done, and take off into new territory from there. No one is offended by that.
But our initial concept was to take an inexpensive stock amplifier, one that cost no more than $100 or so, and modify it into a professional- or recording-quality amp for very few bucks. The Valve Jr. was the amp that gave us the inspiration for this project. Epiphone broke the mold with their little Valve Jr. amp. Out of the box it’s a remarkable value. So, although it was a bit of a challenge I thought it was interesting because we were not stepping on anyone’s toes — we were just taking something that already existed and designing an Upgrade Kit around it. A simple proof of concept that made the case of transformers and guitar tone. It just seemed like a cool thing to do. The project was validated when pro players began demo’ing our prototype amps — they couldn’t believe how amazingly great such a tiny amp could sound, it freaked them out, and they all wanted one of their own!
Our intention was to give the kid who was practicing guitar in his bedroom, whose parents are on a limited budget, REAL guitar tone. In a typical scenario, the parents buy a cheap little amp and guitar combo because they want to see if their kid will stick with it. But the kid doesn’t understand that the sound of the amp is fatiguing. He doesn’t understand why the amp doesn’t sound good. And he doesn’t realize that the amp is fighting him, tiring him out. I know that happened to me and so many of my friends when we were kids. Struggling with hard-to-play guitars and poor-sounding amps is probably the single-most reason so many budding young (and old) guitarists give up the pursuit of their dream. But some are rescued. One day they visit a guy, or hear someone play, who has the amp with the tone and with just the sweep a few chords they experience the “My gawd!!! I want to sound like this!” phenomenon.
That is what we’re trying to offer with these Upgrade Kits — where the tone is accessible to just about anyone. So they could have an amp that wasn’t dull or desensitized. An amp that allows them to make that real connection to the tone. Tone is not just about noise and volume, it is rather complex, and undeniably emotional.
At the LA Amp Show we had our Upgraded Fender Champion “600” running into a full Marshall stack. Here we had this little amp powering eight 12″ speakers and it sounded great. People kept asking to see the back of the amp thinking that we had somehow rigged up something, but it was just the little Champ “600” with our Upgrade Kit.
When you have a nice open tone it is not about counting watts because the window is so big and wide and the soundstage is so deep that it gives you the impression of more power. We are not putting out more power with the Upgraded “600” — but it sure sounds like it! It’s about opening up that tone window and giving you more.
It’s kind of like taking a radio whose volume is set to half way and having it placed about 20 feet away from you then bring it right next to your ear — the volume has not changed but you hear a lot more of its content.
One of the things we do when modifying a circuit is to lower the noise floor, which a lot of people overlook. Many amps, like the Valve Jr., have a nasty hum in standby. We had one that would just start to howl if you left it alone for a while! So whatever high noise floor it had would eventually feedback on itself and cause that noise.
Our focus is on inspiring people. We are trying to show people that they really can get great tone today, that there is no age that has come and gone. There is still a lot of fun things left to do with your amplifier when you are on the search for great tone.
Hearing how much these Kits improve upon the tone of the amplifiers, and how well thought-out they are, will a Mercury amplifier that is designed and built by you ever make an appearance?
No. We are a supplier of key components to the boutique industry and to several of the large amplifier companies, and that is a comfortable spot to be in.
There is no shortage of amplifier companies out there and it really is a conflict of interest if we were to start selling amps and transformers. I would rather stay out of it.
The whole point of the Upgrade Kits was an area where I didn’t see any conflict with the people who were in the amplifier business. In the end the Kits really represent a transformer demonstration. If you were to just show someone a picture of a transformer or even had one in your hand and tried to explain how much better their tone would be, no one would care — it’s a yawner. But when you build one of these inexpensive Upgrade Kits and you actually hear the difference that the transformers make, it really drives home our point that transformers are important, that they are the building blocks of guitar amp tone.
And in the end we do this because we love it, we really love what we do. We get to create all of these products that help people find their tone, and who wouldn’t what to do that?
Transformers mount onto various chassis in several different ways. How the transformer mounts to your chassis determines the mounting style you order.
Most transformers have standardized mounting styles. However, within the industry there are several naming conventions used. Mercury has adapted the following simple and easy-to-remember system.
When ordering you’ll need to know the following —

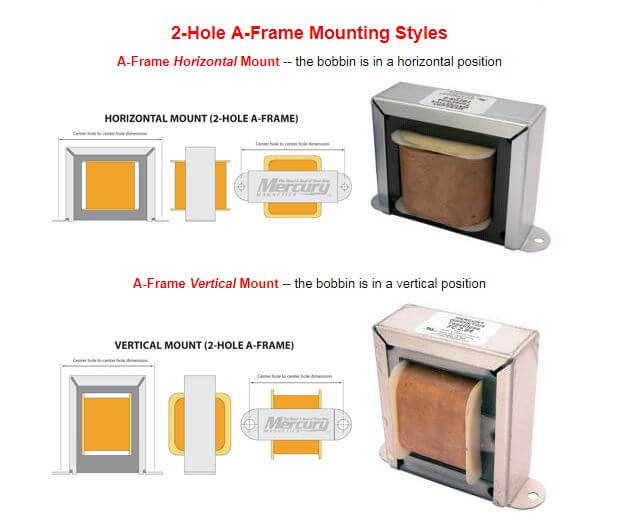
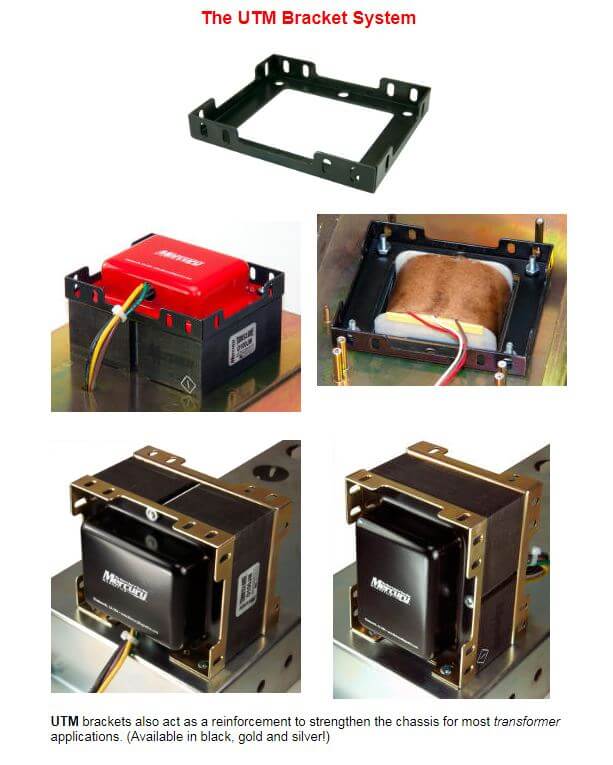
Notes:
Endbells (caps that cover the bobbins and laminations) for transformers are optional. Ask your Mercury Representative about color options and custom graphics.
Not all transformers and chokes can be fitted, or need, endbells. For example, chokes and single-ended outputs are gapped, therefore endbells are not used because they will short the gap. If you have any questions, please consult your Mercury Representative.
A-Frame Mounts are standardized.
4-Hole Mount transformers mount in several ways, including L-Brackets, “Special Brackets” or UTMs.
UTMs (Universal Transformer Mount) brackets will greatly increase your mounting options and are available in several colors. They can help to strengthen the chassis, especially for Flat Mount applications.
Contact us to with any questions or to go over mounting options.
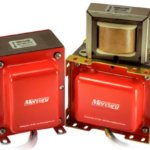
What’s at the heart of your amp restoration, repair and mod business?
When an amp comes to you for service, which best describes your method?
You’re the expert in your customer’s eyes and he often depends on you to not only fix his busted amps, but deliver the best possible tone and reliability from his gear.
Here’s your chance to truly impress your customers by making tonal improvements they never imagined possible. And the best part is how easy Mercury makes it for you to become their “go-to-guy.”
Transformers 101―Design Matters
The simple truth:
Ordinary transformers are at the root of many difficult to diagnose amp problems, not just tone. Excessive noise and heat, tone drift, and reliability issues are just some of the symptoms you should be aware of. When a transformer dies you’ve probably always ordered a replacement from the amp’s manufacturer or a parts distributor. Have you noticed that you never hear any tonal improvement with their generic-sounding transformers? And how replacements often further degrade an amp’s tone?
It’s not your fault!
You’ve only been offered replacement transformers from whatever was available — rather than what amps actually need to perform at their best. A dirty little secret is that they just don’t get it — so, they’ve cut way back on transformer quality for purely economic reasons. Tonal quality is not a first consideration. In fact, it’s not even on their radar!
On your next repair, mod or restoration, try something new. Forget about those anemic other transformers — give Mercury a call. We offer you a whole new world of golden-voiced designs to be explored. Everything from “clones” of the best-sounding vintage gear ever made to the latest tonally-enhanced models. Give your customers something that’ll blow their minds (and help your business grow!) go with Mercury.
Join Mercury’s Service and Support Network (SSN) Program
As more and more musicians discover the awesome tone of Mercury transformers we’re getting bombarded with requests to install replacements or upgrades for everything from modern tube amps and reissues to classic old amps. Although that’s great news, our business is designing and making transformers, not installations and service.
We’re looking for qualified amp techs and music stores with amp service departments to become Mercury distributors and service centers.
There’s nothing better than customer loyalty. Aside from making it possible for the amps you work on to sound better than they ever have, we can help build your business by:
Our expert tech support team will also help you with the all-important “which transformer to use” decisions. The time to start learning about the benefits of high quality transformers is now — call us today! Ask for the Service & Support Network (SSN) manager. He’ll answer any of your questions and if it sounds like a good idea to you, he’ll get you started on our SSN program.
What your customers need to know about the transformer connection to great guitar amp tone
Which components have the single-most dramatic effect on a tube-amp’s tone? Its tubes, speakers or transformers?
Surprisingly, an amp’s transformers are the actual backbone of any tube-based amp’s tone. If your customer is not happy with his amp, or just wants to make it sound a whole lot better, start with its transformers. When you work with premium-quality transformers as a foundation, you’ll discover how much easier it is make the final tweaks to an amp’s tone.
Why are some amps more inspiring to play than others?
There is a phenomenon known as “ear fatigue.” It is caused by unmusical, muddy and confused tone. With tube-based amps, low-quality transformers are one of the main causes of ear (as well as listener) fatigue. As an amp tech you can open up an amp’s sonic potential by upgrading its transformers. And quality magnetics generate the kind of lush tones that inspire guitarists to create more.
I’ve been told that ordinary transformers sound just as good as premium units.
Maybe if you’re tone deaf… or the amp’s circuit is of an extremely poor design. But, even at their best, cheap transformers barely mimic, in a lifeless sort of way, an amp’s tonal capabilities. An alarming number of amp makers cut corners by not using high-quality and better-sounding transformers. By upgrading an amp’s transformers you are essentially correcting this design error. The result is often startling. By simply upgrading the transformers you can give your customers’ amps vivid harmonic overtones, added sparkle and more dynamic headroom, with much better note separation. They’ll love you for it — and that’s good for business!
* * *
The bottom line: Inside every great-sounding amp is a set of quality transformers. If they’re not vintage originals, then they’re probably Mercurys. If your amps don’t come alive when you plug in, it’s time you called Mercury.
Mercury’s NEW MultiChoke offers you these important benefits:
Think of a choke as a shock-absorber for your amp’s power transformer. Did you know that upgrading your tired old or wimpy reissue stock choke — or adding a Mercury choke to an amplifier that doesn’t have one* — will actually extend the life of your power transformer and rectifier?
*Amp manufacturers often cut costs by the use of a resistor in place of a choke. This choice has absolutely nothing to do with tone, it’s purely economic. Replacing that resistor with a choke is a low-cost upgrade that’ll usually give you a huge improvement in tone.
Your amp’s tone noticeably improves with any peaked and tweaked, hand-tuned choke from Mercury. Mercury users tell us that they hear a tonal richness that was not there before adding one of our chokes. Why? Because a choke provides musical smoothing to your amp’s circuit. It also has a huge impact on touch-sensitivity and tone dynamics.
A choke is so much more than a simple inductor. It can also store energy like a capacitor. Better voltage regulation results from using premium-quality chokes. The choke puts less stress on your power transformer and permits higher load currents to be drawn from vacuum tube rectifiers without exceeding their peak current rating. This means life extension for your tube rectifier — and even solid-state rectifiers run happier!
Mercury’s NEW MultiChoke is in a league by itself. The MultiChoke allows you to quickly and easily audition several different choke values to determine the best possible fine-tube the tone from your amp. And, the MultiChoke saves time and money by eliminating the need to purchase a stack of single-value chokes — not to mention all of the added time needed to solder/de-solder leads for your tests.
Depending upon your needs, Mercury offers several MultiChokes with varying value sets. Currently available sets include:
Mercury’s MultiChoke come in 3 sizes* with these center-hole-to-center-hole mounting dimensions:
*Check our catalog for size availability.
For a little dough, and some help from Mercury, you will be on your way to having a better sounding amp.
Also see our adaptation of the MultiChoke to the Orange “Tiny Terror” Upgrade Kit.
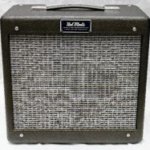
OK, so perhaps you’re sold on snatching a stock Pro Junior, but of course, you want it to sound the best it possibly can…. Should you wish to dig a little deeper in the quest for tone, veteran amp builder Ben Fargen has developed a line of Hot Mods for stock production amplifiers – lots of them, including the Pro Junior, and we asked him to describe the inspirational behind his concept for the Hot Mods….
“For a number of years I had a lot of people wanting me to work on their vintage Fender, Marshall and Vox amps, and I really never had the time until the economy slowed down in 2008. A local customer asked me to take a look at a Marshall JCM800, which (laughing) really isn’t the kind of amp I’d usually be interested in, but I agreed to look at it, got in touch with Mercury Magnetics, went through the schematic, and wound up turning it into a really great sounding high-gain amp that would appeal to people who like that sound. I had also done some design work for Carvin when they wanted to optimize a production design and get the most out of it, so when the economy slowed down I began taking in specific camps to upgrade, and from there we started developing mod kits. Customers went just their chassis in, which isn’t expensive to ship; we do the work and ship it back.
Through the later part of last year we were doing about one mod project a day, at first taking in just about anything, but we’ve since whittled it down to specific amps like the Pro Junior, Blues Junior, Blues Deville and the reissue blackface Deluxe Reverb, for example. With these amps it’s not the design that’s the problem – it’s just that the component selection is based on what is most practical and economical for an affordable production amp. We take those amps and optimize the sound as if production cost was not an issue, and we have customers who have had two or three different amps modded now, because they are basically getting a boutique amp and the tone that comes with it.
TQR: In the Pro Junior specifically, what areas of the circuit do you focus on for the mods?
There are really only so many ways to wire up a tube amp circuit, and in most cases we’re focusing on the same key areas in each amp – plate resistors, coupling caps in the EQ and phase inverter, and slop resistor for the EQ, and cathode resistors and cathode bypass caps are huge and often overlooked…. We hone in on the tone-shaping improvements that give us the biggest bang for the buck, and of course the Mercury transformers make a big impact. You can do any of these mods alone and improve the sound, but it’s really the cumulative benefit of using specific high quality components and the Mercury Magnetics transformers that determine the end result where you really hear the magic. We aren’t the only people doing mod kits, but you’ll notice that we use specific brands and types of caps and resistors in very specific places with our mods, and that’s the result of my having build amps for 12 years and learning what specific types of components are going to do in a particular part of the circuit.
TQR: You also added a power supply choke in the Pro Junior you modded for us….
We add the choke because it is so critical to what I call pick dynamics – the note response to pick attack, and improved sustain. Most budget amps just have a power resistor separating the B+ and the screen voltage – it works and does the job, but the correct choke in a circuit really adds a huge amount of that ying and yang you want to hear between the power amp and the preamp.
TQR: And what is the cost of the Pro Junior mod as you’ve done this amp?
With the full Mercury transformer set it’s $499 without a speaker swap. All the Hot Mods are in the $349 to $549 range until you get into 100 watt or JTM45 Marshall reissues and things like that. We’ve also done a lot of mods for the reissue Bassman…. As you know, there is nothing like a great Bassman, and there are a few revisions that Fender made that are just not happening at all, but when you get rid of those they can sound fantastic.
Here’s the deal…. You economically ship your chassis per Fargen’s instructions and they ship it back fully optimized. We asked Ben to send us a Hot Modded current production Pro Jr. for review and we directly compared it to our stock 2001 Junior, fully loaded with our NOS tubes and Jensen Vibranto. The modded amp Ben sent included stock Groove Tubes and a new Celestion Greenbackten.
As soon as we played through the Hot Modded amp, we heard the same dominate midrange push and lack of treble presence we had heard at first in our own amp. Less pronounced with brighter single coils, yes, but still too middy for our taste, so we subbed in the JensenC10Qfor the Greenback and the angels were singing again – sopranos, altos, tenors, and baritones all present I the choir. In fact, both amps sounded similar with the stock tubes in the Hot Mod Pro and our stock model with the NOS tubes – thick, rich and very smooth with excellent dynamic response and full, clear fidelity. Fargen’s Hot Modded Pro Junior possesses smoother, warmer overall tone while our Pro still sounds brighter and a little glassier overall. We suspect that a bias pot and lower voltages would tame the intensity of the distortion, but the 5751 does a nice job as an easy workaround. Fargen’s amp was also a little quieter at idle than ours, although we hadn’t noticed this until we had a quieter amp for comparison. For more information on all of Fargen’s modifications, check out the Hot Mod pages on the web site.
I have a cool little 1980s Fender Super Champ. It’s one of the amp models that was designed by Paul Rivera. This little guy puts out about 18 watts through a single 10″ speaker. It also features Reverb and an overdrive mode. This is a great little amp to take to jams or recording sessions. It’s an all tube design and one of the last point to point hand-wired Fender amps. A few shortcomings of this amplifier are:
Two of the three shortcomings can be fixed pretty easily and for not too much money. The one that cannot be fixed is the footswitch circuit… I’ve tried and it’s just the design… oh well. First thing is to ditch the stock speaker and put in one that’s more efficient with more clarity and better bass response. I chose an Eminence Ragin Cajun and the amp totally came to life. You can do a gig with no problem once you install the Cajun.
If you want to take the amp up another level or two then you have to replace the puny output transformer. I removed the stock unit and replaced it with a Mercury Magnetics FBFDR-O model. This is the clone of the blackface Deluxe Reverb output transformer. It is definitely bigger and if you install in on a slight angle you can catch a mounting screw hole for a terminal strip so you do not have to drill any holes in the chassis.
The result is absolutely astounding!! It has been a long time since I upgraded a transformer in an amp and this swap reminded me how effective upgrading an output transformer can be. The whole amp just opened up and the bottom end got much tighter and defined… almost piano like. The overall volume of the amp increased and the dynamic range was broadened. There was much more harmonic content and overall the amp sounded and felt much more solid. Besides sounding and feeling better this amp was now a lot more gig worthy. A simple transformer swap did all that and only took about an hour from the time I dropped the chassis until I hit the first note. To me that’s a total home run!!
If you have an amp that sounds and feels good but want to take it up a level or two then let me suggest two reasonable upgrades: New speakers and a transformer swap… at least the output transformer. These two upgrades can transform your amp into something magical. Plus it is a lot less expensive than getting a whole new amp, not to mention the time you have to invest trying a bunch of them until you find one that works for you.
I am affiliated with both Eminence and Mercury Magnetics. If you have any questions and are interested in upgrades please email me and I can help make a recommendation or two on speakers and/or transformers. You will be amazed… I am every time!!
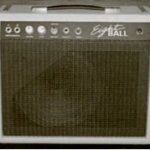
Many of you are already familiar with our resident amp tech, studio owner/engineer and advisory board member Jeff Bakos. In his spare time, Jeff occasionally builds amps for clients on request, and lately he’s been asked to build… you guessed it – small little biters. Since his personal GA-5 has been featured so often on various recording projects, Jeff toyed with the idea of recreating the Gibson GA-5 Skylark for a minute, but given the fact that vintage GA-5s remain fairly plentiful, he ultimately decided to design his own simple take on a smallish amp – the 8 Ball. Housed in a Mojo Champ cabinet, the 8 Ball is built with one of our favorite tens, the Eminence Legend Alnico 1058 (that’s a hint), Mercury Magnetics trannies and choke, and premium components, including Sozo coupling caps. With the bigger Mercury Princeton transformer set, the single 6V6 / 12AX7 / 5Y3 design is capable of producing 10 watts of power. Features include dual inputs, volume and tone controls, a front panel line out jack, and a “vintage” / ”modern” toggle switch also conveniently mounted on the front panel.
The “vintage” setting produces pristine Fendery clean tones up to 12 o’clock on the volume control, gradually followed by a progressively thicker growl with intense distortion and sustain. In this setting, the 8 Ball surpasses all the other small amps we’ve reviewed in terms of practical versatility with stronger, louder clean tones and a more gradual It’s back! We are now resuming limited production of our meticulous recreation of the original 1959 DeArmond R15 1×12 amp. You may recall that we initially produced a limited number of TQ Clarksdale amps in 2006, before our supplier for the original chassis informed us that small runs would no longer be possible. We’ve found a new supplier, and the TQ Clarksdale “DeArmonds” will be built again by Jeff Bakos with our original specs – pin cabinet construction and design identical to the original, original Mercury Magnetics Tone Clone transformer set cloned from our original ’59 DeArmond, hand-wired chassis, premium components including Sozo caps, Celestion G12H 70th Anniversary speaker, premium JJ and Tung-Sol tubes, Evidence Audio speaker cable, custom gold grill cloth and blonde Tolex covering. This 22 watt design represents one of the rarest and most toneful combos ever built. The original 1959 DeArmond 1x12s were built for just one year in Toledo, OH, and a clean example recently sold on eBay for $7000. In 2006 Jeff Bakos meticulously blue-printed our original DeArmond, Mojo created CAD drawings from the original cabinet design, and we sent the transformers to Mercury Magnetics to be cloned. The result is a phenomenal 1×12 that will generally kick any tweed Deluxe straight to the curb with a bigger, bolder voice and lush, musical distortion cranked. The 4-input, cathode-biased Clarksdale can be operated with dual 6V6s and 5Y3 rectifier for optimum burn, or a pair of 6L6s and 5AR4 for slightly more power and clean headroom. Blonde Tolex only, simply because it’s the coolest color…

For all you know-it-alls and music gurus out there who pride yourselves on your vast knowledge of musical fact, know the name Glen Morris. If you have not yet heard of him, you have at least heard him. He is the brains and elbow grease behind Morris Amps, the brand gracing the airwaves behind guitarists like Dallas Green of Alex is on fire and James Black of Finger Eleven.
You’ll hear a Morris Amp on the latest release by the Cancer Bats and in countless studio albums from Canada’s top studios. But who is Glen Morris really? What makes him sound so good?
To understand why these artists are swearing by a Morris amp you have to understand the man, Glen Morris. He says it all started for him when he was a boy. He and a friend overloaded an old fender amp with the output of a small DeArmond amp by disconnecting the speaker and attaching it into the front of the Fender.
“It was the most amazing sound for about 10 seconds.” He says, “Before the amp exploded.”
~Glen Morris
He had to crack it open and study its glorious brains. This was his first rebuild. From that moment on, the sound and structure of an amp has been his passion. He picked up bits of knowledge wherever he could. Enough for friends to dub him Glen “Can’t-leave-it-alone” Morris.
His father was the head of the Electronics Dept. at the Stelco Steel Co. and worked with Radar during the Second World War. From him, Glen learned how to properly saturate a tube to make it sing like a rock and roll song bird.
Now he’s not all wires and solder. Glen is first a guitar player. The final sound of his amps starts at the fretboard and works its way through a patiently obsessively built hand wired circuit board before it gets the Morris brand.
“The layout,routing of the wires, is an extremely important factor in an amp,” he says. Not every guitar amp builder is a guitar player and it really shows.
Glen is a graduate of the Electronics program at George Brown College. While there, he admits that he picked the brains of one special teacher every chance he was given. This teacher was originally from the Ukraine and taught Radio/TV classes. He taught tubes and valves and knew them inside and out, right from the old school. Glen spent countless hours in the library reading old manuals and schematics.
So what’s in a Morris Amp today? Well, Glen has a longstanding relationship with Mercury Magnetics. They supply his transformers and are a vital part of his sound. Some are made exclusively for the Morris brand. He says the defining part of a sound is in the transformer. If any of you readers out there are going to start messing around inside your amp, make sure you don’t skimp on the transformer.
Lately, able artists have enjoyed the sounds of the Morris XSII and XSIII, both versatile amps for the modern rocker. Morris amps are hard working machines and most sell accordingly. He has recently designed two tube distortion pedals under his Morris brand “dismorrtion”. They imitate his bigger sound and are still hand built with tubes at a lesser price.
His new designs are an all steel cab amp head that is specially designed for the boutique pedal players.”So many guys today love to buy and swap pedals all the time. So I designed a very affordable 30-watt single-channel amp that the tone controls work mainly on the harmonics, allowing you to really dial in a great distortion sound with the pedal,” says Glen.
Sound samples and prices are all available on the Morris Amps website, www.morrisamps.com.
Source: https://www.facebook.com/note.php?note_id=237680760133
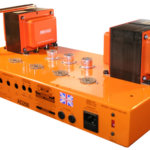
Tim digs into a stock Orange AD200 Bass MK3. He details stripping the amp to its chassis and turning it into a point-to-point handwired amp with high-quality components.
For the past couple of months, I’ve found myself acting as bass player for a new band. It’s been a bit of a change of gears for me as I’m usually playing guitar or lap steel. In playing bass, I found myself with a need for feeding my desire for headroom — a need that can only be satiated with lots of big power tubes and stacks of speakers. I purchased an Orange AD200 bass head with their matching 4×10 and 1×15 bottoms.
In its stock configuration it’s a formidable rig to be sure. I was very impressed with the power, tone and range that it had to offer, even when trying to keep up with a very loud drummer. I played it joyfully for a few months and didn’t have a single complaint. What a happy and content fellow I was… yet… I always have this little nagging voice in the back in my head saying, “what if I changed some components? Sure I’m happy now, but couldn’t I be happier?” And so it always seems to begin with the little nagging voice that I keep listening to against my better judgment. The same voice that often leaves me sitting at my bench, head in hands thinking, why did I start this project? I was so content! WHY?
The concept of changing only a few key components was quickly forgotten once I committed to this project (and had a screwdriver in hand). I gutted the amp to the bare chassis. Out came the printed circuit board (Figure 1) with its board-mounted tube sockets, pots, transformers — everything.
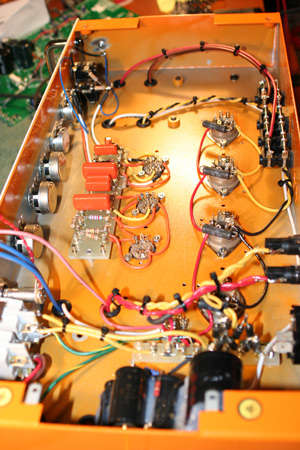
Figure 1: Before gutting.
With the chassis completely stripped, it was time to lay out, measure and drill new holes for the upgraded chassis mounted tube sockets. As the new power tube sockets needed a bit more room than the PCB mounted ones, a Dremel Tool with a coarse sanding drum bit was used to enlarge the holes. Care was taken to make sure that the pin alignment made sense with the lay of the future wires before drilling the mounting holes used to bolt the sockets to the chassis. While I had the drill in hand, I also enlarged the front panel’s pot holes to accommodate the larger upgraded pots that were going to be installed. The placement for the circuit board mounting holes were also located/drilled, as was the location of the ground lugs that were going to be used in the star grounding scheme.
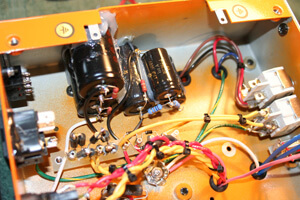
Figure 2: Removing the guts.
One of the most time consuming things for me when building a “one off” amp is the chassis layout. If done properly, it makes the rest of the assembly more of a connect-the-dots type of process. If done in a haphazard and incomplete way, one finds themselves drilling extra holes and routing wires in a way that may not be as professional looking or functional. In high gain designs, a poor layout can lead to excess noise and frustration.
Trying to work within a pre-existing framework is even more of a challenge. It would have been easier to start from scratch with a blank chassis, but I wanted to retain the “Orangeness” of the amp. After all, I am using the original schematic for the project, as it is a fantastic design. I just wanted to upgrade the components and make it a bit more serviceable and rugged.
After mounting the tube sockets (I prefer the Micalex sockets made by Belton) it was now time to select the components to be loaded onto the circuit boards. Unfortunately, this will have to wait for the next installment.
Selection of the parts to be used in a design with a given purpose is an important task. Almost every part in an amplifier makes a difference in the tone — starting with the quality of the AC coming out of the wall, to the power cord, all the way through to the speaker and into the room where the natural acoustics can make or break all of your hard work and tone. Some are pronounced differences, some a bit more subtle. If you add a dozen subtle nuances together, you get a pretty big nuance.
So, how does one wade through the endless amounts of caps, resistors, transformers and other “magical components” available on the market these days? Well, if you’re lucky enough to have the time and financial windfall that we all dream of having, then you can spend your life experimenting, buying and selling great gear without a care in the world. Hopefully, you’re able to develop a relationship with an artist or shop that you can trust and use them as a sounding board. Ultimately, you need to learn to trust your ears. Some of the best sounding amps that I’ve heard have been made with the cheapest, crummiest components. If it sounds right to you, than it is right!
A word of caution: Experimenting can be very fun and rewarding, but it’s easy to get too caught up in the bells and whistles. Don’t forget about the music. I found that when testing some different capacitors in one of my favorite amps that one of the caps sounded much “better” then the other. When I put the “better” sounding cap in and played, I found myself analyzing the sound in every way, from the bass response to the singing highs and, of course, how it felt. When I put the “inferior” cap in, I would start to play, get lost, look at the clock and realize that a half hour had blown by and I didn’t even listen to the cap because I was lost in the music! The “inferior” cap has lived in my amp ever since.
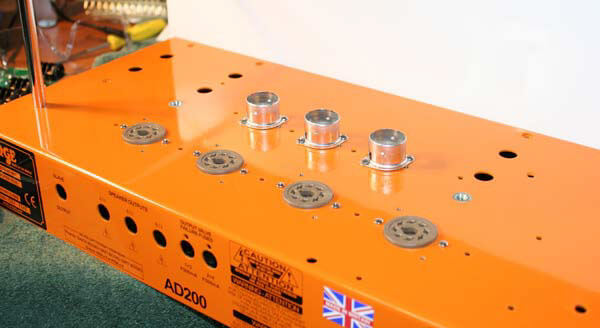
Figure 3: New sockets.
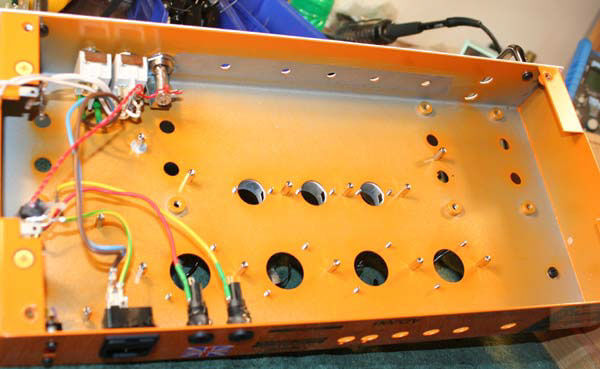
Figure 4: F&T electrolytics power supply caps.
My goal for this project was to “open up” the tone and feel of this already great amp. I wanted tight, slamming bass and open and airy highs with a bit more harmonic interaction. For the power supply caps, I used F&T electrolytics (Figure 4). I like them because of their reasonable size, cost, sound and feel. They are quiet and powerful enough to get good, solid bass without making the amp too fast and therefore not as musical or sweet.
For the coupling caps, I decided on Sprague Orange Drops. I use type 716 as they have a higher quality lead and are a bit more accurate they their 715 brethren. The Orange Drops, while perhaps not as sweet sounding as other choices, have a nice tight bass response with a slightly pinched top end that seems to help with harmonic content and punch. A client described their feel as “walking on packed sand instead of dry loose sand” — perfect for this bass amp.
For resistors, I use different types depending on where they are in the circuit. I don’t like to use carbon comps anywhere that the resistor may be tormented by excessive heat or where it may be prone to inject thermal noise into the signal. I will use them with regularity on the input, for example, but don’t like to use them as plate loads. Of course the brand of resistor has as large an impact as the overall construction. In places where matching and stability are important, I’ll use high-quality metal films.
The pots for this project were a mix of Clarostat Mil Spec. and CTS (CTS because I didn’t have all the values in the Clarostat). I use different types of wire throughout the amps that I build depending on the wire’s purpose. As signal wire, I use certain types of hook-up wire made for the audiophile market. For the B+ and power supply, along with the grounds on the star, I used a high-quality copper multi-strand.
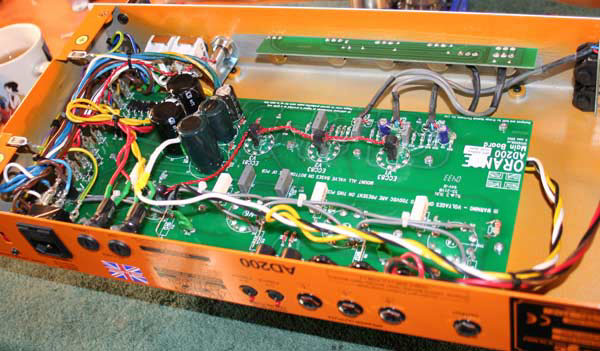
Figure 5: Components installed.
Once all of the parts are selected, they’re laid out and mounted to thick glass component boards (Figure 5) with very sturdy standoffs for ease of mounting. Silicone is applied between caps to create a cushion and help to dampen any unwanted smearing of the signal or microphonics due to rogue vibrations. Paul from Mercury Magnetics sent me a set of beefy transformers that looked quite handsome dressed in their orange end bells.
With the boards made and everything in its place and wired, it was time to fire this creature up and check the voltages at key locations. Using a Variac, voltages are brought up to full power slowly. This is done for a couple of reasons. The first reason is so the electrolytic capacitors in the power supply can form their dielectrics. The second, and perhaps more important, reason is so I can keep an eye on the voltage ratios to make certain that everything is hooked correctly before I install the tubes and risk their lives (and my wallet).
One thing that I appreciate about this design is that Orange took the time (and expense) to design a power transformer and power supply that would deliver 600+ volts to the plates of the power tubes with roughly half of that on the screens. This allows you to get the benefits of high plate voltage (headroom and power) while maintaining a safe operating environment for the power tubes. Now that we’re certain everything is safe and sound, the power tubes (Svetlana “winged c” KT88s) and preamp tubes (mix of NOS RCA and Sylvania) are installed and biased.
Though I’ve been building and modding amps daily for a few decades now, every so often I’m surprised by an end result. With the first strum of the strings, I was floored by the increased headroom, clarity and bell like tones coming out of this powerful amplifier. The change and added versatility in preamp/overdrive section was a pleasant surprise as well. While originally designed as a bass amp, it is fantastic for guitar and pedal steel as well. In retrospect, I’m very glad that I went through the trouble and expense to rebuild this amplifier. It has become my “go to” for almost every application. Long live headroom and power!
Source: https://mercurymagnetics.com/pages/news/PremierGuitar/PremierG-22.htm
A few years ago the guitar playing community experienced a resurgence of low-wattage amps. I’m not sure if it was because of the weight or the sheer volume larger stacks delivered, but the search was renewed for amps that could provide the same tone at an easily manageable weight and sound levels that didn’t make bartenders/engineers/wives scream, “Could you turn that down?”
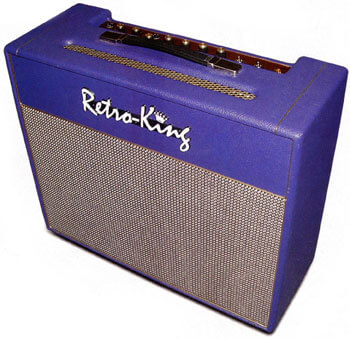 This brought renewed interest in an obscure Marshall amp, the model 1974, an unassuming 18-watt combo. Originally available as a 1×12 — and closely related to the 18-watt model 1958 (2×10) and model 1973 (2×12) combos — the amp featured two EL84 power tubes, three ECC83 preamp tubes and a 6CA4 (EZ81) rectifier tube. There was even a rare reverb-equipped model, but all of the amps featured both a normal channel and a tremolo channel. The magic of the model 1974 was that with just a Les Paul and a cable players could approximate the beloved Eric Clapton “Beano” tone used on the Bluesbreakers with Eric Clapton album. Although I should note that Eric actually relied on a JTM45 combo, interest in the Beano tone ensured the 1974’s place in guitar lore. As was to be expected, clones of this amp began popping up rapidly once the originals, now extremely rare, began fetching prohibitively high prices.
I was fortunate enough to have quite a bit of exposure to these early Marshall amps, having worked with a shop that had no less than six of the model 1974s in stock during my tenure. One exceptional example was retained for studio use. A number of renowned guitarists had used the amp over the years, and they all agreed that it was one of the best — if not the best — they had heard.
A few months ago I was invited to Houston, Texas, by guitar legend Billy Gibbons, to bring a 2×12 Marshall model 1973 to the studio for a new ZZ Top album. Billy is an avid fan of 18-watt amps and has numerous clones to choose from, in addition to two original 18-watt Marshall combos. While we were listening and comparing sounds, I noticed a green Tolex 2×12 combo called the Retro-King 18 Watt sitting in the studio. Once he plugged into it, I knew both the original of the tone and that I had to check one out for myself.
King for a Day
 The Retro-King 18 Watt is a completely custom-built amplifier, with the features you would expect to see in an amp of this class, including a solidly built, Baltic birch cabinet and handwired point-to-point construction. The fit and finish on everything from the cabinet to the Tolex covering was impeccable. The model I tested for this review had a 12″ Mojo Tone British Vintage Series speaker, although builder Chuck Dean will install others by request. The entire enclosure is substantial and provides for a big box tone from a single speaker combo. An impedance selector is included which is great for those planning to use this amp with other speakers or additional cabinets. The transformers are custom-wound to original Radiospares specs (an optional Mercury Magnetics transformer is available by request).
The 18 Watt has a couple of different features that I found to elevate this amp above some of the other 18-watt clones currently available. First, is the Master Volume control. You may ask why a Master Volume is needed for a low-wattage amp; while it does function to reduce the volume when the amp is cranked (bringing us back to that whole bartender/engineer/wives problem), it more importantly regulates how hard the power section is hit by the preamps. How the power section is driven affects everything, including the tone, overdrive and response of the amp, making the Master Volume a critical part of the circuit. The 18 Watt’s Master Volume circuit does not feel or respond like other Master Volume circuits I’ve heard; this one allowed me to get a wide variety of classic 18-watt tones, as well as the sounds of other model 1974 clones on the market. The Retro-King also features a tube biased tremolo like the original — it sounds wonderfully authentic, deep and a little Voxy. A footswitch proved to not only turn the tremolo on and off but to select between two speeds.
The second unique feature packed into Retro-King’s 18 Watt combo is a switch that allows for the selection of a tube rectifier or solid-state diode. The diode setting, while obviously not an original Marshall feature, provided more definition and headroom than the tube rectifier. When tube rectified, this amp has that sweet sag and compression that blues players love. If a player buys this low-wattage combo but is more accustomed to larger amps, this innovative feature will make it fee4l a bit more familiar — definitely a nice touch.
Of course, not all potential users of small amps are blues players. As a matter of fact, when I hooked the amp up to a Marshall Guv’nor pedal and set it for a very clean, high-headroom sound I was rewarded with a great rock sound. The tone was similar to Gary Moore, or even a bit more intense than that, if needed. The amp’s overdrive without a pedal ran from Black Crowes territory to the always-wanted, rarely granted “Beano” tone. Also surprising was that a Strat sounded excellent through this amp — something that I haven’t consistently found in other clones. The harmonics are rich, a la Billy Gibbons, especially when using pick harmonics. The 18 Watt cleaned up nicely and captured my picking dynamics perfectly.
The Final Mojo
I found the Retro-King 18 Watt 1×12 to be louder than the real thing, but with an authentic rendering of the actual tone for which these amps are famous was always there. I was also able to get higher-headroom, punchier tones that I was not able to get with the original. The original produced a slightly more compressed tone when driven hard with humbuckers but this would not have been obvious if the original had not been sitting right beside the Retro-King. In fact, the tones were so similar that I would have been guessing which one was which in a blind taste test. All in all, the Retro-King is more versatile than most other 1974 clones, without sacrificing the reason one buys an 18-watt Marshall-type amp in the first place.
Source: https://mercurymagnetics.com/pages/news/PremierGuitar/PremierG-12.htm
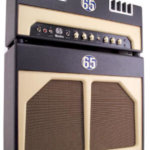
Southern California’s 65 Amps has garnered more attention in a shorter amount of time than almost any boutique amp outfit in recent memory — save, perhaps, its So-Cal-based compatriots, Divided By 13. The company has already earned due recognition for the 35-watt Marquee Club, 45-watt Royal Albert, and, in particular, the conservatively spec’d, but boisterously outspoken 18-watt London 18. All are decidedly Brit-inspired, with dual-channel preamps that employ a pair of Vox’s greatest contributions to tone: the simple EF86-based channel, and the interactive Top Boost channel. Against this backdrop, the SoHo head being reviewed here is the new kid in town, and it’s primed to bust out with a little sibling rivalry — if not an all-out Cain and Abel conflict.
Where the other 65 Amps models show a clear lineage from classic Brit tube topologies, the SoHo hints that its own conception might have occurred during a mid-morning visit from the milkman while mom was home alone. It’s a fairly simple amp compared to the two-channel, eight-knob London 18, but there’s nothing quite like it on planet rock. Ostensibly a single-channel, 20-watt, EL84-based all-tube design with simple controls, it’s the amp’s “little more” that really sets it apart.
65 Amps founders Dan Boul and Peter Stroud clearly like a challenge, and the EF86 pentode preamp tube — which can offer fat, wide, and dynamic tones when it works well — that so many makers have found trouble with again graces the first gain stage of this circuit. While just Volume, Treble, Bass, and a bypassable Master govern this pentode’s fury in “standard” (Bump Off) mode, the Bump function is what really sends this design into another dimension. It’s a footswitchable mid boost of sorts (footswitch included), but rather than being preset like most of the breed, the SoHo’s Bump has its own Tone and 6-position Level control. It can either subtly or radically affect the response and midrange content — and thereby the entire tone and gain structure — of the amplifier. And while it isn’t anything like traditional channel switching (as it only inserts another stage within the amp’s lone channel), 65 contends it’s more than enough to provide a viable lead voice at the tap of a toe.
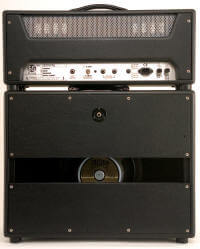
The SoHo’s speaker cabinet is a semi-open-back design loaded with a Celestion G12H-30 or an optional Celestion Alnico Blue.
To add to the novelty of the Bump function, the SoHo’s Master Volume hides a few tricks of its own. Rather than simply reining in output levels, it is what 65 calls a “reductive master,” which adds a little gain when it’s in-circuit, and it also adjusts the tone stack’s frequency response as you roll it down in order to compensate for the way the human ear perceives frequencies differently at different volumes. Flip the 1000-volt military-grade toggle switch on the front panel to Master Off, and the amp performs as if this unusual master circuit didn’t exist — because, electronically, it doesn’t.
“We wanted to have a master that retains a natural tone and feel without as much of the grit and fizz normally associated with master volumes,” says Boul. “It also had to be completely bypassable, and, when activated, it would allow the user to have a new vocabulary of tone — even at high volumes.”
The SoHo’s stylish blending of Brit-inspired retro esthetics with contemporary touches such as modern cooling vents and a brushed aluminum logo exudes a look of quality from the outside, and a probe inside the box reveals a first-class effort from every perspective. From the N.O.S. Tesla/RFT EF86 to SoZo signal caps to Mercury Magnetics transformers to ceramic and Micalex tube sockets, the SoHo is loaded with top-rate components. The workmanship is top-notch. The circuit is immaculately laid out between parallel rows of terminal strips mounted directly to the aluminum chassis, wire runs are neat and economical, and every mechanical component appears intended to last the life of the amp. In addition to the EF86 (which has a double dose of rubber insulation to guard against microphonics), there’s a pair of JJ 12AX7s, a pair of matched and tested JJ/Tesla EL84s, and an Electro-Harmonix EZ81 rectifier. The latter is a big part of the magic in many a recently issued, EL84-based AC15-inspired amp — it provides DC voltage levels that EL84s thrive on, and just enough sag to offer some tactile compression in playing feel, without going overly mushy.
Our review sample came with an open-backed 1×12″ extension cab made from rugged 11-ply Baltic birch, covered in matching two-tone vinyl, and loaded with a Celestion G12H-30 (available with Celestion Alnico Blue for $895; a 2×12 cab with one G12H-30 and one Alnico Blue is $949).
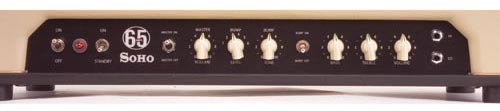
The SoHo starts with a “standard” Volume/Treble/Bass preamp, but its Bump stage and unusual Master Volume increase its versatility exponentially.
Regarding functionality, one of the first things to note is that you need to throw any conceptions of the traditional Master Volume arrangement right out the window. For example, playing with the Volume at 11 o’clock and the Master set to noon, butoff, then switching to Master On, elicits a considerable increase in volume, whereas you’d normally expect to have to set the Master full up to achieve about the same output level as with the Master off. To add to the fun, the Master maxed/Volume maxed config elicits a lot more gain than Master off/Volume maxed. None of this signifies a flaw, it’s just the way this unusual, yet effective master circuit functions. In effect, it provides yet another voice — or range of voices — rather than just a final governance of level. Nevertheless, it might have been helpful if 65 Amps had named it something else, because it really is a circuit of a different color.
Not only are there four distinctly different textures between the Master On/Off and Bump On/Off options, but the controls are all highly interactive. The Master Volume, Bump Level, and Bump Tone controls enabled me to dial in a surprisingly broad range of drive levels and tones, and the considerable difference in gain levels between the Hi and Lo inputs multiplies the variables even further. Plugged into Hi with Bump and Master off, EQ knobs set to noon, and Volume at around 11 o’clock, I achieved a chimey, buoyant tone with my Telecaster that was great for indie thranging, Beatlesy riffing, and mid-volume Brit-rock rhythm work. By upping the Treble just a little, and injecting the Tele into the Lo input, I coaxed some surprisingly satisfying twang from the SoHo, along with a dose of increased headroom that also served well for shimmery jangle parts.
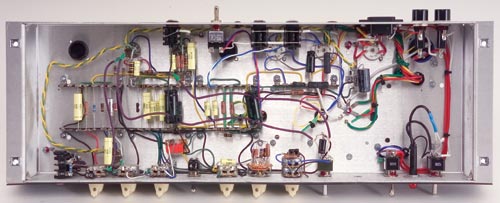
Top-grade components and tidy, handwired connections scream quality.
Jack back into the Hi input, stomp on the Bump footswitch (Bump level 3 for starters), and this Yank in Brit’s clothing exudes gnarly, raucous transatlantic tricks that approach cranked-brownface Fender Deluxe territory, with bovine mids, recessed but appealing highs, and decent low-end thump. Engage the Master Volume and the aggression intensifies, with a considerable jump in gain — even with the Master only halfway up. Plug in an SG Standard, roll the Master down to around ten o’clock, ratchet Bump up to six, and crank the Volume to four o’clock, and the SoHo belts out astoundingly convincing heavy rock chunk and grind — hairy enough for satisfying nu-metal work at pub-friendly volumes. Similar settings excel at fluty rock lead tones, with a well-partnered rhythm voice when you stomp the switch to take Bump back out of the circuit. Cranked up, there’s plenty of thump and roar here, too. With the stout 1×12 cab, the SoHo easily puts out enough volume for small- to medium-sized club gigs with just a vocal P.A., and it’s loud enough for decent self-monitoring on larger stages where guitar amps would be miked.
In terms of pure tone, the SoHo is perhaps not quite as lush and harmonically bountiful as 65’s London 18, but it punches above its weight a little more confidently, and it might just be a more appealing choice for rockers seeking some versatility in a smaller rig. The more you tweak the SoHo’s controls, the more it reveals previously untapped voices, and the package’s great looks and originality further enhance its appeal. If there really was a sibling rivalry in the 65 Amps family of boutique amps, the SoHo would definitely have to watch its back!
Source: https://mercurymagnetics.com/pages/news/GuitarPlayer/GPMar08.htm
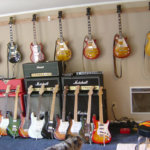
Mark Dewey is a former hair-rocker who’s graduated to the corporate world and Gibson Custom Shop Les Pauls. We were impressed by his collection of reissues, and intrigued by his custom-looking Strats, so we talked a little further with Mark about his collection and playing history. Here’s Mark’s collection, in his own words.
 “This shows pretty much my backline of amps. All of my Marshalls have been modified by Alan Cyr of the Amp Exchange in Woodland Hills, California. He is the best amp guru alive for Marshall amps. They all have Mercury iron and just blister like nothing I have ever heard. I also have a Divided by 13 FTR 37 that Fred Taccone built for me a few years ago. His stuff is very unique — super big clean sounds and a Marshall-Vox-like kind of brown sound on the click channel.
“I still pretty much plug a guitar directly into a Marshall and use the volume as a gain control for my main sound. Sometimes I will Y two amps together and have one DSL 100 with a slight delay and the other 59 HW head or 50 watt JCM 800 as pure tone.
 “In the first photo, you also see a bunch of Gibson Custom guitars and a lineup of custom-built Strats. I got a little carried away with finding the best body wood/neck combinations last year so I built 15 of them. I also have experimented with a ton of pickup manufacturers like Seymour Custom winds, Suhr, DiMarzio, Nordstrand and a few others. My favorite pickup is pretty much a BurstBucker in a Les Paul Historic. They just sound like an open vowel waiting for your strings to vibrate. They are open, airy, clean, crunchy, stingy and have a ton of balls and low end while still being very clear and well-balanced.
![]() “I have tried most [pickup] manufacturers cold and hot. For singles I like Seymour Duncan Custom calibrated set of Alnico 2: 6.5, 6.5 (RW Middle), 6.5. MJ knows what she is doing and is great to work with. The John Suhr v60 LPs are equally as awesome for single coils. I have never tried a BurstBucker in a Strat, so I stick with Seymour or DiMarzio humbuckers. I like the five-way Superstrat wiring where you take two humbuckers and split the north coils on position 2 and the south coils on position 4. Since the pickups are reverse of each other this makes all five positions humbucking. I usually use a hi-pass filter on the volume so it rolls down clean and sparkly.
“I have tried most [pickup] manufacturers cold and hot. For singles I like Seymour Duncan Custom calibrated set of Alnico 2: 6.5, 6.5 (RW Middle), 6.5. MJ knows what she is doing and is great to work with. The John Suhr v60 LPs are equally as awesome for single coils. I have never tried a BurstBucker in a Strat, so I stick with Seymour or DiMarzio humbuckers. I like the five-way Superstrat wiring where you take two humbuckers and split the north coils on position 2 and the south coils on position 4. Since the pickups are reverse of each other this makes all five positions humbucking. I usually use a hi-pass filter on the volume so it rolls down clean and sparkly.
“Most of the guitars in my Gibson Custom Collection are newer reissues from 2001 to 2008. I made the jump and bought my first ’59 from Willcutt’s guitars for $4000. It was a lot of money but quite frankly once I got the guitar, I realized I would rather have the guitar than the money so I was hooked and now have quite a few of them. The sound of a Custom Shop Les Paul is just so much better than anything else for rock guitar. I pretty much only play a Strat every now and then, especially for whammy bar gymnastics.

Ice Water Mansion (Mark is second from left).
“Here are a few of my prime Custom Shop Les Pauls a few years ago. These are some of my favorites actually. However, I have never found one guitar or amp that does it all. There is no true “favorite” — they are all different. I have never had a guitar I thought was “the one.” Perhaps this is the devil’s snare for materialism. I also could not fathom buying a real ’59 because I already worry enough when I put a ’59 reissue in the back seat of my car. Imagine getting a $300,000 guitar stolen?
About Mark
“In the eighties I was in Ice Water Mansion – a hard rock eighties hair band from upstate New York. I used to use BC Rich (USA high end), Dean (USA), Fender (USA) and Ibanez, but never liked seventies or eighties Gibsons. I bought an ’84 Explorer that just sucked. I only wish they had the custom shop of today back then.
“This was a song I wrote about being scared of the dark — “Ghosts in the mirror.” I used my Marshall JCM 800 with a Fender Strat loaded with a humbucker with a boss compressor as a boost for lead schwing.
“I don’t play in a band at the moment but I certainly play about two hours every day and all weekend. I have twp boys, ages four and five who both love guitars. My four-year-old plays drums like a man and also loves his plastic guitar collection. He has about ten, which makes me wonder if we are teaching him the sin of excess which I never meant to do myself.
“I guess at 43, I am done trying to make it big so I just focus on playing for the soul and the enjoyment. When you play a guitar, you forget about the wood in your hands and just kind of get “out there” and that is my bliss.
“I have also really enjoyed building, testing and working on gear too. I never thought I would even play guitar past 25, but I guess it now plays me!”
Listen to Mark’s Guitars
Mark was nice enough to share some YouTube clips of his guitars in action. Says Mark, “These are by no means anything but my wife holding her Sony camera sideways but you can sure hear the tone….”
Source: https://mercurymagnetics.com/pages/news/PremierGuitar/PremierG-14.htm
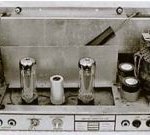
Somewhere along the way, guitar amplifier tone got carelessly shoved into two broad categories – American and British. Fender being the quintessential American tone and Marshall being the obvious default for midrangey and reverb-less British tone. Within each, of course, there are distinct variations… Ampeg, Magnatone, Valco and Gibson, for example, are also American through and through, yet they remain distinctly different in sound and construction, and would rarely be mistaken for a typical Fender. Among British amps, Hiwatt, Sound City and Vox present equally diverse varieties of “British” tone that won’t be confused with a classic plexi Marshall head. But simply adding reverb or delay to a British amplifier will often throw listeners completely off as to its origins, while plugging into the Normal channel of a vintage Fender brown or blackface amp with the right guitar can produce an exceptional “Marshall tone.” Our recent experiment with our ’62 brown Vibrolux and a Goldtop Deluxe Les Paul with Lollar mini humbuckers rammed this point home with alarming clarity…. The point is, labels don’t always serve creativity and discovery well, and in the realm of supposed “vintage amp tone” where different examples can vary so dramatically, labels are worthless in generating much more than “skull chatter,” to quote Kye Kennedy. But, we still crave “Marshall tone,” whatever our individual perceptions of that sound may be. Well, since you asked….
ZZZZZZZZZZZZZZZT!Yes, Gear Page wankers, we just did it again. Careful you don’t get a scab on that thing… it might get infected and fall off. We’ve unearthed two alternatives that will give you the bigger, bolder version of Marshall tone that you remember from your early Jeff Beck Group, Zeppelin and Cream albums, but at a volume level you can easily live with and actually enjoy in 2008.
A reader alerted us to Roy Blankenship, oh, about a year ago, and it took that long to get an amp shipped for review and develop an interview. It was worth the wait. Blankenship builds a manageable range of custom amps in Hollywood, and he seems more interesting in building what he wants, the way he wants, than going big time. We like that. So here’s an introductory dose of Roy Blankenship – an entertaining and frank fellow to e sure. Our review follows Roy’s interview.
TQR: Can you summarize your experience with electronics and guitar amps? How did you get started initially with mods and repairs, and how did that evolve into actually building your own amplifiers?
RB: First, I was born in California. My father worked for North American Aviation, and was transferred to Columbus, Ohio when I was 6 months old. Therefore, I was born crazy, but grew up normal. My father was a genius – he could build anything, and, in fact, he built my first guitar amp. It was a single-ended 6L6 design and had a field-coil speaker. It wasn’t loud enough to play in a band, but I still have it and it still works. I later discovered the cabinet he used was the extension speaker for an old film projector.
I started playing piano when I was 3, and played brass instruments in the school band. When I was a Junior in high school, I bought my first guitar. A Kent solid body, for $49.95. I finally convinced my dad to let me buy a Health kit 2×12 solid-state kit so that I could play out, and that was my first experience with electronic assembly. I was the guy in the band who would dick with all of the equipment. We bought some PA cabinets that had JBL’s in them, I refinished and rewired them, having no idea what I was doing, but it always worked. My dad had a whole workshop including lathe and drill press, so I often did small projects and repairs, like building my own speaker box to house two Jensen 6×9 speakers for the car. I wish I would have had the vision to go into production….
I was a hobbyist for the next 20 years, getting into tube hi-fi and going through a dozen Dynaco Stereo 70s, not knowing anything about them, but doing little stuff like biasing and tube exchanges. I was employed in the music biz as a sales rep for four different firms, and the pinnacle of my career was as national sales manager of Symetrixin Seattle, WA. In 1991, I had a three-state sales territory selling body shop equipment. I stopped to see my friend, Dan Abell (of Abell Audio, 909 King Ave., Columbus, OH), best tech in the world, and drop off some octal sockets my dad had left me. Dan was all upset and expressed that his assistant had quit that day and he was in a bind because he had so much work. On a whim, I said, “Hire me. I have always loved this stuff.” “Can you troubleshoot a circuit?” I said, “Not yet, but I have people skills and can do any number of things so that YOU can work.” I knew his assistant wouldn’t answer the phone or wait on customers, so, after the first day, Dan said,“Man, I can’t believe how much I was able to get done. You’re hired!” Within two weeks, I was repairing circuits. The info that opened the door was the difference between negative and positive polarity transistors. We worked together for the next four and a half years, never an angry word between us. At one point, I wanted to live in California, so I went to a NAMM show and was hired by Groove Tubes as production manager. The learning curve was straight up – there is an incredible amount of information in that place. From there I started my own place in Santa Monica. To escape the chaos that is L.A., I moved to Florida to escape. I realized the repair biz was not a big money maker, so when two clients started encouraging me to build my own designs, I was up for it. We beat it around fora while, they finally ponied up and I built two EL84 amps.They loved them, I was shocked (they were nothing special),but they were the start. I still have number 1 that I bought back from the third owner. My experience with amp repair changed when I came to L.A. People in Ohio and Florida were happy when their amps worked… players in California wanted their amps to sound good. That opened a whole new area of learning. About the same time, I was running into a lot of overly-modified amps that oscillated themselves to death, so I added “demodification” to my business card. People would call me back and say, “Man, this amp really sounds great now,” and I would reply, “Yes, I made it stock.” The only mods I deem worthy are tone-stack bypasses on Fenders and one of two master volume circuits that actually work well. They each allow you to attenuate volume without losing everything, and they both originated with Ken Fischer, amp guru, God rest his soul. Tube amplifier technology stabilized in the mid ‘60s, and very few amp builders have done anything innovative since that time. In order to separate myself from the pack, I wanted to improve on the existing circuits. When these amps were made, people were playing clean, now everyone wants to crank them up,and in order for them to deliver, my belief is that they need a stiffer power supply. I get a lot of comments on how “loud” my amps are for a given wattage rating. One client said, “I have played a lot of these amps, they give up when you hit them, but yours sounds like a big amp.”
TQR: Describe the different models you build in terms of features, construction and tone, how they differ from vintage or other custom built amps, and what you specifically wanted to accomplish and/or improve on with each model.
RB: I build my own take on American and British circuits,and I employ a stiffer power supply than most. I am currently using turret and eyelet board construction, but a printed circuit board can be useful if made properly. The compromises made by volume manufacturers is where the “circuit board-is-bad” myth started. Proper CAD design can lend itself to a quieter, more reliable product as long as the bean counters don’t try to take a nickel out of it at every turn. All of my current product is hand-wired, and as you know, there is a lot of snob appeal and dick-measuring in this business. For example, some of my clients wonder why I do not use Clarostat potentiometers… I have tested all of these devices, and I have never had a bad Alpha pot, but the Clarostats I ordered for testing were 50% defective!
In the Leeds amp, I went with different trannies than most and a stiffer power supply; this gives it more beef. In the Fatboy, I discovered an output tranny that would allow me to use 6V6’s (for 15 watts) or 6L6’s (for 25 watts) without changing the speaker load. Though the tranny was originally designed for an 8 ohm load, it actually worked more efficiently at 16. Overall, using Mercury trannies has been one of the best decisions of this whole venture. Now when I hear an amp with any other tranny, they sound flat. I took one of my amps to visit a friendly competitor, he played it and enjoyed it, then fired up his own amp, and it sounded flat. He was looking at his amp as if,“Hey, what’s going on here?” I think that was his first side-by-side comparison and he could hear the difference, much to his own chagrin.
TQR: What inspired the use of a Variac with the VariPlex? Why not just build a master volume circuit?
RB: We wanted to create a cranked-up Marshall sound at lower volumes, but people have time and again expressed their dissatisfaction with the attenuators on the market and the smashed sound of a bad master volume circuit. I credit Dave Friedman of Rack Systems with the concept and the prototyping. We tried five different kinds of coupling caps, different types and brands of resistors, different trannies…you name it. Eddie Van Halen popularized the whole Variac concept, so we modified the circuit so you could go from full tilt boogie down to 1 watt and the amp would not shut off. We have sold 40 of those amps with no marketing other than clips on a forum. We are now introducing a similar amp with a master volume for those who want it whisper quiet, but saturated. There are two master volume circuits that I know of that sound great even when turned down to speaking levels. We are using one of those and a few other mods in the new model, the Custom 45.
TQR: You describe a process on your web site in which you A/B’d the VariPlex with a friend’s ’68 Plexi and you didn’t stop tweaking the design until 10 out of 10 guitarists chose the VariPlex in a blind test. Can you elabo-rate on how those tests progressed and the changed to the circuit that you made to achieve those results?
RB: I could, but I won’t.
TQR: In your experience, how much variation in tone and component values, including transformers, have you observed in vintage Marshall amps? Isn’t it necessary to listen to a lot of different examples and then choose an exceptional amp as a benchmark?
RB: Yes. We already had “the Holy Grail” plexi in house, so we compared to that one. Most amps will respond to love, but there are some that are just exceptional. The reason for this amp-to-amp variance is manufacturing tolerances. If your trannies are built with plus or minus 20% tolerances, that means your amp could vary as much as 40% from sample to sample.
TQR: The VariPlex doesn’t sound “new” in the sense that it isn’t shrill or bright and sharp like some replica Marshall amps. How did you accomplish this?
RB:That’s my secret.
TQR: How long is the wait for one of your amps once it has been ordered?
RB:We have Carry-Ons in stock for the first time. Generally, we like to say 3-4 weeks just to be safe. Most of this is the gray area of vendor delivery on cabinets.
TQR: What’s ahead? What do you want to accomplish in the future?
RB: I want to be a thorn in someone’s side so they will offer a butt load of dough, I will sign a non-compete, and go away. Then, I can sit on the beach and light my cigars with $100 bills and sip pina coladas. The funniest thing about that picture is that I don’t drink OR smoke. Actually, we are introducing a bass amp shortly. As we gain more exposure, I am sure we will have enough to do. I am happy with people’s response to my products. I do not want to get huge, and I will probably not offer many more models – it gets too confusing. But thanks for considering me as a worthy contributor to your magazine. www.BlankenshipAmps.com (818) 530-8853
Our experience with “vintage Marshall tone” was formed with two stout examples that we were fortunate enough to own and play for years. The first was actually a late ’60 Park ’7550 watt head, followed by a metal panel 1969 Marshall50 watt. Both amps displayed the classic tone, smooth distortion and touch-sensitive dynamics we love to love and eagerly oozed the warmth and dimensionality that reissues lack. This isn’t complicated…. We’d simply drag a newish Marshall clone of some sort into the music room, compare its sound to the old one and invariably say, “Not bad, but this one sounds and feels better.”
When we fired up the Blankenship, however, not only did it sound richer and fuller with more depth than our old Marshalls, but the tone controls actually produce changes in EQ that allowed the amp to achieve a level of versatility that has always been sorely lacking in the originals. And then, of course, there is the nifty Variac that allows the VariPlex to be played at nominal volume levels with no audible deterioration in the responsiveness or tone and the amp. Essentially equipped with features that mirror an original Plexi, the VariPlex is a 2 channel/4 input design with presence, bass, mid and treble controls. Channel 1 is the bright input; channel 2 is more bassy, and the two can be jumpered and mixed to taste.
We took our time developing an impression of the VariPlex, playing it for over two months. Bottom line – it produces an authentic, old-school Marshall voice with better EQ, clarity, and fresher, more vivid harmonic content. Its voice is exceptionally smooth, yet capable of acquiring the melancholy edginess of an early Clapton recording by simply managing EQ, and the Variac as a master volume control works brilliantly. The VariPlex impressed us as a near-perfect example of an overbuild, hand-wired, low-production amp inspired by arguably the best efforts of Jim Marshall and company, circa 1968. Just as the Balls M18 became our modern benchmark for low-powered, classic Marshall tone, so goes the Blankenship VariPlex in the 50-watt range. If there is a better-sounding modern alternative toa vintage Marshall, we have yet to hear it.
We also admired the neat, clean and easy-to-read design of the VariPlex silver control panel, somewhat reminiscent of our old Park. Among all the clones being cloned with Mojo boxes, this amp is a visual standout. And as far as internal build quality is concerned, let the pictures speak for them-selves. In all respects the VariPlexis a solid piece of work,returned to the builder with as much regret as any amp we have ever reviewed. In fact, we’re still thinking about it. Plex forth….
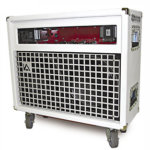
Today it seems as though there’s a boutique amp manufacturer around every corner. Don’t get me wrong — boutique amps aren’t a bad thing, but a great many of them focus on recreating the same types of tones that we’ve heard before, sapping all of the meaning from the word, “boutique.” If you were to be objective about it, you could make the argument that Leo Fender’s Bassman was the forefather of modern guitar amplification — it was the very amp that Jim Marshall and Randall Smith [Mesa Boogie] hot-rodded to make their own famous amps. But with so many small builders basing their sounds off these designs, where is the room for improvement?
With that said, I literally bumped into a mom and pop operation by the name of Industrial Amps at the Boston Guitar Festival, hosted by none other than Premier Guitar. I was wearing a Marshall T-shirt when I ran into JoAnn Niekrewicz, the co-owner of Industrial Amps; seeing my shirt’s logo, she shouted through the crowd, “Try our amps — they are Marshall killers!”
Needless to say, it was a bold statement, but curiosity got the best of me; I immediately sat down and tried all of their amps. Plugging into models like the Rock 120, Blues 60, Crunch 15 and the Overdrive 15, I soon noticed that each amp had its own special sound. The Blues 60 had a nice, hollow blues tone, while the Crunch 15 and the Overdrive 15 seemed perfect for studio recording, providing dynamic tone saturation. When I arrived at the Rock 120, I was thoroughly blown away by the depth of crunch that it produced, especially when it was played through the IA extended 4×12 speaker cabinet, loaded with Celestion Vintage 30s. To explore this amp further, I had them send the Rock 120 combo to my studio, so I could really put it through its paces in a working environment.
“The tubes, transformers and capacitors all cleverly reside behind 1/4″ thick glass, so you can experience the mesmerizing glow of electronics at work. As an added bonus, the Rock 120 is tour-ready, boasting a set of large, riveted, zinc-coated handles with grips on both sides of the case, as well as four caster wheels for easy transport.”
Industrial Rock
Right out of the box, the Rock 120 is a striking piece of modern, industrial design. The amp is constructed in a white Tolex case made from 3/4″ true 11- ply hardwood birch, with the speakers enclosed behind a heavy duty grill made from 1/4″ aluminum for kick-proof protection. As for the cabinet itself, Industrial Amps designer Tony Niekrewicz works closely with a non-profit organization called Living Classrooms in Baltimore, MD. The program gives out-of-school youth, from ages 16-19, a chance to learn carpentry hands-on in a practical work environment.
The tubes, transformers and capacitors all cleverly reside behind 1/4″ thick glass, so you can experience the mesmerizing glow of electronics at work. As an added bonus, the Rock 120 is tour-ready, boasting a set of large, riveted, zinc-coated handles with grips on both sides of the case, as well as four caster wheels for easy transport. Electronically, the amp features 120 watts, two channels — Classic and Heavy — point-to-point hand wiring and an open back cabinet fitted with two 12″ Celestion 80s. The amp itself is powered by four premium 12AX7s, four EL34s, one 12AT7 for reverb and a solid state rectifier tube.
Turning my attention first to the Classic channel, I ran several guitars through it. In particular, my Gibson double-neck Jimmy Page Model produced a gorgeous, ringing tone, much like the tone you hear on the Birds song, “8 Miles High” or even the Zeppelin classic, “The Song Remains the Same.” A word of advice: when using double humbuckers, you’ll have to back off on the guitar’s volume a bit so you won’t overdrive the amp. What worked best for me was a Fender Strat. Though the Classic channel, the single coils produced a very smooth and fresh reverberation, similar to that of a Fender Deluxe.
Switching over to the Heavy channel produced a genuinely heavy bass response, perfect for shaking your tree. Overdriven, the Rock 120 is a cross between a classic Mesa Boogie Mark II and a Soldano amp. I used the amp on several recording sessions and even had Leslie West [of Mountain] play through the amp. He was very impressed with the amp’s gain — this coming from a guy that can never have too much gain. The notes were expressive and had an authentic, singing overtone; for those of you who remember the short-lived Fender Prosonic amp, this amp has a similar, driving tone.
The Rock 120 also recorded very well, especially using a Les Paul Goldtop with a Seymour Duncan ’59 humbucker in the bridge position and a Duncan Custom in the neck position. The tones were very saturated, but without the muddiness that some overdriven amps generate, due to theMercury Magnetics transformer inside — designed to provide both clarity and bottom growl. It has that Mesa Boogie singing tone and is great with pinch harmonics. The Treble, Bass and Presence controls are quite responsive, and unlike some amps, each one of the knobs really affects the tone. As an added bonus, the Heavy channel features a Gain control and a Master, so you don’t have to sacrifice your eardrums for sweet tone.
There’s lots to love here, but IA has thought to add in plenty of little touches that will make the purchasing decision easy. Each amp features dual speaker outs, voltage and ohm selectors, military spec components, and even, “severe duty Honeywell explosion-proof aircraft quality switches.” How much more rock n’ roll can you get?
The Final Mojo
Being an avid collector of vintage tube amps, I’m always skeptical of new products claiming to have superior sound. But my experience with Industrial Amps opened my ears to what small amp builders can achieve. While the price may be equivalent to other boutique amp models out there, the Rock 120 definitely gives you a lot more, in terms of sound and power. You won’t find this amp in Guitar Center, Sam Ash or any of the others commercial retailers — this a true underground find.
Source: https://mercurymagnetics.com/pages/news/PremierGuitar/PremierG-09.htm
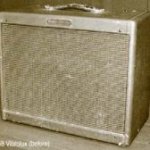
Finding and restoring old amps and cabinets is a slow process that demands patience. From the time we first began trolling eBay, ultimately scoring a tweed Vibrolux and Tremolux, to final delivery of the aged cabinets and assembly of the amps, six months had easily passed.
We first found and bid on a ’58 Vibrolux in September ’06. Sold by an eBay seller in Texas, it had been recovered in reddish-brown cloth similar to the stuff used to cover hymnals or a bad ’60s pleather recliner for the double-wide. Otherwise, it was pretty straight, with the original blown Jensen P10R intact, and the original transformers, caps and resistors. The inside of the cabinet had been painted black, but the cabinet, grill cloth, baffle and control panel were otherwise intact, and the wooden tremolo footswitch was included. We bought the Vibrolux for $1,590.00 with 4 bids placed.
Inspired by Larry Cragg’s detailed description of Neil Young’s tweed Tremolux, a1958 Tremolux surfaced on eBay in November 2006, and we scored it for just $1,082.00 from a seller in San Francisco. We suppose this amp was so cheap because the output transformer had been replaced, and the cabinet had been completely stripped and stained mahogany brown. The original speaker mounting screws in the baffle board were about to fall out. However, the original Tremolux circuit was well-preserved, and a small strip of tape remained in the chassis signed in a delicate hand by “Lilly” – one of the many women in Fullerton employed to assemble amplifiers like the Tremoluxin 1958. God bless her. The Tremolux also arrived with the original wooden foot switch.
The Vibrolux kicked some serious tail right out of the box. We send the original Jensen P10R to John Harrison at A Brown Soun (www.abrown.com) for a re cone, mounting a1965 Jensen C10Q sent by Larry Pogreba in its place – a very stout choice and original equipment in early blackface Vibrolux Reverb amps. Like the Tremolux, the tremolo circuit in the Vibrolux required some TLC,with four caps needing replacement to restore the swampy oscillator circuit to full wobble-weave. We also replaced all the newish tubes with NOS RCAs, Philips and GEs. Once we had the amp mounted in the restored and aged cabinet, we were throwing down hard with our No caster nightly, wallowing in the big sound coming from such an innocent-looking little biter, when the original output trans-former gave it up in a final, glorious gasp. A quick call to Mercury Magnetics produced a ToneClone replacement within a week and we were soon back in business,sounding better than ever.
The 10 watt, 3-input ’58 5F11 Vibrolux is housed in the same cabinet Fender used for narrow panel tweed Deluxe– a fat little featherweight with greasy tremolo and a smooth bark tailor made for a Telecaster. And 10 watts may be the perfect power notch for low-volume home recording and jamming – crystal clear, bright and drenched in gorgeous Fendery overtones at low volume (3-5), and absolutely on fire from 7-10. In all respects, the 5F11 Vibrolux is a big amp in a small package worth pursuing for its outstanding tone and personality at truly usable volume levels.
We were amazed by how Gregg had managed to remove every trace of black paint that had been sprayed inside the cabinet, and his aging job, complete with three coats of amber stain and lacquer, faint water stains along the bottom,worn seams and corners, aged L&L leather handles and scorch marks from the power tubes on the inside of the back panel were flawlessly conceived and applied. Hopkins even recreated the original tube chart with a 1958 date code after requesting that we send him the chassis number and power transformer EIA code for production verification. When we brought the restored Vibrolux to Jeff Bakos’ shop (www.bakosampworks.com), he looked it up and down as it sat on the floor of his workshop, peered into the back and said, “That is totally sick.”
The ’58 Tremolux provided a further study in what can be involved buying 40 year-old amps. Upon arrival,the amp was really smokin,’ even with the Jensen hangin’ off the baffle board. The tremolo was DOA, however, so while the stripped cabinet was getting the spa treatment in St. Louis, Jeff replaced two caps in the trem circuit, we replaced the already replaced output transformer with another from Mercury Magnetics, and stored the chassis away until we received the finished, aged Tremolux cabinet from Gregg in late March ’07.
The 5E9A (’55-’56) and 5G9 (’57-’60) Tremolux are housed in the same taller, wider cabinet Fender used for the 1×15 narrow panel tweed Pro,and the later 5G9 circuit is quite different from both the 5E3 Deluxe and the ’55 5E9ATremolux, being fixed rather than cathode biased, employing a long-tailed phase inverter common to the bigger narrow panel tweed amps, and the addition of an extra filter cap and choke enabled the power to be increased from 15W to 18W in 1957.
Compared to the narrow panel tweed Deluxe and the 5E9 Tremolux, the 5G9 Tremolux develops more volume and headroom, and should you chose to replace the 12AY7 preamp tube with a 12AX7, gain is further increased (it’s already righteous with the 12AY), while the bigger 10” x22” x 10” cabinet produces a much rounder, warmer tone with superior ambience and presence. In the month or so since we’ve had the Tremolux put together in the restored cabinet, a new Tung Sol6V6 blew (after we had opted not to use a couple of spare ’50s RCAs for safety – they are in the amp now and killin’ us with bogs of good thang),and we just took the amp back to Jeff when it began spitting some nasty distortion provoked by low frequencies from the guitar. Turned out to be a few bad solder joints.
Like the Vibrolux, Gregg had stopped short of creating a “3-legged dog with an eye patch,” taking the aging to a moderate level with frayed edges and seams on the amber tweed, a single beer can ring on the top with a foam overflow stain running down the grill cloth, a slight orange stain on one side from pine knot bleed, and assorted scuffs and light abrasions. He also repaired the baffle-board, filling in the old holes for the speaker mounting screws.
We hate doing this to you (again), but truth be told, we have to give the nod to the Tremolux as the most toneful and inspiring amp in its power class (18 watts)that we have ever heard or owned. It’s ascension to Numero Uno status was a bit of a surprise, but then again, we considered the initial source of our inspiration for finding one – Neil Young, via his tech, Larry Cragg, and in hindsight we should have expected as much. With all the attention paid to the tweed Deluxe as the big time bonerizer of the tweed family, the Tremolux seems to have been overlooked for the usual reasons…. In the nose-to-butt-crack daisy-chain march to mediocrity, the masses never seem to acquire a view beyond the first lazy dumb-ass directly in front of them. In the immortal words of the great hoosier educator and smack-down artist Earl Dosey, they are “stepping’ over dimes to pick up nickels.” Let’s hope the lemmings continue to keep their heads down.
So here’s the move…. Sad as we are to share this, our strategy was as obvious as it seems. Forget about original speakers, don’t let a replaced tranny run you off (we’ve never replaced one with a Mercury that didn’t sound better than the original), and deliberately track down the fuglies told girls you can find from the tweed era. Busted baffle boards? We luv that….Ricky-ticky cabinets are good, and the coverin’ don’t matter. What you want is a beater with a totally neglected chassis and as many of the original fat Astron caps and original resist or present as possible. Yeah, some of them may have to be replaced, but it’s far better to allow a prudent and judicious amp tech determine that rather than buying an old amp that has been raped by a hard chargin’ cowboy hooked on Sprague Orange Drops.Buy one of those and your old amp will sound new,never to sound old again, and that’s most definitely not the play you want to make here. A little component drift is good.
There is luck involved, too… not all vintage amps were created equal. Some of them left the birthing bench endowed with incredible tone – a happy accident created by the melding of variable components that resulted in extraordinary sounds. Others were created by the same roll of the dice, but with a different outcome altogether – mysteriously dull, flat, or simply lacking whatever you wish to call it… that tone, mojo, bloom, the harmonic complexity of your first Schlitz, depth, fatness… whatever. To experience the blissful afterglow of unanticipated discovery, you must be willing to risk something, which is another way of saying that faith must be exercised in the absence of a guarantee. In this respect, buying old amps is a lot like life itself…. The greatest obstacle to discovery is the flawed perception of an impossible challenge. And the window of opportunity is closing on these great old amplifiers faster than you may think. Like vintage guitars, the best old amps are being taken out of circulation by col-lectors willing to pay prices that are based on potential future value (more than they are worth today, perhaps, but less than they will be worth tomorrow). For you, hombre, the time to bust a move is now.

We asked Benjamin Fargen and Mike Piera to comment separately on the development of the Weider Signature amp. Our review follows their interviews…
TQR: Briefly describe the process that was involved dialing in the tone of the amp—how you achieved the higher threshold of clean headroom and power in Channel One, and the Distortion Channel.
Fargen: I built the original JW-40 prototype amp for Jim in late 2004 and it was tweaked over the course of two years as Jim played shows to support his album Percolator. I flew back to New York three times during the process for lone three day weekends of tone tweaking, listening and catching Jim at some live performances. Our job was to outperform Jim’s favorite, modified blackface Deluxe Reverb, which had been his main amp for many years—not an easy task since the amp has some very special qualities that were essential to capture while retaining Jim’s signature sound. We also matched it up to many other vintage Fenders and other high end amps that were in the same league, and when we finally surpassed all of them in tone and clean sustain, we knew we had a good design.
The original prototype amp had less headroom, so we decided to go with a slightly higher B+ voltage to squeeze at ad more headroom out of the amp for larger rooms and outdoor shows. We sorted through many different power transformers, output transformers and chokes from Mercury Magnetics before we found the correct match, and the feel and sound we were looking for.
TQR: The reverb seems to “sit” very nicely in the mix—not too splashy or pingy, and it doesn’t add any unwanted overtones. Did you do anything unusual in designing it?
Fargen: It’s similar to a classic Fender-style reverb with some tweaks to the overall EQ and the amount of return level reverb. I feel that the stock Fender design places too many mid and low mid frequencies in the mix,and I prefer more of a high end sparkle for the reverb to stand out. But the biggest problem with a stock Fender-style reverb is the way it can sometimes walk all over the note rather than work with it. The overall amount of reverb you allow to return to the recovery circuit is very critical to obtain a great sound.
TQR: Describe the Slope feature.
Fargen: The slope feature changes the overall frequency response of the EQ circuit to achieve greater flexibility when matching up different guitars and pickups with the JW-40. Jim and I felt it was nice to have other tonal options that changed the overall wide or narrow” character of the EQ structure. This came in really handy when switching between single coils and humbucking pickups.
TQR: Can you briefly summarize the effect the O-rings on the power tubes seem to have on the sound of the amp?
Fargen: The power/preamp tube dampening rings not only help to suppress micro-phonics and tube rattle, but they seem to produce a tighter sound with a very extended low end range. I find they are very useful for thickening up your amp tone at lower volumes, but some players may want to remove them for higher volume levels since the low end can become excessive with darker guitars or humbuckers.
TQR: What have you learned from the experienced designing, tweaking and dialing in this amp?
Fargen: Working on the JW-40project with Jim has been a great experience—he’s a great player with an amazing ear for tone. We worked very hard to achieve an amplifier design that not only exceeded Jim’s needs and expectations from a signature amp, but would be well receive by other players. We set out to deliver a classic guitar amplifier that offers a tone and feel that extends beyond even the best vintage examples that can be found, so this project really forced me to think outside of the box and develop many new techniques rather than just deliver one of my stock amplifiers to Jim with his name on it. It takes partnerships like this to shakeup your normal routine so that you can push the envelope and continue to grow as a designer/builder. Because, as we all know—if you feel you have nothing left to learn, you should just quit now.
It was clear the moment we played the first notes through the Fargen JW-40 that someone with an extraordinary ear and deep experience had influenced the way this amp is voiced. The Rhythm channel pours out more clean, Fendery headroom than one of our favorite, more powerful blackface amps—the Pro Reverb—an the clean tones are richer,fuller, more detailed, lively and deeper. With the Slope switch engaged in the Rhythm channel, the tone becomes even thicker in the upper mids, creating more of an EQ bump rather than a “boost” that ignites some kind of overdrive feature. We did notice some boominess in the low frequencies using a 4×12 cabinet loaded with Celestion’s Gold Alnico G12sand G12H30s, and in our Balls2x12 cabinet with an oval “football” open back design and British optimally voiced for an open back cabinet. There may also be some bias on our part at work here, because we have never cared much for the sound of a Fender amp with a closed back cabinet.
As noted in our discussion with Ben Fargen, the reverb in the JW-40is unique in the way it remains in the back-ground, enhancing, but not overwhelming or washing over the notes. This is undoubtedly the best reverb sound in a combo amp we have ever heard for an under-stated effect, and even players that normally don’t use reverb may find it difficult to resist.
The Lead channel controls function much like an over-drive pedal, with Drive, Level and Tone controls and a toggled Boost switch. A Midrange control is also included. You couldn’t ask for a clearer, more intelligently designed control panel, and the controls themselves are simple and intuitive. As with many overdrive or boost pedals, mixing variable settings for Drive and Level produce a wide range of intensity, from a fat clean boost to rippin’ overdrive, but unlike a typical pedal, higher Level settings do not push the volume of the amp up to extremes as the Level is increased. In practical terms, this means that you can switch between the Rhythm and Lead channels without having to make dramatic adjustments to the volume on your guitar. We also dis-covered some incredibly tasty overdriven tones at very low volumes with the Level down and the Drive up—kind of like a’50s Gibson GA20 with more fidelity and no noise, and that’s a trick you can’t pull off with many distortion pedals.The Tone control helps shape and color the distortion EQ to suit different guitars and moods, and it can also be used to subtly focus on specific harmonic overtones. But the most remarkable feature of the boost circuit is the “clean”character of the over driven tone. Mike Piera’s mention of David Gilmore is instructive in this regard. Gilmore’s fat, overdriven guitar tones on his solos are indicative of the rich fidelity produced by the JW-40. Chords are clear with distinct note separation, sustain and decay are natural rather than sounding forced or artificially contrived,and the overall sound is round, rich and warm with a sweet, clear top end.Our best description of the over driven voice of the Fargen is “majestic,”and who can’t live with that?

Following up on the successful introduction of 65 Amps’ flagship London 18W, the company has launched its second model — the Marquee. Named for the legendary Soho music venue where every ’60s British band of note once honed their craft, the Marquee is a bigger-sounding, louder version of the London 65 in some respects, endowed with great headroom and presence. We asked co-founder of 65 Amps and Sheryl Crow guitarist Peter Stroud to describe the musical intention of the Marquee, and our review follows….
TQR: What inspired the development and design of the Marquee, Peter? What did you want to accomplish specifically?
Peter Stroud: We had guitarists loving the sound of the London, but still needing either more volume or clean headroom. Personally, I wanted an amp to replace the Super Reverb in my live rig with that Fender clarity, but more of the openness and touch sensitivity of an amp like the London. Our initial idea with the Marquee was to create a more powerful version of the London 18 watter using 4 EL84s. But we also wanted something with the midrange clarity of the British amps and the clean sparkle of the American Fender Blackface sounds — just not as hard sounding as the 6L6 cleaner tone can be. On top of that, it has a higher gain tone that really roars.
TQR: To what extent were some of the design features in the Marquee such as the cascaded twin-triode operating in pentode mode and the 6-way Color control inspired by vintage amp designs?
 Peter Stroud: Our initial intention for the Cascode (note spelling) configuration in this amp was to find a sound similar to the pentode type EF86 tube we use in the London, but more quiet. Due to vibration and noise issues inherent with EF86 tubes, we were apprehensive using it in a higher powered combo. The cascode circuit, which utilizes a 12AX7, was popular in early hi-fi preamplifiers. It has a harmonic content similar to the pentode circuit but produces more even-order harmonics. Randall Aiken helped us greatly with this circuit and we’ve continuously tweaked it’s current configuration in our amp. The end result is a distinctly different sounding channel from the Treble-Mid-Bass channel — very warm and rich sounding. It sounds beautiful with single coils and 12-string electrics. So, the Marquee initially came from many inspirations. Dan (Boul) and I are big fans of the Selmer amps. A few years ago while on tour in the UK I had picked up a Selmer Treble & Bass 50 MkIII, which is the early ’70s silver metal front — the ugly one. But that amp sounds awesome, like a “British Fender Blackface” with two EL34s. We’ve since found a Mk I Treble ‘n Bass from the first year they were built.
The font end of the Marquee Treble-Mid-Bass channel was initially inspired by the Selmer, but it branched off quite a bit. We just aimed for that sound. There are also similarities with the Selmer front-end circuit and the early ’60s brown-Tolex Fenders. I know one of your favorite amps is that killer Vibrolux 1×12 you have. The (Marquee) power stage is a fairly typical British-style 4-EL84 circuit. From there we spent months tweaking the tone circuit. We wanted the Treble-Mid-Bass tone configuration for more control with a higher powered amp.
TQR: You’ve played just about every conceivable guitar amp and for years your rig consisted of a Super Reverb and Marshall 50W. To what extent does the Marquee succeed in giving you both the clean and overdriven tones you need at usable state volumes, and how do you use it specifically?
Peter Stroud: On the latest tour I used both a London and a Marquee and A/B’d between the two. The two together worked perfectly for our stage volume. I’d set the London for a slightly driven rhythm sound playing through an EF86 channel and would use the gain boost for leads. The Marquee took the place of my Super Reverb as my clean sound, and it proved to be better since the mids are more pronounced and you get the nice dynamic saturation of EL84s. It’s much more touch sensitive, which is hard to get with a clean sound without using a compressor. The only time I’d kick on both amps was for Led Zep’s “Rock N Roll,” which we play as an encore. I’d crank the Marquee to 6, hit the gain boost and boost the mids. It totally hit the “Pagey” kind of sound. You can dump the mids and boost the bass and highs and get a chimey sparkling clean tone — settings around 4 on the volume, treble and bass around 6 to 7 and midrange around 4. For a cranking rhythm I’ll set the volume around6, boost the mids to 8 or so, drop the bass around 4, treble at 5. There’s also a footswitchable gain, like on the London, so you can set a rhythm tone on the T-M-B channel and kick in the boost for lead. If you turn the amp up to 10, look out!
TQR: You mention “mustard” caps on your web site being used throughout the amp — are these modern reproductions of the original “mustard” caps used by Marshall in the ’60s?
Peter Stroud: Yes, we use the SOZO caps made by John Gaynor. John’s a Marshall enthusiast who has totally nailed (and surpassed, in our opinion) the “mustard cap” tone where you get the nice smooth mids and bell-tone clarity.
TQR: What else are you working on?
Peter Stroud: We have two new models in the works — a smaller “grab n go” 1×12 combo which actually incorporates a master volume with two EL84s. It has a great sounding master volume that has a sound of its own that can be disengaged so that the amp ha a non-master function. Sort of a “British Fender” vibe again. The thing screams, it can get chimey clean, and it’s incredibly versatile. And over the past six months, we’ve been developing a KT77 head using our Marquee as the springboard with a KT77/EL34 power stage. We had a handful of pro level artists who wanted extreme volume and headroom, where they were used to their 50 and 100 watt EL34 hears and quite a lot of volume. Plus, Dan is a big fan of the Vox AC50 and I’m the Marshall fanatic, so we got into that mindset again. We sent a prototype out for a test run with Rich Robinson of The Black Crowes and he ended up using it as his main amp for the entire last month or so of their tour. When we got it back, all the knobs were dimed. Couldn’t ask for better testing in the field! We’ll introduce both of these amps at Winter NAMM.
REVIEW — 65 Marquee
 We spent a lot of quality time with the 35W Marquee Club, and it impressed us as a feisty chameleon that can gracefully move between big, jangly clean tones and an impressive roar with a deep palette of voices available from two very different input channels.
EL84 amps typically produce a distinct, musical compression characteristic that is absent in amplifiers using 6L6 output tubes, yet the Marquee produces gobs of clean headroom — albeit British headroom rather than the trademark 6L6-fueled fidelity of a Fender amp like the Twin or Super Reverb. As far as we’re concerned, British tone in an amplifier denotes rich harmonic depth and chime, often augmented with a dominant midrange emphasis, while Fender amps (Blackface models in particular, sound scooped in the mids by comparison with a wider, broader, looser feel and toner not unlike the difference between the sound of oooh and ahhh. In the Marquee, individual strings seem “closer together,” yet still well-defined throughout its range of clean settings. EQ coloration is accomplished in the “Classic” Channel bass/mid/treble/cut controls, and in the “Normal Channel via six EQ presets on a rotary switch. This “color switch” progressively thickens tone with gradual increases in lows and mids, but the Marquee’s chime and sparkle remain audibly preserved in every setting.
The Marquee produces moderate levels of smooth, overdriven tone at higher volume settings (+6) in the Normal Channel that can be neatly managed from the volume on your guitar, while the footswitchable Boost feature in the Classic Channel yields scorching distortion and sustain that nearly rival that of a Marshall JCM 900 Series Mk III. However, the Marquee delivers a chimier crunch rather than the more linear and cutting, laser beam focus of a high-gain Marshall. It’s a prettier brand of mayhem, if you will. And unlike many vintage British amps, the Marquee succeeds in delivery an enhanced range of both clean and overdriven tones, as well as a more versatile and varied range of EQ emphasis. Overall, we found it to be an inherently bright amp with the EQ controls in neutral settings, but you are also given plenty of room to shape the voice of the Marquee, from brilliant and clangy, to thick, heavy and imposing. We had no trouble dialing in great tones with all of our guitars — thickening the Teles and Stratocasters, planting a wet kiss of treble emphasis on the humbucking Gibsons, and alternatively mining the jangly clean chime and perfect meltdown of P90s. A potent rock amp that can cover a lot of ground, the Marquee is handwired with point-to-point construction that meets the high standards we have all come to expect from custom builders today, the transformers are custom-made by Mercury Magnetics, and the fit and finish of the cabinet work were flawless. As the name implies, the Marquee is steeped in the tones that defined modern rock & roll, viewed through a properly British perspective. And as Fender’s Ritchie Fliegler is fond of saying, “If this is what you like, you’ll really love this!” Quest forth, mate.
Source: https://mercurymagnetics.com/pages/news/ToneQuest/_2007/TQRJan07-2.htm
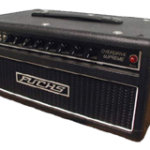
The term “imitation is the sincerest form of flattery” has particular meaning in the music industry, where popular guitars and amplifiers have long been used as templates for the creation of “new” brands. This is particularly true in the boutique amplifier market, where probably 99 percent of currently available models are based on classic designs by Fender, Marshall, and Vox. Given that reality, it’s inevitable that some of the more recent amp builders who have managed to innovate and create truly original sounds will also see their designs cloned to one degree or another. The raison d’etre for copycat products is typically that demand for the real thing outstrips the supply, or that relatively few can afford to purchase the authentic product. Both are true of the amplifiers made by Howard Dumble, and the fact that the vast majority of guitar players will never get closer to one of his Overdrive Specials than the front row seats of a concert makes it no surprise that a small number of builders offer their own takes on that extremely rare and expensive amp (we’re talking around $30,000 these days). One of those is Fuchs Audio Technology, which with its Overdrive Supreme (a name that can also be conveniently abbreviated as ODS) makes no attempt to conceal where it draws its inspiration.
But Fuchs has packed plenty of cool things into this amp that any tube freak could appreciate. A peek inside the aluminum chassis reveals a mix of neat handwired and PCB circuitry, chassis-mounted pots, jacks, and switches (the mini toggles reside on one of the three PC boards), and chassis-mounted sockets for the four Svetlana 6L6GCs, two Ruby 12AX7As, and two Groove Tubes GT12AX7Ms. For low noise, the tube filaments are heated by regulated DC voltage, and regulated high-voltage supplies the preamp stages. The fan-cooled amp sports a high-quality Mercury Magnetics output transformer, and biasing adjustments are facilitated by the addition of bias trim pots and test points for each output tube.
Not that the Overdrive Supreme is overly complicated, but a few of its functions warrant explanation. In basic terms, this amp consists of Clean and Overdrive channels (or preamps), both of which feed a common set of tone controls, a reverb, and a Master volume. The Gain knob adjusts the amplification level in the Clean preamp, which in turn feeds the Overdrive preamp when you switch to distortion mode. Then there are three Overdrive controls: an internal (but user adjustable) trimmer that determines the amount of signal flowing from the clean preamp into the first stage of the Overdrive preamp, an Input knob that sets the amount of distortion (by adjusting the drive level between the two pairs of overdrive stages), and an Output control that’s essentially a lead master volume. This combination of controls gives you the ability to precisely tailor the amp’s gain stages to suit your guitars, pickups, and playing style.
The Overdrive Supreme also has a number of switchable functions that affect its tone. The Brite switch operates on the Gain control to provide a boost in treble (which diminishes in effect as the knob is turned beyond the halfway point), the Deep switch shifts the overall tonality of the amp to emphasize lower frequencies, and the Rock/Jazz switch alters the range and depth of the tone controls to provide for more gain and a more aggressive EQ in the Rock setting, or a smoother, more neutral response in the Jazz position. There’s also a Mid-Boost pull function on the High control that shifts the range of the circuit to emphasize midrange and a Gain-Boost pull function on the Mid control that bypasses the tone controls to increase gain on both channels. Lastly, turning up the Accent control reduces negative feedback at higher frequencies in the power section to increase edge and sustain.
Auditioned with several different speaker setups (including Marshall 2×12 and 4×12 cabs and a Celestion-loaded Dr. Z 2×12), the Overdrive Supreme never failed to impress. The closed-back Dr. Z cab worked particularly well with this amp (the cab’s width was a perfect fit too), and Fuchs also offers a matching 2×12 loaded with Fuchs FAT-1S speakers ($695 retail/street N/A). But even driving two 12s, the Overdrive Supreme is a loud amp that seems to find its “sweet” spot at levels that would be overkill in a small club. You can tame the blast with the Master Volume, but as this amp struts its stuff best when let off the leash, you might want to consider one of the lower-wattage Supremes if you don’t regularly gig on big stages (head and combo configurations are available in power ratings from 30 watts to 150 watts, and at prices starting at $2,395).
In its cleanest mode with the Rock/Jazz switch in the latter position, the Overdrive Supreme delivers crisp clean tones to the limit of its output stage. If you like to play clean at high volume, this amp does the trick. These tones sounded great with a Strat, though humbuckers also elicited a good degree of sparkle, as I discovered when playing it with a new PRS 12-string. The reverb is smooth and pleasing throughout most of its range, though the higher the setting, the more detached the effect seemed to become from the notes. I couldn’t obtain any sproingy surf textures either, even with the Reverb knob turned all the way up, but Fuchs probably intentionally voiced it for more “hall” and less “beach.” Interestingly, when the effects loop is set to Series mode with nothing connected to the Send and Return jacks, all you hear is output from the reverb tank. You either need to have a device in the loop for serial operation, or keep the switch in the Parallel position, which you’ll probably want to do anyway if you’re using a delay or a digital reverb.
Switching to the Overdrive mode, the Supreme delivers soaring lead tones that are ballsy and articulate. I had no trouble obtaining massive distortion from a Strat and a Tele, and even without kicking in the extra gain boost there was no shortage of creamy “forgiveness” in the dynamic response. Pegging the Gain knob is necessary for obtaining maximum grind from this amp, but the cool thing is, when you switch back to Clean mode the sound is dead clean. I didn’t notice any significant tonal difference between the Deep switch settings, but activating the Mid Boost fattens up the sound of single-coils quite effectively. The Overdrive Supreme has a strong midrange presence anyway, a quality that allows it to cut amazingly well in a loud band. (In fact, one tester reported being able to hear this amp clearly from the opposite side of a large stage, even when standing right in the blast zone of the other guitarist). The Overdrive Supremeis also louder and definitely more aggressive with the Rock/Jazz switch in the former position.
It’s very easy to get carried away with the sheer amount of distortion that’s available in Overdrive mode, however, by backing off on the Gain and Input knobs, it was possible to get killer medium-grind tones reminiscent of a cranked Fender Deluxe’s. This is a perfect mode for loud blues playing, especially with that output stage ready to leap into action like a cornered tiger when you dig in with your pick.
There’s enough to like about the Overdrive Supreme that one can almost forgive its four-button Artist footswitch (an essential item that costs an additional $395; a standard 2-button switcher is no extra charge), which has a rather generic housing, label-machine stickers to ID its functions, and uses a fairly stiff type of high-tech cable with a multi-pin connector on the amp end — don’t count on an easy replacement if this baby fails in the field. (Fuchs states that the footswitch is being revised, and will have an aluminum bezel to replace the stick-on lettering.) A hip thing, however, is that its large LEDs are so intensely bright that you’d likely have no trouble seeing their indications even when playing at noon on the Bonneville Salt Flats.
The Overdrive Supremehas that rare quality of being able to draw you in immediately, yet continue to reward and inspire you the more you play it. Considering what it’s based on, it would be a surprise if the Overdrive Supreme wasn’t an impressive amp.
Who’s It For?
Blues, rock, and jazz-fusion players looking for Dumble-style tone and dynamics.
Kudos
Outstanding clean and overdriven tones. Compact, lightweight, and powerful.
Concerns
Footswitch is an expensive option.
Price
$3,195 retail — street price N/A
Contact
Fuchs Audio Technology
(973) 893-0225
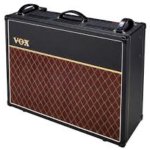
We have always considered the AC30 to be a great amp, if not the most versatile when compared to some other well-known names built during the ’60s… like Fender… arguably the most versatile amplifiers ever built.
The ToneQuest Report advisory board member and super player, James Pennebaker, first alerted us to the full potential of the AC30 when, after two decades of loyally playing vintage Fender amps, he switched to the reissue AC30 TBX as his main stage rig. Suddenly, James’ tone seemed to become his own, whether he was playing through his vintage Gretsch Country Gentleman, Cunetto-era Relic Tele or Strat, or Custom Shop Gibson ES295. Last year during the winter NAMM show in Los Angeles the considerable potential of the AC30 came to light again, thanks to west coast swing king Kid Ramos…. The Kid played two long, incredible sets in a cool little dump in Anaheim called the Doll Hut with vintage Strats and Teles through a vintage AC30 with an equally vintage Fender reverb unit, proving beyond any doubt that you can absolutely rule playing the blues and swing with an AC30 rig. The Kid’s tone was unforgettably smooth and musical in the style of an alto saxophone being expertly blown, and for an electric guitar, that’s a mind-blowing experience you won’t soon forget. So you’ll understand our interest in a mysterious and somewhat troubled AC30 that was traded in at Midtown Music. Sick as this amp first sounded, the Kid’s tone was still calling…. The amp seemed to work fine when it first arrived at Midtown, but it soon developed progressively noisy problems that eventually took it down. That’s when we volunteered to deliver the AC30 to Jeff Bakos and make it the subject of this review.
Jeff was able to diagnose and fix the AC30 in a couple of hours (merely a few bad caps and resistors in the vibrato circuit and tone stack), but the amp’s origins remained a mystery. The cabinet was in excellent, original condition and displayed all the classic marks of vintage British Vox construction, but there was no “Jennings Musical Industries” metal serial number tag on the back panel — only the heads of four brass upholstery nails that had once held a missing plastic ID tag. The gray control panel also lacked the typical Vox “JMI” stenciled logo, yet the amp was clearly built with the correct, hand-wired turret board construction, transformers, and Vox circuit. Our attempts to date the amp by the pot codes were unsuccessful because all of the originals had been replaced with CTS pots dating to the early ’90s, so we contacted Mitch Colby at Korg (Vox and Marshall USA) and sent him images of the amp with a request for help in dating it.
Mitch replied that it appeared to be a “Vox Sound Ltd.” AC30 built in England by Dallas Arbiter, the company famous for the original FuzzFace and Sound City amps made in England. Mitch also added that the Dallas Arbiter AC30s were “very nice” amps, having been built in the early ’70s, immediately following the end of the JMI era. Mystery solved. Contrary to information on the AC30s built at the Dallas Arbiter factory that we found at www.voxamps.co.uk, the cabinet of our amp is built with solid wood throughout — not particle board. And how does it sound? As good as it gets. The Celestion G12 speakers dating to 1979 had been reconed some time ago with the correct Celestion kit, all of the preamp tubes had been updated with JAN GEs, and while not a Jennings, this amp fully earned the vaunted status of vintage AC30 in every regard — punchy, fat, rich in midrange tones where the guitar really lives, with solid bass response and sweet, soaring top end.
Should you decide to explore the full potential of an AC30, you have a number of very good choices. The original vintage amps built by Jennings in England are expensive, so you need to insure originality of the transformers and internal components. A few replaced capacitors or resistors here and there are of no concern, but massive modifications by an overly zealous bench monkey are unacceptable — keep walking. Prices for amps with non-original transformers should be reduced by 30%-50%. Vintage 2×12 combos with original Celestion G12 speakers in excellent condition range from $2,800.00 for a later gray panel to as much as $3,500.00 for a red (candy) panel amp and $5,000.00-$7,000.00 for the earliest tan AC30s. Although increasingly rare, vintage heads alone can sometimes be found for around $1,600.00 and climbing. The limited edition hand-wired AC30 built several years ago by Vox/Korg features reverb and an excellent master volume feature. Outstanding and pricey, expect to pay at least $2,000.00 for this amp in gently used condition. At that price it’s a steal. The discontinued “Korg” AC30 reissue TBX amps like James Pennebaker’s are very good as is, and they can be made to sound even better by replacing the transformers and a few key, tone-shaping components. Don Butler specializes in optimizing reissue Marshall, Vox and Fender amps using premium components and Mercury Magnetics™ ToneClone™ transformers (www.tone-man.com, 661-259-4544).
Early reports on the Chinese AC30 Custom Classic ($1,600.00 with Celestion Alnico G12 speakers, blendable channels, a true bypass FX loop, spring reverb and master volume) are also very good, and Don tells us that his personal Custom Classic also benefited from the same upgrades he makes on the TBX models.
The AC30 is another great amp for players wishing to acquire a sound that sits clearly apart from typical Fender and Marshall tones. AC30s have a unique, compressed character rich in harmonic content and British chime with a versatile amount of clean headroom. More aggressive solos with heavy sustain and gain will require a boost pedal (especially with weaker single coil pickups), but the results will be stellar if you start with a good amp. And don’t buy into the collector hype about Top Boost models being the only desirable version to pursue. Vintage Jennings AC30s stamped “Bass,” “normal,” or “Treble” are equally desirable — in fact, we prefer them. Older AC30s are often a little tattered and may require a tune up and a stout matched quartet of EL84s, but these old amps will reward you with a thicker, richer tone and an intoxicating effluvia of Bitter and Rothmann’s that is lacking in modern AC30 reissues built on printed circuit boards. But oh, how you do pay for the privilege….
The most significant negative regarding all AC30 amps new and old is their considerable weight, which will quickly remind you why they are equipped with not one, but three handles. If you haven’t personally experienced the magical sound of a good AC30, perhaps it’s time. Heave forth….
Vintage 16– single 8Ω tap — two EL84 tubes — Upgrade!
Great for use with single 6L6, 5881, KT66 or EL34 tubes
Brown reissue — use with solid state rectifier — single 240V — Upgrade!
Brown — Single 2Ω tap for 4×10 cabinet — #45249
Rickenbacker M8 — single 120V primary tap
Jet 12T (reissue version) — two EL84 tubes — single 8Ω tap — Upgrade!
Blackface — single 100V primary tap
Tweed — #45216 — single 4 ohm tap — 3 9/16″ mounting centers
Blackface Vibroverb Custom — single 120V primary — Drop-In Upgrade!
Wards Airline GIM 9131A — circa ’60s — single 120V primary tap
Maverick — single 120V primary — Drop-in Upgrade!
50 Watt Combo — Drop-in Upgrade! — single 120V tap
Dark Terror – Single 120V primary — Drop-in Upgrade!
V5 — Single ended 5 watt — 4 & 8Ω taps — Upgrade!
Epiphone Comet PT Single 120V primary
Early ’90s Champ 12 — single 4 & 8Ω taps — Upgrade! Uses Grain-Oriented Iron
Tweed (very early 1947) — single 8Ω tap
Super Champ X2 — single 8Ω tap — Upgrade! Uses Grain-Oriented Iron
Mid ’50s Tweed — single 8Ω tap — 2″ mounting center
Mid ’50s Tweed — single 4Ω tap — 2″ mounting center — medium size version
Late ’50s Tweed — single 4Ω tap — 2-3/8″ mounting center — largest version
Early ’50s Tweed — single 4Ω tap — 1-3/4″ mounting center — smallest version
The “White” amp — rare version from 1956 — single 4Ω tap
(Similar amp to Tweed Princeton)
GA-15 — single 8Ω tap — 2-hole, A-frame mount. Call before ordering!
GA-5 Les Paul Jr. — Original OT is #5584 — 10.5 kΩ primary, single 4Ω tap
Bolts to speaker frame — mounting centers are 2-3/8″
Kalamazoo Reverb 12 — two EL84 tubes — single 8Ω secondary tap
GA17RVT — single 8Ω tap — #TF-18-01 — 2 3/8″ mounting centers
Single ended — 7K primary — 4 & 8Ω taps
Sears Silvertone — Model 1333 — single 8Ω tap
Single 8 Ohm secondary tap
Univox — circa ’60s — single 8Ω tap — use with four 6AQ5 tubes
Univox — circa ’60s — single 4Ω tap — use with four 6AQ5 tubes
Valco — circa ’50s — single 4Ω tap
Brown — single ended — 8Ω tap
Brown — single ended — 8Ω tap — UL tap
Brown — single ended — 2.6Ω tap
GA-79RVT — #TF-88-O — single 8Ω secondary — 2 3/8″ mounting centers
*This transformer is also used in the Gibson GA83-S and GA88-S amps
Sears Silvertone — Model 1396 — #096F — single 8Ω tap
’60s 1474 — single 8Ω tap
ADA MP1 preamp — single 120V primary — Upgrade!
Reverb unit — Single 120V primary
GA-79RVT — #TF-88-O — single 8Ω secondary — 2 3/8″ mounting centers
*This transformer is also used in the Gibson GA83-S and GA88-S amps
480 — single 8Ω secondary — #6107 — also used in Custom 450 amp
Troubadour — late ’50s — single 8Ω secondary
Mercury — single 6BQ5 / EL84 — 4 watt
Single ended — 4K primary — 8Ω secondary
Blackface Era OT — Single 8 Ohm Secondary — #125A1A (#022640)
Same size as original OT with 3-1/8″ Mounting Centers
Tweed — ’50s — 8k primary — single 4Ω secondary
Tweed Deluxe 5E3 amp — ’55-’60 era — #108 — 8 kΩ primary, single 8 ohm tap
Secondary has self leads like original — Horizontal frame — 3 1/8″ mounting centers
Tweed — single 2Ω tap. Uses Grain-Oriented Iron
Tweed 5E3 amp — #108 — Same as FTDO-59 with stranded leads (no self leads)
8 kΩ primary, single 8 ohm tap — Horizontal frame — 3 1/8″ mounting centers
Late ’50s Tweed — #50246 — 8 kΩ primary, single 8 ohm tap
Secondary has self leads like original — Horizontal frame — 3 1/8″ mounting centers
Late ’50s Tweed — #50246 — 8 kΩ primary, single 8 ohm tap
Secondary has self leads like original — Horizontal frame — 3 1/8″ mounting centers
Class 5 — single 16Ω tap — Drop-in Upgrade!
Valco National — circa ’50s — single 4Ω secondary tap
Valco — single 2Ω tap
Reverb-O-Rocket — OT-151A — use with two 7591 tubes — single 8Ω tap
G-12 Gemini One — OT-151A — use with two 7591 tubes — single 8Ω tap
*Correct OT for Ampeg AC-12 amp also
Single ended — 12K primary — 4, 8 & 16Ω taps
Sears Silvertone — Model 1481 single 240V Primary
Rickenbacker M9 — single 120V primary tap
Blackface Reverb Era — Single 8 Ohm Secondary
Larger than stock #125A1A — 3-9/16″ Mounting Centers
Brown 2 x 10 — #45216 — single 4 ohm tap
Bolt hole spacing is 3 9/16″ center to center
Late ’60s Silverface Reverb — single 4 Ohm tap — 125A6A (022848)
Single 8Ω tap — 8k primary — Oversized Upgrade!
Mid 60’s Blackface — single 4-ohm tap for 2×12 — #125A6A
Tweed — #1846 — single 8Ω secondary
Tweed — single 2.6Ω tap — Triad #1846
Single ended — 4K primary — 4Ω secondary
Single ended — 9k primary — 4 & 8Ω taps
Tapped transformer — for use with 5V or 6.3V tube rectifier — single 120V
Single ended — 20k primary — 4Ω tap
M10 single 16Ω secondary — ultra linear taps — #20-0115
Vertical stand up type with 2″ x 2 1/4″ mounting centers
Single ended — 20k primary — 4,8 & 16Ω taps
’60 Tweed — Single 100V primary — higher B+
Range Master — Single 120V primary — Drop-in Upgrade!
Single ended — 3K, 5K, 7K & 9K primary — 4 & 8Ω taps
V5 — Single ended 120 volt primary –Upgrade!
single 120V primary — Upgrade!
Supro Thunderbolt — 5k primary, single 8 ohm secondary tap
Horizontal mount, bolt hole spacing is 2 1/2″ x 2 1/2″
Class 5 — single 16Ω tap — Upgrade!
Early 90’s Model — Single 8Ω taps — vertical mount
#T703 — Circa 1950s — Single 8Ω version
Classic 30 — FatStack Upgrade! — Single 120V Primary
Tweed — Dual B windings: 260-0-260 and 310-0-310VAC — Single 120V primary — Not Available in Flat mount
1946 era Woodie/Woody Deluxe — vertical mount — single 240V primary tap — #5568
single 120V primary –Upgrade!
Single ended — 2.3KΩ primary — 8Ω secondary
For Late Blonde (’63-64) & Blackface era amps — 1-1/4″ stack — #125A13A — Single 4 ohm tap
Exact clone & dimensions of stock OT — bolt hole spacing is 2″ x 3 3/8″ with Especial bracket
Blackface Reverb — 230V single primary
’59 Tweed — #45249 — single 2Ω secondary — bolt hole spacing w/ L-bkts is 2 1/4″ x 3 1/8″
Optional “Especial” bracket is 2″ x 3 3/8″
Custom Classic (Early version) — Drop-in Upgrade for Small Version: Mounting Centers: 2″ X 2-1/2″ — Single 120V Primary — Correct for the AC15 C1 amp
Single 120V primary — Drop-in Upgrade!
Blue Angel– single 120V primary — Drop-in Upgrade!
Vintage Club 50 Head — single 120V primary — Drop-in Upgrade!
Blonde — single 4Ω tap — 1-1/2″ larger stack — #125A13A
Zodiac — Single 120V primary — Drop-in Upgrade!
Brown — Single 120V primary tap — low B+ voltage 278-0-278 unloaded
M10 — single 120V — #20-0023
Vertical stand up type with 2 1/2″ x 2 1/2″ mounting centers
Single ended — 3k primary — 4, 8 & 16Ω taps
Single Ended 5k primary — 4, 8 & 16 Ohm Secondary taps
Blackface — 85 watts into single 8 Ohm tap — #125A30A
Large 60 watt — 3.4K, 6.6K & 8K primary — single 16Ω secondary tap
Vintage Club 50 Head — single 240V primary — Drop-in Upgrade!
MP3 — #20-0024 — single 120V primary tap
DSL 15 — Upgrade! — single 120V tap
Late ’40s Woodie/Woody Pro — single 120V primary
50 Watt Combo — Upgrade — single 120V tap — TXMA 00141
Bolt hole spacing is 2 1/2″ x 3 1/8″
’70s — Model 2275-65 — single 120V primary — Drop-in Upgrade!
BETA LEAD — Upgrade! — Single 120V Primary — #28-2102-B Solid State
Blackface — reissue — single 240V primary tap — Upgrade!
single 120V primary — Upgrade!
LoneStar Special — Single 240V Primary.
Single 120V primary — tapped B+ — 260-0-260 & 300-0-300 — 6.3V @ 9A — 5V @ 4A — Upgrade!
Dynaco PA60 — single 120V primary
Late ’40s Woodie/Woody Pro — single 240V primary
50 Watt Vintage Modern 2266C–TXMA 00126
Single 120V tap — Bolt hole spacing is 2 1/2″ x 3 1/8″
Blonde — single 8Ω tap — #45558 — Rare 3.18 x 3.5″ mounting centers
Custom Classic — Upgrade! Larger version: Mounting Centers: 2-1/2 X 3-1/8″ — Single 120V Primary
Earliest 50 watt — single 120V primary — 5V tube rectifier winding. This transformer design is from within the first 12 Hiwatts built! Partridge transformer design
single 220V, 230V & 240V primary — Upgrade!
Single 16Ω secondary tap
Roadster — single 230V primary — Upgrade!
Roadster — single 120V primary — Upgrade!
Night Train 50 watt — single 120V primary tap — Drop-in Upgrade!
’70s — HD130 — single 240V primary tap — Drop-in Upgrade!
Traynor YBA1A — Single 120V primary — Upgrade!
Custom 280 amp — single 8 Ohm tap — #6107
440 — single 8 Ohm tap
12K primary — single 8 Ohm secondary tap
12K primary — single 8 Ohm secondary tap
Mid ’80s Reverb II — larger — single 8 Ohm tap
Mid 2000’s single 8 Ohm tap — Drop-in Upgrade!
Larger — single 8 Ohm tap — use with two 6L6 tubes
4K primary — single 8 Ohm Secondary
Tweed — single 8 Ohm tap
Early ’90s Champ 25 & 25SE — single 4 & 8 Ohm tap — Upgrade!
Blackface era — single 16 Ohm tap — Upgrade!
Brown — single 4 Ohm tap — Upgrade!
Single 2 Ohm tap — Drop-in Upgrade!
Large– single 8 Ohm tap — Upgrade!
Early 5C8/5D8 Narrow Panel Tweed — #2485 — 8k primary with single 4 Ohm secondary
GA-8T — single 8 Ohm tap
15 watt — 8K primary — single 8 Ohm tap — Upgrade!
GA-19 — single 8 Ohm tap
GA-6 — single 8 Ohm tap
Mid ’50s Tweed – 5E4-A — two 6V6 tubes — single 8 Ohm tap
Excelsior — Single 8 Ohm tap — 8k primary — Oversized Upgrade!
Single 4 Ohm tap — Upgrade!
Blackface Vibroverb Custom — single 8 Ohm tap — the SRV-style over-sized OT — Upgrade!
Twin Custom with 15″ speaker — single 4 Ohm tap — Upgrade!
FatStack Upgrade! — 8k primary — Single 8 Ohm Secondary
Single 8 Ohm tap — 8k primary
Single 8 Ohm tap — larger than stock OT
Tweed — single 8 Ohm tap — oversized
Single 4 Ohm tap — larger than stock OT
Tweed — single 4 Ohm tap — oversized
Larger — single 8 Ohm tap — Horizontal A-Frame mount
’60s Blackface Reverb — single 4-ohm tap — #125A6A
30 watt — VC30 with single 12″ speaker — 4 & 8 Ohm taps — Upgrade!
Early ’90s Champ 25 & 25SE — single 8 Ohm tap — Upgrade!
Larger — single 8 Ohm tap — Vertical A-Frame mount — Drop-in Upgrade!
GA-18T — single 8 Ohm tap
Mid ’50s Tweed – 5E4-A — two 6V6 tubes — single 4 Ohm tap
Single ended — 9k primary — 4, 8 & 16 Ohm taps
Galaxie 25 — single 8 Ohm tap — Upgrade!
Valve Standard — single 8 Ohm tap — Upgrade!
Tweed — single 2 Ohm tap
Sears Silvertone — Model 1334 — single 8 Ohm tap
Blonde — single 16 Ohm tap
(Tube Version) — single 8 Ohm secondary tap
Single 8 Ohm secondary tap
Single 8 Ohm secondary tap
Blackface — single 4 Ohm tap — four screw mount
8K primary — single 8 Ohm secondary — great for use with two 6V6 or two EL84/6BQ5 tubes
Push/pull – 8 Ohm primary — single 8 Ohm tap
Blonde — single 8 Ohm tap
60’s 1448 — amp in guitar case — single 4 Ohm tap — 2″ mounting center — mounted on speaker frame
YGM1 — single 8 Ohm tap — Upgrade!
Single 8 Ohm tap — Upgrade!
Blackface — single 4 Ohm tap — Oversized Upgrade!
Blonde — single 4 Ohm tap — Oversized Upgrade!
Tweed 3×10 — single 2.6 Ohm tap — two screw, A frame style
Single ended — 8k primary — 8 Ohm tap
Single ended — 4 Ohm tap
Single ended — 3.5k primary — 2 & 4 Ohm taps
Single ended — 4K primary — 8 Ohm secondary — larger stack than the SE-4K
Single 8 Ohm tap
Single 4 Ohm secondary tap
Model 1434 — single 8 Ohm tap
60’s — single 8 Ohm tap
Late ’50s — Matches two 6V6 into single 4 Ohm secondary
Late ’60s — single 8 Ohm tap
Late ’50s– single 4 Ohm tap
Blackface Super Reverb — single 2 Ohm tap — Fat Stack Upgrade!
Mounting holes are 2 1/2″ x 3 3/8″
Drop in Upgrade with Single 120V Primary
Drop in Upgrade with Single 120V Primary
Upgrade! Single 8 Ohm Secondary
Drop in Upgrade! Single 16 Ohm Secondary
Drop in Upgrade! Single 120V Primary
Drop in upgrade! Single 120V Primary
Drop in Upgrade! Single 16 Ohm Secondary
Drop in Upgrade for Vintage Jupiter/JP8 Synthesizer — Single 120V Primary
Single Ended — 8K Primary — 4, 8 and 16 Ohm Secondary
Single 4 Ohm Secondary — Contact us for Valve Jr. Upgrade instructions
Upgrade! Single 4 Ohm Secondary
Drop in Upgrade! — Single 120V Primary
Drop in Upgrade! — Single 120V Primary
Drop in Upgrade! — Single 16 Ohm Secondary
Mercury’s Patented Amp-Saver technology actively senses the power (voltage and current) being drawn by your amp at ramp up and ensures your amp doesn’t inhale anything harmful. Seamlessly working with your amp’s on/off switch, using the AmpSaver translates to longer tube life, less heat, and avoiding costly repair bills. Fused for 5A, the AS-1 can benefit tube amps from 5 to 200 watts.
More info here.
Southern California’s 65 Amps has garnered more attention in a shorter amount of time than almost any boutique amp outfit in recent memory — save, perhaps, its So-Cal-based compatriots, Divided By 13. The company has already earned due recognition for the 35-watt Marquee Club, 45-watt Royal Albert, and, in particular, the conservatively spec’d, but boisterously outspoken 18-watt London 18. All are decidedly Brit-inspired, with dual-channel preamps that employ a pair of Vox’s greatest contributions to tone: the simple EF86-based channel, and the interactive Top Boost channel. Against this backdrop, the SoHo head being reviewed here is the new kid in town, and it’s primed to bust out with a little sibling rivalry — if not an all-out Cain and Abel conflict.
Where the other 65 Amps models show a clear lineage from classic Brit tube topologies, the SoHo hints that its own conception might have occurred during a mid-morning visit from the milkman while mom was home alone. It’s a fairly simple amp compared to the two-channel, eight-knob London 18, but there’s nothing quite like it on planet rock. Ostensibly a single-channel, 20-watt, EL84-based all-tube design with simple controls, it’s the amp’s “little more” that really sets it apart.
65 Amps founders Dan Boul and Peter Stroud clearly like a challenge, and the EF86 pentode preamp tube — which can offer fat, wide, and dynamic tones when it works well — that so many makers have found trouble with again graces the first gain stage of this circuit. While just Volume, Treble, Bass, and a bypassable Master govern this pentode’s fury in “standard” (Bump Off) mode, the Bump function is what really sends this design into another dimension. It’s a footswitchable mid boost of sorts (footswitch included), but rather than being preset like most of the breed, the SoHo’s Bump has its own Tone and 6-position Level control. It can either subtly or radically affect the response and midrange content — and thereby the entire tone and gain structure — of the amplifier. And while it isn’t anything like traditional channel switching (as it only inserts another stage within the amp’s lone channel), 65 contends it’s more than enough to provide a viable lead voice at the tap of a toe.
To add to the novelty of the Bump function, the SoHo’s Master Volume hides a few tricks of its own. Rather than simply reining in output levels, it is what 65 calls a “reductive master,” which adds a little gain when it’s in-circuit, and it also adjusts the tone stack’s frequency response as you roll it down in order to compensate for the way the human ear perceives frequencies differently at different volumes. Flip the 1000-volt military-grade toggle switch on the front panel to Master Off, and the amp performs as if this unusual master circuit didn’t exist — because, electronically, it doesn’t.
“We wanted to have a master that retains a natural tone and feel without as much of the grit and fizz normally associated with master volumes,” says Boul. “It also had to be completely bypassable, and, when activated, it would allow the user to have a new vocabulary of tone — even at high volumes.”
The SoHo’s stylish blending of Brit-inspired retro esthetics with contemporary touches such as modern cooling vents and a brushed aluminum logo exudes a look of quality from the outside, and a probe inside the box reveals a first-class effort from every perspective. From the N.O.S. Tesla/RFT EF86 to SoZo signal caps to Mercury Magnetics transformers to ceramic and Micalex tube sockets, the SoHo is loaded with top-rate components. The workmanship is top-notch. The circuit is immaculately laid out between parallel rows of terminal strips mounted directly to the aluminum chassis, wire runs are neat and economical, and every mechanical component appears intended to last the life of the amp. In addition to the EF86 (which has a double dose of rubber insulation to guard against microphonics), there’s a pair of JJ 12AX7s, a pair of matched and tested JJ/Tesla EL84s, and an Electro-Harmonix EZ81 rectifier. The latter is a big part of the magic in many a recently issued, EL84-based AC15-inspired amp — it provides DC voltage levels that EL84s thrive on, and just enough sag to offer some tactile compression in playing feel, without going overly mushy.
Our review sample came with an open-backed 1×12″ extension cab made from rugged 11-ply Baltic birch, covered in matching two-tone vinyl, and loaded with a Celestion G12H-30 (available with Celestion Alnico Blue for $895; a 2×12 cab with one G12H-30 and one Alnico Blue is $949).
Regarding functionality, one of the first things to note is that you need to throw any conceptions of the traditional Master Volume arrangement right out the window. For example, playing with the Volume at 11 o’clock and the Master set to noon, but off, then switching to Master On, elicits a considerable increase in volume, whereas you’d normally expect to have to set the Master full up to achieve about the same output level as with the Master off. To add to the fun, the Master maxed/Volume maxed config elicits a lot more gain than Master off/Volume maxed. None of this signifies a flaw, it’s just the way this unusual, yet effective master circuit functions. In effect, it provides yet another voice — or range of voices — rather than just a final governance of level. Nevertheless, it might have been helpful if 65 Amps had named it something else, because it really is a circuit of a different color.
Not only are there four distinctly different textures between the Master On/Off and Bump On/Off options, but the controls are all highly interactive. The Master Volume, Bump Level, and Bump Tone controls enabled me to dial in a surprisingly broad range of drive levels and tones, and the considerable difference in gain levels between the Hi and Lo inputs multiplies the variables even further. Plugged into Hi with Bump and Master off, EQ knobs set to noon, and Volume at around 11 o’clock, I achieved a chimey, buoyant tone with my Telecaster that was great for indie thranging, Beatlesy riffing, and mid-volume Brit-rock rhythm work. By upping the Treble just a little, and injecting the Tele into the Lo input, I coaxed some surprisingly satisfying twang from the SoHo, along with a dose of increased headroom that also served well for shimmery jangle parts.
Jack back into the Hi input, stomp on the Bump footswitch (Bump level 3 for starters), and this Yank in Brit’s clothing exudes gnarly, raucous transatlantic tricks that approach cranked-brownface Fender Deluxe territory, with bovine mids, recessed but appealing highs, and decent low-end thump. Engage the Master Volume and the aggression intensifies, with a considerable jump in gain — even with the Master only halfway up. Plug in an SG Standard, roll the Master down to around ten o’clock, ratchet Bump up to six, and crank the Volume to four o’clock, and the SoHo belts out astoundingly convincing heavy rock chunk and grind — hairy enough for satisfying nu-metal work at pub-friendly volumes. Similar settings excel at fluty rock lead tones, with a well-partnered rhythm voice when you stomp the switch to take Bump back out of the circuit. Cranked up, there’s plenty of thump and roar here, too. With the stout 1×12 cab, the SoHo easily puts out enough volume for small- to medium-sized club gigs with just a vocal P.A., and it’s loud enough for decent self-monitoring on larger stages where guitar amps would be miked.
In terms of pure tone, the SoHo is perhaps not quite as lush and harmonically bountiful as 65’s London 18, but it punches above its weight a little more confidently, and it might just be a more appealing choice for rockers seeking some versatility in a smaller rig. The more you tweak the SoHo’s controls, the more it reveals previously untapped voices, and the package’s great looks and originality further enhance its appeal. If there really was a sibling rivalry in the 65 Amps family of boutique amps, the SoHo would definitely have to watch its back!
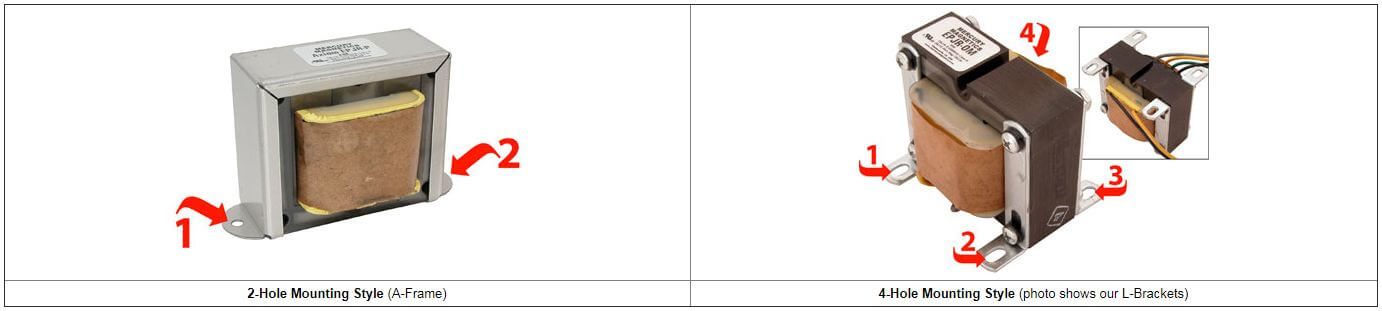